Herunterladen Inhalt Inhalt Diese Seite drucken
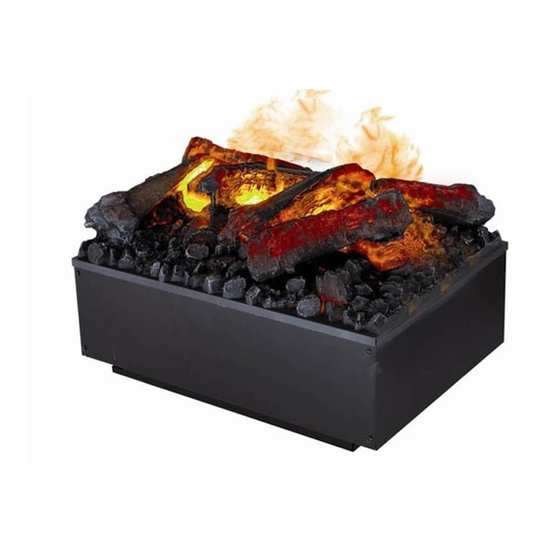
Dimplex CAS500 Bedienungsanleitung
Vorschau ausblenden Andere Handbücher für CAS500:

Werbung

Verfügbare Sprachen
  • DE

Verfügbare Sprachen

  • DEUTSCH, seite 12
The product complies with the European Safety Standards and the European Standard Electromagnetic Compatibility (EMC). These cover the
essential requirements of EMC Directives and the LVD Directive.
CAS500
CAS1000
08/53962/0
Issue 1

Werbung

Inhaltsverzeichnis
loading

Inhaltszusammenfassung für Dimplex CAS500

  • Seite 1 CAS500 CAS1000 08/53962/0 Issue 1 The product complies with the European Safety Standards and the European Standard Electromagnetic Compatibility (EMC). These cover the essential requirements of EMC Directives and the LVD Directive.
  • Seite 2 GB ............................ 1 DE ........................... 10 NL ........................... 19 FR ........................... 28 IT ............................. 37 PL ........................... 46...
  • Seite 3 Dimplex CAS500, CAS1000 Introduction Please read this information guide carefully to be able to safely install, use and maintain your product. Important Safety Advice When using electrical appliances, basic precautions should always be followed to reduce the risk of fire, electrical shock and injury to persons, including the following: If the appliance is damaged, check with the supplier before installation and operation.
  • Seite 4: General Information

    Please see Fig 3 & 4 for examples of the required ventilation. Please take note of the requirement for a ventilation opening on the shelf where the product sits, to allow a clear path for the air to get to the product (Fig 4). CAS500 Free Ventilation Area: Minimum 210cm CAS1000 Free Ventilation Area: Minimum 420cm...
  • Seite 5: Water Connection

    WATER CONNECTION It is recommended that you consult a qualified plumber to ensure a safe and secure installation. Two adaptors have been supplied with the product to connect the ¼” blue PVC pipe of the product to mains water (Fig 5.1).
  • Seite 6 (Fig.16). 5. Each log fuel bed is supplied with a loose non LED log. For single CAS500 installations, this can be placed on top of the fuel bed or stored away with the packaging. For CAS1000 or multiple product installations, the loose log can be placed on the centre join between two fuel beds (Fig 17).
  • Seite 7: Operating The Product

    MANUAL CONTROLS The manual controls are located beneath the fuel bed. (Fig 21) CAS500 Mains Switch - Controls the electricity supply to the appliance. (Fig 21A) Note: This switch must be in the ‘ON’ ( I ) position for the appliance to operate Button Panel - Controls the functioning of the appliance.
  • Seite 8: Remote Control

    Pairing the Remote Control to Multiple Products If you are installing multiple CAS500/CAS1000 products you can pair them to a single remote control. To do this, please install the products as described in the “Installation Instructions”. Ensure that all products are connected to mains power and have water supplied.
  • Seite 9: Maintenance

    Maintenance GENERAL TIPS Only use filtered/decalcified water in this appliance. Always ensure that the appliance is sitting on a level surface. If you intend not using the appliance for longer than 2 weeks, remove and empty the sump and water tank. Once installed, never move this appliance or lay on its back, without draining the water from sump.
  • Seite 10: Additional Information

    3. Remove the old expanded pad and dry the area around the valve. Replace the pad with a new pad, while ensuring the new pad does not come into contact with water. 4. Close the arm of the valve on top of the newly fitted valve (Fig 30B). 5.
  • Seite 11: Troubleshooting

    Troubleshooting The product has been designed to highlight particular errors by flashing the on board LED lights. The lights will flash a number of times corresponding to the error that is occuring, Please see the table below for the meaning of each of the number of flashes.
  • Seite 12 Dimplex CAS500, CAS1000 Einleitung Lesen Sie diese Informationen bitte sorgfältig, um in der Lage zu sein, das Gerät sicher zu installieren und zu warten. Wichtige Sicherheitshinweise Wenn Sie elektronoische Geräte verwenden, sollten grundlegene Sicherheitsvorkehrungen immer zur Anwendung kommen, um die Gefahr von Feuer, einem elektrischen Schlag und Verletzungen zu vermeiden, dazu zählen:...
  • Seite 13: Allgemeine Informationen

    Komponenten dabei abzukühlen und sorgt dafür, dass der Nebel aus dem Gerät entweichen kann. Siehe Abb. 3 und 4 für die notwendige Belüftung. Beachten Sie, dass das Regal, auf dem das Produkt steht, eine Lüftungsöffnung erfordert, damit Luft problemlos zum Produkt gelangen kann. CAS500 Freier Belüftungsbereich: Minimum 210 cm CAS1000 Freier Belüftungsbereich: Minimum 420 cm...
  • Seite 14: Anschluss An Die Wasserversorgung

    ANSCHLUSS AN DIE WASSERVERSORGUNG Es wird die Beiziehung eines professionellen Installateurs angeraten, um eine sichere Installation zu gewährleisten. Mit dem Gerät wurden zwei Adapter mitgeliefert, um das PVC-Rohr (0,25 Zoll) mit dem Leitungwasser zu verbinden (Abb. 5.1). Entweder der weiße Adapter (0,5 Zoll) oder der graue Adapter (0,75 Zoll) können verwendet werden, um das Gerät anzuschließen.
  • Seite 15: Kommissionierung / Erste Inbetriebnahme Des Geräts

    Jedes Gerät kann mit seiner eigenen Fernbedienung betrieben werden. Es ist aber auch möglich, mehrere Geräte mit einer Fernbedienung zu steuern. Achten Sie bitte darauf, dass maximal sechs einzelne Geräte (entweder CAS500 or CAS1000) mit einzer Bluetooth-Fernsteuerung betrieben werden können. Somit können alle Geräte gleichzeitig mit nur einer Fernsteuerung betriebn werden.
  • Seite 16: Das Produkt Bedienen

    Dieser Abschnitt beschreibt, wie Sie das Feuer entweder mit manueller Bedienung oder mit der Fernbedienung aktivieren. MANUELLE BEDIENUNG Die manuellen Kontrollelemente befinden sich neben der Brennstoffschicht. (Abb. 21) CAS500 Hauptschalter - steuert die Stromversorgung des Geräts. (Abb. 21A) Hinweis: Hinweis: Dieser Schalter muss sich auf der Position EIN (I) Position, damit das Gerät betrieben werden kann Tasten-Panel - Steuert die Kontrolle des Geräts.
  • Seite 17 Die Bedienung der Fernsteuerung erfolgt in gleicher Weise wie im Kapitel „Empfänger-Steuerung“ beschrieben. Sie können die Fernsteuerung mit mehreren Produkten koppeln, indem Sie die Anweisungen mit anderen Geräten wie oben beschrieben wiederholen. Bitte beachten Sie dass maximal 6 Geräte des Typs CAS500 oder CAS1000 mit einer Fernsteuerung gekoppelt werden können.
  • Seite 18: Wartung

    SO ERHALTEN SIE DEN GEWÜNSCHTEN FLAMMEFFEKT 1. Aktivieren Sie das Gerät, indem Sie den Hauptschalter umlegen und durch das Drücken d Taste. Der Flammeffekt beginnt nach 45 Sekunden. 2. Drücken Sie die Taste Tasten, um die Intensität der Flammen je nach Wunsch zu steuern. Geben Sie dem Flammengenerator Zeit, um auf Änderungen zu reagieren, die Sie vornehmen.
  • Seite 19: Austausch Des Pads Des Ausflussstoppventil

    4. Kehren Sie die obigen Schritte zum erneuten Zusammensetzen um. Luftfilter 1. Heben Sie das Brennstoffbett vorsichtig ab und legen Sie es beiseite. 2. Schieben Sie den Luftfilter vorsichtig nach oben aus dem Plastikhalter heraus. (Abb.26) 3. Spülen Sie sie vorsichtig mit Wasser in der Spüle ab und trocknen Sie sie mit einem Stoffhandtuch. 4.
  • Seite 20: Problemlösung

    Problemlösung Dieses Produkt wurde dahingehend entwickelt, dass gewisse Fehler durch das Blinken von LEDs angezeigt werden. Die LEDs blinken einige Male, immer abhängig vom jeweiligen Fehler. Bitte sehen Sie in der untenstehenden Tabelle nach, um mehr über die Bedeutung der Blinkzeichen zu erfahren. Symptom Ursache Problembehebung...
  • Seite 21 Dimplex CAS500, CAS1000 Introductie Lees deze informatiehandleiding zorgvuldig door voor het veilig installeren, gebruiken en onderhouden van uw product. Belangrijk veiligheidsadvies Bij het gebruik van elektrische apparaten moeten altijd voorzorgsmaatregelen worden genomen om het risico op brand, elektrische schokken en letsels aan personen te verminderen. Dit...
  • Seite 22: Installatie-Instructies

    4 voor voorbeelden van de vereiste ventilatie. Zorg ervoor dat u de vereiste van een ventilatieopening op de plank waarop het product staat in acht houdt. Zo blijft er genoeg ruimte over voor de luchtcirculatie rondom het apparaat. CAS500 Vrij ventilatiegebied: Minimaal 210 cm CAS1000 Vrij ventilatiegebied: Minimaal 420 cm WATERAANSLUITING Wij raden u aan dat u voor een veilige installatie een gekwalificeerde loodgieter raadpleegt.
  • Seite 23: Elektrische Aansluiting

    aan te sluiten (fig. 5.1). De witte ½ inch of de grijze ¾ inch-adapter kan worden gebruikt om het product op de waterleiding aan te sluiten. Ter referentie: de ¾ inch-adapter is dezelfde aansluiting die op de meeste wasmachines wordt gebruikt. Nadat de juiste waterleidingaansluiting is geïnstalleerd, volgt u de onderstaande stappen om uw product op de watertoevoer aan te sluiten.
  • Seite 24 (fig. 16). 5. Elk brandstofbed met blokken wordt geleverd met een los blok zonder LED. Voor enkele CAS500-installaties kan deze bovenop het brandstofbed worden geplaatst of met de verpakking worden opgeslagen. Voor CAS1000 of installaties met meerdere producten kan het losse blok op de tussenverbinding van twee brandstofbedden worden geplaatst (fig.
  • Seite 25 Dit gedeelte omschrijft hoe u uw haard met de afstandsbediening of handmatig kunt bedienen. HANDMATIGE BEDIENINGSELEMENTEN De handbedieningselementen bevinden zich onder het brandstofbed. (Zie fig. 21.) CAS500 Hoofdschakelaar: regelt de stroomtoevoer naar het apparaat. (Fig. 21A.) Opmerking: De schakelaar moet in de ‘AAN’ ( I ) positie staan, voordat de haard kan functioneren.
  • Seite 26 Installeer de producten zoals beschreven in de ‘Installatie-instructies’. Zorg ervoor dat alle producten op de netvoeding zijn aangesloten en dat er water is toegevoerd. Als u CAS1000- en CAS500-producten koppelt, kies dan de afstandsbediening met 6 knoppen als de hoofdafstandsbediening.
  • Seite 27: Algemene Tips

    Nadat u uw aanpassingen heeft gemaakt aan de vlamhoogte en het knetterende geluid, zal het apparaat deze instellingen onthouden, ook als u het apparaat met de aan/stand-by-knop of met de hoofdschakelaar uitschakelt. De volgende keer dat u het apparaat inschakelt, zal het normaal opstarten. Wacht 45 seconden, voordat het vlameffect begint en het apparaat keert vervolgens terug naar de aangepaste instellingen.
  • Seite 28: Aanvullende Informatie

    3. Plaats de nieuwe omzetter in de opvangbak en zorg ervoor dat de kabel niet over de kegel gaat zitten. 4. Voer de bovenstaande stappen in omgekeerde volgorde uit om het mondstuk en de opvangbak weer in elkaar te zetten. Het luchtfilter 1.
  • Seite 29: Probleemoplossing

    Probleemoplossing Het product is ontworpen om bepaalde fouten kenbaar te maken door het laten knipperen van de ingebouwde LED- lichten. De lichten knipperen een aantal keren overeenkomstig de fout die optreedt. Raadpleeg de onderstaande tabel voor de betekenis van elk aantal flitsen. Symptoom Oorzaak Corrigerende actie...
  • Seite 30 Dimplex CAS500, CAS1000 Introduction Prière de lire attentivement ce mode d'emploi afin d'installer, d'utiliser et d'entretenir votre produit en toute sécurité. Conseils de sécurité importants Toujours observer les précautions de base lors de l'utilisation d'appareils électriques, afin de réduire le risque d'incendie, de chocs électriques et de blessures personnelles, notamment : Si l’appareil est endommagé, contacter le fournisseur avant de l’installer et de le mettre...
  • Seite 31 L'appareil porte un symbole d'avertissement NE PAS COUVRIR. Cet appareil n'est pas équipé d'un dispositif pour contrôler la température ambiante. Ne pas utiliser cet appareil dans des pièces exiguës lorsque des personnes s'y trouvant ne sont pas en mesure de quitter la pièce sans aide, à moins qu'une supervision constante soit assurée. Informations générales Utiliser uniquement de l'eau filtrée/décalcifiée dans cet appareil.
  • Seite 32: Raccordement Au Réseau D'eau

    (Fig 4). CAS500 Zone d'aération libre : Minimum 210 cm CAS1000 Zone d'aération libre : Minimum 420 cm RACCORDEMENT AU RÉSEAU D’EAU...
  • Seite 33 5. Chaque couche de combustible à bûches est dotée d'une bûche sans LED détachable. Pour les installations CAS500 simples, elle peut être placée sur le dessus de la couche de combustible ou rangée dans l'emballage. Pour les installations CAS1000 ou à produit multiple, la bûche détachable peut être placée sur le joint central entre les deux couches de combustible (Fig 17).
  • Seite 34: Fonctionnement Du Produit

    COMMANDES MANUELLES Les commandes manuelles sont situées en dessous de la couche de combustible. (Fig 21) CAS500 Interrupteur secteur - Commande l'alimentation électrique de l'appareil. (Fig 21A) Remarque : Cet interrupteur doit être sur la position « MARCHE » ( I ) pour que l'appareil fonctionne Panneau de boutons - Contrôle le fonctionnement de l'appareil.
  • Seite 35 « Instructions d'installation ». Veiller à ce que tous les produits soient raccordés au secteur et soient alimentés en eau. Si vous appairez les produits CAS1000 et CAS500, choisir la télécommande à 6 boutons comme télécommande principale.
  • Seite 36: Entretien

    OBTENTION DE L'EFFET DE FLAMME SOUHAITÉ 1. Allumer l'appareil en appuyant sur l'interrupteur en position marche et en appuyant sur le bouton . Les flammes commencent au bout de 45 secondes. 2. Appuyer sur les boutons pour ajuster la flamme jusqu'au niveau souhaité. Donner au générateur de flammes le temps de réagir aux changements que vous faites.
  • Seite 37: Informations Supplémentaires

    1. Suivre les étapes 1-5 de la section NETTOYAGE - Bac sous « Entretien » pour avoir accès au transducteur. 2. Appuyer sur le clip et sortir le transducteur de son support par le haut. 3. Placer le nouveau transducteur dans le bac en veillant à ce que son câble ne repose pas sur le cône. 4.
  • Seite 38: Dépannage

    Dépannage Le produit a été conçu pour signaler les erreurs particulières en faisant clignoter les LED intégrées. Les voyants clignotent le nombre de fois correspondant à l'erreur en présence. Consulter le tableau ci-dessous pour connaître la signification du nombre de clignotements. Symptôme Cause Mesure corrective...
  • Seite 39 Dimplex CAS500, CAS1000 Introduzione Leggere attentamente le informazioni riportate in questa guida al fine di installare, utilizzare e mantenere il prodotto in modo sicuro. Avviso importante di sicurezza Quando si utilizzano apparecchiature elettriche, è necessario attenersi sempre alle precauzioni fondamentali per ridurre i rischi di incendio, scossa elettrica e lesioni personali, compreso quanto segue: Se l'apparecchiatura è...
  • Seite 40: Informazioni Generali

    AVVERTENZA: Onde evitare il surriscaldamento, non coprire l'apparecchiatura. Non collocare materiale o vestiti sull'apparecchiatura, né ostruire la circolazione dell'aria attorno all'apparecchiatura. L'apparecchiatura riporta un'etichetta con la dicitura “DO NOT COVER” (NON COPRIRE). Questa apparecchiatura non è dotata di dispositivo di controllo della temperatura ambiente. Non utilizzare questa apparecchiatura in locali di piccole dimensioni quando occupati da persone non in grado di lasciare il locale autonomamente, salvo non sia prevista la costante supervisione.
  • Seite 41: Collegamento Idrico

    Fig. 3 e 4. Prendere nota della necessità di avere un'apertura di ventilazione sul ripiano in cui si trova il prodotto, in modo da avere un percorso libero tramite il quale l'aria possa arrivare al prodotto (Fig. 4). CAS500 Area di ventilazione libera: Almeno 210 cm CAS1000 Area di ventilazione libera: Almeno 420 cm COLLEGAMENTO IDRICO Si consiglia di consultare un idraulico qualificato per garantire un'installazione sicura.
  • Seite 42 È possibile abbinare ogni prodotto al proprio telecomando o abbinare più prodotti a un unico telecomando. Si tenga presente che è possibile collegare un massimo di sei prodotti (CAS500 o CAS1000) a un solo telecomando Bluetooth. Ciò consentirà il controllo di tutti i prodotti contemporaneamente da un unico telecomando. In aggiunta, il software del prodotto è...
  • Seite 43: Funzionamento Del Prodotto

    COMANDI MANUALI I comandi manuali sono situati sotto il braciere (Fig. 21). CAS500 Interruttore generale - Controlla la fornitura di energia elettrica all'apparecchiatura (Fig. 21A). Nota: L'interruttore deve trovarsi nella posizione “ON” ( I ) per consentire il funzionamento dell'apparecchiatura Pulsantiera - Controlla il funzionamento dell'apparecchiatura (Fig.
  • Seite 44 “Istruzioni per l'installazione”. Assicurarsi che tutti i prodotti siano collegati alla rete di alimentazione e alla rete idrica. Se si stanno associando prodotti CAS1000 e CAS500, scegliere il telecomando a 6 tasti come telecomando principale.
  • Seite 45: Manutenzione

    OTTENERE L'EFFETTO FIAMMA DESIDERATO 1. Accendere l'apparecchiatura portando l'interruttore principale in posizione “ON” (acceso) e premendo il tasto Le fiamme inizieranno dopo 45 secondi. 2. Premere il tasto per regolare la fiamma sul livello desiderato. Lasciare al generatore di fiamma il tempo di adeguarsi alle modifiche apportate.
  • Seite 46: Ulteriori Informazioni

    1. Per accedere al trasduttore, seguire i passaggi 1-5 nella sezione PULIZIA - Vaschetta alla voce “Manutenzione”. 2. Premere la clip all'indietro e sollevare il trasduttore verso l'alto, estraendolo dal suo supporto. 3. Posizionare il nuovo trasduttore nella vaschetta, assicurandosi che il cavo non si trovi sopra il cono. 4.
  • Seite 47: Risoluzione Dei Problemi

    Risoluzione dei problemi Il prodotto è stato progettato per evidenziare errori specifici tramite il lampeggiare delle luci LED integrate. Le spie lampeggeranno un numero di volte corrispondente all'errore che si è verificato: fare riferimento alla tabella seguente per scoprire il significato del numero di lampeggi. Sintomo Causa Soluzione...
  • Seite 48 Dimplex CAS500, CAS1000 Wprowadzenie Prosimy o uważne przeczytanie niniejszej Instrukcji, która ułatwi instalację, użytkowanie i konserwację produktu. Ważne informacje dotyczące bezpieczeństwa Podczas użytkowania urządzeń elektrycznych należy zawsze stosować środki ostrożności celem zmniejszenia ryzyka pożaru, porażenia lub innych urazów, opisane niżej: Jeśli urządzenie jest uszkodzone, przed przystąpieniem do jego instalacji i eksploatacji należy...
  • Seite 49: Informacje Ogólne

    OSTRZEŻENIE: Aby uniknąć przegrzania, nie wolno przykrywać urządzenia. Nie wolno pozostawiać na urządzeniu materiałów lub odzieży, ani też utrudniać obiegu powietrza wokół urządzenia. Urządzenie oznaczone jest symbolem ostrzegawczym „NIE ZAKRYWAĆ“. Urządzenie nie zostało wyposażone w regulator temperatury pokojowej. Nie należy używać urządzenia w małych pomieszczeniach, gdy znajdują...
  • Seite 50: Połączenie Elektryczne

    3 i 4. Należy podkreślić, że konieczny jest otwór wentylacyjny w półce, na której produkt jest osadzony, aby umożliwić swobodny dopływ powietrza do produktu (rys. 4). CAS500 Obszar swobodnej wentylacji: Co najmniej 210 cm CAS1000 Obszar swobodnej wentylacji: Co najmniej 420 cm POŁĄCZENIA WODNE...
  • Seite 51 INSTALACJA WIELU PRODUKTÓW JEDNOCZEŚNIE (PODŁĄCZENIE KASKADOWE) Połączenia elektryczne i wodne Zarówno produkt CAS500, jak i CAS1000 mogą być instalowane jeden obok drugiego, aby wydłużyć efekt płomienia. Dostarczając energię elektryczną do wielu produktów, należy zwrócić uwagę, aby maksymalna łączna moc produktów nie przekraczała wartości znamionowej wyłącznika nadprądowego w obwodzie elektrycznym.
  • Seite 52 ELEMENTY STEROWANIA RĘCZNEGO Elementy sterowania ręcznego znajdują się pod paleniskiem. (Rys. 21) CAS500 Przełącznik główny – steruje dopływem zasilania elektrycznego do urządzenia. (Rys. 21A) Uwaga: Przełącznik musi znajdować się w pozycji „ON“ (włączanie) ( I ), aby urządzenie mogło działać.
  • Seite 53: Pilot Zdalnego Sterowania

    Uwaga: z jednym pilotem zdalnego sterowania można sparować maksymalnie sześć urządzeń CAS500 lub CAS1000. Parowanie pilota zdalnego sterowania z wieloma produktami Jeśli instalujesz więcej niż jedno urządzenie CAS500/CAS1000, możesz sparować do sześciu z nich z jednym pilotem zdalnego sterowania. W tym celu zainstaluj produkty w sposób opisany w punkcie „Instrukcja instalacji“. Sprawdź, czy wszystkie produkty są...
  • Seite 54: Ogólne Wskazówki

    UZYSKIWANIE POŻĄDANEGO EFEKTU PŁOMIENIA 1. Aby włączyć urządzenie, ustaw główny przełącznik w położeniu ON i naciśnij przycisk. Płomień uruchomi się po 45 sekundach. 2. Naciśnij przyciski , aby regulować poziom płomienia. Pozostaw generator płomienia na chwilę, do czasu aż zareaguje na wprowadzone zmiany. Po wyregulowaniu wysokości płomienia i głośności dźwięku „trzeszczenia“...
  • Seite 55: Dodatkowe Informacje

    2. Naciśnij zacisk do tyłu i unieś przetwornik do góry, wyjmując go z osłony. 3. Umieść nowy przetwornik w zbiorniku ociekowym, unikając układania przewodu na stożku. 4. Wykonaj powyższe czynności w odwrotnej kolejności, aby ponownie zamontować dyszę i zbiornik ociekowy. Filtr powietrza 1.
  • Seite 56: Rozwiązywanie Problemów

    Rozwiązywanie problemów Zgodnie z konstrukcją produktu poszczególne błędy są sygnalizowane za pomocą pokładowych świateł LED. Światła te migają określoną ilość razy w zależności od błędu. Poniższa tabela objaśnia znaczenie każdego takiego sygnału świetlnego. Objaw Przyczyna Działania naprawcze Produkt nie działa. Niski odczyt poziomu wody po stronie, po Sprawdź...
  • Seite 57 MODEL DIM ‘A’ CAS500 508mm CAS1000 1017mm FUEL BED DIM ‘B’ METAL 304mm 354mm Min: 225mm Max: 260mm Dim A 300mm Dim B Fig.1 400mm 400mm 400mm Fig.2 Fig. 3 >210cm >210cm Eg. 42cm x 5cm Eg. 14.5cm x 14.5cm...
  • Seite 58 >420cm >420cm Eg. 84cm x 5cm Eg. 20.5cm x 20.5cm >420cm >420cm Eg. 84cm x 5cm Eg. 84cm x 5cm Fig.4 Fig.5...
  • Seite 59 Fig. 7A Fig. 7B Fig. 6 Fig. 7 Fig. 8 Fig. 9...
  • Seite 60 Fig. 11 Fig. 10 CAS500 CAS1000 Fig. 13 Fig. 12 Fig. 14 Fig. 15...
  • Seite 61 Fig. 16 Fig. 17 Fig. 18 Fig. 19A Fig. 19B Fig. 19 Fig. 20...
  • Seite 62 Fig 21 CAS500 CAS1000 Fig 22 Fig 23 Fig 24 Fig 25 Fig 27 Fig 26...
  • Seite 63 Fig 28 Fig 29 Fig 30A Fig 30B...

Diese Anleitung auch für:

Cas1000

Inhaltsverzeichnis