Herunterladen Diese Seite drucken

Werbung

Verfügbare Sprachen
  • DE

Verfügbare Sprachen

  • DEUTSCH, seite 9
X-RiteDot
®
Getting Started
Guide
English, Deutsch,
Français, Español,
Italiano, Português,
简体中文, 日本語

Werbung

loading

Inhaltszusammenfassung für X-Rite X-RiteDot

  • Seite 1 X-RiteDot ® Getting Started Guide English, Deutsch, Français, Español, Italiano, Português, 简体中文, 日本語...
  • Seite 2 Europäischen Parlaments und des Rates zur Vermeidung von Elektro- und Elektronik-Abfällen. Weitere Informationen dazu finden Sie auf der Webseite von X-Rite unter www.xrite.com. Depuis le 13 août 2005, les produits X-Rite sont conformes à la directive sur les déchets d'équipements électriques et électroniques (DEEE) de l'Union européenne. Visitez www.xrite.com...
  • Seite 3 Copyright © 2004 by X-Rite, Incorporated “ALL RIGHTS RESERVED” X-Rite® and X-RiteDot® are registered trademarks of X-Rite, Incorporated. All other logos, brand names, and product names mentioned are the properties of their respective holders. Attaching the AC Adapter NOTE: Only use the AC Adapter supplied to charge the battery pack.
  • Seite 4 G E T T I N G S T A R T E D generally follows a left-to-right and top-to-bottom sequence. Press this key to decrease numeric values when editing. Right Key Use to toggle an option’s status or access a screen where additional options exist.
  • Seite 5 G E T T I N G S T A R T E D Setting Measurement Options Before you take any measurements, you must set the measurement options. The options will remain as set until changed. All measurement options are located in the Primary screen.
  • Seite 6 G E T T I N G S T A R T E D Contrast icon. Used to access the contrast adjustment screen. Utilities icon. Used to access the utilities screen where instrument parameters are set. See Editing Instrument Utilities in the Operator’s Manual located on the CD.
  • Seite 7 G E T T I N G S T A R T E D Typical Flexo Plate Measurement The following example illustrates a typical % dot measurement on a flexographical plate. 1. Press the Center key to turn on the instrument. NOTE: Hold the Center key down for 2 seconds if a charging message is displayed.
  • Seite 8 G E T T I N G S T A R T E D...
  • Seite 9: Anschließen Des Netzteils

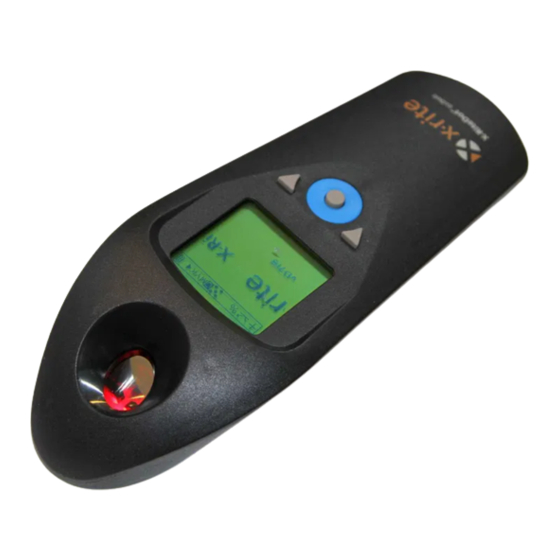
    Dokuments den Adobe® Acrobat Reader, der sich auch auf der CD befindet. Copyright © 2004 von X-Rite, Incorporated Alle Rechte vorbehalten. X-Rite® und X-RiteDot® sind registrierte Marken von X-Rite, Incorporated. Alle anderen erwähnten Logos, Warennamen und Marken sind das Eigentum der jeweiligen Inhaber. Anschließen des Netzteils HINWEIS: Verwenden Sie bitte nur das Netzteil, dass mit dem Gerät geliefert wurde, um...
  • Seite 10 D E R E I N S T I E G Linke Taste Navigation durch die Menüs. Jedes Mal wenn Sie die Taste drücken, bewegt sich das hervorgehobene Quadrat (invertierte Darstellung) zur nächsten verfügbaren Option. Gewöhnlich bewegt sich eine Tastensequenz von links nach rechts bzw.
  • Seite 11 D E R E I N S T I E G Symbol Navigieren Bewegt das Quadrat zur nächsten Option, wenn die darunter liegende (linke) Taste gedrückt wird. Symbol Zurück Mit der darunter liegenden (mittleren) Taste kehren Sie zum vorherigen Menü zurück. Symbol Auswählen/Ändern Schaltet den Status einer Option um oder greift auf ein Menü...
  • Seite 12 D E R E I N S T I E G Positivmessung oder Negativmessung. Zeigt den Messtyp an. Offset Platte (Reflexion), Film (Durchlicht) oder Papier. Zeigt den Einsatzbereich für die Messung an. Prozent oder Dichte (oder Dynamische Papiereinstellung im Modus Papier). Zeigt den Messmodus an. Auto, Cyan, Magenta,...
  • Seite 13 D E R E I N S T I E G Zielfenster 4. Verwenden Sie das Zielfenster, um das Gerät über dem gewünschten Bereich der Platte zu positionieren. 5. Halten Sie das Gerät ruhig, und drücken Sie die mittlere Taste, um eine Messung zu nehmen.
  • Seite 14 D E R E I N S T I E G Zielfenster 5. Verwenden Sie das Zielfenster, um das Gerät über dem gewünschten Bereich der Platte zu positionieren. 6. Halten Sie das Gerät ruhig, und drücken Sie die mittlere Taste, um eine Messung zu nehmen.
  • Seite 15 CD au cas où vous auriez besoin de l’installer sur votre ordinateur. Copyright © 2004 X-Rite, Incorporated. « TOUS DROITS RÉSERVÉS ». X-Rite® et X-RiteDot® sont des marques déposées de X-Rite, Incorporated. Tous les autres logos, marques de produits et noms de produits sont la propriété de leur titulaire respectif.
  • Seite 16 M I S E E N R O U T E Touche de gauche Cette touche vous permet de parcourir les options disponibles. Lorsque vous appuyez sur cette touche, le carré clignotant (impression inversée) se positionne sur l’option suivante. La navigation suit généralement des séquences de gauche à...
  • Seite 17 M I S E E N R O U T E Icône Revenir en arrière : revient à l’écran précédent de l’instrument si vous appuyez sur la touche sous cette icône (touche centrale). Icône Sélectionner/Basculer : bascule l’état d’une option ou affiche un écran d’options supplémentaires si vous appuyez sur la touche sous cette icône (touche de droite).
  • Seite 18 M I S E E N R O U T E Plaque offset (réflectance), Film (transmission) ou Papier imprimé : indique le support utilisé lors d’une mesure. Pourcentage ou Densité (ou paramètre de papier dynamique) : indique le mode de mesure. Automatique, Cyan, Magenta,...
  • Seite 19 M I S E E N R O U T E 4. Utilisez la fenêtre de visualisation pour positionner la zone désirée de l’échantillon. 5. Maintenez l’instrument immobile et appuyez sur la touche centrale pour prendre la mesure. Les résultats de la mesure apparaissent à l’écran de l’instrument.
  • Seite 20 M I S E E N R O U T E 5. Utilisez la fenêtre de visualisation pour positionner la zone désirée de l’échantillon. 6. Maintenez l’instrument immobile et appuyez sur la touche centrale pour prendre la mesure. Les résultats de la mesure apparaissent à l’écran de l’instrument.
  • Seite 21 Adobe® Reader para su conveniencia. Copyright © 2004 por X-Rite, Incorporated. "DERECHOS RESERVADOS". X-Rite® y X-RiteDot® son marcas registradas de X-Rite, Incorporated. Todos los otros logotipos, marcas y productos mencionados son propiedad de sus respectivos dueños. Conectar el adaptador de CA NOTA: Para cargar el paquete de batería, sólo utilice el adaptador de CA provisto.
  • Seite 22 G U Í A R Á P I D A Tecla izquierda Úsela para navegar por las opciones disponibles. Cada vez que presiona la tecla, la casilla resaltada (imagen invertida) se desplaza a la siguiente opción. La secuencia de navegación es generalmente de izquierda a derecha y de arriba hacia abajo.
  • Seite 23 G U Í A R Á P I D A Icono Volver Lleva la pantalla del instrumento a la pantalla anterior cuando la tecla (del medio) que está debajo del icono es presionada. Icono Seleccionar/Alternar Activa o desactiva el estado de una opción o permite acceso a una pantalla donde existen más opciones cuando la tecla (derecha) que está...
  • Seite 24 G U Í A R Á P I D A Plancha Offset (reflectancia), Película (transmisión) o Papel impreso. Indica el sustrato usado durante la medición. Porcentaje o Densidad. Indica el modo de medición. Auto, Cian, Magenta, Amarillo, o K. Indica el modo de iluminación del color seleccionado.
  • Seite 25 G U Í A R Á P I D A 4. Use la ventanilla de observación para posicionar el área deseada en la muestra. 5. Sostenga el instrumento y presione la tecla del medio para tomar la medición. Los resultados de la medición aparecen en la pantalla del instrumento.
  • Seite 26 G U Í A R Á P I D A Sostenga el instrumento y presione la tecla del medio para tomar la medición. Los resultados de la medición aparecen en la pantalla del instrumento. Barra de estado Dato de medición Ángulo de tramado y lineatura Presione la tecla derecha para ver el área de medición en modo ampliado.
  • Seite 27: Tasti Operativi

    CD. Copyright © 2004 di X-Rite, Incorporated. "TUTTI I DIRITTI RISERVATI" X-Rite® e X-RiteDot® sono marchi registrati di X-Rite, Incorporated. Qualsiasi altro logo, marchio, nome commerciale e di prodotto menzionato appartiene ai rispettivi proprietari. Collegamento dell'adattatore AC NOTA: Per ricaricare le batterie utilizzare esclusivamente l'adattatore AC (carica batterie) fornito con lo strumento.
  • Seite 28 P R E P A R A Z I O N E A L L ' U S O Tasto sinistra Consente di spostarsi tra le opzioni disponibili. Ogni volta che si preme il tasto il quadratino evidenziato (immagine al negativo) si sposta sull'opzione successiva.
  • Seite 29 P R E P A R A Z I O N E A L L ' U S O Icone dei tasti Ciascuna icona posizionata al di sopra dei tasti indica un'azione specifica, quando viene premuto il tasto sottostante. Icona di spostamento. Sposta il quadratino evidenziato sull'opzione successiva quando il tasto (a sinistra) al di sotto dell'icona viene premuto.
  • Seite 30 P R E P A R A Z I O N E A L L ' U S O 4. Dopo aver impostato le opzioni nella schermata primaria, premere il tasto centrale per tornare alla schermata di misurazione. Opzioni disponibili A seconda del modello dello strumento, alcune opzioni illustrate potrebbero non essere disponibili.
  • Seite 31 P R E P A R A Z I O N E A L L ' U S O 3. Posizionare lo strumento sul campione di lastra. Accertarsi che la superficie del campione sia piana e che aderisca bene allo strumento. Finestra visore PLATE 4.
  • Seite 32 P R E P A R A Z I O N E A L L ' U S O Finestra visore 5. Posizionarsi sulla parte target del campione mediante la finestra visore. 6. Mantenere ben fermo lo strumento e premere il tasto centrale per eseguire la misurazione.
  • Seite 33 Copyright © 2004 by X-Rite, Incorporated “TODOS OS DIREITOS RESERVADOS” X-Rite® e X-RiteDot® são marcas comerciais registradas da X-Rite, Incorporated. Todos os outros logotipos, nomes de marcas e nomes de produtos são propriedade de seus respectivos detentores.
  • Seite 34 I N F O R M A Ç Õ E S I N I C I A I S Tecla Esquerda Use esta tecla para percorrer as opções disponíveis. A cada vez que essa tecla é pressionada, o quadrado em destaque (imagem em negativo) move-se para a opção seguinte.
  • Seite 35 I N F O R M A Ç Õ E S I N I C I A I S Ícone Retornar. Ao se pressionar a tecla (centro) abaixo desse ícone, retorna-se à tela anterior do instrumento. Ícone Selecionar/Intercambiar. Ao se pressionar a tecla (direita) abaixo desse ícone, troca-se o status de uma opção, ou acessa-se uma tela onde há...
  • Seite 36 I N F O R M A Ç Õ E S I N I C I A I S Material Positivo ou Negativo (filme negativo). Indica o tipo de medição. Chapa Offset (reflectância), Filme (transmitância) ou Papel Impresso. Indica o substrato usado durante uma medição. Porcentagem ou Densidade.
  • Seite 37 I N F O R M A Ç Õ E S I N I C I A I S Janela visora CHAPA 4. Use a janela visora para posicionar o instrumento sobre a área desejada da amostra. 5. Mantenha o instrumento firme e pressione a tecla Centro para fazer a medição.
  • Seite 38 I N F O R M A Ç Õ E S I N I C I A I S Medição Típica de uma Chapa Flexográfica O exemplo a seguir ilustra uma medição típica de pontos porcentuais de uma chapa flexográfica. 1.
  • Seite 39 快 速 入 門 重要 本文档旨在让您熟悉如何使用仪器,并尽快地掌握和运行仪器。有关详 情,请参阅 CD 中 PDF 格式的《操作员手册》。《操作员手册》包括管 理、操作、安装和维护说明。如果您的计算机未安装 Adobe® Reader, 可使用 CD 中附带的 Adobe® Reader。 版权所有 © 2004 X-Rite, Incorporated “保留所有权利”。 X-Rite® 是 X-Rite, Incorporated 的注册商标。本手册所涉及的所有其他标志、品牌及产品 名称为各自拥有者的产权。 连接交流电变压器 注:您只能使用配备的交流电变压器来对电池组充电。在操作过程中,电池组必须一直保 留在仪器中。 1. 将接口电缆的 mini-DIN 插头插入仪器背面。 2. 将变压器的小插头插入接口电缆上 DB9 插头的输入电源端。...
  • Seite 40 快 速 入 門 右键 用于切换一个选项的状态,或者访问存在其它选项的屏幕。在编辑的时 候按此键会增加数字值。 中间键 用于启动仪器,进行测量。在处于一级或二级屏幕时,按此键可返回主 屏幕。 仪器屏幕 仪器接通电源时,将出现主屏幕(中心)。按下左侧键,可看到一级屏 幕选项图标。按下右键,可看到二级屏幕的选项图标。CD 中的《操作 员手册》对这两个屏幕上的选项进行了详细说明。 注:根据仪器型号的不同,有些选项可能不会显示在屏幕上。 一级屏幕 主屏幕 二级屏幕 键图标 键上方的图标表明在按下该键时所出现的特定操作。 定位图标当此图标下的键(左键)按下后,高亮方块移到下一个选 项。 返回图标按下此图标下方的键(中间键),就会从当前仪器屏幕 返回到上一级屏幕。 选择/切换图标当按下此图标下的键(右键)时,将切换选项状态 或访问存在其他选项的屏幕。...
  • Seite 41 快 速 入 門 设置测量选项 您必须先设置测量选项,才能进行测量。这些选项保持不变,直到您作 出更改。所有的测量选项位于一级屏幕中。测量屏幕的状态栏显示当前 设置。 状态栏 1. 按中间键启动仪器。 注: 如果显示正在充电的消息,则按住中间键 2 秒钟。 2. 按左键进入一级屏幕。 3. 设置所需的测量选项。查看以下可用的选项。 4. 设置一级屏幕中的选项后,按中间键 返回到测量屏幕。 可用选项 根据仪器型号的不同,有些选项可能不会显示在屏幕上。 正极或 负极(负片)材料。指明测量类型。 平版(反射)、 底片 (穿透)或 印刷纸。指明在测量过程中 使用的底材。 百分比或 密度传递(或纸张模式下的动态纸张设置)。指明测量 模式。 自动、 青色、 品红、 黄色或 银灰色。指明选定的颜 色照明模式。 随机...
  • Seite 42 快 速 入 門 工具图标。用于访问设置仪器参数的工具屏幕。请参阅 CD 上《操 作员手册》中的“设置仪器工具”。 切换菜单图标。用于访问二级屏幕。 重要: 仪器算法的建立,是为 1% 至 99% 的仪器范围提供可能的最佳结果。因 此,0% 或 100% 的样品测量可能不正确,但并不表示仪器出现故障。 典型平版测量 以下实例阐述在平版上进行的典型网点百分比测量。 1. 按中间键启动仪器。 注:如果显示正在充电消息,则按住中间键 2 秒钟。 2. 设置测量类型( 或 )、反射 ( )、百分比 (%) 和照明( 、 、 、 或 )测量选项。 3. 将仪器置于平版样本之上。确保样本放平,并且仪器接触良好。 查看器窗口...
  • Seite 43 快 速 入 門 典型印刷版测量 以下实例阐述在印刷版上进行的典型网点百分比测量。 1. 按中间键启动仪器。 注:如果显示正在充电消息,则按住中间键 2 秒钟。 )和反射 ( ) 测量选项。 2. 设置测量类型( 或 3. 在平面上放置一个随机提供的黑垫,并将印刷版(图像面朝上)置 于黑垫上。在要进行测量的区域滴一滴 PosiDot。 黑垫 印刷版 4. 使用查看器窗口,将仪器置于滴有液体的样本上。确保液滴填满物 镜的中心,而且在样本区域无气泡或杂物。 查看器窗口 5. 将查看器窗口置于样本所需区域。 6. 拿稳仪器,按中间键进行测量。测量结果会显示在仪器屏幕上。 状态栏 网点值 网点大小 (微米) 网屏角度和网屏线数 7. 按下右键,观察测量区域的放大视图。再次按下右键,返回主测量屏 幕。 8.
  • Seite 44 快 速 入 門...
  • Seite 45 基 本 操 作 の 手 引 き 重要 本書は、本機に慣れ親しんでいただき、すぐにご使用していただくこ とを目的に書かれています。より詳しい説明は CD 内の使用説明書 (PDF ファイル) をご参照ください。使用説明書には規定、操作、イン ストールおよび管理手順の他、Adobe® Acrobat Reader が入って います。 Copyright © 2004 by X-Rite, Incorporated “ALL RIGHTS RESERVED” X-Rite® は、X-Rite, Incorporated の登録商標です。その他、記載されているロゴ、 商標名、製品名は各社の登録商標です。 AC アダプターの取付け 注記: バッテリーパックに付属する専用 AC アダプターのみを使用してください。機器 の使用時は、バッテリーパックを常時本体に取付けておいてください。 1. インターフェース ケーブルの mini-DIN プラグを本機の背面に挿...
  • Seite 46 基 本 操 作 の 手 引 き 操作ボタン 測定の実行とメニュー/オプションを操作する 3 つのボタンは、ディ スプレーの下に配置されています。 右ボタン 左ボタン センターボタン 左ボタン オプションの選択に使用します。ボタンを押すと、ハイライトされた 四角 (白黒反転像) は次のボタンに前進します。順序は左から右です。 編集時には、このボタンで数値を変更(減少)します。 右ボタン 選択の切り替え、またはサブメニューへのアクセスに使用します。編 集時には、このボタンで数値を変更(増加)します。 センターボタン 起動および測定の開始に使用します。表示画面またはサブメニューか ら基本メニューに戻ります。 表示画面 機器の電源を入れると起動画面 (中央) が表示されます。左ボタンを押 して基本メニューのアイコンを表示します。右ボタンを押してサブメ ニューのアイコンを表示します。表示画面のオプションに関するより 詳しい説明は使用説明書 (CD) をご覧ください。 注記: 機種によっては本書の説明が適合しない部分があります。 基本メニュー 起動画面...
  • Seite 47 基 本 操 作 の 手 引 き アイコン ボタン上部に配置されるアイコンはそれぞれのボタンの動作を表しま す。 移動アイコン: ハイライトされた四角を次のボタンに前進させま す。 復帰アイコン: このアイコンを押すと以前の画面に戻ります。 選択/切り替えアイコン: このアイコンで選択項目の切り替えや サブメ ニューへアクセスします。 測定オプションの設定 (測定機能の選択) 実際の測定を行う前に、必ずオプションを設定してください。設定さ れたオプションは変更されるまで有効です。すべての測定オプション は基本メニューに配置されています。現在の設定は測定画面のステー タスバーに表示されます。 ステータスバー 1. センターボタンで機器を起動します。 注記: 充電メッセージが表示された場合は、センターボタンを 2 秒間押し続けて ください。 2. 左ボタンを押して基本メニューに進みます。 3. 希望する測定オプションを設定します。オプションは下記の通り です。 4. 基本メニューでオプションを設定した後、センターボタン を...
  • Seite 48 基 本 操 作 の 手 引 き オプション 使用可能なオプションは機種によって異なりますのでご了承ください。 ポジまたは ネガ (ネガフィルム): 測定タイプを示します。 オフセットプレート (反射)、 フィルム (透過)、 印刷用 紙: 測定される素材を示します。 パーセント または 透過濃度 (ペーパーモードではダイナミ ック用紙設定) 測定モードを示します。 自動、 シアン、 マゼンタ、 イエロー、 墨の発 光色モードを示します。 標準または FM: 網点タイプを示します。 コントラストアイコン表示: 画面のコントラスト調整 ツールアイコン: 機器のパラメーターを設定できるツール画面に アクセスします。詳しくは使用説明書...
  • Seite 49 基 本 操 作 の 手 引 き 測定開口部 4. 測定位置の真上に測定開口部を置きます。 5. 機器を動かさずにセンターボタンを押して測定を開始します。測 定データが表示されます。 ステータスバー 測定データ 網点角度およびスクリーン線数 6. 右ボタンを押して実画像表示を拡大します。再度右ボタンを押して 測定の画面に戻ります。...
  • Seite 50 基 本 操 作 の 手 引 き フレキソプレート測定 フレキソプレート上の網点測定例を次に示しています。 (洗い出し後 のプレートの場合) 1. センターボタンで起動します。 注記: 充電メッセージが表示された場合は、センターボタンを 2 秒間押し続けて ください。 2. 測定タイプ ( または ) および反射 ( ) を設定してください。 3. 付属のブラックマットを平らな表面に置き、フレキソプレートの 「イメージ」を上にしてブラックマットに配置します。測定範囲 に PosiDot を1滴落とします。 ブラックマット フレキソプレート 4. PosiDot が落とされた場所に測定開口部を置きます。この時、液 体がガラスターゲットの中央であること、および空気やゴミがな いことを確認してください。...
  • Seite 52 For questions on product use and operation, contact Applications Support by e-mail at gisupport@x-rite.com or by one of the numbers provided below. For repairs and service, contact Customer Service from the “Support“ page at www.x-rite.com or by one of the numbers provided below.