Herunterladen Inhalt Inhalt Diese Seite drucken
Inhaltsverzeichnis

Werbung

Verfügbare Sprachen
  • DE

Verfügbare Sprachen

  • DEUTSCH, seite 1
BRT300
DE
EN
ES
FR
IT
NL

Werbung

Inhaltsverzeichnis
loading

Inhaltszusammenfassung für SPORTSTECH BRT300

  • Seite 1 BRT300...
  • Seite 2 BENUTZERHANDBUCH DEUTSCH...
  • Seite 3: Video Tutorials

    Video Tutorials Unsere für dich! Aufbau Benutzung Abbau In 3 einfachen Schritten zum schnellen und sicheren Start: 1. QR-Code scannen 2. Videos anschauen 3. Schnell und sicher starten Link zu den Videos: https://service.innovamaxx.de/brt300_video...
  • Seite 4 Sehr geehrter Kunde wir freuen uns, dass Sie sich für ein Gerät aus der SPORTSTECH Produktpalette entschieden haben. SPORTSTECH Sportgeräte bieten Ihnen höchste Qualität und neueste Technologie. Um die Leistungsfähigkeit des Gerätes voll ausnutzen zu können und viele Jahre Freude an Ihrem Gerät zu haben, lesen Sie bitte vor der Inbetriebnahme und dem Beginn des Trainings dieses Benut-...
  • Seite 5: Inhaltsverzeichnis

    INHALTSVERZEICHNIS INHALT Wichtige Informationen ....................6 Explosionszeichnung/Ersatzteilliste ..................8 Aufbauanleitung ......................9 Pflege und Wartung ......................15 Technische Daten ......................15 Freie Fläche und Trainingsfläche ..................16 Trainingsinformationen ....................17...
  • Seite 6: Wichtige Informationen

    WICHTIGE INFORMATIONEN ACHTUNG: Für größtmögliche Wirksamkeit und Sicherheit lesen Sie bitte diese Anleitung und wichtigen Hinweise, bevor Sie das Geräte benutzen. Beachten Sie die folgende Vorsichtsmaßnahme, bevor Sie das Gerät zusammenbauen und benutzen. MONTAGE • Überprüfen Sie, ob alle Teile und Werkzeuge, die in der Teileliste aufgelistet werden, vorhande sind.
  • Seite 7 • Bewahren Sie dieses Gerät in Innenräumen auf, fern von Feuchtigkeit und Staub. Stellen Sie das Gerät nicht in eine Garage, ein Nebengebäude, eine überdachte Terrasse oder nahe ans Wasser. • Wenn Kinder die Erlaubnis haben, das Gerät unter Aufsicht zu nutzen, sollte deren psychischer und physischer Zustand berücksichtigt werden.
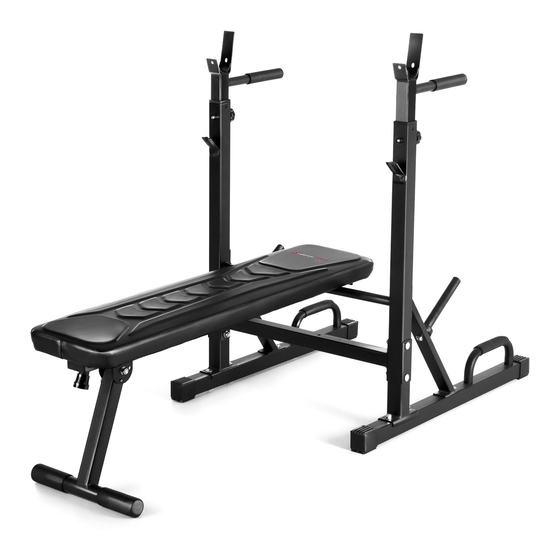
  • Seite 8: Explosionszeichnung/Ersatzteilliste

    EXPLOSIONSZEICHNUNG/ERSATZTEILLISTE Einige der kleineren Teile sind möglicherweise schon an den grösseren Teilen vormontiert. Hinweis: Überprüfen Sie dies bitte sorgfältig! Bitte legen Sie sich selbst einen passenden Schraubenschlüssel zurecht, wenn Sie das Gerät montieren wollen. Unter folgendem Link Unter folgendem Link finden Sie die Explosionszeichnung finden Sie die Explosionszeichnung und die Ersatzteile-Liste:...
  • Seite 9: Aufbauanleitung

    AUFBAUANLEITUNG Befestigen Sie die rechte Stütze (3#) am Stabilisator (1#), richten Sie die Löcher SCHRITT 1: sorgfältig aus und sichern Sie sie mit zwei M10*65 Schlittenschrauben (21#), einer Halterung (10#), zwei 10 mm Scheiben (26#) und zwei M10 Sicherungsmuttern mit Kunststoffring (28#). Stecken Sie den Aufsteckrahmen (9#) in die Löcher des Stabilisators (1#) und sichern Sie diesen dann mit zwei 10 mm Unterlegschei- ben (26#) und zwei Inbusschrauben M8*20 (23#).
  • Seite 10 Befestigen Sie die Schrägkonsole (29#) vorsichtig an der Halterung (3#) und dem SCHRITT 2: Stabilisator (1#), wie im Diagramm dargestellt. Richten Sie die Löcher aus und sichern Sie sie mit zwei M10*20 Inbusschrauben (23#) und zwei 10 mm Scheiben (26#). Setzen Sie den Hantelscheibenhalter (30#) in das Loch der Schräghalterung (29#) ein und sichern Sie ihn mit einer M10*20 Innensechskantschraube (23#) und einer 10 mm Unterlegscheibe (26#) und schieben Sie dann die Stossstange (19#) entlang der Unterseite des Hantelscheibenhalters (30#).
  • Seite 11 Befestigen Sie die Stange (5#) wie im Diagramm dargestellt in der Bohrung der SCHRITT 3: Polsterhalterung (6#) und ziehen Sie die M6*20 Inbusschraube (25#) fest.
  • Seite 12 Stecken Sie beide Enden der Stange (5#) in die Löcher der rechten Stütze SCHRITT 4: (3#) und der linken Stütze (2#). Befestigen Sie den Querträger (4#) zwischen der rechten Stütze (3#) und der linken Stütze (2#) und sichern Sie ihn mit vier M10*65 Schrauben (21#), zwei Halterungen (10#) und vier 10 mm Unterlegscheiben (26#) und vier M10 Sicherungsmuttern mit Kunststoffring (28#).
  • Seite 13 Befestigen Sie die Schrägstütze (7#) an der Halterung der Polsterstütze, SCHRITT 5: sichern Sie sie mit einer Inbusschraube M10*60 (22#), zwei 10 mm Scheiben (26#) und einer M10 Sicherungsmutter mit Kunststoffring (28#) und einem Siche- rungsstift (37#).
  • Seite 14 Befestigen Sie das Pad (20#) auf dem Padhalter und sichern Sie es mit vier 8 mm SCHRITT 6: Unterlegscheiben (27#) und vier Inbusschrauben M8*18 (24#). Stecken Sie die zwei Dipstangen (8#) separat in die Öffnung der rechten und linken Stütze und wählen Sie die gewünschte Höhe aus. Höhe bei Verwendung mit dem Verriegelungsknopf (11#).
  • Seite 15: Pflege Und Wartung

    PFLEGE UND WARTUNG Überprüfen Sie das Gerät in regelmäßigen Abständen, um entstandene Beschädi- gungen oder Abnutzungen zu erkennen. Schmieren Sie bewegliche Teile regelmäßig mit Leichtlauföl, um vorzeitigen Ver- schleiß zu vermeiden. Überprüfen und befestigen Sie alle Teile, bevor Sie das Gerät verwenden. Ersetzen Sie defekte Teile sofort und benutzen Sie das Gerät nicht weiter, bis es sich in ein- wandfreiem Zustand befindet.
  • Seite 16: Freie Fläche Und Trainingsfläche

    FREIE FLÄCHE UND TRAININGSFLÄCHE Der Trainingsbereich (A) sollte mindestens 2,6 m betragen. Der Freiraum (B) sollte mindestens 0,6 m grösser sein als der Trainingsbereich in den Richtungen, aus denen auf das Equipment zugegriffen wird. Der Freiraum muss auch die Fläche für den Notabstieg beinhalten. Wenn zwei Geräte nebenei- nander stehen, kann der freie Bereich geteilt werden.
  • Seite 17: Trainingsinformationen

    TRAININGSINFORMATIONEN Wie Sie mit Ihrem Trainingsprogramm starten, hängt von Ihrer physischen Kondition ab. Wenn Sie einige Jahre keinen Sport getrieben haben oder übergewichtig sind, sollten Sie langsam anfangen und sich von Mal zu Mal ein wenig steigern. Bitte beachten Sie folgende wesentliche Punkte: •...
  • Seite 18 Muskeltabelle Aerobische Übungen: Aerobische Übungen verbessern die Fitness von Lunge und Herz - dem wichtigsten Muskel des Körpers. Aerobische Fitness wird durch jede Aktivität gefördert, die Ihre grossen Muskeln anspricht (z.B. Arme, Beine oder Gesäss). Das Herz schlägt schnell und man atmet tief durch.
  • Seite 19: Warm-Up Und Cool-Down Übungen

    Warm-up und Cool-down Übungen Jedes Workout sollte die folgenden drei Teile beinhalten: 1. Ein Warm-up, bestehend aus 5-10 Minuten dehnen und leichten Übungen. Ein vernünftiges Warm-up erhöht die Körpertemperatur, die Herzfrequenz und die Blutzirkulation in Vorbereitung für das Training. 2. Das Workout in der richtigen Trainingszone, 20-30 Minuten Training mit der Herzfrequenz in der Ziellzone.
  • Seite 20 DEHNUNGSÜBUNGEN Bevor Sie das Laufband benutzen, ist es am besten, 5 bis 10 Minuten zum Aufwärmen Stretching- Übungen durchzuführen. Dehnen vor dem Training hilft die Flexibilität zu verbessern und das Verletzungsrisiko zu mindern. MIT DEM KOPF ROLLEN Drehen Sie den Kopf nach rechts für eine Sekunde, fühlen Sie die Streckung auf der linken Seite des Nackens, dann drehen Sie den Kopf zurück für eine Sekunde, recken Sie Ihr Kinn nach oben und lassen Ihren Mund geöffnet.
  • Seite 21 USER MANUAL ENGLISH...
  • Seite 22 video tutorials for you! construction reduction 3 simple steps for a fast and safe start: 1. scan the QR code 2. watch videos 3. start fast and safely Link to the videos: https://service.innovamaxx.de/brt300_video...
  • Seite 23 Dear customer We are pleased that you have chosen a device from the SPORTSTECH product range. SPORTSTECH sports equipment offer you the highest quality and latest technology. In order to take full advantage of the device‘s performance, and to have many years of pleasure in your device, please read this manual carefully before commissioning and starting the training and use the device according to the instructions.
  • Seite 24 TABLE OF CONTENTS INHALT Important Safety Information ..................26 List of Parts.........................28 Assembly Instructions ....................29 Care and Maintenance ....................35 Technical specifications ....................35 Free Space and Training Space ..................36 Training Information ......................37 Stretch exercise ......................40...
  • Seite 25: Important Safety Information

    IMPORTANT SAFETY INFORMATION • ATTENTION: For maximum effectiveness and safety please read these instructions and important information before using the device. Please note carefully all the following precautions before assembling and using the device. ASSEMBLY • Check that all parts and tools itemized in the parts list are present. Keep in mind that some parts are already pre-assembled.
  • Seite 26 dition should be taken into account. You should remain vigilant at all times that the device is being used in the correct way and as per the safety instructions. Under no circumstances should this device be considered a toy or play thing. •...
  • Seite 27: List Of Parts

    LIST OF PARTS Note: Some of the smaller parts may already be preassembled for the larger parts. Please check this carefully! Please avail yourself of a suitable wrench if you want to assenble the device. At the following link At the following link you will find the exploded drawing you will find the exploded drawing and the spare parts list:...
  • Seite 28: Assembly Instructions

    ASSEMBLY INSTRUCTIONS Attach the right support (3 #) to the stabilizer (1 #), align the holes carefully and STEP 1: secure with two M10 * 65 carriage screws (21 #), one bracket (10 #), two phi discs (26 #) and two M10 aircraft nuts (28 #). Insert the slip-on frame (9 #) into the holes of the stabilizer (1 #) and secu- re them with two phi washers (26 #) and two allen screws M8 * 20 (23 #).
  • Seite 29 Carefully attach the angled bracket (29 #) to the bracket (3 #) and the STEP 2: stabilizer (1 #), as shown in the diagram. Align the holes and secure using two M10 * 20 socket head cap screws (23 #) and two 10 mm washers (26 #).
  • Seite 30 Attach the rod (5 #) to the bore of the padded holder as shown in the diagram STEP 3: (6 #) and tighten the M6 * 20 Aalen screw (25 #)
  • Seite 31 Insert both ends of the rod (5 #) into the holes of the right support (3 #) and the STEP 4: left support (2 #). Attach the crossbar (4 #) between the right support (3 #) and the left support (2 #) and secure it with four M10 * 65 screws (21 #), two mounts (10 #), four 10 mm washers (26 #) and four M10 locknuts (28 #).
  • Seite 32 Attach the angle support (7 #) to the bracket of the padded support, STEP 5: secure with an Aalen screw M10 * 60 (22 #), two 10 mm washers (26 #) and an M10 locknut (28 #) and a locking pin (37 #).
  • Seite 33 Attach the pad (20 #) to the pad holder and secure it with four 8mm washers STEP 6: (27 #) and four allen screws M8 * 18 (24 #).Insert the two dipsticks (8 #) separa- tely into the opening of the right and left support and select the desired height. Secure the height with the lock button (11 #).
  • Seite 34: Care And Maintenance

    CARE AND MAINTENANCE Examine the equipment periodically in order to detect any damage or wear which may have been produced. Lubricate moving parts with light oil periodically to prevent premature wear. Inspect and tighten all parts before using the equipment, replace any defective parts immediately, and do not use the equipment again until it is in perfect working order.
  • Seite 35: Free Space And Training Space

    FREE SPACE AND TRAINING SPACE The training area (A) should be at least 2.6m. The free space (B) should be at least 0.6 m larger than the training area in the direction in which the equipment is accessed. The free area must also be sufficient to allow for the area needed for an emergency descent.
  • Seite 36: Training Information

    TRAINING INFORMATION How you start with your exercise program depends on your physical condition. If you have not exercised for some years or are overweight, you should start slowly and increase your traning regime slowly and gradually. Please note the following essential points: •...
  • Seite 37 Muscle Chart Aerobic exercises: Aerobic exercises improve the fitness of the lungs, the heart and main muscles of the body. Aerobic fitness is promoted by each activity of your larger muscles (for example, arms, legs or buttocks). The heart beats fast and you, in turn, take deep breaths. Aerobic exercise should be part of every exercise plan.
  • Seite 38: Training Frequency

    Warm-up and Cool-down Exercises Each workout should include the following three parts: 1. A warm-up, consisting of 5-10 minutes stretching and light exercises. A sensiblewarm-up gently increases body temperature, heart rate and blood circulation in preparation the workout. 2. A workout in the correct training zone, 20-30 minutes training with the heart rate in the right zone.
  • Seite 39: Stretch Exercise

    STRETCH EXERCISE No matter how you do sports, please do some stretch at first, The warm muscle will extend easily, so warm up yourself with 5-10minutes, Then We suggest the following stretch exercise, five times.10 counts for each time or longer do these exercise again after sports. HEAD ROLLS Rotate your head to the right for one count, feeling the stretch up the left side of your neck, then rotate your head back for one count, stretching your chin to the ceiling and letting your mouth open.
  • Seite 40 MANUAL DE USUARIO ESPAÑOL...
  • Seite 41 tutoriales en video Nuestros para usted! Construcción Utilizar Reducción En 3 sencillos pasos para un arranque rápido y seguro: 1. Escanear el código QR 2. Ver vídeos 3. Comienza rápido y seguro Enlace a los videos: https://service.innovamaxx.de/brt300_video...
  • Seite 42 Estimado cliente Nos alegra que haya elegido un dispositivo de la línea de productos de SPORTSTECH. El equipo de- portivo de SPORTSTECH le ofrece la más alta calidad y lo último en tecnología. Con el fin de aprovechar al máximo el rendimiento el dispositivo, y de poder disfrutar de muchos años con el mismo, por favor lea este manual cuidadosamente antes de ponerlo en marcha y antes de comenzar su rutina de ejercicios y use el dispositivo siguiendo las instrucciones.
  • Seite 43 TABLA DE CONTENIDOS INHALT Información importante de seguridad ................46 dibujo de explsoión/lista de repuestos ................48 Instrucciones de montaje ....................49 5. Cuidado y mantenimiento ..................55 6. Especificaciones técnicas ..................55 Zona libre y zona de entrenamiento ................56 Información sobre el entrenamiento ................57 Ejercicios de estiramiento ....................60...
  • Seite 44: Información Importante De Seguridad

    INFORMACIÓN IMPORTANTE DE SEGURIDAD ATENCIÓN: Antes de utilizar este dispositivo, lea este manual para hacerlo funcionar de forma segura y sacar el máximo rendimiento. Tome las siguientes precauciones antes de montar y usar el dispositivo. MONTAJE • Compruebe que todas las piezas y herramientas enumeradas en la lista de piezas están presen- tes.
  • Seite 45 • Guarde esta unidad en el interior, lejos de la humedad y el polvo. No coloque la unidad en un garaje, edificio anexo, terraza cubierta o cerca del agua. • Si se permite que los niños usen el dispositivo bajo supervisión, se debe tener en cuenta su estado mental y físico.
  • Seite 46: Dibujo De Explsoión/Lista De Repuestos

    DIBUJO DE EXPLSOIÓN/LISTA DE REPUESTOS ATENCIÓN: Es posible que algunas de las piezas más pequeñas ya estén premontadas en las piezas más grandes. Compruébelas cuidadosamente Necesitará una llave adecuada para montar el dispositivo. En el siguiente enlace En el siguiente enlace encontrarás el dibujo de explosión encontrarás el dibujo de explosión y la lista de repuestos:...
  • Seite 47: Instrucciones De Montaje

    INSTRUCCIONES DE MONTAJE Coloque el soporte derecho (3#) en el estabilizador (1#), alinee cuidadosamente PASO 1: los orificios y asegúrelos con dos tornillos M10*65 (21#), un soporte (10#), dos arandelas de 10 mm (26#) y dos tuercas de seguridad M10 (28#). Inserte la estructura de sujeción (9#) en los orificios del estabilizador (1#) y fíjelo con dos arandelas de 10 mm (26#) y dos tornillos de cabeza cilíndrica M8*20 (23#).
  • Seite 48 Fije con cuidado el soporte inclinado (29#) al soporte (3#) y al estabilizador (1#) PASO 2: como se muestra en el diagrama. Alinee los orificios y asegúrelos con dos tornillos de cabeza cilíndrica M10*20 (23#) y dos arandelas de 10 mm (26#). Inserte el soporte de la placa de peso (30#) en el orificio del soporte inclinado (29#) y asegúrelo con un tornillo de hexágono interior M10*20 (23#) y una arandela de 10mm (26#), luego deslice el paragolpes (19#) a lo largo de la parte inferior del...
  • Seite 49 Fije la varilla (5#) como se muestra en el diagrama en el agujero del soporte de la PASO 3: almohadilla (6#) y apriete el tornillo de cabeza cilíndrica M6*20 (25#).
  • Seite 50 Inserte ambos extremos de barra (5#) en los orificios del soporte derecho (3#) PASO 4: y del izquierdo (2#). Coloque la traviesa (4#) entre el soporte derecho (3#) y el izquierdo (2#) y asegúrelo con cuatro tornillos M10*65 (21#), dos soportes (10#), cuatro arandelas de 10mm (26#) y cuatro tuercas de seguridad M10 (28#).
  • Seite 51 Fije el soporte angular (7#) al soporte de la tapicería, asegúrelo con un tornillo Allen PASO 5: M10*60 (22#), dos arandelas de 10 mm (26#) y una contratuerca M10 (28#) y un pasador de bloqueo (37#).
  • Seite 52 Conecte la almohadilla (20#) al soporte de la almohadilla y fíjela con cuatro aran- PASO 6: delas de 8 mm (27#) y cuatro tornillos de cabeza cilíndrica M8*18 (24#). Inserte las dos barras paralelas (8#) por separado en la abertura del soporte derecho e izquierdo y seleccione la altura deseada.
  • Seite 53: Cuidado Y Mantenimiento

    CUIDADO Y MANTENIMIENTO Examine el equipo periódicamente con el fin de detectar cualquier daño o desgaste que pueda haberse producido. Lubrique las partes móviles con aceite suave periódicamente para evitar desgaste prematuro. Inspeccione y apriete todas las partes antes de usar el equipo, reemplace cualquier parte defectuosa inmediatamente, y no use el equipo de nuevo hasta que esté...
  • Seite 54: Zona Libre Y Zona De Entrenamiento

    ZONA LIBRE Y ZONA DE ENTRENAMIENTO La zona en la que se va a entrenar (A) debe ser de al menos 2,6 m. El espacio libre (B) debe ser al menos 0,6 m más grande que el área de entrenamiento en las direcciones desde las que se acce- de al dispositivo.
  • Seite 55: Información Sobre El Entrenamiento

    INFORMACIÓN SOBRE EL ENTRENAMIENTO La forma de iniciar su programa de entrenamiento depende de su condición física. Si no ha practicado deporte durante unos cuantos años o tiene problemas de sobrepeso, deberá comenzar lentamente e ir aumentando la inten- sidad progresivamente. Tenga en cuenta las siguientes recomendaciones: •...
  • Seite 56 Tabla de músculos Ejercicios aeróbicos Los ejercicios aeróbicos mejoran la capacidad pulmonar y el corazón, que son los músculos más importantes del cuerpo. El acondicionamiento aeróbico mejora con cualquier actividad que se dirija a los músculos grandes (por ejemplo, los brazos, las piernas o los glúteos). En estos casos, el corazón late rápido y los pulmones se llenan más hondo.
  • Seite 57 Ejercicios de calentamiento y estiramiento Cualquier entrenamiento debe ser estos tres pasos: 1. Un calentamiento de entre 5 y 10 minutos con ejercicios de estiramiento suaves. Un calenta- miento razonable aumenta la temperatura corporal, la frecuencia cardíaca y la circulación sanguí- nea para prepararse para el calentamiento.
  • Seite 58: Ejercicios De Estiramiento

    EJERCICIOS DE ESTIRAMIENTO No importa cómo se ejercite, siempre haga algo de estiramiento primero. El calentamiento muscular hará que sus músculos se extiendan fácilmente, así que caliente al menos 5-10 minutos. Luego le sugerimos hacer los siguientes ejercicios de estiramiento cinco veces. El estiramiento antes del ejercicio le ayuda a mejorar la flexibilidad y reduce los riesgos de lesiones.
  • Seite 59 MANUEL D‘UTILISATEUR FRANÇAIS...
  • Seite 60 tutoriels vidéo pour vous! construction utilisation réduction 3 étapes simples pour un démarrage ra- pide et sécurisé: 1. Scannez le code QR 2. Regarder les vidéos 3. Démarrez rapidement et en toute sécurité. Enlace a los videos: https://service.innovamaxx.de/brt300_video...
  • Seite 61 Cher client Nous sommes très heureux que vous ayez choisi un appareil de SPORTSTECH. L‘équipement sportif de SPORTSTECH vous offre la plus haute qualité et la dernière technologie. Afin de profiter pleinement des performances de l‘appareil et de pouvoir utiliser l’appareil pendant plusieurs années, veuillez lire attentivement ce manuel avant la mise en service et le démarrage de...
  • Seite 62 TABLE DES MATIÈRES INHALT Informations importantes pour votre sécurité ..............66 Dessin éclaté/liste des pièces de rechange ..............68 Instructions de montage ....................69 Entretien et maintenance ....................75 Spécifications techniques ....................75 Surface libre et surface d‘entraînement ................76 Informations sur l‘entraînement ..................77 Excercice d'étirement ....................80...
  • Seite 63: Informations Importantes Pour Votre Sécurité

    INFORMATIONS IMPORTANTES POUR VOTRE SÉCURITÉ ATTENTION : Pour une efficacité et une sécurité maximales veuillez, avant toute utilisation, lire les instructions et les informations importantes qui suivent. Res- pectez les consignes de sécurité suivantes avant d‘assembler et d‘utiliser l‘appareil. MONTAGE •...
  • Seite 64 • Les personnes ayant un handicap ne doivent pas utiliser cet équipement sans la supervision d‘une personne qualifiée ou d‘un médecin. • Entreposez cet appareil à l‘intérieur, à l‘abri de l‘humidité et de la poussière. Ne le placez pas dans un garage, une dépendance, une terrasse couverte ou près de l‘eau.
  • Seite 65: Dessin Éclaté/Liste Des Pièces De Rechange

    DESSIN ÉCLATÉ/LISTE DES PIÈCES DE RECHANGE • Remarque : Certaines des petites pièces peuvent déjà être pré-assemblées sur les plus gran- des pièces. Veuillez le vérifier attentivement ! Pour le montage de l‘appareil, merci de vous munir d‘une clé de serrage appropriée. A l‘adresse suivante A l‘adresse suivante vous trouverez le dessin éclaté...
  • Seite 66: Instructions De Montage

    INSTRUCTIONS DE MONTAGE Fixez le support droit (3#) au stabilisateur (1#), alignez soigneusement les trous et ÉTAPE 1 : assemblez avec deux vis à tête fendue M10*65 (21#), un écrou (10#), deux ron- delles 10mm (26#) et deux contre-écrous M10 (28#). Insérez le cadre emboîtable (9#) dans les trous du stabilisateur (1#) et assemblez-le à...
  • Seite 67 Fixez soigneusement le support incliné (29#) sur le support (3#) et le stabilisateur ÉTAPE 2 : (1#) comme indiqué sur le schéma. Alignez les trous et assemblez-les avec deux vis à tête cylindrique M10*20 (23#) et deux rondelles 10mm (26#). Insérez le support des haltères (30#) dans le trou du support incliné...
  • Seite 68 Fixez la tige (5#) comme indiqué sur le schéma dans le trou du support du coussin ÉTAPE 3 : (6#) et serrez la vis à tête cylindrique M6*20 (25#).
  • Seite 69 Insérez les deux extrémités de la tige (5#) dans les trous du support droit (3#) et ÉTAPE 4 : du support gauche (2#). Fixez la traverse (4#) entre le support droit (3#) et le sup- port gauche (2#) puis sécurisez-la avec quatre vis M10*65 (21#), deux fixations (10#), quatre rondelles de 10mm (26#) et quatre contre-écrous M10 (28#).
  • Seite 70 Consolidez le support incliné (7#) sur la fixation du support du coussin, Fixez-le ÉTAPE5 : avec une vis à tête cylindrique M10*60 (22#), deux rondelles de 10 mm. (26#), un écrou de blocage M10 (28#) et une goupille de sécurité (37#).
  • Seite 71 Fixez le patin (20#) sur son support et bloquez-le à l‘aide de quatre rondelles de 8 ÉTAPE 6 : mm (27#) et quatre vis à tête cylindrique M8*18 (24#). Insérer les deux barres de dip (8#) séparément dans l‘ouverture des côtés droit et gauche. Sélectionnez et calez à...
  • Seite 72: Entretien Et Maintenance

    ENTRETIEN ET MAINTENANCE Examinez l‘équipement d‘une manière périodique afin de détecter tout dommage ou usure qui se sont peut être produits. Lubrifier périodiquement les pièces en mouvement avec de l‘huile légère pour éviter une usure prématurée. Inspectez et serrez toutes les pièces avant d‘utiliser l‘appareil, remplacez les pièces défectueuses immédiatement et n‘utilisez pas l‘appareil jusqu‘à...
  • Seite 73: Surface Libre Et Surface D'entraînement

    SURFACE LIBRE ET SURFACE D‘ENTRAÎNEMENT La zone d‘entraînement (A) doit être d‘au moins 2,6 m. L‘espace libre (B) doit être d‘au moins 0,6 m plus grande que la zone d‘entraînement dans les directions par lesquelles on accède au matériel. L‘espace libre doit également inclure une zone permettant de descendre d‘urgence. Si deux appa- reils se trouvent l‘un à...
  • Seite 74: Informations Sur L'entraînement

    INFORMATIONS SUR L‘ENTRAÎNEMENT La façon dont vous débutez votre programme d‘entraînement dépend de votre condition physique. Si vous n‘avez pas fait d‘exercice depuis quelques années ou si vous êtes en surpoids, vous devriez commencer lentement et petit à petit augmenter la difficulté. S‘il vous plaît notez les points essentiels suivants : •...
  • Seite 75 Table musculaire Exercices aérobiques : les exercices aérobiques améliorent les capacités pulmonaires et cardiaques, le cœur étant le muscle le plus important de l‘organisme. La condition physique aérobique est améli- orée par toute activité qui fait appel à vos gros muscles (p. ex. bras, jambes ou fesses). Le cœur bat vite et vous respirez profondément.
  • Seite 76 Exercices d‘échauffement et de récupération Chaque séance d‘entraînement devrait comprendre les trois séquences suivantes : 1. Un échauffement composé de 5 à 10 minutes d‘étirements et d‘exercices légers. Un échauffe- ment raisonnable augmente la température corporelle, la fréquence cardiaque et la circulation sanguine en préparation aux exercices qui vont suivre, à...
  • Seite 77: Excercice D'étirement

    EXCERCICE D'ÉTIREMENT Peu importe comment vous pratiquez le sport, Veuillez faire quelques étirements avant de commencer votre entraî-nement, le muscle chaud s’étendra facilement, donc réchauffez vous durant 5-10minutes, nous suggérons l'exercice d'étirement suivant : 5 fois ,10 comptes pour chaque fois ou plus, faire ces exercices à...
  • Seite 78: Manuale Dell'utente

    MANUALE DELL‘UTENTE ITALIANO...
  • Seite 79 Video Tutorial Il nostro per te! Montaggio Utilizzo Smontaggio 3 semplici passaggi per un inizio veloce e sicuro: 1. Scannerizza il QR-Code 2. Guarda il Video 3. Inizia ad allenarti! Enlace a los videos: https://service.innovamaxx.de/brt300_video...
  • Seite 80 Gentile cliente Siamo lieti che lei abbia scelto un apparecchio della gamma di prodotti SPORTSTECH. Le attrezzature sportive SPORTSTECH offrono la massima qualità e la tecnologia più moderna. Al fine di sfruttare appieno le prestazioni del dispositivo, e di avere molti anni di piacere nell‘utilizzarlo, si prega di leggere attentamente questo manuale prima di avviarlo e di iniziare l‘allenamento e utilizzare...
  • Seite 81 INDICE INHALT Importanti informazioni per la vostra sicurezza ..............86 Disegno esploso/lista dei pezzi di ricambio ..............88 Istruzioni di assemblaggio ....................89 Cura e manutenzione ....................95 Specifiche tecniche ......................95 Spazio libero e zona d’allenamento .................96 Informazioni d’allenamento ....................97 Esercizi di stretching .....................100...
  • Seite 82: Importanti Informazioni Per La Vostra Sicurezza

    IMPORTANTI INFORMAZIONI PER LA VOSTRA SICUREZZA ATTENZIONE: Prima dell’utilizzo del prodotto, si raccomanda di leggere atten- tamente queste importanti istruzioni, per un’utilizzo efficiente e sicuro. Osservate bene le seguenti istruzioni, prima di assemblare il dispositivo e cominciare ad utilizzarlo. ASSEMBLAGGIO •...
  • Seite 83 • Conservate il disposivo solo all’interno dell’abitazione, lontano da umidità e polvere. Non tenete il dispositivo in garage, locali annessi, terrazzi con tettoia o vicino all’acqua. • Se i bambini dovessero avere l’autorizzazione di utlizzare il dispositivo sotto sorveglianza di un adulto, bisognerà...
  • Seite 84: Disegno Esploso/Lista Dei Pezzi Di Ricambio

    DISEGNO ESPLOSO/LISTA DEI PEZZI DI RICAMBIO Avviso: Alcuni pezzi più piccoli sono probabilmente già preassemblati a pezzi più grandi. Control- late con attenzione! Prima di cominciare l’assemblaggio verificate di avere una chiave inglese adatta. Al seguente link Al seguente link troverete il disegno esploso troverete il disegno esploso e la lista dei pezzi di ricambio:...
  • Seite 85: Istruzioni Di Assemblaggio

    ISTRUZIONI DI ASSEMBLAGGIO Fissate il supporto destro (3#) sullo stabilizzatore (1#), allineate bene i buchi e PASSO 1: fermatelo con due viti di scorrimento M10*65 (21#), un sostegno (10#), due dischi da 10 mm (26#) e due dadi di fissaggio M10 (28#). Infilate la cornice (9#) nei fori dello stabilizzatore (1#) e fissatela con due dischi da 10 mm (26#) e due viti a brugo M8+*20 (23#).
  • Seite 86 Fissate la console inclinata (29#) con attenzione al fissaggio (3#) e lo stabilizzatore PASSO 2: (1#), come rappresentato nel diagramma. Allineate i fori e fissate con due viti a brugola M10*20 (23#) e due dischi da 10 mm (26#). Posizionate il bloccaggio per bilancieri (30#) nel buco del supporto inclinato (29#) e assicuratelo con una vite a brugola M10*20 (23#) e dei dischi da 10 mm (26#) e fate scivolare il par- aurti (19#) lungo la parte inferiore del bloccaggio per bilancieri (30#).
  • Seite 87 Fissate la barra foro di fissaggio dell’imbottitura (5#) come rappresentato nel dia- PASSO 3: gramma e avvitatelo com una vite a brugola M6*20 (25#).
  • Seite 88 Infilate le parti finali della barra (5#) nei buchi del supporto destro (3#) e in quello PASSO 4: sinistro (2#). Fissate la traversa (4#) tra il supporto desto (3#) e quello sinistro (2#) e fissatelo con quattro viti M10*65 (21#), due fissaggi (10#) e quattro dischi da 10 mm (26#) e quattro dadi di bloccaggio (28#).
  • Seite 89 Fissate la traversa (7#) sul fissaggio del supporto imbottito, assicuratelo con una PASSO 5: vite a brugola M10*60 (22#), due dischi da 10 mm (26#) ed un dado di fissaggio, (28#) ed il perno di sicurezza (37#).
  • Seite 90 Fissate il Pad (20#) sul porta-pad e mettetelo in sicurezza con quattro dischi da PASSO 6: 8mm (27#) e quattro viti a brugola M8*18 (24#). Infilate le due barre per Dip (8#) separatamente nell’apertura del supporto destro e sinistro, e decidete la altezza desiderata.
  • Seite 91: Cura E Manutenzione

    CURA E MANUTENZIONE Esaminare l‘apparecchio periodicamente per rilevare eventuali danni o usura che potrebbero verificarsi nel tempo. Lubrificare periodicamente le parti in movimento con olio leggero per prevenire l‘usura prematura. Controllare e stringere tutte le parti prima di utilizzare il dispositivo, sostituire immedi- atamente eventuali componenti difettosi e non utilizzare l‘apparecchio prima che sia di nuovo in perfette condizioni.
  • Seite 92: Spazio Libero E Zona D'allenamento

    SPAZIO LIBERO E ZONA D’ALLENAMENTO La zona d’allenamento (A) dovrebbe essere di minimo 2,6 m. La spazio libero (b) dovrebbe essere minimo 0,6 m più estesa della zona d’allenamento, dalla direzione in cui si accede all’equipag- giamento. Lo spazio libero deve contenere anche lo spazio per la discesa di emergenza. Se due dispositivi sono uno accanto all’altro, lo spazio libero può...
  • Seite 93: Informazioni D'allenamento

    INFORMAZIONI D’ALLENAMENTO Se é da diversi anni che non praticate nessuno sport o se siete in sovrappeso, dovreste cominciare lentamente ed aumentare di volta in vola. Osservate bene i prossimi Punti essenziali: • Cominciate il vostro programma di allenamento lentamente e prefissatevi traguardi realistici. •...
  • Seite 94 Tabella dei Muscoli Esercizi aerobici: gli esercizi aerobici migliorano lo stato di salute dei polmoni e del cuore - il muscolo più importante del corpo. L’attività aerobica viene promossa da tutte quelle attività che coinvolgono i muscoli più grandi del corpo (ad esempio Braccia o Sedere). Il cuore batte forte e si respira profon- damente.
  • Seite 95 Esercizi di riscaldamento e defaticamento Ogni allenamento dovrebbe includere le seguenti tre parti: 1. Un riscaldamento, che consiste in 5-10 Minuti di stretching ed esercizi leggeri. Un giusto riscaldamento aumenta la temperatura corporea, la frequenza cardiaca e la circolazione sanguig- na, in preparazione all’allenamento.
  • Seite 96: Esercizi Di Stretching

    ESERCIZI DI STRETCHING Non importa la ragione per cui fai sport, fai in modo di fare sempre esercizi di stretching prima di cominciare. Il uscolo riscaldato si allungherà facilmente, quindi scaldati con degli esercizi per 5-10 minuti. Ti suggeriamo di eseguire i seguenti esercizi cinque volte conta fino a dieci ogni volta o anche più a lungo quando ripeti l’esercizio dopo aver praticato sport.
  • Seite 97 GEBRUIKSAANWIJZING NEDERLANDS...
  • Seite 98 Video-tutorials Onze voor jou! Montage Gebruik Demontage In 3 eenvoudige stappen voor een snelle en veilige start: 1. Scan de QR-code 2. Bekijk video‘s 3. Begin snel en veilig Enlace a los videos: https://service.innovamaxx.de/brt300_video...
  • Seite 99 Geachte klant, Bedankt voor het kiezen van de premium SUP Board van InnovaMaxx GmbH. Lees de instructies zorgvuldig door en neem de veiligheidsinstructies in acht. De bedrijfsveiligheid en de werking van het apparaat kunnen alleen worden gegarandeerd als zowel de algemene veiligheids- en ongevallenpreventievoorschriften van de wetgeving en de veiligheidsinstruc- ties in deze gebruiksaanwijzing in acht worden genomen.
  • Seite 100 INHOUD INHALTSVERZEICHNIS NL Belangrijke informatie voor je veiligheid ................106 Explosietekening/Onderdelenlijst ..................108 Montage-instructies ......................109 Verzorging en onderhoud ....................115 Technische Gegevens ....................115 Vrije ruimte en trainingsruimte ..................116 Trainingsinformatie .......................117 Stretchoefeningen ......................120...
  • Seite 101: Belangrijke Informatie Voor Je Veiligheid

    BELANGRIJKE INFORMATIE VOOR JE VEILIGHEID LET OP: Lees deze handleiding en belangrijke opmerkingen voor maximale ef- fectiviteit en veiligheid voordat je het apparaat in gebruik neemt. Neem de volgende voorzorgsmaatregelen in acht voordat je het apparaat monteert en gebruikt. MONTAGE •...
  • Seite 102 garage, een bijgebouw, een overdekt terras of in de buurt van water. • Als kinderen het apparaat onder toezicht mogen gebruiken, moet rekening worden gehouden met hun mentale en fysieke toestand. Zij dienen te worden gecontroleerd en geïnstrueerd voor het juiste gebruik van het apparaat.
  • Seite 103: Explosietekening/Onderdelenlijst

    EXPLOSIETEKENING/ONDERDELENLIJST Let op: Sommige van de kleinere onderdelen zijn mogelijk al voorgemonteerd op de grotere onderdelen. Controleer dit zorgvuldig! Zorg voor een geschikte schroevendraaier als je het apparaat monteert. Onder de volgende link Onder de volgende link vind je de explosietekening vind je de explosietekening en de reserveonderdelenlijst: en de reserveonderdelenlijst:...
  • Seite 104: Montage-Instructies

    MONTAGE-INSTRUCTIES Bevestig de rechtersteun (3#) aan de stabilisator (1#), lijn de gaten zorgvuldig uit STAP 1: en zet vast met twee M10*65 sleufschroeven (21#), één beugel (10#), twee 10 mm sluitringen (26#) en twee M10 borgmoeren (28#). Steek het opbouwframe (9#) in de gaten van de stabilisator (1#) en zet vast met twee 10 mm sluitringen (26#) en twee M8*20 inbusschroeven (23#).
  • Seite 105 Bevestig de schuine console (29#) voorzichtig aan de steun (3#) en de stabili- STAP 2: sator (1#) zoals weergegeven in het diagram. Lijn de gaten uit en zet vast met twee M10*20 inbusschroeven (23#) en twee 10 mm sluitringen (26#). Steek de halterschijvenhouder (30#) in het gat van de schuine console (29#) en zet deze vast met een M10*20 inbusschroef (23#) en een 10 mm sluitring (26#) en schuif vervolgens de bumper (19#) langs de onderkant van de halterschijvenhouder...
  • Seite 106 Bevestig de stang (5#) aan het gat van de bekledingshouder (6#) zoals weergege- STAP 3: ven in het diagram en draai de M6*20 inbusschroef (25#) vast.
  • Seite 107 Steek beide uiteinden van de stang (5#) in de gaten van de rechtersteun (3#) en STAP 4: de linkersteun (2#). Bevestig de dwarsbalk (4#) tussen de rechtersteun (3#) en de linkersteun (2#) en zet vast met vier M10*65 schroeven (21#), twee sluitringen (#10), vier 10 mm sluitringen (26#) en vier M10 borgmoeren (28#).
  • Seite 108 Bevestig de schuine steun (7#) aan de drager van de bekledingssteun, zet deze STAP 5: vast met een M10*60 inbusschroef (22#), twee 10 mm sluitringen (26#), een M10 borgmoer (28#) en een borgpen (37#).
  • Seite 109 Bevestig de bekleding (20#) aan de bekledinghouder en zet vast met vier 8 mm STAP 6: sluitringen (27#) en vier M8*18 inbusschroeven (24 #). Steek de twee dipstangen (8#) afzonderlijk in de opening van de rechter- en linkersteun en kies de gewenste hoogte.
  • Seite 110: Verzorging En Onderhoud

    VERZORGING EN ONDERHOUD Controleer het apparaat regelmatig om beschadigingen of slijtage op te sporen. Smeer regelmatig bewegende onderdelen met een lichtlopende olie om voortijdige slijtage te voorkomen. Controleer en bevestig alle onderdelen voordat je het toestel in gebruik neemt. Ver- vang defecte onderdelen onmiddellijk en stop het gebruik tot het weer in perfecte staat is.
  • Seite 111: Vrije Ruimte En Trainingsruimte

    VRIJE RUIMTE EN TRAININGSRUIMTE Het trainingsgebied (A) moet minimaal 2,6 m zijn. De vrije ruimte (B) moet ten minste 0,6 meter groter zijn dan het trainingsgebied in de richtingen van waaruit de apparatuur wordt betreden. De vrije ruimte moet ook het gebied voor nooddaling omvatten. Als twee apparaten naast elkaar staan, kan het vrije gebied worden verdeeld.
  • Seite 112: Trainingsinformatie

    TRAININGSINFORMATIE Hoe je met je trainingsprogramma begint, hangt af van je fysieke conditie. Als je enkele jaren niet hebt getraind of te zwaar bent, moet je langzaam beginnen en elke keer een beetje opbouwen. Let op de volgende belangrijke punten: •...
  • Seite 113 Spiertabel Aerobe oefeningen: Aerobe oefeningen verbeteren de conditie van de longen en het hart, de belangrijkste spier van het lichaam. De aerobe conditie verbetert door elke activiteit die op je grote spieren is gericht (bijv. armen, benen of billen). Het hart klopt snel en je haalt diep adem. Aerobe oefeningen moeten deel uitmaken van elk trainingsplan.
  • Seite 114 Warming-up- en cooling-down-oefeningen Elke training moet de volgende drie delen omvatten: 1. Een warming-up, bestaande uit 5 tot 10 minuten stretchen en lichte oefeningen. Een verstandige warming-up verhoogt de lichaamstemperatuur, de hartslag en de bloedcirculatie als voorberei- ding op de training. 2.
  • Seite 115: Stretchoefeningen

    STRETCHOEFENINGEN Voor je de loopband gebruikt, kun je het beste 5 tot 10 minuten stretchoefeningen doen voor de opwarming. Stretching voor de training helpt de flexibiliteit te verbeteren en het risico op letsel te verminderen. MET JE HOOFD ROLLEN Draai je hoofd een seconde naar rechts, voel de stretch aan de linkerkant van je nek, draai dan je hoofd een seconde terug, strek je kin omhoog en laat je mond open.
  • Seite 116 Verkauf durch / Distributed by / Distribuido por / Distribué / Distribuito da InnovaMaxx GmbH Potsdamer Platz 11 10785 Berlin +49 30 220 663 569 service@innovamaxx.de http://www.sportstech.de...

Inhaltsverzeichnis