Herunterladen Inhalt Inhalt Diese Seite drucken
Auriol Z31092 Bedienungs- Und Sicherheitshinweise
Vorschau ausblenden Andere Handbücher für Z31092:
Inhaltsverzeichnis

Werbung

Verfügbare Sprachen
  • DE

Verfügbare Sprachen

  • DEUTSCH, seite 43
ESTACIÓN METEOROLÓGICA INALÁMBRICA
Instrucciones de utilización y de seguridad
STAZIONE METEOROLOGICA RADIOCONTROLLATA
Indicazioni per l'uso e per la sicurezza
ESTAÇÃO METEOROLÓGICA SEM FIOS
Instruções de utilização e de segurança
RADIO-CONTROLLED WEATHER STATION
Operation and Safety Notes
FUNK-WETTERSTATION
Bedienungs- und Sicherheitshinweise
Z31092

Werbung

Inhaltsverzeichnis
loading

Inhaltszusammenfassung für Auriol Z31092

  • Seite 1 ESTACIÓN METEOROLÓGICA INALÁMBRICA Instrucciones de utilización y de seguridad STAZIONE METEOROLOGICA RADIOCONTROLLATA Indicazioni per l’uso e per la sicurezza ESTAÇÃO METEOROLÓGICA SEM FIOS Instruções de utilização e de segurança RADIO-CONTROLLED WEATHER STATION Operation and Safety Notes FUNK-WETTERSTATION Bedienungs- und Sicherheitshinweise Z31092...
  • Seite 2 Instrucciones de utilización y de seguridad Página IT / MT Indicazioni per l’uso e per la sicurezza Pagina Instruções de utilização e de segurança Página GB / MT Operation and safety notes Page DE / AT / CH Bedienungs- und Sicherheitshinweise Seite...
  • Seite 4: Inhaltsverzeichnis

    Índice Uso previsto ........................Página 5 Descripción de las piezas ..................Página 5 Datos técnicos ......................... Página 5 Volumen de suministro ................... Página 5 Seguridad ........................... Página 5 Indicaciones generales de seguridad ..................Página Indicaciones de seguridad referentes a las baterías ............Página Antes de la puesta en funcionamiento Colocación de los dispositivos ....................
  • Seite 5: Uso Previsto

    … / Descripción de las … / Datos técnicos /Volumen de suministro / Seguridad Estación meteorológica Canal selección de función inalámbrica Compartimento de las pilas Tecla ºC / ºF Tecla TX (“Tecla de ajuste de canal”) © Uso previsto Soporte de pie La estación meteorológica muestra la temperatura ©...
  • Seite 6: Indicaciones Generales De Seguridad

    Seguridad / Antes de la puesta en funcionamiento © Indicaciones generales tensión final. En este caso existe el riesgo de de seguridad que se derramen. En caso de que se haya derramado el líquido de las baterías dentro del aparato, sáquelas inmediatamente para ¡PELI- evitar daños en el aparato.
  • Seite 7: Puesta En Funcionamiento De La Estación Meteorológica

    Antes de la puesta en funcionamiento / Manejo Cierre la cubierta del compartimento de las la tecla TX , para ajustar la conexión de forma pilas. manual. En cuanto la estación meteorológica se conecta con el sensor exterior, comienza a recibir auto- Montar el sensor exterior: Nota: Para realizar estos pasos se necesita un máticamente la señal de radiofrecuencia DCF.
  • Seite 8: Ajuste Manual De Fecha / Idioma / Lugar / Hora / Zona Horaria

    Manejo Para corregir las eventuales desviaciones de la 3. Confirme su entrada presionando la tecla hora exacta, el reloj realiza diariamente una sin- MODE . El indicador de minutos del cronización a la 01.00, las 02.00 y 03.00 horas indicador de tiempo parpadea.
  • Seite 9: Uso De La Indicación De Hora 12 / 24

    Manejo Alemania La Corogna London Groningen Suiza, Lichtenstein Aachen Leon Manchester Den Haag Berlin Las Palmas Plymouth Rotterdam Basel Düsseldorf Madrid Bern Hungría Portugal Dresden Malaga Budapest Evora Chur Erfurt Palma de Coimbra Geneva Croacia Mallorca Frankfurt Zagreb Faro Locamo Flensburg Salamanca Leiria...
  • Seite 10: Activar / Desactivar La Función De Despertador

    Manejo Consejo: Mantenga pulsada la tecla de SUN / MOON , la tecla o la tecla / 12 / 24 . De este / 12 / 24 modo conseguirá ajustar más rápido el valor. Pulse la tecla SUN / MOON para con- Este modo de ajuste rápido puede emplearse firmar su ingreso.
  • Seite 11: Leer La Presión Atmosférica

    Manejo © Ajustar canal Pulse la tecla HISTORY / WEATHER para confirmar su ajuste. Nota: Observe que el clima actual esté Para ello, abra la tapa del compartimento ajustado correctamente. En caso contrario de las pilas situado en la parte trasera del puede suceder que el pronóstico meteoroló- sensor exterior y retírelo.
  • Seite 12: Visualizar La Temperatura En °C / °F

    Manejo / Solución de problemas / Limpieza y mantenimiento © © Visualizar la temperatura Indicación de la batería en °C / °F El indicador de la batería aparece en el display Nota: La unidad de temperatura prescrita LCD de la estación meteorológica, si las baterías legalmente es °C.
  • Seite 13: Eliminación

    MK45 5HP, UK, declaramos bajo respon- sabilidad propia, que el producto: Estación meteorológica inalámbrica N.º de modelo: Z31092 Versión: 11 / 2011, referido en esta declaración, cumple con las normas / documentos normativos de la directiva 1999 / 5 / EC. Si es necesario puede descargar estos documentos de www.milomex.com.
  • Seite 14 Indice Utilizzo secondo la destinazione d’uso ............ Pagina 15 Descrizione dei componenti ................Pagina 15 Dati tecnici .......................... Pagina 15 Volume di consegna ....................Pagina 15 Sicurezza Avvisi di sicurezza generali ....................Pagina 16 Indicazioni di sicurezza per le batterie ................. Pagina 16 Prima della messa in funzione Posizioni le apparecchiature ....................
  • Seite 15: Utilizzo Secondo La Destinazione D'uso

    Utilizzo … / Descrizione dei componenti / Dati tecnici / Volume di consegna Stazione meteorologica Sensore esterno radiocontrollata LED di controllo Temperatura esterna / Canale del sensore esterno © Utilizzo secondo la Dispositivo di sospensione destinazione d’uso Selettore del canale Vano portabatterie La stazione meteo mostra la temperatura interna Tasto °C / °F...
  • Seite 16: Sicurezza

    Sicurezza / Prima della messa in funzione Non smaltire le batteria con i rifiuti domestici! Sicurezza Ogni consumatore è obbligato ai termini di legge a smaltire la batteria secondo le regole Legga tutte le istruzioni e gli avvisi di sicurezza. vigenti! Negligenza nell’attenersi alle istruzioni e agli Tenere le batterie fuori dalla portata dei...
  • Seite 17: Mettere In Funzione I Sensori

    Prima della messa in funzione / Azionamento © Mettere in funzione i sensori zato il simbolo del canale scelto con il canale del sensore esterno (se necessario, cambiare il Eliminare il nastro di protezione canale del sensore esterno secondo quanto spie- gato nel capitolo “Impostazione del canale”).
  • Seite 18: Impostazione Manuale Di Data / Lingua / Posizione Geografica / Orario / Fuso Orario

    Azionamento Per correggere eventuali scostamenti dall’orario Qualora non si prema alcun tasto per 30 esatto, l’orologio, quotidianamente, esegue auto- secondi, il display a cristalli liquidi torna maticamente alle ore 01:00, 02:00 e 03:00 automaticamente alla visualizzazione standard. una sincronizzazione con il segnale radio DCF. 3.
  • Seite 19: Utilizzo Della Visualizzazione 12 / 24 Ore

    Azionamento Germania La Corogna London Groningen Svizzera, Lichtenstein Aachen Leon Manchester Den Haag Berlin Las Palmas Plymouth Rotterdam Basel Düsseldorf Madrid Bern Ungheria Portogallo Dresden Malaga Budapest Evora Chur Erfurt Palma de Coimbra Geneva Croazia Mallorca Frankfurt Zagreb Faro Locamo Flensburg Salamanca Leiria...
  • Seite 20: Attivazione / Disattivazione Della Funzione Di Sveglia

    Azionamento Suggerimento: Mantenere premuto il tasto nel controllo breve dell’orario della levata e oppure il tasto / 12 / 24 . In del tramonto del sole e della luna. Lampeg- questo modo è possibile eseguire un’impo- gia la visualizzazione della posizione geo- stazione accelerata dei valori.
  • Seite 21: Lettura Della Pressione Atmosferica

    Azionamento 0HR = pressione atmosferica corrente = piovoso –1HR = Pressione atmosferica 1 ora prima –2HR = Pressione atmosferica 2 ore prima, ecc. Premere il tasto HISTORY / WEATHER Premere e mantenere premuto il tasto “+“ / per confermare le impostazioni. °C / °F per circa 3 secondi per commutare Nota: Fare attenzione a che le condizioni...
  • Seite 22: Mostrare La Temperatura Interna

    Azionamento / Rimozione degli errori Nota: Qualora non si prema per 5 secondi = La temperatura esterna diminuisce. alcun tasto, le visualizzazioni tornano auto- maticamente alla visualizzazione standard. Per cancellare i valori massimi e minimi memo- © Mostrare la temperatura rizzati premere e mantenere premuto il tasto interna “–“...
  • Seite 23: Pulizia E Cura

    Qualora il display segnalasse dei disturbi, meteorologica radiocontrollata” · Modello n° rimuovere tali apparecchi dalla portata della Z31092 Versione: 11 / 2011, alla quale si riferi- stazione meteo / del sensore esterno, oppure sce la presente dichiarazione, è conforme alle...
  • Seite 24 Introdução Utilização correcta ...................... Página 25 Descrição das peças ....................Página 25 Dados técnicos ........................ Página 25 Material fornecido ...................... Página 25 Segurança .......................... Página 25 Indicações gerais de segurança .................... Página 26 Indicações de segurança relativas às pilhas ................ Página 26 Antes da colocação em funcionamento Instalar os aparelhos ......................
  • Seite 25: Utilização Correcta

    … / Descrição das peças / Dados técnicos / Material fornecido / Segurança Estação meteorológica sem fios Dispositivo de suspensão Interruptor de selecção de canal Compartimento das pilhas © Utilização correcta Botão °C / °F Botão TX (“botão de ajuste de canal”) A estação meteorológica indica a temperatura Pé...
  • Seite 26: Indicações Gerais De Segurança

    Segurança / Antes da colocação em funcionamento © Indicações gerais de segurança Evite o contacto com a pele, olhos e mucosas. No caso de contacto com o ácido das pilhas, PERIGO DE lave o local afectado com bastante água e / ou consulte um médico! MORTE E DE ACIDENTES PARA BEBÉS E CRIANÇAS!
  • Seite 27: Colocar A Estação Meteorológica Em Funcionamento

    Antes da colocação em funcionamento / Operação rádio é indicado permanentemente no visor. Montar o sensor exterior: Nota: Necessita de um berbequim para efectuar Se, no momento da colocação em funcionamento, este passo. não for possível uma sincronização com o relógio Procure um local adequado para o sensor atómico, poderá...
  • Seite 28: Ajustar Manualmente A Data / Idioma / Localização / Tempo Em Horas / Fuso Horário

    Operação procura receber o sinal de radiofrequência Se não premir qualquer botão dentro de DCF. Este processo demora alguns minutos 30 segundos, o visor LC retrocede automati- e é sinalizado no visor LC através do símbolo camente para a indicação padrão. da torre de rádio intermitente 3.
  • Seite 29: Utilizar A Indicação De 12 / 24 Horas

    Operação Perpignan Catania Enschede Belgrade Checoslo- váquia Lille Firenze Groningen Áustria Rouen Foggia Den Haag Graz Prague Strasbourg Genova Rotterdam Innsbruck Grécia Toulouse Lecce Linz Portugal Messina Evora Salzburg Atenas Finlândia Helsinki Milano Coimbra Vienna Chipre Napoli Faro Nicósia Grã- Bélgica Bretanha Palermo...
  • Seite 30: Indicar A Hora Do Nascer E Pôr-Do-Sol E Da Lua

    Operação Prima o botão SNOOZE / LIGHT para pâncias entre o aparelho e o serviço de previsão desligar o despertador. O alarme liga-se au- meteorológica local, oriente-se pelo último. tomaticamente de novo após 5 minutos. Se premir o botão ou ou o botão Mantenha o botão HISTORY / WEATHER / 12 / 24 , o despertador desliga-se e...
  • Seite 31: Consultar A Pressão Atmosférica Das Últimas 12 Horas

    Operação Nota: a pressão atmosférica absoluta é necessário adicionar outro sensor exterior e, medida através da estação meteorológica. consequentemente, outro canal, a estação Ajuste a pressão atmosférica relativa de meteorológica recebe automaticamente o acordo com a pressão atmosférica ao nível sinal.
  • Seite 32: Retroiluminação

    Operação / Resolução de problemas / Limpeza e conservação / Eliminação © Resolução de problemas Prima brevemente o botão “–“ / MAX / MIN . São indicadas a temperatura interior e exterior máxima medida, bem como a Nota: o aparelho contém componentes electró- humidade do ar máxima medida.
  • Seite 33: Informações

    MK45 5HP, UK declara, sob exclusiva responsabilidade, que o produto: Estação mete- orológica sem fios · Modelo n.º: Z31092 Versão: 11 / 2011, ao qual se refere a presente declara- ção, se encontra em conformidade com as normas / documentos normativos da Directiva 1999 / 5 / CE.
  • Seite 34 Table of contents Intended use ........................Page 35 Description of parts and features ..............Page 35 Technical data ........................Page 35 Scope of supply .........................Page 35 Safety ............................Page 35 General safety information ......................Page 36 Safety instructions for batteries....................Page 36 Before initial use Setting up devices ........................Page 36 Putting the outdoor sensor into operation ..................Page 36 Putting the weather station into operation .................Page 37 Operation...
  • Seite 35: Intended Use

    … / Description of parts and … / Technical data / Scope of supply / Safety Radio-controlled weather station °C / °F button TX button (“Channel setting button”) Stand Intended use Technical data The weather station displays the indoor and out- door temperatures in Celsius (°C) or Fahrenheit (°F), the indoor air humidity in percent (% RH) and Weather Station:...
  • Seite 36: General Safety Information

    Safety / Before initial use General safety information Avoid contact with the skin, eyes and mucous membranes. Any parts of the body coming DANGER into contact with battery acid should be rinsed off with copious amounts of water TO LIFE AND ACCIDENT and / or a doctor contacted if necessary! HAZARD FOR TODDLERS AND SMALL CHILDREN! Never allow...
  • Seite 37: Putting The Weather Station Into Operation

    Before initial use / Operation the weather station. Check that there are no clocks in the world close to Frankfurt / Main, obstacles between the outdoor sensor and Germany – this varies by 1 second in a million the weather station. Otherwise there may be years.
  • Seite 38: Setting The Date / Language / Location / Clock / Time Zone Manually

    Operation Setting the date / language / 5. Confirm your settings by pressing the MODE location / clock / time zone button . The year value flashes in the time manually display . Press the button / 12 / 24 button to set it to the At the location site of the weather station, recep- desired value.
  • Seite 39: Using The 12 / 24 Hour Display

    Operation Parma Enschede St.Petersburg Brugges Czech Republic Perugia Groningen Bruxelles Sweden Roma Den Haag Gothenburg Charleroi Prague Torino Rotterdam Stockholm Liege Greece Trieste Portugal Slovakia Switzerland, Liechtenstein Venezia Evora Bratislave Athens Verona Coimbra Basel Slovenia Cyprus Ventimiglia Faro Ljubljana Bern Nicosia Ireland Leiria...
  • Seite 40: Moon Phases

    Operation To check the setting / rising time for other location & date, press and hold down the = cloudy SUN / MOON button for about 3 sec- onds to access the setting / rising time of the sun or moon quick control mode. The loca- tion flashes.
  • Seite 41: Setting The Channel

    Operation Displaying the indoor   0HR = present barometric pressure temperature – 1HR = barometric pressure an hour earlier – 2HR = barometric pressure two hours earlier, etc. The current Indoor temperature is shown in Press and hold down the “+“ / °C / °F button the LC display.
  • Seite 42: Backlight

    This means that if it is placed near the article Radio-controlled Weather Station, an object that transmits radio signals, it could model number Z31092, version 11 / 2011 cause interference. This could be, for example, fulfills the basic requirement and the other mobile telephones, walkie talkies, CB radios, relevant requirements of 1999 / 5 / EC.
  • Seite 43 Inhaltsverzeichnis Bestimmungsgemäße Verwendung ..............Seite 44 Teilebeschreibung ......................Seite 44 Technische Daten ......................Seite 44 Lieferumfang ........................Seite 44 Sicherheit ..........................Seite 44 Allgemeine Sicherheitshinweise ....................Seite 45 Sicherheitshinweise zu Batterien ....................Seite 45 Vor der Inbetriebnahme Geräte aufstellen .........................Seite 45 Außenfühler in Betrieb nehmen ....................Seite 45 Wetterstation in Betrieb nehmen ....................Seite 46 Bedienung DCF-Funksignal empfangen ......................Seite 46...
  • Seite 44: Bestimmungsgemäße Verwendung

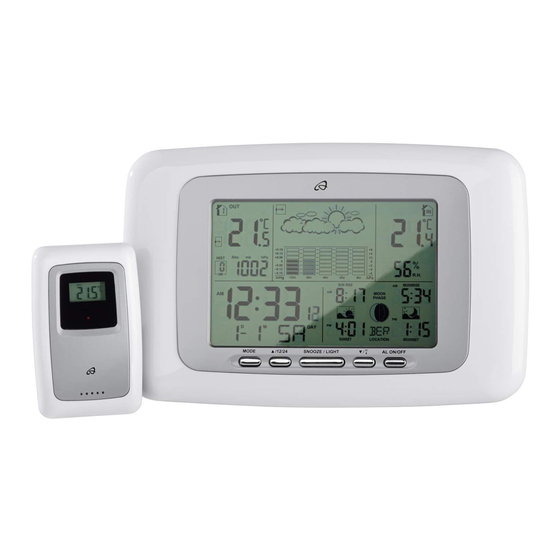
    … Verwendung / Teilebeschreibung / Technische … / Lieferumfang / Sicherheit Funk-Wetterstation Batteriefach °C- / °F-Taste TX-Taste („Kanaleinstelltaste“) Bestimmungsgemäße Standfuß Verwendung Technische Daten Die Wetterstation zeigt die Innen- und Außen- temperatur in Celsius (°C) oder Fahrenheit (°F) und die Innenluftfeuchtigkeit (% RH), sowie Wetterstation: deren Maximal- und Minimalwerte an.
  • Seite 45: Allgemeine Sicherheitshinweise

    Sicherheit / Vor der Inbetriebnahme Allgemeine Sicherheitshinweise Falls die Batterien in Ihrem Gerät ausgelaufen sein sollten, entnehmen Sie diese sofort, um LEBENS- Schäden am Gerät vorzubeugen! Vermeiden Sie den Kontakt mit Haut, Augen UND UNFALLGEFAHR FÜR und Schleimhäuten. Bei Kontakt mit Batterie- KLEINKINDER UND KINDER! Lassen Sie Kinder niemals unbeaufsichtigt säure spülen Sie die betroffene Stelle mit...
  • Seite 46: Wetterstation In Betrieb Nehmen

    Vor der Inbetriebnahme / Bedienung Bei erfolgreichem Empfang des DCF-Funksignals Außenfühler montieren: Hinweis: Sie benötigen für diesen Arbeitsschritt wird das Funkturm-Symbol dauerhaft im LC- eine Bohrmaschine. Display angezeigt. Wenn zum Zeitpunkt der Inbe- Suchen Sie einen geeigneten Platz für den triebnahme keine Synchronisation mit der Atomuhr Außenfühler.
  • Seite 47: Datum / Sprache / Standort / Uhrzeit / Zeitzone Manuell Einstellen

    Bedienung Kommt die Verbindung mit dem DCF-Funksignal 4. Bestätigen Sie Ihre Eingabe durch Drücken der nicht zustande, wird die Suche unterbrochen. Zur MODE-Taste . Die Sekundenanzeige der nächsten vollen Stunde wird automatisch versucht Zeitanzeige blinkt. Drücken Sie die Taste die Verbindung herzustellen. / 12 / 24-Taste / -Taste oder die...
  • Seite 48: 24-Stundenanzeige Verwenden

    Bedienung Zaragossa Edinburgh Venezia Szczecin Bern Glasgow Verona Warsaw Chur Frankreich Besançon London Ventimiglia Geneva Russland Biarritz Manchester St.Petersburg Locamo Irland Bordeaux Plymouth Dublin Luceme Schweden Brest Gothenburg St Moritz Ungarn Luxemburg Cherbourg Budapest Stockholm St Gallen Norwegen Lyon Bergen Sion Kroatien Slovakei...
  • Seite 49: Sonnen- Und Mondaufgangs- Bzw. -Untergangsuhrzeit Anzeigen

    Bedienung Drücken Sie die ALARM-Taste , um die Weckfunktion zu aktivieren. Das Alarm- Symbol erscheint im LC-Display. Neumond Wachsender Halbmond Wachsender Drücken Sie erneut die ALARM-Taste , um Halbmond Vollmond die Weckfunktion zu deaktivieren. Das Alarm- Symbol erlischt im LC-Display. Das Alarmsignal ertönt, sobald die eingestellte Vollmond Abnehmender...
  • Seite 50: Luftdruck Ablesen

    Bedienung Außentemperatur anzeigen = Der Luftdruck bleibt konstant. Drücken Sie die Kanal-Taste , um die Außen- temperatur der verschiedenen Außenfühler = Der Luftdruck wird sinken. anzuzeigen. – Drücken Sie die Kanal-Taste 1 x, um Kanal 1 anzuzeigen. Luftdruck ablesen – Drücken Sie die Kanal-Taste 2 x, um Kanal 2 anzuzeigen.
  • Seite 51: Maximale / Minimale Temperatur / Luftfeuchtigkeit Anzeigen

    Bedienung / Fehler beheben / Reinigung und Pflege / Entsorgung Folgende Kategorien stehen zur Verfügung: Hinweis: Achten Sie dabei auf die richtige Polarität. Diese wird im Batteriefach ange- „Dry“ = Luftfeuchtigkeit < 45 % zeigt. „Comfort“ = Luftfeuchtigkeit 45–75 %, Schließen Sie das Batteriefach Innentemperatur Drücken Sie die RESET-Taste...
  • Seite 52: Informationen

    Cottage, Barton Road, Pulloxhill, Bedfordshire, MK45 5HP, UK, erklären in alleiniger Verantwor- tung, dass das Produkt: Funk-Wetterstation, Model-Nr.: Z31092, Version 11 / 2011, auf das sich diese Erklärung bezieht, mit den Normen / nor- mativen Dokumenten der 1999 / 5 / EC überein- stimmt.
  • Seite 53 Milomex Services Hilltop Cottage Barton Road Pulloxhill Bedfordshire MK45 5HP Model no.: Z31092 Version: 11 / 2011 © by ORFGEN Marketing Estado de las informaciones · Versione delle informazioni · Estado das informações · Last information update · Stand der Informationen:...

Inhaltsverzeichnis