Herunterladen Inhalt Inhalt Diese Seite drucken
Inhaltsverzeichnis

Werbung

Verfügbare Sprachen
  • DE

Verfügbare Sprachen

  • DEUTSCH, seite 1
Brotbackautomat
10030774

Werbung

Inhaltsverzeichnis
loading

Inhaltszusammenfassung für Klarstein 10030774

  • Seite 1 Brotbackautomat 10030774...
  • Seite 2: Inhaltsverzeichnis

    Rezepte 11 Reinigung und Pflege 15 Fehlersuche und Fehlerbehebung 15 Entsorgung und Konformitätserklärung 16 Technische Daten Artikelnummer 10030774 Stromversorgung 220-240 V ~ 50-60 Hz Leistung 550 W Sicherheitshinweise • Kinder über 8 Jahren, physisch und körperlich eingeschränkte Menschen sollten das Gerät nur benutzen, wenn sie vorher von einer Aufsichtsperson ausführlich mit den Funktionen und den Sicherheitsvorkehrun-...
  • Seite 3: Geräteübersicht

    • Schalten Sie das Gerät nicht ein, wenn sich keine Zutaten in der Brotform befinden. • Schlagen Sie nicht auf die Brotform oder den Rand, um das Brot zu entfernen, Sie könnten die Form be- schädigen. • Bringen Sie zuerst das Kabel am Gerät an, bevor Sie den Stecker in die Steckdose stecken. Schalten Sie das Gerät zuerst aus, bevor Sie den Stecker später wieder aus der Steckdose ziehen.
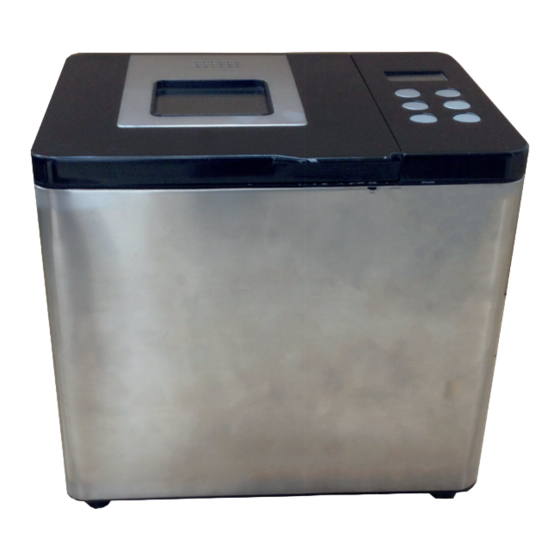
  • Seite 4: Bedienfeld Und Tastenfunktionen

    Bedienfeld und Tastenfunktionen Programme 1 Weißbrot 2 Süßes Brot 3 Natürlicher Sauerteig 4 Französisches Brot 5 Vollkornweizenbrot 6 Schnell 7 Zuckerfrei 8 Vollkornbrot 9 Milchbrot 10 Kuchen 11 Roher Teig 12 Sauerteig 13 Marmelade 14 Backen 15 Joghurt 16 Glutenfrei 17 Klebreis 18 Rösten 19 Gären...
  • Seite 5: Schnellstart-Anleitung

    Arbeitsablauf 1. Startverzögerung (falls nötig) 2. Vorheizen 3. Kneten 1 4. Ruhen 5. Kneten 2 6. Fermentieren 1,2,3 7. Backen 8. Warmhalten 9. Ende Start/Pause/Stop • In den Programmen 1-9 und 16 kann ein zeitverzögerter Start eingestellt werden. Nachdem Sie die verzö- gerte Startzeit eingestellt haben, drücken Sie auf START/STOP.
  • Seite 6: Bedienung Und Programme

    Es kann vorkommen, dass der Rührer im Brot stecken bleibt wenn Sie es entneh- men. Benutzen Sie in diesem Fall den Haken wie folgt: • Stecken Sie den Haken in die Achse des Rührers (A). • Ziehen Sie vorsichtig am Haken, um den Rührer zu entfernen (B). Bedienung und Programme Vor dem ersten Betrieb Beim ersten Betrieb kann sich etwas Rauch und ein Geruch entwickeln.
  • Seite 7 3. Setzen Sie die Backform mit den Zutaten ins Gerät und schließen Sie den Deckel. Falls Sie beim Schließen des Deckels einen Widerstand spüren, heben Sie ihn wieder an und drehen Sie die Achse am Boden der Form in einen anderen Winkel. Nachdem Sie die Form in das Gerät eingesetzt haben, drehen Sie sie im Uhrzeigersinn, um sie zu befestigen.
  • Seite 8 Wenn der Countdown abgelaufen ist und das Display 0:00 anzeigt, erklingt der Summer und signalisiert, dass das Brot fertig ist. Nutzen Sie entweder die Warmhaltefunktion oder drücken Sie auf START/STOP und ziehen Sie den Stecker aus der Steckdose. 10. Das Brot ist sehr heiß. Benutzen Sie Ofenhandschuhe wenn Sie die Backform entnehmen und schütteln Sie die Form leicht, um das Brot zu lösen.
  • Seite 9: Spezielle Funktionen

    Programm YOGURT (Joghurt) Mit diesem Programm können verschiedene Aufgaben erledigt werden. So können Sie damit Teig aufgehen lassen aber auch Joghurt oder Rum herstellen. Drücken Sie MENU, wählen Sie Programm 15 und starten Sie das Gerät. Die voreingestellte Zeit beträgt 8 Stunden und kann von 5-15 Stunden eingestellt werden. Programm: STICKY RICE (Klebreis) Mit dem Klebreis-Programm lässt sich mit wenigen Schritten der perfekte Klebreis herstellen.
  • Seite 10: Warmhaltefunktion

    Hinweise zum Summer • Der Summer ertönt, wenn Sie das Gerät am Netz anschließen. • Der Summer ertönt, wenn Sie die Tasten LOAF, COLOR und MENU drücken oder die Zeit einstellen. • Der Summer ertönt, wenn Sie START/STOP drücken. • Während des Knetens ertönt der Summer regelmäßig, um sie daran zu erinnern die restlichen Zutaten hin- zuzugeben.
  • Seite 11: Rezepte

    Rezepte Programm 1: Weißbrot Programm 2: Süßes Brot Zutat 500 g 750 g Zutat 500 g 750 g Wasser 180 ml 240 ml Wasser 180 ml 240 ml Butter 2 EL 2 EL Butter 2 EL 2 EL Salz ½ TL ½...
  • Seite 12 Programm 7: Zuckerfrei Programm 8: Vollkornbrot Zutat 500 g 750 g Zutat 500 g 750 g Wasser 130 ml 180 ml Wasser 120 ml 170 ml Butter 2 EL 2 EL Butter 2 EL 2 EL Salz 1 TL 1 TL Salz 1 TL 1 TL...
  • Seite 13 Programm 13: Marmelade Programm 15: Joghurt Zutat Zutat Orangen 600 g Milch 500 ml Zucker 300 g Joghurt 70 ml Gelatine 50 g Zucker 4 EL Programm 16: Glutenfrei Programm 17: Klebreis Zutat 500 g 750 g Zutaten: 250 g Reis und 275 ml Wasser/Milch Wasser 130 ml 180 ml...
  • Seite 14 Hinweise zu den Rezepten Mehl Bedenken Sie, dass sich nicht jede Art von Mehl zum Brotbacken eignet. Wenn Sie in Ihrer Umgebung kein Brotmehl kaufen können, ersetzen Sie es bitte durch Gluten-Mehl oder Nudelmehl. Trockenhefe Ersetzen Sie die Trockenhefe nicht durch Backnatron. Nur mit Trockenhefe erzielen Sie eine weiche Textur und eine ansprechende Brotkruste.
  • Seite 15: Reinigung Und Pflege

    Reinigung und Pflege Oberflächenreinigung • Ziehen Sie den Stecker aus der Steckdose, bevor Sie das Gerät reinigen. • Geben Sie etwas Neutralreiniger auf einen trockenen, weichen Lappen und wischen Sie die Oberfläche da- mit ab. Trocknen Sie das Gerät danach sorgfältig ab. Benutzen Sie zur Reinigung keine Scheuermittel oder Lösemittel.
  • Seite 16: Entsorgung Und Konformitätserklärung

    Problem Mögliche Ursache Lösung Fehlercode E00 wird Die Temperatur im Geräteinneren Benutzen Sie das Gerät nur in Räumen mit angezeigt. liegt unter -10 °C. einer Temperatur zwischen -10 °C und 40 °C. Fehlercode E01 wird Die Temperatur im Geräteinneren Kühlen Sie das Gerät mit einem Ventilator oder angezeigt.
  • Seite 17: Technical Data

    Recipes 26 Cleaning and Care 30 Troubleshooting 30 Disposal and declaration of Conformity 31 Technical Data Item number 10030774 Power supply 220-240 V ~ 50-60 Hz Power consumtion 550 W Safety Instructions • This appliance can be used by children aged from 8 years and above and persons with reduced physical, sensory or mental capabilities or lack of experience and knowledge if they have been given supervision or instruction concerning use of the appliance in a safe way and understand the hazards involved.
  • Seite 18: Product Description

    • Never switch on the appliance without properly placed bread pan filled ingredients. • Never beat the bread pan on the top or edge to remove the pan, this may damage the bread pan. • Always attach plug to appliance first, then plug cord into the wall outlet. to disconnect, turn any control to OFF, then remove plug from wall outlet.
  • Seite 19: Control Panel And Controls

    Control Panel and Controls Programs 1 Soft Bread 2 Sweet Bread 3 Natural sourdough 4 French 5 Whole-Wheat 6 Quick 7 Sugar-free 8 Multigrain 9 Milky Loaf 10 Cake 11 Raw Dough 12 Leaven Dough 13 Jam 14 Bake 15 Yogurt 16 Gluten-free 17 Sticky rice 18 Stir-fry...
  • Seite 20: Quickstart Guide

    Working status 1. Reservation (if you need) 2. Preheat 3. Knead 1 4. Rest 5. Knead 2 6. Ferment 1,2,3 7. Bake 8. Keep Warm 9. Complete Start/Pause/Stop • This bread maker(program 1-9 and 16) have function of “Reservation”, after set your reservation time, click button “start / stop”, „:“...
  • Seite 21: Operation And Programs

    It may happen the stirring rod remains stuck in the bread when it is turned out. In this case, use the hook accessory as follows. • Insert the hook in the axis of the stirring rod (A). • Pull gently to release the stirring rod (B). Operation and Programs Before first Use The appliance may emit a little smoke and a characteristic smell when you turn it on for the first time.
  • Seite 22 3. Put the barrel holding the mixture of material into container and close the lid. If you found a obstruct with barrel during pressing down, you could lift barrel again and turn the axle at the bottom of barrel to the ano- ther angle.
  • Seite 23 When countdown is up to 0:00, the buzzer sound will be given to notify that bread is done. Use Keep Warm Functions or press “Start/Stop” for 1 second and remove plug from outlet. 10. Because bread is very hot, please wear glove and shake bread lightly before taking it out. “Cake”...
  • Seite 24: Special Functions

    “Yogurt” Operation Instruction This is a performance with powerful practical use. You can rise the dough or making yogurt, rum. Press “Menu” ,select program 15, it’ s work the“Yogurt” ,default Time is 8 hours, can be adjusted from 5 hours to 13 hours. “Sticky rice ”...
  • Seite 25 Buzzer Sound • A buzzer sound is given as electricity is connected. • A buzzer sound is given as Loaf, Color, Menu or Time Setup is pressed. • A buzzer sound is given as switch “Start/Stop”. • In kneading process the buzzer sound is given continuously to remind you of adding material. •...
  • Seite 26: Recipes

    Recipes Program 1: Soft bread Program 2: Sweet bread Material 500 g 750 g Material 500 g 750 g Water 180 ml 240 ml Water 180 ml 240 ml Butter 2 tbsp 2 tbsp Butter 2 tbsp 2 tbsp Table Salt ½...
  • Seite 27 Program 7: Sugar-free Program 8: Multigrain bread Material 500 g 750 g Material 500 g 750 g Water 130 ml 180 ml Water 120 ml 170 ml Butter 2 tbsp 2 tbsp Butter 2 tbsp 2 tbsp Table Salt 1 tsp 1 tsp Table Salt 1 tsp...
  • Seite 28 Program 13: Jam Program 15: Yogurt Material Material Orange 600 g Milk 500 ml Sugar 300 g Yogurt 70 ml Gelantin 50 g Sugar 4 tbsp Program 16: Gluten-free Program 17: Sticky rice Material 500 g 750 g Material: 250 g rice and 275 ml water/milk Water 130 ml 180 ml...
  • Seite 29 Precautions on Bread Recipes Flour Please don’t think that any kind of flour can make perfect bread. If you can’t purchase bread flour in your own area, please replace it with “Gluten Flour” or “Dumpling (Noodle) Flour”. Yeast Powder Please don’t replace Yeast Powder with Soda Powder. The yeast powder expired or lacking activation will ap- parently affect the soft texture and look of bread.
  • Seite 30: Cleaning And Care

    Cleaning and Care Keep Surface Clean 1. Unplug unit and disconnect electricity before cleaning. 2. Apply the small amount neutral cleaning solution to a clean and soft cloth and wipe the unit, and then dry it tho- roughly with another dry cloth. Please don’t use gas oil or other abrasive cleansers and corrosive liquids to clean. Keep Accessories Clean 1.
  • Seite 31: Hints On Disposal

    Problem Possible Cause Solution LED indicates”E00”. Temperature inside the unit lower Use the unit under the environment at -10°C than -10°C. to 40°C. LED indicates “E01”. 50°C Temperature inside the unit with electric fan allow to cool or naturally cool higher than 50°C.
  • Seite 32: Datos Técnicos

    Recetas 41 Limpieza y cuidado 45 Detección y resolución de problemas 45 Retirada del aparato y declaración de conformidad 46 Datos técnicos Número de artículo 10030774 Suministro eléctrico 220-240 V ~ 50-60 Hz Potencia 550 W Indicaciones de seguridad • Los niños mayores de 8 años y las personas con discapacidades físicas o psíquicas solamente podrán utilizar el aparato si han sido previamente instruidas sobre su uso y conocen las indicaciones de seguridad.
  • Seite 33: Descripción Del Aparato

    • Mueva el aparato con precaución cuando contenga aceite u otro líquido calientes. • No toque ninguna pieza en movimiento durante el funcionamiento del aparato. • No encienda el aparato si no ha colocado ningún alimento en el molde para el pan. •...
  • Seite 34: Panel De Control Y Funciones De Los Botones

    Panel de control y funciones de los botones Programas 1 Pan blanco 2 Pan dulce 3 Masa madre natural 4 Pan francés 5 Pan integral 6 Rápido 7 Sin azúcar 8 Multicereales 9 Pan de leche 10 Bizcocho 11 Masa cruda 12 Masa madre 13 Mermelada 14 Hornear...
  • Seite 35: Manual De Inicio Rápido

    Procedimiento 1. Inicio programado (si lo necesita) 2. Precalentar 3. Amasar 1 4. Remover 5. Amasar 2 6. Fermentar 1,2,3 7. Hornear 8. Mantener caliente 9. Fin Start/Pause/Stop • En los programas 1-9 y 16 puede configurar un inicio programado. Tras haber realizado la configuración, pul- se START/STOP.
  • Seite 36: Utilización Y Programas

    Es posible que el removedor quede atascado en el pan cuando lo retire. En este caso, utilice los ganchos del siguiente modo: • Encaje el gancho en el eje del removedor (A). • Tire con cuidado de los ganchos para quitar el removedor (B). Utilización y programas Antes del primer uso Durante el primer uso, es posible que se genere un poco de humo y olor.
  • Seite 37 3. Coloque el molde con los ingredientes dentro del aparato y cierre la tapa. Si nota cierta resistencia al cerrar la tapa, levántela y gire el eje situado en el fondo del molde hacia otra posición. Después de haber colocado el molde en el aparato, gírelo en el sentido de las agujas del reloj para fijarlo.
  • Seite 38 Cuando haya transcurrido la cuenta atrás, el display muestra 0:00, se emite un zumbido para indicar que el pan está listo. Utilice la función de mantenimiento de calor o pulse START/STOP y desconecte el enchufe de la toma de corriente. 10.
  • Seite 39: Funciones Especiales

    Programa YOGURT (Yogur) Con este programa puede realizar distintos tareas. Puede dejar que la masa suba pero también preparar yogur o ron. Pulse MENU y seleccione el programa 15 para iniciar el aparato. El tiempo predeterminado es de 8 horas y puede ajustar en un rango de 5 a 15 horas.
  • Seite 40 Indicaciones sobre el zumbador • El zumbador sonará cuando conecte el aparato a la red eléctrica. • El zumbador suena cuando pulse los botones LOAD, COLOR y MENU o ajuste el tiempo. • El zumbador sonará cuando pulse START/STOP. • Durante el amasado, el zumbador se activará con frecuencia para recordarle que debe añadir el resto de ingredientes.
  • Seite 41: Recetas

    Recetas Programa 1: Pan blanco Programa 2: Pan dulce Ingrediente 500 g 750 g Ingrediente 500 g 750 g Agua 180 ml 240 ml Agua 180 ml 240 ml Mantequilla 2 cucharadas 2 cucharadas Mantequilla 2 cucharadas 2 cucharadas 1/2 cucharadita 1/2 cucharadita 1/2 cucharadita 1 cucharadita...
  • Seite 42 Programa 7: sin azúcar Programa 8: Pan multicereales Ingrediente 500 g 750 g Ingrediente 500 g 750 g Agua 130 ml 180 ml Agua 120 ml 170 ml Mantequilla 2 cucharadas 2 cucharadas Mantequilla 2 cucharadas 2 cucharadas 1 cucharadita 1 cucharadita 1 cucharadita 1 cucharadita...
  • Seite 43 Programa 13: Mermelada Programa 15: Yogur Ingrediente Ingrediente Naranjas 600 g Leche 500 ml Azúcar 300 g Yogur 70 ml Gelatina 50 g Azúcar 4 cucharadas Programa 16: Sin gluten Programa 17: Arroz glutinoso Ingrediente 500 g 750 g Ingredientes: 250 g de arroz y 275 ml de agua/leche Agua 130 ml 180 ml...
  • Seite 44 Indicaciones relacionadas con las recetas Harina Piense que no todos los tipos de harina son aptos para hacer pan. Si no puede comprar harina para pan, sus- titúyala por harina de gluten o harina para pasta. Levadura seca No sustituya la levadura seca por bicarbonato. Solo con la levadura seca conseguirá una textura blanda y una corteza del pan adecuada.
  • Seite 45: Limpieza Y Cuidado

    Limpieza y cuidado Limpieza de la superficie • Antes de limpiar el aparato, apáguelo y desconecte el enchufe de la toma de corriente. • Moje un paño suave con un poco de limpiador neutro y frote la superficie con él. Seque el aparato comple- tamente.
  • Seite 46: Indicaciones Para La Retirada Del Aparato

    Problema Posible causa Solución Aparece el código de La temperatura en el interior del Utilice el aparato solamente en estancias a una error E00. aparato se coloca por debajo de temperatura entre -10 °C y 40 °C. -10 °C. Aparece el código de La temperatura en el interior del Enfríe el aparato con un ventilador o colóquelo error E01.
  • Seite 47: Fiche Technique

    Recettes 56 Nettoyage et entretien 60 Identification et résolution des problèmes 60 Information sur le recyclage et déclaration de conformité 61 Fiche technique Numéro d’ a rticle 10030774 Alimentation électrique 220-240 V ~ 50-60 Hz Puissance 550 W Consignes de sécurité...
  • Seite 48: Aperçu De L' A Ppareil

    • Ne pas allumer l’ a ppareil lorsqu’ a ucun ingrédient n’ a été versé dans le moule à pain. • Ne pas taper sur le moule à pain ou sur son rebord pour sortir le pain, cela pourrait l’ e ndommager. •...
  • Seite 49: Panneau De Commande Et Touches De Commande

    Panneau de commande et touches de commande Programme 1 Pain blanc 2 Brioche 3 Pâte fermentée naturelle 4 Baguette 5 Pain semi-complet 6 Rapide 7 Sans sucre 8 Pain complet 9 Pain au lait 10 Gâteau 11 Pâte crue 12 Pâte fermentée 13 Marmelade 14 Cuisson au four 15 Yaourt...
  • Seite 50: Prise En Main Rapide

    Cycles de fonctionnement 1. Démarrage différé (si nécessaire) 2. Préchauffage 3. Pétrissage 1 4. Repos 5. Pétrissage 2 6. Fermentation 1, 2, 3 7. Cuisson 8. Maintien au chaud 9. Fin Start/Pause/Stop • Les programmes 1-9 et 16 permettent de paramétrer un démarrage différé. Une fois le temps réglé pour le démarrage différé, appuyer sur START/STOP.
  • Seite 51: Utilisation Et Programme

    Il arrive parfois que le mélangeur reste coincé dans le pain au moment de sortir celui-ci. Dans ce cas, utiliser le crochet comme suit : • Introduire le crochet dans l’ a xe de rotation du mélangeur (A). • Tirer prudemment sur le crochet pour sortir le mélangeur (B) Utilisation et programmes Avant la première utilisation Lors de la première utilisation, un dégagement de fumée ou d’...
  • Seite 52 3. Placer le moule à pain contenant les ingrédients dans l’ a ppareil et refermer le couvercle. Si une résistance se fait sentir au moment de refermer le couvercle, le soulever de nouveau et tourner l’ a xe du fond du moule pour le positionner dans un autre angle.
  • Seite 53 Lorsque le compte à rebours est écoulé et que l’ a fficheur indique 0:00, un signal sonore retentit pour signifier que le pain est prêt. Utiliser la fonction de maintien au chaud ou appuyer sur START/STOP puis débrancher l’ a ppareil. 10.
  • Seite 54: Fonction Spéciales

    Programme : YOGURT (yaourt) Ce programme permet d’ e ffectuer différentes tâches. Il permet de lever la pâte mais également de fabriquer du yaourt ou de faire du rhum. Appuyer sur MENU et sélectionner le programme 15 et démarrer l’ a ppareil. La durée prédéfinie est de 8 heures et peut être ajustée entre 5 et 15 heures.
  • Seite 55 Remarque sur le signal sonore • Le signal sonore retentit lorsque l’ a ppareil est branché sur secteur. • Le signal sonore retentit lorsque les touches LOAF, COLOR et MENU sont appuyées ou lorsqu’une durée est paramétrée. • Le signal sonore retentit lorsque la touche START/STOP est appuyée. •...
  • Seite 56: Recettes

    Recettes Programme 1 : pain blanc Programme 2 : pain brioché Ingrédient 500 g 750 g Ingrédient 500 g 750 g 180 ml 240 ml 180 ml 240 ml Beurre 2 càs 2 càs Beurre 2 càs 2 càs ½ càc ½...
  • Seite 57 Programme 7 : sans sucre Programme 8 : pain complet Ingrédient 500 g 750 g Ingrédient 500 g 750 g 130 ml 180 ml 120 ml 170 ml Beurre 2 càs 2 càs Beurre 2 càs 2 càs 1 càc 1 càc 1 càc 1 càc...
  • Seite 58 Programme 13 : marmelade Programme 15 : yaourt Ingrédient Ingrédient Oranges 600 g Lait 500 ml Sucre 300 g Yaourt 70 ml Gélatine 50 g Sucre 4 càs Programme 16 : sans gluten Programme 17 : riz gluant Ingrédient 500 g 750 g Ingrédients : 250 g de riz et 275 ml d’...
  • Seite 59 Remarques sur les recettes Farine Noter que toutes les farines ne sont pas adaptées à la préparation de pain. S’il est impossible de trouver de la farine à pain à proximité, remplacer par de la farine de gluten ou de la farine pour pâtes. Levure boulangère Ne pas remplacer la levure sèche boulangère par de la soude.
  • Seite 60: Nettoyage Et Entretien

    Nettoyage et entretien Nettoyage des surfaces • Débrancher l’ a ppareil avant de le nettoyer. • Verser un peu de produit nettoyant neutre sur une éponge sèche et souple et s’ e n servir pour essuyer les surfaces de l’ a ppareil. Puis sécher minutieusement l’ a ppareil. Ne pas utiliser de produit abrasif ou corrosif pour nettoyer l’...
  • Seite 61: Information Sur Le Recyclage Et Déclaration De Conformité

    Problème Cause possible Solution Le message d’ e rreur La température interne de Utiliser l’ a ppareil uniquement dans des pièces E00 s’ a ffiche. l’ a ppareil est inférieure à - 10 °C. dont la température est comprise entre - 10 °C et 40 °C Le message d’...
  • Seite 62: Dati Tecnici

    Ricette 71 Pulizia e manutenzione 75 Risoluzione dei problemi 75 Smaltimento e dichiarazione di conformità 76 Dati tecnici Numero articolo 10030774 Alimentazione 220-240 V ~ 50-60 Hz Potenza 550 W Avvertenze di sicurezza • I bambini al di sotto degli 8 anni e le persone fisicamente o mentalmente disabili dovrebbero utilizzare il dispositivo solo se istruite da qualcuno sui requisiti di sicurezza da rispettare.
  • Seite 63: Panoramica Del Dispositivo

    • Non accendere il dispositivo senza aver prima inserito gli ingredienti al suo interno. • Non battere la teglia nella parte superiore o sul bordo per rimuovere il pane, in quanto si potrebbe dann- eggiare. • Collegare il cavo al dispositivo prima di inserire la spina nella presa elettrica. Spegnere il dispositivo prima di staccare la spina dalla presa elettrica.
  • Seite 64: Pannello Di Controllo E Tasti Funzione

    Pannello di controllo e tasti funzione Programmi 1 Pane bianco 2 Pane dolce 3 Lievitazione naturale 4 Pane francese 5 Pane integrale 6 Rapido 7 Senza zucchero 8 Multicereali 9 Pane al latte 10 Torta 11 Pasta grezza 12 Pasta lievitata 13 Marmellata 14 Cottura 15 yogurt 16 Senza glutine...
  • Seite 65: Guida Rapida All'avvio

    Ciclo di lavorazione 1. Avvio ritardato (se necessario) 2. Preriscaldamento 3. Impastare 1 4. Riposo 5. Impastare 2 6. Lievitare 1,2,3 7. Cuocere 8. Tenere caldo 9. Fine Start/Pause/Stop • Nei programmi 1-9 e 16 è possibile impostare l‘avvio ritardato. Dopo aver impostato l‘avvio ritardato, preme- re START/STOP.
  • Seite 66: Funzionamento E Programmi

    Può accadere che l‘agitatore rimanga incastrato all‘interno del pane. In questo caso, utilizzare il gancio come segue: • Inserire il gancio nell‘asse dell‘agitatore (A). • Tirare delicatamente il gancio, per rimuovere l‘agitatore (B). Funzionamento e programmi Prima del primo utilizzo Al primo utilizzo è...
  • Seite 67 3. Inserire la teglia con gli ingredienti nel dispositivo e chiudere il coperchio. Se si incontra resistenza durante la chiusura del coperchio, sollevarlo e ruotare l‘asse alla base in un‘angolazione diversa. Dopo aver inserito la teglia nel dispositivo, ruotarla in senso orario per fissarla. 4.
  • Seite 68 Una volta terminato il conto alla rovescia, il display visualizzerà 0:00 e un segnale acustico segnalerà che il pane è pronto. È possibile impostare la funzione „tenere al caldo“ o premere START / STOP ed estrarre la spina dalla presa di corrente. 10.
  • Seite 69: Funzioni Speciali

    Programma YOGURT Con questo programma si potranno eseguire diverse operazioni. Si potrà far ricrescere l‘impasto o realizzare yogurt e rum. Premere MENU, selezionare il programma 15 e avviare il dispositivo. Il tempo preimpostato è di 8 ore e può essere regolato da 5-15 ore. Programma: STICKY RICE (Riso glutinoso) Con il programma „riso glutinoso“...
  • Seite 70 Note sul segnale acustico • Il segnale acustico si attiva quando si collega il dispositivo alla rete elettrica. • Il cicalino suona quando si premono i pulsanti LOAF, COLOR e MENU o si imposta il tempo. • Il cicalino suona quando si preme START/STOP. •...
  • Seite 71: Ricette

    Ricette Programma 1 Pane bianco Programma 2: Pane dolce Ingrediente 500 g 750 g Ingrediente 500 g 750 g Acqua 180 ml 240 ml Acqua 180 ml 240 ml Burro 2 cucchiai 2 cucchiai Burro 2 cucchiai 2 cucchiai Sale ½...
  • Seite 72 Programma 7: Senza zucchero Programma 8: Multicereali Ingrediente 500 g 750 g Ingrediente 500 g 750 g Acqua 130 ml 180 ml Acqua 120 ml 170 ml Burro 2 cucchiai 2 cucchiai Burro 2 cucchiai 2 cucchiai Sale 1 cucchiaino 1 cucchiaino Sale 1 cucchiaino...
  • Seite 73 Programma 13: Marmellata Programma 15: Yogurt Ingrediente Ingrediente Arance 600 g Latte 500 ml Zucchero 300 g Yogurt 70 ml Gelatina 50 g Zucchero 4 cucchiai Programma 16: Senza glutine Programma 17: Riso glutinoso Ingrediente 500 g 750 g Ingredienti: 250 g riso e 275 ml acqua/latte Acqua 130 ml 180 ml...
  • Seite 74 Note sulle ricette Farina Si avvisa che non tutte le farine sono adatte alla panificazione. Se non è possibile acquistare la farina adatta nella propria zona, si prega di sostituirla con farina al glutine o farina 00. Lievito in polvere Non sostituire il lievito con il bicarbonato di sodio.
  • Seite 75: Pulizia Delle Superfici

    Pulizia delle superfici • Staccare la spina dalla presa di corrente prima di pulire l‘apparecchio. • Utilizzare un detergente neutro e un panno morbido e asciutto per pulire le superfici del dispositivo. Succes- sivamente, asciugare con cura. Non utilizzare per la pulizia sostanze o pagliette abrasive. Pulizia degli accessori •...
  • Seite 76: Smaltimento E Dichiarazione Di Conformità

    Problema Possibile causa Soluzione Viene visualizzato il La temperatura all'interno del Utilizzare il dispositivo solo in ambienti con codice errore E00. dispositivo è -10 °C. temperatura tra -10 °C e 40 °C. Viene visualizzato il La temperatura all'interno del Raffreddare il dispositivo con un ventilatore o codice errore E01.

Inhaltsverzeichnis