Inhaltsverzeichnis
Werbung
Quicklinks
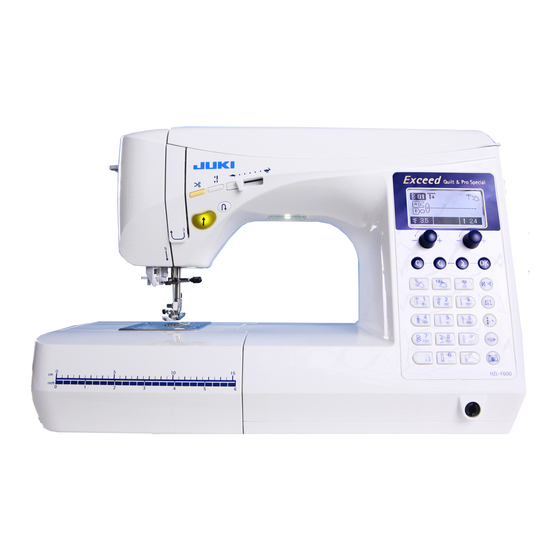
COMPUTER SEWING MACHINE
COMPUTER-NÄHMASCHINE
KOMPUTEROWA MASZYNA DO SZYCIA
ШВЕЙНАЯ МАШИНА С ЭЛЕКТРОННЫМ УПРАВЛЕНИЕМ
HZL-F series
INSTRUCTION MANUAL
GEBRAUCHSANLEITUNG
INSTRUKCJA OBSŁUGI
РУКОВОДСТВО ПО ЭКСПЛУАТАЦИИ
Please read this instruction manual before using
the machine as it contains important operational
Attention
and safety information.
Keep this manual accessible so that you may refer
to it at anytime while operating the machine.
Bitte lesen Sie diese Bedienungsanleitung vor
dem Benutzen der Nähmaschine sorgfältig
durch, sie enthält wichtige Benutzungs- und
Hinweis
Sicherheitshinweise.
Halten Sie die Anleitung beim Nähen immer
in Griffweite, um bei eventuellen Fragen die
entsprechenden Kapitel nachlesen zu können.
Proszę przeczytać tą instrukcję przed użyciem
maszyny ponieważ zawiera ona ważne informacje
Uwaga
dotyczące użytkowania oraz bezpieczeństwa.
Zachowaj tą instrukcję na przyszłość, by mogła
służyć podczas użytkowania maszyny.
Перед началом работы внимательно
прочитайте эту инструкцию по эксплуатации,
ВНИМАНИЕ
так как она содержит важную информацию
по работе с машиной а также по технике
безопасности.
Werbung
Inhaltsverzeichnis

Verwandte Anleitungen für JUKI HZL-F -Serie


Inhaltszusammenfassung für JUKI HZL-F -Serie
- Seite 1 COMPUTER SEWING MACHINE COMPUTER-NÄHMASCHINE KOMPUTEROWA MASZYNA DO SZYCIA ШВЕЙНАЯ МАШИНА С ЭЛЕКТРОННЫМ УПРАВЛЕНИЕМ HZL-F series INSTRUCTION MANUAL GEBRAUCHSANLEITUNG INSTRUKCJA OBSŁUGI РУКОВОДСТВО ПО ЭКСПЛУАТАЦИИ Please read this instruction manual before using the machine as it contains important operational Attention and safety information. Keep this manual accessible so that you may refer to it at anytime while operating the machine.
-
Seite 2: Important Safety Instructions
“IMPORTANT SAFETY INSTRUCTIONS” “When using an electrical appliance, basic safety precautions should always be followed, including the following:” “Read all instructions before using this sewing machine.” “DANGER _To reduce the risk of electric shock:” 1. “An appliance should never be left unattended when plugged in.” 2. - Seite 3 Thank you for purchasing our products. To safely and properly use this product, please read the instruction manual carefully and understand the properties of this computer sewing machine. This machine is composed of well-chosen brand-name parts and is well quality controlled. Please try a variety of different sewing methods and have fun. FOR USA AND CANADA ONLY This appliance has a polarized plug (one blade wider than the other).
-
Seite 4: Wichtige Sicherheitshinweise
“WICHTIGE SICHERHEITSHINWEISE” “Bei der Benutzung elektrischer Geräte sollten immer bestimmte grundsätzliche Sicherheitsregeln in Acht genommen werden. Hierzu zählen unter anderem: “ “Lesen Sie erst die Gebrauchsanleitung sorgfältig durch, bevor Sie diese Nähmaschine benutzen.” “ACHTUNG _Zum Schutz vor elektrischem Schlag:” 1. “Ein Gerät darf niemals unbeaufsichtigt gelassen werden, wenn sie an die Stromversorgung angeschlossen ist.” 2. - Seite 5 Danke für den Kauf unseres Produkts. Für die sichere und ordnungsgemäße Benutzung dieses Produkts lesen Sie bitte die Gebrauchsanleitung sorgfältig durch und machen Sie sich mit den Eigenschaften dieser Computer-Nähmaschine vertraut. Diese Maschine ist aus sorgsam ausgewählten Markenteilen zusammengestellt und hat eine gründliche Qualitätskontrolle durchlaufen. Wir hoffen, dass Sie möglichst viele Nähfunktionen ausprobieren werden und wünschen Ihnen viel Vergnügen mit Ihrer neuen Nähmaschine.
-
Seite 6: Ważne Informacje Dotyczące Bezpieczeństwa
WAŻNE INFORMACJE DOTYCZĄCE BEZPIECZEŃSTWA Użytkując urządzenie elektryczne powinno się stosować podstawowe środki ostrożności, zawierające poniższe: Przeczytaj całą instrukcję przed użyciem maszyny do szycia. UWAGA! _by zredukować ryzyko porażenia: 1. Urządzenie nie powinno być pozostawione bez opieki podczas gdy jest podłączone do prądu. 2. - Seite 7 Dziękujemy za zakupienie naszego produktu. By bezpiecznie i prawidłogo użytkować ten produkt przeczytaj tą instrukcję uważnie by zrozumieć cechy tej komputerowej maszyny do szycia. Ta maszyna do szycia jest zbudowana ze starannie dobranych markowych częsci i podlega starannej kontroli jakości. Zachęcamy do przetestowania wielu różnych metod szycia i czerpania przyjemności z szycia. DOTYCZY TYLKO MIESZKAŃCÓW USA I KANADY Ta maszyna posiada spolaryzowaną...
-
Seite 8: Основные Инструкции По Технике Безопасности
ОСНОВНЫЕ ИНСТРУКЦИИ ПО ТЕХНИКЕ БЕЗОПАСНОСТИ При пользовании электроприбором всегда соблюдайте основные правила техники безопасности, включая следующее правило: «Перед началом эксплуатации прочтите все инструкции». ОПАСНО _ для снижения риска поражения электрическим током: 1. Никогда не оставляйте включённую в электросеть машину без присмотра. 2. - Seite 9 Спасибо за покупку швейной машины! Для надежной и безопасной работы машины, пожалуйста, внимательно прочтите это руководство по эксплуатации к машине и изучите ее свойства. Машина собрана из прошедших тщательный отбор фирменных запасных частей, качество которых проверено. Попробуйте различные типы строчек и получайте удовольствие от шитья! ТОЛЬКО...
-
Seite 10: Inhaltsverzeichnis
Contents Patchwork quilt Important safety instructions ………………………………… Principal parts 13, 14 …………………………………………………… Accessories 15, 16 ……………………………………………………… Patchwork piecing (joining) …………………………………… Applique (1) 101, 102 …………………………………………………… Basic operations Applique (2) 103, 104 …………………………………………………… Crazy quilt …………………………………………………………… Function of operational buttons Stitch in ditch quilting 106, 107 F600 …………………………………... - Seite 11 Inhaltsangabe Patchwork-Quilt Wichtige Sicherheitshinweise 3, 4 ………………………………… Wichtige Teile der Nähmaschine 13, 14 ………………………… Zubehör 15, 16 …………………………………………………………… Patchwork Piecing (zusammennähen) …………………… Applikationen (1) 101, 102 …………………………………………… Basisbetrieb Applikationen (2) 103, 104 …………………………………………… Crazy Quilt …………………………………………………………… Funktion der Arbeitstasten Quilten im Nahtschatten F600 106, 107 …………………………………………...
- Seite 12 Spis treści Naszywanie łat-Pikowanie Ważne informacje dotyczące bezpieczeństwa.…… 5, 6 Główne częsci 13, 14 …………..………………………………… Akcesoria 15, 16 ……………………………………………………… Naszywanie łat (zszywanie) …………………………… Aplikacje (1) 101, 102 ……………………………………………… Główne funkcje Aplikacje (2) 103, 104 ……………………………………………… Artystyczne pikowanie ………………………………………… Przyciski funkcyjne... Naszywanie wzdłóż...
- Seite 13 Содержание ПЭЧВОРК Основные инструкции по технике безопасности 7, 8 … Главные детали 13, 14 ……………………………………………… Принадлежност 15, 16 ……………………………………………… Пэчворк ……………………………………………………………… Аппликация (1) 101, 102 …………………………………………… ОСНОВНЫЕ ОПЕРАЦИИ Аппликация (2) 103, 104 …………………………………………… Художественный квилтинг …………………………………… Функции кнопок управления F600 Объемный...
-
Seite 14: Principal Parts
Principal parts / Wichtige Teile der Nähmaschine Główne części / Главные детали F600 Only Tylko F600 nur F600 F600 только * Do not put heavy objects onto hard case and wide table. * Legen Sie keine schweren Gegenstände auf die Abdeckung oder den Anschiebetisch * Nie kłaść... -
Seite 15: Zubehör
1. Speed controller 1. Geschwindigkeitsregler 1. Ogranicznik obrotów 2. Presser foot pressure adjustment dial 2. Einstellrad Nähfußdruck 2. Regulator docisku stopki 3. Face plate cover 3. Vordere Abdeckung 3. Pokrywa przednia 4. Threading lever 4. Einfädelhebel 4. Dźwignia nawlekacza igły 5. -
Seite 16: Accessories
Accessories / Zubehör / Akcesoria/ Принадлежности Draw the auxiliary bed out to the left. Ziehen Sie die Zubehörbox nach links heraus. Wyciągnij płytę z wyposażeniem w lewo. Отодвиньте выдвижной столик влево. 1. Buttonhole presser foot (E) 1. Knopflochfuß (E) ● Inside the auxiliary bed. 2. - Seite 17 13. Standard presser foot (A) 13. Normalfuß (A) ● Supplied with the machine 14. Bobbin (1) 14. Spule (1) ● Mitgeliefert mit der Maschine 15. Spool cap (large) 15. Garnrollenhalter (groß) ● Dostarczone z maszyną ● Поcтавляeтcя в комплeктe c машиной 13.
-
Seite 18: Function Of Operational Buttons
Function of operational buttons / Funktionen der Arbeitstasten Przyciski funkcyjne / Функции кнопок управления Needle up/down button Przełącznik pozycji igły(góra/dół) When machine stops, press this button to change the needle position. Funkcja działa, gdy maszyna nie pracuje. Po wciśnięciu igła zmienia (When the needle is up, the needle moves down and vise versa.) położenie z górnego na dolne i na odwrót. -
Seite 19: Connecting To The Power Supply
Connecting to the power supply / Ans Stromnetz anschließen Włączanie do sieci elektrycznej / Подключение к электросети • When machine is not in use, turn off the power (turn to “O”) and pull out the power plug. Warning Otherwise, it may cause electric shock and/or fire. •... -
Seite 20: Name And Function Of Other Operational Buttons
Name and function of other operational buttons Operational buttons and screen Description of screen Needle stop position Stitch pattern Needle stops at its highest position Pattern number * Patterns on the screen Needle stops at its will be sewn. Direct patterns lowest position Practical patterns Buttonhole patterns... - Seite 21 Name and function of operational buttons Zigzag width This is used to change the zigzag width and the needle position. adjustment dial * buttons on F400/F300. Stitch length This is used to change the stitch length. adjustment dial * buttons on F400/F300. Confirmation This is used to confirm the selected stitch pattern and/or settings.
-
Seite 22: Name Und Funktion Der Anderen Arbeitstasten
Name und Funktion der anderen Arbeitstasten Arbeitstasten und Bildschirm Beschreibung des Bildschirms Position Nadelstopp Stichmuster Nadel stoppt in der höchsten Position Musternummer * Es werden die im Bildschirm Nadel stoppt in der gezeigten Muster genäht. Direktmuster niedrigsten Position Praktische Muster Knopflochmuster Modus für Quiltmuster... - Seite 23 Name und Funktion der Arbeitstasten Einstellrad für Mit dieser Taste ändern Sie die Zickzack-Breite und die Nadelposition. Zickzack-Breite * Tasten der F400/F300. Einstellrad für Hiermit wird die Stichlänge geändert. Stichlänge * Tasten der F400/F300. Bestätigungstaste Hiermit bestätigen Sie das gewählte Stichmuster und/oder die Einstellungen. Wahltaste Hiermit bewegen Sie den Cursor.
-
Seite 24: Opis Wyświetlacza
Nazwy i funkcje innych przycisków Przyciski funkcjne oraz wyświetlacz Opis wyświetlacza Pozycja zatrzymania igły Igła zatrzymuje się Wzór ściegu w górnej pozycji. Rodzaj i numer ściegu * wyświetlany jest wybrany wzór. Igła zatrzymuje się Użytkowe w dolnej pozycji. NPodstawowe Obszywanie dziurek Tryb wyboru wzoru Hafciarskie Ozdobne... - Seite 25 Nazwy i funkcje przycisków funkcyjnych Regulator Regulacja szerokości ściegu i położenia igły. szerokości ściegu * W modelach F400/F300 przyciski Regulator Regulacja długości ściegu długości ściegu * W modelach F400/F300 przyciski Przycisk Przycisk zatwierdzania zatwierdzania Przyciski Służą do poruszania się kursorem wybierania Przycisk Służy do rezygnacji z wybranego ściegu i anulowania wybranych opcji.
-
Seite 26: Наименование И Функции Других Кнопок Управления
Наименование и функции других кнопок управления Кнопки управления и экран Описание экрана Положение останова иглы Игла останавливается в Образец стежка крайней верхней точке Номер образца * Будет выполнена строчка по Игла останавливается в Прямая строчка образцу на экране крайней нижней точке Используемые... - Seite 27 Наименование и функции кнопок управления Диск для регулирования Используется для изменения ширины зигзага и положения иглы ширины зигзага * Кнопки для регулировки F400/F300 Диск для регулирования Используется для изменения длины стежка длины стежка * Кнопки для регулировки F400/F300 Кнопка Используется для подтверждения выбора образца и/или какой-либо настройки. подтверждения...
-
Seite 28: Speed Control
Speed control / Einstellen der Geschwindigkeit Kontrola prędkości / Контроль скорости Speed controller Faster speed Maximum sewing speed can be freely set by the speed controller. Schneller Slower speed Wysoka prędkość Langsamer Geschwindigkeitsregler болеe быcтрaя скорость Niska prędkość болеe мeдленнaя Die gewünschte Geschwindigkeit kann nach Belieben über den скорость... -
Seite 29: Presser Foot Lifting Lever And Installation Of Knee Lifting Lever
Presser foot lifting lever and installation of knee lifting lever Nähfußheber und Einsetzen des Kniehebels Dźwignia podnośnika stopki i instalacja kolankowego podnośnika stopki Рычаг подъема прижимной лапки и установка рычага подъема колена Presser foot lifting lever / Nähfußheber Dźwignia podnośnika stopki / Рычаг для подъема прижимной лапки The presser foot can be up or down position by using the presser foot lifting lever. - Seite 30 F600 / F400 Installation of knee lifting lever / Einsetzen des Kniehebels Instalacja kolankowego podnośnika stopki / Установка рычага для подъема колена The knee lifting lever is useful when a guilt is being sewn and for other concave portion projects that require the use of both hands. With the knee lifting lever, Aussparung you are able to control the position of the presser foot without using your Rowki...
-
Seite 31: Changing The Presser Foot
Changing the presser foot / Wechseln des Nähfußes Wymiana stopki / Зaмeна прижимной лапки Removing and installing the presser foot / Einen Nähfuß entfernen und einsetzen Demontaż i instalowanie stopki / Демонтаж и установка прижимной лапки Attention Turn off the power before replacing the presser foot. Achtung Vor dem Wechseln des Nähfußes immer den Strom ausschalten. - Seite 32 Removing and installing presser foot holder / Den Nähfußhalter entfernen und einsetzen Wymiana i instalacja uchwytu stopki / Демонтаж и установка держателя прижимной лапки Removing presser foot holder Presser foot holder 1. Lift the needle and presser foot lifting lever. Nähfußhalter 2.
- Seite 33 The type and application of the presser foot / Typen und Anwendungsbereiche der Nähfüße Typy i zastosowania stopek / Тип и назначение прижимной лапки Marking of presser foot / Markierung am Nähfuß Symbol stopki / Маркировка прижимной лапки ↓ Standard presser foot This is used mainly for straight stitch and zigzag stitches.
-
Seite 34: Patchwork-Fuß
Marking of presser foot / Markierung am Nähfuß Symbol stopki / Маркировка прижимной лапки ↓ Walking foot In general, this presser foot is used for difficult-to-feed” materials such as knits, jersies, vinyl, artificial leather and leather or quilting. Walking-Nähfuß Im Allgemeinen benutzt man diesen Fuß für schwer “laufende” Materialen Stopka wspomagająca wie Strick, Jersey, Vinyl, Kunstleder und Leder oder zum Quilten. -
Seite 35: Bobbin Thread Preparation
Bobbin thread preparation / Vorbereiten der Spule (Unterfaden) Nawlekanie nici dolnej / Подгoтoвкa нижней нити Attention When the bobbin is taken out and/or put into the bobbin case, turn off the power (turn to “O”). Achtung Vor dem Einsetzen oder Entnehmen der Spule den Hauptschalter ausschalten (auf “O” stellen). Uwaga Gdy szpuleczka jest wyjmowana lub wkładana do gniazda, wyłącz zasilanie (przełącznik na “O”). - Seite 36 Winding the bobbin thread / Garn aufspulen Nawijanie szpuleczki / Намотка нитки на шпульку * An exclusive motor is built-in for winding bobbin so that you can wind bobbin at any time. * Zum Aufspulen ist ein eigener Motor eingebaut. Sie können also jederzeit neues Garn aufspulen. * By umożliwić...
- Seite 37 Put the thread end into the guide at the bobbin winding shaft and pull it to the right side to cut it. Legen Sie das Fadenende in die Führung am Spuler und ziehen Sie es zum Abschneiden nach rechts. Przewlecz końcówkę nici przez prowadnicę na trzpieniu nawlekacza szpuleczki i pociągnij w prawo by ją...
- Seite 38 Setting the bobbin / Einsetzen der Spule / Zakładanie szpuleczki / Установка шпульки Put the bobbin in the bobbin case. * Place the bobbin so that thread winds counterclockwise. Legen Sie die Spule in den Spulenkorb. * So einlegen, dass der Faden gegen den Uhrzeigersinn abläuft. Umieść...
- Seite 39 Thread to guide D and E leave the thread underneath. (Thread guide E first and it will thread to guide D as well.) * When pulling bobbin thread, bobbin rotates counterclockwise. If bobbin rotates clockwise, put the bobbin upside down. Jetzt den Faden durch die Führungen D und E führen und ihn dann unten hängen lassen.
-
Seite 40: Needle Thread Preparation
Needle thread preparation / Vorbereiten des Oberfadens Nawlekanie nici górnej / Подготовка верхней нити Threading the needle thread Note / Hinweis / Uwaga / Примечание: Einfädeln des Oberfadens Make sure to push the needle to the top. Droga nawlekania nici Achten Sie darauf, dass die Nadel in der Заправка... - Seite 41 Small spool Place a thread spool to the spool pin and a spool cap onto the Spool Cap Kleine Garnrolle Garnrollenhalter spool pin. Mała szpulka Trzymak szpulki There are three types of the spool caps, large, medium and small. Mаленькaя шпулькa Шпульный...
-
Seite 42: Automatic Needle Threader
Automatic needle threader / Automatischer Nadeleinfädler Automatyczny nawlekacz igły / Устройство для автоматической заправки нити в иглу Lower the presser foot. * Be careful that the cutter is inside. * Achtung: Denken Sie an den Schneider. * The automatic needle threader sometimes fails to thread the * Uwaga, wenątrz jest obcinacz. -
Seite 43: Pulling Up The Bobbin Thread
Pulling up the bobbin thread / Unterfaden herausziehen Wywlekanie nici szpuleczki / Извлечение нижней нити Basic operation: Proste czynności: You can start to sew without pulling up the bobbin thread, Możesz rozpocząć szyć bez wywlekania nici pod stopkę however, if you want to sew with the bobbin thread pulled out, jednak jeśli chcesz szyć... -
Seite 44: Attaching The Needle
Attaching the needle / Eine Nadel einsetzen Zakładanie igły / Установка иглы Warning When changing the needle, turn off the power. Vorsicht Beim Auswechseln einer Nadel immer den Stromschalter ausschalten. Uwaga Gdy zmieniasz igłę, wyłącz zasilanie. Предупреждение При замене иглы отключайте машину от электросети. Removing needle Screwdriver Schraubenzieher... -
Seite 45: Ersatznadeln
Needles to be purchased When purchasing spare needles, specify HA X 1 (130/705H) or HA X 1 SP (needle for knits) . Needle size: Ersatznadeln The larger the number, the thicker the needle. Kaufen Sie nur Ersatznadeln vom Typ HA X 1 (130/705H) oder HA X 1 SP (Nadel für Strickwaren). -
Seite 46: Fabric, Thread And Needle Table
Fabric, thread and needle table Fabric Thread Needle HA×1 Lawn Light-weight material Silk thread No.80,90 ………………………………………… No.11 Spun thread No.80,90 ……………………………………… Georgette Knit needle Tricot Spun thread No.60-90 ……………………………………… No.11 Wool and synthetic Silk thread No.80 ……………………………………………… No.11-14 fabrics Spun thread No.60-90 ……………………………………... -
Seite 47: Таблица Сочетаемости Тканей, Нитей И Игл
Tabela doboru igły i nici do materiału Materiał Nić Igła 130/705H (HAx1) Batyst Nici jedwabne Cienki materiał #80,90 ………………………………………… 70 (11) Nici syntetyczne #80,90 ……………………………………… Żorżeta Igła do dzianin (11) Trykot Nici syntetyczne #60-90 …………………………………… HAx1SP Nici jedwabne ……………………………………………… Wełna i tkaniny syntetyczne 70 (11) ~90 (14) Nici syntetyczne #60-90... -
Seite 48: How To Adjust Thread Tension
How to adjust thread tension / Einstellen der Fadenspannung Dobór napręzenia nici / Как отрегулировать натяжение нити Needle thread Fabric (right side) Oberfaden Stoff (Oberseite) Nić górna Tkanina (prawa strona) верхняя нить ткань (правильная cтoрoна) Fabric (wrong side) Stoff (Unterseite) Tkanina (lewa strona) ткань... -
Seite 49: Wenn Die Oberfadenspannung Zu Locker Ist
When the needle thread is too strong: Fabric (right side) Needle thread Stoff (Oberseite) Oberfaden The bobbin thread will be pulled to the front side of the fabric. Tkanina (prawa strona) Nić górna Turn the thread tension adjustment dial towards "-1" to "-3". ткань... -
Seite 50: How To Adjust Presser Foot Pressure
How to adjust the presser foot pressure / How to lower the feed dog Nähfußdruck einstellen / Transporteur versenken Dobór nacisku stopki/Włączanie i wyłączanie transportera Как отрегулировать силу нажима прижимной лапки/как уменьшить скорость подачи How to adjust presser foot pressure Turn the presser foot pressure adjustment dial to set the proper pressure. -
Seite 51: How To Lower Feed Dog
How to lower the feed dog Move the drop feed knob to the right-hand side, in case the feed dog is in the down position for free motion quilting, button sewing, etc. * Move the drop feed knob to the left-hand side after sewing. The feed dog will be engaged automatically when the machine starts to sew. -
Seite 52: How To Select A Stitch Pattern / Ein Stichmuster Auswählen
How to select a stitch pattern / Ein Stichmuster auswählen F600 ☆ There are 225 types of stitch patterns. ☆ When turning on the machine, the straight stitch of the center needle position is chosen automatically. ☆ There are 4 methods to select stitch pattern. ☆... - Seite 53 ・Buttonhole patterns / Knopflochmuster Pattern No. Muster Nr. Refer to page Siehe Seite ・Quilt patterns ・Decorative patterns ・Quiltmuster ・Ziermuster Patterns for crazy quilt / Stichmuster für Crazy Quilt Refer to Refer to page page Siehe Siehe Seite Seite One point pattern / Punktmuster Letters / Buchstaben Push and choose...
- Seite 54 Dobieranie ściegu / Как выбрать образец строчки F600 ☆ Dostępnych jest 225 ściegów. ☆ Po włączeniu maszyny automatycznie wybierany jest ścieg prosty ze środkową pozycją igły. ☆ Istnieją cztery sposoby wyboru ściegu. ☆ Существует 225 образцов строчек. ☆ При включении машины автоматически выбирается прямая строчка с положением иглы по центру. ☆...
- Seite 55 ・Ściegi do obszywania dziurek / Образцы строчек для выметывания пуговичных петель Nr ściegu № обр. Patrz str. см. стр. ・Ściegi hafciarskie ・Ściegi ozdobne ・Образцы для квилтинга ・Декоративные строчки Ściegi do patchworku / Образцы для художественного квилтинга Patrz Patrz str. str. см.
-
Seite 56: Ein Stichmuster Auswählen F400
How to select a stitch pattern / Ein Stichmuster auswählen F400 ☆ There are 157 types of stitch patterns. ☆ When turning on the machine, the straight stitch of the center needle position is chosen automatically. ☆ There are 4 methods to select stitch pattern. ☆... - Seite 57 ・Buttonhole patterns / Knopflochmuster Pattern No. Muster Nr. Refer to page Siehe Seite ・Quilt patterns ・Decorative patterns ・Quiltmuster ・Ziermuster Refer to Refer to page page Siehe Siehe Seite Seite One point pattern / Punktmuster Letters / Buchstaben Push and choose Push and choose Check the number in this portion and select.
- Seite 58 Dobieranie ściegu / Как выбрать образец строчки F400 ☆ Dostępnych jest 157 ściegów. ☆ Po włączeniu maszyny automatycznie wybierany jest ścieg prosty ze środkową pozycją igły. ☆ Istnieją cztery sposoby wyboru ściegu. ☆ Существует 157 типов образцов строчек. ☆ При включении машины автоматически выбирается прямая строчка с положением иглы по центру. ☆...
- Seite 59 ・ Ściegi do obszywania dziurek/ Образцы строчек для выметывания пуговичных петель Nr ściegu № обр. Patrz str. см. стр. ・Ściegi hafciarskie ・Ściegi ozdobne ・Образцы для квилтинга ・Декоративные строчки Patrz Patrz str. str. см. стр. см. стр. Symbole / Одноточечный образец Litery / Буквы...
-
Seite 60: Ein Stichmuster Auswählen F300
How to select a stitch pattern / Ein Stichmuster auswählen F300 ☆ There are 105 types of stitch patterns. ☆ When turning on the machine, the straight stitch of the center needle position is chosen automatically. ☆ There are 4 methods to select stitch pattern. ☆... - Seite 61 ・Buttonhole patterns / Knopflochmuster Pattern No. Muster Nr. Refer to page Siehe Seite ・Quilt patterns ・Decorative patterns ・Quiltmuster ・Ziermuster Refer to Refer to page page Siehe Siehe Seite Seite One point pattern / Punktmuster Letters / Buchstaben Push and choose Push and choose Check the number in this portion and select.
- Seite 62 Dobieranie ściegu / Как выбрать образец строчки F300 ☆ Dostępne jest 105 ściegów. ☆ Po włączeniu maszyny automatycznie wybierany jest ścieg prosty ze środkową pozycją igły. ☆ Istnieją cztery sposoby wyboru ściegu. ☆ Существует 105 типов образцов строчек. ☆ При включении машины автоматически выбирается прямая строчка с положением иглы по центру. ☆...
- Seite 63 ・ Ściegi do obszywania dziurek/ Образцы строчек для выметывания пуговичных петель Nr ściegu № обр. Patrz str. см. стр. ・Ściegi ozdobne ・Ściegi hafciarskie ・Образцы для квилтинга ・Декоративные строчки Patrz Patrz str. str. см. стр. см. стр. Symbole / Одноточечный образец Litery / Буквы...
-
Seite 64: Geradstich
Straight stitch / Geradstich / Ściegi proste / Прямая строчка Pattern No. / Muster Nr. Direct 1 / Direkt 1 / Podstawowy 1 / прямой 1 Numer ściegu / Обpaзец № Standard presser foot (A) / Normalfuß (A) Presser foot / Nähfuß Stopka standardowa (A) / Stopka / Прижимнaя... -
Seite 65: Nähen Von Dicken Stoffrändern
* You can also cut the threads by the thread cutter at the face plate cover. * Sie können die Fäden auch mit dem Fadenschneider am Maschinenarm abschneiden. * Możesz również odciąć nici odcinaczem znajdującym się przy osłonie bocznej. * Вы также можете перерезать нити при помощи механизма обрезки нитей, расположенного... -
Seite 66: Lock-Stich Am Ende Der Näharbeit
Lock stitch after sewing-end <When start/stop button is used> After the sewing is finished, push the reverse stitch button. While it is pressed, the machine will sew reverse and when it is released, the machine will stop sewing reverse. * When reverse stitching, the sewing speed is slow. <When foot controller is used>... -
Seite 67: Автоматическое Закрепление Строчки И Обрыв Нитей
Automatic lock stitch and thread trimming Example: straight stitch Beispiel: Geradstich Automatischer Verschlussstich und Fadenschneidertaste Przykład: ścieg prosty Automatyczne zakańczanie ściegu i odcinanie nici. Пример: прямя строчка Автоматическое закрепление строчки и обрыв нитей After selecting a stitch pattern, push one time. The machine will sew a few reverse stitches (lock stitches), trim both needle and bobbin threads and stop. -
Seite 68: F600 F400 F300
How to change needle positions / How to change the stitch length Nadelposition ändern / Stichlänge ändern Zmiana położenia igły / Zmiana długości ściegu Как изменить положение иглы/ Как изменить длину стежка When changing the needle position of straight stitch It is possible to change the needle position with the zigzag width adjusting dial/button. -
Seite 69: Straight Stitch
Other straight stitch patterns / Andere Geradstichmuster Inne wzory ściegu prostego / Другие образцы прямых строчек Lock stitch (stay stitches) At the sewing-end, push the reverse stitch button. The machine will sew several stay stitches and stop. Verschlussstich (bleibende Stiche) Wenn Sie mit der Näharbeit fertig sind, drücken Sie die Rückwärtstaste. -
Seite 70: Строчка Зигзаг
Zigzag stitch / Zickzackstich / Ścieg zygzakowaty / Строчка зигзаг Pattern No. / Muster Nr. Direct 4 / Direkt 4 / Podstawowy 4 / прямой 4 Numer ściegu / Обpaзец № Presser foot / Nähfuß Standard presser foot (A) / Normalfuß (A) Stopka / Прижимнaя... - Seite 71 When changing the stitch length The stitch length can be adjusted while sewing. Turning to the left (- side), the displayed value becomes F600 smaller and the stitch length becomes smaller accordingly. Turning to the right (+ side), the displayed value becomes larger and the stitch length becomes larger accordingly.
-
Seite 72: Overcasting Stitch
Overcasting stitch / Versäuberungsstich / Ścieg obrzucający / Краеобметочный стежок Attention Turn off the power before replacing the presser foot. Vorsicht Vor dem Wechseln des Nähfußes die Maschine ausschalten. Uwaga Przed wymianą stopki wyłącz zasilanie. Внимание Перед заменой прижимной лапки отключите машину от электросети. This stitch is used to prevent the edge of fabric from fraying. - Seite 73 Overcasting stitch 3 / Versäuberungsstich 3 / Ścieg obrzucający 3 / Краеобметочный стежок 3 Practical 08 (Light-weight material) Pattern No. / Muster Nr. Praktisch 08 (leichte Stoffe) Ścieg / Обpaзец № Użytkowy 08 (cienki materiał) прaктичеcкий 08 (легкие материалы) Overcasting presser foot (C) / Overlock-Fuß (C) Presser foot / Nähfuß...
-
Seite 74: Blind Stitch
Blind stitch / Blindstich / Ścieg kryty / Потайной шов Pattern number / Musternummer Numer ściegu / Номер образца Direct 8 / Direkt 8 / Podstawowy 8 / прямой 8 Practical 13 (Light-weight material) / Praktisch 13 (leichte Stoffe) Pattern No. Użytkowy 13 (lekki materiał) / Muster Nr. - Seite 75 0.5 to 0.6 cm 0,5 bis 0,6 cm 0,5 do 0,6 cm Fold from basting line. 0,5 – 0,6 см Leave 0.5 to 0.6 cm. Faltung ab Heftlinie. 0,5 bis 0,6 cm Abstand lassen. Fabric Fabric (wrong side) Zegnij materiał wzdłóż linii wykończenia. (wrong side) Stoff Stoff...
- Seite 76 When changing the needle entry point / Nadeleinstichstelle ändern Zmiana położenia igły / Для изменения позиции контакта иглы с тканью 1. If the stitches reach too far beyond the folded edge 1. Wenn die Stiche zu weit über die Faltkante hinaus gehen 1.
-
Seite 77: Buttonhole Stitches
Buttonhole stitches / Knopflochstiche / Ściegi do obszywania dziurek / Строчки для обметывания пуговичных петель Pattern number / Musternummer Numer ściegu / Номер образца Direct 0 / Direkt 0 / Podstawowy 0 / прямой 0 Pattern No. / Muster Nr. Ścieg / Buttonhole 01, 02, 04~15 / Knopfloch 01, 02, 04-15 Обpaзец... -
Seite 78: Nähfuß Einsetzen
Buttonholes for women’s blouses and Do damskich bluzek i ubrań dziecięcych. Rounded end children’s clothes. Also for light weight Nadają się również do lekkich materiałów. Abgerundete materials пуговичные петли для женских блузок и детской Ecken Knopfloch für Damenblusen und одежды, а также для легких материалов. Zaokrąglone Kinderkleidung. -
Seite 79: Knopfmaß Einrichten
Set the button. Button holder Pull the button holder toward A , place the button on the button holder, Knopfhalter and then push the holder toward B to set the buttonhole length. Uchwyt guzika * It is impossible to set a button thicker than 4mm. держатель... - Seite 80 Place the fabric under the presser foot. Raise the presser foot, pass the needle thread through the hole on the presser foot and pull it out sideways. Place the fabric under the presser foot, align the marking with the sewing-start point.
- Seite 81 Unplug the sensor pin after sewing. Nach dem Nähen den Sensorstecker wieder herausziehen. Odłącz wtyczkę po szyciu. После выполнения строчки отсоединить штифт датчика. Opening the buttonhole using a ripper. [double bartack] Pierce a stopper pin at the bartack and open the buttonhole with a ripper. Be careful not to cut the stitches.
- Seite 82 Buttonhole with gimp / Knopfloch mit Gimpenfaden Obszywanie dziurek z żyłką wzmacniającą / Пуговичная петля с каркасной нитью Pattern No. / Muster Nr. Ścieg/ Direct 0 / Direkt 0 / Podstawowy 0 / Прямой 0 Обpaзец № Presser foot / Nähfuß Buttonhole presser foot (E) / Knopflochfuß...
- Seite 83 Bring down the needle to the sewing start point and lower the presser foot. Sew the buttonhole. Die Nadel am Startpunkt in den Stoff senken und den Nähfuß auf den Stoff setzen. Jetzt das Knopfloch nähen. Ustaw igłę w miejscu rozpoczęcia szycia i opóść stopkę.. Obszyj dziurkę.
- Seite 84 When changing the width of the buttonhole / Knopflochbreite ändern Zmiana szerokości dziurki / Для изменения ширины пуговичной петли Turn the zigzag width adjusting dial/button. Einstellrad/Taste für Zickzack-Breite drehen/drücken. * The setting of the buttonhole width and stitch length will be Zmień...
-
Seite 85: Manuelles Zweistufiges Knopfloch
Manual 2-step buttonhole / Manuelles zweistufiges Knopfloch Obszywanie dziurek z nastawami ręcznymi / Ручная пуговичная петля в 2 этапа Pattern No. / Muster Nr. Buttonhole 03 / Knopfloch 03 / Do obszywania dziurek 03 / Ścieg / пуговичная петля 03 Обpaзец... - Seite 86 Push start/stop button to sew. Necessary length * At this time, if the start/stop button is pushed, the machine will stop Benötigte Länge sewing. And if the start/stop button is pushed again, then the machine will Porządany odcinek continue to sew the left side of the buttonhole. нeобxодимая...
- Seite 87 Pierce a stopper pin at the bartack and open the buttonhole with a ripper. Be careful not to cut the stitches. As the numbers of stitches of both right and left lines of buttonhole is memorized in the sewing machine, the buttonhole of the same size can be sewn.
-
Seite 88: Bartacking
Bartacking / Riegelnähte / Wyszywanie rygielka / Выполнение закрепки Pattern No. Practical 19 / Praktisch 19 / Użytkowy 19 F600 Muster Nr. прaктичеcкий 19 Ścieg Practical 17 / Praktisch 17 F400 / F300 Обpaзец № Użytkowy 17 / прaктичеcкий 17 Presser foot Manual buttonhole presser foot (I) / Manueller Knopflochfuß... - Seite 89 Start/stop button Start/Stop-Taste Start sewing. Przycisk Start/stop Push the start/stop button and the machine starts to sew straight stitches. кнопкa пуск/останов Nähen. Starting Wenn Sie die Start/Stop-Taste eindrücken näht die Maschine gerade Stiche. point Nähbeginn Początek szycia. Początek Wciśnij przycisk start/stop. Maszyna zacznie szyć prosty ścieg точкa нaчaлa Начните...
-
Seite 90: Inserting Zippers
Inserting zippers / Reißverschlüsse einnähen Wszywanie suwaków / Вшивание застежки-молнии Pattern No. / Muster Nr. Direct 1 / Direkt 1 / Podstawowy 1 / прямой 1 Ścieg / Обpaзец № Presser foot / Nähfuß Zipper presser foot (B) / Reißverschlussfuß (B) Stopka / Прижимнaя... - Seite 91 Attach the zipper presser foot (B) to the machine. When sewing the left side of the zipper, place the zipper under the right portion of the zipper presser foot. When sewing the right side of the zipper, place the zipper under the left portion of the foot. Setzen Sie den Reißverschlussfuß...
- Seite 92 Sew the zipper tape on the seam allowance from bottom to top. Fitting the edge of the zipper presser foot along the edge of the zipper teeth, sew the zipper tape on the seam allowance. At the slider part of the zipper, stop the machine at 5 cm (2 inches) before the slider.
-
Seite 93: Втачивание Застежки-Молнии Встык
Centered insertion / Mittiger Reißverschluss / Wszywanie zamka względem jego środka / Втачивание застежки-молнии встык Seam line / Saumlinie Baste zipper and garment body. Slider / Schieber Linia środkowa / Suwak / собачка Open the seam allowance. Fit the teeth of the zipper at the end of the seam линия... -
Seite 94: Shirring And Gathering
Shirring and gathering / Kräuseln und Raffen Szycie falbanek i marszczenie materiału / Сборки и буфы Pattern No. / Muster Nr. Direct 1/Direkt 1 /Podstawowy 1 /прямой 1 Ścieg / Обpaзец № Standard presser foot (A) Presser foot / Nähfuß Normalfuß... - Seite 95 Start sewing. Leave about 5 cm of needle and bobbin threads both at the sewing start and at the sewing end and sew a parallel line. Nähen. An beiden Seiten der Naht etwa 5 cm vom Ober- und Unterfaden hängen lassen und eine Parallelnaht nähen. Początek szycia.
-
Seite 96: Pintucking
Pintucking / Biesen / Fałdowanie / Защипы Pattern No. / Muster Nr. Direct 1 /Direkt 1 /Podstawowy 1 /прямой 1 Ścieg / Обpaзец № Standard presser foot (A) Presser foot / Nähfuß Normalfuß (A) Stopka / Прижимнaя лапкa Ogólnego przeznacznia (A) cтандартная... -
Seite 97: Welt Seam
Welt seam / Kappnaht / Zabezpieczanie krawędzi / Обтачка каймой Pattern No. / Muster Nr. Direct 1 /Direkt 1 /Podstawowy 1 /прямой 1 Ścieg / Обpaзец № Standard presser foot (A) Presser foot / Nähfuß Normalfuß (A) Stopka / Прижимнaя лапкa Ogólnego przeznaczenia (A) cтандартная... -
Seite 98: How To Use Quilt Guide F600 / F400
How to use the quilt guide / Arbeiten mit der Quilt-Führung F600 / F400 Używanie prowadnika do pikowania / Как использовать направляющую для квилтинга Pattern No. / Muster Nr. Direct 1,4 /Direkt 1,4 /Podstawowy 1,4 /прямой 1,4 Ścieg / Обpaзец № Standard presser foot (A) Presser foot / Nähfuß... -
Seite 99: Scallop Stitches
Scallop stitches / Bogenstiche / Sciegi obrębiające / Фестоны One point 24, 25 / Ein-Punkt 24, 25 / Symbol 24, 25 F600 Pattern No. одноточечный 24, 25 Muster Nr. Ścieg One point 24 / Ein-Punkt 24 / Symbol 24 / одноточечный 24 F400 Обpaзец... -
Seite 100: Decorative Stitches
Decorative stitches / Zierstiche / Ściegi ozdobne / Декоративные строчки Decorative 01~72 / Dekorativ 01-72 / Ozdobny 01-72 F600 Pattern No. декоративный 01~72 Muster Nr. Decorative 01~49 / Dekorativ 01-49 / Ozdobny 01-49 F400 Ścieg декоративный 01~49 Обpaзец № Decorative 01~20 / Dekorativ 01-20 / Ozdobny 01-20 F300 декоративный... -
Seite 101: Patchwork Piecing (Joining)
Patchwork piecing / Patchwork-Piecing / Naszywanie łat / Пэчворк Pattern No. / Muster Nr. Direct 2 / Direkt 2 / Podstawowy 2 / прямой 2 Ścieg / Обpaзец № Standard presser foot (A) Presser foot / Nähfuß Normalfuß (A) Stopka / Прижимнaя лапкa Ogólnego przeznaczenia (A) cтандартная... -
Seite 102: Applique (1)
Applique (1) / Applikation (1) / Aplikacje (1) / Аппликация (1) Pattern No. / Muster Nr. Direct 5 / Direkt 5 / Podstawowy 5 / прямой 5 Steeknummer / Обpaзец № Manual buttonhole presser foot (I) Manueller Knopflochfuß (I) Do szycia ściegiem gęstym (I) Presser foot лапка... - Seite 103 Turn the hand wheel towards you and start sewing along with the outer side of the applique fabric. When you start sewing, the machine will automatically sew 3 lock stitches. * When sewing steep angles, keep the needle inside the fabric, raise the presser foot, change sewing direction and sew slowly.
-
Seite 104: Applique (2)
Applique (2) / Applikation (2) / Aplikacje (2) / Аппликация (2) Direct 6 / Direkt 6 / Podstawowy 6 / прямой 6 Pattern No. Quilting 01~04, 35~37 / Quilten 01-04, 35-37 F600 Muster Nr. Hafciarskie 01-04, 35-37 / квилтинг 01-04, 35-37 Ścieg Quilting 01~04, 07, 08 / Quilten 01-04, 07, 08 F400/F300... - Seite 105 Turn the hand wheel towards you and start sewing along with the outer side of the applique fabric. When you start sewing, the machine will automatically sew 3 lock stitches. Basting * When sewing steep angles, keep the needle inside the fabric, raise the Heftlinie presser foot, change sewing direction and sew slowly.
-
Seite 106: Zufallsmuster
Crazy quilt / Crazy Quilt / Artystyczne pikowanie / Художественный квилтинг Pattern number / Musternummer Numer ściegu / номер образца Pattern No. Quilting 01~67 /Quilten 01-67 /Hafciarskie 01-67 /квилтинг 01-67 F600 Muster Nr. Quilting 01~29 /Quilten 01-29 /Hafciarskie 01-29 /квилтинг 01-29 F400 Ścieg Quilting 01~20 /Quilten 01-22 /Hafciarskie 01-22 /квилтинг... -
Seite 107: Stitch In Ditch Quilting
Stitch in ditch quilting / Quilten im Nahtschatten F600 Naszywanie wzdłóż krawędzi / Объемный квилтинг Pattern No. / Muster Nr. Direct 1 / Direkt 1 / Podstawowy 1 / прямой 1 Ścieg / Обpaзец № Edge sewing presser foot (R) Presser foot / Nähfuß... -
Seite 108: Nahtschatten-Quilten Bei Biegungen
Put the guide of the presser foot along with the crease and sew. The needle enters behind the guide, so that the edge of the crease can be sewn. Zum Nähen setzen Sie den Nähfuß mit der Führung genau auf die Faltkante. Die Nadel tritt genau hinter der Führung in den Stoff, wodurch der Rand der Faltung genäht werden kann. -
Seite 109: Quilten (Geradstich) F600 / F400
Quilting (straight stitch) / Quilten (Geradstich) F600 / F400 Pikowanie (ścieg prosty) / Квилтинг (прямая строчка) Pattern No. / Muster Nr. Direct 1,4 /Direkt 1,4/Podstawowy 1,4/прямой 1,4 Ścieg / Обpaзец № Walking foot (N) / Walking-Nähfuß (N) Presser foot / Nähfuß Wspomagająca transport (N) Stopka / Прижимнaя... - Seite 110 Assemble the walking foot. Presser bar Raise the presser bar. Loosen the setscrew for presser foot holder and remove Nähfußstange Actuating lever the presser foot holder. (Refer to page 31) Drążek stopki Antriebshebel Set the actuating lever on the needle clamp and insert the assembling point to прижимнaя...
-
Seite 111: F600
Quilting (free motion) / Freihand-Quilten F600 / F400 Szycie swobodne / Квилтинг (свободное движение) Pattern No. / Muster Nr. Direct 1 / Direkt 1 Ścieg / Обpaзец № Podstawowy 1 / прямой 1 Presser foot / Nähfuß Quilt presser foot (Q) / Quiltfuß (Q) / Do szycia Stopka / Прижимнaя... - Seite 112 Move the drop feed knob to the right hand side. Feed dog is now down. Schieben Sie den Schieber zum Versenken des Transporteurs nach rechts. Der Transporteur ist jetzt nach unten gesenkt. Przesuń przełącznik transportera w prawo. Transporter jest teraz wyłączony. Переместите...
- Seite 113 Tips / Tipps: / Porady / Советы: ● How to lock stitches 1. At sewing start, pull up the bobbin thread on the top layer of the fabric, hold both needle and bobbin threads together and sew 3 stitches on the same point. After that move fabrics as you wish. In this way, stitches on the wrong side of the fabrics look neat. 2.
-
Seite 114: One-Point Stitch/Sewing Letters
One-point stitch/sewing letters / Ein-Punkt-Stiche/Buchstaben Symbole i litery / Одноточечный образец/ вышивание букв One point 01~38 / Ein-Punkt 01-38 F600 F600 Symbole 01-38 / одноточечный 01~38 Pattern No. / Muster Nr. One point 01~33 / Ein-Punkt 01-33 F400 Ścieg / Symbole 01-33 / одноточечный... -
Seite 115: Test Sewing
Test sewing / Nähprobe / Szycie próbne / Тестовая строчка Practical 22 / Praktisch 22 F600 Pattern No. / Muster Nr. Podstawowy 22 / прaктичеcкий 22 Ścieg/ Practical 20 / Praktisch 20 F400 / F300 Обpaзец № Podstawowy 20 / прaктичеcкий 20 Manual buttonhole presser foot (I) Presser foot / Nähfuß... -
Seite 116: Operational Buttons And Screen
Operational buttons and screen Pattern select mode Direct select Note: The Cell phone input mentioned here is Select by number Sewing pattern the input method that is used in cell phones. Cell phone input Needle-stop position For example, in input mode, when you Stop with needle press three times... -
Seite 117: Funktionstasten Und Bildschirm
Funktionstasten und Bildschirm Modus für Musterauswahl Direktauswahl Hinweis: Mit Handy- Eingabe ist hier die Auswahl nach Nummer Stichmuster Eingabeart wie bei Handys gemeint. Handyeingabe Nadelstopp-Position Das heißt, dass Sie zum Beispiel in Methode Stopp mit hoher für den Buchstaben “C” Nadel dreimal drücken... - Seite 118 Wyświetlacz i przyciski Tryb wyboru ściegu Uwaga: Klawiatura Wybór bezpośredni użyta tutaj jest Wybór przez numer analogiczna do tej z Wyszywany wzór telefonów komórkowych Wybór z klawiatury Pozycja zatrzymania igły Na przykład w trybie wyboru Stop z igłą na górze wciśniesz przycisk Stop z igłą...
-
Seite 119: Экран И Кнопки Управления
Экран и кнопки управления Режим выбора образца Прямой выбор Примечание: принцип ввода данных на этой Выбор по номеру Образец строчки клавиатуре такой Положение останова иглы же как на сотовом Ввод на клавиатуре телефоне. Например, в Игла останавливается режиме ввода в крайней при... -
Seite 120: How To Select Patterns (Letters)
How to select pattern (letters) / Ein Muster (Buchstaben) auswählen Układanie wzoru do wyszycia (litery) / Как выбрать образцы (буквы) Example / Beispiel / Przykład / Пример: Press Drücken Wciśnij JUKI Нажмите Press Drücken Wciśnij Нажмите Press Press Einmal Drücken Wciśnij... - Seite 121 Press When you want to change the size of pattern Drücken Wciśnij (letters) ….. Нажмите Move the cursor to the desired pattern (letter). You can change the height and width by: Press Height: Zigzag width adjusting dial Drücken Width: Stitch length adjusting dial Wciśnij Нажмите...
-
Seite 122: How To Edit Patterns (Letters)
How to edit patterns (letters) / Ein Muster (Buchstaben) bearbeiten Edycja utworzonego wzoru (litery) / Как редактировать образцы (буквы) Example / Beispiel: / Przykład: / Пример) JUKI JUKI Change ändern in . / Zmiana . / Заменить на Press , and move the ‘_’(cursor) to the position... -
Seite 123: How To Stitch A Pattern (Letters)
How to stitch a pattern (letters) / Ein Muster (Buchstaben) nähen Wyszywanie symboli (liter) / Как вышить образец (буквы) Place the fabric underneath the presser foot and start. The machine will stop automatically when sewing is finished. Notes: 1. Note that the sewing speed varies according to stitch patterns (letters) to be sewn. -
Seite 124: Save / Call Of Pattern (Letters)
Save/call of patterns (letters) / Ein Muster (Buchstaben) speichern/aufrufen Zapisywanie i odczytywanie wzorów (liter) / Сохранение/ вызов образцов/букв The letters and one point patterns can be combined and saved for later use. There are 10 folders in total for saving. Buchstaben- und Ein-Punkt-Muster können kombiniert und für spätere Zwecke gespeichert werden. - Seite 125 To delete the content stored inside a folder. Den Inhalt eines Ordners löschen. Usuwanie zawartości folderu. Чтобы удалить содержимое папки Press Drücken Wciśnij Нажмите to select the target folder where content to be deleted is stored. Press wählen Sie den Ordner, dessen Inhalt gelöscht werden soll. Drücken Użyj by wybrać...
-
Seite 126: Character Selecting Methods
Character selecting methods / Auswahl der Zeichen Wybieranie znaków / Методы выбора букв No. of pressing a button No. of pressing a button / Anzahl Tastendrücke Anzahl Tastendrücke Ilość przyciśnięć przycisku / количeство нaжaтий кнопки Ilość przyciśnięć przycisku количeство нaжaтий кнопки ’... -
Seite 127: Type And Usage Of Options
Type and usage of options / Optionen und ihre Anwendung Typy i używanie opcji / Тип и использование опций < Type of options > < Optionen > < Typy opcji > < Тип настроек > Changing the seam width of buttonhole Nahtbreite eines Knopflochs ändern Zmiana szerokości szczeliny obszycia dziurki изменение... -
Seite 128: Change Of Seam Width Of Buttonhole
Change of seam width of buttonhole Seam width Nahtbreite eines Knopflochs ändern Nahtbreite Szerokość szczeliny Zmiana szerokości szczeliny obszycia dziurki ширина шва Изменение ширины шва для обметывания петель The seam width of buttonhole is changeable. * It is changeable when sewing a buttonhole. Es ist möglich, die Breite einer Knopflochnaht zu ändern. -
Seite 129: Change Of Needle Position
Change of needle position / Nadelposition ändern Zmiana pozycji igły / Изменение положения иглы Example) change the needle position of zigzag stitch to left needle position. * Default setting is center needle position. Beispiel: Nadel beim Zickzackstich in linke Position bringen. * Die Standardeinstellung der Nadel ist die mittlere Position. -
Seite 130: Setting The Thread Trimming Foot Switch To Off
Setting the thread trimming foot switch to OFF Fußschalter für Fadenschnitt ausschalten Wyłączanie nożnego przełącznika odcinania nici Установка ножного переключателя обрезки нити на выкл In order to avoid trimming the thread by mistake while sewing, you can set the thread trimming foot switch to “off” beforehand. Um nicht versehentlich beim Nähen den Faden abzuschneiden, kann die Fadenschnittfunktion im Fußschalter ausgeschaltet werden. -
Seite 131: Nähen Mit Zwillingsnadel
Twin needle sewing / Nähen mit Zwillingsnadel Szycie podwójną igłą / Работа с двойной иглой Direct 1, 4 / Direkt 1, 4 / Podstawowy 1, 4 / прямой 1,4 One-point 17, 19, 20, 21, 24~31, 34~38 / Ein-Punkt 17, 19, 20, 21, 24-31, 34-38 F600 Pattern No. -
Seite 132: Twin Needle Sewing
How to thread the needles Place the supplementary spool pin. Thread to the thread guide A first. After that, thread paths are same up from B to F . Do not thread G for right-hand needle. Thread to right-hand and left-hand needles separately. * Automatic needle threader can not be used. - Seite 133 Setting of twin needle sewing / Nähen mit Zwillingsnadel einstellen Szycie igłą podwójną - opcje / Установка двойной иглы * Select a stitch pattern suitable for twin needle sewing. * Ein Stichmuster wählen, das für Zwillingsnadeln geeignet ist. * Wybierz ścieg odpowiedni do szycia igłą podwójną. * Выберите...
- Seite 134 * Twin needle setting can not be done while a stitch pattern * Maximum zigzag width is 7.0 mm, however, other than those for twin needle sewing is selected. display shows * Größte Zickzack-Breite ist 7,0 mm, angezeigt mark will be shown. wird aber nur * Maksymalna szerokość...
-
Seite 135: Guide
Guide / Anleitung / Pomoc maszyny / Руководство The guide for winding bobbin thread, setting of bobbin, threading of needle thread, changing presser foot and needle can be seen on the LCD display. Im Bildschirm kann auch eine Anleitung zum Aufspulen des Unterfadens, Einsetzen der Spule, Einfädeln des Oberfadens und Wechseln von Nadel und Nähfuß... -
Seite 136: Contrast Of Liquid Crystal Display (Lcd)
Contrast of Liquid Crystal Display (LCD) Kontrast des LCD-Bildschirms einstellen Kontrast wyświetlacza LCD Контрастность жидкокристаллического дисплея The LCD contrast can be chosen from 11 levels. Der Kontrast kann auf 11 Stufen eingestellt werden. Do wyboru jest 11 poziomów kontrastu wyświetlacza LCD. Можно... -
Seite 137: Button Reception Buzzer Volume Settings
Button reception buzzer volume settings / Lautstärke Summton einstellen Głośność / Настройка громкости звука при нажатии на кнопки The volume of buzzer can be adjusted. Die Lautstärke des Summtons lässt sich wie folgt einstellen: Głośność może zostać zmieniona. Можно отрегулировать громкость звука. Mute / Still low / Leise loud / Laut... -
Seite 138: Language Setting
Language setting / Sprache einstellen Ustawienia języka / Настройка языка You can select language from 8 languages or pictographs. (Default setting is English.) Sie können aus 8 Sprachen oder Piktogrammen wählen. (Fabrikseinstellung ist Englisch.) Masz wybór 8 języków oraz piktogramów. (Domyślnie ustawiony jest angielski.) Вы... -
Seite 139: Elongation
Elongation One-point 24~38 / Ein-Punkt 24-38 F600 Symbole 24-38 / одноточечный 24 ˜ 38 Strecken Pattern No. Muster Nr. One-point 24~33 / Ein-Punkt 24-33 F400 Wydłużanie Symbole 24-33 / одноточечный 24 ˜ 33 Ścieg Удлиннение № образца One-point 13~18 / Ein-Punkt 13-18 F300 Symbole 13-18 / одноточечный... -
Seite 140: Message Catalog
Message catalog / Anzeige von Warnmeldungen Katalog komunikatów maszyny / Перечень сообщений Message Cause (Reason to display such messages) Meldung Ursache (Grund für die Meldung) Komunikat Przyczyna (Powód wyświetlenia tego komunikatu) Сообщение Причина (почему на экране отобразилось это сообщение) A. When “start/stop”, “reverse stitch” or “thread-trimming” button is pressed while the presser foot is raised. - Seite 141 Message Cause (Reason to display such messages) Meldung Ursache (Grund für die Meldung) Komunikat Przyczyna (Powód wyświetlenia tego komunikatu) Сообщение Причина (почему на экране отобразилось это сообщение) A. When in the mode and more than one stitch pattern is selected, user attempts to move to mode and/or B.
- Seite 142 Message Cause (Reason to display such messages) Meldung Ursache (Grund für die Meldung) Komunikat Przyczyna (Powód wyświetlenia tego komunikatu) Сообщение Причина (почему на экране отобразилось это сообщение) A. When in the option setting, settings which will be kept after turning off the machines are changed.
-
Seite 143: Introduction Of Optional Accessory Parts
Introduction of optional accessory parts / Optionale Zubehörteile Opcjonalne akcesoria/ Описание дополнительных вспомогательных компонентов Make your home sewing more pleasant! Uczyń swoje domowe wyroby ładniejszymi! Please purchase the following items in the shop where you buy our Zakup poniższe przedmioty w sklepie z naszymi produktami. products. - Seite 144 ● Throat plate for straight stitch ● Quilt presser foot (open type) Use with patchwork presser foot for better stitch quality. It is used in free motion sewing. As the front portion is open, it is easy to see the needle entry point. ●...
- Seite 145 ● Invisible zipper foot ● Wide Table As a seam does not appear on the right side of the fabric, For sewing large projects such as quilts, etc. an opening can be finished with fabric edges neatly butted. ● Anschiebetisch ●...
- Seite 146 ● Walking foot ● Patchwork presser foot This presser foot is used for "difficult-to-feed" materials such This presser foot is used for patchwork stitches. knit, jersies, vinyl, artificial leather and leather or quilting. ● Patchwork-Fuß ● Walking-Nähfuß Diesen Fuß verwenden Sie für Patchwork-Stiche. Dieser Nähfuß...
-
Seite 147: How To Install Wide Table
How to install Wide Table / Den Anschiebetisch installieren Instalacja szerokiej płyty wysięgu / Как установить широкий стол Remove auxiliary bed. Ziehen Sie die Zubehörbox heraus. Zdemontuj płytę z wyposażeniem. Демонтируйте выдвижной столик. Open legs of Wide Table until they stop securely at the stopping position. -
Seite 148: Machine Maintenance
Machine Maintenance / Pflege der Maschine Konserwacja maszyny / Техническое обслуживание машины When lint and/or dirt has built up, it may cause machine failures. Therefore, clean the machine frequently. Wenn die Maschine verstaubt oder voller Flusen ist, kann es zu Defekten kommen. Reinigen Sie Ihre Nähmaschine daher regelmäßig. Gromadzenie się... - Seite 149 Remove lint and dirt. Remove lint and dirt around the feed dog and bobbin case holder with the cleaning brush. Flusen und Staub entfernen. Reinigen Sie den Bereich um den Transporteur und den Spulenkorb mit dem Bürstchen. Usuń zanieczyszczenia. Usuń zanieczyszczenia z okolic transportera i gniazda szpuleczki za pomocą pędzelka.
-
Seite 150: Performance Check List
Performance check list If sewing difficulties occur, make sure the instructions are correctly followed. If a problem still exists, the reminders below may help solve it. Refer- Case Cause (Reason) Solution ence page ● The machine stops sewing ● The machine sews at slow speed ●... - Seite 151 Refer- Case Cause (Reason) Solution ence page ● The needle threading lever ● Hand wheel is turned by mistake while ● Turn hand wheel slightly away from will not return to the original the needle threading lever is in down you.
-
Seite 152: Anleitung Zur Fehlerbehebung
Anleitung zur Fehlerbehebung Halten Sie, falls Fehler auftreten, genau an die Anleitung. Wenn das Problem weiterhin besteht, können die unten stehenden Ratschläge vielleicht helfen. Refe- Problem Ursache (Grund) Abhilfe renz- seite ● Die Maschine hört plötzlich ● Das Nähtempo der Maschine ist ●... - Seite 153 Refe- Problem Ursache (Grund) Abhilfe renz- seite ● Der Hebel des Einfädlers geht ● Handrad wurde versehentlich ● Drehen Sie das Handrad leicht nach nicht in die Ausgang sposition gedreht als der Hebel des Einfädlers hinten (von Ihnen weg). zurück und die Maschine kann unten war (gerade einfädeln wollte).
-
Seite 154: Rozwiązywanie Problemów
Rozwiązywanie problemów Jeżeli występują trudności podczas szycia należy upewnić się, że przestrzegano uwag zawartych w instrukcji. Jeżeli problem wciąż występuje poniższe uwagi mogą pomóc w jego rozwiązaniu. Problem Przyczyna Rozwiązanie strona ● Maszyna nagle przestała ● Szyto zbyt długo z niską prędkością ●... - Seite 155 Probleem Oorzaak Oplossing Blz. ● Dźwignia nawlekacza igły ● Przypadkowo obrócono koło ręczne ● Obróć koło lekko do tyłu. nie chce wrócić do pierwotnej podczas gdy dźwignia nawlekania igły. (od siebie). pozycji i nawlekacz nie była opuszczona (w czasie nawlekania) obraca się.
-
Seite 156: Лист Выполнения Проверок
Лист выполнения проверок При появлении трудностей во время шитья убедитесь, что инструкция соблюдена должным образом. Если проблема не исчезнет, следующие ниже рекомендации помогут Вам решить ее. см. Неисправность Причина Пути устранения стр. ● Во время выполнения ● Машина шьет постоянно на ●... - Seite 157 см. Неисправность Причина Пути устранения стр. ● Рычаг для заправки иглы ● По ошибке был повернут маховик, ● Слегка поверните маховик от не возвращается в исходное тогда как рычаг для заправки иглы себя (к противоположной стороне положение и машина не находится...
-
Seite 158: List Of Stitch Patterns F600
List of stitch patterns / Übersicht der Stichmuster F600 Lista ściegów / Перечень образцов строчки Patterns for crazy quilt / Stichmuster für Crazy Quilt / Sciegi do artystycznego pikowania / Образцы для художественн- огоквилтинга... - Seite 159 One-point / Ein-Punkt / Symbole / Вышивка Pattern for elongation / Muster zum Strecken / Ściegi do wydłużania / Образцы для удлинения Letters/numbers/signs Letters/nummers/tekens Litery/Cyfry/Znaki Буквы/цифры/знаки...
-
Seite 160: List Of Stitch Patterns F400
List of stitch patterns / Übersicht der Stichmuster F400 Lista ściegów / Перечень образцов строчки... - Seite 161 One-point / Ein-Punkt / Symbole / Вышивка Pattern for elongation / Muster zum Strecken Ściegi do wydłużania / Образцы для удлинения Letters/numbers/signs Letters/nummers/tekens Litery/Cyfry/Znaki Буквы/цифры/знаки...
-
Seite 162: List Of Stitch Patterns F300
List of stitch patterns / Übersicht der Stichmuster F300 Lista ściegów / Перечень образцов строчки... - Seite 163 One-point / Ein-Punkt / Symbole / Вышивка Pattern for elongation Muster zum Strecken Ściegi do wydłużania Образцы для удлинения Letters/numbers/signs Letters/nummers/tekens Litery/Cyfry/Znaki Буквы/цифры/знаки...
-
Seite 164: Maße Und Gewicht
Масса (масса с жестким чехлом) 9,8 кг / 21,6 фунтов 8-2-1,KOKURYO-CHO, CHOFU-SHI, TOKYO 182-8655, JAPAN PHONE : (81)3-3480-2458 FAX : (81)3-3480-5037 Copyright C 2009 JUKI CORPORATION All rights reserved throughout the world. Alle Rechte weltweit vorbehalten. Wszystkie prawa zastrzeżone. Все права зарезервированы. F6 000709...