Dentaurum discovery sl 2.0 Gebrauchsanweisung
Selbstligierende brackets
Quicklinks
Gebrauchsanweisung
Instructions for use
Mode d'emploi
Modo de empleo
Modalità d'uso
Für Ihre Fragen zur Verarbeitung unserer Produkte steht Ihnen unser Customer
Support gerne zur Verfügung.
Hotline Tel.-Nr. Festsitzende Technik
+49 72 31 / 803 - 550
Hotline Tel.-Nr. Herausnehmbare Technik
+49 72 31 / 803 - 555
Telefonische Auftragsannahme
+49 72 31 / 803 - 210
Mehr Informationen zu Dentaurum-Produkten
finden Sie im Internet.
www.dentaurum.de
Stand der Information / Date of information / Mise à jour /
Fecha de la información / Data dell'informazione:
01/12
Turnstraße 31 · 75228 Ispringen · Germany · Telefon + 49 72 31 / 803 - 0 · Fax + 49 72 31 / 803 - 295
www.dentaurum.de · E-Mail: info@dentaurum.de
Gebrauchsanweisung
Selbstligierende Brackets – discovery
Sehr geehrte Kundin, sehr geehrter Kunde
Vielen Dank, dass Sie sich für ein Qualitätsprodukt aus dem Hause Dentaurum entschieden
haben.
Damit Sie dieses Produkt sicher und einfach zum größtmöglichen Nutzen für sich und die
Patienten einsetzen können, muss diese Gebrauchsanweisung sorgfältig gelesen und
beachtet werden.
In einer Gebrauchsanweisung können nicht alle Gegebenheiten einer möglichen Anwen-
dung beschrieben werden. Deshalb steht Ihnen unsere Hotline gerne für Fragen und
Anregungen zur Verfügung.
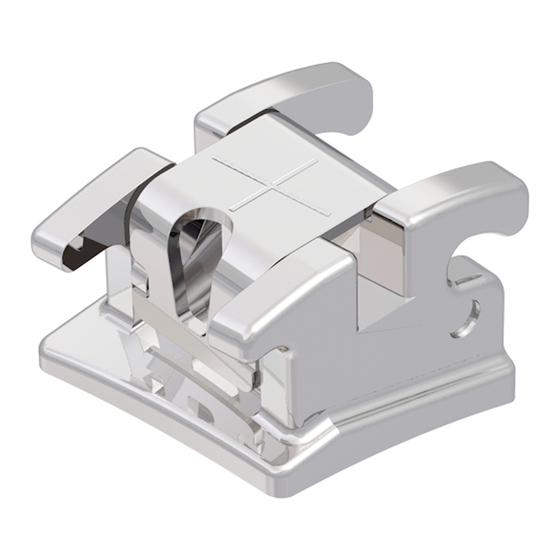
Fig. 1
Aufgrund der ständigen Weiterentwicklung unserer Produkte empfehlen wir Ihnen auch bei
häufiger Verwendung des gleichen Produktes immer wieder das aufmerksame Durchlesen
der jeweils aktuell beiliegenden bzw. im Internet unter www.dentaurum.de hinterlegten
Gebrauchsanweisung.
1. Hersteller
Dentaurum GmbH & Co. KG · Turnstraße 31 · 75228 Ispringen · Deutschland
2. Allgemeine Beschreibung
discovery
bewährten discovery
Erfahrung mit den modernen Ansprüchen der kieferorthopädischen Behandlung.
Die Brackets sind per CAD (Computer Aided Design) optimal an die Zahnform angepasst
Fig. 2
und bieten Ihnen ein optimales Handling. Die Brackets lassen sich über die gelaserte
FDI-Kennzeichnung auf der Basis und die gelaserte Kreuzmarkierung auf dem Bracket
einfach identifizieren und platzieren. Die patentierte laserstrukturierte Basis sichert die
optimale Haftung und gewährleistet ein einfaches Debonding.
3. Verarbeitungsschritte
3.1. Patientenaufklärung
Klären Sie den Patienten über die möglichen Folgen und Risiken der Therapie mit Brackets,
insbesondere beim Debonding, auf.
3.2. Zahnvorbehandlung
Prüfen Sie jeden Zahn sorgfältig auf eventuell vorhandene Schmelzschädigungen, um
beim Debonding nicht von Zahnschädigungen „überrascht" zu werden. Bitte beachten
Fig. 3
Sie für die Konditionierung der Zähne die Herstellerangaben des jeweils verwendeten
Bracket-Adhäsives.
3.3. Bracket-Adhäsivauswahl
Sie können discovery
befestigen. Wir empfehlen unser ConTec SE Adhäsiv (REF 163-550-00). Bitte beachten Sie
die Herstellerangaben des jeweiligen Bracket-Adhäsives sowie die Tabelle Adhäsivsysteme
in unserem Orthodontie-Katalog.
3.4. Entnahme und Handhabung
Fassen Sie discovery
distal, um sie aus der Verpackung zu entnehmen und gemäß folgender Arbeitsschritte zu
handhaben. Die Basis der discovery
oder in irgendeiner Weise kontaminiert werden, da sonst die Haftung negativ beeinflusst
Fig. 4 a
werden könnte.
3.5. Anwendung des Bracket-Adhäsives
Das jeweilige Bracket-Adhäsiv wird gemäß den Herstellerangaben vorbereitet. Tragen Sie
eine kleine, aber für die Benetzung der gesamten Bracketbasis ausreichende Menge auf die
Mitte der Bracketbasis auf. Dies garantiert eine optimale Haftung.
3.6. Applikation und Ausrichtung der Brackets
Nach dem Aufbringen des Adhäsives platzieren Sie das discovery
gewohnt auf dem Zahn.
Richten Sie das discovery
pinzette optimal aus und drücken es so an, dass überschüssiges Adhäsiv seitlich an der
Bracketbasis austritt.
Fig. 4 b
Als Orientierungshilfe zum Ausrichten dienen die Lasermarkierungen auf dem Deckel des
Brackets (Fig. 1). Die vertikale Linie markiert die Mitte des Brackets im Winkel der jeweiligen
Zahnachse (Angulation). Die horizontale Linie ist identisch mit der Mitte des Slots (Bogen-
ebene). Dies ist bei der Ausrichtung des Brackets zu berücksichtigen.
Antagonistenkontakt ist aufgrund der Abrasionsgefahr und/oder dem vorzeitigen Bracket-
verlust unbedingt zu vermeiden. Bringen Sie ggf. eine Bisserhöhung durch einen palatinalen
Aufbiss, z.B. mittels Bite-Bumper™ (REF 705-000-00), an. Vor dem Aushärten ist das ausge-
tretene überschüssige Adhäsiv vollständig zu entfernen. Dies ist von besonderer Bedeutung
für ein einfaches Debonding am Ende der Behandlung.
Achten Sie darauf, dass auf der Gingival- und Okklusalseite des Brackets kein Adhäsiv in die
Mechanik des Verschlusses (Bracketdeckel) gelangt. Dies könnte die Funktion des Deckels
behindern oder zerstören. Das Entfernen der Überschüsse ist für ein einfaches Debonding
am Ende der Behandlung von besonderer Bedeutung.
Fig. 5 a
3.7. Funktionsweise der Verschlussmechanik / Ligieren der Bögen
Der Slot des selbstligierenden Brackets discovery
Alle Deckel, sowohl im Ober- als auch im Unterkiefer, werden von okklusal nach gingival
geöffnet (Fig. 2). Dazu ist unbedingt das sondenförmige Ende des sl-Instrumentes
(REF 023-277-00) zu verwenden (Fig. 3).
Bevor der Bogen eingesetzt werden kann, sind die Deckel zu öffnen. Das spitze sondenförmige
Ende des sl-Instrumentes von labial/bukkal in die Aussparung des Deckels zwischen den
okklusalen Bracketflügeln einführen (Fig. 4a und 4b). Mit dem sl-Instrument den Deckel nach
vestibulär gingival durch eine leichte Kippbewegung öffnen (Fig. 5a und 5b). Der Deckel springt
auf.
Die discovery
während des Einsetzens des Bogens offen hält. Zur Aktivierung von CapSafe
Fig. 5 b
den Deckel nach der spontanen Öffnungsbewegung mit dem Finger oder dem
sl-Instrument in gingivale Richtung, bis ein deutlicher Widerstand übersprungen wird
(Fig. 6a und 6b). Der Deckel ist nun gegen unbeabsichtigtes Zufallen gesichert (Fig. 7).
Den Bogen in den Slot einlegen (Fig. 8), dies ggf. unter Zuhilfenahme des gabelförmigen
Arbeitsendes des sl-Instrumentes. Mit dem Finger oder dem sl-Instrument den Deckel von
gingival nach okklusal schließen (Fig. 9). Der Deckel muss spürbar einrasten. Dies gewähr-
leistet den sicheren Verschluss des Slots (Fig. 10).
Um Lippen- und Wangenirritationen während des Bogenwechsels zu vermeiden, empfehlen
wir die Verwendung von Lippenretraktoren (REF 075-600-00 oder 075-601-00).
3.8. Bracket-Debonding
Die ausgezeichneten Hafteigenschaften von discovery
des Debondings besonderer Beachtung: Das Debonding der discovery
Fig. 6 a
können Sie mit einer Weingart-Zange (z.B. REF 003-120-00) oder im Seitenzahnbereich mit
der abgewinkelten Bracket-Abnehmezange (REF 004-347-00) vornehmen. Fassen Sie die
Brackets mesial-distal an den Flügeln. Drehen Sie das Bracket dann mit einer kurzen Links-
CapSafe
®
oder Rechtsdrehung ohne Zug vom Zahn.
4. Hinweise für den Behandler/Patienten
Bitte beachten Sie, dass z.B. beim Bogenwechsel die Zähne nicht mit geöffneten Bracket-
Deckeln geputzt werden dürfen! Dies führt zum Verbiegen der grazilen Deckel. Dadurch wird die
Funktion des Verschlussmechanismus zerstört und die Klappe kann nicht mehr optimal schließen.
5. Angaben zur Zusammensetzung
Die Zusammensetzung entnehmen Sie bitte der Werkstoffliste, siehe Katalog bzw.
www.dentaurum.de.
Fig. 6 b
6. Sicherheitshinweise
• S ollten auf einen oder mehrere der Inhaltsstoffe allergische Reaktionen bekannt sein,
darf das Produkt nicht angewendet werden.
• D a der Werkstoff 1.4542 der selbstligierenden discovery
magnetisierbaren Metallen gehört, empfehlen wir die Abnahme der Brackets vor der
MRT-Untersuchung.
7. Lagerung und Haltbarkeit
discovery
8. Hinweise für Produkte zum einmaligen Gebrauch
discovery
Fig. 7
aufbereitung eines einmal benutzten discovery
erneute Anwendung am Patienten ist nicht zulässig.
Aufgrund der mechanischen Beanspruchungen während der Behandlung und beim
Debonding können weder Maßhaltigkeit noch Hafteigenschaften der Brackets nach dem
Recyclingprozess gewährleistet werden.
9. Sonstige Hinweise
• Die technischen Informationen wie Torque, Angulation, Größe etc. nehmen Sie bitte dem
jeweiligen Produkt-Etikett oder den Katalog-Angaben.
• Es bestehen keine besonderen Vorsichtsmaßnahmen bei Entsorung der discovery
Brackets.
10. Lieferprogramm
Fig. 8
Das discovery
11. Qualitätshinweise
Dentaurum versichert dem Anwender eine einwandfreie Qualität der Produkte. Der Inhalt
dieser Gebrauchsanweisung beruht auf eigener Erfahrung. Der Anwender ist für die
Verarbeitung der Produkte selbst verantwortlich. In Ermangelung einer Einflussnahme von
Dentaurum auf die Verarbeitung besteht keine Haftung für fehlerhafte Ergebnisse.
12. Erklärung der verwendeten Etikettensymbole
REF
Fig. 9
➔ www.dentaurum.de
Stand der Information: 01/12
Änderungen vorbehalten
Fig. 10
DE
®
sl 2.0
sl 2.0 sind die kleinsten selbstligierenden Brackets weltweit. Auf Basis der
®
Brackets entwickelt, vereint discovery
sl 2.0 die Summe langjähriger
®
®
®
sl 2.0 Brackets mit allen handelsüblichen Bracket-Adhäsiven
®
sl 2.0 Brackets mit einer Klemmpinzette (z.B. REF 025-277-00) mesial-
sl 2.0 Brackets sollte nicht mit den Fingern berührt
®
®
sl 2.0 Bracket wie
®
sl 2.0 Bracket mittels der Angulierungshilfe an der Klemm-
®
sl 2.0 wird mit einem Deckel verschlossen.
®
sl 2.0 Brackets verfügen über eine Mechanik (CapSafe
®
), die den Deckel
®
drückt man
®
sl 2.0 Brackets bedürfen im Rahmen
®
sl 2.0 Brackets
®
sl 2.0 Brackets zu den gering
sl 2.0 Brackets in der geschlossenen Verpackung lagern.
®
®
sl 2.0 Brackets sind nur zur einmaligen Verwendung vorgesehen. Die Wieder-
sl 2.0 Brackets (Recycling) sowie dessen
®
®
sl 2.0 Lieferprogramm entnehmen Sie bitte dem Orthodontie-Katalog.
®
Bestellnummer
Chargenbezeichnung
12345
CE-Zeichen MP-Klasse IIa
Gebrauchsanweisung
im Internet erhältlich
Nicht zur Wiederverwendung
Codablock-Barcode
Matrixcode
Instruction for use
Self-ligating brackets – discovery
®
sl 2.0
Dear Customer
Thank you for choosing this high-quality product from Dentaurum.
In order to achieve the best results with this product, it is important to carefully study and
follow these instructions for use.
The written instructions cannot cover all possible situations that can occur during use.
For this reason, our hotline is available to answer any other questions or concerns that
may arise.
Due to constant developments, we recommend, even when using the same products
regularly, that you study the enclosed current instructions for use or refer to our website
at www.dentaurum.de.
1. Manufacturer
Dentaurum GmbH & Co. KG · Turnstraße 31 · 75228 Ispringen · Germany
2. General description
discovery
®
sl 2.0 are the smallest self-ligating brackets worldwide. Developed on the basis
of the well-proven discovery
®
brackets discovery
®
sl 2.0 unites the sum of many years of
experience with the modern standard of orthodontic treatment.
Per CAD (computer aided design) the brackets are ideally adapted to the tooth shape and
offer ideal handling. The lasered FDI-marking on the base and the lasered cross marking on
the lid help to easily identify and position the brackets. The patented laser-structured base
ensures the optimal bond and guarantees easy debonding.
3. Working stages
3.1. Patient consultation
Inform the patient about the possible consequences and risks involved in treatment using
brackets, in particular during debonding.
3.2. Tooth conditioning
Check each tooth thoroughly for any existing damage to the enamel to avoid being
"surprised" by damage to the tooth during debonding. Adhere to the bracket adhesive
manufacturer's instructions for conditioning the teeth.
3.3. Bracket adhesive selection
discovery
sl 2.0 brackets can be bonded using all commercially available bracket adhesives.
®
We recommend our ConTec SE adhesive (REF 163-550-00).
Adhere to the manufacturer's instructions for the bracket adhesive as well as the Adhesive
System Table in our orthodontic catalog.
3.4. Removal and handling
Grip the discovery
sl 2.0 brackets using clamping tweezers (e.g. REF 025-277-00) mesially-
®
distally, to remove them from the packaging and handle according to the following steps.
The base of the discovery
sl 2.0 brackets should not be touched with your fingers or
®
contaminated in any way, as this could otherwise detrimentally affect the bond.
3.5. Application of the bracket adhesive
Prepare the bracket adhesive according to the manufacturer's instructions. Apply a small
amount of adhesive to the center of the bracket base, but enough to cover the entire
bracket base. This guarantees an optimum bond.
3.6. Placement and alignment of the bracket
After applying the adhesive, place the discovery
®
sl 2.0 bracket in the usual way onto
the tooth.
Optimally align the discovery
®
sl 2.0 bracket with the angulation aid of the clamping
tweezers and press it onto the tooth so that the surplus adhesive exudes from the sides
of the bracket base.
Use the laser markings on the top of the brackets (Fig. 1) as a positioning guide. The vertical
line marks the bracket center along the relevant long axis of the tooth crown (angulation).
The horizontal line marks the middle of the slot (archwire level). Please note that the slot
does not lie in the center of the bracket, and take this into consideration when
aligning the bracket!
It is essential to avoid contactwith the antagonist due to the risk of abrasion and / or
premature bracket loss. If necessary a palatal bite raise can be used e.g. Bite-Bumper™
(REF 705-000-00).
It is essential to ensure that no adhesive material enters the bracket fastening
mechanism on the gingival and occlusal side of the bracket, as this could restrict or
destroy the functionality of the lid.
Completely remove the excuded excess adhesive before it has cured. This is particularly
important to ensure easy debonding at the end of treatment.
3.7. How the fastening mechanism works / securing the arch wire
The slot of the discovery
®
sl 2.0 brackets is closed off with a lid. All lids, whether they are
designed for the upper or lower jaw, open from the occlusal side towards gingival (Fig. 2).
This is carried out using only the probe-shaped end of the sl instrument (REF 023-277-00)
(Fig. 3).
The lid must be opened in order to insert the arch wire. Place the pointed probe-shaded
end of the sl instrument from the labial/buccal side into the notch in the lid between the
occlusal bracket wings (Fig. 4a and 4b) and flip the lid open, using slight leverage towards
vestbular-gingival (Fig. 5). The lid will spring open.
The discovery
®
sl 2.0 brackets include a mechanism (CapSafe
remain open while the arch wire is being inserted. In order to activate CapSafe
lid and press it back in a gingival direction with your finger or the sl instrument until there
is a feeling of resistance (Fig. 6). The lid is now secured in the open position (Fig. 7).
Place the arch wire into the slot (Fig. 8). If necessary, use the forked end of the sl instrument
to aid in this step. To close the lid, use your finger or the sl instrument to press the lid from
the gingival to the occlusal position (Fig. 9). The lid should close with a distinct click, which
guarantees the lid is now secure (Fig. 10).
In order to prevent lip and cheek irritations during arch wire change, we recommend to use
lip retractors (REF 075-600-00 or 075-601-00).
3.8. Bracket debonding
The excellent bonding characteristics of discovery
®
sl 2.0 brackets means the process
of debonding requires special attention: When debonding discovery
advisable to use a Weingart plier (eg. REF 003-120-00) or in the molar region, an angled
bracket removing plier (REF 004-347-00). Grasp the bracket mesio-distally on the tie wings,
and twist toward the left or the right without pulling away from the tooth.
4. Note for doctor and patient
Please consider that teeth must never be brushed with the bracket lids open e.g. for arch
wire change! This leads to torsion of the delicate lids, which distructs the function of the
closing mechanism so that the lid cannot be optimally closed any more.
5. Information about the composition
Information about the composition is included in the materials list, see catalog or
www.dentaurum.de.
6. Safety information
• T he product should not be used if there is a known allergy to one or more of the
ingredients.
• A s the material 1.4542 used in the self-ligating discovery
®
slightly magnetizable metals, we recommend to take the brackets off before the
magnetic resonance imaging examination.
7. Storage and shelf-life
Store discovery
sl 2.0 brackets in closed packaging.
®
8. Information for single-use products
discovery
®
sl 2.0 brackets are intended for single use only. Reconditioning of discovery
brackets that have already been used (recycling) and reuse on patients is not permitted.
Due to the mechanical wear during treatment and debonding neither dimensional accuracy
nor bonding characteristics of the brackets can be guaranteed after a recycling process.
9. Additional tips
• T echnical information such as torque, angulation, size etc. can be found on the relevant
product label or in the catalog information.
• T here are no particular precautions to be taken when disposing of discovery
brackets after treatment.
10. Delivery program
For the complete range of discovery
®
sl 2.0 products please see our orthodontics catalog.
11. With reference to our quality standards
Dentaurum ensures a faultless quality of the products manufactured by us. These
recommendations are based upon our own experiences. The user himself is responsible for
the processing of the products. Responsibility for failures cannot be taken, as we have no
influence on the processing on site.
sl 2.0
12. Explanation of symbols used on the label
REF
Order number
Batch description
12345
CE Mark MP Class 2a
Instructions for use available in
➔ www.dentaurum.de
the internet
Not for reuse
Codablock barcode
Matrix code
Date of information: 01/12
Subject to modifications
EN
®
), which enables the lid to
®
, open the
®
sl 2.0 brackets it is
sl 2.0 brackets is one of the
®
sl 2.0
sl 2.0
®

Verwandte Anleitungen für Dentaurum discovery sl 2.0


Inhaltszusammenfassung für Dentaurum discovery sl 2.0
- Seite 1 2.0 Sehr geehrte Kundin, sehr geehrter Kunde Dear Customer Vielen Dank, dass Sie sich für ein Qualitätsprodukt aus dem Hause Dentaurum entschieden Thank you for choosing this high-quality product from Dentaurum. haben. In order to achieve the best results with this product, it is important to carefully study and Damit Sie dieses Produkt sicher und einfach zum größtmöglichen Nutzen für sich und die...
- Seite 2 11. Observaciones referentes a la calidad personnellement responsable de la mise en œuvre des produits. N’ayant aucune influence sur leur manipulation par ce dernier, Dentaurum ne peut être tenu pour responsable de Dentaurum garantiza al usuario una calidad impecable de los productos. Las indicaciones Modalità...