Herunterladen Inhalt Inhalt Diese Seite drucken
Klarstein 10031206 Bedienungsanleitung

Klarstein 10031206 Bedienungsanleitung

Multifunktions druckkochtopf
Inhaltsverzeichnis

Werbung

Verfügbare Sprachen
  • DE

Verfügbare Sprachen

  • DEUTSCH, seite 1
Multifunktions
Druckkochtopf
10031206

Werbung

Inhaltsverzeichnis
loading

Inhaltszusammenfassung für Klarstein 10031206

  • Seite 1 Multifunktions Druckkochtopf 10031206...
  • Seite 2: Inhaltsverzeichnis

    Tastenfunktionen und Garzeittabelle 6 Programme und Programmierung 8 Reinigung und Pflege 9 Fehlersuche und Fehlerbehebung 9 Hinweise zur Entsorgung 10 Konformitätserklärung 10 Technische Daten Artikelnummer 10031206 Stromversorgung 220-240 V ~ 50-60 Hz Leistung 900 W Fassungsvermögen Arbeitsdruck 40-70 kPa Maximaler Druck...
  • Seite 3: Geräteübersicht

    • Halten Sie das Äußere des Innentopfs und das Heizelement immer sauber. Benutzen Sie den Innentopf nur in Verbindung mit dem Außentopf und ersetzen Sie den Innentopf nicht durch einen anderen Topf. • Benutzen Sie nur Löffel aus Holz oder Plastik, um die Antihaftbeschichtung nicht zu beschädigen. •...
  • Seite 4: Der Kochprozess Im Überblick

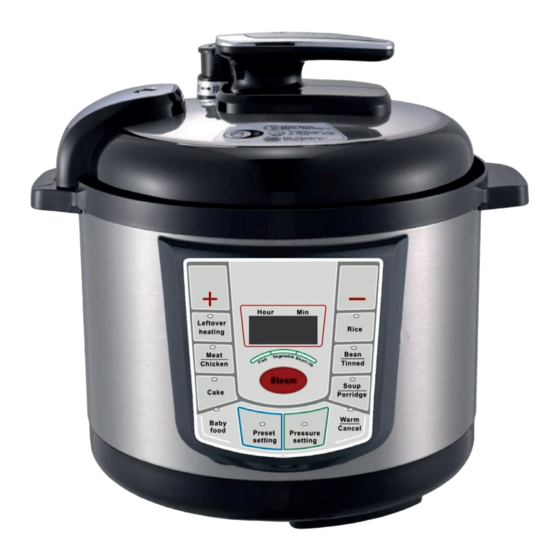
    Geräteübersicht 1 Griffbefestigung 2 Handgriff 3 Deckel 4 Druckventil 5 Auslassventil 6 Schwimmerventil 7 Schwimmer 8 Innentopf 9 Zwischentopf 10 Mittelring 11 Bedienfeld 12 Heizung 13 Kondenswasserbehälter 14 Henkel 15 Außentopf 16 Netzkabel 17 Basis 18 Ventil öffnen 19 Ventil sperren 20 Dichtungsring 21 Aufhängung Der Kochprozess im Überblick...
  • Seite 5: Inbetriebnahme Und Bedienung

    3. Druck ablassen Sobald die Kochzeit abgelaufen ist, startet die Warmhalte-Funktion. Der Druck im Inneren wird automatisch abgelassen. Solange der Topf noch unter Druck steht können Sie den Deckel nicht öffnen. Der Deckel kann erst geöffnet werden wenn der Druck komplett abgelassen wurde. Es dauert eine Weile bis der Druck komplett abgelassen wurde.
  • Seite 6: Tastenfunktionen Und Garzeittabelle

    3. Reinigen Sie die Außenseite des Innentopfs und das Heizelement, bevor Sie den Innentopf in den Außen- topf stellen. Versichern Sie sich, dass der Innentopf korrekt sitzt. 4. Befestigen Sie den Dichtungsring am Deckel, indem Sie ihn nach links und rechts bewegen, bis er fest sitzt. Setzen Sie den Deckel auf und drehen Sie ihn gegen den Uhrzeigersinn, bis er fest sitzt.
  • Seite 7 Programm Voreingestellte Zeit Einstellbare Zeit Temperatur Fisch 8 Minuten 8-16 Minuten 100-105 °C Steam Gemüse 10 Minuten 8-16 Minuten 100-105 °C (Dünsten) Rippchen 15 Minuten 8-16 Minuten 100-105 °C Warm/Cancel (Warmhalten/Stop) 65-75 °C Pressure Keeping (Druck halten) 2-99 Minuten Preset Setting (Startverzögerung) 0.5-24 Stunden Hinweise zu den Programmen und Funktionen Das Gerät verfügt über die folgenden Programme: Rice (Reis), Baby Food (Babybrei), Left heating (Reste erwär-...
  • Seite 8: Programme Und Programmierung

    Programme und Programmierung Verzögerten Start einstellen (PRESET SETTING) Drücken Sie auf PRESET SETTING. Die voreingestellte Startzeit wird angezeigt und das Zahlendisplay blinkt. Mit jedem tastendruck erhöht sich die Zeit um 0.5 Stunden. Ab 10 Stunden erhöht sich die zeit mit jedem Tastendruck um 1 Stunde.
  • Seite 9: Reinigung Und Pflege

    Wichtige Hinweise • Wenn Sie klebrige Lebensmittel zubereitet, sollte das Druckventil nicht angehoben werden, bevor die WARM-Kontrollleuchte nicht mehr blinkt und der Schwimmer nach unten fällt. Andernfalls kann es sein, dass Nahrung in das Ablassventil gerät. • Solange der Topf noch unter Druck steht können Sie den Deckel nicht öffnen. Der Deckel kann erst geöffnet werden wenn der Druck komplett abgelassen wurde.
  • Seite 10: Hinweise Zur Entsorgung

    Problem Mögliche Ursache Lösung Dampf tritt aus dem Der Dichtungsring wurde nicht Bringen Sie den Dichtungsring an. Deckel aus. angebracht. Der Dichtungsring ist schmutzig. Entfernen Sie den Schmutz. Der Dichtungsring ist beschädigt. Tauschen Sie den Ring aus. Der Deckel ist nicht richtig geschlossen. Schließen Sie den Deckel. Dampf tritt aus dem Der Dichtungsring des Reinigen Sie den Ring.
  • Seite 11: Technical Data

    Function of the Controls and Cooking Table 15 Programs and Programming 17 Cleaning and Care 18 Troubleshooting 18 Hints on Disposal 19 Declaration of Conformity 19 Technical Data Item number 10031206 Power supply 220-240 V ~ 50-60 Hz Power consumtion 900 W Capacity Working pressure 40-70 kPa...
  • Seite 12: Product Description

    • It would better keep clean both the outside bottom of the inner pot and the heater surface. Moreover, the inner pot is allowed neither to heat directly over the fire, nor to substitute with other pots. • Do use the wooden or plastic spoons to prevent the non-stick coating from damage. •...
  • Seite 13: Overview Of The Cooking Process

    Product Description 1 Handle 2 Handle Lid 3 Lid 4 Pressure Limit Valve 5 Release valve needle 6 Float valve 7 Float 8 Inner pot 9 Middle pot 10 Middle Ring 11 Control Panel 12 Heater 13 Dew Collector 14 Pot Ear 15 Outer Shell 16 Power Cord, Pin Plug 17 Base...
  • Seite 14: Use And Operation

    3. Pressure Release Process when the pressure-keeping time countdown finished, it will turn to „warm“ function, and also will release the pressure inside automatically (the cooker will be locked automatically when there is pressure inside, so you can‘t open it, you just can open the cooker while all the pressure release completely), this release process is slow, in general,we suggest that you wait for it, or cut off the power, and then cover the lid with a wet towel to accelerate cooling.
  • Seite 15: Function Of The Controls And Cooking Table

    3. Attach the inner pot inside the thermal insulator.First,clean the outer of the inner pot, the surface of the heater and the inside of the thermal insulator ; then attach the inner pot inside the thermal insulator, and make sure they have good connection. 4.
  • Seite 16 Program Set time Time range Temperature range fish 8 minutes 8-16 minutes 100-105 °C Steam Vegetable 10 minutes 8-16 minutes 100-105 °C short rib 15 minutes 8-16 minutes 100-105 °C Warm/Cancel 65-75 °C Pressure keeping setting 2-99 minutes Preset setting 0.5-24 hours Hints on programs and Functions Options has functions: rice, baby food, Meat/Chicken, leftover-heating, bean/Tinned, cake, steam (fish, ve-...
  • Seite 17: Programs And Programming

    Programs and Programming Preset Setting Pressing PRESET SETTING each time, the pertinent preset time shows on the display and its indicator light blinks. At the beginning, each pressing adds by 0.5 hour. When the preset time goes more than 10 hours, each pressing adds by 1 hour.
  • Seite 18: Cleaning And Care

    Important Hints • When sticky food cooked,the pressure limit valve should not be raised before the indicator light of warm keeping stops blinking and the float falls down. Otherwise,the food will go out from the release valve needle. • In general, we suggest you wait for the pressure releasing by itself, but this process will take some time, If you want to accelerate cooling,you can cut off the power,and cover the lid with a wet towel.
  • Seite 19: Hints On Disposal

    Problem Possible Cause Solution The steam leaking from The seal ring is uninstalled Install the seal ring the lid The seal ring has food crumbs Clean the seal ring The seal ring is damaged Change the seal ring The lid is unlocked Lock the lid The steam leaking from the seal ring of the float valve has food...
  • Seite 20: Fiche Technique

    Nettoyage et entretien 27 Identification et résolution des problèmes 27 Information sur le recyclage 28 Déclaration de conformité 28 Fiche technique Numéro d’ a rticle 10031206 Alimentation électrique 220-240 V ~ 50-60 Hz Puissance 900 W Contenance Pression de fonctionnement...
  • Seite 21: Aperçu De L' A Ppareil

    • Toujours maintenir la surface externe de la cuve et l’ é lément chauffant propre. Utiliser la cuve uniquement en association avec le récipient extérieur et ne pas remplacer la cuve par une autre cuve. • Utiliser uniquement des cuillers en bois ou en plastique pour ne pas endommager le revêtement antiadhésif. •...
  • Seite 22: Aperçu Des Phases De Cuisson

    Aperçu de l’appareil 1 Fixation de la poignée 2 Poignée 3 Couvercle 4 Valve de pression 5 Soupape d’ é vacuation 6 Soupape à flotteur 7 Flotteur 8 Cuve 9 Cuve intermédiaire 10 Joint intermédiaire 11 Panneau de commande 12 Élément chauffant 13 Récupérateur d’...
  • Seite 23: Mise En Marche Et Utilisation

    3. Décompression La fonction de maintien au chaud démarre une fois que la durée de cuisson est écoulée. La pression interne est automatiquement évacuée. Tant que la cuve est encore sous pression, il n’ e st pas possible d’ o uvrir le couvercle. Il n’...
  • Seite 24: Fonction Des Touches Et Tableau Des Durées De Cuisson

    3. Nettoyer les surfaces externes de la cuve ainsi que l’ é lément chauffant avant de placer la cuve dans le réci- pient extérieur. 4. Attacher le joint d’ é tanchéité au couvercle en le déplaçant de droite à gauche et inversement jusqu’ à ce qu’il soit bien fixé.
  • Seite 25 Programme Durée paramétrée Durée paramétrable Température 8 minutes 8-16 minutes 100-105 °C 100-105 °C Poisson Légumes 10 minutes 8-16 minutes 100-105 °C Côtelette 15 minutes 8-16 minutes 100-105 °C Warm/Cancel (Maintien au chaud / Stop) Pressure keeping (Maintien de la pression) 2-99 minutes Preset Setting (Démarrage différé) 0.5-24 heures...
  • Seite 26: Programmes Et Programmation

    Programmes et programmation Paramétrage du démarrage différé (PRESET SETTING) Appuyer sur PRESET SETTING. Le temps de démarrage différé s’ a ffiche et l’ é cran d’ a ffichage clignote. Chaque pression de touche augmente la durée de 0,5 heures. À partir de 10 heures, la durée augmente de 1 heure à chaque pression de touche.
  • Seite 27: Nettoyage Et Entretien

    Remarques importantes • Lors de la préparation d’ a liments gluants, ne pas soulever la valve de pression avant que le voyant lumi- neux WARM ne cesse de clignoter et que le flotteur soit redescendu. Sinon, il se peut que de la nourriture s’introduise dans la soupape d’...
  • Seite 28: Information Sur Le Recyclage

    Problème Cause possible Solution De la vapeur s’ é chappe Le joint d’ é tanchéité n’ a pas été Installer le joint. du couvercle correctement installé. Le joint d’ é tanchéité est sale. Enlever la saleté. Le joint d’ é tanchéité est endommagé. Remplacer le joint.
  • Seite 29: Datos Técnicos

    Limpieza y cuidado 36 Detección y resolución de problemas 36 Indicaciones para la retirada del aparato 37 Declaración de conformidad 37 Datos técnicos Número de artículo 10031206 Suministro eléctrico 220-240 V ~ 50-60 Hz Potencia 900 W Capacidad Presión de funcionamiento 40-70 kPa Presión máxima...
  • Seite 30: Descripción Del Aparato

    • Mantenga siempre limpio el exterior de la olla interior y la resistencia. Utilice el recipiente interior solo con la olla exterior y no sustituya el recipiente interior por ningún otro tipo de recipiente. • Utilice solamente cucharas de madera o plástico para evitar dañar el recubrimiento antiadherente. •...
  • Seite 31: Descripción Del Proceso De Cocción

    Descripción del aparato 1 Fijación de las asas 2 Asa 3 Tapa 4 Válvula de presión 5 Válvula de escape 6 Válvula flotador 7 Flotador 8 Recipiente interior 9 Recipiente intermedio 10 Junta central 11 Panel de control 12 Resistencia 13 Recipiente para el agua condensada 14 Asa...
  • Seite 32: Puesta En Marcha Y Uso

    3. Liberar la presión Cuando haya finalizado el tiempo de cocción, se inicia la función de mantenimiento de calor. La presión del interior se libera automáticamente. Mientras el recipiente todavía se encuentre bajo presión, no podrá abrir la tapa. La tapa podrá abrirse una vez se haya liberado toda la presión. Tardará un rato hasta que la presión se libere por completo.
  • Seite 33: Funciones De Los Botones Y Tabla De Tiempos De Cocción

    3. Limpie el exterior de la olla y la resistencia antes de colocar el recipiente interior dentro del exterior. Asegú- rese de que el recipiente interior esté correctamente colocado. 4. Fije la junta de sellado a la tapa moviéndola a derecha e izquierda hasta que quede encajada. Coloque la tapa y gírela en el sentido contrario de las agujas del reloj hasta que encaje completamente.
  • Seite 34 Programa Tiempo Tiempo ajustable Temperatura predeterminado Pescado 8 minutos 8-16 minutos 100-105 °C Steam (Cocinar Verduras 10 minutos 8-16 minutos 100-105 °C al vapor) Costillas 15 minutos 8-16 minutos 100-105 °C Warm/Cancel (mantener calor/ 65-75 °C detener) Pressure keeping (Mantener la presión) 2-99 minutos Preset Setting (Inicio programado) 0.5-24 horas...
  • Seite 35: Programas Y Programación

    Programas y programación Inicio programado (PRESET SETTING) Pulse PRESET SETTING. El tiempo de inicio predeterminado aparece en el display el campo numérico parpa- dea. Cada vez que pulse el botón, el tiempo aumenta 0,5 horas. A partir de 10 horas, el tiempo aumenta 1 hora cada vez que pulse el botón.
  • Seite 36: Limpieza Y Cuidado

    Indicaciones importantes • Cuando prepare alimentos pegajosos, la válvula de presión no debe levantarse antes de que el indicador luminoso WARM deje de parpadear y el flotador caiga hacia abajo. De lo contrario, es posible que los ali- mentos pasen a la válvula de escape. •...
  • Seite 37: Indicaciones Para La Retirada Del Aparato

    Problema Posible causa Solución El vapor se evacua por La junta de sellado no se ha colocado. Monte correctamente la junta de la tapa. sellado. La junta de sellado está sucia. Retire la suciedad. La junta de sellado está desgastada. Sustituya la junta.
  • Seite 38: Dati Tecnici

    Programmi e programmazione 44 Pulizia e manutenzione 45 Ricerca e risoluzione dei problemi 45 Smaltimento 46 Dichiarazione di conformità 46 Dati tecnici Articolo numero 10031206 Alimentazione 220-240 V ~ 50-60 Hz Potenza 900 W Capacità Pressione di esercizio 40-70 kPa...
  • Seite 39: Descrizione Del Prodotto

    • Pulire la parte esterna della pentola interna e l‘elemento riscaldante. Utilizzare la pentola interna solo in combinazione con la pentola esterna e non sostituire la pentola interna con un´altra. • Utilizzare solo cucchiai di legno o di plastica per non danneggiare il rivestimento antiaderente. •...
  • Seite 40: Descrizione Del Processo Di Cottura

    Descrizione del prodotto 1 Fissaggio impugnatura 2 Impugnatura 3 Coperchio 4 Valvola a pressione 5 Valvola di scarico vapore 6 Valvola del galleggiante 7 Galleggiante 8 Pentola interna 9 Pentola intermedia 10 Anello intermedio 11 Pannello dei comandi 12 Cottura 13 Contenitore acqua di condensa 14 Manico 15 Pentola esterna...
  • Seite 41: Messa In Funzione E Utilizzo

    3. Scaricare la pressione Allo scadere del tempo di cottura, si avvia la funzione di mantenimento in caldo. La pressione all‘interno vi- ene scaricata automaticamente. Fintanto che la pentola è ancora sotto pressione, non è possibile aprire il coperchio. Attendere che la pressione si scarichi completamente prima di aprire il coperchio. In alternativa, staccare la spina dalla presa e coprire il coperchio con un panno umido per accelerare il raffreddamento.
  • Seite 42: Tasti Funzione E Tabella Dei Tempi Di Cottura

    3. Pulire la parte esterna della pentola interna e l´elemento riscaldante prima di inserire la pentola interna in quella esterna. Assicurarsi che la pentola interna sia inserita correttamente. 4. Fissare la guarnizione al coperchio ruotandolo a sinistra e a destra fino al suo inserimento. Mettere sopra il coperchio e ruotarlo in senso antiorario fino al suo inserimento.
  • Seite 43 Programma Tempo predefinito Tempo impostabile Temperatura Pesce 8 minuti 8-16 minuti 100-105 °C Steam (Cottura Verdure 10 minuti 8-16 minuti 100-105 °C a vapore) Costole 15 minuti 8-16 minuti 100-105 °C Warm/Cancel (tenere in caldo/stop) 65-75 °C Pressure keeping (mantenere la 2-99 minuti pressione) Preset setting (avvio ritardato)
  • Seite 44: Programmi E Programmazione

    Programmi e programmazione Impostare l´avvio ritardato (PRESET SETTING) Premere PRESET SETTING. Appare l‘orario predefinito per l´avvio e le cifre lampeggiano sul display. Ad ogni pressione di tasto, il tempo aumenta di 0,5 ore. A partire da 10 ore, il tempo aumenta di 1 ora ad ogni pressione di tasto.
  • Seite 45: Pulizia E Manutenzione

    Note importanti • In caso di preparazione di alimenti pastosi, non sollevare la valvola a pressione prima che la spia WARM smetta di lampeggiare e prima che scenda il galleggiante. In caso contrario può accadere che gli alimenti finiscano nella valvola di scarico del vapore. •...
  • Seite 46: Smaltimento

    Problema Causa possibile Soluzione Il vapore fuoriesce dal Non è stata installata la guarnizione. Installare la guarnizione. coperchio. La guarnizione è sporca. Pulire la guarnizione. La guarnizione è danneggiata. Sostituire la guarnizione. Il coperchio non è chiuso Chiudere il coperchio. correttamente.

Inhaltsverzeichnis