Seite 1
Istruzioni per l’uso p. 72 .... Airless Hochdruck-Spritzgerät Airless high-pressure spraying unit Groupe de projection à haute pression Impianto per la verniciatura a spruzzo ad alta pressione Airless ProSpray 27 • 31 Ausgabe 10 / 2003 0508 536 Edition Edizione...
Seite 2
Lösemittel. Vor jeder Inbetriebnahme sind gemäß Betriebsanleitung folgende Punkte zu beachten: 1. Fehlerhafte Geräte dürfen nicht benutzt werden. 2. Wagner-Spritzpistole sichern mit Sicherungshebel am Abzugsbügel 3. Erdung sicherstellen – Der Anschluss muss über eine vor- schriftsmäßig geerdete Schutzkontakt-Steckdose erfolgen.
über den Hochdruckschlauch abge- Nie die Spritzpistole auf sich, Personen und Tiere leitet. Deshalb muss der elektrische Widerstand zwi- richten. schen den Anschlüssen des Hochdruckschlauchs gleich Nie die Spritzpistole ohne Spritzstrahl-Berührungs- oder kleiner ein Megaohm betragen. schutz benutzen. ProSpray 27 • 31...
Seite 5
Arbeiten oder Reparaturen an der elektrischen Ausrüstung Diese nur von einer Elektrofachkraft durchführen lassen. Für unsachgemäße Installation wird keine Haftung über- nommen. Arbeiten an elektrischen Bauteilen Bei allen Arbeiten den Netzstecker aus der Steck- dose ziehen. ProSpray 27 • 31...
Zum besseren Verständnis der Funktion kurz den tech- Luftblasen eingerührt werden. Luftblasen nischen Aufbau. stören beim Spritzen, können sogar zur Betriebsunterbrechung führen. WAGNER ProSpray sind elektrisch angetriebene Hoch- druckspritzgeräte. Viskosität Ein Zahnradgetriebe überträgt die Antriebskraft auf eine Mit dem Gerät ist es möglich, hochviskose Beschich- Kurbelwelle.
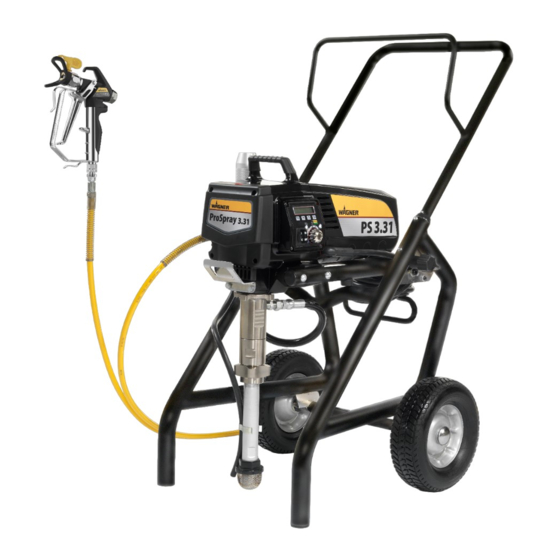
Boden, 120 bar (12 MPa) Betriebsdruck, schallharter Boden. 3.6 Transport Gerät schieben oder ziehen. Handgriff (Abb. 3, Pos. 1) bis zum Anschlag herauszie- hen. Handgriff einfahren – Druckknöpfe (2) an den Hol- men eindrücken, dann Handgriff einfahren. ProSpray 27 • 31...
Achtung 2. Gelb bis 120 bar (12 MPa) 3. Grün von 120 bar (12 MPa) bis 230 bar (23 MPa) 7. Trennöl einfüllen (Abb. 5). Nur soviel einfüllen, dass kein Trennöl in den Beschichtungsstoff-Behälter tropft. SERVICE ProSpray 27 • 31...
Vor Anschluss an das Stromnetz darauf achten, dass die Netzspannung übereinstimmt mit der Angabe auf dem Leistungsschild am Gerät. Sobald der Netzstecker angeschlossen ist, leuchtet die grüne Kontrollleuchte. Sie befindet sich unter der Leuchtanzeige der elektronischen Druckeinstellung. ProSpray 27 • 31...
Beschichtungsstoff verdünnen. 6. Ansaugrohr und Rücklaufschlauch im Beschichtungs- stoff eingetaucht lassen oder in ein entsprechendes Reinigungsmittel einschwenken. Beim Einsatz von schnelltrocknenden – oder Zweikomponenten-Beschich- tungsstoff, Gerät unbedingt innerhalb der Verarbeitungszeit mit geeignetem Achtung Reinigungsmittel durchspülen. ProSpray 27 • 31...
8. Geeignetes Reinigungsmittel einige Minuten im Kreislauf pumpen. 9. Entlastungsventil schließen, Ventilstellung SPRAY ( p Spritzen). 10. Abzugsbügel an der Spritzpistole ziehen. 11. Restliches Reinigungsmittel in einen offenen Behälter pumpen, bis das Gerät leer ist. 12. Gerät ausschalten OFF (AUS). ProSpray 27 • 31...
7. Stützscheibe (5) an die Stützfeder (3) anlegen. Filter- 2. Griff (2) in das Pistolengehäuse einschrauben und an- patrone (2) über die Stützfeder schieben. ziehen. 8. Filtergehäuse (1) einschrauben und mit Bandschlüssel 3. Schutzbügel (1) einrasten. bis zum Anschlag anziehen. ProSpray 27 • 31...
Entlastungsventil demontieren und reinigen oder den Rücklaufschlauch, wenn austauschen. das Entlastungsventil in Stel- lung SPRAY (p Spritzen) steht. Packungen verklebt oder Packungen ausbauen, reinigen oder austauschen. verschlissen. Ventilkugeln verschlissen. Ventilkugeln ausbauen und austauschen. Ventilsitze verschlissen. Ventilsitze ausbauen und austauschen. ProSpray 27 • 31...
Seite 15
Druckregelknopf drehen bis ein zufriedenstellendes Spritzbild erreicht wird. Zu niedrige Fördermenge. Alle Filter reinigen oder austauschen. Beschichtungsstoff hat zu hohe Entsprechend Herstellerangabe verdünnen. Viskosität. Gerät verliert an Leistung Druckeinstellung ist zu niedrig. Druckregelknopf auf höhere Ziffer drehen. ProSpray 27 • 31...
Teile fassen. Verteilerblock (6). Mitnehmer aufschieben und mit Gefahr Maschinenfett einstreichen. 6. Bohrung in der Ventilwelle (8) und im Entlastungsven- tilgriff (2) in Übereinstimmung bringen. 7. Kerbstift (1) einsetzen und Entlastungsventilgriff in Stellung PRIME/SPRAY stellen. ProSpray 27 • 31...
Seite 17
Teile austauschen. Verschlissener Einlass- ventilsitz (7), falls er auf einer Seite unbenützt ist, um- gedreht einbauen. 10. Montage in umgekehrter Reihenfolge durchführen. O-Ring (5) mit Maschinenfett einstreichen und auf richtigen Sitz im Einlassventilgehäuse (2) achten. ProSpray 27 • 31...
Achtung 11. Aus der oberen und unteren Packung die Transport- vorrichtung entfernen. Die Transportvorrichtung aus der oberen Packung wird zur Montage des Kolbens benötigt. 12. Obere Packung (8) und untere Packung (9) mit Ma- schinenfett einstreichen. ProSpray 27 • 31...
Seite 19
23. Gewinde des oberen Gehäuses (6) mit Maschinenfett einstreichen. Oberes Gehäuse aus dem Schraubstock herausneh- men. 24. Oberes Gehäuse (6) in das Getriebegehäuse ein- schrauben. Verbindungsbolzen (2) in den Pleuel (3) und den Kolben (4) einsetzen und mit dem Spiralring (1) sichern. ProSpray 27 • 31...
Zubehör und Ersatzteile 12. Zubehör und Ersatzteile 12.1 Zubehör für ProSpray 27 • 31 (Zubehörbild, siehe Seite 96) Pos. Best. Nr. Benennung Pos. Best. Nr. Benennung 0149 040 Spritzpistole G 08 0034 030 Doppelstutzen zum Kuppeln von (Ausführung in Aluminium) Hochdruckschläuchen...
Länge 100 cm Bestell-Nr. 0096 015 Länge 30 cm Bestell-Nr. 0999 321 Länge 200 cm Bestell-Nr. 0096 016 Länge 45 cm Bestell-Nr. 0999 322 Länge 300 cm Bestell-Nr. 0096 017 Länge 60 cm Bestell-Nr. 0999 323 ProSpray 27 • 31...
0.043 / 1.10 0090 543 1088 543 1006 543 50° 0.052 / 1.30 0090 552 1088 552 1006 552 Spritzbreite bei etwa 30 cm Abstand zum Spritzobjekt und 100 bar (10 MPa) Druck mit Kunstharzlack 20 DIN-Sekunden. ProSpray 27 • 31...
Seite 26
The operating instructions state that the following points must always be observed before starting up: 1. Faulty units must not be used. 2. Secure WAGNER spray gun using the safety catch on the trigger. 3. Ensure that the unit is properly earthed. The connection must take place through a correctly earthed two-pole and earth socket outlet.
Seite 27
11.2 Inlet and outlet valve........38/39 Functioning of the unit ........11.3 Packings ............40/41 Legend for explanatory diagram 11.4 ProSpray 27 • 31 connection diagram ..ProSpray 27 • 31 .......... Explanatory diagram ProSpray 27 • 31 ..Accessories and spare parts ......
For this reason the electric resistance between the connections of the high-pressure hose must be equal or lower than 1 MΩ. For reasons of function, safety and durability use only original WAGNER high-pressure hoses. ProSpray 27 • 31...
Seite 29
Work or repairs on the electrical equipment Only have this work carried out by a qualified electrician. No liability will be taken for incorrect installation. Working on electrical components Remove the mains plug from the socket for all such works. ProSpray 27 • 31...
Description of unit 3.3 Legend for explanatory diagram ProSpray 27 • 31 Spray gun Excess-current circuit breaker High-pressure hose ON/OFF switch and pressure regulator knob Extendable handle Filter Unit connecting line Suction tube Relief valve Return hose Lever position vertical – PRIME ( k circulation) Filling orifice for separating oil (separating oil prevents Lever position horizontal –...
Pushing or pulling the unit Pull out the handle (Fig. 3, Item 1) until it will come no further. Insert the handle – push the buttons (2) on the spars, and then push in the handle. ProSpray 27 • 31...
7. Fill in separating oil (Fig. 5). Do not fill in too much se- 3. Green – from 120 bar (12 MPa) to 230 bar (23 MPa) parating oil, i.e. ensure that no separating oil drips in- to the coating material container. SERVICE ProSpray 27 • 31...
The green indicating light illuminates as soon as the po- wer plug is connected. It is located under the illuminating display of the electronic pressure adjuster. ProSpray 27 • 31...
– increase the operating If fast-drying or two-component coa- pressure or dilute the coating material. ting material is used, ensure that the unit is rinsed with a suitable cleaning agent within the processing time. Attention ProSpray 27 • 31...
9. Close the relief valve, valve position SPRAY (p spray). 10. Pull the trigger of the spray gun. 11. Pump the remaining cleaning agent into an open container until the unit is empty. 12. Switch the unit OFF. ProSpray 27 • 31...
Screw in grip (2) into the gun housing and tighten. (3). Slide the filter cartridge (2) over the bearing spring. Slot in protective guard (1). 8. Screw in the filter housing (1) and tighten it as far as possible with the strap wrench. ProSpray 27 • 31...
SPRAY ( p spray) position. Packings sticky or worn. Remove and clean or replace packings. Valve balls worn. Remove and replace valve balls. Valve seats worn. Remove and replace valve seats. ProSpray 27 • 31...
Seite 39
Piston is worn. Remove and replace piston. Increased pulsation at Incorrect high-pressure hose Only use WAGNER original-high-pressure hoses the spray gun type. in order to ensure functionality, safety and durability. Tip worn or too large. Replace tip.
Danger 6. Bring the hole in the valve shaft (8) and in the relief valve grip (2) into alignment. 7. Insert the grooved pin (1) and set the relief valve grip to the position PRIME/SPRAY. ProSpray 27 • 31...
Seite 41
If the worn inlet valve seat (7) is unused on one side, install it the other way around. 10. Carry out installation in the reverse order. Lubricate O-ring (5) with machine grease and ensure proper seating in the inlet valve housing (2). ProSpray 27 • 31...
11. Remove the transportation devices from the upper and lower packings. The transportation device from the upper packing is re- quired for installation of the piston. 12. Lubricate upper packing (8) and lower packing (9) with machine grease. ProSpray 27 • 31...
Seite 43
Remove upper housing from the vice. 24. Screw upper housing (6) into the gear unit housing. Insert connection pin (2) into the connecting rod (3) and piston (4) and secure with the spiral ring (1). ProSpray 27 • 31...
Accessories and spare parts 12. Accessories and spare parts 12.1 Accessories for ProSpray 27 • 31 (accessories illustration, see Page 96) Item Order No. Description Item Order No. Description 0149 040 Spray gun G 08 9984 510 High-pressure hose DN 4 mm, 7.5 m...
Accessories and spare parts 12.3 Spare parts list of drive (spare parts diagram, see Page 98) ProSpray 27 ProSpray 31 Item Order No. Order No. Description 0507 772 0507 772 Screw 0508 698 0508 698 Front cover 0507 767 0507 767...
0999 321 Length 100 cm Order no. 0096 015 Length 45 cm Order no. 0999 322 Length 200 cm Order no. 0096 016 Length 60 cm Order no. 0999 323 Length 300 cm Order no. 0096 017 ProSpray 27 • 31...
0090 543 1088 543 1006 543 50° 0.052 / 1.30 0090 552 1088 552 1006 552 Spray width at about 30 cm to the object and 100 bar (10 MPa) pressure with synthetic-resin paint 20 DIN seconds. ProSpray 27 • 31...
Seite 50
Avant toute mise en service, respecter les points suivants con- formément aux instructions de service: Ne jamais utiliser un équipement défectueux Verrouiller le pistolet Wagner par le levier de sécurité à la gâchette Assurer la mise à la terre correcte. La prise de réseau doit être équipée d’un contact de protection (terre).
Seite 51
Domaine d'utilisation ........11.2 Clapet d'admission et de refoulement ..62/63 Produits de revêtement ........ 11.3 Garnitures ............64/65 11.4 Schéma électrique ProSpray 27 • 31 .... Description du matériel ......Accessoires et pièces de rechange ..Le procédé Airless ........
En cas de blessure de la peau par l’in- jection de peintures ou de solvants, consultez sans retard un médecin. Renseignez le médecin sur la na- ture de la peinture ou du solvant utilisés. ProSpray 27 • 31...
Seite 53
Ne jamais nettoyer le groupe à l’aide d’un jet d’eau ou de vapeur sous pression. Danger Travaux et réparations sur l’équipement électrique Ces interventions sont réservées au personnel spécia- lisé. Nous déclinons toute responsabilité dans le cas d’une installation incorrecte. ProSpray 27 • 31...
Pour mieux comprendre le fonctionnement, voici une Bien remuer le produit, avant l’utilisation. brève description de la conception technique: WAGNER ProSpray est un matériel de projection par Attention: Si le produit est remué avec un haute pression à entraînement électrique.
(12 MPa), sol réverbérant. 3.6 Transport Pousser ou tirer le matériel Sortir la poignée (fig. 3, pos. 1) en butée. Pour rentrer la poignée - enfoncer les boutons (2) sur les tubes du châs- sis, puis rentrer la poignée. ProSpray 27 • 31...
7. Remplir l'huile de balayage (fig. 5) dans le compar- 3. Vert de 120 bar (12 MPa) jusqu'à 230 bar (23 MPa) timent sur le côté frontal du matériel. Eviter le trop- plein qui pourrait s'écouler dans le réservoir du pro- duit de revêtement. SERVICE ProSpray 27 • 31...
Dès que la fiche de secteur est branchée, le voyant vert de contrôle s'allume. Il se trouve sous le voyant lumineux du réglage électronique de la pression. ProSpray 27 • 31...
Lors de la mise en œuvre de peintures à augmenter la pression de projection soit séchage rapide ou d'un produit à deux diluer davantage le produit. composants, rincer sans faut le groupe à l'intérieur du temps d'utilisation avec Danger le produit de nettoyage adéquat. ProSpray 27 • 31...
9. Fermer la vanne de décharge, position SPRAY ( p projection). 10. Tirer la gâchette du pistolet. 11. Pomper les restes du produit de nettoyage dans un récipient ouvert pour vider le matériel. 12. Arrêter le matériel OFF (ARRET). ProSpray 27 • 31...
3. Emboîter la garde de protection (1) placer. 7. Appliquer la rondelle d'appui (5) contre le ressort (3). Glisser la cartouche (2) sur le ressort. 8. Visser le corps de filtre (1) et serrer à fond avec la clé à bande. ProSpray 27 • 31...
SPRAY ( p projection). Garnitures collées ou usées. Démonter et nettoyer ou remplacer les garnitures. Billes des soupapes usées. Démonter et remplacer les billes. Sièges des soupapes usées. Démonter et remplacer les sièges. ProSpray 27 • 31...
Seite 63
Débit trop faible. Nettoyer ou remplacer tous les filtres. La viscosité du produit est Diluer suivant les prescriptions du fournisseur. trop élevée. Le rendement diminue Pression trop basse. Tourner le bouton sur un chiffre plus élevée. ProSpray 27 • 31...
(6). Engager l'entraîneur et l'enduire de graisse. 6. Faire coïncider les alésages de l'axe (8) et de la poig- née de vanne (2). 7. Monter la goupille cannelée (1) et tourner la poignée de vanne en position PRIME/SPRAY. ProSpray 27 • 31...
Seite 65
Si le siège (7) est usé d'un côté seulement, le tourner. 10. Effectuer le remontage en ordre inverse. Graisser le joint torique (5) et veiller à sa position correcte dans le corps (2). ProSpray 27 • 31...
Eviter d’endommager le boîtier supérieur. Attention 11. Enlever le moyen de manutention des garnitures supérieures et inférieures neuves. Ce dispositif de la garnitures supérieur sert ensuite au montage du piston. 12. Graisser les garnitures supérieure (8) et inférieure (9). ProSpray 27 • 31...
Seite 67
23. Graisser le filetage du boîtier supérieur (6). Sortir le boîtier supérieur de l'étau. 24. Visser le boîtier supérieur (6) dans le carter d'entraî- nement. Monter la goupille (2) dans la bielle (3) et le piston (4). L'assurer par la bague spiralée (1). ProSpray 27 • 31...
1006 543 importantes 50° 0.052 / 1.30 0090 552 1088 552 1006 552 Largeur du jet à une distance de 30 cm environ du support, pression de projection 100 bar (10 MPa), laque synthétique de 20 secondes-DIN. ProSpray 27 • 31...
Seite 74
2. Attivare il dispositivo di sicurezza dell’aerografo WAGNER con la leva che si trova vicino alla staffa a grilletto. 3. Assicurarsi del collegamento alla messa a terra. La presa di corrente deve essere munita di un contatto di protezione per la messa a terra in conformità...
Seite 75
11.2 Valvola di entrata e di scarico ......86/87 Metodo Airless ..........11.3 Guarnizioni ............88/89 Funzionamento dell’apparecchio ....11.4 Schema elettrico ProSpray 27 • 31 ....Leggenda della figura illustrativa ProSpray 27 • 31 .......... Accessori e ricambi ........Figura illustrativa ProSpray 27 • 31 ....
Pertanto la resistenza elettrica tra i raccordi del tubo flessibile ad al- ta pressione deve avere un valore minore o uguale ad 1 MΩ. ProSpray 27 • 31...
Seite 77
Il recipiente deve essere collegato a terra. Pulizia dell'apparecchio Pericolo di cortocircuito dovuto alla pene- trazione di acqua! Non pulire mai l'apparecchio con unità a getto liquido o a getto di vapore ad alta Pericolo pressione. ProSpray 27 • 31...
WAGNER ProSpray sono impianti per la verniciatura a Mescolare bene il materiale di copertura prima di iniziare a spruzzo ad alta pressione azionati elettricamente.
Descrizione dell’apparecchio 3.3 Leggenda della figura illustrativa ProSpray 27 • 31 Aerografo Interruttore di protezione contro le sovracorrenti Tubo flessibile ad alta pressione Interruttore ON/OFF e manopola di regolazione Impugnatura estraibile Filtro Cavo di allacciamento dell'apparecchio Tubo di aspirazione Valvola di sfiato Apertura di rifornimento dell'olio distaccante (l'olio Posizione verticale della leva –...
1,60 m dal suolo, pressione di esercizio 120 bar (12 MPa), suolo ad elevata impedenza acustica. 3.6 Trasporto Spingere o tirare l'apparecchio. Estrarre completamente l'impugnatura (fig. 3, pos. 1). Reinserire l'impugnatura – premere i pulsanti (2) sui tubo- lari e quindi inserire l'impugnatura. ProSpray 27 • 31...
2. Giallo fino a 120 bar (12 MPa) quantità d'olio distaccante tale da non farlo sgoccio- 3. Verde da 120 bar (12 MPa) a 230 bar (23 MPa) lare nel serbatoio del materiale di copertura. SERVICE ProSpray 27 • 31...
Inserendo la spina di collegamento in rete, la lampada spia verde si accende. Si trova sotto l'indicatore lumino- so della regolazione elettronica della pressione ProSpray 27 • 31...
8. Aumentare la pressione ruotando lentamente la relati- dell'apparecchio occorre utilizzare esclusivamen- va manopola di regolazione su valori maggiori. te tubi flessibili ad alta pressione WAGNER. Controllare la figura di spruzzatura, aumentare la pressione fino ad ottenere una nebulizzazione corret-...
9. Chiudere la valvola di sfiato, posizione della valvola SPRAY ( p spruzzatura). 10. Azionare il grilletto dell'aerografo. 11. Pompare il detergente residuo in un recipiente aperto fino a svuotare completamente l'apparecchio. 12. Spegnere (OFF) l'apparecchio. ProSpray 27 • 31...
Applicare la cartuccia filtrante (2) sulla molla di spinta. 3. Innestare in posizione la staffa di protezione (1). 8. Avvitare la scatola del filtro (1) e serrarla completa- mente con una chiave a nastro. ProSpray 27 • 31...
SPRAY ( p spruzzatura). Guarnizioni incollate o usurate. Smontare le guarnizioni e pulirle o sostituirle. Sfere delle valvole usurate. Smontare e sostituire le sfere delle valvole. Sedi delle valvole usurate. Smontare e sostituire le sedi delle valvole. ProSpray 27 • 31...
Seite 87
Tubo ad alta pressione di tipo Per ragioni di funzionalità, sicurezza e durata sull'aerografo errato. dell'apparecchio occorre utilizzare esclusivamente tubi flessibili ad alta pressione WAGNER. Ugello usurato o troppo grande. Sostituire l'ugello. Pressione eccessiva. Ruotare la manopola di regolazione della pressione su un valore minore.
10. Manutenzione 10.1 Manutenzione generale L’apparecchio deve essere sottoposto a manutenzione una volta all’anno dal personale di assistenza WAGNER. 1. Controllare se i tubi flessibili ad alta pressione, il cavo di alimentazione elettrica e la spina sono danneggiati. 2. Controllare se la valvola di entrata e di scarico ed il fil- tro sono usurati.
Seite 89
(7) rigirata. 10. Eseguire il montaggio in successione inversa. Spalmare grasso per macchine sull'O-Ring (5) e veri- ficare il suo corretto posizionamento nel corpo della valvola di entrata (2). ProSpray 27 • 31...
11. Togliere il dispositivo di trasporto dalle guarnizioni superiore ed inferiore. Il dispositivo di trasporto della guarnizione superiore è necessario per montare il pistone. 12. Spalmare grasso per macchine sulla guarnizione su- periore (8) e sulla guarnizione inferiore (9). ProSpray 27 • 31...
Seite 91
Togliere il corpo superiore dalla morsa. 24. Avvitare il corpo superiore (6) nella scatola del ridut- tore. Applicare la spina di collegamento (2) nella biella (3) e nel pistone (4) e bloccarla con l'anello a spirale (1). ProSpray 27 • 31...
1006 543 50° 0.052 / 1.30 0090 552 1088 552 1006 552 Larghezza di spruzzatura a circa 30 cm di distanza dall'oggetto da rivestire ed alla pressione di 100 bar (10 MPa) con vernice sintetica 20 DIN-s. ProSpray 27 • 31...
Ersatzteilbild Spare parts diagram Illustration des pièces de rechange Figura dei ricambi ProSpray 27 • 31 d Hochdruck-Spritzgerät g High-pressure spraying equipment f Matériel de projection i Apparecchio di verniciatura a spruzzo à haute pression ad alta pressione ProSpray 27 • 31...
Ersatzteilbild Spare parts diagram Illustration des pièces de rechange Figura dei ricambi ProSpray 27 • 31 d Antrieb g Drive f Entraînement i Sistema di azionamento ProSpray 27 • 31...
Ersatzteilbild Spare parts diagram Illustration des pièces de rechange Figura dei ricambi ProSpray 27 • 31 d Farbstufe g Paint section f Pompe à peinture i Stadio della vernice ProSpray 27 • 31...
Ersatzteilbild Spare parts diagram Illustration des pièces de rechange Figura dei ricambi ProSpray 27 • 31 d Hochdruckfilter g High-pressure filter f Filtre haute pression i Filtro ad alta pressione ProSpray 27 • 31...
Ersatzteilbild Spare parts diagram Illustration des pièces de rechange Figura dei ricambi ProSpray 27 • 31 d Wagen g Carriage f Chariot i Carrello ProSpray 27 • 31...
254 66 Helsingborg Denmark Hong Kong Sweden Phone 43632811 Phone 852 / 865 1802 Phone 042/150020 Fax 43430528 Fax 852 / 529 1753 Fax 042/150035 A list of international WAGNER distributors is available on request 02 / 03 ProSpray 27 • 31...
Der Betreiber ist verpflichtet, das Gerät zur Prüfung anzumelden. manufacturer´s liability can fully or partially be inapplicable; Wenden Sie sich bitte an die Kundendienststellen der Firma WAGNER. in extreme cases usage of the entire device (Diese Vorschrift gilt nur für Deutschland).
Con gli accessori e le parti di ricambio originali WAGNER avete la officiels concernés (syndicats corporatifs et inspection du garanzia che tutte le norme di sicurezza sono soddisfatte.
Date: 06. 03. 2003 Data: 06. 03. 2003 Geschäftsführer Unterschrift Vizepräsident der internationalen Verkäufe Executive Officer Signature Vice President of International Sales Directeur Signature Vice-président des ventes internationales Dirigente affaristico Firma Vice presidente delle vendite internazionali ProSpray 27 • 31...