Olimpia splendid NEXYA S4 E DUCT 9 Handbuch Für Installation, Gebrauch Und Wartung
Vorschau ausblenden
Andere Handbücher für NEXYA S4 E DUCT 9:
- Hinweise für die verwendung und pflege (168 Seiten)

Verwandte Anleitungen für Olimpia splendid NEXYA S4 E DUCT 9


Inhaltszusammenfassung für Olimpia splendid NEXYA S4 E DUCT 9
- Seite 1 NEXYA S4 E DUCT 9 NEXYA S4 E DUCT 12 Attenzione: rischio di incendio Caution: risk of fire Attention : risque d'incendie Achtung: Brandrisiko Atención: riesgo de incendio Atenção: risco de incêndio Let op: brandgevaar Προσοχή: κίνδυνος πυρκαγιάς...
- Seite 2 AVVERTENZE 1. L’apparecchio contiene gas R32 (classificazione infiammabilità A2L) 2. Rispettare le leggi vigenti (ad es. la normativa nazionale sul gas) 3. Prestare attenzione al fatto che il refrigerante R32 è inodore 4. Prestare attenzione al fatto che gli apparecchi con gas refrigerante infiammabile non si posso installare in stanze troppo piccole.
- Seite 3 AVERTISSEMENTS 1. L’appareil contient du gaz R32 (classement d’inflammabilité A2L) 2. Respecter les lois en vigueur (ex. loi nationale sur le gaz) 3. Attention : le réfrigérant R32 est inodore 4. Faire attention au fait que les appareils à gaz réfrigérant inflammable ne doivent pas être installés dans des pièces trop petites.
-
Seite 4: General Information
OLIMPIA without the express authorization l’autorisation expresse de la société an Dritte ohne ausdrückliche SPLENDID. of the manufacturer, OLIMPIA OLIMPIA SPLENDID. Genehmigung der Firma OLIMPIA Le macchine possono subire SPLENDID. Les machines peuvent subir des SPLENDID. aggiornamenti e quindi presentare mises à... - Seite 5 Einzelteilen bitte ausschließlich e s c l u s i v a m e n t e r i c a m b i SPLENDID parts. exclusivement des pièces de original OLIMPIA SPLENDID- originali OLIMPIA SPLENDID. rechange originales OLIMPIA Ersatzteile verwenden.
- Seite 6 Rendere note a tutto il personale The following instructions must Communiquer ces instructions Das für den Transport und interessato al trasporto ed be made known to all personnel à tout le personnel concerné par für die Maschineninstallation all’installazione della macchina involved in the machine’s tran- le transport et l’installation de la zuständige Personal ist von...
- Seite 7 Fate attenzione che l’acqua non Do not allow water to run into Veiller à ce qu’il n’entre pas d’eau Achten Sie darauf, dass kein entri nelle parti elettriche electric parts. dans les parties électriques Wasser in elektrische Teile Potrebbe provocare incendi, guasti It may cause fire, failure of the Cela pourrait provoquer des gelangt.
- Seite 8 SMALTIMENTO DISPOSAL ELIMINATION ENTSORGUNG Il simbolo sul prodotto o sulla This symbol on the product or Ce symbole apposé sur le produit Dieses Symbol auf dem Produkt confezione indica che il prodotto its packaging indicates that the ou son emballage indique que oder seiner Verpackung weist non deve essere considerato come appliance cannot be treated as...
- Seite 9 SIMBOLOGIA SYMBOLS SYMBOLOGIE BILDSYMBOLE I pittogrammi riportati nel seguente The pictograms in the next chapter Les pictogrammes reportés au chapitre Die im folgenden Kapitel aufgeführten capitolo consentono di fornire provide the necessary information suivant permettent de fournir rapidement Bildsymbole liefern schnell und rapidamente ed in modo univoco for correct, safe use of the machine et de manière univoque les informations...
-
Seite 10: Bestimmungs-Gemässe Verwendung
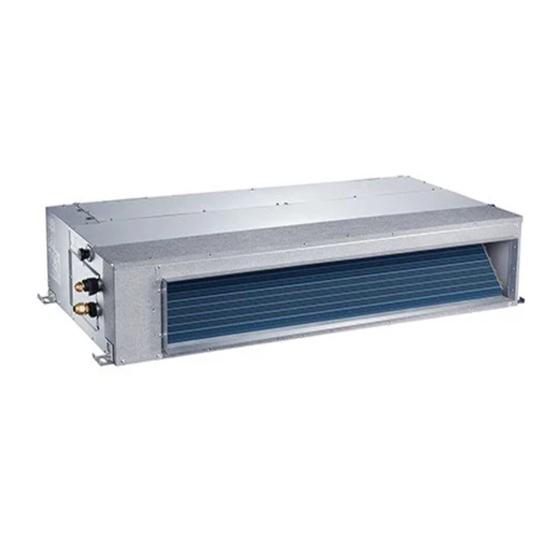
(Außen- und Inneneinheit), der persone, cose o animali esulano OLIMPIA SPLENDID of any liability. aux personnes, aux biens ou aux über die beschriebene Verwendung la OLIMPIA SPLENDID da ogni animaux dégage la société OLIMPIA hinausgeht, gilt als nicht zulässig und... - Seite 11 COMPONENTI DELL'UNITÀ INDOOR UNIT PARTS COMPOSANTS DE L’UNITE KOMPONENTEN DER INTERNA INTERNE INNENEINHEIT A - Uscita dell'aria A - Air outlet A - Sortie de l’air A - Luftaustritt B - Ingresso dell'aria B - Air inlet B - Entrée de l’air B - Lufteintritt C - Armadio elettrico di C - Electric control cabinet...
- Seite 12 1. Verifiche all'area 1. Checks to the area 1. Contrôles de la zone 1. Überprüfungen des Bereiches Prima di iniziare a lavorare Prior to beginning work Avant de commencer su impianti contenenti on systems containing à t r a v a i l l e r s u r d e s Vo r d e m B e g i n n d e r refrigeranti infiammabili, flammable refrigerants,...
- Seite 13 adeguatamente sigillata 5.Presence of fire correctement scellé ou keine Funken verursacht, extinguisher o intrinsecamente sicura. intrinsèquement sûr. angemessen versiegelt If any hot work is to beziehungsweise eigensicher 5. Presenza di estintori be conducted on the 5. Présence d’extincteurs ist. Qualora sia necessario refrigeration equipment S ’...
- Seite 14 operazioni. work is carried out. ventilation doit disperser de Stellen Sie eine konstante La ventilazione deve The ventilation should façon sûre tout réfrigérant Belüftung während des disperdere in modo safely disperse any libéré et, si possible, Zeitraums der Eingriffe sicuro ogni refrigerante released refrigerant l’éjecter à...
- Seite 15 fabbricati con materiali refrigerant containing matériaux intrinsèquement denn, die Komponenten intrinsecamente resistenti components, unless résistants à la corrosion s i n d a u s e i g e n s i c h e r alla corrosione o siano t h e c o m p o n e n t s ou sont protégés de façon korrosionsbeständigen...
- Seite 16 d a l l ' a p p a r e c c h i o worked upon prior to doivent être débranchées trennen. Sollte es unbedingt i n f u n z i o n e p r i m a any removal of sealed de l’appareil en fonction e r f o r d e r l i c h s e i n , d i e...
- Seite 17 L'apparecchio deve The appliance should L'appareil doit être Das Gerät muss in e s s e r e i n s t a l l a t o , be installed, operated installé, utilisé et gardé einem Raum mit einer azionato e conservato and stored in an area dans un local d’une...
- Seite 18 SEZIONE DI INSTALLAZIONE INSTALLATION SECTION SECTION D’INSTALLATION INSTALLATIONSABSCHNITT Precauzioni Precautions Précautions Vorsichtsmaßnahmen ■ Seguire le normative locali, ■ Adhere to the local, domestic and ■ Suivre la réglementation locale, ■ Befolgen Sie die geltenden örtlichen, nazionali ed internazionali vigenti. international regulations in force. nationale et internationale en vigueur.
-
Seite 19: Vorsichtsmassnahmen
ATTENZIONE ATTENTION ATTENTION ACHTUNG Non installare l'unità in luoghi Do not install the unit in places Ne pas installer l'unité dans des Installieren Sie das Gerät nicht an dove possano propagarsi gas where flammable gases may lieux où des gaz inflammables Orten, an denen sich brennbare infiammabili. - Seite 20 ACCESSORI ACCESSORIES ACCESSOIRES ZUBEHÖR Controllare che nell'imballo vi Check that the package contains the S’assurer que l’emballage contient Kontrollieren Sie, dass in der siano contenuti gli accessori per installation accessories: les accessoires pour l’installation : Verpackung die Zubehörteile für die l'installazione: Installation enthalten sind: ACCESSORI...
-
Seite 21: Indoor Unit
INSTALLAZIONE DELL’UNITÀ I N S TA L L AT I O N O F T H E INSTALLATION DE L’UNITÉ I N S T A L L A T I O N D E R INTERNA INDOOR UNIT INTERNE INNENEINHEIT Installazione del corpo dell’unità... - Seite 22 Nuovi edifici e soffitti New buildings and ceilings Nouveaux bâtiments et plafonds Neue Gebäude und Decken Usare viti tipo Fischer, mattoni forti Use Fischer type screws, strong Utiliser une vis du type Fischer, des Verwenden Sie Schrauben vom Typ di terracotta. terracotta bricks.
-
Seite 23: Manutenzione
LUOGO DI INSTALLAZIONE INSTALLATION PLACE LIEU D’INSTALLATION INSTALLATIONSORT > 11.8in(30cm) Strong and durable ceiling >0.8in(2cm) Indoor unit Right Left side side > 0.8in(2cm) Service access Ceiling >4in(10cm) >11.8in(30cm) Floor SPAZIO PER MAINTENANCE SPACE ESPACE POUR PLATZ FÜR DIE WARTUNG MANUTENZIONE MAINTENANCE >... - Seite 24 Air inlet dimensions Air lter Descending ventilation opening and mounted hook Air lter Electric control box (unit: mm/inch) Outline dimension air outlet opening size air return opening size Size of mounted lug MODEL (Btu/h) 9K/12K 700/27.6 200/7.9 506/19.9 450/17.7 152/6 537/21.1 186/7.3 599/23.6...
- Seite 25 Installazione del corpo principale Unit main body installation Installation du corps principal Installation des Hauptgeräts der dell’unità de l’unité Einheit 1. Installare il filtro dell’aria come 1. Install the air filter as specified in 1. Installer le filtre à air de la façon 1.
- Seite 26 Regolare la direzione dell'ingresso Adjust the air inlet direction Régler la direction de l’entrée Regulieren Sie die Richtung des dell'aria (dal lato posteriore verso (from rear side to under-side). de l’air Lufteintritts (von der Rückseite il lato inferiore). (de l’arrière vers le bas). zur Unterseite hin).
- Seite 27 Installazione del condotto d'aria fresca Fresh air duct installation Installation du conduit d'air frais Installation des Frischluftkanals 1. Rimuovere il pannello di 1.Take off the ventilation panel and 1. Enlever le panneau de ventilation 1. Entfernen Sie die Lüftungsblende ventilazione e la flangia. flange.
- Seite 28 Manutenzione pompa: Pump maintainance: Maintenance pompe : Pumpenwartung: 1- Entfernen Sie die vier Schrauben 1- Rimuovere le quattro viti dalla 1- Remove four screws from the 1- Enlever les quatre vis de la pompe von der Ablasspumpe. pompa di scarico. drain pump.
- Seite 29 ■ Test di drenaggio ■ Drainage test ■ Test de drainage ■ Entwässerungstest - Dopo aver completato il - After having completed the - Après avoir terminé le branchement - Führen Sie nach fertigem Anschluss collegamento delle tubazioni scarico connection of the condensate drain des tubes d’évacuation condensation, der Kondenswasser-Abflussleitungen condensa, eseguire un test di...
- Seite 30 PROVA DI FUNZIONAMENTO OPERATION TEST ESSAI DE FONCTIONNEMENT BETRIEBSTEST - Il test deve essere eseguito solo - The test should be performed only - Le test doit être effectué seulement - Der Test darf erst nach Abschluss dopo aver completato l’installazione. after completing the installation.
- Seite 31 CABLAGGIO WIRING CÂBLAGE VERKABELUNG Per il cablaggio, fare riferimento al For wiring, refer to the user manual Pour le câblage, l’on se reportera Für die Verkabelung nehmen Sie manuale utente allegato all'unità include in outdoor unit. au manuel utilisateur joint à l’unité Bezug auf das der Außeneinheit esterna.
- Seite 32 OPERAZIONI MANUALI MANUAL OPERATIONS OPERATIONS MANUELLES MANUELLE ARBEITEN Manual button LED display Operation indicator Infrared receiver Alarm indicator Timer indicator PRE-DEF (pre-heating/defrost) indicator Questo pannello di This display panel on the Ce panneau d’affichage Dieser Anzeigenschirm auf visualizzazione sull'unità indoor unit can be used to sur l’unité...
- Seite 33 MANUTENZIONE E PULIZIA DEL FILTER MAINTENANCE AND MAINTENANCE ET NETTOYAGE F I LT E R WA R T U N G U N D – FILTRO CLEANING DU FILTRE REINIGUNG AVVERTENZA WARNING AVERTISSEMENT WARNHINWEIS - Non procedere con la pulizia del - Do not clean the air conditioner - Ne pas procéder au nettoyage du - Beginnen Sie die Reinigung der Klimaanlage...
- Seite 34 - Manutenzione del motore - Fan motor maintenance: - Maintenance du moteur - Wartung des Lüftermotors: ventilatore: ventilateur : 1.Smontare il pannello del ventilatore. 1. Remove the fan's panel. 1. Démonter le panneau du 1. Montieren Sie die Lüfterabdeckung 2 . S m o n t a r e m e t à...
- Seite 35 ■ Pulizia del filtro dell’aria ■ Cleaning the air filter ■ Nettoyage du filtre à air ■ Reinigung des Luftfilters - Il filtro dell’aria può prevenire - The air filter can prevent the entry - Le filtre à air peut empêcher - Der Luftfilter verhindert das l’ingresso di polvere o altre particelle.
- Seite 36 - Usare aspirapolvere o acqua - Use a vacuum cleaner or water to - Utiliser un aspirateur ou de l’eau - Benutzen Sie zur Reinigung des per pulire il filtro; se la polvere è clean the filter; if there is too much pour nettoyer le filtre ;...
- Seite 37 CODICI DI ERRORE ERROR CODES CODES D’ERREUR FEHLERCODES Indoor EEPROM (Electrically Erasable Programmable Read-Only Memory) error Indoor and outdoor unit communication malfunction Indoor fan speed malfunction Indoor room temperature sensor error Evaporator coil temperature sensor error Refrigerant leak detection system malfunction Water level alarm malfunction Dual indoor unit (twin model only) communication malfunction...
- Seite 38 Una panoramica dell'uscita cavi del An overview of the wall-mounted Une vue d’ensemble de la sortie Eine Übersicht der Kabelausgänge telecomando a muro. remote control wire outlet. câbles de la télécommande murale. der Wand-Fernbedienung. Uscita cavi sul lato superiore - Top side wire outlet Sortie câbles sur le côté...
- Seite 39 NOTA: NON consentire all'acqua NOTE: DO NOT allow water to NOTE : NE PAS permettre à l’eau de HINWEIS: Ermöglichen Sie dem di penetrare nel telecomando. enter the remote control. pénétrer dans la télécommande. Wasser NICHT das Eindringen in Creare una curva e sigillare i cavi. Make a curve and seal the wires.
- Seite 40 Installazione Telecomando a Muro Wall-Mounted Remote Control Installation Télécommande I n s t a l l a t i o n d e r W a n d - Installation murale Fernbedienung AVVERTIMENTO WARNING AVERTISSEMENT WARNHINWEIS NON utilizzare l'unità con le DO NOT operate the unit with wet NE PAS utiliser l'unité...
- Seite 41 Operazioni Preliminari all'Installazione Preparation Before Installation Opérations préliminaires à l’installation Arbeiten vor der Installation 1. Assicurarsi che siano disponibili i 1. Ensure you have the following 1. S’assurer de la disponibilité des 1. Stellen Sie sicher, dass die folgenden seguenti componenti. parts.
- Seite 42 2. Montare la piastra posteriore del 2. Mount the back plate of the 2. Monter la plaque arrière de la 2. Montieren Sie die Rückplatte der telecomando remote control télécommande Fernbedienung a. Per l'installazione a vista, fissare a. For exposed mounting, fasten the a.
- Seite 43 3. Impostazione data e ora 3. Set the time and date 3. Paramétrage date et heure 3. Einstellung von Datum und Uhrzeit Il telecomando è dotato di una The remote control has a small, La télécommande est dotée d’une Die Fernbedienung ist mit einer piccola batteria integrata che built-in battery that allows the time petite batterie intégrée qui permet...
-
Seite 44: Tasti Del Telecomando
TASTI DEL TELECOMANDO REMOTE CONTROL TOUCHES DE LA TASTEN DER BUTTONS TELECOMMANDE FERNBEDIENUNG TIME ON FOLLOW ME TIME AUXIL HEATER MODE SPEED SWINGT RESET LOCK A- TOUCHE TEMPORISATEUR ON (ACTIVE) A- TASTE TIMER ON (AKTIVIERT) A- TASTO TIMER ON (ATTIVATO) A- TIMER ON BUTTON •... - Seite 45 SCHERMO A CRISTALLI LIQUIDI LCD SCREEN ECRAN A CRISTAUX LIQUIDES FLÜSSIGKRISTALLBILDSCHIRM A- Mode de fonctionnement A- Betriebsmodus A- Modalità di funzionamento A- Operation mode Zeigt den gewählten Betriebsmodus an. Affiche le mode de fonctionnement Visualizza la modalità di funzionamento Displays the selected operating mode. B- Folgemir sélectionné.
- Seite 46 Funzione RAFFREDDAMEN-TO/ COOL/HEAT/FAN Function Fonction REFROIDISSEMENT/ Funktion KÜHLUNG/HEIZUNG/ RISCALDAMENTO/VENTOLA CHAUFFAGE/VENTILATEUR LÜFTER 1 Press the MO DE button to select 1 Premere il tasto MODALITÀ per COOL, HEAT or FAN. 1 Appuyer sur la touche MODE pour 1 Drücken Sie die MODUS-Taste selezionare RAFFREDDAMENTO, 2 Set your desired temperature using sélectionner REFROIDISSEMENT,...
- Seite 47 Funzione SEGUIMI FOLLOW ME Function Fonction SUIS-MOI Funktion FOLGEMIR Die Funktion FOLGEMIR ermöglicht, La funzione SEGUIMI consente The FOLLOW ME function enables La fonction SUIS-MOI permet de die Temperatur in der aktuellen di rilevare la temperatura nella the remote control to measure the relever la température dans la position Position zu ermitteln.
- Seite 48 Funzione TIMER TIMER Function Fonction TEMPORISATEUR TIMER Funktion La vostra unità di climatizzazione è Votre unité de climatisation est Ihre Klimaeinheit verfügt über zwei Your air conditioning unit has two dotée de deux fonctions liées au dotata di due funzioni correlate al timer: Timer-Funktionen: timer-related functions: temporisateur :...
- Seite 49 Impostazione simultanea di TIMER Setting both TIMER ON and TIMER P a r a m é t r a g e s i m u l t a n é Gleichzeitige Einstellung von TIMER ON e TIMER OFF (Funzione Timer OFF at the same time (Combined de TEMPORISATEUR ON et ON und TIMER OFF (Funktion...
- Seite 50 L'unità si accenderà dopo 6 ore ovvero The unit will now turn on after 6 hours L'unité s’allumera au bout de 6 Die Einheit wird sich nach 6 Stunden alle 19 (7:00 PM) e si spegnerà dopo (7:00 PM) and turn off again after 8 heures, autrement dit à...