HomeMatic CCU2 Bedienungsanleitung

Verwandte Anleitungen für HomeMatic CCU2


Inhaltszusammenfassung für HomeMatic CCU2
- Seite 1 Montage- und Inbetriebnahmeanleitung (S. 2) Installation and operating manual (p. 28) Zentrale CCU2: Central Control Unit CCU2: HM-Cen-O-TW-x-x-2...
-
Seite 2: Inhaltsverzeichnis
Alle Rechte vorbehalten. Ohne schriftliche Zustimmung des Heraus- 10 Hinweise zur Störungsbeseitigung ......... 18 gebers darf dieses Handbuch auch nicht auszugsweise in irgendei- 10.1 WebUI wird nach Eingabe der URL http://homematic-ccu2 ner Form reproduziert werden oder unter Verwendung elektro- nicht geladen ................18 nischer, mechanischer oder chemischer Verfahren vervielfältigt oder... -
Seite 3: Hinweise Zu Dieser Anleitung
Hinweise zu dieser Anleitung Allgemeine Hinweise zum Funkbetrieb Lesen Sie diese Anleitung sorgfältig, bevor Sie Ihre HomeMatic Die Funk-Übertragung wird auf einem nicht exklusiven Übertra- Komponenten in Betrieb nehmen. gungsweg realisiert, weshalb Störungen nicht ausgeschlossen wer- Bewahren Sie die Anleitung zum späteren Nachschlagen auf! den können. Weitere Störeinflüsse können hervorgerufen werden... -
Seite 4: Funktion
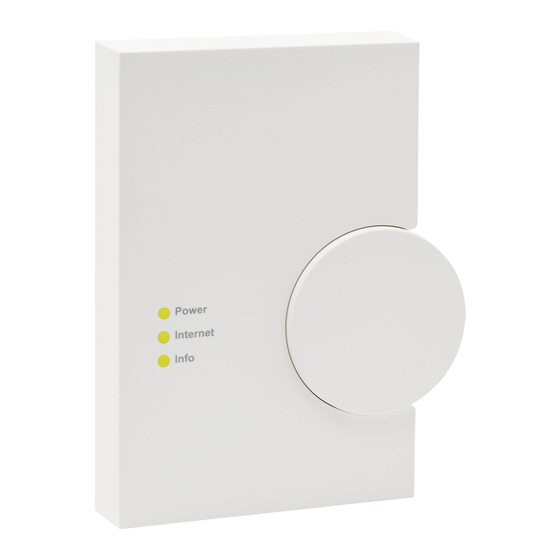
Funktion Übersicht und Anschlüsse Die HomeMatic Zentrale CCU2 übernimmt als zentrales Element des HomeMatic-Systems vielfältige Steuer-, Kontroll- und Konfigu- rationsmöglichkeiten für alle Geräte in Ihrer Installation. Die Bedienung der Zentrale erfolgt komfortabel am PC über die Micro-SD HomeMatic Bedienoberfläche WebUI, für die Sie lediglich einen Standard-Webbrowser benötigen. Power Internet Die Bedienoberfläche WebUI bietet vielfältige Funktionen für Ihre Info HomeMatic Installation: • Konfiguration und Bedienung von HomeMatic Geräten,... -
Seite 5: Inbetriebnahme
Inbetriebnahme Wandmontage Bitte verwenden Sie für die Wandmontage die zwei mitgelieferten Schrauben und Dübel. Stellen Sie bei der Auswahl des Montageortes und beim Bohren in der Nähe vorhandener Schalter oder Steckdosen sicher, dass in der Wand keine Leitungen verlaufen. Montieren Sie die Zentrale nicht in der Nähe anderer Störquellen (z. -
Seite 6: Zentrale An Die Stromversorgung Anschließen
öffnen Sie Ihren Webbrow- ser. Datenverbindung: Ethernet (TCP/IP und DHCP) • Geben Sie in Ihrem Browser die URL „http://homematic-ccu2“ USB 1.1 oder höher (nur mit Be- ein. Anschließend gelangen Sie auf die Startseite Ihrer WebUI. triebssystem Microsoft Windows®... -
Seite 7: Datum Und Uhrzeit Einstellen
Wenn Sie nach Eingabe der URL „http://homematic-ccu2“ • Klicken Sie anschließend auf „Zeit- und Positionseinstellung“. nicht zur Startseite der WebUI gelangen, folgen Sie bitte den Anweisungen im Abschnitt 10. 8.2 Datum und Uhrzeit einstellen Sobald Ihre Zentrale ans Netzwerk angeschlossen wurde, werden Datum und Uhrzeit automatisch erkannt und eingestellt. -
Seite 8: Updates Installieren
8.3 Updates installieren Bevor Sie Ihre WebUI nutzen können, prüfen Sie Ihr System auf verfügbare Updates und installieren Sie diese. Bei bestehender Internetverbindung sehen Sie auf der Startseite Ihrer WebUI, ob für Ihr System ein Update zur Verfügung steht: • Führen Sie im Feld „Software-Update“ die Schritte 1-4 durch: • Schritt 1: Klicken Sie zunächst auf den Button „Herunterladen“, um die Software-Installationsdateien auf Ihrem PC zu speichern. -
Seite 9: Geräte Anlernen Und System Konfigurieren
Bitte warten Sie, bis das Update eingespielt schnell schnell eingespielt wurde Ihre HomeMatic Zentrale ist jetzt für das Anlernen von Geräten be- Alarmmeldungen blinkt Kontrollieren Sie die Systemmel- reit. Anschließend können Sie Ihre Geräte über die WebUI steuern liegen vor... -
Seite 10: Hinweise Zur Störungsbeseitigung
10 Hinweise zur Störungsbeseitigung • Kopieren Sie im nächsten Fenster die IP-Adresse Ihrer Zentrale. 10.1 WebUI wird nach Eingabe der URL http://homematic-ccu2 nicht geladen Sollten Sie nach Eingabe der URL http://homematic-ccu2 in Ihrem Webbrowser nicht auf die WebUI Bedienoberfläche gelangen, gibt es unterschiedliche Lösungen zur Störungsbeseitigung. 10.1.1 IP-Adresse Ihrer Zentrale eingeben Sie können statt der URL http://homematic-ccu2 auch die IP-Adres- se Ihrer Zentrale in Ihren Webbrowser eingeben, um auf die WebUI zu gelangen. -
Seite 11: Recovery System
• Die Zentrale öffnet sich automatisch als Laufwerk im Explorer. • Kopieren Sie die IP-Adresse Ihrer Zentrale. • Geben Sie die IP-Adresse anschließend in Ihrem Internetbrowser ein und Sie gelangen zur WebUI Bedienoberfläche. • Öffnen Sie die Installationsdatei „setup.exe“ und installieren Sie diese. • Geben Sie anschließend die URL „10.101.82.51“ in Ihren Inter- 10.1.2 Anschluss per USB-Kabel netbrowser ein und Sie gelangen auf die WebUI Bedienoberflä- Sollten Sie Ihre Zentrale ohne Netzwerkverbindung nutzen, können... - Seite 12 Einstellungen und Programmierungen werden dabei System gestartet wurde, blinken alle LEDs gleichzeitig. gelöscht. • Über die Eingabe der Adresse „http://homematic-ccu2“ in Ihrem Über den Button „Reset network settings“ können Sie Webbrowser gelangen Sie auf die Startseite des Recovery nur die Netzwerkeinstellungen in den Werkszustand der Systems.
-
Seite 13: Duty Cycle Limit Erreicht
Erstinstallation eines Systems durch vermehrte und funkintensive Anlernprozesse der Fall sein. Eine Überschreitung des Duty Cycle Limits wird durch Blinken Ihres HomeMatic-Gerätes angezeigt und kann sich durch temporär fehlende Funktion des Gerätes äußern. Nach kurzer Zeit (max. 1 Stunde) ist die Funktion des Gerätes wiederhergestellt. -
Seite 14: Lieferumfang
13 Lieferumfang Entsorgungshinweis • HomeMatic Zentrale CCU2 Gerät nicht im Hausmüll entsorgen! Elektronische Geräte • Steckernetzteil (Ausgangsspannung 5V , 1500 mA) sind entsprechend der Richtlinie über Elektro- und Elektronik- • Montagematerial (2x Schrauben, 2x Dübel) Altgeräte über die örtlichen Sammelstellen für Elektronik- • USB-Kabel... - Seite 27 Bevollmächtigter des Herstellers: Manufacturer’s authorised representative: eQ-3 AG Maiburger Straße 29 26789 Leer / GERMANY www.eQ-3.de...