Compass 6HV Ultimate Handbuch

Verwandte Anleitungen für Compass 6HV Ultimate

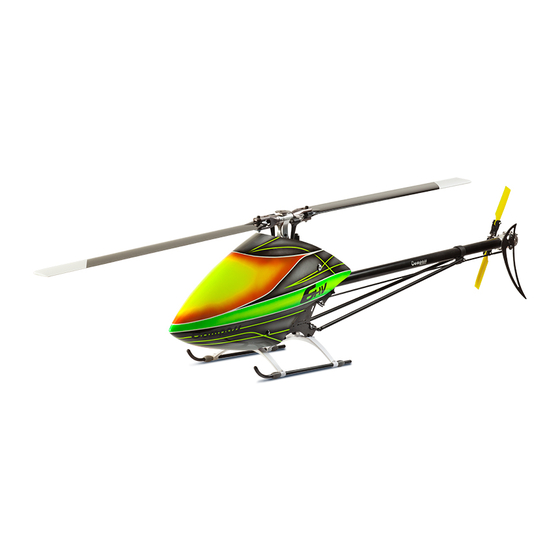
Inhaltszusammenfassung für Compass 6HV Ultimate
- Seite 1 Manual Copy Right @ Compass Model 2014 Copy Right @ Compass Model 2014 www.compassmodel.com www.compassmodel.com...
-
Seite 2: Inhaltsverzeichnis
Content / Inhaltsverzeichnis Page Topic Thema Front Cover Deckblatt Content Inhaltsverzeichnis Content Inhaltsverzeichnis Content Inhaltsverzeichnis Introduction, Warranty, Safety (eng) Einleitung, Garantie und Sicherheit (eng) Introduction, Warranty, Safety (de) Einleitung, Garantie und Sicherheit (de) Technical Specification Technische Daten Basic Information Grundlagen (eng) Basic Information Grundlagen (de) STEP1: Main Blade Grips... - Seite 3 Content / Inhaltsverzeichnis Page Topic Thema STEP22: Servo Arm Schritt 22: Servoarme STEP23: Bearing Blocks 1 Schritt 23: Lagerböcke 1 STEP24: Bearing Blocks 2 Schritt 24: Lagerböcke 2 STEP25: Break Away 1 Schritt 25: Sollbruchstellenplättchen 1 STEP26: Break Away 2 Schritt 26: Sollbruchstellenplättchen 2 STEP27: Main Pulley Schritt 27: Hauptriemenrad...
-
Seite 4: Page Topic
Content / Inhaltsverzeichnis Page Topic Thema STEP52: Maingear to Frame Schritt 52: Getriebe - Chassis STEP53: Rotorhead to Frame Schritt 53: Rotorkopf - Chassis STEP54: Motor to Frame 1 Schritt 54: Motor - Chassis 1 STEP55: Motor to Frame 2 Schritt 55: Motor - Chassis 2 STEP56: ESC Mount to Frame Schritt 56: Reglerplatte - Chassis... - Seite 5 The manufacturer’s warranty covers defects in material or workmanship, or missing components, to the original purchaser for 30 days from the date of purchase. Compass Model Ltd. will replace or repair, at our discretion, the defective or missing component(s). Defective components must be returned to our Distributor prior to replacement.
-
Seite 6: Einleitung
Haftung für Schäden, die aus der Montage und/oder Gebrauch/Missbrauch des Produktes hervorgehen. Obwohl der Compass Model 6HV Ultimate durch einen Elektromotor betrieben wird, sollte er mit der gleichen Sorgfalt wie ein Verbrennermodell gebaut und betrieben werden. Betreiben Sie Ihren 6HV Ultimate stets mit größter Vorsicht und Sicherheit. - Seite 7 Technical Specification / Technische Daten Height / Höhe 322mm Width / Breite 183mm (159mm) Lenght / Länge 1217mm Gear Ratio (10T) / Untersetzung (10 Zähne) 9.7 : 1 : 4.36 Take Off Weight with Battery / Startgewicht mit Akku 3400 - 3800g Motor KV (12S) / Motor KV (12S) 500 - 570 Rotor Blades / Rotorblätter...
-
Seite 8: Basic Information
Compass logo facing outwards. Ball links manufactured by Compass Model are usually slightly stiff on the ball when new. The links must be sized with a link sizer (Compass part number E- XQT-01). -
Seite 9: Basic Information
Nylon Stoppmuttern sollten nach einmaligen Gebrauch getauscht werden um eine ideale Funktion zu gewährleisten. Compass Model ist stets bemüht hochwertige Kugellager zu verwenden, aber auch diese müssen von Zeit zu Zeit, oder nach einem Absturz geprüft werden. Vermeiden Sie Öle zum Schmieren der Kugellager, da diese nicht druckfest sind und das Lager früher verschleißen oder fressen kann. -
Seite 10: Step1: Main Blade Grips
Main Blade Grips (2x) Pos. Description Qty. Part Number Main Grip 07-0102 Use medium threadlock on all Main Grip Arm 07-0105m screws threaded into metal parts. Washer 8.4 x 12 x 0.3 mm 82-841203 Verwenden Sie auf allen Schrauben die in Metallteile Bearing 8 x 16 x 5 mm 60-8165 geschraubt werden mittelfeste... -
Seite 11: Step2: Rotor Head
Rotor Head 1 Pos. Description Qty. Part number Rotor Hub 14-0106 Use medium threadlock on all Spindle 02-0113 screws threaded into metal parts. Cap Head Bolt M3 x 6 80-0306 Verwenden Sie auf allen Schrauben die in Metallteile geschraubt werden mittelfeste Cap Head Bolt M3 x 12 80-0312 Schraubensicherung. - Seite 12 Rotor Head 2 Pos. Description Qty. Part number Parts from Step 2 Use medium threadlock on all Parts from Step 1 screws threaded into metal parts. Verwenden Sie auf allen Washer 5.1 x 11 x 1 82-51111 Schrauben die in Metallteile geschraubt werden mittelfeste Button Head Bolt M5 x1 0 79-0510...
- Seite 13 Adjust length of swash driver/ball link assembly to 76.5 mm (as shown). The ball link should move smoothly on the ball. If necessary ream link with a ball link sizer to ensure proper fit. Snap links onto ball so that the word Compass faces outwards.
- Seite 14 Rotor Head 3 Use medium threadlock on all Pos. Description Qty. screws threaded into metal parts. Parts from Step 4 Verwenden Sie auf allen Schrauben die in Metallteile Parts from Step 3 geschraubt werden mittelfeste Schraubensicherung. Apply threadlock into threads in the main grip arms. Attach swash drivers (2) to main grip arms, being careful to not get any threadlock in the bearings.
- Seite 15 Swashplate Swashplate 1 Pos. Description Qty. Part Use medium threadlock on all screws threaded into metal parts. Swashplate 10-0003S Verwenden Sie auf allen Schrauben die in Metallteile Link Ball M2.5 02-0701s geschraubt werden mittelfeste Schraubensicherung. Swash Pin 09-7056s Preassembled at factory. Bereits vormontiert.
- Seite 16 Qty. Slide swashplate (2) onto main shaft. Snap ball links onto balls with the Parts from Step 5 word Compass writing facing outward. Parts from Step 6 Schieben Sie die Taumelscheibe (2) auf die Hauptrotorwelle und klipsen Sie die Kugelpfannen mit dem...
-
Seite 17: Step8: Tail Grip
Tail Grip Pos. Description Qty. Part number Tail Grip 09-7208 Link Ball M2.5 02-0701s Do not overtighten screws threaded into plastic parts. Ziehen Sie Schrauben die in Mount link balls (2) to tail grips (1). Kunststoffteile geschraubt werden vorsichtig an ohne sie Montieren Sie die Kugeln (2) an die Heckblatthalter (1). -
Seite 18: Step9: Tail Rotor Hub
Tail Rotor Hub 1 Pos. Description Qty. Part number Use medium threadlock on all screws threaded into metal parts. Tail Rotor Hub 09-7209 Verwenden Sie auf allen Schrauben die in Metallteile Setscrew M4 x 4 81-0404 geschraubt werden mittelfeste Schraubensicherung. Washer 3.2 x 7.4 x 0.8 mm 82-327408 Cap Socket Bolt M3 x 6... - Seite 19 Tail Rotor Hub 2 Pos. Description Qty. Part number Tail Rotor Blades 95 mm 02-0250 Cap Socket Bolt M3 x 22 80-0322 Nylon Nuts M3 91-0003 Special Washer 09-7207 Parts from Step 9 Mount tail rotor blades (1) into the tail grips with leading edges towards ball links. Use one special washer (4) on each side of each tail rotor blade.
-
Seite 20: Step11: Tail Pitch Slider
Tail Pitch Slider Pos. Description Qty. Part number Use medium threadlock on all screws threaded into metal parts. Tail Pitch Sleeve 09-0213 Verwenden Sie auf allen Schrauben die in Metallteile Bearing 8 x 12 x 3.5 mm 60-8123 geschraubt werden mittelfeste Schraubensicherung. -
Seite 21: Step12: Tail Control Arm
Tail Control Arm Pos. Description Qty. Part number Use medium threadlock on all screws threaded into metal parts. Cap Socket Bolt M2 x 6 mm 80-0206s Verwenden Sie auf allen Schrauben die in Metallteile Cap Socket Bolt M3 x 20 80-0320 geschraubt werden mittelfeste Schraubensicherung. -
Seite 22: Step13: Tail Case
Tail Case 1 Pos. Description Qty. Part number Preassembled at factory. Tail Sideframe (Aluminium) 09-7050N Bearing 6 x 13 x 5 mm 61-6135 Bereits vormontiert. Apply a small amount of bearing mount threadlock to inside of bearing seat of both tail case sides and press in bearings until firmly seated. - Seite 23 Tailshaft Pos. Description Qty. Part number Preassembled at factory. Tail Pulley 17T 14-0007 Bereits vormontiert. Tail Rotor Shaft 09-0214 Spring Pin 2.5 x 14 mm 84-2514 Push tail pulley (1) onto tail rotor shaft (2). Press spring pin (3) carefully through hole in the tail pulley and tail rotor shaft using a 2.5 mm drift punch, 2 mm hex driver, or bench vise.
- Seite 24 Tail Case 2 Pos. Description Qty. Part number Use medium threadlock on all screws threaded into metal parts. Tail Case Center 10-0006 Verwenden Sie auf allen Schrauben die in Metallteile Parts from Step 13 geschraubt werden mittelfeste Schraubensicherung. Parts from Step 14 Preassembled at factory.
- Seite 25 Idler Pos. Description Qty. Part number Use medium threadlock on all screws threaded into metal parts. Tail Guide Wheel Collar 09-7066 Verwenden Sie auf allen Schrauben die in Metallteile Bearing 3 x 6 x 2 mm 61-3062 geschraubt werden mittelfeste Schraubensicherung.
- Seite 26 Remove two M2.5 bolts (3) from tail case. Feed belt all the way into tail boom. Insert the boom into the tail case until boom seats firmly against ridge inside tail case. Align boom with tail case so that the words Compass on either side of the boom are level.
- Seite 27 Tail Rotor 1 Pos. Description Part number Use medium threadlock on all screws threaded into metal parts. Parts from Step 10 Verwenden Sie auf allen Schrauben die in Metallteile Parts from Step 11 geschraubt werden mittelfeste Schraubensicherung. Parts from Step 17 Set Screw M4 x 4 81-0404 Push tail pitch slider assembly(1) onto tail rotor shaft of tail unit (3) assembled in Step 16.
- Seite 28 Tail Rotor 2 Use medium threadlock on all Pos. Description Qty. screws threaded into metal parts. Parts from Step 18 Verwenden Sie auf allen Schrauben die in Metallteile Parts from Step 12 geschraubt werden mittelfeste Schraubensicherung. Mount tail pitch control arm (2) assembled in Step 12, to tail unit (1).
-
Seite 29: Step20: Tail Control Rod
Tail Control Rod Pos. Description Qty. Part number Preassembled at factory. Tail Control Rod 685 x 4mm 14-0012 Bereits vormontiert. Wire Link Rod M2 x 708 10-3001 Delrin Tail Link Support 09-7080 Tail Control Rod Guide 14-1005 Ball Link M2 02-0709 Push the three Delrin tail link supports (3) onto tail control rod (1). -
Seite 30: Step21: Tail Support
Tail Support Pos. Description Qty. Part number Parts from Step 20 Tail Support Braces 14-8809 Cap Head Bolt M3 x 35 80-0335 Nylock Nut M3 91-0003 Push tail control rod guide onto tail boom. Note slight angle where tail support braces attach. Install two tail support braces (2) onto guide, using bolt (3) and nylock nut (4). - Seite 31 Servo Arm 18mm (3x) / 15mm (1x) Pos. Description Qty. Part number Use medium threadlock on all screws threaded into metal parts. Cap Socket Bolt M2 x 8 80-0208S Verwenden Sie auf allen Schrauben die in Metallteile Stainless Link Balls 02-0701 geschraubt werden mittelfeste Schraubensicherung.
-
Seite 32: Step23: Bearing Blocks
Bearing Blocks Pos. Description Qty. Part number Preassembled at factory. Bearing Block 02-0605 Bereits vormontiert. Bearing 10 x 19 x 5 mm 60-10195 To replace bearing, heat bearing block, then press bearing out from other side. To install bearing, heat block, while cooling the bearing in a refrigerator. - Seite 33 Bearing Blocks 2 Pos. Description Qty. Part number Preassembled at factory. Lower Bearing Block 14-0605 Bereits vormontiert. Bearing 10 x 19 x 5 mm 60-10195 To replace the bearing, heat bearing block, then press the bearing out from other side. To install bearing, heat block, while cooling the bearing in a refrigerator.
-
Seite 34: Step25: Break Away
Break Away 1 (2x) Pos. Description Qty. Part number Use medium threadlock on all screws threaded into metal parts. Cap Socket Bolt M3 x 8 80-0308 Verwenden Sie auf allen Schrauben die in Metallteile Canopy Mount - Front 14-0810 geschraubt werden mittelfeste Schraubensicherung. - Seite 35 Break Away 2 (2x) Pos. Description Qty Part number Use medium threadlock on all screws threaded into metal parts. Cap Socket Bolt M3 x 8 80-0308 Verwenden Sie auf allen Schrauben die in Metallteile Canopy Quick Release Mount 06-8703D geschraubt werden mittelfeste Schraubensicherung.
- Seite 36 Mainpulley Pos. Description Qty. Part number Use medium threadlock on all screws threaded into metal parts. Main Pulley 07-4501 Verwenden Sie auf allen Schrauben die in Metallteile Main Pulley Hub 07-0623 geschraubt werden mittelfeste Schraubensicherung. Cap Socket Bolt M3 x 6 80-0306 Preassembled at factory.
- Seite 37 Main Gear Pos. Description Qty. Part number Use medium threadlock on all screws threaded into metal parts. Main Gear 14-4603 Verwenden Sie auf allen Schrauben die in Metallteile Autorotation Hub 07-0612E geschraubt werden mittelfeste Schraubensicherung. Cap Socket Bolt M3 x 6 80-0306 Preassembled at factory.
- Seite 38 Main Gear 2 Pos. Description Qty. Part number Use medium threadlock on all screws threaded into metal parts. Parts from Step 28 Verwenden Sie auf allen Schrauben die in Metallteile Parts from Step 27 geschraubt werden mittelfeste Schraubensicherung. One Way Sleeve 07-0622 Nylock Nut M3 91-0003...
- Seite 39 Counter Bearing Block Pos. Description Qty. Part number Cap Socket Bolt M3 x 6 80-0306 Use medium threadlock on all screws threaded into metal Cap Socket Bolt M3 x 30 80-0330 parts. Verwenden Sie auf allen Bearing 6 x 13 x 5 mm 60-6135 Schrauben die in Metallteile geschraubt werden mittelfeste...
-
Seite 40: Schritt 31: Motorträger
Motor Mount Pos. Description Qty. Part number Cap Socket Bolt M3 x 6 80-0306 Use medium threadlock on all Cap Socket Bolt M3 x 10 80-0310 screws threaded into metal parts. Motor Pinion 10T helical 07-4310L Verwenden Sie auf allen Schrauben die in Metallteile Washer 3.2 x 7 x 0.8 mm 82-3708... - Seite 41 Mast Lock Collar Pos. Description Qty. Part number Mast Lock Collar 14-2018 Headsocket Bolt M3 x 10 80-0310 Thread bolts (2) into mast lock collar without threadlock. Note: Do not tighten at this time. Schrauben Sie die Klemmschrauben (2) vorerst nur teilweise und ohne Schraubensicherung in den Klemmring (1).
- Seite 42 Battery Tray Pos. Description Qty. Part number Use medium threadlock on all screws threaded into metal parts. Cross Member M3 x 30 02-1805 Verwenden Sie auf allen Schrauben die in Metallteile Battery Tray 14-0008 geschraubt werden mittelfeste Schraubensicherung. Flat Head Bolt M3 x 6 78-0306 Cap Socket Bolt M3 x 10 80-0308...
- Seite 43 ESC Trays 2X Pos. Description Qty. Part number ESC Tray 14-0009 Cap Socket Bolt M3 x 22 80-0322 Controller Mount Collar 14-2008 Pass bolts (2) through holes of ESC trays (1) and collars (3). Note: Prepare two mirror image units as shown below. Führen Sie die Schrauben (2) durch die Löcher der Reglerplatte (1) und durch die Abstandshalter (3).
- Seite 44 Gyro Tray Pos. Description Qty. Part number Use medium threadlock on all screws threaded into metal parts. Cross Member M3 x 30 02-1805 Verwenden Sie auf allen Schrauben die in Metallteile Gyro Tray 14-0008 geschraubt werden mittelfeste Schraubensicherung. Flat Head Bolt M3 x 6 78-0306 Cap Socket Bolt M3 x 8 80-0308...
- Seite 45 Belt Tensioner Pos. Description Qty. Part number Use medium threadlock on all screws threaded into metal Belt Tensioner Mount 14-2002 parts. Verwenden Sie auf allen Tail Belt Guide Pulley 14-2003 Schrauben die in Metallteile geschraubt werden mittelfeste Schraubensicherung. CF Bridge for Guiding Wheel 14-0005 Cap Socket Bolt M3 x 18 80-0318...
- Seite 46 Upper Sideframe Right Pos. Description Qty. Part number Use medium threadlock on all screws threaded into metal parts. Metal Servo Nuts 14-2001 Verwenden Sie auf allen Schrauben die in Metallteile Sideframe Right 14-0002 geschraubt werden mittelfeste Schraubensicherung. Cap Socket Bolt M2.5 x 12 80-2512 The upper right sideframe (seen from Washer 2.7 x 7 x 0.8 mm...
- Seite 47 Upper Sideframe Left Use medium threadlock on all Pos. Description Qty. Part number screws threaded into metal parts. Metal Servo Nuts 14-2001 Verwenden Sie auf allen Schrauben die in Metallteile Sideframe Left 14-0001 geschraubt werden mittelfeste Schraubensicherung. Cap Socket Bolt M2.5 x 12 80-2512 Washer 2.7 x 7 x 0.8 82-2578...
- Seite 48 Lower Sideframe Left Use medium threadlock on all Pos. Description Qty. Part number screws threaded into metal parts. Metal Servo Nuts 14-2001 Verwenden Sie auf allen Schrauben die in Metallteile Lower Frame Left 14-0003 geschraubt werden mittelfeste Schraubensicherung. Cap Socket Bolt M2.5 x 12 80-2512 Washer 2.7 x 7 x 0.8 82-2578...
-
Seite 49: Schritt 35: Kreiselplatte
Frame 1 Pos. Description Qty. Part number Use medium threadlock on all Parts from STEP 35 screws threaded into metal parts. Parts from STEP 37 Verwenden Sie auf allen Schrauben die in Metallteile geschraubt werden mittelfeste Cap Socket Bolt M3 x 8 80-0308 Schraubensicherung. -
Seite 50: Schritt 36: Riemenspanner
Frame 2 Pos. Description Qty. Part number Use medium threadlock on all screws threaded into metal Parts from Step 40 parts. Verwenden Sie auf allen Crossmember M3 x 30 02-0805 Schrauben die in Metallteile geschraubt werden mittelfeste Schraubensicherung. Cap Socket Bolt M3 x8 80-0308 Cap Socket Bolt M3x10 80-0310... - Seite 51 Frame 3 Pos. Description Qty. Part number Use medium threadlock on all screws threaded into metal Parts from Step 40 parts. Verwenden Sie auf allen Crossmember M3 x 3 02-0805 Schrauben die in Metallteile geschraubt werden mittelfeste Cap Socket Bolt M3 x 10 80-0310 Schraubensicherung.
- Seite 52 Frame 4 Pos. Description Qty. Part number Use medium threadlock on all screws threaded into metal Parts from Step 42 parts. Verwenden Sie auf allen Parts from Step 38 02-0805 Schrauben die in Metallteile geschraubt werden mittelfeste Schraubensicherung. Cap Socket Bolt M3 x 8 80-0308 Mount upper left sideframe (2) to left sideframe (1) using bolts (3, 4).
- Seite 53 Frame 5 Pos. Description Qty. Part number Use medium threadlock on all screws threaded into metal Parts from Step 43 parts. Verwenden Sie auf allen Parts from Step 25 Schrauben die in Metallteile geschraubt werden mittelfeste Schraubensicherung. Cap Socket Bolt M3 x 10 80-0308 Carbon Reinforcer 14-0006...
- Seite 54 Frame 6 Pos. Description Qty. Part number Use medium threadlock on all screws threaded into metal Parts from Step 44 parts. Verwenden Sie auf allen Cap Socket Bolt M3 x 8 80-0308 Schrauben die in Metallteile geschraubt werden mittelfeste Schraubensicherung. Cap Socket Bolt M3x10 80-0310 Install bolts (2, 3) through frame (1) into belt tensioner and lower cross member.
-
Seite 55: Schritt 40: Chassis
Frame 7 Pos. Description Qty. Part number Use medium threadlock on all screws threaded into metal Parts from Step 45 parts. Verwenden Sie auf allen Cap Socket Bolt M3 x 8 80-0308 Schrauben die in Metallteile geschraubt werden mittelfeste Battery Backstop 14-1003 Schraubensicherung. -
Seite 56: Schritt 41: Chassis
Frame 8 Pos. Description Qty. Part number Use medium threadlock on all screws threaded into metal Parts from Step 46 parts. Verwenden Sie auf allen Parts from Step 26 Schrauben die in Metallteile geschraubt werden mittelfeste Schraubensicherung. Mount canopy quick releases (2) to frame (1). Note orientation of break aways, (see drawing below). - Seite 57 Landing Gear1 Pos. Description Qty. Part number Use medium threadlock on all screws threaded into metal Parts from Step 47 parts. Verwenden Sie auf allen Cap Socket Bolt M3 x 10 80-0310 Schrauben die in Metallteile geschraubt werden mittelfeste Schraubensicherung. Struts (3D Plus) 02-0822 Carbon S trut Mount...
- Seite 58 Landing Gear 2 Pos. Description Qty. Part number Use medium threadlock on all screws threaded into metal Parts from Step 48 parts. Verwenden Sie auf allen Skids 02-0821 Schrauben die in Metallteile geschraubt werden mittelfeste Schraubensicherung. Set Screw M3 x 5 81-0305 Skid Stopper 02-0821C...
- Seite 59 Boom Clamp Pos. Description Qty. Part number Mount rubber ring (6) to belt tensioner and belt tensioner mount (4) using bolts (5) and guide wheel Parts from Step 49 mount collar (7). Pass bolts (8, 9) with washers (3) through boom clamp (11), then through washers (3). Attach nylock nuts (2).
- Seite 60 Boom to Frame Pos. Description Qty. Part number Use medium threadlock on all screws threaded into metal Parts from Step 50 parts. Verwenden Sie auf allen Parts from Step 21 Schrauben die in Metallteile geschraubt werden mittelfeste Schraubensicherung. Cap Socket Bolt M3 x 25 80-0325 Washer 3.2 x 7 x 0 8 mm 82-3708...
-
Seite 61: Schritt 42: Chassis
Maingear to Frame Pos. Description Qty. Part number Use medium threadlock on all screws threaded into metal Parts from Step 51 parts. Verwenden Sie auf allen Parts from Step 29 Schrauben die in Metallteile geschraubt werden mittelfeste Schraubensicherung. Pull tailbelt around main pulley of main gear assembly (2). Do not rotate/twist belt in either direction. - Seite 62 Rotorhead to Frame Pos. Description Qty. Part number Use medium threadlock on all screws threaded into metal Parts from Step 52 parts. Verwenden Sie auf allen Parts from Step 7 Schrauben die in Metallteile geschraubt werden mittelfeste Schraubensicherung. Parts from Step 32 Remove main shaft retention bolt from main gear assembly.
- Seite 63 Motor to Frame 1 Pos. Description Qty. Part number Use medium threadlock on all screws threaded into metal Parts from Step 53 parts. Verwenden Sie auf allen Parts from Step 31 Schrauben die in Metallteile geschraubt werden mittelfeste Schraubensicherung. Remove all M3x8 bolts from motor unit (2) and slide motor mount assembly into frame. Loosely install 4 bolts for motor mount.
- Seite 64 Motor to Frame 2 Pos. Description Qty. Part number Use medium threadlock on all screws threaded into metal Parts from Step 54 parts. Verwenden Sie auf allen Cap Socket Bolt M3 x 8 80-0308 Schrauben die in Metallteile geschraubt werden mittelfeste Schraubensicherung.
- Seite 65 ESC Mount to Frame Pos. Description Qty. Part number Use medium threadlock on all screws threaded into metal Parts from Step 55 parts. Verwenden Sie auf allen Parts from Step 34 Schrauben die in Metallteile geschraubt werden mittelfeste Schraubensicherung. Crossmember M3 x 30 02-0805 Crossmember M3 x 3 4 14-2007...
- Seite 66 RC-Equipment Pos. Description Qty. Part number Use alcohol to clean and degrease Parts from Step 56 bonding surfaces. Bitte benutzen Sie Alkohol zum reinigen und entfetten der Klebestellen. Reciever FBL -Unit Mount FBL Unit (4) on gyro tray using the manufacturer's recommended adhesive pad. If none is provided, use a tough, thin pad.
- Seite 67 Battery 1 Pos. Description Qty. Part number Use alcohol to clean and degrease Parts from Step 57 bonding surfaces. Velcro (60 x 30mm) Hook Bitte benutzen Sie Alkohol zum reinigen und entfetten der Klebestellen. Clean battery tray with alcohol. Attach a 60 x 30mm piece of self-adhesive hook and loop material (hook side) (2) to battery tray as shown in drawing.
- Seite 68 Battery 2 Pos. Description Qty. Part number Use alcohol to clean and degrease Battery 12S 2500-3500mAh bonding surfaces. Velcro (60 x 30 mm) Loop Bitte benutzen Sie Alkohol zum reinigen und entfetten der Klebestellen. Clean battery with alcohol. Attach a 60 X 30 strip of a self-adhesive hook and loop material, loop side (2) to battery.
- Seite 69 Battery 3 Pos. Description Qty. Part number Parts from Step 58 Parts from Step 59 Hook and Loop Strap 20x300 VBT300 Slide hook and loop straps (3) trough holes in frame and attach battery to helicopter. Shorten the hook and loop straps with scissors, if necessary. Schieben Sie die Klettbänder (3) durch die Löcher im Chassis und fixieren Sie damit den Akku am Hubschrauber.
- Seite 70 Servoarm to Servo 1 Pos. Description Qty. Part number Use medium threadlock on all screws threaded into metal Parts from Step 60 parts. Verwenden Sie auf allen Parts from Step 22 Schrauben die in Metallteile geschraubt werden mittelfeste Servo Arm Bolt Schraubensicherung.
- Seite 71 Servoarm to Servo 2 Pos. Description Qty. Part number Use medium threadlock on all screws threaded into metal Parts from Step 61 parts. Verwenden Sie auf allen Parts from Step 22 Schrauben die in Metallteile geschraubt werden mittelfeste Servo Arm Bolt Schraubensicherung.
- Seite 72 Links Pos. Description Qty. Part number Parts from Step 62 6HV Linkage Set 14-LG01 Tread ball links approximately the same distance onto both ends of each linkage rods, using lengths from table below as a starting point. Note: The lengths may require a small readjustment. The table shows the lengths of the completed linkages measured from the center of the hole in the link (X) or measured from the end of the link (Y).
- Seite 73 Rotorblades Pos. Description Qty. Part number Parts from Step 63 Rotorblades 615 mm F-04-0250T Remove blade bolt and nylock nuts from blade grips and mount main rotor blades as shown below. Install a spacer The blades washer above and below each blade root, in the grip. Snug the nylock nut down but do not fully tighten it. should not be able to move by their own weight, but still relatively easily.
- Seite 74 Pos. Description Qty. Part number Use a small amount of grease/vaseline on rubber grommets for easier mounting. Canopy 6HV Ultimate 14-0851(R/Y) Benutzen Sie etwas Fett (zum Beispiel Rubber Grommets 02-8853 Vaseline) um die Gummitüllen leichter auf die Haubenhalter drücken zu können.
- Seite 75 Stecken Sie noch einmal die selbe Aufmerksamkeit in das Setup der Elektronik und Sie werden viel Spaß mit ihrem 6HV Ultimate haben. Wir hoffen Sie hatten keine Probleme beim Bau - Falls doch so wenden Sie sich doch am besten an unseren Kundensupport.
- Seite 76 Wiring Pos. Description Qty. Parts from Step 66 Never use RC components with damaged wires. Check all wires for damaged insulation and breakage. Make sure all servo connectors fit tightly, and that no wires are loose in their connectors. All wires must be protected against damage from sharp edges of carbon frame and metal parts (carbon fiber and metal parts are conductive).
-
Seite 77: Schritt 18: Heckrotor
Control Check Mode 1 Mode 2 Aileron Roll Elevator Nick Pitch Pitch Rudder Heckrotor Move transmitter sticks as shown and compare the responses of the helicopter with those in the drawings. For example: If you fly mode 2 and give aileron to the right (top transmitter drawing - stick movement shown in red), the swashplate should tilt to the right (top drawing of helicopter - red arrow). - Seite 78 Flybarless-Setup 1 For easy measurement of pitch angles during setup, place something long and straight (like a flybar or CF-Tube) on the bearing block behind the main rotor shaft (see drawing below). This will allow you to use a normal pitch gauge to set the collective and cyclic pitch.
- Seite 79 Flybarless-Setup 2 Hitec/Futaba Aileron Elevator ESC Signal Gyro Gain Aux2 Motor-Wire Rudder Motor-Kabel Pitch Aux1 Reciever Empfänger Follow the instructions that came with your radio and FBL unit very carefully. Note that Please read the manual of your FBL-Unit, each manufacturer does things differently. transmitter and receiver very attentively.
- Seite 80 Flybarless-Setup 3 Important: The compensation in the FBL Movement of helicopter unit must work in the correct direction. Bewegung des Hubschraubers Aileron compensation: Tilt helicopter to the right (blue arrow). The FBL unit should tilt the swashplate in the opposite direction (to the left-red arrow).
- Seite 81 Flybarless-Setup 4 Elevator Compensation: Observe helicopter/swashplate from the left side. Tilt nose of helicopter up (blue arrow - rotating helicopter clockwise). The swashplate must tilt forward (red arrow - rotating counter-clockwise) as shown in drawing. Tilt nose of helicopter down (blue arrow - rotating helicopter counter-clockwise).
- Seite 82 1200 - 1800 RPM 1800 - 2400 RPM Set the endpoints of the tail servo to both limits A and B Compass 95 mm A = 14mm / B = 0.5mm A = 13.5mm / B = 1mm (distance between slider and bearing).
- Seite 83 Rotation Check When main rotor rotates clockwise (blue arrow) tail blades should rotate counter clockwise (red arrow) observed from right side of the helicopter. If not, the belt is twisted in the incorrect direction (see step 48). Be sure that main rotor and tail rotor blades are installed in the correct direction.