HP Latex 560 Anleitung Zur Druckermontage
Quicklinks
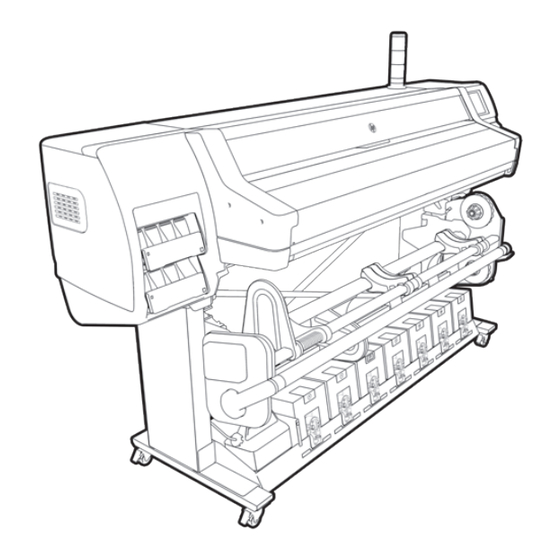
HP Latex 560 Printer
HP Latex 570 Printer
Printer assembly
EN
instructions
Instructions d'assemblage
FR
de l'imprimante
Anleitung zur
DE
Druckermontage
Istruzioni per l'installazione
IT
della stampante
Instrucciones de montaje
ES
de la impresora
Instruções de montagem
PT
da impressora
تعليمات تجميع الطابعة
AR
*N2G70-90017*
N2G70-90017
© Copyright 2016, 2017 HP Development Company, L.P.
Large Format Division
Camí de Can Graells 1-21 · 08174
Sant Cugat del Vallès
Barcelona · Spain
All rights reserved
Printed in XXX
FR
1. Câbles EE
2. Guides latéraux
3. Maintenance utilisateur
4. Têtes d'impression
5. Cartouche de maintenance
6. Accessoire de chargement du support
7. Collecteur d'encre
8. Rouleau de nettoyage
9 Capuchon du collecteur de condensation
10. Protecteur du plateau de sortie
11. Accessoire de la balise (HP Latex 570 uniquement)
12. Clé tricoise 17 mm
Le câble LAN, le rouleau de support, et les cartouches
ne sont pas inclus.
EN
Outils nécessaires
Box Contents
1. EE cables
Serre-écrou électrique de taille 17 / Couteau /
2. Edge holders
Élévateur / Tournevis plat HP Latex 570 uniquement
Remarque: l'Assemblée peut être fait avec des outils
3. User maintenance
manuels seulement, mais l'installation sera plus long.
4. Printheads
5. Maintenance cartridge
Remarque : L'ensemble de l'imprimante ne peut pas
6. Media loading accessory
être démonté à partir des supports inférieurs. Un
7. Ink collector
fonctionnement correct de l'imprimante ne peut pas
être assuré.
8. Wiper roller
9 Condensor collector cap
10. Output platen protector
DE
11. Beacon accessory (HP Latex 570 only)
1 EE-Kabel
12. Spanner size 17
2. Kantenhalter
LAN cable, roll of substrate, and cartridges are
not included.
3. Wartung durch den Benutzer
4. Druckköpfe
5. Wartungspatrone
Tools required
6. Zubehör für das Laden von Druckmedien
Electrical nutdriver size 17 / Cutter / Forklift /
Flat screwdriver (HP Latex 570 only)
7. Tintenkollektor
Note: Assembly can be done with manual tools
8. Wischrolle
only, but installation will take longer.
9 Kondensator-Behälterkappe
10. Ausgabeeinzugsflächenschutz
Note: The printer body cannot be disassembled
11. Warnsignal-Zubehör (nur HP Latex 570)
from the legs. Correct printer functionality
cannot be assured.
12. Maulschlüssel Größe 17
LAN-Kabel, Druckmaterialrolle und Patronen sind
nicht enthalten.
Erforderliche Werkzeuge
Elektrischer Nussschraubendreher Größe
17 / Schnittvorrichtung / Gabelstapler /
Schlitzschraubendreher nur HP Latex 570
Hinweis: Die Montage kann nur mit Handwerkzeugen
durchgeführt werden, aber die Installation wird
länger dauern.
Hinweis: Das Druckergehäuse kann nicht von
den Beinen abgebaut werden. Die korrekte
Funktionsweise des Druckers kann nicht
gewährleistet werden.
Please read these instructions carefully. These assembly instructions explain how to assemble the printer. Because spare screws are supplied, some screws will remain unused after assembly of the printer.
EN
FR
Veuillez lire attentivement ces instructions. Ces instructions d'assemblage expliquent comment assembler l'imprimante. Des vis de rechange étant fournies, certaines vis pourront rester inutilisées après l'assemblage
de l'imprimante.
Lesen Sie diese Anleitungen sorgfältig durch. Dieses Dokument enthält Anleitungen für den Zusammenbau des Druckers. Zum Lieferumfang gehören Ersatzschrauben, sodass nach dem Zusammenbau einige
DE
Schrauben übrig bleiben.
Leggere attentamente queste istruzioni. Queste istruzioni descrivono la procedura d'installazione della stampante. Poiché vengono fornite viti di riserva, alcune potrebbero risultare inutilizzate dopo l'installazione
IT
della stampante.
Lea atentamente estas instrucciones. Estas instrucciones de montaje explican cómo se monta la impresora. Como también se incluyen tornillos de repuesto, después de montar la impresora quedarán algunos sin
ES
utilizar.
Leia as instruções com atenção. Estas instruções de montagem explicam como montar a impressora. Como são fornecidos parafusos sobressalentes, alguns permanecerão sem uso depois da montagem da
PT
impressora.
.يرجى قراءة هذه اإلرشادات بعناية. تشرح هذه التعليمات المجمعة كيفية تجميع الطابعة. نظ ر ًا لتوفير براغي احتياطية، ستظل بعض البراغي غير مستخدمة بعد تجميع الطابعة
AR
IT
Contenu de l'emballage
1. Cavi EE
2. Supporti dei bordi
3. Manutenzione utente
4. Testine di stampa
5. Cartuccia di manutenzione
6. Accessorio di caricamento dei supporti
7. Raccoglitore inchiostro
8. Rullino di pulizia
9. Tappo raccoglitore condensa
10. Protezione della piastra di uscita
11. Accessorio segnale luminoso (solo per modelli HP
Latex 570)
12. Chiave 17
Il cavo LAN, il rotolo del supporto di stampa e le
cartucce non sono inclusi.
Strumenti necessari
Chiave elettrica 17 / Taglierina / Carrello elevatore a
forca / Cacciavite piatto, solo per modelli HP Latex 570
Nota: Il montaggio può essere fatto solo con
strumenti manuali, ma l'installazione richiederà più
tempo.
Nota: il corpo della stampante non può essere
disassemblato dai piedi stabilizzatori; la corretta
funzionalità della stampante non potrebbe essere
garantita.
Verpackungsinhalt
ES
1. Cables EE
2. Sujetapapeles
3. Mantenimiento usuario
4. Cabezales de impresión
5. Cartucho de mantenimiento
6. Accesorio de carga de material de impresión
7. Recogedor de tinta
8. Rodillo limpiador
9. Tapón recogedor condensador
10. Protector de la platina de salida
11.Baliza de señalización (solo para HP Latex 570)
12. Llave inglesa de tamaño 17
El cable LAN, el rollo de sustrato y los cartuchos no
están incluidos.
Herramientas requeridas
Destornillador de tuercas eléctrico tamaño 17 /
Cuchilla / Carretilla elevadora / Destornillador de
punta plana solo para HP Latex 570
Nota: El montaje se puede hacer sólo con
herramientas manuales, pero la instalación llevará
más tiempo.
Nota: El cuerpo de la impresora no se puede separar
de las patas. No se puede asegurar un funcionamiento
correcto de la impresora.
1
PT
Contenuto della confezione
1. Cabos EE
2. Suportes de borda
3. Manutenção do usuário
4. Cabeçotes de impressão
5. Cartucho de manutenção
6. Acessório de carregamento de mídia
7. Coletor de tinta
8. Rolete de limpeza
9. Tampa do coletor de condensação
10. Protetor do cilindro de saída
11. Acessório de sinalizador (apenas HP Latex 570)
12. Chave de boca de tamanho 17
Cabo de LAN, rolo de substrato e cartuchos não
incluídos.
Ferramentas necessárias
Chave de porca elétrica tamanho 17 / Cortador /
Empilhadeira / Chave de fenda plana (apenas HP
Latex 570)
Nota: A montagem pode ser feita apenas com
ferramentas manuais, mas a instalação irá
demorar mais tempo.
Observação: O corpo da impressora não pode ser
desmontado a partir das pernas. A funcionalidade
correta da impressora não pode ser garantida.
AR
Contenido de la caja
،)NAL( ال يتم تضمين ك َ بل شبكة المنطقة المحلية
مفك صمولة كهربي مقاس 71 / قاطع / ر افعة
فقطHP Latex 570 شوكية / مفك ب ر اغي مسطح
مالحظة: يمكن القيام بالتجميع باستخدام أدوات
.مالحظة: ال يمكن تفكيك جسم الطابعة من األرجل
Conteúdo da caixa
محتو يات الصندوق
EE 1. كبالت
ّ 2. حامالت الحواف
3. الصيانة الخاصة بالمستخدم
4. رؤوس الطباعة
5. خر طوشة الصيانة
6. ملحق تحميل الوسائط
7. جامع الحبر
8. الماسحة الدو ّ ار ة
9. غطاء جامع المكث ّ ف
01. واقي أسطوانة الخرج
) فقطHP Latex 570( 11. ملحق اإلشار ة
17 21. مفتاح ب ر اغي مقاس
.وبكر ة الر كيز ة، والخ ر اطيش
األدوات المطلوبة
.يدوية فقط، لكن سيستغرق التر كيب وقت ً ا أطول
.ال يمكن ضمان األداء الوظيفي السليم للطابعة

Verwandte Anleitungen für HP Latex 560


Inhaltszusammenfassung für HP Latex 560
- Seite 1 مفك صمولة كهربي مقاس 71 / قاطع / ر افعة Schlitzschraubendreher nur HP Latex 570 Destornillador de tuercas eléctrico tamaño 17 / فقطHP Latex 570 شوكية / مفك ب ر اغي مسطح Hinweis: Die Montage kann nur mit Handwerkzeugen Cuchilla / Carretilla elevadora / Destornillador de مالحظة: يمكن...
- Seite 2 Schließen Sie die Deckel des Verpackungskartons, Minuten. entfernen Sie die Plastikfolien, und entfernen Sie Il tempo necessario per l’installazione è circa: 60 minuti per la stampante HP Latex 560 e 65 minuti per la stampante HP die Abdeckung des Kartons. Entfernen Sie den Latex 570.
- Seite 3 Remove printer from packaging Retrait de l’imprimante de son emballage Nehmen Sie den Drucker aus der Verpackung Rimozione della stampante dalla confezione Extracción de la impresora del embalaje Remova a impressora da embalagem إزالة الطابعة من العبوة Remove 2 screws from each support using the size 17 Remove 3 screws from each of the 4 columns and remove Remove the protective plastic bag.
- Seite 4 Remove all the boxes. Remove the desiccant bags, cut the tapes and remove the Remove the loading accessory. Remove the 2 screws, protection, and metal bracket from ink collector box. each side. The spanner may be required to hold the nut in place on the back side.
- Seite 5 Remove the wooden/foam block. Untighten the screw to lower the printer. Now repeat the last Remove 5 screws. Take the screw and spanner next the bag that these assembly instructions were in. At one end of the printer (not important which), 3 steps on the other side.
- Seite 6 Wichtig: Dieser Schritt muss von 2 Personen ausgeführt werden. Rimuovere la plastica, sbloccare le ruote, estrarre la Solo per il modello HP Latex 570: aprire il coperchio. Mettere le rampe in posizione sul pallet. Fissare le rampe al pallet con le viti rimosse in precedenza; 2 stampante dal pallet facendola scivolare giù...
- Seite 7 Schrauben an. Solo per il modello HP Latex 570: abbassare il coperchio. Solo per il modello HP Latex 570: serrare le 4 viti (T-25). Solo per il modello HP Latex 570: collegare il cavo. Solo en impresoras HP Latex 570: Apriete los 4 tornillos Solo en impresoras HP Latex 570: Conecte el cable.
- Seite 8 .أزل لك األشر طة من الجانب الخارجي للطابعة فقط: هام؛ ال تقم بإ ز الة الملصق المشارHP Latex 570 طابعة .افتح اإلطار انزع الشريطين الب ر تقاليين، واسحبهما من قطعة الك ر تون...
- Seite 9 Remove the tape. Open the maintenance cartidge door and remove the Close the window. Remove the tie from media input and media output sides. packaging from inside of the printer. Ouvrez la porte de la cartouche de maintenance et Retirez l’adhésif. Refermez le capot.
- Seite 10 Setup the Printer Configuration de l’imprimante Einrichten des Druckers Configurazione della stampante Instalación de la impresora Configure a impressora ق ٌ م بإعداد الطابعة Switch on the printer at the back. Move the printer to its final location. Connect LAN and power cord cables: printer and curing. Important: Ensure that the building’s electrical system meets Note: Make sure that the condensate collector is properly the printer’s electrical requirements.
- Seite 11 3L supplies are inserted. autopurge. If it fails, the above message appears, if so find and install new media profiles, how to print from the RIP SW. Use the Quick Guide for training topics (www.hp.com/ HP Latex 560 Printer: Go to step 40.
- Seite 12 . فقط: أزل مستلز مات الحبر الكبير ةHP Latex 570 طابعة . فقط: افتح الك ر تونة من الخلفHP Latex 570 طابعة . فقط: ثب ّ ت الخ ر اطيش وقم بتوصيلهاHP Latex 570 طابعة (موافق) علىKO فقط: اضغط علىHP Latex 570 طابعة...
- Seite 13 HP Latex 570 Printer only: Go tho the rear of the printer HP Latex 570 Printer only: If the assisted purge is successful, the HP Latex 570 Printer only: Remove the label. Install the 775 ink cartridges. startup continues normally. If not, a System Error occurs: and with the pump working, squeeze the ink bag during 30 - You can repeat the process by restarting the printer.
- Seite 14 فقط: ضع األقفال على أد ر اج الخ ز اناتHP Latex 570 طابعة .افتح الحامل وتحقق من احتواء رؤوس طباعة اإلعداد على حبر .أدخل خر طوشة الصيانة، وادفعها ألبعد ما يمكن...
- Seite 15 Load the substrate Chargement du substrat Laden des Druckmaterials Caricamento del supporto di stampa Carga del sustrato Carregue o substrato قم بتحميل الر كيزة When prompted; remove the setup printheads. Remove the orange packaging from the printhead. Insert the printheads and close the printhead cover and window.
- Seite 16 15’’ The printer will start the printhead alignment. Wait until the Rest the roll of substrate that you want to load on the Insert the lead-edge of the substrate into the printer where Wait until the substrate emerges from the printer Ready for substrate message appears on the front panel.
- Seite 17 On the front panel, select the family of the substrate The printer automatically performs substrate advance If the network requires a web proxy to access the Internet, ensure you have the proxy port and proxy address information. roll you loaded into the printer, and then press the calibration and printhead alignment.
- Seite 18 If during the wizard process, you get an error on proxy test, Follow connectivity wizard to: To switch the HP Latex 500 Printer Series Beacon on; in the • Enable online substrate preset searches: search and install latest presets available in the web directly from printer’s front press details- modify- enable proxy: use the proxy server front panel, go to: Settings>Setup>Beacon>Select On.
- Seite 19 هام: بمجر د انتهاء إعداد الطابعة، تأكد من د ر اسة تدريب هام: الستكمال تثبيت الطابعة، ق ُ م بالوصول إلى ال ر ابط أعاله للعثور على معلوماتHP Latex ق ُ م بزيار ة مر كز معلومات . على هاتفك الذكيHP Latex Mobile App ق ُ م بتنزيل تطبيق...
- Seite 20 النصوص الواضحة للضمان المحدود التي تصحب مثل هذه المنتجات والخدمات. ويجب عدم اعتبار أي مما ور د هنا على أنه عبار ة عن ضمان مسؤولة ً عن األخطاء أو حاالت السهو الفنية أوHP إضافي. لن تكون .التحريرية المتضم ّ نة في هذه الوثيقة...