Inhaltsverzeichnis
Werbung
Verfügbare Sprachen
Verfügbare Sprachen
Quicklinks
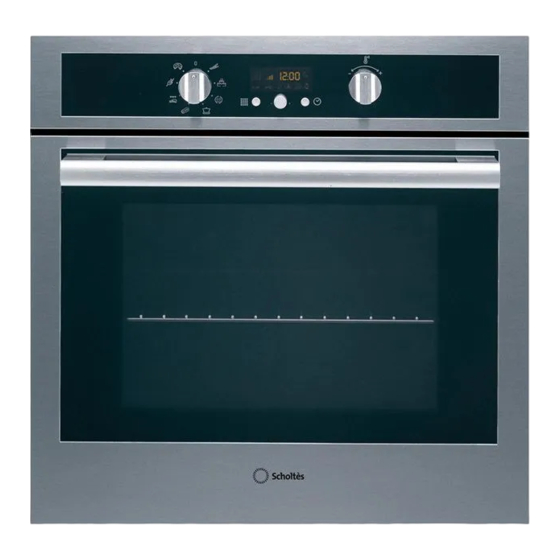
FP E6.1 S
FP E6.1 G S
Italiano
Istruzioni per l'uso
FORNO
Sommario
Istruzioni per l'uso,1
Descrizione dell'apparecchio,13
Installazione,16
Avvio e utilizzo,18
Programmi,18
Precauzioni e consigli,22
Manutenzione e cura,22
English
Operating Instructions
OVEN
Contents
Operating Instructions,1
Warnings,3
Assistance,8
Description of the appliance,13
Installation,25
Français
Mode d'emploi
FOUR
Sommaire
Mode d'emploi,1
Avertissements,4
Description de l'appareil,11
Installation,34
Programmes,36
Nettoyage et entretien,40
Español
Manual de instrucciones
HORNO
Sumario
Manual de instrucciones,1
Advertencias,4
Asistencia,9
Descripción del aparato,11
Descripción del aparato,14
Instalación,43
Programas,45
Portuges
Instruções para a utilização
Índice
Instruções para a utilização,1
Advertências,5
Assistência,9
Descrição do aparelho,11
Descrição do aparelho,14
Instalação,52
Programas,54
Werbung
Inhaltsverzeichnis

Verwandte Anleitungen für Scholtes FP E6.1 G S


Inhaltszusammenfassung für Scholtes FP E6.1 G S
-
Seite 1: Inhaltsverzeichnis
FP E6.1 S FP E6.1 G S Français Mode d’emploi FOUR Sommaire Mode d’emploi,1 Avertissements,4 Assistance,8 Description de l’appareil,11 Description de l’appareil,13 Installation,34 Mise en marche et utilisation,36 Programmes,36 Précautions et conseils,40 Nettoyage et entretien,40 Italiano Español Istruzioni per l’uso... - Seite 2 Deutsch Bedienungsanleitung BACKOFEN Inhaltsverzeichnis Bedienungsanleitung,2 Hinweise,6 Kundendienst,9 Beschreibung Ihres Gerätes,12 Beschreibung Ihres Gerätes,14 Installation,61 Inbetriebsetzung und Gebrauch,63 Programme,63 Vorsichtsmaßregeln und Hinweise,67 Reinigung und Pflege,67 Nederlands Gebruiksaanwijzing OVEN Inhoud Gebruiksaanwijzing,2 Belangrijk,6 Service,10 Beschrijving van het apparaat,12 Beschrijving van het apparaat,15 Het installeren,70 Starten en gebruik,72 Programma’s,72 Voorzorgsmaatregelen en advies,76...
-
Seite 3: Avvertenze
AT T E N Z I O N E : A s s i c u r a r s i c h e l’apparecchio sia spento prima di sostituire la lampada per evitare la possibilità di Avvertenze scosse elettriche. ATTENZIONE: Questo apparecchio e le ! Quando si inserisce la griglia assicurarsi sue parti accessibili diventano molto caldi... -
Seite 4: Avertissements
Keep children away from the appliance Avant d’activer la fonction de nettoyage during the automatic cleaning cycle as automatique : surfaces may become very hot. • nettoyer la porte du four • enlever avec une éponge humide les Never use steam cleaners or pressure résidus les plus gros. - Seite 5 el mismo. Los niños no deben jugar con O presente aparelho pode ser utilizado el aparato. Las operaciones de limpieza y por crianças com mais de 8 anos e de mantenimiento no deben ser realizadas por pessoas com capacidades físicas, por niños sin vigilancia.
-
Seite 6: Hinweise
Backofeninneren mit einem feuchten S c h w a m m e n t f e r n e n . K e i n e Reinigungsmittel verwenden. Hinweise • Entfernen Sie alle Zubehöre und den Gleitschienen-Bausatz (wenn ZUR BEACHTUNG: Bei Gebrauch wird vorhanden);... - Seite 7 kunnen krassen, en als gevolg het glas doen verbrijzelen. Voor het activeren van de functie automatische reiniging: • reinig de ovendeur • verwijder met een natte spons het ergste vuil uit de oven. Gebruik geen schoonmaakmiddelen; • verwijder alle accessoires en de kit met de geleiders (indien aanwezig);...
-
Seite 8: Assistance
• il trasporto dell’elettrodomestico non riparabile in loco. Inoltre, qualora l’elettrodomestico non sia riparabile la garanzia prevede la sostituzione a prezzo agevolato in funzione dell’anzianità del prodotto. Assistenza * Al costo di 14,25 centesimi di Euro al minuto (iva inclusa) Attenzione: dal Lun. -
Seite 9: Kundendienst
• Si ce n’est pas le cas, contacter le service d’Assistance Servicio de asistencia técnica (SAT) technique agréé. Llame al 902.133.133 y nuestros técnicos intervendrán con rapidez y eficacia, devolviendo el electrodoméstico a sus ! Ne jamais faire appel à des techniciens non agréés. condiciones óptimas de funcionamiento. -
Seite 10: Service
! Wenden Sie sich nur an autorisierte Techniker. Geben Sie bitte Folgendes an: • die genaue Beschreibung des Fehlers • die auf dem Display TEMPERATUR angezeigte Meldung • das Gerätemodell (Mod.) • die Seriennummer (S/N). Letztere Informationen können dem Typenschild, das sich auf dem Gerät befindet, entnommen werden. -
Seite 11: Description De L'appareil
Descrizione dell’apparecchio Descripción del aparato Vista d’insieme Vista en conjunto 1 POSIzIONE 1 1 POSICIóN 1 2 POSIzIONE 2 2 POSICIóN 2 3 POSIzIONE 3 3 POSICIóN 3 4 POSIzIONE 4 4 POSICIóN 4 5 POSIzIONE 5 5 POSICIóN 5 6 GUIDE di scorrimento dei ripiani 6 GUÍAS de deslizamiento de las bandejas 7 Ripiano LECCARDA... -
Seite 12: Beschreibung Ihres Gerätes
Beschreibung Ihres Gerätes Geräteansicht 1 EINSCHUBHöHE 1 2 EINSCHUBHöHE 2 3 EINSCHUBHöHE 3 4 EINSCHUBHöHE 4 5 EINSCHUBHöHE 5 6 GLEITFÜHRUNGEN für die Einschübe 7 Einschub FETTPFANNE 8 Einschub BACKOFENROST 9 Bedienfeld Beschrijving van het apparaat Algemeen aanzicht 1 POSITIE 1 2 POSITIE 2 3 POSITIE 3 4 POSITIE 4... - Seite 13 Descrizione dell’apparecchio Description de l’appareil Pannello di controllo Tableau de bord 1 Manopola PROGRAMMI 1 Bouton PROGRAMMES 2 DISPLAY 2 AFFICHEUR 3 Manopola TERMOSTATO 3 Bouton THERMOSTAT 4 Tasto IMPOSTAzIONE TEMPI 4 Touche SELECTION TEMPS 5 Manopola IMPOSTAzIONE TEMPI 5 Bouton SELECTION TEMPS 6 Tasto PIROLISI 6 Bouton PYROLYSE Display...
- Seite 14 Descripción del aparato Beschreibung Ihres Gerätes Panel de control Bedienfeld 1 Mando PROGRAMAS 1 Drehknopf PROGRAMME 2 DISPLAY 2 DISPLAY 3 Mando TERMOSTATO 3 Drehknopf THERMOSTAT 4 Botón FIJACIóN DE TIEMPOS 4 Taste zEITEINSTELLUNG 5 Mando de FIJACIóN DE TIEMPOS 5 Drehknopf zEITEINSTELLUNG 6 Botón PIRóLISIS 6 Taste PYROLYSE...
-
Seite 15: Beschrijving Van Het Apparaat
Beschrijving van het apparaat Bedieningspaneel 1 Knop PROGRAMMI 2 DISPLAY 3 THERMOSTAATKNOP 4 Toets INSTELLEN TIJDEN 5 Knop INSTELLEN TIJDEN 6 Toets PYROLYSE Display 7 Aanwijzer van de Voorverwarming 8 Cijfers TEMPERATUREN en TIJDEN 9 Symbool KLOK 10 Symbool EINDE BEREIDING 11 Symbool DUUR 12 Symbool TIMER 13 Aanwijzer DEURBLOKKERING... -
Seite 16: Collegamento Elettrico
Installazione ! È importante conservare questo libretto per poterlo consultare in ogni momento. In caso di vendita, di cessione o di trasloco, assicurarsi che resti insieme all’apparecchio per informare il nuovo proprietario sul funzionamento e sui relativi avvertimenti. ! Leggere attentamente le istruzioni: ci sono importanti informazioni sull’installazione, sull’uso e sulla sicurezza. - Seite 17 Montaggio del cavo di alimentazione TARGHETTA CARATTERISTICHE larghezza cm 43,5 1. Aprire la morsettiera Dimensioni* altezza cm 32,4 f a c e n d o l e v a c o n u n profondità cm 40,6 cacciavite sulle linguette laterali del coperchio: tirare Volume* lt.
-
Seite 18: Avvio E Utilizzo
Avvio e utilizzo 3. Un segnale acustico e l’accensione di tutti gli indicatori di preriscaldamento segnalano che il preriscaldamento è completo. È possibile infornare gli alimenti da cuocere. ATTENzIONE! Il forno è 4. Durante la cottura è sempre possibile: dotato di un sistema di - modificare il programma di cottura agendo sulla manopola arresto griglie che consente PROGRAMMI;... -
Seite 19: Programmi Di Cottura Automatici
Programma MULTICOTTURA Programma PANE Poiché il calore è costante in tutto il forno, l’aria cuoce e Per ottenere i migliori risultati vi consigliamo di seguire rosola il cibo in modo uniforme. È possibile utilizzare fino a attentamente le indicazioni sotto riportate: un massimo di due ripiani contemporaneamente. -
Seite 20: Consigli Pratici Di Cottura
un programma di cottura. • Si consiglia di impostare la temperatura al massimo. Programmare la durata di cottura Non allarmarsi se la resistenza superiore non resta costantemente accesa: il suo funzionamento è controllato 1. Premere più volte il tasto finchè non lampeggiano da un termostato. - Seite 21 Tabella cottura Programmi Alimenti Peso Posizione dei Preriscaldamento Temperatura Durata (Kg) ripiani consigliata cottura (°C) (minuti) Crostate 1 o 2 25-35 Torta di frutta 1 o 2 40-50 Plum-cake 1 o 2 170-180 45-55 Cake piccoli su 2 ripiani 1 e 3 180-190 20-25 Forno...
-
Seite 22: Precauzioni E Consigli
Precauzioni e consigli Smaltimento • Smaltimento del materiale di imballaggio: attenersi alle norme locali, così gli imballaggi potranno essere riutilizzati. ! L’apparecchio è stato progettato e costruito in conformità • La direttiva Europea 2012/19/CE sui rifiuti di apparecchiature alle norme internazionali di sicurezza. elettriche ed elettroniche (RAEE), prevede che gli Queste avvertenze sono fornite per ragioni di sicurezza e elettrodomestici non debbano essere smaltiti nel normale... -
Seite 23: Pulire La Porta
! Non utilizzare mai pulitori a vapore o ad alta pressione Pulizia automatica PIROLISI per la pulizia dell’apparecchio. Il programma PIROLISI porta la temperatura interna del forno a raggiungere i 500°C e attiva il processo di pirolisi, Pulire la porta ossia la carbonizzazione dei residui. - Seite 24 1. Premere il tasto finchè non lampeggiano l’icona e i due digit numerici sul DISPLAY; 2. ruotare la manopola IMPOSTAZIONE TEMPI verso il “ ” e “ ” per regolare l’ora; 3. premere di nuovo il tasto finchè non lampeggiano gli altri due digit numerici sul DISPLAY;...
-
Seite 25: Installation
Installation Ventilation To ensure adequate ventilation, the back panel of the cabinet must be removed. It is advisable to install the oven ! Please keep this instruction booklet in a safe place for so that it rests on two strips of wood, or on a completely future reference. -
Seite 26: Electrical Connections
! Once the appliance has been installed, the power supply Fitting the power supply cable cable and the electrical socket must be easily accessible. 1. Open the terminal board ! The cable must not be bent or compressed. by inserting a screwdriver into the side tabs of the ! The cable must be checked regularly and replaced by cover. -
Seite 27: Start-Up And Use
Start-up and use can then be placed in the oven. 4. During cooking it is always possible to: - change the cooking mode by turning the SELECTOR knob; WARNING! The oven is - adjust the temperature by turning the THERMOSTAT knob; provided with a stop system - set the cooking duration and the cooking end time (see to extract the racks and... -
Seite 28: Automatic Cooking Modes
constant throughout the oven, the air cooks and browns ! Do not open the oven door to avoid offsetting the cooking food uniformly. A maximum of two racks may be used at the same time. time and temperature. BREAD mode TRADITIONAL OVEN mode To obtain the best results, we recommend that you carefully Both the top and bottom heating elements will come on. -
Seite 29: Programming Cooking
Programming cooking BARBECUE • Insert the rack in position 3 or 4. Place the food in the ! A cooking mode must be selected before programming centre of the rack. can take place. • We recommend that the temperature is set to its maximum level. -
Seite 30: Cooking Advice Table
Cooking advice table Cooking Foods Weight Rack Preheating Recommended Cooking modes (in kg) position temperature time (°C) (minutes) Tarts 1 or 2 25-35 Fruit cakes 1 or 2 40-50 Sponge cake made with yoghurt 1 or 2 170-180 45-55 Small cakes on 2 racks 1 and 3 180-190 20-25... -
Seite 31: Precautions And Tips
Precautions and tips Disposal • When disposing of packaging material: observe local legislation so that the packaging may be reused. ! This appliance has been designed and manufactured • The European Directive 2012/19/EC on Waste in compliance with international safety standards. The Electrical and Electronic Equipment (WEEE), requires following warnings are provided for safety reasons and that old household electrical appliances must not... -
Seite 32: Cleaning The Oven Door
Automatic cleaning using the PYROLYSIS • All accessories - with the exception of the sliding racks cycle - can be washed like everyday crockery, and are even dishwasher safe. ! Never use steam cleaners or pressure cleaners on the During the PYROLYSIS cycle, the internal temperature appliance. - Seite 33 Programming the automatic cleaning end time 1. Press the button until the icon and the two numerical digits on the DISPLAY begin to flash. 2. Turn the SET TIME KNOB towards “ ” and “ ” to adjust the hour value. 3.
-
Seite 34: Installation
Installation Aération Pour garantir une bonne aération, la cavité d’encastrement doit être dépourvue de paroi arrière. Il est conseillé ! Conservez ce mode d’emploi pour pouvoir le consulter d’installer le four de manière à ce qu’il repose sur deux à tout moment. En cas de vente, de cession ou de cales en bois ou bien sur un plan d’appui continu qui ait une déménagement, veillez à... -
Seite 35: Raccordements Électriques
! Il doit être contrôlé périodiquement et ne peut être Montage du câble d’alimentation remplacé que par un technicien agréé (voir Assistance). 1. Pour ouvrir le bornier, ! Nous déclinons toute responsabilité en cas de non faire pression à l’aide d’un tournevis sur les languettes respect des normes énumérées ci-dessus. -
Seite 36: Mise En Marche Et Utilisation
Mise en marche et utilisation montée en température s’éclairent progressivement au fur et à mesure que la température augmente. Pour modifier la température, tourner le bouton AT T E N T I O N ! L e f o u r THERMOSTAT. -
Seite 37: Programmes De Cuisson Automatiques
Mise en marche de toutes les résistances (sole, voûte dès ouverture de la porte du four. et circulaire) ainsi que du ventilateur. Ce programme est Programmes de cuisson automatiques particulièrement indiqué pour la cuisson de mets délicats (comme des gâteaux levés par ex.) et certains petits-fours Ces programmes sont entièrement automatiques : la sur trois niveaux en même temps. -
Seite 38: Comment Programmer Une Cuisson
• beurrez légèrement la plaque. PROGRAMMES sur « 0 ». Conseils de cuisson Recette PIzzA : 1 Plaque, gradin du bas, four froid ou chaud ! Pour vos cuissons ventilées n’utilisez pas les gradins 1et Recette pour 3 pizzas d’environ550g : 1.000g de farine, 5 : ils sont directement frappés par l’air chaud qui pourrait 500g d’eau, 20g de sel, 20 g de sucre, 10 cl d’huile d’olive, brûler vos mets délicats. - Seite 39 Tableau de cuisson Programmes Aliments Poids Niveau Préchauffage Température Durée (Kg) enfournement préconisée cuisson (°C) (minutes) Tartes 1 ou 2 25-35 Tarte aux fruits 1 ou 2 40-50 Cake aux fruits 1 ou 2 170-180 45-55 Petits gâteaux sur 2 niveaux 1 et 3 180-190 20-25...
-
Seite 40: Précautions Et Conseils
Précautions et conseils Mise au rebut • Mise au rebut du matériel d’emballage : conformez-vous aux réglementations locales, les emballages pourront ! Cet appareil a été conçu et fabriqué conformément aux ainsi être recyclés. normes internationales de sécurité. Ces conseils sont •... -
Seite 41: Nettoyage De L'appareil
Nettoyage de l’appareil Remplacement de l’ampoule d’éclairage • Nettoyer l’extérieur émaillé ou inox et les joints en caoutchouc à l’aide d’une éponge imbibée d’eau tiède Pour changer l’ampoule additionnée de savon neutre Si les taches sont difficiles à d’éclairage du four : cavité... - Seite 42 Les sécurités • l’icône s’allume sur l’afficheur pour indiquer le verrouillage automatique de la porte du four dès que la température a atteint des valeurs élevées ; • l’icône indique qu’il est possible d’annuler, à tout moment, le cycle de nettoyage par pression sur la touche •...
-
Seite 43: Instalación
Instalación ! Una vez empotrado el aparato no se deben permitir contactos con las partes eléctricas. El consumo declarado en la placa de características ha sido ! Es importante conservar este manual para poder medido en una instalación de este tipo. consultarlo en todo momento. -
Seite 44: Conexión Eléctrica
Conexión eléctrica ! Una vez instalado el aparato, el cable eléctrico y la toma de corriente deben ser fácilmente accesibles. Los hornos que poseen cable de alimentación tripolar, son fabricados para funcionar con corriente alterna a la tensión ! El cable no debe sufrir pliegues ni compresiones. y frecuencia indicadas en la placa de características que se encuentra en el aparato (ver más adelante). -
Seite 45: Puesta En Funcionamiento Y Uso
Puesta en funcionamiento y uso Es posible modificar la temperatura girando el mando TERMOSTATO. 3. Una señal acústica y el encendido de todos los indicadores ATENCIóN! El horno está de precalentamiento indicarán que el precalentamiento ha dotado de un sistema de finalizado. -
Seite 46: Programas De Cocción Automáticos
! Una vez finalizada la fase de cocción, el horno emite una Programa MULTICOCCIóN señal sonora. Debido a que el calor es constante en todo el horno, el aire cocina y tuesta la comida de modo uniforme. Es posible ! No abra la puerta del horno para evitar que se alteren los utilizar hasta un máximo de dos niveles simultáneamente. -
Seite 47: Programar La Cocción
de levadura en polvo) cocción (jugos y/o grasas). • Levitación a temperatura ambiente: 1 hora. • Coloque en el horno cuando está frío o caliente MULTICOCCIÓN • Utilice las posiciones 2 y 4 colocando en la 2 los • Ponga en marcha el programa de cocción PIZZA alimentos que requieren mayor calor. -
Seite 48: Tabla De Cocción
Tabla de cocción Programas Alimentos Peso Posición Precalentamiento Temperatura Duración de (Kg) de las aconsejada la cocción bandejas (°C) (minutos) Tortas glaseadas 1 o 2 25-35 Torta de fruta 1 o 2 40-50 Plum-cake 1 o 2 170-180 45-55 Tortas pequeñas en 2 niveles 1 y 3 180-190 20-25... -
Seite 49: Precauciones Y Consejos
Precauciones y consejos Eliminación • Eliminación del material de embalaje: respete las normas locales, de esta manera los embalajes podrán ser ! El aparato ha sido proyectado y fabricado en conformidad reutilizados. con las normas internacionales de seguridad. • En base a la Norma europea 2012/19/CE de Residuos Estas advertencias se suministran por razones de seguridad de aparatos Eléctricos y Electrónicos (RAEE), los y deben ser leídas atentamente. -
Seite 50: Limpiar La Puerta
! No utilice la lámpara del horno para iluminar ambientes. • Los accesorios se pueden lavar como cualquier vajilla, incluso en lavavajillas, con excepción de las guías Limpieza automática PIRóLISIS deslizables. ! No utilice nunca limpiadores a vapor o de alta presión El programa PIRÓLISIS eleva la temperatura interior del para la limpieza del aparato. - Seite 51 Programar el final de la limpieza automática 1. Presione el botón hasta que centelleen el icono y las dos cifras en la PANTALLA; 2. gire el mando de FIJACIÓN DE TIEMPOS hacia “ ” y “ ” para regular la hora; 3.
-
Seite 52: Instalação
Instalação Ventilação Para garantir uma boa ventilação é necessário eliminar a parede traseira do vão. É preferível instalar o forno de ! É importante guardar este folheto para poder consultá-lo a maneira que apoie-se sobre duas ripas de madeira, ou qualquer momento. - Seite 53 ! O cabo deve ser verificado periodicamente e substituído Montagem do cabo de fornecimento somente por técnicos autorizados (veja a Assistência Técnica). 1. Para abrir a caixa de ! A empresa exime-se de qualquer responsabilidade se terminais faça alavanca com uma chave de parafuso estas regras não forem obedecidas.
-
Seite 54: Forno
Início e utilização temperatura sobe. É possível modificar a temperatura se rodar o selector do TERMÓSTATO. ATENçãO! O forno está 3. Soa um sinal e acendem-se todos os indicadores de pré- equipado com um sistema aquecimento, a indicar que o pré-aquecimento terminou. É de bloqueio das grelhas possível colocar os alimentos no forno. - Seite 55 ! É possível modificar a duração da cozedura para optimizar Programa de FORNO PARA PASTÉIS e personalizar o resultado final. Esta função é indicada para a cozedura de comidas delicadas, (especialmente doces que necessitarem de ! Quando alcançar a fase de cozedura, o forno emitirá um levitação) e algumas preparações “mignon”...
-
Seite 56: Conselhos Práticos Para Cozedura
Receita para PIzzA: necessitarem de mais calor. 1 Bandeja pingadeira, prateleira baixa, forno frio ou quente • Coloque a bandeja pingadeira embaixo e a grade em Receita para 3 pizzas de aproximadamente 550g: 1.000 g. cima. Farinha, 500 g. Água, 20 g. Sal, 20 g. Açúcar, 10 cl. Azeite, 20 g. -
Seite 57: Tabela De Cozedura
Tabela de cozedura Programas Alimentos Peso Posição Pré- Temperatura Duração da (Kg) aquecimento aconselhada cozedura prateleiras (°C) (minutos) Tortas doces 1 ou 2 25-35 Torta de fruta 1 ou 2 40-50 Plum cake 1 ou 2 170-180 45-55 Forno Queques pequenos em 2 prateleiras 1 e 3 180-190 20-25... -
Seite 58: Precauções E Conselhos
Precauções e conselhos Eliminação • Eliminação do material de embalagem: obedeça as regras locais, de maneira que as embalagens possam ! Este aparelho foi projectado e fabricado em conformidade ser reutilizadas. com as normas internacionais de segurança. Estas • A directiva Europeia 2012/19/CE relativa aos resíduos advertências são fornecidas por razões de segurança e de equipamentos eléctricos e electrónicos (REEE) prevê... -
Seite 59: Limpeza Da Porta
! Não utilizar a lâmpada do forno como iluminação de • Os acessórios podem ser lavados como quaisquer utensà lios, inclusive numa máquina de lavar loiça, ambientes. excepto as guias corrediças. Limpeza automática PIRóLISE ! Nunca utilize equipamento de limpeza a vapor ou de alta pressão para limpar a aparelhagem. - Seite 60 Programar o fim da limpeza automática 1. Premir a tecla até o ícone e os dois primeiros algarismos piscarem no VISOR; 2. rode o selector de CONFIGURAÇÃO de TEMPOS para “ ” ou “ ” para regular a hora; 3. pressione de novo a tecla até os outros dois algarismos começarem a piscar no VISOR;...
-
Seite 61: Elektroanschluss
Installation ! Bewahren Sie diese Bedienungsanleitung bitte sorgfältig auf, damit Sie sie jederzeit zu Rate ziehen können. Sorgen Sie dafür, dass sie im Falle eines Verkaufs, eines Umzugs oder einer Übergabe an einen anderen Benutzer das Gerät stets begleitet, damit auch der Nachbesitzer die Möglichkeit hat, darin nachschlagen zu können. -
Seite 62: Elektrischer Anschluss
! Das Netzkabel darf nicht gebogen oder eingeklemmt Anschluss des Netzkabels werden. 1. Das Klemmengehäuse ! Das Kabel muss regelmäßig kontrolliert werden und darf öffnen, indem die seitlichen Zungen des Deckels mithilfe nur durch autorisiertes Fachpersonal ausgetauscht werden eines Schraubenziehers (siehe Kundendienst). -
Seite 63: Inbetriebsetzung Und Gebrauch
Inbetriebsetzung und Gebrauch 2. Der Backofen schaltet auf Vorheizen; die Anzeigen der aktuellen Vorheiztemperatur schalten sich nach und nach an, je weiter die Temperatur steigt. ACHTUNG! Der Ofen ist mit Die Temperatur kann mithilfe des Drehschalters einem Arretierungssystem THERMOSTAT abgeändert werden. der Roste ausgestattet. - Seite 64 Einschubhöhe 3 ein und stecken Sie den Spieß in die 40°C und 250°C verändert werden. entsprechende Öffnung der Backofenrückwand; Programm BROT 3. Setzen Sie den Drehspieß durch Wahl der Symboltaste Benutzen Sie diese Funktion zur Brotherstellung. Für in Betrieb. Einzelheiten beziehen Sie sich bitte auf das Kapitel “Automatische Programme”.
-
Seite 65: Garzeit Programmieren
Backblech mit dem Teig. • Beispiel: Es ist 9:00 und es wird eine Dauer von 1 Std. und 15 • Schieben Sie die Brote in den kalten Ofen. Min. sowie das Programmende für 12:30 Uhr vorprogrammiert. • Starten Sie das Garprogramm BROT. Das Programm startet um 11:15:00 automatisch. - Seite 66 Tabelle der Garzeiten Programmen Speisen Gewicht Einschubhöhe Empfohlene Garzeit Vorheizen (Kg) Temperatur (minuten) (°C) Torten 1 oder 2 25-35 Obstkuchen 1 oder 2 40-50 Plum Cake 1 oder 2 170-180 45-55 Kleingebäck auf 2 Ebenen 1 und 3 180-190 20-25 Gebäck Biskuitböden 1 oder 2...
-
Seite 67: Vorsichtsmaßregeln Und Hinweise
Vorsichtsmaßregeln und Hinweise Entsorgung • Entsorgung des Verpackungsmaterials: Befolgen Sie die lokalen Vorschriften; Verpackungsmaterial kann ! Das Gerät wurde entsprechend den strengsten wiederverwertet werden. internationalen Sicherheitsvorschriften entworfen und gebaut. • Gemäß der Europäischen Richtlinie 2012/19/EC Nachstehende Hinweise werden aus Sicherheitsgründen über Elektro- und Elektronik-Altgeräte (WEEE) geliefert und sollten aufmerksam gelesen werden. -
Seite 68: Backofentür Reinigen
Lampenaustausch • Der Backofen sollte möglichst nach jedem Gebrauch, solange er noch etwas warm ist, gereinigt werden. Hierzu warmes Wasser und ein Reinigungsmittel verwenden. Die Backofenlampe wie folgt Mit Wasser nachspülen und mit einem weichen Tuch ersetzen: Backofenraum trocken. Scheuermittel vermeiden. 1. - Seite 69 Auch für den PYROLYSE-Zyklus kann, wie für jeden Nach Abschluss der Selbstreinigung normalen Garvorgang, programmiert werden, wann dieser Die Backofentür kann nicht sofort geöffnet werden, beendet werden soll (siehe Programmierung des Endes des sondern erst dann, wenn die Backofentemperatur auf ein Selbstreinigungsvorgangs).
-
Seite 70: Het Installeren
Het installeren ! Bewaar dit boekje zorgvuldig voor eventuele verdere raadpleging. Wanneer u het product weggeeft, verkoopt, of wanneer u verhuist, dient u dit boekje bij het apparaat te bewaren zodat alle nodige informatie voorhanden blijft. ! Lees de gebruiksaanwijzingen zorgvuldig door: er staat belangrijke informatie in over installatie, gebruik en veiligheid. -
Seite 71: Elektrische Aansluitingen
! De kabel mag niet worden gebogen of samengedrukt. Monteren voedingskabel ! De kabel moet van tijd tot tijd worden gecontroleerd en 1. Licht de lipjes aan de zijkant van het deksel van mag alleen door erkende monteurs worden vervangen (zie het klemmenbord op met een Service). -
Seite 72: Starten En Gebruik
Starten en gebruik de THERMOSTAATKNOP. 3. Een geluidssignaal en de ontsteking van alle aanwijzers van de voorverwarming geven aan dat de voorverwarming BELANGRIJK! De oven compleet is. U kunt de etenswaren in de oven zetten. i s u i t g e r u s t m e t e e n 4. -
Seite 73: Automatische Kookprogramma's
persoonlijk gekozen eindresultaat. Programma MULTIKOKEN Alle verwarmingselementen gaan aan (onder, boven en ! Als de kookfase is bereikt laat de oven 3 geluidssignalen cirkelvormig) en de ventilator gaat draaien. Aangezien horen. de warmte in de hele oven constant is, zorgt de lucht dat de gerechten op gelijkmatige wijze gekookt en gebakken ! Open de ovendeur niet teneinde te vermijden dat de worden. -
Seite 74: De Bereiding Programmeren
gist (of 2 zakjes bakpoeder). om de beurt de eindtijd en de duur van de bereiding. • Rijzen op kamertemperatuur : 1 uur Om een programmering te annuleren draait u de • In koude of warme oven zetten PROGRAMMAKNOP op stand “0”. •... - Seite 75 Kooktabel Programma's Gerechten Gewicht Roosterstanden Voorverwarmen Aangeraden Kooktijd (Kg) temperatuur (minuten) (°C) Vruchtentaart (harde bodem) 1 of 2 25-35 Vruchtentaart 1 of 2 40-50 Cakejes 1 of 2 170-180 45-55 Kleine cakejes op 2 roosters 1 en 3 180-190 20-25 Gebak Cake 1 of 2...
-
Seite 76: Onderhoud En Verzorging
Voorzorgsmaatregelen en • Het apparaat is niet geschikt om te worden ingeschakeld m.b.v. een externe timer ofwel door advies een gescheiden afstandsbedieningssysteem. Afvalverwijdering Dit apparaat is ontworpen en vervaardigd volgens de • Verwijdering van het verpakkingsmateriaal: houd u aan geldende internationale veiligheidsvoorschriften. Deze de plaatselijke normen, zodat het verpakkingsmateriaal aanwijzingen zijn geschreven voor uw veiligheid en u dient hergebruikt kan worden. -
Seite 77: Schoonmaken Van Het Apparaat
Schoonmaken van het apparaat Het controleren van de afdichtingen Controleer regelmatig de staat van de afdichtingen rondom • De buitenkant, dus zowel het email en het roestvrij staal de ovendeur. In het geval de afdichtingen beschadigd zijn, als de rubberen afdichtingen, kunnen met een spons en dient u zich tot de dichtstbijzijnde Technische Dienst te een sopje worden afgenomen. - Seite 78 Zoals voor een normaal kookprogramma is het ook voor de PYROLYSE cyclus mogelijk een einde te programmeren (zie Programmeren van het einde van de automatische reiniging). Veiligheidssystemen • het verlichte symbool op het display geeft aan dat de ovendeur automatisch is geblokkeerd omdat de temperatuur zeer hoog is geworden;...
- Seite 80 195102278.01 05/2013 - XEROX FABRIANO...