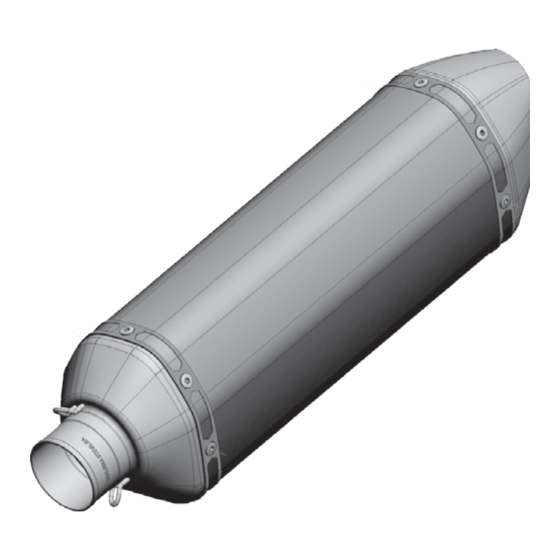
Seite 1
Installation instructions Akrapovič Exhaust System Evolution for the Aprilia RSV4 Aprilia Tuono V4 *505863* Revision 1.0 04/2017 www.akrapovic.com...
Akrapovič takes all copyright and other rights infringement cases under serious consideration. If you have any reason to believe that your exhaust system is not an original Akrapovič product, please contact our local partners or Akrapovič at info@akrapovic.com. 2 / 28...
Seite 3
(PLEASE USE THE QR CODE ON THE FRONT PAGE OR LOOK FOR “SCHEMATIC VIEW” IN THE RESPECTIVE PRODUCT PAGE ON WWW.AKRAPOVIC.COM). MAKE SURE THAT YOU HAVE ALL THE PARTS NECESSARY FOR THE INSTALLATION OF YOUR NEW AKRAPOVIČ EXHAUST SYSTEM. IF ANY OF THE PARTS IS MISSING, PLEASE DO NOT PROCEED WITH UNINSTALLING YOUR STOCK EXHAUST SYSTEM/ INSTALLING THE AKRAPOVIČ...
Please consult the appropriate laws in your area before installing any aftermarket part or system on your vehicle to ensure compliance with all applicable laws. Neither Akrapovic d.d. nor any of their subsidiaries or the sellers of the parts or systems make any representation that any of their parts or systems comply with any such laws.
ECU fuel-mapping enrichment. Evolution For perfect performance, throttle response and durability of the engine, the Akrapovič Evolution exhaust system should be used in combination with ECU fuel mapping enrichment provided by a professional, to avoid severe engine damage or breakdown, which could result in injury.
Seite 6
REMOVAL OF STOCK EXHAUST SYSTEM: Put the motorcycle on a side stand, we recommend a central racing stand. Make sure, that surface is solid and flat. Unscrew marked bolts and carefully remove heat shield off the motorcycle (F 01).
Seite 7
F 03 Partially remove stock muffler, as shown and remove valve cables off the bracket and muffler. Carefully remove stock muffler off the motorcycle (F 04). CAUTION: be careful not to injure yourself or damage any part of the motorcycle during this procedure! F 04 7 / 28...
Seite 8
Remove the metal collar and rubber damper from the muffler hanging bracket (F 05). CAUTION: be careful not to injure yourself or damage any part of the motorcycle during this procedure! F 05 Unscrew marked bolts, remove plastic fasteners on both sides of the motorcycle and carefully remove the lower and middle parts of the cowling (F 06, 07, 08, 09).
Seite 10
F 09 Disconnect electrical connector from the valve actuator. Unscrew marked bolts and partially remove valve actuator (F 10). IMPORTANT: be careful not to damage any part of the motorcycle during this procedure! F 10 10 / 28...
Seite 11
Disconnect exhaust valve cables and carefully remove the cables from the motorcycle (F 11, 12). IMPORTANT: be careful not to damage any part of the motorcycle during this procedure! F 11 F 12 11 / 28...
Seite 12
Assemble and reinstall the valve actuator, without cables, onto the motorcycle in reverse order as it was removed. Check vehicle manufacturer manual for tightening torques (F 13, 14). IMPORTANT: be careful not to damage any part of the motorcycle during this procedure! F 13 9.8Nm...
Seite 13
Unscrew the bolt and remove the safety pin from the oil cooler hanging brackets and move the cooler out of the way (F 15). IMPORTANT: be careful not to damage the radiator or any other part of the motorcycle during this process! F 15 11.
Seite 14
Unscrew both lambda sensors, unhook the marked springs and carefully remove the collector off the motorcycle (F 17, 18). IMPORTANT: make sure not to damage the lambda sensor’s electrical lead during this procedure! CAUTION: be careful not to injure yourself or damage any part of the motorcycle during this procedure! F 17 IMPORTANT: make sure not to damage the lambda sensor’s electrical lead during this procedure!
Seite 15
Unscrew the rear headers’ flange nuts and carefully remove the headers off the motorcycle (F 19). CAUTION: be careful not to injure yourself or damage any part of the motorcycle during this procedure! F 19 14. Unscrew the front headers’ flange nuts and carefully remove the headers off the motorcycle (F 20). CAUTION: be careful not to injure yourself or damage any part of the motorcycle during this procedure! F 20 15 / 28...
Seite 16
INSTALLATION OF THE AKRAPOVIČ EXHAUST SYSTEM: Set up the flanges together with the springs and sleeves; make sure you orient the flanges and springs as shown (F 21). FRONT HEADERS REAR HEADERS F 21 Set up the left rear header with flange, spring and sleeve; make sure you orient the flange and spring as shown (F 22).
Seite 17
Set up and tighten the front header’s flanges together with the springs and sleeves onto the front cylinder head, using stock nuts; make sure you orient the flanges and springs as shown (F 23). CAUTION: be careful not to injure yourself or damage any part of the motorcycle during this process! INSTALLATION TIP: use new stock exhaust port gaskets.
Seite 18
Instal the left rear header together with sleeve, flange and spring; tighten the flange onto the rear cylinder head, using stock nuts and attach the spring (F 25). CAUTION: be careful not to injure yourself or damage any part of the motorcycle during this process! INSTALLATION TIP: use new stock exhaust port gasket.
Seite 19
Insert the front headers into the sleeves and attach the springs (F 27). IMPORTANT: make sure, that springs pull the header tubes all the way into the sleeves – use rubber mallet if necessary to tap the connections into place! CAUTION: be careful not to injure yourself or damage any part of the motorcycle during this process! F 27 Assemble the collector onto the headers and install the lambda sensors into the collector (F 28).
Seite 20
Attach the springs at the rear and front headers - collectors joints (F 29, 30). IMPORTANT: make sure, that springs pull the collector all the way onto the headers – use rubber mallet if necessary to tap the connections into place!
Seite 21
Slide the link pipe onto the collector’s outlet and attach the spring (F 31). IMPORTANT: make sure, that spring pull the link pipe all the way onto the collector – use rubber mallet if necessary to tap the connection into place! INSTALLATION TIP: coat the interior side of the input bush of the titanium link pipe with Akrapovič...
Seite 22
Install the Carbon Fiber Bracket onto the right side of the sub frame, using bolts, washers and Aluminium distance bushes from Akrapovič installation kit (F 33). IMPORTANT: use bolt sealant on the bolt threads! DISTANCE BUSH 22Nm 16ftlb WASHER...
Seite 23
Position the muffler correctly, slide it onto the outlet of the link pipe and attach the springs (F 35). IMPORTANT: be careful not to damage the muffler or any other part of the motorcycle during this process! INSTALLATION TIP: coat the interior side of the inlet bushes of the muffler with Akrapovič ceramic anti- seizing grease (white tube).
Seite 24
Align the muffler in respect to the motorcycle and tighten the muffler’s bracket bolt to the specified torque (F 37). IMPORTANT: be careful not to damage any part of the motorcycle or exhaust system during this process! 22Nm 16ftlb...
Seite 26
FINAL INSTALLATION AND MAINTENANCE: Clean grease spots off all exhaust system surfaces, when installation is finished. Cleaning will prevent spots from burning onto the surface. Do not use aggressive chemical cleaners, because they can damage the surface or sticker.
TROUBLESHOOTING: Problem Possible cause Solution tighten the clamp to specified loosened clamp torque Exhaust gas leaks out of the muffler/pipe clamp connections tap the connection into place and connection is not completely tighten the clamp to specified joined torque 27 / 28...
Seite 29
Einbauanleitung Akrapovič-Auspuffanlage Evolution Istruzioni per il montaggio Impianto di scarico Akrapovič Evolution Instructions d‘installation Système d‘échappement d‘Akrapovič Evolution Instrucciones de montaje Sistema de escape Akrapovič Evolution Instruções de montagem Sistema de Escape Akrapovič Evolution Navodila za namestitev Izpušni sistem Akrapovič Evolution...
Akrapovič unterzieht alle Fälle von Verstößen gegen Urheber- und andere Rechte einer eingehenden Prüfung. Sollten Sie Grund zu der Annahme haben, dass es sich bei Ihrer Auspuffanlage nicht um ein Originalprodukt von Akrapovič handelt, wenden Sie sich bitte an unsere Partner vor Ort oder an Akrapovič unter info@akrapovic. com.
Seite 33
TEILELISTE AB (BITTE VERWENDEN SIE DEN QR-CODE AUF DER VORDERSEITE ODER SUCHEN SIE NACH „SCHEMATISCHE ÜBERSICHT“ AUF DER JEWEILIGEN PRODUKTSEITE UNTER WWW. AKRAPOVIC.COM). STELLEN SIE SICHER, DASS IHNEN ALLE ERFORDERLICHEN TEILE FÜR DEN EINBAU IHRER NEUEN AKRAPOVIČ-AUSPUFFANLAGE ZUR VERFÜGUNG STEHEN. SOLLTE EIN TEIL FEHLEN, BAUEN SIE IHRE ORIGINAL-AUSPUFFANLAGE BITTE NICHT AB/BAUEN SIE DIE AKRAPOVIČ-AUSPUFFANLAGE NICHT EIN UND WENDEN SIE SICH AN DEN HÄNDLER, BEI DEM SIE...
Sie einige grundlegende Hinweise zur Konformität Ihrer Akrapovič-Auspuffanlage mit verschiedenen gesetzlichen Anforderungen im produktbezogenen Teil unserer Website (bitte verwenden Sie den QR-Code auf der Vorderseite oder suchen Sie auf www.akrapovic.com nach der jeweiligen Produktseite). Die EG- und ECE-Betriebserlaubnis finden Sie auf dem Zertifikat, das Ihrem Produkt beiliegt.
Evolution Für perfekte Leistungen, Reaktionen der Drosselklappe und Langlebigkeit des Motors sollten die Abgassysteme Akrapovič Evolution zusammen mit einer Verbesserung des ESG-Kraftstoff-Diagramms, die von einem qualifizierten Profi hergestellt wurde, verwendet werden, damit größere Schäden am Motor oder Defekte, die zu einer Körperverletzung führen könnten, vermieden werden.
Seite 36
AUSBAU DER ORIGINAL-AUSPUFFANLAGE: Stellen Sie das Motorrad auf einen Seitenständer, wir empfehlen einen Zentralständer. Achten Sie darauf, dass die Fläche fest und eben ist. Lösen Sie die markierten Schrauben und entfernen Sie vorsichtig das Hitzeschutzblech vom Motorrad (F 01).
Seite 37
EINBAU DER AKRAPOVIČ-AUSPUFFANLAGE: Setzen Sie den Flansch mit den Federn und Muffen zusammen; achten Sie darauf, dass Sie die Flansche und Federn wie gezeigt ausrichten (F 21). Setzen Sie den hinteren linken Rohrverteiler mit Flansch, Feder und Muffe zusammen; achten Sie darauf, dass Sie Flansch und Feder wie gezeigt ausrichten (F 22).
Seite 38
WICHTIG: Achten Sie darauf, dass während dieses Vorgangs keine Teile des Motorrads oder der Auspuffanlage beschädigt werden! WICHTIG: Die Schraube nur von Hand festziehen! 16. Richten Sie den Schalldämpfer im Verhältnis zum Motorrad aus und ziehen Sie die Schraube der Schalldämpfer- Halterung mit dem angegebenen Drehmoment fest (F 37).
ENDMONTAGE UND WARTUNG: Entfernen Sie nach dem abgeschlossenen Einbau Fettflecken von allen Oberflächen der Auspuffanlage. Die Reinigung verhindert ein Einbrennen der Flecken in die Oberfläche. Verwenden Sie keine aggressiven chemischen Reinigungsmittel, da diese die Oberfläche oder den Aufkleber beschädigen können.
Seite 41
FEHLERBEHEBUNG: Problem Mögliche Ursache Lösung ziehen Sie die Klemme mit dem gelockerte Klemme vorgegebenen Drehmoment fest Abgase treten aus den Verbindungen von Schalldämpfer klopfen Sie die Verbindung an und Rohrklemmen aus die Verbindung ist nicht die richtige Stelle und ziehen vollständig verbunden Sie die Klemme mit dem vorgegebenen Drehmoment fest...
Istruzioni per il montaggio Impianto di scarico Akrapovič Evolution per i modelli Aprilia RSV4 Aprilia Tuono V4 Revisione 1.0 05/2017 www.akrapovic.com www.akrapovic.com...
Akrapovič prende in seria considerazione tutti i casi di violazione del copyright e degli altri diritti. Se per qualsiasi motivo ritieni che il tuo impianto di scarico non sia un prodotto originale Akrapovič ti preghiamo di contattare i nostri partner locali o direttamente Akrapovič all’indirizzo info@akrapovic.com. 16 / 74...
Seite 45
SUL NOSTRO SITO WEB (SI PREGA DI UTILIZZARE IL CODICE QR RIPORTATO IN COPERTINA O DI CERCARE LA “VISUALIZZAZIONE SCHEMATICA” NELLA RISPETTIVA PAGINA DEL PRODOTTO SU WWW.AKRAPOVIC.COM). ACCERTATI DI AVERE TUTTI I COMPONENTI NECESSARI PER IL MONTAGGIO DEL TUO NUOVO IMPIANTO DI SCARICO AKRAPOVIČ. SE DOVESSE MANCARE UNO QUALSIASI DEI COMPONENTI SI PREGA DI NON PROCEDERE CON LO SMONTAGGIO DELL’IMPIANTO DI SCARICO DI SERIE/MONTAGGIO DELL’IMPIANTO DI SCARICO AKRAPOVIČ...
Akrapovič a diversi requisiti di legge (si prega di utilizzare il codice QR riportato in copertina o di cercare la rispettiva pagina del prodotto su www.akrapovic.com). Per le omologazioni EC ed ECE si prega di consultare il certificato allegato al prodotto.
Per ottenere delle prestazioni ottimali, risposta in accelerazione e durata di vita del motore, gli impianti di scarico Akrapovič Evolution dovrebbero essere utilizzati in combinazione con la mappatura della centralina elettronica per l’arricchimento del carburante effettuata da un professionista del settore, al fine di evitare gravi danni o guasti al motore, che possono provocare lesioni personali.
Seite 48
RIMOZIONE DELL'IMPIANTO DI SCARICO DI SERIE: Mettere la moto sul cavalletto laterale; consigliamo di utilizzare un cavalletto centrale da corsa. Accertarsi che la superficie sia solida e in piano. Svitare i bulloni contrassegnati e, con cautela, rimuovere lo scudo termico (F 01).
Seite 49
MONTAGGIO DELL'IMPIANTO DI SCARICO AKRAPOVIČ: Montare le flange insieme alle molle e ai manicotti; accertarsi di orientare le flange e le molle, come mostrato (F 21). Montare lo scarico posteriore sinistro con la flangia, la molla e il manicotto; accertarsi di orientare la flangia e la molla come mostrato (F 22).
Seite 50
16. Allineare il silenziatore in base alla moto e serrare il bullone della staffa del silenziatore alla coppia specificata (F 37). IMPORTANTE: durante questa procedura prestare attenzione a non danneggiare nessuna parte della moto! 17. Rimontare tutte le parti di serie e della carenatura che sono state rimosse in ordine inverso rispetto a quello di rimozione (F 38).
Seite 52
INSTALLAZIONE FINALE E MANUTENZIONE: A montaggio terminato eliminare le macchie di grasso da tutte le superfici dell'impianto di scarico. Questo evita che le macchie brucino sulla superficie. Non utilizzare detergenti chimici aggressivi che potrebbero danneggiare la superficie o l'adesivo.
RISOLUZIONE PROBLEMI: Problema Possibile causa Soluzione serrare la fascia alla coppia fascia allentata specificata I gas di scarico escono dalle fasce di collegamento tra silenziatore e tubi spingi i componenti l'uno verso i componenti non sono l'altro e serra la fascia alla sufficientemente connessi coppia specificata 25 / 74...
Seite 55
Instructions d'installation Système d'échappement d'Akrapovič Evolution pour la Aprilia RSV4 Aprilia Tuono V4 Révision 1.0 05/2017 www.akrapovic.com www.akrapovic.com...
Akrapovič prend très au sérieux tous les cas d'infraction du copyright et des autres droits. Si vous avez des raisons à croire que votre système d'échappement n'est pas un produit d'origine Akrapovič, veuillez contactez nos partenaires locaux ou Akrapovič en envoyant un e-mail à info@akrapovic.com. 28 / 74...
Seite 57
SUR NOTRE SITE (VEUILLEZ UTILISER LE CODE QR FIGURANT SUR LA PREMIÈRE PAGE OU CHERCHER LA « VUE SCHÉMATIQUE » QUE VOUS TROUVEREZ SUR LA PAGE CORRESPONDANTE DU PRODUIT SUR WWW.AKRAPOVIC.COM). ASSUREZ-VOUS DE DISPOSER DE TOUTES LES PIÈCES NÉCESSAIRES POUR L'INSTALLATION DE VOTRE NOUVEAU SYSTÈME D'ÉCHAPPEMENT D'AKRAPOVIČ.
Ni Akrapovic d.d., ni aucune de ses filiales ne déclarent que leurs pièces ou systèmes aient reçu un tel ordre exécutif, ou que leurs pièces ou systèmes sont conformes à...
Pour un rendement idéal, la réponse de l’accélérateur et la durabilité du moteur, le système d’échappement Evolution d’Akrapovič doit être utilisé en combinaison avec l’enrichissement de la cartographie de carburant de l’ECU fournie par un professionnel, afin éviter d’endommager gravement le moteur ou qu’il ne tombe en panne, en entraînant des blessures.
Seite 60
RETRAIT DU SYSTÈME D'ÉCHAPPEMENT DE SÉRIE : Placez la moto sur une béquille latérale, nous vous recommandons d’utiliser une béquille de course centrale. Assurez-vous que la surface est solide et plane. Dévissez les boulons indiqués et retirez avec précaution la protection thermique de la moto (F 01).
Seite 61
INSTALLATION DU SYSTÈME D'ÉCHAPPEMENT D'AKRAPOVIČ : Installez conjointement les brides avec les ressorts et les manchons ; veillez à ce que les brides et les ressorts soient orientés tel qu'indiqué (F 21). Installez l'embase gauche arrière avec les brides, les ressorts et les manchons ; assurez-vous que les brides et les ressorts soient orientés tel qu'indiqué...
Seite 62
16. Alignez le silencieux par rapport à la moto, serrez le boulon du support du silencieux au couple spécifié (F 37). IMPORTANT : veillez à n'endommager aucune pièce de la moto ou du système d'échappement au cours de ce processus ! 17.
Seite 64
INSTALLATION FINALE ET ENTRETIEN : Nettoyez les taches de graisse de toutes les surfaces du système d'échappement, lorsque l'installation est terminée. En nettoyant les taches, vous éviterez qu’elles brûlent sur la surface. N'utilisez pas de nettoyants chimiques agressifs, car ils peuvent endommager la surface ou l'étiquette.
Seite 65
DÉPANNAGE : Problème Cause possible Solution resserrer le collier au couple collier desserré spécifié Fuites du gaz d'échappement du silencieux / raccordements du collier du tuyau mettez la connexion en place le raccord n'est pas et serrer le collier au couple complètement serré...
Seite 67
Instrucciones de instalación Sistema de escape Akrapovič Evolution para el modelo Aprilia RSV4 Aprilia Tuono V4 Revisión 1.0 05/2017 www.akrapovic.com www.akrapovic.com...
En caso de que tenga algún motivo para sospechar que su sistema de escape no sea un producto original de Akrapovič, por favor póngase en contacto con nuestros distribuidores oficiales locales o con Akrapovič mediante la dirección de correo electrónico info@akrapovic.com. 40 / 74...
Seite 69
PIEZAS DISPONIBLE EN NUESTRA PÁGINA WEB (POR FAVOR UTILICE EL CÓDIGO QR DE LA PÁGINA PRINCIPAL O BUSQUE «VISTA FRONTAL» EN LA PÁGINA DEL PRODUCTO CORRESPONDIENTE EN WWW.AKRAPOVIC.COM). COMPRUEBE QUE TENGA TODAS LAS PIEZAS NECESARIAS PARA EL MONTAJE DE SU NUEVO SISTEMA DE ESCAPE AKRAPOVIČ. EN CASO DE QUE LE FALTE ALGUNA DE LAS PIEZAS, POR FAVOR NO EMPIECE A DESMONTAR SU SISTEMA DE ESCAPE ORIGINAL / MONTAR EL SISTEMA DE ESCAPE DE AKRAPOVIČ, CONTACTE CON EL DISTRIBUIDOR QUE LE HA...
Seite 70
Akrapovič respecto de varios requisitos legales en la parte de productos de nuestra página web (por favor utilice el código QR de la página principal o consulte la página del producto correspondiente en www. akrapovic.com). Para las homologaciones de tipo CE y CEE por favor consulte el certificado que acompaña a su producto.
Para un funcionamiento perfecto, respuesta óptima del acelerador y durabilidad del motor, el sistema de escape Evolution de Akrapovič con tubo de conexión opcional se debería usar conjuntamente con la ECU con mapa de inyección de combustible instalado por un profesional, para evitar que se produzcan daños irreparables o fallos en el motor, que puedan causar lesiones.
Seite 72
RETIRADA DEL SISTEMA DE ESCAPE ORIGINAL: Coloque la moto sobre un caballete lateral, recomendamos el uso de un caballete de carreras. Asegúrese de que la superficie es sólida y lisa. Desenrosque los tornillos marcados y retire el protector térmico con cuidado de la moto (F 01).
Seite 73
INSTALACIÓN DEL SISTEMA DE ESCAPE DE AKRAPOVIČ: Instale y apriete manualmente las bridas junto con los muelles y los manguitos, asegúrese de orientar las bridas y los muelles tal y como se muestra (F 21). Instale el múltiple trasero izquierdo con la brida, el muelle y el manguito, asegúrese de orientar la brida y el muelle tal y como se muestra (F 22).
Seite 74
IMPORTANTE: ¡Preste atención a no dañar ninguna pieza de la moto o del sistema de escape durante este proceso! 17. Vuelva a colocar todas las piezas y carenados originales que se han desmontado en el orden contrario al que se retiraron (F 38).
Seite 76
INSTALACIÓN FINAL Y MANTENIMIENTO: Limpie las manchas de grasa de las superficies del sistema de escape al terminar con la instalación. La limpieza impedirá que las manchas de grasa puedan inflamarse en la superficie. No utilice agentes químicos agresivos durante la limpieza, ya que podrían provocar daños en ella o en los adhesivos.
RESOLUCIÓN DE PROBLEMAS: Problema Posible causa Solución apriete la abrazadera hasta el abrazadera suelta par especificado El gas de escape sale por el silenciador/ las conexiones de ponga la conexión en su las abrazaderas de los tubos las conexiones no están sitio, a continuación apriete totalmente unidas la abrazadera hasta el par...
Instruções de montagem Sistema de escape Akrapovič Evolution para Aprilia RSV4 Aprilia Tuono V4 Revisão 1.0 05/2017 www.akrapovic.com www.akrapovic.com...
Akrapovič é rígida no que diz respeito a todos os casos de violação de direitos de autor e de outros direitos. Caso tenha motivos para acreditar que o seu sistema de escape não é um produto original da Akrapovič, contacte os nossos representantes locais ou a Akrapovič para info@akrapovic.com. 52 / 74...
Seite 81
VERIFIQUE AS PEÇAS QUE RECEBEU NA LISTA DE PEÇAS DISPONÍVEL NO NOSSO SÍTIO WEB (USE O CÓDIGO QR NA CAPA OU PESQUISE A «VISUALIZAÇÃO ESQUEMÁTICA» NA PÁGINA CORRESPONDENTE DO PRODUTO EM WWW.AKRAPOVIC.COM). CERTIFIQUE-SE DE QUE TEM TODAS AS PEÇAS NECESSÁRIAS PARA A INSTALAÇÃO DO SEU NOVO SISTEMA DE ESCAPE AKRAPOVIČ.
Seite 82
Web (use o código QR na capa ou pesquise a página de produto correspondente em www.akrapovic.com). Para aprovações de tipo CE e ECE, consulte o certificado anexo ao seu produto.
ECU. Evolution Para o desempenho ótimo, resposta de aceleração e durabilidade do motor, o sistema Akrapovič Evolution deve ser usado em combinação com enriquecimento de mapeamento de combustível ECU fornecido por um profissional, de forma a evitar danos graves ou quebra do motor suscetível de provocar lesões.
Seite 84
REMOÇÃO DO SISTEMA DE ESCAPE INSTALADO: Coloque o motociclo no descanso lateral, recomendamos um descanso de competição central. Certifique-se de que a superfície é estável e plana. Desenrosque os parafusos marcados e retire cuidadosamente a proteção térmica do motociclo (F 01).
Seite 85
MONTAGEM DO SISTEMA DE ESCAPE AKRAPOVIČ: Monte e aperte manualmente os flanges em conjunto com as molas e mangas; certifique-se de que orienta os flanges e molas conforme mostrado (F 21). Monte o colector traseiro esquerdo com o flange, mola e manga; certifique-se de que orienta os flanges e molas conforme mostrado (F 22).
Seite 86
IMPORTANTE: aperte apenas os parafusos manualmente! 16. Alinhe o silenciador em relação ao motociclo e aperte os parafusos da abraçadeira em fibra de carbono do silenciador aos torques especificados (F 37). IMPORTANTE: tenha cuidado para não danificar qualquer peça do motociclo ou do sistema de escape durante este processo! 17.
Seite 88
INSTALAÇÃO FINAL E MANUTENÇÃO: Limpar as manchas de gordura de todas as superfícies do sistema de escape, quando a instalação estiver concluída. A limpeza irá prevenir manchas de queimadura na superfície. Não usar produtos químicos de limpeza agressivos, pois podem danificar a superfície ou o autocolante.
RESOLUÇÃO DE PROBLEMAS: Problema Possível causa Solução Apertar a braçadeira com o Braçadeira solta torque especificado Fugas de gás do silenciador/ das ligações das braçadeiras de Bater na ligação até se tubulação A ligação não está posicionar corretamente e completamente unida apertar a braçadeira com o torque especificado 61 / 74...
Navodila za namestitev Izpušni sistem Akrapovič Evolution za modela Aprilia RSV4 Aprilia Tuono V4 Različica 1.0 05/2017 www.akrapovic.com www.akrapovic.com...
Oblika izpušnega sistema je zaščitena z registriranim modelom Skupnosti št. RCD 002747329-0001. Podjetje Akrapovič bo resno obravnavalo vsako kršitev avtorskih ali drugih pravic. Če sumite, da vaš izpušni sistem ni originalni izdelek podjetja Akrapovič, se obrnite na lokalnega partnerja podjetja Akrapovič ali na podjetje Akrapovič na naslovu info@akrapovic.com. 64 / 74...
Seite 93
DELE, KI STE JIH PREJELI, PRIMERJAJTE S SEZNAMOM DELOV NA SPLETNI STRANI PODJETJA AKRAPOVIČ (UPORABITE KODO QR NA SPREDNJI STRANI ALI POIŠČITE SHEMATSKI PRIKAZ NA STRANI POSAMEZNEGA IZDELKA NA NASLOVU WWW.AKRAPOVIC.COM). PREPRIČAJTE SE, DA STE PREJELI VSE DELE, KI JIH POTREBUJETE ZA NAMESTITEV NOVEGA IZPUŠNEGA SISTEMA AKRAPOVIČ.
(uporabite kodo QR na sprednji strani ali pa poiščite stran določenega izdelka na naslovu www.akrapovic.com). Za homologaciji ES in EGS si oglejte certifikat, ki je priložen izdelku.
Za zagotavljanje popolne zmogljivosti, odzivnosti dušilne lopute in trpežnosti motorja je treba izpušni sistem Akrapovič Evolution uporabljati v kombinaciji z izboljšanjem delovanja elektronske krmilne enote, ki ga vgradi strokovno osebje, s čimer boste preprečili škodo ali okvare, ki lahko povzročijo poškodbe.
Seite 96
ODSTRANJEVANJE TOVARNIŠKEGA IZPUŠNEGA SISTEMA: Motorno kolo postavite na nogo. Priporočamo uporabo sredinskega dirkalnega stojala. Prepričajte se, da je podlaga trdna in ravna. Odvijte označene vijake in previdno odstranite toplotno zaščito z motornega kolesa (F 01). POZOR: pazite, da med tem postopkom ne boste poškodovali sebe ali katerega koli dela motornega kolesa.
Seite 97
NAMESTITEV IZPUŠNEGA SISTEMA AKRAPOVIČ: Sestavite prirobnice z vzmetmi in ovoji. Pazite, da boste prirobnice in vzmeti obrnili, kot je prikazano (F 21). Sestavite levi zadnji izhod kolektorja s prirobnico, vzmetjo in ovojem. Pazite, da boste prirobnico in vzmet obrnili, kot je prikazano (F 22). Namestite in privijte prirobnice sprednjih izhodov kolektorja skupaj z vzmetmi in ovoji na glavo sprednjega valja ter pri tem uporabite tovarniške matice;...
Seite 98
17. Znova namestite vse odstranjene tovarniške dele in okrove v obratnem vrstnem redu, kot ste jih odstranili (F 38). NASVET ZA NAMESTITEV: zatezni momenti so navedeni v priročniku, ki ga je izdal proizvajalec vozila. POZOR: pazite, da med tem postopkom ne boste poškodovali katerega koli dela motornega kolesa.
Seite 100
KONČNA NAMESTITEV IN VZDRŽEVANJE: Z vseh površin izpušnega sistema po zaključku namestitve očistite vse mastne madeže. Če jih ne očistite, se bodo madeži vžgali v površino. Ne uporabljajte agresivnih čistil, saj lahko poškodujejo površino oz. nalepko. 1. Dušilec – zunanji ovoj iz titana: očistite ga z mehko krpo, ki jo navlažite z univerzalnim mazivom v razpršilu (WD-40 ali podobnim)*.
Seite 101
UGOTAVLJANJE IN ODPRAVLJANJE TEŽAV: Težava Možen vzrok Ukrep Objemko privijte skladno Premalo privita objemka z navedenim zateznim momentom. Izpušni plin uhaja iz spojev, zatesnjenih z objemkami. Spoj potisnite do konca skupaj, objemko pa privijte Spoj ni pravilno sestavljen. skladno z navedenim zateznim momentom.