Inhaltsverzeichnis
Werbung
Verfügbare Sprachen
Verfügbare Sprachen
Quicklinks
Werbung
Inhaltsverzeichnis
Fehlerbehebung

Verwandte Anleitungen für Zanussi ZOHKF1X1


Inhaltszusammenfassung für Zanussi ZOHKF1X1
- Seite 1 EN User Manual | Oven NL Gebruiksaanwijzing | Oven FR Notice d'utilisation | Four DE Benutzerinformation | Backofen PT Manual de instruções | Forno ES Manual de instrucciones | Horno ZOHKF1X1 ZOHNF1K1 ZOHNF1W1...
-
Seite 2: Inhaltsverzeichnis
VISIT OUR WEBSITE TO: Get usage advice, brochures, trouble shooter, service and repair information: www.zanussi.com/support Subject to change without notice. CONTENTS 1. SAFETY INFORMATION................2 2. SAFETY INSTRUCTIONS................4 3. INSTALLATION....................7 4. PRODUCT DESCRIPTION................8 5. BEFORE FIRST USE..................8 6. DAILY USE......................9 7. -
Seite 3: General Safety
be kept away from the appliance unless continuously supervised. • Children should be supervised to ensure that they do not play with the appliance. • Keep all packaging away from children and dispose of it appropriately. • WARNING: The appliance and its accessible parts become hot during use. -
Seite 4: Safety Instructions
• Always use oven gloves to remove or insert accessories or ovenware. • To remove the shelf supports first pull the front of the shelf support and then the rear end away from the side walls. Install the shelf supports in the opposite sequence. •... - Seite 5 2.3 Use • Make sure not to cause damage to the mains plug and to the mains cable. Should the mains cable need to be replaced, this WARNING! must be carried out by our Authorised Risk of injury, burns and electric shock or Service Centre.
-
Seite 6: Internal Lighting
• Always cook with the appliance door • Concerning the lamp(s) inside this product closed. and spare part lamps sold separately: • If the appliance is installed behind a These lamps are intended to withstand furniture panel (e.g. a door) make sure the extreme physical conditions in household door is never closed when the appliance appliances, such as temperature,... -
Seite 7: Installation
3. INSTALLATION 3.1 Building in WARNING! Refer to Safety chapters. (*mm) min. 550 min. 560 (*mm) min. 550 min. 560 ENGLISH... -
Seite 8: Product Description
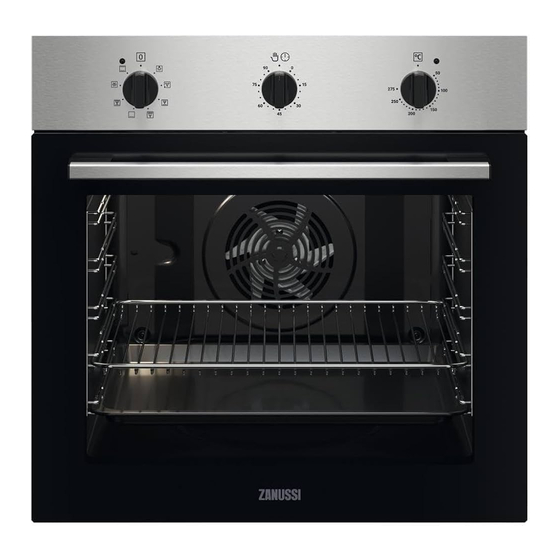
3.2 Securing the oven to the cabinet 4. PRODUCT DESCRIPTION 4.1 General overview Control panel Power lamp / symbol Knob for the heating functions Knob for the timer Control knob (for the temperature) Temperature indicator / symbol Heating element Lamp Cavity embossment - Aqua cleaning container Shelf support, removable... -
Seite 9: Daily Use
5.1 Before first use The oven can emit an odour and smoke during preheating. Make sure that the room is ventilated. Step 1 Step 2 Clean the oven Preheat the empty oven Remove all accessories and removable shelf sup‐ Set the maximum temperature for the function: ports from the oven. -
Seite 10: Clock Functions
EU 66/2014). Tests according to: IEC/EN 60350-1. Heating Application function The oven door should be closed during cooking so that the function is not interrupted To bake and roast food on one shelf and the oven operates with the highest position. -
Seite 11: Additional Functions
Wire shelf: Push the shelf between the guide bars of the shelf support and make sure that the feet point down. Baking tray: Push the tray between the guide bars of the shelf support. 9. ADDITIONAL FUNCTIONS 9.1 Cooling fan 9.2 Safety thermostat When the appliance operates, the cooling fan Incorrect operation of the oven or defective... -
Seite 12: Cooking Times
To prevent too much smoke in the oven Initially, monitor the performance when you during roasting, add some water into the cook. Find the best settings (heat setting, deep pan. To prevent the smoke cooking time, etc.) for your cookware, recipes condensation, add water each time after it and quantities when you use this appliance. -
Seite 13: Conventional Cooking
Conventional Cooking Fan Cooking BREAD AND PIZZA (min) (°C) (°C) White bread, 1 - 2 60 - 70 pieces, 0.5 kg each Rye bread, pre‐ 30 - 45 Bread tin heating is not needed Bread rolls, 6 - 8 230 - 250 230 - 250 10 - 20 Baking tray... - Seite 14 Conventional Cooking Fan Cooking MEAT (min) (°C) (°C) English roast beef, 60 - 70 medium English roast beef, 70 - 75 well done Conventional Cooking Fan Cooking MEAT (min) (°C) (°C) Pork shoulder, with 120 - 150 rind Pork shin, 2 pieces 100 - 120 Leg of lamb 110 - 130...
- Seite 15 BEEF LAMB (°C) (min) (°C) (min) Roast beef or fillet, me‐ 180 - 190 6 - 8 Lamb saddle, 1 - 1.5 160 - 180 40 - 60 dium Roast beef or fillet, well 170 - 180 8 - 10 done POULTRY (°C)
- Seite 16 (kg) Defrosting time Further defrosting (min) time (min) Meat 100 - 140 20 - 30 Turn halfway through. 90 - 120 Cream 2 x 0.2 80 - 100 10 - 15 Cream can also be whip‐ ped when still slightly fro‐ zen in places.
- Seite 17 Ramekins Pizza pan Baking dish Flan base tin Ceramic Dark, non-reflective Dark, non-reflective Dark, non-reflective 8 cm diameter, 5 28 cm diameter 26 cm diameter 28 cm diameter cm height 10.7 Moist Fan Baking For the best results follow suggestions listed in the table below.
- Seite 18 (°C) (min) Tartlets, 8 pieces baking tray or dripping pan 30 - 40 Vegetables, poached, baking tray or dripping pan 35 - 45 0.4 kg Vegetarian omelette pizza pan on wire shelf 35 - 45 Mediterranean vege‐ baking tray or dripping pan 35 - 45 tables, 0.7 kg 10.8 Information for test institutes...
-
Seite 19: Care And Cleaning
( °C) (min) Short bread Fan Cooking Baking tray 140 - 150 20 - 40 Short bread Fan Cooking Baking tray 2 and 4 140 - 150 25 - 45 Short bread Conventional Baking tray 140 - 150 25 - 45 Cooking Toast, 4 - 6 Grill... - Seite 20 11.2 How to remove: Shelf supports Remove the shelf supports to clean the oven. Step 1 Turn off the oven and wait until it is cold. Step 2 Pull the front of the shelf support away from the side wall. Step 3 Pull the rear end of the shelf support away from the side wall and remove...
- Seite 21 Step 2 Lift and pull the latches until they click. Step 3 Close the oven door halfway to the first opening position. Then lift and pull to remove the door from its seat. Step 4 Put the door on a soft cloth on a stable sur‐ face.
-
Seite 22: Troubleshooting
11.5 How to replace: Lamp Always hold the halogen lamp with a cloth to prevent grease residue from burning on the lamp. WARNING! Risk of electric shock. The lamp can be hot. Before you replace the lamp: Step 1 Step 2 Step 3 Turn off the oven. -
Seite 23: Energy Efficiency
Serial number (S.N.) ......... 13. ENERGY EFFICIENCY 13.1 Product Information and Product Information Sheet according to EU Ecodesign and Energy Labelling Regulations Supplier's name Zanussi ZOHKF1X1 949496249 Model identification ZOHNF1K1 949496304 ZOHNF1W1 949496305 Energy Efficiency Index 81.2 Energy efficiency class Energy consumption with a standard load, conventional mode 0.93 kWh/cycle... -
Seite 24: Environmental Concerns
Use the residual heat to warm up other Moist Fan Baking dishes. Function designed to save energy during cooking. Keep food warm Choose the lowest possible temperature When you use this function the lamp is off. setting to use residual heat and keep a meal warm. -
Seite 25: Veiligheidsinformatie
GA NAAR ONZE WEBSITE VOOR: Advies over gebruik, brochures, het oplossen van problemen, service- en reparatie- informatie: www.zanussi.com/support Wijzigingen voorbehouden. INHOUDSOPGAVE 1. VEILIGHEIDSINFORMATIE................25 2. VEILIGHEIDSVOORSCHRIFTEN..............27 3. MONTAGE ....................30 4. BESCHRIJVING VAN HET PRODUCT............32 5. VOORAFGAAND AAN HET EERSTE GEBRUIK......... 32 6. -
Seite 26: Algemene Veiligheid
jonger dan 8 jaar en personen met zware en complexe beperkingen dienen altijd uit de buurt van het apparaat te worden gehouden, tenzij ze voortdurend onder toezicht staan. • Houd toezicht op kinderen om te voorkomen dat zij met het apparaat gaan spelen.. -
Seite 27: Veiligheidsvoorschriften
• WAARSCHUWING: Zorg ervoor dat het apparaat is uitgeschakeld voordat u de lamp vervangt om elektrische schokken te voorkomen. • WAARSCHUWING: Het apparaat en de toegankelijke onderdelen ervan worden heet tijdens het gebruik. Zorg ervoor dat je de verwarmingselementen of het oppervlak van de apparaatruimte niet aanraakt. -
Seite 28: Elektrische Aansluiting
• Als het stopcontact los zit, mag u de stekker niet in het stopcontact steken. Diepte van het apparaat 569 mm • Trek niet aan het netsnoer om het Ingebouwde diepte van het 548 mm apparaat los te koppelen. Trek altijd aan apparaat de stekker. - Seite 29 • Laat het apparaat tijdens de werking niet ophopen en schade aan het apparaat, de onbeheerd achter. behuizing of de vloer veroorzaken. Sluit • Schakel het apparaat na elk gebruik uit. het meubelpaneel niet tot het apparaat • Wees voorzichtig met het openen van de compleet is afgekoeld na gebruik.
-
Seite 30: Montage
• Gebruik alleen lampjes met dezelfde • Neem contact op met uw plaatselijke specificaties. overheid voor informatie over het afvoeren van het apparaat. 2.6 Service • Haal de stekker uit het stopcontact. • Snijd het netsnoer vlak bij het apparaat af •... - Seite 31 (*mm) min. 550 min. 560 3.2 Bevestiging van de oven aan de kast NEDERLANDS...
-
Seite 32: Beschrijving Van Het Product
4. BESCHRIJVING VAN HET PRODUCT 4.1 Algemeen overzicht Bedieningspaneel Aan-uitlampje/symbool Knop voor verwarmingsfuncties Knop voor de timer Bedieningsknop (voor de temperatuur) Temperatuurindicator/symbool Verwarmingselement Lamp Ventilator Uitholling reliëf - Aqua-reinigingscontainer Inschuifrails, verwijderbaar Inzetniveaus 4.2 Accessoires • Bakplaat Voor gebak en koekjes. •... -
Seite 33: Dagelijks Gebruik
Schakel de oven uit en wacht tot deze is afgekoeld. Plaats de accessoires en de verwijderbare inschuifrails in de oven. 6. DAGELIJKS GEBRUIK WAARSCHUWING! Verwar‐ Toepassing Raadpleeg de hoofdstukken Veiligheid. mingsfunc‐ 6.1 Instellen: Verwarmingsfunctie Voor het braden van grote stukken vlees of gevogelte met bot op één niveau. -
Seite 34: Klokfuncties
aanbevelingen voor energiebesparing raadpleegt u het hoofdstuk "Energie- efficiëntie", Energiebesparing. 7. KLOKFUNCTIES 7.1 Hoe instellen: Einde bereiding Hier stelt u de tijd in voor het uitschakelen van de ovenfuncties. Stap 1 Selecteer de ovenfunctie en de temperatuur. Stap 2 Draai de knop van de timer naar zijn volledige bereik. Stap 3 Draai de knop van de timer om de uitschakeltijd in te stellen. -
Seite 35: Extra Functies
Bakplaat: Schuif de plaat tussen de geleidestangen van de inschuifrail. 9. EXTRA FUNCTIES 9.1 Koelventilator oververhitting veroorzaken. Om dit te voorkomen is de oven voorzien van een Als het apparaat in werking is, wordt de veiligheidsthermostaat die de stroomtoevoer koelventilator automatisch ingeschakeld om onderbreekt. - Seite 36 10.2 Bakken en braden Boven + onderwarm‐ Warme Lucht CA‐ (min) (°C) (°C) Geklopte recepten 170 45 - 60 Cakevorm Zandkoekjesdeeg 20 - 30 Cakevorm Cheesecake van 70 - 80 Cakevorm, Ø 26 karnemelk Strudel 60 - 80 Bakplaat Jamtaart 30 - 40 Bakplaat Kerstkrans, ver‐...
- Seite 37 Boven + onderwarmte Warme Lucht BROOD EN PIZZA (min) (°C) (°C) Witbrood, 1 - 2 60 - 70 stuks; 0,5 kg per stuk Roggebrood, 30 - 45 Bakblik voor voorverwarmen is brood niet nodig Brood/Broodjes, 6 230 - 250 230 - 250 10 - 20 Bakplaat - 8 broodjes...
- Seite 38 Boven + onderwarmte Warme Lucht VLEES (min) (°C) (°C) Engelse biefstuk, me‐ 60 - 70 dium Engelse biefstuk, gaar 70 - 75 Boven + onderwarmte Warme Lucht VLEES (min) (°C) (°C) Schouderkarbonade, 120 - 150 met zwoerd Varkensschenkel, 2 100 - 120 stuks Lamsbout 110 - 130...
- Seite 39 RUNDVLEES LAMSVLEES (°C) (min) (°C) (min) Biefstuk of filet, rauw 190 - 200 5 - 6 Lamspoot / Geroosterd 150 - 170 100 - 120 lamsvlees, 1 - 1,5 kg Biefstuk of filet, medi‐ 180 - 190 6 - 8 Lamsrugfilet, 1 - 1,5 kg 160 - 180 40 - 60...
-
Seite 40: Drogen - Warme Lucht
(kg) Ontdooitijd Nadooitijd (min) (min.) Forel 0,15 25 - 35 10 - 15 Aardbeien 30 - 40 10 - 20 Boter 0,25 30 - 40 10 - 15 Gebak 10.5 Drogen - Warme Lucht Bedek de bakplaten met vetbestendig papier of bakpapier. -
Seite 41: Warmelucht (Vochtig)
10.7 Warmelucht (vochtig) Volg voor de beste resultaten de volgende aanwijzingen op die hieronder in de tabel staan. (°C) (min) Zoete broodjes, 12 bakplaat of lekschaal 40 - 50 stuks Broodjes, 9 stuks bakplaat of lekschaal 35 - 45 Pizza, bevroren, 0,35 rooster 45 - 55 Biscuitrol... - Seite 42 10.8 Informatie voor testinstituten Testen volgens IEC 60350-1. ( °C) (min) Kleine ca‐ Boven + on‐ Bakplaat 20 - 35 kes, 20 derwarmte stuks per bakplaat Kleine ca‐ Warme Lucht Bakplaat 150 - 160 20 - 35 kes, 20 stuks per bakplaat Kleine ca‐...
-
Seite 43: Onderhoud En Reiniging
( °C) (min) Runderbur‐ Grillen Bakrooster, max. 20 - 30 Plaats het rooster op ger, 6 lekbak het vierde niveau en stuks, 0,6 de lekbak op het der‐ de niveau in de oven. Draai het voedsel hal‐ verwege de berei‐ dingstijd om. - Seite 44 Stap 1 Schakel de oven uit en wacht totdat deze is afgekoeld. Stap 2 Trek de inschuifrail bij de voorkant uit de zijwand. Stap 3 Trek de geleider bij de achterkant uit de zijwand en verwijder het. Stap 4 Plaats de inschuifrails in omgekeerde volgorde.
- Seite 45 Stap 2 Til de vergrendelingen op en trek eraan tot‐ dat ze klikken. Stap 3 Sluit de ovendeur in de eerste openings‐ stand. Til hem daarna op en trek hem naar voren, verwijder hem dan van zijn plek. Stap 4 Plaats de deur op een zachte doek op een stabiele ondergrond.
-
Seite 46: Probleemoplossing
11.5 Hoe te vervangen: Lamp Houd de halogeenlamp altijd met een doek vast om te voorkomen dat er vetrestjes op de ovenlamp verbranden. WAARSCHUWING! Gevaar voor elektrische schokken. Het lampje kan heet zijn. Voordat u de lamp vervangt: Stap 1 Stap 2 Stap 3 Schakel de oven uit. -
Seite 47: Energiezuinigheid
......... Serienummer (S.N.) ......... 13. ENERGIEZUINIGHEID 13.1 Productinformatie en productinformatieblad volgens de EU- voorschriften voor ecologisch ontwerp en energie-etikettering Naam leverancier Zanussi ZOHKF1X1 949496249 Modelnummer ZOHNF1K1 949496304 ZOHNF1W1 949496305 Energie-efficiëntie-index 81.2 Energie-efficiëntieklasse Energieverbruik met een standaard belading, conventionele modus 0.93kWh/cyclus Energieverbruik met een standaard belasting, heteluchtmodus 0.69kWh/cyclus... -
Seite 48: Milieubescherming
Restwarmte Warmelucht (vochtig) Wanneer de kookduur langer is dan 30 Functie is ontworpen om tijdens de bereiding minuten, verlaag dan de oventemperatuur tot energie te besparen. minimaal 3-10 minuten voor het einde van het Als je deze functie gebruikt is de verlichting koken. -
Seite 49: Information Sur La Sécurité
VISITEZ NOTRE SITE WEB POUR : Obtenir des conseils d’utilisation, des brochures, un dépanneur, des informations sur le service et les réparations : www.zanussi.com/support Sous réserve de modifications. TABLE DES MATIÈRES 1. INFORMATION SUR LA SÉCURITÉ............49 2. CONSIGNES DE SÉCURITÉ................51 3. -
Seite 50: Sécurité Générale
comprennent les risques encourus. Les enfants de moins de 8 ans et les personnes ayant un handicap très important et complexe doivent être tenus à l'écart de l’appareil, à moins d'être surveillés en permanence. • Veillez à ce que les enfants ne jouent pas avec l’appareil. •... -
Seite 51: Consignes De Sécurité
• AVERTISSEMENT : Assurez-vous que l'appareil est éteint avant de remplacer l'ampoule pour éviter tout risque d'électrocution. • AVERTISSEMENT : L'appareil et ses parties accessibles deviennent chauds pendant l'utilisation. Des précautions doivent être prises pour éviter de toucher les éléments chauffants ou la surface de la cavité... -
Seite 52: Branchement Électrique
• Si la prise secteur est détachée, ne branchez pas la fiche secteur. Profondeur d’encastrement 548 mm • Ne tirez pas sur le câble secteur pour de l’appareil débrancher l'appareil. Tirez toujours sur la Profondeur avec porte ou‐ 1022 mm fiche de la prise secteur. -
Seite 53: Éclairage Interne
• Éteignez l'appareil après chaque l’humidité peuvent s’accumuler derrière la utilisation. porte fermée du meuble et provoquer • Soyez prudent lors de l'ouverture de la d’importants dégâts sur l’appareil, votre porte de l'appareil lorsque celui-ci logement ou le sol. Ne fermez pas la paroi fonctionne. -
Seite 54: Mise Au Rebut
• Ce produit contient une source lumineuse • Contactez votre service municipal pour de classe d’efficacité énergétique G. obtenir des informations sur la marche à • Utilisez uniquement des ampoules ayant suivre pour mettre l’appareil au rebut. les mêmes spécifications. •... -
Seite 55: Fixation Du Four Au Meuble
(*mm) min. 550 min. 560 3.2 Fixation du four au meuble FRANÇAIS... -
Seite 56: Description De L'appareil
4. DESCRIPTION DE L'APPAREIL 4.1 Vue d’ensemble Bandeau de commande Voyant / symbole de mise sous tension Manette de sélection des modes de cuisson Manette du minuteur Manette de commande (de la température) Indicateur / symbole de température Résistance Éclairage Chaleur tournante Bac de la cavité... -
Seite 57: Utilisation Quotidienne
Retirez du four les accessoires et les supports de Réglez la température maximale pour la fonction : grille amovibles. Nettoyez le four et les accessoires avec un chiffon Durée : 1 h. en microfibre, de l’eau chaude et un détergent Réglez la température maximale pour la fonction : doux. -
Seite 58: Fonctions De L'horloge
65/2014 et EU 66/2014). Tests conformes à la norme : IEC/EN 60350-1. Mode de Application cuisson La porte du four doit être fermée pendant la cuisson pour que la fonction ne soit pas Pour cuire et rôtir des aliments sur interrompue et que le four fonctionne avec la un seul niveau. -
Seite 59: Fonctions Supplémentaires
Grille métallique: Poussez la grille entre les barres de guidage des supports de grille et assurez-vous que les pieds sont orientés vers le bas. Plateau de cuisson: Poussez la plaque entre les rails du support de grille. 9. FONCTIONS SUPPLÉMENTAIRES 9.1 Ventilateur de refroidissement surchauffe dangereuse. - Seite 60 Si vous ne trouvez pas les réglages Pour éviter qu’il y ait trop de fumée dans le appropriés pour une recette spécifique, four pendant le rôtissage, ajoutez un peu cherchez-en une qui s'en rapproche. d’eau dans le plat à rôtir. Pour éviter la condensation de la fumée, ajoutez de l’eau à...
- Seite 61 Chauffage Haut/Bas Chaleur tournante GÂ‐ TEAUX (min) (°C) (°C) Brioches, pré‐ 25 - 35 Plateau de cuis‐ chauffer le four à vide Éclairs, un niveau 45 - 70 Plateau de cuis‐ Éclairs, deux ni‐ 110 - 120 Plateau de cuis‐ veaux Tourtes 50 - 60...
- Seite 62 Chauffage Haut/Bas Chaleur tournante FLANS (min) (°C) (°C) Flan de pâtes, le pré‐ 40 - 50 chauffage n'est pas nécessaire Flan aux légumes, le 45 - 60 préchauffage n'est pas nécessaire Quiches 50 - 60 Lasagnes 180 - 190 180 - 190 25 - 40 Cannelloni 180 - 190...
-
Seite 63: Turbo Gril
Chauffage Haut/Bas Chaleur tournante VIANDE (min) (°C) (°C) Oie entière 150 - 200 Lapin, en morceaux 60 - 80 Lièvre, en morceaux 150 - 200 Faisan entier 90 - 120 Chauffage Haut/Bas Chaleur tournante POISSON (min) (°C) (°C) Truite / Dorade, 3 à 40 - 55 4 poissons Thon / Saumon, 4 à... - Seite 64 AGNEAU VOLAILLE (°C) (min) (°C) (min) Râble d'agneau, 1 - 160 - 180 40 - 60 Canard, 1,5 - 2 kg 180 - 200 80 - 100 1,5 kg Oie, 3,5 - 5 kg 160 - 180 120 - 180 Dinde, 2,5 - 3,5 kg 160 - 180 120 - 150...
- Seite 65 Réglez la température sur 60 - 70 °C. LÉGUMES (°C) FRUITS Haricots 60 - 70 6 - 8 Prunes 8 à 10 Poivrons 60 - 70 5 à 6 Abricots 8 à 10 Légumes pour soupe 60 - 70 5 à 6 Tranches de pommes 6 - 8 Champignons...
- Seite 66 (°C) (min) Soufflé, 6 pièces ramequins en céramique sur 45 - 55 une grille métallique Fond de tarte en gé‐ moule à tarte sur une grille 35 - 45 noise métallique Gâteau à étages Plat de cuisson sur la grille 35 - 50 métallique Poisson poché, 0,3...
- Seite 67 ( °C) (min) Petits gâ‐ Chauffage Plateau de 20 - 35 teaux, 20 Haut/Bas cuisson par plateau Petits gâ‐ Chaleur tour‐ Plateau de 150 - 160 20 - 35 teaux, 20 nante cuisson par plateau Petits gâ‐ Chaleur tour‐ Plateau de 2 et 4 150 - 160 20 - 35...
-
Seite 68: Entretien Et Nettoyage
11. ENTRETIEN ET NETTOYAGE AVERTISSEMENT! Reportez-vous aux chapitres concernant la sécurité. 11.1 Remarques concernant le nettoyage Nettoyez l’avant de l’appareil uniquement avec un chiffon en microfibre imbibé d’eau tiède et d’un détergent doux. Nettoyez et contrôlez le joint de la porte autour du cadre de la cavité. Utilisez une solution de nettoyage pour nettoyer les surfaces métalliques. - Seite 69 Étape 3 Écartez l'arrière du support de grille de la paroi latérale et retirez-le. Étape 4 Installez les supports de grille dans l'ordre inverse. 11.3 Comment utiliser : Nettoyage Aqua Clean Étape 3 Réglez la température sur 90 °C. Ce processus de nettoyage utilise l'humidité Étape 4 Laissez le four fonctionner pendant pour retirer la graisse et les particules...
- Seite 70 Étape 3 Fermez la porte du four à mi-chemin de la première position d’ouverture. Puis, soulevez et tirez pour retirer la porte de son emplace‐ ment. Étape 4 Posez la porte sur un chiffon doux placé sur une surface stable. Étape 5 Tenez la garniture de porte (B) sur le bord supérieur de la porte des deux côtés et...
-
Seite 71: Dépannage
Avant de remplacer l'éclairage : Étape 1 Étape 2 Étape 3 Éteignez le four. Attendez que le Débranchez le four de l'alimentation Placez un chiffon au fond de la cavi‐ four ait refroidi. secteur. té. Lampe arrière Étape 1 Tournez le diffuseur en verre pour le retirer. Étape 2 Nettoyez le diffuseur en verre. -
Seite 72: Rendement Énergétique
13. RENDEMENT ÉNERGÉTIQUE 13.1 Informations sur le produit et fiche d'information sur le produit conformément aux réglementations européennes sur l'écoconception et l'étiquetage énergétique Nom du fournisseur Zanussi ZOHKF1X1 949496249 Identification du modèle ZOHNF1K1 949496304 ZOHNF1W1 949496305 Indice d’efficacité énergétique 81.2 Classe d’efficacité... -
Seite 73: En Matière De Protection De L'environnement
Maintien des aliments au chaud Lorsque vous utilisez cette fonction, Sélectionnez la température la plus basse l’éclairage est éteint. possible pour utiliser la chaleur résiduelle et maintenir le repas au chaud. Chaleur tournante humide Fonction conçue pour économiser de l'énergie en cours de cuisson. 14. -
Seite 74: Sicherheitshinweise
BESUCHEN SIE UNSERE WEBSITE, UM: Anwendungshinweise, Prospekte, Informationen zu Fehlerbehebung, Service und Reparatur zu erhalten: www.zanussi.com/support Änderungen vorbehalten. INHALTSVERZEICHNIS 1. SICHERHEITSHINWEISE................74 2. SICHERHEITSANWEISUNGEN..............76 3. MONTAGE....................79 4. GERÄTEBESCHREIBUNG................81 5. VOR DER ERSTEN VERWENDUNG............81 6. TÄGLICHER GEBRAUCH................82 7. -
Seite 75: Allgemeine Sicherheit
Gerät sicher zu bedienen ist und welche Gefahren bei nicht ordnungsgemäßer Bedienung bestehen. Kinder unter 8 Jahren und Personen mit schweren Behinderungen oder Mehrfachbehinderung sollten vom Gerät ferngehalten werden, wenn sie nicht ständig beaufsichtigt werden. • Kinder sollten beaufsichtigt werden, um sicherzustellen, dass sie nicht mit dem Gerät. -
Seite 76: Sicherheitsanweisungen
gleichermaßen qualifizierten Person ausgetauscht werden, um Gefahren durch elektrischen Strom zu vermeiden. • WARNUNG: Vergewissern Sie sich, dass das Gerät ausgeschaltet ist, bevor Sie die Lampe austauschen, um einen Stromschlag zu vermeiden. • ACHTUNG: Das Gerät und die zugänglichen Geräteteile werden während des Betriebs heiß. -
Seite 77: Elektrischer Anschluss
• Alle Teile, die gegen direktes Berühren schützen, sowie die isolierten Teile Schranktiefe 550 (550) mm müssen so befestigt werden, dass sie Höhe der Gerätevordersei‐ 594 mm nicht ohne Werkzeug entfernt werden können. • Stecken Sie den Netzstecker erst nach Höhe der Geräterückseite 576 mm Abschluss der Montage in die Steckdose. - Seite 78 2.3 Gebrauch – Gehen Sie beim Herausnehmen oder Einsetzen des Zubehörs sorgfältig vor. • Verfärbungen der Emaille- oder WARNUNG! Edelstahlbeschichtung haben keine Verletzungs-, Verbrennungs-, Auswirkung auf die Leistung des Geräts. Stromschlag- oder Explosionsgefahr. • Verwenden Sie eine tiefe Pfanne für feuchte Kuchen.
-
Seite 79: Innenbeleuchtung
2.5 Innenbeleuchtung • Dabei dürfen ausschließlich Originalersatzteile verwendet werden. WARNUNG! 2.7 Entsorgung Stromschlaggefahr. WARNUNG! • Bezüglich der Lampe(n) in diesem Gerät und separat verkaufter Ersatzlampen: Verletzungs- und Erstickungsgefahr. Diese Lampen müssen extremen • Informationen zur Entsorgung des Geräts physikalischen Bedingungen in erhalten Sie von Ihrer Haushaltsgeräten standhalten, wie z.B. -
Seite 80: Befestigung Des Ofens Am Möbel
(*mm) min. 550 min. 560 3.2 Befestigung des Ofens am Möbel DEUTSCH... -
Seite 81: Gerätebeschreibung
4. GERÄTEBESCHREIBUNG 4.1 Gesamtansicht Bedienfeld Betriebskontrolllampe/-symbol Einstellknopf für die Ofenfunktionen Timer-Einstellknopf Einstellknopf (für die Temperatur) Temperaturanzeige / -symbol Heizelement Lampe Ventilator Garraumvertiefung - Behälter für Aqua- Reinigungsfunktion Einschubschienen, herausnehmbar Einschubebenen 4.2 Zubehör • Backblech Für Kuchen und Plätzchen. • Kombirost Für Kochgeschirr, Kuchenformen, Braten. -
Seite 82: Täglicher Gebrauch
Entfernen Sie alle Zubehörteile und die heraus‐ Stellen Sie die Höchsttemperatur für folgende nehmbaren Einhängegitter aus dem Backofen. Funktion ein: Reinigen Sie das Gerät und das Zubehör nur mit Zeit: 1 Std. einem Mikrofasertuch, warmem Wasser und einem Stellen Sie die Höchsttemperatur für folgende milden Reinigungsmittel. -
Seite 83: Uhrfunktionen
Die Backofentür sollte während des Kochanweisungen finden Sie im Kapitel Garvorgangs geschlossen bleiben, damit die „Tipps und Hinweise“,Feuchte Funktion nicht unterbrochen wird. So wird Umluft.Allgemeine Empfehlungen zum gewährleistet, dass der Backofen mit der Energiesparen finden Sie im Kapitel höchsten Energieeffizienz arbeitet. „Energieeffizienz“, Energiesparen. -
Seite 84: Zusatzfunktionen
Kombirost: Schieben Sie den Rost zwischen die Führungs‐ schienen der Einhängegitter mit den Füßen nach unten zeigend. Backblech: Schieben Sie das Backblech zwischen die Füh‐ rungsstäbe der Einhängegitter. 9. ZUSATZFUNKTIONEN 9.1 Kühlgebläse gefährlichen Überhitzung führen. Um dies zu verhindern, ist der Backofen mit einem Wenn das Gerät in Betrieb ist, schaltet sich Sicherheitsthermostat ausgestattet, der die das Kühlgebläse automatisch ein, um die... -
Seite 85: Backen Und Braten
Kuchen backen Rauchkondensation zu verhindern, fügen Sie Öffnen Sie die Backofentür nicht, bevor 3/4 jedes Mal nach dem Austrocknen Wasser der eingestellten Garzeit abgelaufen ist. hinzu. Wenn Sie zwei Backbleche gleichzeitig Garzeitdauer verwenden, lassen Sie eine Zwischenebene Die Kochzeiten hängen von der frei. - Seite 86 Ober- / Unterhitze Umluft KU‐ CHEN (Min.) (°C) (°C) Blätterteig, eine 45 - 70 Backblech Ebene Blätterteig, zwei 110 - 120 Backblech Ebenen Törtchen 50 - 60 Backblech Üppiger Früchte‐ 12 - 20 Backblech kuchen Englischer Sand‐ 25 - 35 Backblech wichkuchen à...
- Seite 87 Ober- / Unterhitze Umluft FLANS (Min.) (°C) (°C) Gemüseflan, Aufhei‐ 45 - 60 zen ist nicht erforder‐ lich. Quiches 50 - 60 Lasagne, frisch 180 - 190 180 - 190 25 - 40 Cannelloni 180 - 190 180 - 190 25 - 40 Verwenden Sie den Kombirost.
-
Seite 88: Heißluftgrillen
Ober- / Unterhitze Umluft FLEISCH (Min.) (°C) (°C) Kaninchen, in Stücke 60 - 80 geschnitten Hase, in Stücke ge‐ 150 - 200 schnitten Fasan, ganz 90 - 120 Ober- / Unterhitze Umluft FISCH (Min.) (°C) (°C) Forelle / Seebrasse, 3 - 4 40 - 55 Fische Thunfisch / Lachs, 4 - 6 Fi‐... - Seite 89 LAMM GEFLÜGEL (°C) (Min.) (°C) (Min.) Lammkeule / Lamm‐ 150 - 170 100 - 120 Hähnchen, Poularde, 1 190 - 210 50 - 70 braten, 1 – 1,5 kg – 1,5 kg Lammrücken, 1 – 160 - 180 40 - 60 Ente, 1,5-2 kg 180 - 200 80 - 100...
-
Seite 90: Feuchte Umluft - Empfohlenes Zubehör
Stellen Sie die Temperatur auf 60 - 70 °C ein. GEMÜSE (°C) (Std.) OBST (Std.) Bohnen 60 - 70 6 - 8 Pflaumen 8 - 10 Paprika 60 - 70 5 - 6 Aprikosen 8 - 10 Suppengemüse 60 - 70 5 - 6 Apfelscheiben 6 - 8... -
Seite 91: Informationen Für Prüfinstitute
(°C) (Min.) Englischer Sandwich‐ Backform auf Kombirost 35 - 50 kuchen à la Victoria Fisch, pochiert, 0,3 kg Backblech oder tiefes Blech 35 - 45 Fisch, ganz, 0,2 kg Backblech oder tiefes Blech 25 - 35 Fischfilet, 0,3 kg Pizzapfanne auf Kombirost 30 - 40 Fleisch, pochiert, 0,25 Backblech oder tiefes Blech... -
Seite 92: Reinigung Und Pflege
( °C) (Min) Apfelku‐ Ober- / Unter‐ Kombirost 70 - 90 chen, 2 hitze Formen à Ø 20 cm Apfelku‐ Umluft Kombirost 70 - 90 chen, 2 Formen à Ø 20 cm Fettfreier Ober- / Unter‐ Kombirost 40 - 50 Backofen für 10 Min Biskuit, Ku‐... -
Seite 93: Entfernen: Einhängegitter
11.1 Hinweise zur Reinigung Reinigen Sie die Vorderseite des Geräts nur mit einem Mikrofasertuch mit warmem Wasser und einem milden Reinigungsmittel. Reinigen und überprüfen Sie die Türdichtung um den Garraumrahmen. Reinigen Sie die Metalloberflächen mit einer geeigneten Reinigungslösung. Reinigungsmittel Reinigen Sie Flecken mit einem milden Reinigungsmittel. Reinigen Sie den Garraum nach jedem Gebrauch. -
Seite 94: Aus- Und Einbau: Tür
Schritt 2 Schritt 5 Schalten Sie den Backofen aus. Stellen Sie folgende Funktion ein: Schritt 6 Warten Sie, bis der Backofen kalt ist. Schritt 3 Stellen Sie die Temperatur auf 90 °C Trocknen Sie den Garraum mit einem ein. weichen Tuch ab. Schritt 4 Lassen Sie den Backofen 30 Min. -
Seite 95: Austausch: Lampe
Schritt 5 Fassen Sie die Türabdeckung (B) an der Oberkante der Tür an beiden Seiten an. Drü‐ cken Sie sie nach innen, um den Klippver‐ schluss zu lösen. Schritt 6 Ziehen Sie die Türabdeckung nach vorn, um sie abzunehmen. Schritt 7 Halten Sie die Oberkante der Türglasscheibe fest und ziehen Sie sie vorsichtig heraus. -
Seite 96: Fehlersuche
Rahmen des Garraums des Geräts. Entfernen Sie das Typenschild nicht vom Garraum. Wir empfehlen Ihnen, die Daten hier zu notieren: Modell (MOD.): ......... Produktnummer (PNC) ......... Seriennummer (S.N.) ......... 13. ENERGIEEFFIZIENZ 13.1 Produktinformation und Produktinformationsblatt gemäß den EU- Verordnungen zu Umweltdesign und Energiekennzeichnung Name des Lieferanten Zanussi DEUTSCH... -
Seite 97: Energiesparen
ZOHKF1X1 949496249 Modellbezeichnung ZOHNF1K1 949496304 ZOHNF1W1 949496305 Energieeffizienzindex 81.2 Energieeffizienzklasse Energieverbrauch mit einer Standardbeladung, konventioneller Mo‐ 0.93kWh/Programm Energieverbrauch mit einer Standardbeladung, Umluft-Modus 0.69kWh/Programm Anzahl der Garräume Wärmequelle Strom Volumen Art des Backofens Eingebauter Backofen ZOHKF1X1 26.7kg Masse ZOHNF1K1 26.7kg ZOHNF1W1 26.7kg... -
Seite 98: Umwelttipps
14. UMWELTTIPPS mit diesem Symbol nicht mit dem Recyceln Sie Materialien mit dem Symbol Hausmüll. Bringen Sie das Gerät zu Ihrer Entsorgen Sie die Verpackung in den örtlichen Sammelstelle oder wenden Sie sich entsprechenden Recyclingbehältern. an Ihr Gemeindeamt. Recyceln Sie zum Umwelt- und Gesundheitsschutz elektrische und elektronische Geräte. -
Seite 99: Segurança De Crianças E Pessoas Vulneráveis
VISITE O NOSSO WEBSITE PARA: Obter conselhos de utilização, folhetos, resolução de problemas e informações sobre assistência e reparações: www.zanussi.com/support Sujeito a alterações sem aviso prévio. ÍNDICE 1. INFORMAÇÕES DE SEGURANÇA..............99 2. INSTRUÇÕES DE SEGURANÇA............... 101 3. INSTALAÇÃO....................104 4. DESCRIÇÃO DO PRODUTO..............106 5. -
Seite 100: Segurança Geral
complexas afastadas do aparelho, a menos que sejam constantemente vigiadas. • As crianças devem ser vigiadas para garantir que não brincam com o aparelho. • Mantenha todos os materiais de embalagem fora do alcance das crianças e elimine-os de forma apropriada. •... -
Seite 101: Instruções De Segurança
• AVISO: Certifique-se de que o aparelho está desligado antes de substituir a lâmpada, para evitar a possibilidade de choque elétrico. • AVISO: O forno e as partes acessíveis ficam quentes durante a utilização. Deve ter cuidado para evitar tocar nas resistências ou na superfície da cavidade do aparelho. -
Seite 102: Ligação Elétrica
• disjuntores de protecção, fusíveis (os fusíveis de rosca devem ser retirados do Profundidade com a porta 1022 mm suporte), diferenciais e contactores. aberta • A instalação eléctrica deve possuir um Dimensão mínima da aber‐ 560x20 mm dispositivo de isolamento que lhe permita tura de ventilação. - Seite 103 2.4 Manutenção e limpeza • Não aplique pressão sobre a porta aberta. • Não utilize o aparelho como superfície de trabalho ou armazenamento. AVISO! • Abra a porta do aparelho com cuidado. A Risco de ferimentos, incêndio e danos no utilização de ingredientes com álcool pode aparelho.
-
Seite 104: Assistência Técnica
2.6 Assistência técnica • Contacte a sua autoridade municipal para saber como descartar o aparelho • Para reparar o aparelho, contacte o corretamente. Centro de Assistência Técnica Autorizado. • Desligue o aparelho da alimentação • Utilize apenas peças sobressalentes eléctrica. originais. - Seite 105 (*mm) min. 550 min. 560 3.2 Fixação do forno no armário PORTUGUÊS...
-
Seite 106: Descrição Do Produto
4. DESCRIÇÃO DO PRODUTO 4.1 Resumo geral Painel de commandos Luz/símbolo de potência Botão para os tipos de aquecimento Botão do temporizador Botão de controlo (para a temperatura) Símbolo/indicador de temperatura Elemento de aquecimento Lâmpada Ventilador Relevo da cavidade - Recipiente da limpeza com água Apoio para prateleira, amovível Nível das prateleiras... -
Seite 107: Utilização Diária
Desligue o forno e aguarde até estar frio. Coloque os acessórios e apoios de prateleiras amovíveis do forno. 6. UTILIZAÇÃO DIÁRIA AVISO! Tipo de Aplicação Consulte os capítulos relativos à aquecimen‐ segurança. Para assar peças de carne grandes 6.1 Como definir: Tipo de ou aves com ossos numa posição aquecimento da prateleira. -
Seite 108: Funções De Relógio
Para instruções de cozedura, consulte o capítulo "Eficiência Energética", Poupança de capítulo “Sugestões e dicas”, Ventilado com Energia. Resistência Para recomendações gerais sobre poupança de energia, consulte o 7. FUNÇÕES DE RELÓGIO 7.1 Como definir: Fim de cozedura Para definir a hora de desligar funções do forno. Passo 1 Selecionar a função do forno e a temperatura. -
Seite 109: Funções Adicionais
Tabuleiro para assar: Introduza o tabuleiro entre as barras-guia do apoio para prateleiras. 9. FUNÇÕES ADICIONAIS 9.1 Ventoinha de arrefecimento sobreaquecimento perigoso. Para evitar isso, o forno possui um termóstato de segurança Quando o aparelho está a funcionar, a que corta a alimentação elétrica. O forno ventoinha de arrefecimento liga-se volta a ativar-se automaticamente quando a automaticamente para manter as superfícies... - Seite 110 10.2 Bolos e assados Aquecimento con‐ Cozedura ventilada vencional BO‐ (min) (°C) (°C) Receitas batidas 45 - 60 Forma de bolo Biscoitos amantei‐ 20 - 30 Forma de bolo gados Cheesecake de 70 - 80 Forma de bolo, Ø soro de leite coa‐ 26 cm lhado Strudel...
- Seite 111 Aquecimento conven‐ Cozedura ventilada cional PÃO E PIZZA (min) (°C) (°C) Pão branco, 1 – 2 60 - 70 unidades, 0,5 kg cada Pão de centeio, 30 - 45 Forma de pão não é necessário pré-aquecer Pastéis, 6 – 8 230 - 250 230 - 250 10 - 20...
- Seite 112 Aquecimento convencio‐ Cozedura ventilada CARNE (min) (°C) (°C) Vaca 50 - 70 Porco 90 - 120 Vitela 90 - 120 Carne assada, mal 50 - 60 passada Carne assada, média 60 - 70 Carne assada, bem 70 - 75 passada Aquecimento convencional Cozedura ventilada CARNE (min)
- Seite 113 Aquecimento convencional Cozedura ventilada PEIXE (min) (°C) (°C) Atum / Salmão, 4 - 6 file‐ 35 - 60 10.3 Grelhador ventilado Pré-aqueça o forno vazio. VITELA Utilize a segunda posição da prateleira. (°C) (min) Coloque um tacho na primeira posição da prateleira para recolher gordura.
- Seite 114 10.4 Descongelar (kg) Tempo de des‐ Tempo extra de des‐ congelação congelação (min.) (min.) Frango 100 - 140 20 - 30 Coloque o frango sobre um pires virado ao contrá‐ rio e este sobre um prato grande. Vire a meio do tempo.
- Seite 115 Formas individu‐ Forma com base para Forma para pizza Assadeira flan Vitrocerâmica Escuro, não refletor Escuro, não refletor Escuro, não refletor 8 cm de diâmetro, 28 cm de diâmetro 26 cm de diâmetro 28 cm de diâmetro 5 cm de altura 10.7 Ventilado com Resistência Para obter os melhores resultados, siga as sugestões indicadas na tabela abaixo.
- Seite 116 (°C) (min.) Biscoitos, 16 unida‐ tabuleiro para assar ou tabu‐ 30 - 45 leiro para recolha de gorduras Macarons, 20 unida‐ tabuleiro para assar ou tabu‐ 45 - 55 leiro para recolha de gorduras Queques, 12 unida‐ tabuleiro para assar ou tabu‐ 30 - 40 leiro para recolha de gorduras Pastelaria salgada,...
-
Seite 117: Manutenção E Limpeza
( °C) (min) Tarte de Cozedura ven‐ Prateleira em 70 - 90 maçã, 2 tilada grelha formas, Ø 20 cm Pão-de-ló Aquecimento Prateleira em 40 - 50 Pré-aqueça o forno sem gordu‐ convencional grelha durante 10 min. ra, forma do bolo de Ø26 cm Pão-de-ló... - Seite 118 11.1 Notas sobre a limpeza Limpe a parte da frente do aparelho apenas usando um pano de microfibras com água mor‐ na e um detergente suave. Limpe e verifique a junta da porta em torno da moldura da cavi‐ dade. Utilize uma solução de limpeza para limpar as superfícies metálicas.
- Seite 119 11.3 Como utilizar: Limpeza com água Passo 2 Selecione a função: Este procedimento de limpeza utiliza Passo 3 Defina a temperatura para 90°C. humidade para remover gordura e partículas de alimentos do forno. Passo 4 Deixe o forno funcionar durante 30 min. Passo 5 Desligue o forno.
- Seite 120 Passo 5 Segure no friso da porta (B) no rebordo su‐ perior da porta, nos dois lados, e pressione para dentro para soltar o fecho de encaixe. Passo 6 Puxe o friso da porta para a frente para o re‐ mover.
-
Seite 121: Resolução De Problemas
Número do produto (PNC) ......... Número de série (S.N.) ......... 13. EFICIÊNCIA ENERGÉTICA 13.1 Informação do produto e folheto de informação do produto de acordo com os Regulamentos de Ecodesign e Rotulagem de Energia da UE Nome do fornecedor Zanussi PORTUGUÊS... -
Seite 122: Poupança De Energia
ZOHKF1X1 949496249 Identificação do modelo ZOHNF1K1 949496304 ZOHNF1W1 949496305 Índice de Eficiência Energética 81.2 Classe de eficiência energética Consumo de energia com uma carga normal, modo convencional 0.93kWh/ciclo Consumo de energia com uma carga padrão, modo de ventilação 0.69kWh/ciclo forçada Número de cavidades... -
Seite 123: Preocupações Ambientais
14. PREOCUPAÇÕES AMBIENTAIS Recicle os materiais que apresentem o aparelhos que tenham o símbolo juntamente com os resíduos domésticos. símbolo . Coloque a embalagem nos Coloque o produto num ponto de recolha contentores indicados para reciclagem. Ajude para reciclagem local ou contacte as suas a proteger o ambiente e a saúde pública autoridades municipais. -
Seite 124: Información Sobre Seguridad
VISITE NUESTRO SITIO WEB PARA: Obtener consejos, folletos, soluciones a problemas e información de servicio y reparación: www.zanussi.com/support Salvo modificaciones. CONTENIDO 1. INFORMACIÓN SOBRE SEGURIDAD............124 2. INSTRUCCIONES DE SEGURIDAD............126 3. INSTALACIÓN.................... 129 4. DESCRIPCIÓN DEL PRODUCTO..............131 5. ANTES DEL PRIMER USO.................131 6. -
Seite 125: Instrucciones Generales De Seguridad
del aparato a los niños de menos de 8 años, así como a las personas con minusvalías importantes y complejas, salvo que estén bajo supervisión continua. • Es necesario vigilar a los niños para que no jueguen con el aparato. •... -
Seite 126: Instrucciones De Seguridad
• ADVERTENCIA: El horno y las piezas accesibles se calientan mucho durante el funcionamiento. Debe tener cuidado para evitar tocar los elementos de calentamiento o la superficie del interior del aparato. • Utilizar siempre guantes o manoplas para horno para retirar o introducir accesorios o recipientes. -
Seite 127: Conexión Eléctrica
• No desconecte el aparato tirando del cable de conexión a la red. Tire siempre Tamaño mínimo de la aber‐ 560x20 mm del enchufe. tura de ventilación. Abertu‐ ra situada en la parte trase‐ • Use únicamente dispositivos de ra inferior aislamiento apropiados: línea con protección contra los cortocircuitos, Longitud del cable de ali‐... -
Seite 128: Iluminación Interna
2.4 Mantenimiento y limpieza • Tenga cuidado al abrir la puerta del aparato mientras funciona. Puede liberarse aire caliente. ADVERTENCIA! • No utilice el aparato con las manos Existe riesgo de lesiones, incendios o mojadas ni con agua en contacto. daños al aparato. -
Seite 129: Asistencia Tecnica
2.6 Asistencia tecnica • Contacte con las autoridades locales para saber cómo desechar correctamente el • Para reparar el aparato, póngase en aparato. contacto con el centro de servicio • Desconecte el aparato de la red. autorizado. • Corte el cable eléctrico cerca del aparato •... - Seite 130 (*mm) min. 550 min. 560 3.2 Fijación del horno al mueble ESPAÑOL...
-
Seite 131: Descripción Del Producto
4. DESCRIPCIÓN DEL PRODUCTO 4.1 Resumen general Panel de mandos Piloto/símbolo de alimentación Mando de las funciones de cocción Mando del temporizador Mando de control (para la temperatura) Indicador/símbolo de temperatura Resistencia Bombilla Ventilador Relieve de la cavidad - Contenedor de limpieza con agua Soporte de parrilla extraíble Posiciones de las parrillas... -
Seite 132: Uso Diario
Retire todos los accesorios del horno y carriles la‐ Seleccione la temperatura máxima para la función: terales extraíbles del horno. Limpie el horno y los accesorios solo con un paño Tiempo: 1 h. de microfibra humedecido en agua tibia y deter‐ Seleccione la temperatura máxima para la función: gente suave. -
Seite 133: Funciones Del Reloj
La puerta del horno debe estar cerrada Consulte las instrucciones de cocción en el durante la cocción para que no se interrumpa capítulo “Consejos”, Horneado húmedo + la función y el horno funcione con la máxima ventil..Para recomendaciones generales eficiencia energética posible. sobre ahorro energético, consulte el capítulo “Eficiencia energética”, Ahorro energético. -
Seite 134: Funciones Adicionales
Bandeja: Introduzca la bandeja entre las guías del carril de apoyo. 9. FUNCIONES ADICIONALES 9.1 Ventilador de refrigeración sobrecalentamientos peligrosos. Para evitarlo, el horno dispone de un termostato Cuando el aparato está en funcionamiento, el de seguridad que interrumpe la alimentación. ventilador de enfriamiento se enciende El horno se vuelve a encender automáticamente para mantener frías sus... -
Seite 135: Horneado Y Asado
10.2 Horneado y asado Cocción convencio‐ Cocción ventil PAS‐ TELES (min) (°C) (°C) Recetas batidas 45 - 60 Molde de pastel Masa de mante‐ 20 - 30 Molde de pastel quilla Tarta de queso 70 - 80 Molde de pastel, con suero de le‐... - Seite 136 Cocción convencional Cocción ventil PAN Y PIZZA (min) (°C) (°C) Pan blanco, 1 - 2 60 - 70 piezas, 0,5 kg ca‐ da una Pan de centeno, 30 - 45 Molde de pan no se necesita precalentar Panecillos, 6 - 8 230 - 250 230 - 250 10 - 20...
- Seite 137 Cocción convencional Cocción ventil CARNE (min) (°C) (°C) Rosbif al punto 60 - 70 Rosbif muy hecho 70 - 75 Cocción convencional Cocción ventil CARNE (min) (°C) (°C) Paletilla de cerdo, con 120 - 150 corteza Morcillo de cerdo, 2 100 - 120 trozos Pata de cordero...
- Seite 138 VACUNO CORDERO (°C) (°C) Rosbif o filete muy he‐ 170 - 180 8 - 10 Costillar de cordero, 1 - 160 - 180 40 - 60 1,5 kg CERDO AVES (°C) (°C) Paletilla / Cuello / Ja‐ 160 - 180 90 - 120 Aves troceadas, 0,2 - 200 - 220...
- Seite 139 (kg) Tiempo de des‐ Tiempo de descon‐ congelación gelación posterior (min) (minutos) Carne 100 - 140 20 - 30 Dele la vuelta a media cocción. 90 - 120 Nata 2 x 0,2 80 - 100 10 - 15 La nata se puede montar perfectamente incluso aunque queden puntos li‐...
- Seite 140 Ramequines Bandeja para pizza Bandeja para hornear Molde para base Cerámica Oscuro, mate Oscuro, mate Oscuro, mate 8 cm de diámetro, 28 cm de diámetro 26 cm de diámetro 28 cm de diámetro 5 cm de altura 10.7 Horneado húmedo + ventil. Para obtener el mejor resultado, siga las recomendaciones de la tabla siguiente.
- Seite 141 (°C) (min) Magdalenas, 12 pie‐ bandeja o bandeja honda 30 - 40 Tarta salada, 16 pie‐ bandeja o bandeja honda 35 - 45 Galletas crujientes de bandeja o bandeja honda 40 - 50 masa quebrada, 20 piezas Tartaletas, 8 piezas bandeja o bandeja honda 30 - 40 Verduras pochadas,...
-
Seite 142: Mantenimiento Y Limpieza
( °C) (min) Bizcocho Cocción con‐ Parrilla 40 - 50 Precaliente el horno sin grasa, vencional durante 10 min molde para bizcocho Ø26 cm Bizcocho Cocción ventil Parrilla 40 - 50 Precaliente el horno sin grasa, durante 10 min molde para bizcocho Ø26 cm Bizcocho... - Seite 143 Limpie el interior después de cada uso. La acumulación de grasa u otros residuos puede provocar un incendio. Puede aparecer condensación por humedad en el aparato o en los paneles de cristal. Para reducir la condensación ponga en funcionamiento el horno 10 minutos antes de cocinar. No guarde la comida en el aparato más de 20 minutos.
- Seite 144 11.4 Cómo quitar e instalar: Puerta La puerta del horno tiene dos paneles de cristal. Puede retirar la puerta del horno y el panel interno de cristal para limpiarlo. Lee enteramente las instrucciones de "Extracción e instalación de la puerta" antes de retirar los paneles de cristal. PRECAUCIÓN! No utilices el horno sin los paneles de cristal.
- Seite 145 Paso 7 Sujete el panel de la puerta de cristal por el borde superior y extráigalo con cuidado. Asegúrese de que el cristal se desliza com‐ pletamente fuera de los soportes. Paso 8 Limpie los paneles de cristal con agua y jabón. Seque cuidadosamente los paneles de cristal con cuidado.
-
Seite 146: Solución De Problemas
13.1 Información del producto y ficha de información del producto conforme a la normativa de la UE sobre etiquetado energético y diseño ecológico Nombre del proveedor Zanussi ZOHKF1X1 949496249 Identificación del modelo ZOHNF1K1 949496304 ZOHNF1W1 949496305 Índice de eficiencia energética 81.2... -
Seite 147: Ahorro Energético
Fuente de energía Electricidad Volumen Tipo de horno Horno empotrable ZOHKF1X1 26.7kg Masa ZOHNF1K1 26.7kg ZOHNF1W1 26.7kg IEC/EN 60350-1 - Aparatos electrodomésticos de cocción - Parte 1: Cocinas, hornos, hornos de vapor y grills - Métodos de medida del rendimiento. - Seite 148 867360189-B-192023...