Herunterladen Diese Seite drucken
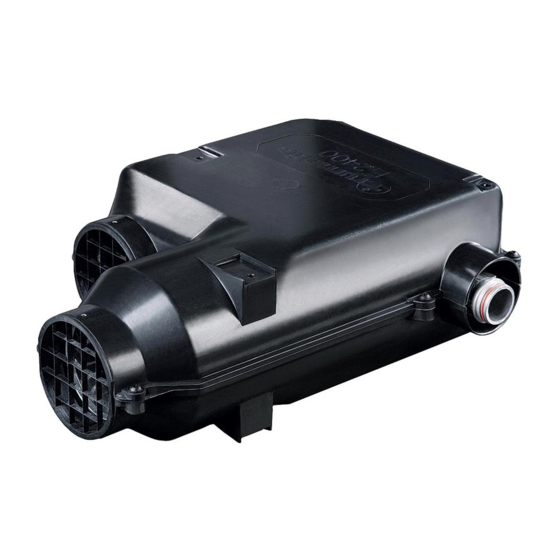
Truma Trumatic E 2400 E Gebrauchsanweisung
Vorschau ausblenden Andere Handbücher für Trumatic E 2400 E:

Werbung

Verfügbare Sprachen

Verfügbare Sprachen

Im Fahrzeug mitzuführen!
To be kept in the vehicle!
Da tenere nel veicolo!
ab 07 / 2010
Seite 2
Seite 8
Page 14
Page 19
Pagina 25
Pagina 30

Werbung

loading

Inhaltszusammenfassung für Truma Trumatic E 2400 E

  • Seite 1: Inhaltsverzeichnis

    Trumatic E 2400 E ab 07 / 2010 Gebrauchsanweisung Seite 2 Einbauanweisung Seite 8 Im Fahrzeug mitzuführen! Operating instructions Page 14 Installation instructions Page 19 To be kept in the vehicle! Istruzioni per l‘uso Pagina 25 Istruzioni di montaggio Pagina 30...
  • Seite 2: Trumatic E 2400 E

    Trumatic E 2400 E (ab 07/2010) Einbaubeispiel Installation example Esempio di montaggio 1 Bedienteil (nach Wahl) 1 Control panel (of your 1 Unità di comando (scelta) 2 Zeitschaltuhr (Zubehör) choice) 2 Temporizzatore 3 Verbrennungsluft- 2 Time switch (accessories) (accessorio) Zuführung...
  • Seite 3: Verwendete Symbole

    Rote LED „Störung“ .............. 5 Entsorgung ................5 Zubehör ................6 Technische Daten ............... 6 Abmessungen ............... 6 Fehlersuchanleitung ............7 Truma Hersteller-Garantieerklärung ......8 Einbauanweisung Verwendungszweck .............. 8 Zulassung ................8 Vorschriften ................9 Einbauhinweise für Nutzfahrzeuge ........9 Einbauhinweise für Fahrerhäuser .........
  • Seite 4: Sicherheitshinweise

    Sachkundigen (DVFG, TÜV, DEKRA) zu wiederholen und auf einer entsprechenden Prüfbescheinigung (in Deutschland Für Wartungs- und Reparaturarbeiten dürfen nur Truma Origi- z. B. G 609 Entwurf, d. h. in der Truma Prüfbescheinigung) zu nalteile verwendet werden. bestätigen. Bei Abgasführung unter Boden muss der Fahrzeugboden Verantwortlich für die Veranlassung der Überprüfung ist...
  • Seite 5: Gebrauchsanweisung

    – Schnellschlussventil in der Gaszuleitung öffnen. spannung für die Heizung hin (ggf. Batterie laden). – Gewünschte Raumtemperatur am Drehknopf einstellen. In Deutschland ist bei Störungen grundsätzlich das Truma Servicezentrum zu benachrichtigen; in anderen Ländern ste- – Einschalten der Heizung: hen die jeweiligen Servicepartner zur Verfügung (siehe Truma Serviceheft oder www.truma.com).
  • Seite 6: Zubehör

    Zubehör Technische Daten ermittelt nach EN 624 bzw. Truma Prüfbedingungen 1. Vorschaltgerät VG 2 für Fahrerhausheizungen von Gefahrgut-Tankfahrzeugen Gasart nach ADR (darf nicht zusammen mit einer Zeitschaltuhr Erdgas (aus der fahrzeugeigenen CNG-Anlage) verwendet werden). Betriebsdruck 50 mbar (siehe Typenschild) 2. Außenschalter AS Nennwärmeleistung...
  • Seite 7: Fehlersuchanleitung

    Heizung schaltet sich nach – Warmluftaustritte blockiert. – Kontrolle der einzelnen Austrittsöffnungen. einer längeren Betriebsdauer auf Störung. – Umluftansaugung – Blockade der Umluftansaugung entfernen. blockiert. Sollten diese Maßnahmen nicht zur Störungsbehebung führen, wenden Sie sich bitte an den Truma Service.
  • Seite 8: Einbauanweisung

    (Caravans Fahrzeugklasse O) sowie für Nutzfahrzeuge (Fahr- 85640 Putzbrunn, Deutschland zeugklasse N) zugelassen. Bei Störungen wenden Sie sich bitte an das Truma Service- Das Jahr der ersten Inbetriebnahme muss auf dem zentrum oder an einen unserer autorisierten Servicepartner Typenschild angekreuzt werden.
  • Seite 9: Vorschriften

    Öffnen des Fensters über die Truma Typbezogene Montageanleitungen und Einbausätze stehen Abschaltautomatik bei Truma zur Verfügung. (Zubehör Art.-Nr. 39050- 00800) selbständig In Deutschland ist für Gefahrgut-Tankfahrzeuge im Geltungs- abschalten. bereich der ADR die Heizung nur mit Truma Vorschaltgerät zugelassen.
  • Seite 10: Abgasführung

    Kamininnenteil (11) mit 3 Schrauben (12) befestigen (Ein- baulage beachten! Der Truma Schriftzug muss unten sein). Für die Heizung Trumatic E 2400 E darf für den Einbau mit Kaminaußenteil (13) aufsetzen und mit 2 Schrauben (14) Wandkamin nur das Truma Abgasrohr AA 24 (Art.-Nr. 39420- anschrauben.
  • Seite 11: Unterflurmontage Mit Wandkaminset

    Spritzwasser in die Heizung eindringen kann! Schellen befestigen. Das Warmluftsystem wird für jeden Fahrzeugtyp individuell im Baukastenprinzip ausgelegt. Dafür steht ein reichhaltiges Zubehör-Programm zur Verfügung (siehe Prospekt). Skizzen mit optimalen Einbauvorschlägen für Warmluftanlagen kön- nen über das Truma Servicezentrum kostenlos angefordert werden.
  • Seite 12: Montage Der Rohre Bei Durchführungen

    Raumtemperatur verwendet werden (Zubehör). Montage des Bedienteils mit Drehschalter Ist eine Unterputzmontage des Bedienteils nicht mög- lich, liefert Truma auf Wunsch einen Aufputzrahmen (1 – Art.-Nr. 40000-52600) als Zubehör. Loch Ø 55 mm bohren. Das Bedienteilkabel (2) am Bedienteil (3) anstecken und anschlie- ßend die hintere Abdeckkappe (4) als Zugentlastung aufstecken.
  • Seite 13: Montage Der Elektronischen Steuereinheit

    11 V und 15 V liefern und die Wechselspan- nungswelligkeit < 1,2 Vss beträgt. Für die unterschiedlichen Anwendungsfälle empfehlen wir die Ladeautomaten von Truma. Bitte fragen Sie Ihren Händler. Andere Ladegeräte nur mit einer 12 V-Batterie als Puffer verwenden.
  • Seite 14: Operating Instructions

    Trumatic E 2400 E (as of 07/2010) Table of Contents Symbols used Symbols used ..............14 The unit must only be installed and repaired by an Safety instructions ............15 expert. Important operating notes ..........15 Symbol indicates a possible hazard.
  • Seite 15: Safety Instructions

    – Modifications to the device (including accessories), check the mounting of the unit and the cowl. – Modifications to the exhaust duct and the cowl, – Failure to use original Truma parts as replacement parts and Following a blow-back (misfire) always have the exhaust duct accessories, checked by an expert! –...
  • Seite 16: Operating Instructions

    (charge the battery if required). – Set the desired room temperature at the control knob. In Germany, always notify the Truma Service Centre if prob- – Switching on the heater: lems are encountered; in other countries the relevant service...
  • Seite 17: Accessories

    Accessories Technical Data Determined in accordance with EN 624 or Truma test conditions 1. Series unit VG 2 for vehicle cab heaters in dangerous goods vehicles in ac- Type of gas cordance with ADR (not to be used in conjunction with a Natural gas (from vehicle-internal CNG system) time switch).
  • Seite 18: Troubleshooting Guide

    – Warm air outlets blocked. – Inspect individual outlet openings. period of time, the heater switches to failure. – Circulated air intake – Remove blockage from circulated air intake. blocked. If these actions do not remedy the problem, please contact Truma Service.
  • Seite 19: Installation Instructions

    – Consumable parts which are subject to wear and tear – Use of parts other than original Truma components in any Intended use of the units – In gas pressure regulation systems: damage caused by for- eign substances in the gas (e.g.
  • Seite 20: Regulations

    – Modifications to the exhaust duct and the cowl, In order to heat the vehicle evenly throughout, the heater – Failure to use original Truma parts as replacement parts and must be installed in a location in the vehicle that is as central...
  • Seite 21: Exhaust Duct

    (13) and screw on with 2 screws (14). bustion air intake duct ZR24 (part no. 39440-00) may be used for the Trumatic E 2400 E heater for installation with a wall A new O-ring must be fitted whenever the exhaust duct...
  • Seite 22: Underfloor Installation With Wall Cowl Kit

    A wide range of accessories is available for this purpose (see brochure). Diagrams with optimum installation suggestions for warm air systems can be requested free of charge from the Truma Service Centre.
  • Seite 23: Installing The Pipes With Leadthroughs

    (10). The various pieces for pipe branching can also be fitted to the connector piece (8), allowing the pipes Truma supplies side parts (7) in eight different colours to R 72 (Ø 72 mm), ÜR (Ø 65 mm) or ZR 18 (Ø 49 mm) to be improve the appearance of the cover frames (6).
  • Seite 24: Installing The Electronic Control Unit

    Unscrew the cover of the control unit. 15 V and the alternating current ripple is < 1.2 Vpp. We rec- ommend the Truma automatic chargers for the various appli- The connectors on the electronic control unit must cations. Please contact your dealer. Other chargers may be not be disconnected or connected unless the supply used only with a 12 V battery as a buffer.
  • Seite 25: Istruzioni Per L'uso

    Smaltimento ..............27 Accessori ................28 Specifiche tecniche ............28 Dimensioni ................28 Istruzioni per la ricerca guasti ........29 Dichiarazione di garanzia del costruttore Truma ..30 Istruzioni di montaggio Scopo d’impiego ..............30 Omologazione ..............30 Disposizioni ................. 31 Avvertenze per l’installazione in veicoli commerciali ..
  • Seite 26: Avvertenze Di Sicurezza

    Se il regolatore di pressione è esposto all’azione degli agenti nico qualificato! atmosferici (soprattutto in camion), montare sempre il cap- puccio di protezione Truma (accessorio di serie nel kit di mon- Montare un nuovo o-ring ogni volta che si smonta il tubo dei taggio per camion).
  • Seite 27: Istruzioni Per L'uso

    In Germania, in caso di guasti occorre rivolgersi, in linea di Unità di comando con interruttore a scorrimento principio, al centro di assistenza Truma; negli altri paesi, sono Mettere l’interruttore (a) su riscaldamento e l’interruttore (b) disponibili i rispettivi partner di assistenza (vedere il libretto di alla potenza desiderata.
  • Seite 28: Accessori

    Specifiche tecniche rilevate conformemente alla norma EN 624 o alle condizioni di 1. Ballast VG 2 prova Truma per stufe di cabine di autocisterne per il trasporto di merci pericolose secondo ADR (non deve essere utilizzato insie- Tipo di gas me ad un temporizzatore).
  • Seite 29: Istruzioni Per La Ricerca Guasti

    – Controllare le singole aperture di uscita. mento prolungato, la stufa si bloccate. mette in modalità guasto. – Rimuovere l’ostruzione dall’aspirazione dell’aria di ricircolo. – Aspirazione dell’aria di ricircolo bloccata. Qualora queste misure non consentano di eliminare l’anomalia, rivolgersi al servizio di assistenza Truma.
  • Seite 30: Istruzioni Di Montaggio

    8 posti a sedere conducente escluso, in rimorchi (caravan, classe di veicoli O) e in veicoli commerciali (classe di In caso di guasti rivolgersi al centro di assistenza Truma o a veicoli N). un nostro partner di assistenza autorizzato (vedere il libretto di assistenza Truma o il sito www.truma.com).
  • Seite 31: Disposizioni

    (o sotto di esso), in modo – l’utilizzo di accessori e parti di ricambio non originali Truma, che i tubi di distribuzione dell’aria da posare siano all’incirca di – l’inosservanza delle istruzioni per l’uso e di montaggio.
  • Seite 32: Tubo Dei Gas Di Scarico

    è rivolto verso l’alto) e avvitare saldamente la fascetta (4) in modo che la nervatura della fascetta faccia Per la stufa Trumatic E 2400 E, per l’installazione con presa sulla battuta. camino a parete utilizzare esclusivamente il tubo di scarico Truma AA 24 (n°...
  • Seite 33: Montaggio Sotto Pianale Con Il Kit Camino A Parete

    A tale scopo, è disponibile un’ampia gamma di accessori (v. prospetto). Bozze con proposte d’in- stallazione ottimali per impianti dell’aria calda possono essere richiesti gratuitamente al centro di assistenza Truma.
  • Seite 34: Montaggio Dei Tubi Con Bussole Passanti

    (5) dal foro (U). elettrico in base alle descrizioni dell’interfaccia Truma. Qualsi- asi modifica apportata ai relativi componenti Truma fa deca- Se necessario, accorciare i due pezzi di tubo LF 18 (6) a mi- dere il diritto di garanzia e comporta l’esclusione dei diritti di sura, applicarvi sull’interno sigillante plastico per carrozzeria...
  • Seite 35: Montaggio Della Centralina Elettronica

    (linguette piatte per autoveicoli da 6,3 mm). so fornita. Non collegare altre utenze alla linea di alimentazione! Se non può essere montato incassato, Truma fornisce su richiesta una cornice per montaggio in superficie come acces- Se si utilizzano alimentatori o apparecchi di rete, assi- sorio (n°...
  • Seite 36 In order to avoid delays, please have the unit model and serial number ready (see type plate). In caso di guasti rivolgersi al centro di assistenza Truma o a un nostro partner di assistenza autorizzato (vedere il libretto di assistenza Truma o il sito www.truma.com).