Herunterladen Inhalt Inhalt Diese Seite drucken

Atlantic SOLIUS DIGITAL Bedienungsanleitung

Vorschau ausblenden Andere Handbücher für SOLIUS DIGITAL:
Inhaltsverzeichnis

Werbung

Verfügbare Sprachen

Verfügbare Sprachen

N891_R02 (22.02.2022)

Werbung

Inhaltsverzeichnis
loading

Inhaltszusammenfassung für Atlantic SOLIUS DIGITAL

  • Seite 1 N891_R02 (22.02.2022)
  • Seite 2: Inhaltsverzeichnis

    Contents Warning ............................3 Installation and Servicing ......................4 Preparing to install the appliance ....................4 Installing the appliance ........................5 Connecting the appliance....................... 6 Mounting the appliance ......................... 6 Maintenance ..........................6 Operation ............................ 7 The unit ............................ 7 Switch ............................
  • Seite 3: Warning

    Warning Caution hot surface. IMPORTANT: Certain parts of this product can become very hot and cause burns. Particular attention must be paid in the Caution: presence of children and vulnerable individuals. hot surface - This appliance must be kept away from children under the age of 3, unless under constant supervision.
  • Seite 4: Installation And Servicing

    Warning: To prevent overheating, and for safety reasons, do not cover the heating appliance. Appliances carrying this symbol must not be disposed of with household waste. They must be collected separately and recycled. Products at the end of their life must be collected and recycled in accordance with the local provisions and decrees.
  • Seite 5: Installing The Appliance

    Wet area No electrical appliance Wet area Wet area Medium- IPX4 electrical appliance wet area Maintain the minimum distances from furniture when positioning the appliance. Do not install shelves above vertical appliances. Dimensions in cm INSTALLING THE APPLIANCE Unlocking the horizontal appliance locking tab We recommend leaving the appliance in its protective blocks, and placing it flat on the floor.
  • Seite 6: Connecting The Appliance

    CONNECTING THE APPLIANCE Connection rules - The appliance must be connected to a 230 V, 50 Hz single-phase power supply. - If the power cable is damaged, it must be replaced by the manufacturer, its After-Sales service or a similarly qualified professional to prevent any hazards. CAUTION: These appliances cannot be installed stationary on the French market.
  • Seite 7: Operation

    Operation THE UNIT Press any button to activate the display. Comfort Change Mode Access Programming Parameters mode the parameters mode mode Confirm Back (press and hold) Increase Lock (press and hold both buttons) Decrease Set temperature Heating indicator SWITCH There is an on/off switch located at the rear of the appliance control unit. Only use this to switch off the appliance for long periods of time (period without heating;...
  • Seite 8: Displays

    DISPLAYS Setting the time and day Comfort temperature Eco temperature Allocate predefined programs to the 7 days No heating of the week Enter menu Personalise programs Exit menu Window open detection OPERATING MODES Several operating modes are available: OMFORT MODE You set your temperature when you are present.
  • Seite 9: Use

    INITIAL SWITCH-ON Press any button to activate the display. When it is first powered on, Comfort mode is selected, and the temperature is set to 19 °C. When the appliance is heated for the first time, a slight odour may be noted. This results from the evacuation of any traces linked to the manufacture of the appliance.
  • Seite 10: Eco Mode

    ECO MODE ELECTING CO MODE quick press ETTING THE TEMPERATURE Use the buttons to set the temperature (desired temperature). Increase or decrease from 10 °C min. to 19 °C max., in increments of 0.5 °C. The maximum temperature is limited to 2 °C below the Comfort temperature. Decrease further to 7 °C (non-modifiable frost protection temperature).
  • Seite 11 By default, a program is already allocated to each day of the week. Monday Tuesday Wednesday Thursday Friday Saturday Sunday You can change the allocation of the programs in the Settings To change the program (Comfort , Eco , Off ) and the operating ranges, go into Settings (see "Settings").
  • Seite 12: Settings

    SETTINGS In Settings , you can: • : Set the time and day. • : Select the program (P1 to P7) for each day of the week (d1 to d7). • : Personalise each of the programs (P1 to P7), choosing the operating mode (Co, Ec, oF) for each hour of the day (from 00:00 to 23:00).
  • Seite 13: Selecting A Predefined Program For Each Day Of The Week

    ELECTING A PREDEFINED PROGRAM FOR EACH DAY OF THE WEEK 1 - Select Settings . The symbol will be displayed. 2 - Press three times to display 3 - Press to display the first day. The day number will be displayed 4 - Select the day to set using the buttons.
  • Seite 14: Activating Or Deactivating The Open Window Detection Function

    Predefined P6 Modified P6 There is an automatic inactivity timeout from Settings after one minute. After the power has been cut, you may need to reset the day and time. CTIVATING OR DEACTIVATING THE OPEN WINDOW DETECTION FUNCTION 1 - Select Settings .
  • Seite 15: Locking Access To The Controls

    LOCKING ACCESS TO THE CONTROLS Your appliance's controls can be child-locked by pressing and holding these two buttons at the same time for more than 3 seconds. Then when you press one of the buttons, will be displayed. The controls will be locked.
  • Seite 16: Load Shedding

    Load shedding Our appliances are compatible with various load shedding systems. However, you must not use mains shut-off load shedding, since these systems are incompatible with our appliances. Sudden, inadvertent and repeated power shut-offs can cause premature wear and damage to the electronics boards, which would not be covered by the manufacturer's warranty.
  • Seite 17: Maximum Temperature

    MAXIMUM TEMPERATURE The appliance can save a maximum temperature (of between 19 °C and 28 °C), which the settings cannot exceed. By default, it is set to 28 °C. 1 - Press and hold the buttons at the same time for more than 3 seconds to display 2 - Press to display (Max.
  • Seite 18: Troubleshooting

    Troubleshooting Problem encountered Checks to carry out The control panel does The display is on standby. Press any button to activate the display. Check not light up. that the appliance is connected to the power supply. Check that the switch is in position I.
  • Seite 19 Problem encountered Checks to carry out The appliance does Increase the temperature. not heat up enough. If the ambient temperature of the room does not reach the requested temperature, read the temperature at the bottom right of the appliance (this is where the sensor is located). If this temperature is above the set temperature, then the appliance should not be heating up.
  • Seite 20 If you have been unable to solve your problem, contact your retailer/installer, after noting the references for your appliance. These are located on the side of the appliance. Measure the room temperature. The commercial code (C) and the serial number (E) provide the manufacturer's identification of the appliance you have just bought.
  • Seite 21: Specifications

    Specifications Model references RWEH BD0 Item Symbol Value Unit Heat output Nominal heat output P nom 0.3 to 2 300 to 2000 Minimum thermal output P min Maximum continuous thermal output P max,c 2000 Auxiliary electricity consumption At rated thermal output el max 0.000 At minimum thermal output...
  • Seite 22: Warranty Conditions

    This information can be found on the information plate situated on the side of the device. To claim under guarantee, contact your installer or dealer. If necessary, contact : ATLANTIC INTERNATIONAL 2 Allée Suzanne Penillault-Crapez 94110 ARCUEIL FRANCE...
  • Seite 23 Inhaltsverzeichnis Warnhinweise ......................... 24 Installation und Wartung ......................25 Vorbereiten der Installation des Gerätes ...................25 Installieren des Gerätes ......................26 Anschliessen des Gerätes ......................27 Beefestigen des Gerätes ......................27 Wartung ..........................27 Betrieb ............................ 28 Bedieneinheit ..........................28 Schalter ..........................28 Anzeigen ..........................28 Betriebsmodi ..........................29 Verwendung ..........................
  • Seite 24: Warnhinweise

    Warnhinweise Achtung: Sehr heiße Oberfläche. Caution hot surface. ACHTUNG: Einige Teile dieses Gerätes können sehr heiß werden und Verbrennungen verursachen. Bei Anwesenheit Achtung: von Kindern und gefährdeten Personen ist besondere Vorsicht Sehr heiße Oberfläche geboten. Caution hot surface - Kinder unter 3 Jahren sollten von diesem Gerät ferngehalten werden und nur unter ständiger Aufsicht in dessen Nähe kommen.
  • Seite 25: Installation Und Wartung

    - Ein Energiemanagementsystem oder Lastabwurfsystem durch Unterbrechung der Stromversorgung ist mit unseren Geräten nicht kompatibel. Dies beschädigt den Thermostat. - Das Gerät nicht unter einer Steckdose anbringen. Warnung: Vermeidung einer Überhitzung Sicherheitsgründen darf das Heizgerät nicht abgedeckt werden. Mit diesem Symbol gekennzeichnete Geräte dürfen nicht in den Hausmüll gegeben werden, sondern müssen getrennt gesammelt und recycelt werden.
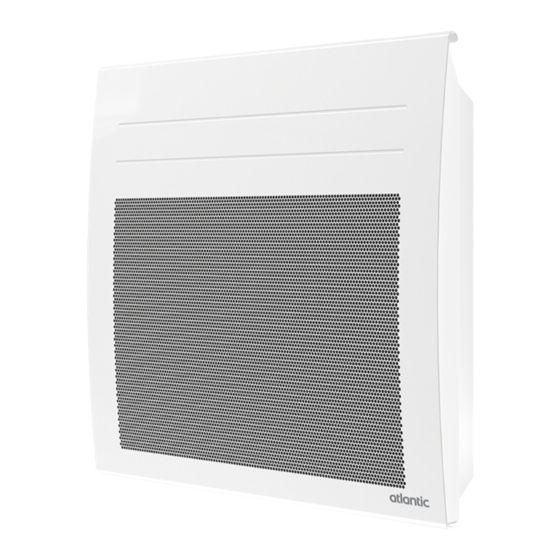
  • Seite 26: Installieren Des Gerätes

    Bereich 1 Keine elektrischen Geräte Bereich Bereich Bereich 2 Elektrisches Gerät IPX4 Beachten Wahl Installationsortes Gerätes Mindestabstände Einrichtungsgegenständen. Bringen Sie über vertikalen Geräten keine Regale an. Maße in cm INSTALLIEREN DES GERÄTES Lösen der Aufhängevorrichtung vom Gerät Wir empfehlen, das Gerät in den Schutzelementen zu lassen und es flach mit der Vorderseite nach unten auf den Boden zu legen.
  • Seite 27: Anschliessen Des Gerätes

    DES GERÄTES ANSCHLIESSEN Regeln für den Anschluss - Das Gerät muss mit 230 V, einphasig, 50 Hz versorgt werden. - Sollte das Stromversorgungskabel beschädigt sein, muss es vom Hersteller, dessen Kundendienst oder einer vergleichbar qualifizierten Person ausgetauscht werden, um Gefahren zu vermeiden. ACHTUNG: Diese Geräte können auf dem französischen Markt nicht an einer Wandsteckdose installiert werden BEEFESTIGEN DES GERÄTES...
  • Seite 28: Betrieb

    Betrieb BEDIENEINHEIT Drücken Sie eine beliebige Taste, um die Anzeige zu aktivieren. Komfort- Programm- Einstellungen Modus wechseln Eco- modus Einstellungen aufrufen Modus Modus Bestätigen Zurück (langes Drücken) Erhöhen Sperren (beide Tasten lang drücken) Verringern Eingestellte Temperatur Heizanzeige SCHALTER An der Rückseite der Bedieneinheit des Gerätes befindet sich ein Ein-/Ausschalter.
  • Seite 29: Anzeigen

    ANZEIGEN Einstellen von Uhrzeit und Komforttemperatur Wochentag Eco-Temperatur Zuweisen von voreingestellten Programmen für die 7 Keine Heizung Wochentage Menübeginn Anpassen von Programmen Menüende Erkennung eines offenen Fensters BETRIEBSMODI Es stehen mehrere Betriebsarten zur Auswahl: OMFORTMODUS Sie stellen Ihre Temperatur ein, wenn Sie anwesend sind. Das Gerät richtet sich kontinuierlich nach der eingestellten Komforttemperatur.
  • Seite 30: Verwendung

    Um den Programm-Modus zu verwenden, müssen Sie zunächst unter Einstellungen die Uhrzeit und den Wochentag einstellen. Verwendung ERSTES EINSCHALTEN Drücken Sie eine beliebige Taste, um die Anzeige zu aktivieren. Beim ersten Einschalten ist der Komfort-Modus ausgewählt und die Temperatur auf 19 °C eingestellt. Bei der ersten Erwärmung kann ein leichter Geruch durch die Ableitung eventueller mit der Herstellung des Gerätes verbundener Rückstände entstehen.
  • Seite 31: Eco-Modus

    ECO-MODUS USWÄHLEN DES ODUS kurzes Drücken INSTELLEN DER EMPERATUR Verwenden Sie die Tasten , um die Temperatur (gewünschte Temperatur) einzustellen. Erhöhen oder verringern Sie die Temperatur in Schritten von 0,5 °C auf min. 10 °C bis max. 19 °C. Die Höchsttemperatur ist immer auf 2 °C unter der Komforttemperatur begrenzt. Verringern Sie die Temperatur auf bis zu 7 °C (Frostschutztemperatur nicht veränderbar).
  • Seite 32 Das Gerät verfügt über 7 (veränderbare) Programme, die festlegen, zu welchen Tageszeiten Gerät Komforttemperatur (Co, im Komfortmodus eingestellte Temperatur) oder der Eco- Temperatur (Ec, Komforttemperatur − 2°°C) folgen soll. Standardmäßig jedem Wochentag bereits ein Programm zugewiesen. Co = Comfort Ec = Eco können Zuweisung Programme in...
  • Seite 33: Einstellungen

    EINSTELLUNGEN In den Einstellungen können Sie: • : die Uhrzeit und den Wochentag einstellen; • : das Programm (P1 bis P7) für jeden Wochentag (d1 bis d7) wählen; • : jedes der Programme (P1 bis P7) individuell anpassen, indem Sie die Betriebsstufe (Co, Ec, oF) für jede Tageszeit (von 0 Uhr bis 23 Uhr) wählen.
  • Seite 34: Auswählen Eines Voreingestellten Programms Für Jeden Tag Der Woche

    USWÄHLEN EINES VOREINGESTELLTEN ROGRAMMS FÜR JEDEN AG DER OCHE 1 - Wählen Sie Einstellungen . Das Symbol wird angezeigt. 2 - Drücken Sie 3 Mal , um anzuzeigen. 3 - Drücken Sie , um den ersten Tag anzuzeigen. Die Nummer des Tages wird angezeigt.
  • Seite 35: Aktivieren Oder Desaktivieren Der Erkennung Eines Offenen Fensters

    P6 voreingestellt P6 geändert Nach einer Minute ohne Betätigung verlassen Sie automatisch die Einstellungen. Nach einem Stromausfall kann es erforderlich sein, Wochentag und Uhrzeit erneut einzustellen. KTIVIEREN ODER ESAKTIVIEREN DER RKENNUNG EINES OFFENEN ENSTERS 1 - Wählen Sie Einstellungen . Das Symbol wird angezeigt 2 - Drücken Sie 2 Mal , um...
  • Seite 36: Sperren Der Bedienelemente

    SPERREN DER BEDIENELEMENTE Um eine Betätigung durch Kinder zu verhindern, können Sie die Bedienelemente Ihres Gerätes sperren. Halten Sie dazu die beiden Tasten gleichzeitig länger als 3 Sekunden gedrückt. Wenn Sie anschließend eine der Tasten drücken, wird angezeigt. Die Bedienelemente sind gesperrt. Führen Sie denselben Vorgang durch, um die Sperre aufzuheben.
  • Seite 37: Lastabwurf

    Lastabwurf Unsere Geräte sind mit verschiedenen Lastabwurfsystemen kompatibel. Sie dürfen jedoch keinen Lastabwurf durch Unterbrechung der Netzstromversorgung verwenden, da dieses System mit unseren Geräten nicht kompatibel ist. Unerwünschte und wiederholte Unterbrechungen der Stromversorgung können zu vorzeitigem Verschleiß und einer Beschädigung der Leiterplatten führen, die nicht durch die Herstellergarantie abgedeckt sind.
  • Seite 38: Höchsttemperatur

    HÖCHSTTEMPERATUR Das Gerät ermöglicht die Speicherung einer Höchsttemperatur (zwischen 19 °C und 28 °C), die bei den Einstellungen nicht überschritten werden kann. Standardmäßig ist sie auf 28 °C eingestellt. 1 - Halten Sie die Tasten gleichzeitig länger als 3 Sekunden gedrückt, es wird angezeigt.
  • Seite 39: Bei Problemen

    5 - Drücken Sie zur Bestätigung . Alle Anzeigelampen leuchten auf. Anschließend schaltet das Gerät wieder in den Komfortmodus mit 19 °C. Bei Problemen Aufgetretenes Durchzuführende Kontrollen Problem Die Bedieneinheit Die Anzeige befindet sich im Standby-Modus. Drücken Sie eine beliebige geht nicht an.
  • Seite 40 Aufgetretenes Durchzuführende Kontrollen Problem Thermostat ...) unterbrechen Sie die Stromversorgung des Gerätes (Sicherung, Schutzschalter) für etwa 10 Minuten und schalten Sie es dann wieder ein. Das Gerät heizt, Zwischen dem Öffnen des Fensters und der Erkennung kann eine gewisse Zeit obwohl das Fenster vergehen.
  • Seite 41 Aufgetretenes Durchzuführende Kontrollen Problem Das Display zeigt Dieses Symbol wird angezeigt, wenn das Gerät überhitzt ist. Kontaktieren Sie den Kundendienst. Das Display zeigt Dieses Symbol wird angezeigt, wenn der Sensor des Gerätes defekt ist. Kontaktieren Sie den Kundendienst. Wenn Sie das Problem nicht lösen konnten, wenden Sie sich an Ihren Händler/Installateur, halten Sie dabei die Referenznummern des Gerätes bereit.
  • Seite 42: Technische Daten

    Technische Daten Modellbezeichnungen RWEH BD0 Bezeichnung Symbol Wert Einheit Wärmeleistung Nennwärmeleistung P nenn 0,3 bis 2 300 bis 2000 Minimale Wärmeleistung P min Maximale kontinuierliche Wärmeleistung P max, c 2000 Zusätzlicher Stromverbrauch Bei Nennwärmeleistung el max 0,000 Bei minimaler Wärmeleistung el min 0,000 Im Standby-Modus...
  • Seite 43: Garantiebedingungen

    - Die Garantie gilt für 2 Jahre ab Installations- bzw. Kaufdatum und kann sich ohne Na- chweise nicht länger als 30 Monate über das Erzeugungsdatum hinaus erstrecken. - Atlantic garantiert den Austausch oder die Lieferung der als schadhaft anerkannten Teile, jegliche Schadenshaftpflicht ist ausgeschlossen.
  • Seite 44 Obsah Varování ..........................45 Instalace a údržba ......................46 Příprava přístroje na instalaci ................46 Instalace přístroje ....................47 Připojení přístroje ....................48 Připevnění přístroje ....................48 Údržba ......................48 Funkce ..........................49 ......................49 Jednotka Spínač ......................49 Zobrazení ......................
  • Seite 45: Varování

    Varování Pozor, povrch přístroje je velmi horký. Pozor, horký povrch. POZOR: Určité části tohoto produktu mohou být velmi horké a způsobit popáleniny. Je nutné věnovat zvláštní Pozor: Velmi horký povrch pozornost v případě přítomnosti dětí a dalších osob, Pozor, horký kterým by mohlo hrozit zranění.
  • Seite 46: Instalace A Údržba

    Pozor: Aby nedocházelo přehřívání a z bezpečnostních důvodů topné zařízení nezakrývejte. Přístroje opatřené tímto symbolem nesmí být vyhazovány do běžného domovního odpadu, ale musí být likvidovány samostatně a recyklovány. Sběr a recyklace produktů na konci životnosti musí být provedený v souladu s místními předpisy a nařízeními. Svislá...
  • Seite 47: Instalace Přístroje

    Žádný elektrický přístroj Prostor 1 Prostor Prostor Elektrický přístroj IP X4 Prostor 2 Při volbě umístění přístroje dodržujte minimální vzdálenosti od nábytku. Nad svislé přístroje neumísťujte police. Rozměry v cm INSTALACE PŘÍSTROJE Odjistěte zavěšovací lištu přístroje Doporučujeme vám nechat přístroj v ochranných prvcích. Body pro vrtání...
  • Seite 48: Připojení Přístroje

    PŘIPOJENÍ PŘÍSTROJE Zásady připojování - Přístroj musí být napájen 230 V jednofázovým proudem o frekvenci 50 Hz. - Aby nevzniklo riziko, musí být tento napájecí kabel v případě poškození vyměněn výrobcem, jeho poprodejním servisem nebo osobami s podobnou kvalifikací. PŘIPEVNĚNÍ PŘÍSTROJE Pro odjištění...
  • Seite 49: Funkce

    Funkce JEDNOTKA Displej aktivujete stisknutím kteréhokoli tlačítka. Režim Režim Režim Změna režimu Parametry Naprogramování Komfort Zobrazit parametry Potvrdit Zpět (dlouhé stisknutí) Zvýšit Zajistit (dlouhé stisknutí obou tlačítek) Snížit Kontrolka ohřívání Nastavená teplota SPÍNAČ Na zadní straně ovládací jednotky přístroje je umístěn spínač pro spuštění/vypnutí.
  • Seite 50: Zobrazení

    ZOBRAZENÍ Nastavení času a dne v týdnu. Teplota Komfort Teplota Eko Přiřazení předem nastavených programů k 7 dnům v týdnu Přístroj neohřívá Vlastní nastavení programů Vstup do menu Detekce otevřeného okna Ukončení menu FUNKČNÍ REŽIMY Nabídka obsahuje několik funkčních režimů: EŽIM OMFORT Nastavte teplotu, kterou chcete mít v místnosti, když...
  • Seite 51: Používání

    Používání PRVNÍ ZAPNUTÍ Displej aktivujete stisknutím kteréhokoli tlačítka. Při prvním zapnutí zařízení bude zvolen režim Komfort (ve výchozím nastavení je teplota vytápění 19 °C). Při prvním zapnutí vytápění může vznikat mírný zápach, jehož příčinou je odpařování případných stop výroby přístroje. Při prvním uvedení do provozu vám přístroj doporučujeme nechat zahřát na 28 °C po dobu 1 hodiny.
  • Seite 52: Režim Eko

    REŽIM EKO ÝBĚR REŽIMU krátké stisknutí ASTAVENÍ TEPLOTY Pro nastavení teploty použijte tlačítka (požadovaná teplota). Teplotu můžete zvýšit nebo snížit krokově po 0,5 °C na minimální hodnotu 10 °C až maximální hodnotu 19 °C. Maximální požadovaná hodnota teploty Eko je vždy omezena na o 2 °C nižší hodnotu než...
  • Seite 53 Ve výchozím nastavení je ke každému dni v týdnu přiřazen určitý pondělí úterý středa čtvrtek pátek neděle sobota program. Přiřazení programů můžete změnit v Nastavení Změnu režimu (Komfort Co, Eko Ec, Vypnuto oF) a rozmezí teplot najdete v Nastavení (viz „Nastavení“). Pomocí...
  • Seite 54: Nastavení

    NASTAVENÍ V Nastavení můžete vybrat: • : Nastavení času a dne v týdnu. • : Vybrat program (P1 až P7) pro jednotlivé dny v týdnu (d1 až d7). • : Upravit si nastavení jednotlivých programů (P1 až P7) výběrem funkčního režimu (Co, Ec, oF) pro jednotlivé...
  • Seite 55: Výběr Předem Nastaveného Programu Pro Jednotlivé Dny V Týdnu

    ÝBĚR PŘEDEM NASTAVENÉHO PROGRAMU PRO JEDNOTLIVÉ DNY V TÝDNU 1 – Zvolte Nastavení . Zobrazí se symbol 2 – Stisknutím 3 se zobrazí 3 – Stisknutím se zobrazí první den. Číslo dne se zobrazuje takto 4 – Pomocí tlačítek zvolte den, který chcete nastavit.
  • Seite 56: Aktivace Nebo Deaktivace Detekce Otevřeného Okna

    Přednastavený program P6 Upravený P6 Pokud po dobu jedné minuty neprovedete žádnou akci, režim Nastavení bude automaticky ukončen. Po výpadku elektrického proudu může být nutné provést nové nastavení dne a času. KTIVACE NEBO DEAKTIVACE DETEKCE OTEVŘENÉHO OKNA 1 – Zvolte Nastavení .
  • Seite 57: Zablokování Přístupu K Ovladačům

    ZABLOKOVÁNÍ PŘÍSTUPU K OVLADAČŮM Pro zamezení nechtěné manipulaci dětmi můžete ovladače svého přístroje zablokovat současným stisknutím obou tlačítek na dobu delší než 3 sekundy. Po dalším stisknutí některého z tlačítek se zobrazí . Ovladače jsou zablokovány. Pro odblokování ovladačů postupujte stejným způsobem. Na obrazovce se zobrazí...
  • Seite 58: Vypínání

    Vypínání Přístroj můžeme vypnout dvěma způsoby. 1) Úpravou nastavení programu výběrem funkčního režimu oF (více na str. 27) 2) Vypnutí spínačem, Tento spínač používejte pouze pro delší dobu (mimo topnou sezónu). Pokud jste nastavili datum a čas a uvedete přístroj mimo napětí, budete požádáni o provedení...
  • Seite 59: Kontrolka Topení V Pohotovostním Režimu

    Přístroj umožňuje načíst maximální teplotu (19 °C až 28 °C), která nesmí být při provádění nastavení překročena. Ve výchozím nastavení je tato maximální teplota 28 °C. 1 – Současně stiskněte tlačítka na déle než 3 sekundy pro zobrazení 2 – Stisknutím se zobrazí...
  • Seite 60: Případě Problémů

    V případě problémů Problém Co zkontrolovat Ovládací jednotka se Displej je v pohotovostním režimu. Displej aktivujete stisknutím nerozsvítí. kteréhokoli tlačítka. Zkontrolujte, zda je přístroj řádně elektricky napájen. Zkontrolujte, zda je spínač v poloze I. Ukazatel vytápění se Ukazatel vytápění se rozsvítí, jakmile je odpor elektricky napájen. nerozsvítí.
  • Seite 61 Problém Co zkontrolovat Vytápění přístrojem Zvyšte teplotu. není dostatečné. Pokud nedosahuje teplota uvnitř místnosti požadovanou teplotu, změřte teplotu v místě vpravo pod přístrojem (zde je umístěno čidlo). Je-li tato teplota vyšší než nastavená teplota, je normální, že přístroj netopí. V případě výrazného rozdílu mezi teplotou napravo pod přístrojem a teplotou uvnitř...
  • Seite 62 Pokud se vám nepodařilo problém vyřešit, kontaktujte svého prodejce/instalatéra a sdělte mu referenční údaje týkající se přístroje. Ty jsou uvedeny na straně přístroje. Změřte teplotu uvnitř místnosti. Obchodní kód (C) a sériové číslo (E) slouží k identifikaci přístroje, který jste si zakoupili, výrobcem.
  • Seite 63: Specifikace

    Specifikace Identifikátory modelu RWEH BD0 Položka Symbol Hodnota Jednotka Tepelný výkon Jmenovitý tepelný výkon 0,3 až 2 P nom 300 až 2 000 Minimální tepelný výkon P min Maximální nepřetržitý tepelný výkon P max, c 2000 Vedlejší spotřeba elektřiny Při jmenovitém tepelném výkonu el max 0,000 Při minimálním tepelném výkonu...
  • Seite 64: Záruční Podmínky

    ZÁRUČNÍ PODMÍNKY UCHOVEJTE TENTO DOKUMENT NA BEZPEČNÉM MÍSTĚ (Tento dokument by měl být použit pouze v případě reklamace a včetně dokladu o zakoupení) Dodavatel poskytuje na výrobky záruku 24 měsíců od data prodeje. Záruka se nevztahuje na vady způsobené dopravou, nedbalou manipulací, neodbornou montáží, nedodržením pokynů...

Inhaltsverzeichnis