Inhaltsverzeichnis
Fehlerbehebung

Verwandte Anleitungen für Whirlpool AKZ 476/IX


Inhaltszusammenfassung für Whirlpool AKZ 476/IX
- Seite 1 User and maintenance manual Bedienungs- und Wartungsanleitung Manuel d'utilisation et d'entretien Handleiding voor gebruik en onderhoud Manual de utilização e manutenção...
-
Seite 3: Important Safety Instructions
These instructions shall also be available on website: docs.whirlpool.eu IMPORTANT SAFETY INSTRUCTIONS YOUR SAFETY AND THAT OF OTHERS IS VERY IMPORTANT This manual and the appliance itself provide important safety warnings, to be read and observed at all times. This is the danger symbol, pertaining to safety, which alerts users to potential risks to themselves and others. - Seite 4 - If the surface of the induction plate is cracked, do not use it and switch off the appliance to avoid the possibility of electric shock (only for models with induction function). - Do not touch the appliance with any wet part of the body and do not operate it when barefoot.
- Seite 5 - Overheated oils and fats catch fire easily. Always remain vigilant when cooking foods rich in fat and oil. - Never leave the appliance unattended during food drying. - If alcoholic beverages are used when cooking foods (e.g. rum, cognac, wine), remember that alcohol evaporates at high temperatures.
-
Seite 6: Electrical Connection
ELECTRICAL CONNECTION Make sure the power voltage specified on the appliance dataplate is the same as the mains voltage. The dataplate is on the front edge of the oven (visible when the door is open). • Power cable replacement (type H05 RR-F 3 x 1.5 mm ) must be carried out by a qualified electrician. -
Seite 7: Troubleshooting Guide
TROUBLESHOOTING GUIDE The oven does not work: • Check for the presence of mains electrical power and if the oven is connected to the electrical supply. • Turn off the oven and restart it to see if the fault persists. The door will not open: •... -
Seite 8: Oven Interior
Oven interior IMPORTANT: do not use abrasive sponges or metallic scrapers or scourers. Over time, these can ruin enamelled surfaces and the oven door glass. • After every use, allow the oven to cool then clean it preferably while it is still warm in order to remove built-up dirt and stains caused by food residues (e.g. - Seite 9 MAINTENANCE Use protective gloves. WARNING Ensure the oven is cold before carrying out the following operations. Disconnect the appliance from the power supply. REMOVING THE DOOR To remove the door: Open the door fully. Lift the catches and push them forwards as far as they will go (Fig. 1). Close the door as far as it will go (A), lift it up (B) and turn it (C) until it is released (D) (Fig.
-
Seite 10: Replacing The Oven Lamp
REPLACING THE OVEN LAMP To replace the rear lamp (if present): Disconnect the oven from the power supply. Unscrew the lamp cover (Fig. 8), replace the lamp (see note for lamp type) and screw the lamp cover back on. Reconnect the oven to the power supply. To replace the side lamp (if present): Disconnect the oven from the power supply. -
Seite 11: Accessories Supplied
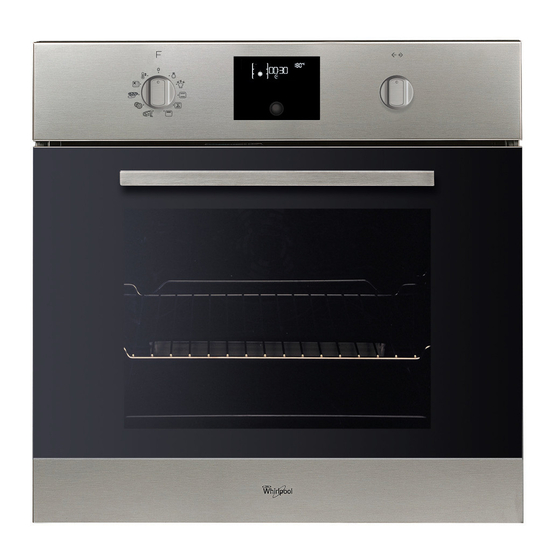
INSTRUCTIONS FOR OVEN USE FOR ELECTRICAL CONNECTION, SEE THE PARAGRAPH ON INSTALLATION Control panel Upper heating element/grill Cooling fan (not visible) Dataplate (not to be removed) Lamp Circular heating element (not visible) Turnspit Lower heating element (not visible) 10. Door 11. -
Seite 12: Inserting Wire Shelves And Other Accessories In The Oven
INSERTING WIRE SHELVES AND OTHER ACCESSORIES IN THE OVEN Insert the wire shelf horizontally, with the raised part “A” upwards (Fig. 1). Other accessories, such as the drip tray and baking tray, are inserted in the same way as the wire shelf (Fig. -
Seite 13: Setting The Time
STARTING THE OVEN - SETTING LANGUAGE At the first switch on of the oven, display shows ENGLISH. Turn the “Browse” knob until the desired language is displayed then press the button to confirm. SETTING THE TIME After setting the language, the time must be set on the clock. The two hour digits flash on the display. Turn the “Browse”... -
Seite 14: Setting Cooking Time
SETTING COOKING TIME This function can be used to cook food for a set length of time, from a minimum of 1 minute to the maximum time allowed by the selected function, after which the oven switches off automatically. Once the temperature is confirmed, the symbol flashes. - Seite 15 BROWNING At the end of cooking, with certain functions, the display indicates the possibility of browning. This function can only be used when cooking time has been set. PRESS At the end of cooking time, the display shows: “PRESS TO BROWN”. Press button , and the oven starts a 5 minute browning cycle.
- Seite 16 SETTINGS Turn the “Functions” knob indicator to the symbol to access a submenu containing five display settings which can be changed. Language Turn the “Browse” knob to display “LANGUAGE”. Press to access the setting. Turn the “Browse” knob to select the desired language and confirm by pressing button Clock Turn the “Browse”...
- Seite 17 OVEN FUNCTION DESCRIPTION TABLE FUNCTIONS KNOB To stop cooking and switch off the oven. LAMP To switch the oven interior light on/off. To speed up defrosting of food. Place food on the middle shelf. Leave food in its packaging in order to prevent it from drying out on the outside. DEFROST For keeping just-cooked food hot and crisp (e.g: meat, fried food or flans).
- Seite 18 FUNCTIONS KNOB (Continued) To bake different types and sizes of pizza and bread. This function contains two programmes with predefined settings. Simply indicate the values BREAD/PIZZA required (temperature and time) and the oven will manage the cooking cycle automatically. Place the dough on the 2nd shelf after preheating the oven.
-
Seite 19: Cooking Table
COOKING TABLE Recipe Function Pre- Shelf (from Temp. Time Accessories and heating bottom) (°C) (min) notes 160-180 30-90 Cake tin on wire shelf Shelf 4: cake tin on Leavened cakes wire shelf 160-180 30-90 Shelf 1: cake tin on GENTLE wire shelf Drip tray/baking tray 160-200... - Seite 20 Recipe Function Pre- Shelf (from Temp. Time Accessories and heating bottom) (°C) (min) notes Shelf 3: drip tray / 10-15 baking tray or wire shelf Shelf 3: oven tray on Frozen pizza wire shelf (switch levels halfway 10-20 through cooking) Shelf 1: drip tray / baking tray 180-190...
- Seite 21 Recipe Function Pre- Shelf (from Temp. Time Accessories and heating bottom) (°C) (min) notes Shelf 2: wire shelf (turn food two thirds of the way through Medium (2) 50-65 cooking) Roast chicken Shelf 1: drip tray with water 1-1.3 kg Shelf 2: turnspit (if present) High (3)
- Seite 22 TESTED RECIPES (in compliance with IEC 60350-1:2011-12 and DIN 3360-12:07:07) Recipe Function Pre- Shelf (from Temp. Time Accessories and notes heating bottom) (°C) (min) IEC 60350-1:2011-12 § 7.5.2 15-25 Drip tray / baking tray Shelf 3: baking tray (switch Shortbread levels halfway through cooking) 20-30 Shelf 1: drip tray/baking tray...
-
Seite 23: Recommended Use And Tips
RECOMMENDED USE AND TIPS How to read the cooking table The table indicates the best function to use for any given food, to be cooked on one or more shelves at the same time. Cooking times start from the moment food is placed in the oven, excluding pre-heating (where required). -
Seite 24: Wichtige Sicherheitshinweise
Diese Anleitung sollte auch auf folgender Internetseite verfügbar sein: docs.whirlpool.eu WICHTIGE SICHERHEITSHINWEISE IHRE EIGENE UND DIE SICHERHEIT ANDERER PERSONEN IST ÄUßERST WICHTIG In diesen Anweisungen sowie auf dem Gerät selbst werden wichtige Sicherheitshinweise angegeben, die Sie durchlesen und stets beachten sollten. - Seite 25 – Berühren Sie das Gerät nicht mit feuchten Händen und verwenden Sie es nicht, wenn Sie barfuß sind. – Das Gerät ist ausschließlich zur Zubereitung von Nahrungsmitteln für private Haushalte konzipiert. Jeder hiervon abweichende Gebrauch (z. B. das Beheizen von Räumen) ist nicht gestattet. Der Hersteller lehnt jegliche Haftung für Personen oder Tiere oder Sachschäden ab, wenn die diese Hinweise und Warnung nicht beachtet worden sind.
-
Seite 26: Vorbereitung Des Unterbauschranks
– Heißes Fett und Öl sind leicht entzündlich. Beaufsichtigen Sie stets den Garvorgang, wenn Sie Speisen mit viel Fett oder Öl zubereiten. – Lassen Sie das Gerät während des Dörrens von Speisen niemals unbeaufsichtigt. – Bei Verwendung von alkoholischen Getränken (z. B. Rum, Cognac, Wein usw.) zum Braten oder Backen ist zu beachten, dass Alkohol bei hohen Temperaturen verdampft. -
Seite 27: Elektrischer Anschluss
ELEKTRISCHER ANSCHLUSS Die Spannung auf dem Typenschild des Geräts muss der Spannung der Netzversorgung entsprechen. Das Typenschild befindet sich an der Vorderkante des Geräts (bei offener Tür sichtbar). • Das Netzkabel (Typ H05 RR-F 3 x 1,5 mm ) darf nur durch Fachpersonal ersetzt werden. Wenden Sie sich an eine autorisierte Kundendienststelle. -
Seite 28: Anleitung Zur Fehlersuche
ANLEITUNG ZUR FEHLERSUCHE Der Backofen funktioniert nicht: • Prüfen Sie, ob das Stromnetz Strom führt und der Backofen an das Netz angeschlossen ist. • Schalten Sie den Backofen aus und wieder ein, um festzustellen, ob die Störung erneut auftritt. Die Gerätetür lässt sich nicht öffnen: •... -
Seite 29: Geräteinnenraum
Geräteinnenraum WICHTIG: Vermeiden Sie den Gebrauch von Scheuerschwämmen, Topfkratzern und Metallschabern. Diese können die Emailflächen und das Glas der Gerätetür mit der Zeit beschädigen. • Lassen Sie den Backofen nach jedem Gebrauch etwas abkühlen und reinigen Sie ihn, solange er noch warm ist, um Verkrustungen und Flecken durch Speisereste (z. -
Seite 30: Ausbau Der Tür
PFLEGE – Verwenden Sie Schutzhandschuhe. WARNUNG – Führen Sie die beschriebenen Vorgänge aus, wenn das Gerät kalt ist. – Trennen Sie das Gerät von der Stromversorgung. AUSBAU DER TÜR Gehen Sie zum Ausbau der Tür wie folgt vor: Öffnen Sie die Backofentür vollständig. Ziehen Sie die Schließhaken der Scharniere bis zum Anschlag nach vorne (Abb. -
Seite 31: Auswechseln Der Glühlampe
AUSWECHSELN DER GLÜHLAMPE Zum Auswechseln der hinteren Lampe (falls vorhanden): Trennen Sie den Ofen von der Stromversorgung. Schrauben Sie die Lampenabdeckung ab (Abb. 8). Wechseln Sie die Glühlampe aus (bezüglich des Typs siehe nachstehenden Hinweis) und schrauben Sie die Lampenabdeckung wieder auf. Schließen Sie den Ofen wieder an das Stromnetz an. -
Seite 32: Mitgelieferte Zubehörteile
Kundenspezifisch STEIGENDER KOMFORT BEDIENUNGSANLEITUNG FÜR DEN OFEN FÜR DEN ELEKTRISCHEN ANSCHLUSS LESEN SIE BITTE DEN TEIL BEZÜGLICH DER INSTALLATION Bedientafel Oberes Heizelement/Grill Kühlgebläse (nicht sichtbar) Typenschild (darf nicht entfernt werden) Lampe Rundes Heizelement (nicht sichtbar) Gebläse Drehspieß Unteres Heizelement (nicht sichtbar) 10. -
Seite 33: Einschieben Der Roste Und Anderer Zubehörteile In Den Ofen
EINSCHIEBEN DER ROSTE UND ANDERER ZUBEHÖRTEILE IN DEN OFEN Schieben Sie den Rost mit dem erhöhten Teil „A“ nach oben weisend waagerecht ein (Abb. 1). Die anderen Zubehörteile, wie Fettpfanne oder Backblech, wird auf die gleiche Weise eingesetzt wie der Rost (Abb. 2). BESCHREIBUNG DES BEDIENFELDS Abb. -
Seite 34: Einstellung Der Uhrzeit
INBETRIEBNAHME DES BACKOFENS – EINSTELLUNG DER SPRACHE Bei der ersten Inbetriebnahme des Backofens wird ENGLISH angezeigt. Drehen Sie den „Navigationsknopf“, bis die gewünschte Sprache angezeigt wird, und drücken Sie dann zur Bestätigung die Taste EINSTELLUNG DER UHRZEIT Nach der Sprachauswahl muss die Uhrzeit eingestellt werden. Auf dem Display blinken die beiden Stundenziffern. Drehen Sie den „Navigationsknopf“, bis die korrekte Stunde angezeigt wird. -
Seite 35: Einstellen Der Garzeit
EINSTELLEN DER GARZEIT Diese Funktion erlaubt das Garen für eine unbestimmte Zeitdauer, von mindestens 1 Minute bis zur für die gewählte Garfunktion maximal zulässigen Garzeit. Nach Ablauf der Garzeit schaltet sich der Ofen automatisch ab. Nach dem Bestätigen der Temperatur blinkt das Symbol Drehen Sie den Einstellknopf, bis die gewünschte Garzeit angezeigt wird. -
Seite 36: Auswählen Von Spezialfunktionen
AUSWÄHLEN VON SPEZIALFUNKTIONEN Durch Drehen des Zeigers am „Funktionswahlknopf“ auf das Symbol gelangen Sie in ein Untermenü mit Sonderfunktionen. Zum Blättern, Auswählen und Starten einer dieser Funktionen gehen Sie folgendermaßen vor: AUFTA AUFGE WARM Drehen Sie den „Funktionswahlknopf“ auf das Symbol : Auf dem Display wird „AUFTAUEN“... -
Seite 37: Helligkeit
SETTING Durch Drehen des Zeigers des “Funktionswahlknopfs” auf das Symbol erhalten Sie Zugriff auf ein Untermenü mit fünf Displayeinstellungen, die sich ändern lassen. Sprache Drehen Sie den „Navigationsknopf“, bis „SPRACHE“ angezeigt wird. Drücken Sie , um auf die Einstellung zuzugreifen. Drehen Sie den Navigationsknopf, um die gewünschte Sprache zu wählen, und bestätigen Sie mit der Taste Drehen Sie den „Navigationsknopf“, bis „UHR“... - Seite 38 TABELLE FUNKTIONSBESCHREIBUNGEN BACKOFEN FUNKTIONSWAHLKNOPF Zum Unterbrechen des Garvorgangs und Abschalten des Geräts. BELEUCHTUNG Zum Ein-/Ausschalten der Innenbeleuchtung. Zur Beschleunigung des Auftauens von Speisen. Es wird empfohlen, das Gargut auf die mittlere Einschubebene zu geben. Es wird empfohlen, die Lebensmittel in ihrer Verpackung aufzutauen, um dem Austrocknen der AUFTAUEN Oberfläche vorzubeugen.
- Seite 39 FUNKTIONSWAHLKNOPF (Fortsetzung) SETTING Für die Einstellungen des Displays (Sprache, Uhrzeit, Helligkeit, Lautstärke (EINSTELLUNGEN) Signalton, Energiesparen). Zum Backen verschiedener Sorten und Formen von Brot und Pizza. Innerhalb dieser Funktion gibt es zwei Programme mit vordefinierten Einstellungen. Es genügt, einfach die notwendigen Werte (Temperatur und BROT/PIZZA Zeit) anzugeben, und der Backofen verwaltet den optimalen Garzyklus automatisch.
- Seite 40 GARTABELLE Rezept Funk- Vorhei- Einschube- Temp. Zeit Zubehör und tion bene (°C) (Min.) Anmerkungen (von unten) 160-180 30-90 Kuchenform auf Rost Ebene 4: Kuchenform Hefekuchen auf Rost 160-180 30-90 Ebene 1: Kuchenform SCHO- auf Rost NEND Fettpfanne / Backblech 160–200 30-85 oder Kuchenform auf Rost...
- Seite 41 Rezept Funk- Vorhei- Einschube- Temp. Zeit Zubehör und tion bene (°C) (Min.) Anmerkungen (von unten) Einschubebene 3: 10-15 Fettpfanne / Backblech oder Rost Einschubebene 3: Form Tiefkühlpizza auf Rost (vertauschen Sie die Ebenen nach der 10-20 Hälfte der Garzeit) Ebene 1: Fettpfanne / Backblech 180-190 40-55 Kuchenform auf Rost...
- Seite 42 Rezept Funk- Vorhei- Einschube- Temp. Zeit Zubehör und tion bene (°C) (Min.) Anmerkungen (von unten) Einschubebene 4: Rost Bratwürste / (Gargut nach halber Grillspieße / Mittel - Hoch (2– – 15-40 Garzeit wenden) Rippchen / Einschubebene 3: Hamburger Fettpfanne mit Wasser Einschubebene 2: Rost (Gargut nach zwei Dritteln der Garzeit...
- Seite 43 ERPROBTE REZEPTE (in Übereinstimmung mit den Richtlinien IEC 60350-1:2011-12 und DIN 3360-12:07:07) Rezept Funk- Vor- Einschube- Temp. Zeit Zubehör und Anmerkungen tion heizen bene (°C) (Min.) (von unten) IEC 60350-1:2011-12 § 7.5.2 15-25 Fettpfanne / Backblech Einschubebene 3: Backblech Mürbeteigkekse (Einschubebenen nach halber Garzeit 20-30 vertauschen)
-
Seite 44: So Lesen Sie Die Gartabelle
HINWEISE ZUM GEBRAUCH UND EMPFEHLUNGEN So lesen Sie die Gartabelle Die Tabelle gibt die beste Garfunktion für ein bestimmtes Lebensmittel an, das auf einer oder mehreren Ebenen gleichzeitig gegart werden kann. Die Garzeiten gelten ab dem Moment, in dem Sie das Gargut in den Ofen geben, die (eventuell erforderliche) Vorheizzeit zählt nicht dazu. -
Seite 45: Consignes De Sécurité Importantes
Ces directives sont également disponibles sur le site Web : docs.whirlpool.eu CONSIGNES DE SÉCURITÉ IMPORTANTES VOTRE SÉCURITÉ ET CELLE D'AUTRUI SONT TRÈS IMPORTANTES Le présent manuel contient des consignes de sécurité importantes, qui figurent également sur l'appareil ; elles doivent être lues et observées à... - Seite 46 - Si la surface de la plaque à induction est fissurée, ne l'utilisez pas et éteignez l'appareil pour éviter tout risque de choc électrique (uniquement pour les modèles avec fonction induction). - Évitez de toucher l'appareil avec les mains mouillées et ne l'utilisez pas lorsque vous êtes pieds nus.
- Seite 47 - Lorsqu'elles atteignent une température trop élevée, les huiles et les matières grasses peuvent s'enflammer facilement. Surveillez régulièrement la cuisson des aliments riches en graisse ou en huile. - Ne laissez jamais l'appareil sans surveillance pendant le dessèchement des aliments. - Si votre préparation nécessite l'utilisation de boissons alcoolisées (rhum, cognac, vin, par exemple), n'oubliez pas que l'alcool s'évapore à...
-
Seite 48: Conseils Pour La Protection De L'environnement
BRANCHEMENT ÉLECTRIQUE Assurez-vous que la tension figurant sur la plaque signalétique de l'appareil correspond à celle de votre habitation. La plaque signalétique se trouve sur le bord avant du four (visible lorsque la porte est ouverte). • Le remplacement du cordon d'alimentation (type H05 RR-F 3 x 1,5 mm ) doit être effectué... -
Seite 49: Guide De Dépannage
GUIDE DE DÉPANNAGE Le four ne marche pas : • Vérifiez qu'il n'y a pas de coupure de courant et que le four est correctement branché. • Éteignez puis rallumez le four pour voir si le problème persiste. La porte ne s'ouvre pas : •... -
Seite 50: Enceinte Du Four
Enceinte du four IMPORTANT : n'utilisez pas d'éponges abrasives, de grattoirs métalliques ou de tampons à récurer. À la longue, ceux-ci risquent d'abîmer les surfaces émaillées et la vitre de la porte. • Après chaque utilisation, laissez refroidir le four et nettoyez-le, de préférence lorsqu'il est encore tiède, pour éviter que les résidus d'aliments ne s'incrustent ou ne tâchent (par exemple, aliments à... - Seite 51 ENTRETIEN Munissez-vous de gants de protection. AVERTISSEMENT Assurez-vous que le four est froid avant d'effectuer les opérations suivantes. Débranchez l'appareil de l'alimentation électrique. DÉMONTAGE DE LA PORTE Pour démonter la porte : Ouvrez complètement la porte du four. Soulevez les deux manettes d'arrêt des charnières en les poussant vers l'avant, jusqu'à la butée (Fig.
-
Seite 52: Remplacement De L'ampoule
REMPLACEMENT DE L'AMPOULE Pour remplacer l'ampoule arrière (si présente) : Débranchez le four. Dévissez le couvercle de l'ampoule (Fig. 8), remplacez l'ampoule (voir la remarque pour le type de lampe), puis revissez le couvercle de l'ampoule. Rebranchez le four. Pour remplacer l'ampoule latérale (si présente) : Débranchez le four. -
Seite 53: Accessoires Non Fournis
CustomRISINGCONVENIENCE DIRECTIVES POUR L’UTILISATION DU FOUR VOIR LE PARAGRAPHE SUR L’INSTALLATION POUR LE BRANCHEMENT ÉLECTRIQUE Bandeau de commande Résistance chauffante supérieure/grill Ventilateur de refroidissement (caché) Plaque signalétique (à ne pas enlever) Lampe Résistance chauffante circulaire (non visible) Ventilateur Tournebroche Élément chauffant inférieur (non visible) 10. -
Seite 54: Liste Des Fonctions
INSERTION DE GRILLES ET AUTRES ACCESSOIRES A L’INTÉRIEUR DU FOUR Insérez la grille horizontalement, avec la partie rehaussée « A » orientée vers le haut (Fig. 1). Les autres accessoires, comme la lèchefrite et la plaque à pâtisserie, sont introduits de la même manière que la grille (Fig. -
Seite 55: Réglage De L'heure
ACTIVATION DU FOUR - RÉGLAGE DE LA LANGUE Lors de la première activation du four, l'affichage indique ENGLISH. Tournez le bouton « Navigation » jusqu'à ce que la langue souhaitée s'affiche, puis appuyez sur le bouton pour confirmer. RÉGLAGE DE L'HEURE Après le réglage de la langue, il est nécessaire de régler l'heure. -
Seite 56: Réglage Du Temps De Cuisson
RÉGLAGE DU TEMPS DE CUISSON Cette fonction permet de cuire pendant un temps défini, d'un minimum de 1 minute jusqu'au temps maximal permis par la fonction sélectionnée. Quand le temps de cuisson s'est écoulé, le four s'éteint automatiquement. Après confirmation de la température, le symbole clignote. - Seite 57 SÉLECTION DES FONCTIONS SPÉCIALES Tournez le bouton « Fonctions » sur le symbole pour accéder à un sous-menu contenant des fonctions spéciales. Pour parcourir ces fonctions, en choisir une, puis la démarrer, procédez comme suit : DECON LEVAG MAINT Tournez le bouton « Fonctions » sur le symbole : l'indication «...
- Seite 58 SETTING Tournez le bouton « Fonctions » sur le symbole pour accéder à un sous-menu contenant cinq réglages d'affichage, qu'il est possible de modifier. Langue Tournez le bouton « Navigation » jusqu'à ce que l'indication « LANGUE » s'affiche. Appuyez sur pour accéder au réglage.
-
Seite 59: Maintien Au Chaud
TABLEAU DESCRIPTIF DES FONCTIONS DU FOUR BOUTON DE FONCTIONS Pour interrompre la cuisson et éteindre le four. AMPOULE Pour allumer/éteindre la lumière à l'intérieur du four. Pour accélérer la décongélation des aliments. Placez les aliments sur la grille du milieu. Laissez la nourriture dans son emballage pour empêcher qu'elle se dessèche. - Seite 60 BOUTON DE FONCTIONS (suite) Pour cuire différents types et tailles de pains et pizzas. Cette fonction a deux programmes dont les réglages sont prédéfinis. Il suffit d'indiquer les valeurs PAIN/PIZZA requises (température et durée) et le four gère automatiquement le cycle de cuisson.
- Seite 61 TABLEAU DE CUISSON Recette Fonction Pré- Gradin Temp. Temps Accessoires et chauf- (en partant (°C) (min) remarques fage du bas) Moule à gâteaux sur la 160-180 30-90 grille métallique Gâteaux à Grille 4 : moule à pâte levée gâteau sur grille 160-180 30-90 Grille 1 : moule à...
- Seite 62 Recette Fonction Pré- Gradin Temp. Temps Accessoires et chauf- (en partant (°C) (min) remarques fage du bas) Grille 3 : lèchefrite / 10 - 15 plaque de cuisson ou grille Grille 3 : moule à Pizza surgelée gâteau sur grille (inversez les niveaux 10-20 à...
- Seite 63 Recette Fonction Pré- Gradin Temp. Temps Accessoires et chauf- (en partant (°C) (min) remarques fage du bas) Grille 2 : grille (retournez les aliments aux deux tiers de Moyenne (2) 50-65 la cuisson) Poulet rôti Grille 1 : lèchefrite 1 - 1,3 kg remplie d'eau 2e grille : Tournebroche (selon le modèle)
- Seite 64 RECETTES TESTÉES (conformément aux normes IEC 60350-1:2011-12 et DIN 3360-12:07:07) Recette Fonction Pré- Gradin Temp. Temps Accessoires et remarques chauf- (en partant (°C) (min) fage du bas) CEI 60350-1:2011-12 § 7.5.2 15-25 Lèchefrite/plaque de cuisson Grille 3 : plaque à pâtisserie Biscuit salé...
-
Seite 65: Conseils D'utilisation Et Suggestions
CONSEILS D'UTILISATION ET SUGGESTIONS Comment lire le tableau de cuisson Le tableau indique la fonction la plus appropriée à la cuisson simultanée d'un aliment donné sur une ou plusieurs grilles à la fois. Les temps de cuisson commencent à partir du moment où le plat est placé dans le four et ne tiennent pas compte du préchauffage (si nécessaire). -
Seite 66: Belangrijke Veiligheidsinstructies
Deze instructies vindt u tevens op de volgende website: docs.whirlpool.eu BELANGRIJKE VEILIGHEIDSINSTRUCTIES UW VEILIGHEID EN DIE VAN ANDEREN IS ERG BELANGRIJK Deze handleiding en het apparaat zelf zijn voorzien van belangrijke veiligheidsaanwijzingen, die te allen tijde moeten worden gelezen en opgevolgd. - Seite 67 - Wanneer het oppervlak is gebarsten, schakel dan het apparaat uit om het risico op een elektrische schok te voorkomen (uitsluitend voor modellen met inductiefunctie). - Raak het apparaat niet aan met vochtige lichaamsdelen en gebruik het niet op blote voeten. - Het apparaat is uitsluitend bestemd voor huishoudelijk gebruik en alleen voor het bereiden van voedsel.
- Seite 68 Neem in geval van twijfel contact op met uw leverancier of de dichtstbijzijnde Whirlpool Consumenten Service. Om eventuele schade te voorkomen, wordt geadviseerd om de oven pas voor de installatie van de piepschuim bodem te halen.
-
Seite 69: Elektrische Aansluiting
ELEKTRISCHE AANSLUITING Controleer of de elektrische spanning die aangegeven staat op het typeplaatje van het apparaat overeenkomt met de voedingsspanning van uw woning. Het typeplaatje bevindt zich op de voorrand van de oven (zichtbaar wanneer de ovendeur openstaat). • Eventuele vervangingen van de voedingskabel (type H05 RR-F 3 x 1,5 mm ) mogen uitsluitend worden uitgevoerd door erkende technici. -
Seite 70: Opsporen Van Storingen
• uw volledige adres; • uw telefoonnummer. Wend u tot een erkende Whirlpool Consumenten Service indien reparatie noodzakelijk is (alleen dan heeft u zekerheid dat originele vervangingsonderdelen worden gebruikt en de reparatie correct wordt uitgevoerd). REINIGING Gebruik geen stoomreinigers. - Seite 71 Binnenkant van de oven BELANGRIJK: gebruik geen schuursponsjes, sponsjes van staalwol of metalen schrapers. Hierdoor kunnen de gelakte oppervlakken en het glas van de deur op den duur beschadigd raken. • Laat de oven na elk gebruik afkoelen en reinig het apparaat bij voorkeur als het nog lauw is om aangekoekte etensresten (bijv.
- Seite 72 ONDERHOUD Draag beschermende handschoenen. WAARSCHUWING Voer de aangegeven werkzaamheden uit als het apparaat afgekoeld is. Trek de stekker uit het stopcontact. VERWIJDEREN VAN DE DEUR De deur verwijderen: Open de deur helemaal. Til de twee vergrendelingen van de scharnieren omhoog en naar voren tot ze niet verder kunnen (Afb.
-
Seite 73: Vervangen Van Het Lampje
De lamp die in het apparaat wordt gebruikt is specifiek ontworpen voor elektrische apparaten en is niet geschikt voor ruimteverlichting (EC Richtlijn Nr. 244/2009). De lampjes zijn verkrijgbaar bij de Whirlpool Consumenten Service. BELANGRIJK: Raak halogeenlampjes niet met blote handen aan om te voorkomen dat ze beschadigd worden door uw vingerafdrukken. -
Seite 74: Bijgeleverde Accessoires
C. DRAAISPIT te gebruiken voor het gelijkmatig grillen van grote stukken vlees en gevogelte. Het aantal accessoires is afhankelijk van het aangeschafte model. NIET-BIJGELEVERDE ACCESSOIRES Bij de Whirlpool Consumenten Service kunt u apart andere accessoires aanschaffen. NL72... -
Seite 75: Beschrijving Bedieningspaneel
PLAATSEN VAN DE ROOSTERS EN ANDERE ACCESSOIRES IN DE OVEN Schuif het rooster horizontaal in de oven, met het verhoogde gedeelte “A” omhoog gericht (Afb. 1). Andere accessoires, zoals de opvangbak en de bakplaat, worden op dezelfde wijze als het rooster in de oven geschoven (Afb. -
Seite 76: De Tijd Instellen
INSCHAKELING VAN DE OVEN - INSTELLING TAAL Als de oven voor het eerst wordt ingeschakeld, geeft het display “ENGLISH” weer. Draai aan de knop “Navigatie” tot de gewenste taal wordt weergegeven en druk op de knop om te bevestigen. DE TIJD INSTELLEN Nadat de taal is ingesteld, moet het huidige tijdstip worden ingesteld. - Seite 77 INSTELLING VAN DE BEREIDINGSDUUR Met deze functie kunt u gerechten gedurende een ingestelde tijd bereiden, van minimaal 1 minuut tot de maximale tijd van de geselecteerde functie, waarna de oven automatisch uitgeschakeld wordt. Nadat u de temperatuur bevestigd heeft, gaat het symbool knipperen.
- Seite 78 EEN BRUIN KORSTJE GEVEN Na afloop van de bereiding wordt, voor de functies waarbij dat kan, op het display de mogelijkheid weergegeven om uw gerecht een bruin korstje te geven. Deze functie kan alleen geactiveerd worden als u een bereidingsduur hebt ingesteld. DRUK Als de bereidingstijd is afgelopen, verschijnt op het display: “DRUK OM TE GRATIN”.
- Seite 79 INSTELLINGEN Door de wijzer van de knop “Functies” ter hoogte van het symbool te zetten, opent u een submenu met vijf instellingen van het display die gewijzigd kunnen worden. Taal Draai de knop “Navigatie” om “TAAL” weer te geven. Druk op om toegang te krijgen tot de instelling.
-
Seite 80: Warmhouden
TABEL OVENFUNCTIES FUNCTIEKNOP Om de bereiding te onderbreken en de oven uit te schakelen. LAMP Om het lampje in de oven in/uit te schakelen. Voor het versnellen van het ontdooien van voedsel. Plaats het voedsel op de middelste steunhoogte. Laat het voedsel in de verpakking zitten zodat het niet uitdroogt. - Seite 81 FUNCTIEKNOP (Vervolg) Voor het instellen van het display (taal, tijd, helderheid, volume van het INSTELLINGEN geluidssignaal, energiebesparing). Voor het bakken van verschillende soorten en formaten brood en pizza. Binnen deze functie zijn er twee programma's waarvan de instellingen van te voren zijn vastgesteld. U hoeft alleen de vereiste waarden (temperatuur BROOD/PIZZA en tijd) aan te geven, dan zorgt de oven automatisch voor een optimale bereidingscyclus.
- Seite 82 BEREIDINGSTABEL Recept Functie Voor- Steun- Temp. Tijd Accessoires en verwar- hoogte (°C) (min) opmerkingen (van onder) 160-180 30-90 Taartvorm op rooster Steunhoogte 4: Luchtig gebak taartvorm op rooster 160-180 30-90 Steunhoogte 1: VOOR- taartvorm op rooster ZICHTIG Opvangbak/bakplaat of 160–200 30-85 taartvorm op rooster Steunhoogte 3:...
- Seite 83 Recept Functie Voor- Steun- Temp. Tijd Accessoires en verwar- hoogte (°C) (min) opmerkingen (van onder) Steunhoogte 3: 10-15 opvangbak/bakplaat op rooster Steunhoogte 3: ovenschaal op rooster Diepvriespizza's (verwissel de steunhoogtes 10-20 halverwege de bereidingstijd) Steunhoogte 1: opvangbak/bakplaat 180-190 40-55 Taartvorm op rooster Steunhoogte 3: taartvorm op rooster Hartige taarten...
- Seite 84 Recept Functie Voor- Steun- Temp. Tijd Accessoires en verwar- hoogte (°C) (min) opmerkingen (van onder) Steunhoogte 4: rooster (draai het voedsel Worstjes/Spiesen/ Gemiddeld - halverwege de Spareribs/ 15-40 Hoog bereidingstijd om) Hamburgers Steunhoogte 3: opvangbak met water Steunhoogte 2: rooster (draai het voedsel na tweederde van de Gemiddeld...
- Seite 85 GETESTE RECEPTEN (in overeenstemming met de norm IEC 60350-1:2011-12 en DIN 3360-12:07:07) Recept Functie Voor- Steun- Temp. Tijd Accessoires en opmerkingen verwar- hoogte (°C) (min) (van onder) IEC 60350-1:2011-12 § 7.5.2 15-25 Opvangbak / bakplaat Steunhoogte 3: bakplaat (verwissel de Koekjes van steunhoogtes halverwege de kruimeldeeg...
- Seite 86 GEBRUIKSADVIEZEN EN -SUGGESTIES Lezen van de bereidingstabel De tabel geeft aan welke functie het best gebruikt kan worden voor een bepaald gerecht, dat op één of meerdere steunhoogtes tegelijk kan worden bereid. De bereidingsduren gelden vanaf het moment dat het gerecht in de oven wordt gezet, zonder de voorverwarmingstijd (indien nodig).
- Seite 87 Estas instruções estão também disponíveis no website: docs.whirlpool.eu INSTRUÇÕES IMPORTANTES SOBRE SEGURANÇA A SUA SEGURANÇA E A DOS OUTROS É MUITO IMPORTANTE Este manual e o próprio aparelho possuem mensagens importantes relativas à segurança, que deve ler e respeitar sempre.
- Seite 88 - Evite tocar no aparelho com partes do corpo que estejam húmidas, bem como utilizá-lo descalço. - Este aparelho destina-se exclusivamente ao uso doméstico para cozedura de alimentos. Estão proibidos outros tipos de utilização (por exemplo: aquecimento de divisões da casa). O Fabricante declina qualquer responsabilidade por ferimentos em pessoas, animais ou danos materiais decorrentes da inobservância dos conselhos e das precauções acima.
-
Seite 89: Instalação
- Nunca deixe o aparelho sem vigilância durante a secagem de alimentos. - Se utilizar bebidas alcoólicas para cozinhar alimentos (por exemplo, rum, conhaque, vinho), lembre-se de que o álcool evapora a temperaturas elevadas. Em virtude disso, poderá ocorrer o risco de os vapores libertados pelo álcool se incendiarem ao entrarem em contacto com a resistência elétrica. -
Seite 90: Ligação Elétrica
LIGAÇÃO ELÉTRICA Verifique se a tensão elétrica especificada na chapa de características do aparelho corresponde à tensão da rede elétrica. A placa de características está situada na extremidade frontal do forno (visível com a porta aberta). • A substituição do cabo de alimentação (tipo H05 RR-F 3 x 1,5 mm ) deve ser efetuada por um eletricista qualificado. -
Seite 91: Guia De Resolução De Problemas
GUIA DE RESOLUÇÃO DE PROBLEMAS O forno não funciona: • Verifique se há energia elétrica e se o forno está ligado à tomada elétrica. • Desligue e volte a ligar o forno, para verificar se o problema ficou resolvido. A porta não abre: •... -
Seite 92: Interior Do Forno
Interior do forno IMPORTANTE: Não utilize esponjas abrasivas ou raspadores e polidores metálicos. Com o decorrer do tempo, estes poderão danificar as superfícies esmaltadas e o vidro da porta do forno. • Após cada utilização, deixe o forno arrefecer e depois limpe-o, de preferência ainda morno, para remover a sujidade acumulada e manchas provocadas por resíduos de alimentos (por ex, alimentos com um elevado teor de açúcar). -
Seite 93: Manutenção
MANUTENÇÃO Utilize luvas de proteção. AVISO Certifique-se de que o forno está frio antes de realizar as operações seguintes. Desligue o aparelho da corrente elétrica. REMOÇÃO DA PORTA Para remover a porta: Abra a porta na totalidade. Levante os dois trincos e empurre-os o mais possível para a frente (Fig. 1). Feche a porta o mais possível (A), levante-a (B) e rode-a (C) até... - Seite 94 SUBSTITUIÇÃO DA LÂMPADA DO FORNO Para substituir a lâmpada traseira (se existente): Desligue o forno da corrente elétrica. Desaperte a cobertura da lâmpada (Fig. 8), substitua a lâmpada (consulte a nota para ver o tipo de lâmpada) e aparafuse novamente a cobertura da lâmpada. Ligue o forno novamente à...
- Seite 95 CustomRISINGCONVENIENCE INSTRUÇÕES DE UTILIZAÇÃO DO FORNO PARA EFETUAR AS LIGAÇÕES ELÉTRICAS, CONSULTE O PARÁGRAFO RELATIVO À INSTALAÇÃO Painel de comandos Resistência superior/grelhador Ventoinha de arrefecimento (não visível) Chapa de características (não remover) Lâmpada Resistência circular (não visível) Ventoinha Espeto Resistência inferior (não visível) 10.
-
Seite 96: Descrição Do Painel De Controlo
INTRODUÇÃO DA GRELHA E OUTROS ACESSÓRIOS NO INTERIOR DO FORNO Introduza a grelha metálica na horizontal, com a parte “A” virada para cima (Fig. 1). Outros acessórios, como o tabuleiro coletor e o tabuleiro para pastelaria, são introduzidos da mesma forma que a grelha (Fig. -
Seite 97: Pré-Aquecimento Rápido
INICIAR O FORNO - DEFINIR O IDIOMA Na primeira vez que liga o forno, aparece ENGLISH. Rode o botão de “Navegação” até que seja apresentada a língua desejada no visor e depois prima o botão para confirmar. AJUSTE DA HORA Após definir o idioma, deverá... -
Seite 98: Temporizador De Cozinha
DEFINIÇÃO DA DURAÇÃO DA COZEDURA Esta função permite cozer alimentos por um tempo definido, de um mínimo de 1 minuto até ao tempo máximo permitido pela função selecionada, no final do qual o forno se desliga automaticamente. Após confirmar a temperatura, o símbolo pisca. - Seite 99 SELECIONAR FUNÇÕES ESPECIAIS Rode o indicador do botão “Funções” alinhando-o com o símbolo para aceder a um submenu que contém as funções especiais. Para explorar e selecionar uma destas funções, proceda como se segue: DESCO LEVED MANUT Rode o botão “Funções” para o símbolo : no visor surge “DESCONGELACAO”...
- Seite 100 DEFINIÇÕES Rode o indicador do botão “Funções” para o símbolo para aceder a um submenu que contém quatro definições do visor que podem ser alteradas. Idioma Rode o botão “Navegação” até visualizar “IDIOMA”. Prima para aceder à definição. Rode o botão “Navegação” para selecionar a língua desejada e confirme premindo o botão Relógio Rode o botão “Navegação”...
- Seite 101 TABELA DE DESCRIÇÃO DE FUNÇÕES DO FORNO BOTÃO DE FUNÇÕES Para interromper a cozedura e desligar o forno. LÂMPADA Para ligar/desligar a lâmpada no interior do forno. Para descongelar mais rapidamente os alimentos. É aconselhável posicionar os alimentos no nível central. Sugerimos que deixe o alimento na embalagem para impedir a desidratação da superfície.
- Seite 102 BOTÃO DE FUNÇÕES (Continuação) Para cozinhar diferentes tipos e formatos de pão e pizza. Esta função possui dois programas pré-definidos. Deverá apenas indicar os valores pedidos PÃO/PIZZA (temperatura e tempo) e o forno fará automaticamente a gestão do ciclo de cozedura.
-
Seite 103: Tabela De Cozedura
TABELA DE COZEDURA Receita Função Pré- Nível Temp. Tempo Acessórios e notas aqueci- (de baixo (°C) (min.) mento para cima) 160-180 30-90 Forma para assar na grelha Bolos com leve- Nível 4: forma para assar dura na grelha 160-180 30-90 Nível 1: forma para assar DELI- na grelha... - Seite 104 Receita Função Pré- Nível Temp. Tempo Acessórios e notas aqueci- (de baixo (°C) (min.) mento para cima) Nível 3: tabuleiro coletor/ 10-15 tabuleiro ou grelha Nível 3: tabuleiro de assar Pizza congelada na grelha (inverta os níveis 10-20 a meio da cozedura) Nível 1: tabuleiro coletor/ tabuleiro para pastelaria 180-190...
- Seite 105 Receita Função Pré- Nível Temp. Tempo Acessórios e notas aqueci- (de baixo (°C) (min.) mento para cima) Nível 2: grelha (vire o alimento quando atingir dois terços do tempo de Médio (2) 50-65 cozedura) Frango assado Nível 1: tabuleiro coletor 1-1,3 kg com água Nível 2: espeto...
- Seite 106 RECEITAS TESTADAS (em conformidade com a norma IEC 60350-1:2011-12 e DIN 3360-12:07:07) Receita Função Pré- Nível Temp. Tempo Acessórios e notas aqueci- (de baixo (°C) (min.) mento para cima) IEC 60350-1:2011-12 § 7.5.2 Tabuleiro coletor/tabuleiro 15-25 para pastelaria Biscoitos Nível 3: tabuleiro para pastelaria (Shortbread) (alterar níveis a meio da cozedura) 20-30...
- Seite 107 UTILIZAÇÃO RECOMENDADA E SUGESTÕES Como efetuar a leitura da tabela de cozedura A tabela indica a melhor função a utilizar com um determinado alimento, a cozinhar num ou em vários níveis em simultâneo. Os tempos de cozedura começam a partir do momento em que o alimento é colocado no forno, excluindo o pré-aquecimento (sempre que necessário).