Herunterladen Inhalt Inhalt Diese Seite drucken
SUPAIR DELIGHT 4 SPORT Benutzerhandbuch
Vorschau ausblenden Andere Handbücher für DELIGHT 4 SPORT:
Inhaltsverzeichnis

Werbung

Verfügbare Sprachen

Verfügbare Sprachen

SUPAIR s.a.s
PARC ALTAÏS
34 RUE ADRASTÉE
74650 CHAVANOD
User's manual
FRANCE
RCS ANNECY 387956790
DELIGHT 4 SPORT
Revision index : V1 25/08/2022

Werbung

Inhaltsverzeichnis
loading

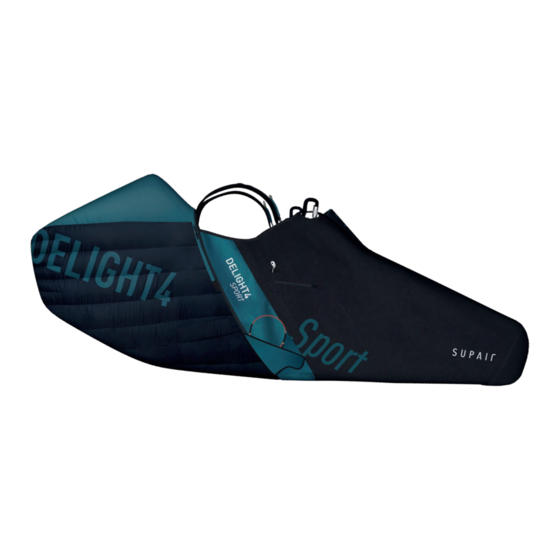
Inhaltszusammenfassung für SUPAIR DELIGHT 4 SPORT

  • Seite 1 SUPAIR s.a.s PARC ALTAÏS 34 RUE ADRASTÉE 74650 CHAVANOD User’s manual FRANCE RCS ANNECY 387956790 DELIGHT 4 SPORT Revision index : V1 25/08/2022...
  • Seite 2 Harness user’s manual | DELIGHT 4 SPORT Thank you for choosing the DELIGHT 4 SPORT. We are glad to be able to share our common paragliding passion with you. SUPAIR has been designing, producing and selling free flying equipment since 1984.
  • Seite 3: Inhaltsverzeichnis

    Harness user’s manual | DELIGHT 4 SPORT LIST OF CONTENT Introduction In flight behaviour Technical data Flight phasis Size choice Take off Components list In-flight Equipment overview Speedbar use Accessory assembly Landing Carabiners Using reserve parachute Back protection plate Throwing...
  • Seite 4: Introduction

    After reading this manual, we suggest you to check your harness in static hang-posts to adjust it before your first flight. The DELIGHT 4 SPORT is a ‘‘semi light’’ harness (made of light materials). Do not fly with shoes equipped with lacing hooks. It can tear your coverleg.
  • Seite 5: Technical Data

    Harness user’s manual | DELIGHT 4 SPORT TECHNICAL DATA Back lenght Back inclination adjustment Seat length Seat width Carabiners height Carabiners distance Speedbag length Model Pilot size (cm) 155-170 165 -180 180-190 > 190 Pilot wieght (mini - maxi) (kg)
  • Seite 6: Size Choice

    “lying flat” flying position, we advise you to try out the harness under a hanging device at one of our retailers in order to choose the correct size. For a complete list of our retailers, please check our website : www.supair.com Size...
  • Seite 7: Components List

    Harness user’s manual | DELIGHT 4 SPORT COMPONENTS LIST Naked harness DYNEEMA solo risers Reserve parachute handle/pod EDELRID FORAS automatic carabi- ners Repair kit Security leash with GRIVEL carabiner Footplate 3B Standard speedbar Carbon seat-plate DELIGHT 4 BUMPAIR Scoop mylar...
  • Seite 8: Equipment Overview

    Harness user’s manual | DELIGHT 4 SPORT EQUIPMENT OVERVIEW Cockpit Reserve parachute pocket and handle Main attachment points Small storage pocket Back storage pocket Belly strap Belly strap adjustment Back inclinaison adjustment Shoulder straps adjustment Reserve parachute attachment points Speedbar pulleys...
  • Seite 9: Carabiners

    Harness user’s manual | DELIGHT 4 SPORT ACCESSORIES ASSEMBLY Carabiners Compatible carabiners : FORAS carabiners Ref. : MAILMOUSFORAS Pass the carabiner through the Insert the carabiner into the 3 hole in the coverleg provided for main attachment straps. this purpose.
  • Seite 10: Back Protection Plate

    Harness user’s manual | DELIGHT 4 SPORT ACCESSORIES ASSEMBLY Back protection plate 1. Open the back pocket zipper and spot the pocket for back protection. 2. Open the back protection pocket zipper. 3. Install the back protection with curved corners to the bottom.
  • Seite 11 Harness user’s manual | DELIGHT 4 SPORT ACCESSORIES ASSEMBLY 4. Make sure to push the back protection plate into the bottom of the pocket 5. Stuck the corners in the pocket to correctly install the back protection in its place.
  • Seite 12: Seatplate

    ACCESSORIES ASSEMBLY Seatplate The DELIGHT 4 SPORT harness can be used with and without seatplate Flying with a seatplate provides a more rigid base and more efficient weight shifts. The harness gives more information and is more precise. The harness will also be easier to manage in case of flight envelope exit. The seatplate also contributes to a more comfortable seat without side compression.
  • Seite 13 Harness user’s manual | DELIGHT 4 SPORT ACCESSORIES ASSEMBLY 4. Open the lower foam zipper 5. You will find the seatplate pocket that is closed thanks to a velcro. Open the velcro. 6. Insert the seatplate in the place with the curved side to the back.
  • Seite 14: Footplate

    4. Fold down the top of the pocket over the plate to keep it in its place. 5. Close the velcro and put it back correctly. Bottom narrowest side The DELIGHT 4 SPORT is also compatible with the carbon footplate as an option. Ref. : S/M : MPPL010...
  • Seite 15: Bumpair

    The DELIGHT 4 SPORT harness must be used with its BUMPAIR . The DELIGHT 4 SPORT BUMPAIR is made of two parts. The “Upper” and the “Lower” part. The DELIGHT 4 SPORT BUMPAIR is made of two parts. The “Upper” and the “Lower” part.
  • Seite 16 Harness user’s manual | DELIGHT 4 SPORT ACCESSORIES ASSEMBLY 4. Close the compartment thanks to the zipper. 5. Spot the second compartment. 6. Insert the upper foam (marked UPPER) in its compartment. 7. Close the compartment thanks to the zipper Pay attention not to stick the speedbar between the two parts of the BUMPAIR 8.
  • Seite 17 Harness user’s manual | DELIGHT 4 SPORT ACCESSORIES ASSEMBLY BUMPAIR final position: The zip slider of the compartments has to be correctly stored in its place in order to avoid any tangle with a strap or during the BUMPAIR manipulation.
  • Seite 18: Speedbar

    Harness user’s manual | DELIGHT 4 SPORT ACCESSORIES ASSEMBLY Speedbar Compatible speedbar : 3B STANDARDS : ACCEL3BSTD Pay attention not to stick the speedbar between the two parts of the BUMPAIR when folding and closing the protec- tion. It would make the speedbar unusable during the flight.
  • Seite 19 Harness user’s manual | DELIGHT 4 SPORT ACCESSORIES ASSEMBLY Installing speedbar : For each side of the harness: Pass the speedbar’s string through the pulley on the side fabric of Fold the tip of the speedbag to acces the footplate.
  • Seite 20: Installing The Reserve Parachute

    Folding the reserve parachute in its pod Warning: the DELIGHT 4 SPORT S & M must be used with a S/M reserve parachute pod the DELIGHT 4 SPORT L & XL must be used with a L/XL reserve parachute pod The reserve parachute must be set in the DELIGHT 4 SPORT specific pod.
  • Seite 21 Harness user’s manual | DELIGHT 4 SPORT INSTALLING THE RESERVE PARACHUTE Reform the folding in the DELIGHT 4 SPORT pod respecting the Store the reserve parachute lines in the pod at the opposite side rectangular shape of the pod of the handle.
  • Seite 22 Harness user’s manual | DELIGHT 4 SPORT INSTALLING THE RESERVE PARACHUTE Pass the lines in the loop to lock the pod opening. Verify the final installation. SUPAIR | DELIGHT 4 SPORT| page 22 Revision index: V1 25/08/2022...
  • Seite 23: Reserve Parachute/Risers Connection

    Harness user’s manual | DELIGHT 4 SPORT INSTALLING THE RESERVE PARACHUTE Reserve parachute/risers Access to the parachute attachment points To access to the parachute attachment points, open the riser guide zipper, starting from above the left shoulder. We recommend to use the risers delivered witht the harness in order to guarantee an optimal opening of the parachute Connecting risers to harness thanks to lark’s head.
  • Seite 24 Harness user’s manual | DELIGHT 4 SPORT INSTALLING THE RESERVE PARACHUTE Tighten each knot. proceed the same way for the second attachment point. Make sure the final position of the risers is similar to the following illustration: SUPAIR | DELIGHT 4 SPORT| page 24...
  • Seite 25 Harness user’s manual | DELIGHT 4 SPORT INSTALLING THE RESERVE PARACHUTE One (1) square 7mm Maillon Rapide® will be needed + two (2) flexible toric rings. - Give a second twist to the Tidy up the assembly. - Push the two riser ends - Open the 7mm square Maillon through the toric ring loop.
  • Seite 26: Installating The Parachute In The Container

    Harness user’s manual | DELIGHT 4 SPORT INSTALLING THE RESERVE PARACHUTE Installating the parachute in the container Thank you for reading the following carefully ! We recommend for the initial rescue parachute assembly and installation to be made by a qualified professional.
  • Seite 27 Harness user’s manual | DELIGHT 4 SPORT INSTALLING THE RESERVE PARACHUTE Take the zip slider at the very bottom of the zipper. Only the handle is sticking out. Take the zip slider halfway up. The bottom of the parachute pocket should now be closed.
  • Seite 28 Harness user’s manual | DELIGHT 4 SPORT INSTALLING THE RESERVE PARACHUTE Pass the first handle cable (on the left on the illustration) in the 3 loops located on the zipper. Make sure that the cable is inserted all the way through.
  • Seite 29 Harness user’s manual | DELIGHT 4 SPORT INSTALLING THE RESERVE PARACHUTE Pass the second cable in the loop located on the edge of the triangular pocket. Once again, make sure that the cable is inserted all the way through. Fold down the flap to insert it in the triangular pocket.
  • Seite 30 Harness user’s manual | DELIGHT 4 SPORT INSTALLING THE RESERVE PARACHUTE Once the flap is folded down into the pocket, pass the second cable through the last loop under the flap. The reserve parachute handle is now installed. Make sure that your installation is similar to the following illustration:...
  • Seite 31: Mandatory Extraction Procedure

    Harness user’s manual | DELIGHT 4 SPORT INSTALLING THE RESERVE PARACHUTE Take the zipper all the way up until the left shoulder. The installation of the rescue parachute is now complete. Mandatory extraction test procedure Check the completed installation during a hang-test.
  • Seite 32: Storage & Tips

    Harness user’s manual | DELIGHT 4 SPORT STORAGE & TIPS Back storage Instrument safety pocket leash USB cable passage for Hose outlet of the water bag. instrument charging Cockpit pocket Small side storage pocket with accessory security clip + radio cable...
  • Seite 33: Harness Folding Tips

    Harness user’s manual | DELIGHT 4 SPORT HARNESS FOLDING TIPS Compact folding: Put the harness on its back. Fold down the seat. Open the BUMPAIR main zipper. Open the cockpit in order to flatten it before Fold down both edges of the harnerss and Unfold the BUMPAIR.
  • Seite 34 Harness user’s manual | DELIGHT 4 SPORT HARNESS FOLDING TIPS Fold down the coverleg by inserting the foot Turn the harness over with the foil facing up. Open the back pocket. plate between the seat and the back. Pass the shoulder straps over the coverleg.
  • Seite 35: Harness Adjustment

    Harness user’s manual | DELIGHT 4 SPORT HARNESS ADJUSTEMENT Adjusting the harness before each takeoff is vital. Various adjustment Adjusting the chest strap Adjusting the shoulder straps. Adjusting the backrest. Adjusting the coverleg SUPAIR | DELIGHT 4 SPORT| page 35...
  • Seite 36 Harness user’s manual | DELIGHT 4 SPORT HARNESS ADJUSTEMENT Back inclinaison: - Tightening will bring the backrest at a more vertical angle ( recommended posture for beginners ). - Releasing the backrest will tilt the back support rearward. Thightening Loosening Adjust the shoulder straps length using the trimmers.
  • Seite 37 Harness user’s manual | DELIGHT 4 SPORT HARNESS ADJUSTEMENT Belly strap adjustment : The distance to consider corresponds to the length between the middle points at the bottom of each carabiner. The ideal distance varies between paragliding wing models. Adjust your chest strap according to the recommendations of your paraglider manufacturer.
  • Seite 38: Speedbag Adjustment

    Harness user’s manual | DELIGHT 4 SPORT HARNESS ADJUSTEMENT Speedbag adjustment Speedbag length: Your legs must be stretched, sit to the bottom of the harness. Adjust the foot-tip strap Adjust the heel strap If the setting is too long or too short, move the attachment points.
  • Seite 39 Harness user’s manual | DELIGHT 4 SPORT RESERVE PARACHUTE/RISERS Connecting harness/risers Without twisting the risers, connect them to the harness attachment loops using the self-locking carabiners. Check for the risers to be properly positioned and Flight direction Edelrid FORAS untwisted. The «A» risers must be located at the carabiners front and facing the flight direction (see diagram).
  • Seite 40: Getting Into The Harness

    GETTING INTO THE HARNESS Harness user’s manual | DELIGHT 4 SPORT Pass the anti-fall Close the left loop of Put on the Close the right loop Close the anti-fall clip through the the belly strap. shoulder straps. of the belly strap.
  • Seite 41: Spare Parts

    Harness user’s manual | DELIGHT 4 SPORT SPARE PARTS Optional parts: Cockpit extension Carbon footplate Ref.: COCREHAUSSE CARBON FOOTPLATE: S/M size: MPPL010 L/XL size: MPPL024 Spare parts: Anti-perforation mylar Scoop mylar Carbon seatplate MINI CARBON SEATPLATE: S/M size: MPPL021 L/XL size: MPPL025...
  • Seite 42 Harness user’s manual | DELIGHT 4 SPORT SPARE PARTS Handle and pod 3B Speedbar Ref.: S/M : POID4SSM Ref.: ACCEL3BSTD Ref.: L/XL : POID4SLXL Polypro seatplate BUMPAIR DELIGHT 4 SPORT protective foam POLYPRO SETAPLATE D4SP S/M MPPL038 BUMPAIR DELIGHT4 POLYORO SEATPLATE D4SP L/XL MPPL025 Ref.: PROBUMPD4S...
  • Seite 43 Harness user’s manual | DELIGHT 4 SPORT SPARE PARTS REPAIR KIT Round elastic for speedbar What is it for ? replacement Replacement scoop mylar Polycarbonate cable for packing Self-adhesive Velcro to stick behind the Cockpit leash for instru- Tear repair pad for foil...
  • Seite 44: In Flight Behaviour

    3 and STRIKE 2. The harness filters the air mass to only communicate the right information for precise and comfortable piloting. Modifying the beld strap length influences the stability of the DELIGHT 4 SPORT and it allows to adapt to the preferences of each pilot.
  • Seite 45: Flight Phasis

    Harness user’s manual | DELIGHT 4 SPORT FLIGHT PHASIS Pre-flight control • Check that the harness and the carabiners are not damaged • Make sure that the reserve parachute safety cables to ride through the closing tabs keeping the reserve rescue pocket flaps closed.
  • Seite 46: In-Flight

    Harness user’s manual | DELIGHT 4 SPORT FLIGHT PHASIS In flight Once in flight, the DELIGHT 4 SPORT behaviour is intuitive and stable. Please set the distance between the two carabiners according to aerology and to the wing manufacturer’s recommendations. Speedbar use We recommend a cautious speed-bar use due to the increased risk of major partial or full frontal collapses.
  • Seite 47: Using Reserve Parachute

    Harness user’s manual | DELIGHT 4 SPORT USING THE RESERVE PARACHUTE Throwing the reserve parachute It is strongly recommended to frequently check your reserve parachute handle location while in flight. This exercise should be executed instinctively and will increase your chances of a successful parachute extraction in case of an emergency.
  • Seite 48: Towing

    Harness user’s manual | DELIGHT 4 SPORT TOWING To takeoff under tow, you must be equipped with a quick release specially designed for the task. Connect the tow bridle to the wing riser loops with a Dyneema adaptor with a resistance greater or equal to 300kg. The tow bridle will then be fastened by using a lark’s head knot or an adapted metal link.
  • Seite 49: Care

    BUMPAIR dorsal protector damage after substantial impact(s). It must be replaced by a new one after two (2) substantial impacts or five (5) years of use ( whichever comes first ). The threads and fabric used for the manufacturing of the DELIGHT 4 SPORT were specifically selected for their quality and resilience levels.
  • Seite 50: Repair

    We have minimized our manufacturing footprint by carefully selecting environmentally friendly materials. If you estimate that your DELIGHT 4 SPORT has reached the end of it life span, you can separate plastics from metals and recycle them according to your community rules in effect.
  • Seite 51: Warranty

    The provided safety protections in the SUPAIR harnesses are guaranteed for use in medium temperature (between -10ºC and 35ºC).
  • Seite 52: Bumpair Delight 4 Sport Shock Absorber

    Harness user’s manual | DELIGHT 4 SPORT BUMPAIR DELIGHT 4 SPORT shock absorber The harness you have just purchased has a AIRBAG type shock absorber. This protection is intended to protect you against potential impacts. It complies with EU Regulations 2016/425 relating to personal protective equipment (PPE) and certified by expert following protocol CRITT-SP SL-003 09/2021.
  • Seite 53 Store your protection in a dry, ventilated area at room temperature and not compressed. It must be cleaned only with water. If your shock absorber is damaged, have it professionally tested and repaired or contact us at sav@supair.com. Test reports and the EU Declaration of Conformity are available at: www.supair.com •...
  • Seite 54: In Case Of Accident

    Harness user’s manual | DELIGHT 4 SPORT IN CASE OF ACCIDENT Communicate in case of accident Emergency numbers EUROPE / INDIA Need help? USA / CANADA CHINA / JAPAN NEPAL IRAN AUSTRALIA NEW ZEALAND Light SOS : SUPAIR | DELIGHT 4 SPORT| page 54...
  • Seite 55: Maintenance Booklet

    Harness user’s manual | DELIGHT 4 SPORT MAINTENANCE BOOKLET This page will help you keep record of your ACCESS2 BUMPAIR scheduled maintenance. Care Care Purchase date: Resale Resale Owner’s name : Date Date Name and stamp of the store :...
  • Seite 56: Annex

    Harness user’s manual | DELIGHT 4 SPORT ANNEX MANUAL NAMES OF PARTS (ILLUS. 1) NAMES OF PARTS (ILLUS. 1) COBRA® COMPONENTS COBRA® Quick Release COBRA® Quick Release The COBRA® components by AUSTRIALPIN are intended for usage (1) Body consists of (a) female part (b) male part; (2) adjuster bar (1) Body consists of (a) female part (b) male part;...
  • Seite 57 Harness user’s manual | DELIGHT 4 SPORT ANNEX MATERIALS from the body. You can recognize the upper side from the lettering Body: aluminum AUSTRIALPIN and/or COBRA®. b) For COBRA® components Rivets, adjuster bar, integrated D-Ring: stainless steel with adjuster bar or middle bridge only: Make sure the strap is Clips: brass correctly threaded through the adjustment mechanism.
  • Seite 58 Harness user’s manual | DELIGHT 4 SPORT ANNEX OPERATING INSTRUCTIONS END OF USE General: Always pay close attention to correct alignment, especially the In the following cases, the equipment should immediately be removed way the COBRA® component are pointing. The upper side must face away from from the persons body.
  • Seite 59 Harness user’s manual | DELIGHT 4 SPORT ANNEX STORAGE, TRANSPORT AND MAINTENANCE Store your equipment in a dry state in a dry place protected from daylight at normal environmental temperatures (-10° to +30°C) where it is free of any mechanical compression, pressure or tensile load. Store the equipment away from chemicals, and away from an acidic or saline atmosphere.
  • Seite 60 Harness user’s manual | DELIGHT 4 SPORT SUPAIR | DELIGHT 4 SPORT| page 60 Revision index: V1 25/08/2022...
  • Seite 61 SUPAIR s.a.s Parc Altaïs 34 rue Adrastée 74650 Chavanod, Annecy FRANCE www.supair.com info@supair.com +334 50 45 75 29 RCS ANNECY 387956790...
  • Seite 62 SUPAIR PARC ALTAÏS 34 RUE ADRASTÉE 74650 CHAVANOD Notice d’utilisation FRANCE DELIGHT 4 SPORT RCS ANNECY 387956790 Indice de révision : V1 25/08/2022...
  • Seite 63 Notice d’utilisation | DELIGHT 4 SPORT Nous vous remercions d’avoir fait le choix de notre sellette DELIGHT 4 SPORT pour votre pratique du parapente. Nous sommes heureux de pouvoir ainsi vous accompagner dans notre passion commune. SUPAIR conçoit, produit et commercialise du matériel pour le vol libre depuis 1984.
  • Seite 64 Notice d’utilisation | DELIGHT 4 SPORT Table des matières Introduction Installation dans la sellette Données Techniques Pièces de rechange et optionnelles Choix des tailles Comportement en vol Nomenclature Phases du vol Vue d’ensemble de la sellette Contrôle prévol Mise en place des accessoires Décollage...
  • Seite 65: Introduction

    Après avoir pris connaissance de ce manuel, nous vous invitons à tester votre sellette sous un portique avant le premier vol. La DELIGHT 4 SPORT est une sellette conçue avec des matériaux light. Ne volez pas avec des chaussures à crochets pour le laçage ou avec des cramons proéminents.
  • Seite 66: Données Techniques

    Notice d’utilisation | DELIGHT 4 SPORT DONNÉES TECHNIQUES Hauteur du dos Hauteur du réglage d’inclinaison de dossier Profondeur d’assise Largeur d’assise Hauteur des points d’attache Distance entre les points d’attache Longueur speedbag Taille de la sellette Taille du pilote (cm)
  • Seite 67: Choix Des Tailles

    Nous recommandons tout de même de faire un essai sous portique et au mieux, en vol auprès d’un de nos revendeurs partenaires afin de choisir la taille qui vous conviendra le mieux. Liste complète des centres d’essais sur notre site www.supair.com Taille...
  • Seite 68: Nomenclature

    Notice d’utilisation | DELIGHT 4 SPORT NOMENCLATURE Sellette nue (1) Elévateurs solo DYNEEMA (1 paire) Poignée / Pod du parachute de secours (x1) Mousquetons automatiques EDELRID FORAS (1 paire) Kit réparation (x1) Sangle de sécurité avec mousqueton GRIVEL (x1) Plateau pieds polypro (1x) Accélérateur 3B speedbag Standard...
  • Seite 69: Vue D'ensemble De La Sellette

    Notice d’utilisation | DELIGHT 4 SPORT VUE D’ENSEMBLE DE LA SELLETTE Cockpit Poignée/poche du parachute de secours Points d’accroche principaux Poche petit rangement Poche dorsale de rangement Ventrale Réglage écartement ventrale Réglage d’inclinaison du dossier Réglage sangle d’épaule Points d’accroche secours Poulies pour passage accélérateur...
  • Seite 70: Mise En Place Des Accessoires

    Notice d’utilisation | DELIGHT 4 SPORT MISE EN PLACE DES ACCESSOIRES Mousquetons Mousquetons compatibles : Mousquetons EDELRID FORAS Réf. : MAILMOUSFORAS Insérez le mousqueton dans les 3 sangles Passez le mousqueton dans le passage d’accroche principales. du speedbag prévu à cet effet...
  • Seite 71: Plaque De Protection Dorsale

    Notice d’utilisation | DELIGHT 4 SPORT MISE EN PLACE DES ACCESSOIRES Plaque de protection dorsale 1. Ouvrez le zip de la poche de rangement arrière et repérez la poche dédiée à la protection dorsale. 2. Ouvrez le zip de l’emplacement de la protection.
  • Seite 72 Notice d’utilisation | DELIGHT 4 SPORT MISE EN PLACE DES ACCESSOIRES 4. Veillez à bien enfoncer la plaque jusqu’au fond de la poche. 5. Coincez les coins hauts dans la poche pour que la plaque soit bien installée dans son compartiment.
  • Seite 73: Plateau D'assise

    Plateau d’assise La sellette DELIGHT 4 SPORT peut être utilisée avec ou sans plateau d’assise. Voler avec le plateau donne une assise plus rigide et des transferts de charge plus nets. La sellette donne donc plus d’informations et est plus précise au pilotage.
  • Seite 74 Notice d’utilisation | DELIGHT 4 SPORT MISE EN PLACE DES ACCESSOIRES 4. Ouvrez le zip de la mousse inférieure. 5. Vous y trouverez l’emplacement de la planchette, elle se ferme avec un velcro. 6. Insérez la planche d’assise, côté courbé vers l’arrière et avec le creux d’assise vers le bas.
  • Seite 75: Plateau Pieds

    4. Rabattez le haut de la poche sur le plateau pour qu’il se maintienne bien dans son emplacement. 5. Refermez le velcro et replacez le speedbag. Bottom côté le plus étroit La DELIGHT 4 SPORT est également compatible avec le plateau pieds carbone en option. Réf. : S/M : MPPL010...
  • Seite 76: Bumpair

    La sellette DELIGHT 4 SPORT doit être utilisée avec son BUMPAIR Le BUMPAIR de la DELIGHT 4 SPORT est composé de deux parties: la partie «Upper part» et la partie «Lower part» . Le BUMPAIR de la DELIGHT 4 SPORT est composé de deux parties: la partie «Upper part» et la partie «Lower part» .
  • Seite 77 Notice d’utilisation | DELIGHT 4 SPORT MISE EN PLACE DES ACCESSOIRES 4. Fermez le compartiment à l’aide du zip. 5. Repérez le second compartiment. 6. Insérez la mousse supérieure (marquée “UPPER”) dans son compartiment. 7. Fermez le compartiment à l’aide du zip.
  • Seite 78 Notice d’utilisation | DELIGHT 4 SPORT MISE EN PLACE DES ACCESSOIRES Position finale du BUMPAIR: Le curseur des zips des compartiments doit être rangé correctement dans son emplacement afin d’éviter tout accrochage avec une sangle ou lors de la manipulation du BUMP.
  • Seite 79: Accélérateur

    Notice d’utilisation | DELIGHT 4 SPORT MISE EN PLACE DES ACCESSOIRES Accélérateur Accélérateurs compatibles : - 3B STANDARDS : ACCEL3BSTD Attention à ne pas coincer l’accélérateur entre les deux parties du BUMPAIR en repliant et fermant le zip de la protection.
  • Seite 80 Notice d’utilisation | DELIGHT 4 SPORT MISE EN PLACE DES ACCESSOIRES Installation de l’accélérateur : Pour chaque côté de la sellette : Passez le cordon d’accélérateur dans la poulie située sur la paroi Retournez le speedbag pour avoir accès au plateau latérale de la sellette en passant au plus proche du châssis.
  • Seite 81: Mise En Place Du Parachute De Secours

    PLIER LE PARACHUTE DANS SON POD Attention: Les DELIGHT 4 SPORT S et M doivent être montées avec un pod parachute de secours S/M déidé. Les DELIGHT 4 SPORT L et XL doivent être montées avec un pod parachute de secours L/XL dédié.
  • Seite 82 Notice d’utilisation | DELIGHT 4 SPORT MISE EN PLACE DU PARACHUTE Reformez l’accordéon dans le pod de la DELIGHT4 SPORT en Rangez les suspentes du parachute dans le pod, du côté opposé à respectant la forme rectangulaire du pod. la poignée du pod.
  • Seite 83 Notice d’utilisation | DELIGHT 4 SPORT MISE EN PLACE DU PARACHUTE Passez les suspentes dans la boucle pour bloquer l’ouverture du pod. Vérifiez l’installation finale. SUPAIR | DELIGHT 4 SPORT| page 22 Indice de révision : V1 25/08/2022...
  • Seite 84 Notice d’utilisation | DELIGHT 4 SPORT MISE EN PLACE DU PARACHUTE Connexion Élévateurs - Sellette Accès aux points d’attache du parachute Pour accéder aux points d’attache du parachute, ouvrez le zip du guide élévateurs, du dessus de l’épaule gauche. Nous recommandons l’utilisation des élévateurs fournis avec la sellette afin de garantir une ouverture du secours optimale.
  • Seite 85 Notice d’utilisation | DELIGHT 4 SPORT MISE EN PLACE DU PARACHUTE Serrez bien chaque noeud. Procédez de la même manière pour le deuxième point d’attache. Assurez-vous que la position finale des élévateurs est similaire à l’illustration suivante: SUPAIR | DELIGHT 4 SPORT| page 24...
  • Seite 86 Notice d’utilisation | DELIGHT 4 SPORT MISE EN PLACE DU PARACHUTE Connexion Élévateurs - Parachute de secours Munissez vous d’un Maillon Rapide® 7mm carré ou ovale et de deux joints toriques. - Faites une seconde torsion avec Placez correctement - Passez les deux brins - Ouvrez le Maillon Rapide®...
  • Seite 87: Installation Du Parachute Dans Le Container

    Notice d’utilisation | DELIGHT 4 SPORT MISE EN PLACE DU PARACHUTE Installation du parachute dans le container Merci de lire attentivement! Nous recommandons de faire réaliser l’installation initiale du parachute de secours par une personne compétente (revendeur, instructeur, etc.). Le pliage et la mise en place du parachute dans la sellette doivent répondre aux exigences exclusives de ce manuel d’utilisation.
  • Seite 88 Notice d’utilisation | DELIGHT 4 SPORT MISE EN PLACE DU PARACHUTE Descendez le curseur de la poche élévateurs jusqu’en bas du zip. Seule la poignée doit dépasser. Remontez le curseur à mi-course du zip. Le bas de la poche secours doit maintenant être fermé.
  • Seite 89 Notice d’utilisation | DELIGHT 4 SPORT MISE EN PLACE DU PARACHUTE Passez le premier jonc de la poignée (à gauche sur les illustrations du manuel) dans les 3 passants se situant sur le zip de la poche secours. Assurez-vous que le jonc soit bien inséré jusqu’au bout.
  • Seite 90 Notice d’utilisation | DELIGHT 4 SPORT MISE EN PLACE DU PARACHUTE Passez le deuxième jonc dans le passant situé sur le bord de la poche triangulaire. Cette fois encore, assurez-vous de passer le jonc dans son entièreté, jusqu’à la butée.
  • Seite 91 Notice d’utilisation | DELIGHT 4 SPORT MISE EN PLACE DU PARACHUTE Une fois la languette rabattue, passez le deuxième jonc dans le dernier passant situé sous la languette. La poignée de secours est maintenant installée. Assurez-vous que votre installation correspond au montage présenté dans l’illustration...
  • Seite 92: Test D'exctraction Obligatoire

    Notice d’utilisation | DELIGHT 4 SPORT MISE EN PLACE DU PARACHUTE Remontez le curseur sur l’intégralité du zip, jusqu’au bout de l’épaule gauche et rangez le curseur dans son emplacement de la même manière qu’indiqué à la page 17. L’installation du parachute de secours est maintenant terminée.
  • Seite 93: Rangements Et Astuces

    Notice d’utilisation | DELIGHT 4 SPORT RANGEMENTS ET ASTUCES Poche dorsale Attaches sécurité pour de rangement les instruments Passage cable USB Sortie du tuyau de la poche à eau. pour recharge des instruments Poche cockpit Petite poche de rangement latérale avec attache de sécurité...
  • Seite 94 Notice d’utilisation | DELIGHT 4 SPORT RANGEMENTS ET ASTUCES Pliage compact: Positionnez la sellette sur le dos. Rabattez l’assise. Ouvrez le zip principal du BUMP. Ouvrez le cockpit afin de l’aplatir avant de le Rabattez les deux bords de la sellette et Dépliez le BUMP...
  • Seite 95 Notice d’utilisation | DELIGHT 4 SPORT RANGEMENTS ET ASTUCES Rabattez le cocon en intercalant le plateau Retournez la sellette, le profilage vers le haut. Ouvrez la poche dorsale. pieds entre l’assise et le dossier. Passez les bretelles au-dessus du speedbag.
  • Seite 96: Les Différents Réglages

    Notice d’utilisation | DELIGHT 4 SPORT RANGEMENTS ET ASTUCES Important : nous vous conseillons de régler votre sellette sous portique avant toute utilisation. Les différents réglages Réglage écartement ventrale Réglage des sangles d’épaules Réglage inclinaison du dossier Réglage du speedbag...
  • Seite 97: Régler Sa Sellette

    Notice d’utilisation | DELIGHT 4 SPORT RANGEMENTS ET ASTUCES Régler sa sellette Inclinaison du dossier - Serrer revient à redresser le dossier - Desserrer revient à incliner le dossier en arrière. desserer serrer Ajustez la longueur des sangles d’épaules grâce aux boucles de réglage d’épaule.
  • Seite 98 Notice d’utilisation | DELIGHT 4 SPORT RANGEMENTS ET ASTUCES Régler la ventrale : La distance à considérer correspond à l’écartement entre les points d’attache du parapente (milieu à milieu bas des maillons). La distance idéale varie selon les voiles de parapente.
  • Seite 99 Notice d’utilisation | DELIGHT 4 SPORT AJUSTEMENTS DE LA SELLETTE Régler sa sellette - Ajustements du speedbag Longueur du speedbag Vos jambes doivent être tendues, calez-vous bien au fond de la sellette Réglez la sangle de pointes des pieds Réglez la sangle des talons Si le réglage est trop long ou trop court, déplacez les points d’attache.
  • Seite 100: Connexion Voile - Sellette

    Notice d’utilisation | DELIGHT 4 SPORT CONNEXION VOILE - SELLETTE Connexion voile – sellette Sans faire de twist, connectez les élévateurs aux points d’accroche de la sellette. Veillez à ce que les élévateurs soient dans le bon sens : les «A»...
  • Seite 101: Installation Dans La Sellette

    INSTALLATION DANS LA SELLETTE Notice d’utilisation | DELIGHT 4 SPORT Passez l’attache Enfilez les Fermez la boucle Fermez la boucle Fermez l’attache anti-chute dans la bretelles de la gauche de la ventrale. droite de la ventrale. anti-chute rouge. boucle rouge.
  • Seite 102: Pièces Optionnelles

    Notice d’utilisation | DELIGHT 4 SPORT PIECES DE RECHANGE / OPTIONNELLES Pièces optionnelles: Plateau pieds carbone Réhausse cockpit Réf.: Tailles S/M: MPPL010 Réf.: COCREHAUSSE Tailles L/XL: MPPL024 Plus léger que le plateau pieds polypro, cet accessoire convient Permet d’adapter l’inclinaison des instruments à la position de pilotage afin d’éviter les reflets du soleil sur les écrans des instruments.
  • Seite 103 Notice d’utilisation | DELIGHT 4 SPORT PIECES DE RECHANGE / OPTIONNELLES Poignée et pod Accélérateur 3B Réf.: S/M : POID4SSM Réf.: ACCEL3BSTD Réf.: L/XL : POID4SLXL Plateau pieds polypro Protection BUMPAIR DELIGHT 4 SPORT PLATEAU POLYPRO PIEDS D4SP S/M MPPL038...
  • Seite 104: Pieces De Rechange

    Notice d’utilisation | DELIGHT 4 SPORT PIECES DE RECHANGE KIT DE REPARATION Elastique rond pour A quoi ça sert? remplacement accelerateur Mylar d’ecope de remplacement Jonc polycarbonate pour Velcro auto collant à coller derrière les Lien de sécurité pour relier Pastille de réparation...
  • Seite 105: Comportement En Vol

    STRIKE 2. La sellette filtre la masse d’air pour ne transmettre que les informations nécessaires à un pilotage précis et confortable. Jouer sur le réglage de la ventrale influence la stabilité de la sellette et permet à la DELIGHT 4 SPORT de s’adapter aux préférences de pilotage de chaque pilote.
  • Seite 106: Phases Du Vol

    Notice d’utilisation | DELIGHT 4 SPORT PHASES DU VOL Contrôle Prévol • Vérifiez que ni votre sellette ni vos mousquetons ne se sont détériorés. • Vérifiez soigneusement que les câbles de la poignée du parachute de secours passent dans les boucles de maintien des volets de la poche secours.
  • Seite 107: En Vol

    PHASES DU VOL En Vol Une fois en vol, le comportement de la DELIGHT 4 SPORT est instinctif et stable. Veillez à régler l’écartement de la ventrale de façon adaptée aux conditions aérologiques et selon ce qui est préconisé par le fabricant de votre voile.
  • Seite 108: Faire Secours

    Notice d’utilisation | DELIGHT 4 SPORT «FAIRE SECOURS» Lancer le parachute de secours Nous vous conseillons vivement de repérer de façon fréquente l’emplacement de la poignée du parachute de secours. Pour ce faire, nous vous recommandons de faire régulièrement le geste d’aller attraper la poignée devant soi afin d’automatiser la prise de la poignée. Ce geste doit pouvoir s’effectuer les yeux fermés.
  • Seite 109: Vol Treuillé

    égale à 300kg. Le largueur pourra être ensuite fixé soit par une tête d’alouette ou un maillon adapté. Pour finir l’installation, suivez les recommandations du fabricant du largueur. Pour la pratique du vol treuillé, veuillez vous renseigner auprès d’un organisme compétent. La DELIGHT 4 SPORT n’est pas équipée de points d’attache spécifiques pour le treuillage. CONTRÔLES INDISPENSABLES À...
  • Seite 110: Entretien

    • boucles et mousquetons (fonctionnement correct, pas d’usure) Les fibres qui composent les sangles et les tissus de la DELIGHT 4 SPORT ont été sélectionnées et tissées de façon à garantir le meilleur compromis légèreté/durée de vie possible. Toutefois, dans certaines conditions, suite par exemple à une exposition très prolongée aux UV et/ou une abrasion importante ou encore à...
  • Seite 111: Réparation

    Un grand nombre de nos composants sont recyclables. Si vous jugez que votre DELIGHT 4 SPORT a atteint la fin de sa vie, vous pouvez séparer toutes les parties métalliques et plastiques et appliquer les règles de tri sélectif en vigueur dans votre pays.
  • Seite 112: Garantie

    GARANTIE SUPAIR apporte le plus grand soin à la conception et la production de ses produits. SUPAIR garantit ses produits 5 ans (à partir de la date d’achat) contre toute malfaçon ou défaut de conception qui se présenterait dans le cadre d’une utilisation normale du produit. Toute utilisation abusive ou incorrecte, toute exposition hors de proportions à...
  • Seite 113 Notice d’utilisation | DELIGHT 4 SPORT Amortisseur de choc BUMPAIR DELIGHT 4 SPORT La sellette que vous venez d’acquérir dispose d’une protection de type BUMPAIR. Cette protection est destinée à protéger contre les chocs. Elle est conforme aux Règlements UE 2016/425 relatifs aux équipements de protection individuelle (EPI) et est certifiée à dire d’expert selon protocole CRITT-SP SL-003 09/2021.
  • Seite 114 Si votre amortisseur de choc est endommagé, faites-le expertiser et réparer par un professionnel ou contactez-nous à sav@supair.com. Les rapports de test et la déclaration UE de conformité sont disponibles sur notre site internet à l’adresse: www.supair.com/telechargements/ • Conforme au réglement UE 2016/425 •...
  • Seite 115: En Cas D'incident

    Notice d’utilisation | DELIGHT 4 SPORT EN CAS D’INCIDENT Communiquer en cas d’accident Numéros d’urgence EUROPE / INDIA Besoin d’aide? USA / CANADA CHINA / JAPAN NEPAL IRAN AUSTRALIA NEW ZEALAND SOS lumineux : SUPAIR | DELIGHT 4 SPORT| page 54...
  • Seite 116: Carnet D'entretien

    Notice d’utilisation | DELIGHT 4 SPORT CARNET D’ENTRETIEN Cette page vous permettra de noter toutes les étapes de la vie de votre sellette SUPAIR. Entretien Entretien Date d’achat Revente Revente Nom du propriétaire : Date Date Nom et cachet du magasin : Nom de l’atelier/de l’acheteur...
  • Seite 117: Annexe

    Notice d’utilisation | DELIGHT 4 SPORT ANNEXE ANNEXE MANUEL NOMS DES PIÈCES NOMS DES PIÈCES (ILLUS. 1) COMPOSANTS COBRA Blocage rapide COBRA (1) Le corps se compose de (a) la partie femelle (b) la partie mâle ; (2) la barre de Les composants COBRA®...
  • Seite 118 Notice d’utilisation | DELIGHT 4 SPORT ANNEXE ANNEXE MATÉRIAUX b) Pour les composants COBRA® avec barre de réglage ou pont Corps : aluminium central uniquement : Assurez-vous que la sangle est correctement Rivets, barre de réglage, anneau en D intégré : acier inoxydable enfilée dans le mécanisme de réglage.
  • Seite 119 Notice d’utilisation | DELIGHT 4 SPORT ANNEXE ANNEXE INSTRUCTIONS D'UTILISATION FIN D'UTILISATION Généralités : Veillez toujours à ce que l'alignement soit correct, notamment Dans les cas suivants, l'équipement doit être immédiatement retiré de en ce qui concerne l'orientation des composants COBRA®. La partie l'utilisation active : supérieure doit être orientée à...
  • Seite 120 Notice d’utilisation | DELIGHT 4 SPORT ANNEXE ANNEXE STOCKAGE, TRANSPORT ET ENTRETIEN Stockez votre équipement au sec, dans un endroit protégé de la lumière du jour, à des températures ambiantes normales (-10° à +30°C) et à l'abri de toute compression mécanique, pression ou traction.
  • Seite 121 Notice d’utilisation | DELIGHT 4 SPORT SUPAIR | DELIGHT 4 SPORT| page 60 Indice de révision : V1 25/08/2022...
  • Seite 122 SUPAIR s.a.s Parc Altaïs 34 rue Adrastée 74650 Chavanod, Annecy FRANCE www.supair.com info@supair.com +334 50 45 75 29 RCS ANNECY 387956790...
  • Seite 123 SUPAIR s.a.s PARC ALTAÏS 34 RUE ADRASTÉE 74650 CHAVANOD Betriebshandbuch FRANCE RCS ANNECY 387956790 DELIGHT 4 SPORT Revisionsdatum : V1 25/08/2022...
  • Seite 124 Betriebshandbuch Gurtzeuge | DELIGHT 4 SPORT Herzlichen Dank, dass du dich für ein DELIGHT 4 SPORT entschieden hast. Wir sind stolz, unsere gemeinsame Leidenschaft Gleitschirmfliegen mit dir zu teilen. SUP’AIR entwickelt, produziert und vertreibt Produkte für den Flugsport seit 1984. Durch die Wahl eines SUP’AIR Produktes profitierst du von mehr als 30 Jahren Fachwissen, Innovationen und Aufmerksamkeit.
  • Seite 125 Betriebshandbuch Gurtzeuge | DELIGHT 4 SPORT INHALTSVERZEICHNIS Einfürhung Flugverhalten Technische Daten Flugphasen Größebenwahl Vorflug Check Fachbegriffe START Gurtzeugübersicht Im Flug Installation von Zubhör Benutzung des Beschleunigers Karabiner Landung Rückenschutz Rettunggeräteauslösung Sitzbrett Rettungwurf Fußbrett Windenschlepp BUMPAIR Vorgeschriebene Prüfungen Beschleunigungssystemms Vorgeschriebener 6 Monatscheck Rettungsgeräteeinbau...
  • Seite 126: Einfürhung

    4 bis 5 Stunden am Stück fliegen.” Das DELIGHT 4 SPORT wurde nach EN 1651+A1 und LTF 91/09 mit 130 daN (ca. 130 kg) zertifiziert. Außerdem ist es gemäß der Richtlinie 89/686/CEE CE-zertifiziert. Dieses Produkt erfüllt die Anforderungen der europäischen Norm EN 1651+A1.
  • Seite 127: Technische Daten

    Betriebshandbuch Gurtzeuge | DELIGHT 4 SPORT TECHNISCHE DATEN Rückenhöhe Einstellung der Rückenneigungshöhe Sitztiefe Sitzbreite Höhe der Aufhängepunkte Abstand der Aufhängepunkte Speedbag Länge Model Größe des Piloten (cm) 155-170 165 -180 180-190 > 190 Gewicht des Piloten (mini - maxi) (kg)
  • Seite 128: Größenwahl

    Hängemattenprinzip und der “flach liegenden” Flugposition empfehlen wir das Gurtzeug in einem Aufhängesimulator bei einem unserer Händler zu testen, um die für dich am besten geeignete Größe auszuwählen. Eine vollständige Liste unserer Händler findest du unter : www.supair.com Größe...
  • Seite 129: Fachbegriffe

    Betriebshandbuch Gurtzeuge | DELIGHT 4 SPORT FACHBEGRIFFE Gurtzeug DYNEEMA-Rettungsschirmleinen Rettergriff und Innencontainer automatische Karabiner EDELRID FORAS Reparatursatz Sicherheitsleine Karabiner GRIVEL Fußplatte Beschleuniger 3B Speedbag Standard Karbon Sitzbrett BUMPAIR DELIGHT 4 Mylar Rückenschutz Revisiondatum: V1 25/08/2022 SUPAIR | DELIGHT 4 SPORT| Seite 7...
  • Seite 130: Gurtzeugübersicht

    Betriebshandbuch Gurtzeuge | DELIGHT 4 SPORT GURTZEUGÜBERSICHT Cockpit Rettungstasche und Griff Befestigungspunkten kleine Aufbewahrungstasche Stauraum - Rückentasche Brustgurts Einstellung des Brustgurts Lenden- und Sitztiefeverstellung Einstellung der Rückenlehne Aufhängepunkt der Rettung umlenkrolle der Beschleuniger BUMPAIR Revisiondatum: V1 25/08/2022 SUPAIR | DELIGHT 4 SPORT| Seite 8...
  • Seite 131: Installation Von Zubhör

    Betriebshandbuch Gurtzeuge | DELIGHT 4 SPORT INSTALLATION VON ZUBEHÖR Karabiner Kompatible Karabiner : KArabiner FORAS Ref. : MAILMOUSFORAS Führe den Karabiner durch Stecke den Karabiner in das dafür vorgesehene die 3 Hauptschlaufen. Loch im Beinsack. Revisiondatum: V1 25/08/2022 SUPAIR | DELIGHT 4 SPORT| Seite 9...
  • Seite 132: Rückenschutz

    Betriebshandbuch Gurtzeuge | DELIGHT 4 SPORT INSTALLATION VON ZUBEHÖR Rückenschutz 1. Öffne den Reißverschluss der Gesäßtasche, dort findest du die Tasche für den Rückenschutz. 2. Öffne den Reißverschluss der Rückenschutztasche. 3. Platziere den Rückenschutz mit den abgerundeten Ecken nach unten.
  • Seite 133 Betriebshandbuch Gurtzeuge | DELIGHT 4 SPORT INSTALLATION VON ZUBEHÖR 4. Stelle sicher, dass du es in den Boden der Tasche geschoben hast. 5. Stecke die Ecken in die Tasche, um den Rückenschutz korrekt an seinem Platz zu installieren. 6. Schließe die Rückentasche des Rückenprotektors.
  • Seite 134: Sitzbrett

    INSTALLATION VON ZUBEHÖR Sitzbrett Das DELIGHT 4 SPORT kann mit oder ohne Sitzbrett geflogen werden. Das Fliegen mit Sitzpbrett bietet eine steifere Basis und effizientere Gewichtsverlagerungen. Das Gurtzeug gibt mehr Informationen und ist präziser. Das Gurtzeug ist auch beim Verlassen des Sitzens einfacher zu handhaben. Das Sitzbrett trägt auch zu einem bequemeren Sitz ohne seitliche Kompression bei.
  • Seite 135 Betriebshandbuch Gurtzeuge | DELIGHT 4 SPORT INSTALLATION VON ZUBEHÖR 4. Öffne den unteren Schaumstoffreißverschluss. 5. Hier findest du das Sitzbrett. Schließ es mit dem Klettverschluss. 6. Setze das Sitzbrett an der Stelle mit der gebogenen Seite nach hinten ein. 7. Setze das Sitzbrett ganz nach unten ein.
  • Seite 136: Fußbrett

    Betriebshandbuch Gurtzeuge | DELIGHT 4 SPORT INSTALLATION VON ZUBEHÖR Fußbrett Oben breiteste Seite Kompatible Sitzbrett S / M : Ref MPPL010 oder L / XL : Ref : MPPL024 Fußbrett aufstellen 1. Drehe die Spitze des Beinsacks um. 2. Öffne den Klettverschluss der Tasche.
  • Seite 137: Bumpair

    Das DELIGHT 4 SPORT muss mit seinem BUMPAIR verwendet werden. Der DELIGHT 4 SPORT BUMPAIR besteht aus zwei Teilen. Der „obere“ und der „untere“ Teil. Der DELIGHT 4 SPORT BUMPAIR besteht aus zwei Teilen. Der „obere“ und der „untere“ Teil.
  • Seite 138 Betriebshandbuch Gurtzeuge | DELIGHT 4 SPORT INSTALLATION VON ZUBEHÖR 4. Schließe das Fach mit dem Reißverschluss. 5. Das zweite Fach. 6. Setze den oberen Schaumstoff (mit UPPER gekennzeichnet) in sein Fach ein. 7. Schließe das Fach mit dem Reißverschluss. Achte darauf, den Beschleuniger beim Zusammenklappen und Schließen des 8.
  • Seite 139 Betriebshandbuch Gurtzeuge | DELIGHT 4 SPORT INSTALLATION VON ZUBEHÖR endgültige Installation des BUMP: Der Reißverschlussschieber der Fächer muss korrekt an seinem Platz aufbewahrt werden, um ein Verheddern mit einem Gurtband oder während des BUMP-Einbaus zu vermeiden. Revisiondatum: V1 25/08/2022 SUPAIR...
  • Seite 140: Beschleunigungssystemms

    Betriebshandbuch Gurtzeuge | DELIGHT 4 SPORT INSTALLATION VON ZUBEHÖR Beschleunigungssystems Kompatible Beschleuniger : 3B STANDARDS : ACCEL3BSTD Achte darauf, den Beschleuniger beim Zusammenklappen und Schließen des Schutzes nicht zwischen die beiden Teile des BUMP zu klemmen. Es würde den Beschleuniger während des Fluges unbrauchbar machen.
  • Seite 141 Betriebshandbuch Gurtzeuge | DELIGHT 4 SPORT INSTALLATION VON ZUBEHÖR Beschleuniger aufstellen : Für jede Seite : Führe das Beschleunigungsseil so nah wie möglich am Sitz Falte den Beinsack auf, um Zugang zur Fußplatte zu durch die Umlenkrolle am Seitengewebe des Gurtzeugs.
  • Seite 142: Rettungsgeräteeinbau

    FLUID LIGHT Zusammenlegen des Rettungsschirms in seinem Innencontainer Achtung: Das DELIGHT 4 SPORT S & M muss mit einem S/M-Rettungscontainersystem verwendet werden. Das DELIGHT 4 SPORT L & XL muss mit einem L/XL-Rettungscontainersystem verwendet werden. Le Der Rettungsschirm muss in den DELIGHT 4 SPORT-spezifischen Container Öffne den Original-Container des...
  • Seite 143 Betriebshandbuch Gurtzeuge | DELIGHT 4 SPORT RETTUNGSGERÄTEEINBAU Verbessere die Faltung des DELIGHT 4 SPORT Containers, indem Bewahre die Rettungsschirmleinen im Pod auf der du die rechteckige Form des Retterfachs beachtest. gegenüberliegenden Seite des Griffs auf Schließe den Pod mit dem im Reparatursatz enthaltenen Kabel in der richtigen Reihenfolge wie folgt durch die Ösen:...
  • Seite 144 Betriebshandbuch Gurtzeuge | DELIGHT 4 SPORT RETTUNGSGERÄTEEINBAU Führe die Leinen in der Schleife, um die Öffnung zu verriegeln. Überprüfe die endgültige Installation. Revisiondatum: V1 25/08/2022 SUPAIR | DELIGHT 4 SPORT| Seite 22...
  • Seite 145: Verbindung Der Rettungsschirmverbindungsleinen Mit Den Gurtzeug

    Betriebshandbuch Gurtzeuge | DELIGHT 4 SPORT RETTUNGSGERÄTEEINBAU Verbindung der Rettungsschirmverbindungsleinen mit dem Gurtzeug Zugang zu den Befestigungspunkten des Fallschirms Um Zugang zu den Befestigungspunkten des Fallschirms zu erhalten, öffne den Führungsreißverschluss des Tragegurts, beginnend oberhalb der linken Schulter. Wir empfehlen, die mitgelieferten Tragegurte zu verwenden, um eine optimale Öffnung des Fallschirms zu gewährleisten.
  • Seite 146 Betriebshandbuch Gurtzeuge | DELIGHT 4 SPORT RETTUNGSGERÄTEEINBAU Gehe für den zweiten Befestigungspunkt genauso vor. Gehe für den zweiten Befestigungspunkt genauso vor. Stelle sicher, dass die endgültige Position der Tragegurte ähnlich der folgenden Abbildung ist: Revisiondatum: V1 25/08/2022 SUPAIR | DELIGHT 4 SPORT| Seite 24...
  • Seite 147: Verbinde Den Rettungsschirm Mit Den Verbindungsleinen

    Betriebshandbuch Gurtzeuge | DELIGHT 4 SPORT RETTUNGSGERÄTEEINBAU Verbinde den Rettungsschirm mit den Verbindungsleinen Bitte verwende einen rechteckigen Schäkel Maillon Rapide® 7mm rechteckig und zwei O-Ringe. - Verbindungsleinen- Schlaufe. Fahre mit einem fehlerfreien - Führe die beiden Leinen durch - Bitte verwende einen rechteckigen - Stecke die Schlaufe durch den und präzisen Einbau fort.
  • Seite 148: Einbau Des Rettungsschirms

    Betriebshandbuch Gurtzeuge | DELIGHT 4 SPORT RETTUNGSGERÄTEEINBAU Einbau des Rettungsschirms Danke für aufmerksames Lesen ! Wir empfehlen den Rettungsschirmeinbau von einer qualifizierten Person einbauen zu lassen. Das Falten und der Einbau des Rettungsgeräts in das Gurtzeug müssen spezifischen Richtlinien entsprechen, die du hier im Betriebshandbuch findest.
  • Seite 149 Betriebshandbuch Gurtzeuge | DELIGHT 4 SPORT RETTUNGSGERÄTEEINBAU Nimm den Reißverschlussschieber ganz unten am Reißverschluss. Nur der Griff ragt heraus. Nimm den Reißverschlussschieber halb nach oben. Der Boden der Fallschirmtasche sollte nun geschlossen sein. Revisiondatum: V1 25/08/2022 SUPAIR | DELIGHT 4 SPORT| Seite 27...
  • Seite 150 Betriebshandbuch Gurtzeuge | DELIGHT 4 SPORT RETTUNGSGERÄTEEINBAU Führe das erste Griffkabel (links in der Abbildung) durch die 3 Schlaufen am Reißverschluss. Achte darauf, dass das Kabel vollständig eingeführt wird. Die Spitze des ersten Kabels muss unter der kleinen dreieckigen Tasche verlaufen.
  • Seite 151 Betriebshandbuch Gurtzeuge | DELIGHT 4 SPORT RETTUNGSGERÄTEEINBAU Führe das zweite Kabel durch die Schlaufe am Rand der dreieckigen Tasche. Achten erneut darauf, dass das Kabel vollständig eingesteckt ist. Klapp die Klappe nach unten, um sie in die dreieckige Tasche zu stecken.
  • Seite 152 Betriebshandbuch Gurtzeuge | DELIGHT 4 SPORT RETTUNGSGERÄTEEINBAU Sobald die Klappe in die Tasche gefaltet ist, führe das zweite Kabel durch die letzte Schlaufe unter der Klappe. Der Rettungsschirmgriff ist nun montiert. Stelle sicher, dass die Installation der folgenden Abbildung ähnelt:...
  • Seite 153: Vorgeschriebene Kompatibilitätsprüfrung

    Betriebshandbuch Gurtzeuge | DELIGHT 4 SPORT RETTUNGSGERÄTEEINBAU Ziehe den Reißverschluss ganz nach oben bis zur linken Schulter. Die Installation des Rettungsschirms ist nun abgeschlossen. Vorgeschriebene Kompatibilitätsprüfung Überprüfe den kompletten Einbau in Flugposition in einer Gurtzeugaufhängung (Kompatibilitätstest) und wenn es erfolgreich war, wiederhole denselben Ein- bau, wenn dieser erfolgreich war..
  • Seite 154: Staurum Und Tipps

    Betriebshandbuch Gurtzeuge | DELIGHT 4 SPORT STAURAUM UND TIPPS Rückentasche Instrumentenbefestigung Schlauchauslass des Wasserbeutels. USB-Kabel zum Aufladen von Instrumenten Cockpittasche Funkkabeldurchführung Revisiondatum: V1 25/08/2022 SUPAIR | DELIGHT 4 SPORT| Seite 32...
  • Seite 155: Kompact Zusammenklappar

    Betriebshandbuch Gurtzeuge | DELIGHT 4 SPORT STAURAUM UND TIPPS Kompakt zusammenklappbar: Lege das Gurtzeug auf den Rücken. Klappe den Sitz herunter. Öffne den BUMPAIR-Hauptreißverschluss. Öffne das Cockpit, um es zu glätten, bevor du Falte beide Kanten des Gurtzeugs nach Entfalte den BUMP.
  • Seite 156 Betriebshandbuch Gurtzeuge | DELIGHT 4 SPORT STAURAUM UND TIPPS Klappe den Beinsack herunter, indem du Drehe den Gurt mit der Foil / Bürzel nach die Fußplatte zwischen Sitzfläche und Öffne die Gesäßtasche. oben um Rückenlehne einführst. Führe die Schultergurte über die Abdeckung.
  • Seite 157: Einstellugen

    Betriebshandbuch Gurtzeuge | DELIGHT 4 SPORT EINSTELLUNGEN Die Einstellung des Gurtzeugs vor jedem Start ist lebenswichtig. Die Verschiedenen Einstellungen Einstellung des Brustgurts Lenden- und Sitztiefeverstellung Einstellung der Rückenlehne Einstellung der Speedbag Revisiondatum: V1 25/08/2022 SUPAIR | DELIGHT 4 SPORT| Seite 35...
  • Seite 158: Gurtzeuggeinstellung

    Betriebshandbuch Gurtzeuge | DELIGHT 4 SPORT EINSTELLUNGEN Gurtzeugeinstellung Lenden- und Sitztiefeverstellung - Anziehen des Rückenverstellers führt zu einer aufrechteren Rückenlehne (empfohlene Position für Anfänger). - Durch Lösen der Rückenverstellung wird die Rückenneigung flacher. Lockern Festziehen Stelle die Länge der Schultergurte mit den Schnallen für die Schulterverstellung ein.
  • Seite 159 Abkippen in die geklappte Seite deines Schirms). Lendenwirbelstütze Mit dieser Einstellung können Sie die Rückenstütze beliebig einstellen. Je straffer die Einstellung, desto liegender die Flugposition. Wenn Sie diese Einstellung lockern, wird die Position aufrechter. Revisiondatum: V1 25/08/2022 SUPAIR | DELIGHT 4 SPORT| Seite 37...
  • Seite 160: Einstellung Des Beinsack

    Betriebshandbuch Gurtzeuge | DELIGHT 4 SPORT EINSTELLUNGEN Einstellung des Beinsack Beinsack-Länge Deine Beine müssen gestreckt sein. Passe das Fußspitzenband an Stelle den Fersenriemen ein Wenn die Einstellung zu lang oder zu kurz ist, verschieben die Befestigungspunkte. Sobald die Einstellungen korrekt vorgenommen wurden, verriegel den Gurt durch die doppelte Schlaufe, um zu verhindern, dass sich die Einstellungen bewegen.
  • Seite 161: Verbidung Gleitschirm-Gurtzeug

    Betriebshandbuch Gurtzeuge | DELIGHT 4 SPORT VERBINDING GLEITSCHIRM - GURTZEUG Verbindung Gleitschirm/Gurtzeug Verbinde die Tragegurteinhängeschlaufen ohne Verdrehung der Tragegurte mit den Aufhängepunk- ten des Gurtzeugs mittels Automatik-Karabinern. Überprüfe, dass die Tragegurte vorschriftsmäßig in Flugrichtung Karabiner Edelrid der richtigen Position und nicht verdreht sind. Die FORAS «A»...
  • Seite 162: Gurtzeug Setzen

    GURTZEUG SETZEN Betriebshandbuch Gurtzeuge | DELIGHT 4 SPORT Schließe die linke Schließe die rechte Führe den Anti- Lege die Schlaufe des Schließe den Schlaufe des Fall-Clip durch Gurtbänder an. Bauchgurts. Absturzsicherungsclip. Bauchgurts. die rote Schlaufe. Schließe den Schließe den Schließe den rechten Schließe den Clip...
  • Seite 163: Ersatzteile

    Betriebshandbuch Gurtzeuge | DELIGHT 4 SPORT ERSATZTEILE Optionale Teile: Cockpit-Erweiterung Karbon Fußbrett Ref.: COCREHAUSSE KARBON FUßBRETT: Größe S/M: MPPL010 Größe L/XL: MPPL024 Ersatzteile: Anti-Perforations-Mylar Mylar Karbon Sitzbrett KARBONE FUßBRETT MINI: Größe S/M: MPPL021 Größe L/XL: MPPL025 Revisiondatum: V1 25/08/2022 SUPAIR...
  • Seite 164 Betriebshandbuch Gurtzeuge | DELIGHT 4 SPORT ERSATZTEILE Rettergriffe und innencontainer 3B Beschleunigers Ref.: S/M : POID4SSM Réf.: ACCEL3BSTD Ref.: L/XL : POID4SLXL Polypro Fußbrett BUMPAIR DELIGHT 4 SPORT PROTEKTOR POLYPRO FUßBRETT D4SP S/M MPPL038 BUMPAIR DELIGHT4 POLYPRO FUßBRETT D4SP L/XL MPPL025 Réf.: PROBUMPD4S...
  • Seite 165 Betriebshandbuch Gurtzeuge | DELIGHT 4 SPORT ERSATZTEILE REPARATURSET Rundes Gummiband als Wozu ist das? Beschleunigerersatz Ersatz Mylar Selbstklebender Klettverschluss zum Cockpitleine für Riss-Reparaturpad Polykarbonatkabel Aufkleben hinter den Instrumenten zum Instrumente zum Einpacken des Aufkleben hinter dem Cockpit Rettungsfallschirms. Revisiondatum: V1 25/08/2022...
  • Seite 166: Flugverhalten

    Stabilität des DELIGHT 4 SPORT und ermöglicht eine Anpassung an die Vorlieben jedes Piloten. Das DELIGHT 4 SPORT ist so konzipiert, dass er in sitzender oder halb liegender Position geflogen werden kann. Daher ist das Gurtzeug sowohl für erfahrene Piloten als auch für Piloten geeignet, die einen zugänglichen und einfach zu bedienenden ersten Beinsack-...
  • Seite 167: Flugphasen

    Betriebshandbuch Gurtzeuge | DELIGHT 4 SPORT FLUGPHASEN Vorflug Check • Überprüfe, dass weder dein Gurtzeug noch die Karabiner beschädigt sind und die Zulassung noch gültig ist. • Überprüfe sorgfältig, ob die Kabel des Rettungsgriffs durch die Verschlusslaschen geführt wurden und die Containerklappen geschlossen bleiben.
  • Seite 168: Im Flug

    Betriebshandbuch Gurtzeuge | DELIGHT 4 SPORT FLUGPHASEN Im Flug Einmal in der Luft, ist das Verhalten der DELIGHT 4 SPORT instinktiv und stabil. Bitte wähle deinen Karabinerabstand entsprechend der Flugbedingungen und der Empfehlung deines Gleitschirmherstellers. Benutzung des Beschleunigers Wir empfehlen einen vorsichtigen Gebrauch des Beschleunigers, weil das Risiko von massiven Klappern wächst. Bitte lese gewissenhaft das Handbuch deines Gleitschirms.
  • Seite 169: Rettunggeräteauslösung

    Betriebshandbuch Gurtzeuge | DELIGHT 4 SPORT RETTUNGSGERÄTEAUSLÖSUNG RETTERWURF Wir weisen verstärkt darauf hin, den Rettergirff im Flug regelmäßig blind zu ertasten. Um dies zu trainieren, schlagen wir vor, die rechte Hand entlang der Tragegurte bis zum Rettergriff heruntergleiten zu lassen. Diese Bewegung solltest du blind üben. Dadurch verbesserst du deine Chancen im Notfall deinen Rettungsschirm schnellmöglichst auslösen zu können.
  • Seite 170: Windenschlepp

    Betriebshandbuch Gurtzeuge | DELIGHT 4 SPORT WINDENSCHLEPP Um per Schlepp zu starten, musst du eine Schleppklinke verwenden, die eigens dafür gebaut worden und zugelassen ist. Schließen Sie die Schleppklinke mit einem Dyneema- oder Seiladapter mit einem Widerstand größer oder gleich 300 kg an die Tragegurtschlaufe an.
  • Seite 171: Wartung

    Schnallen und Karabiner (Funktion / Verschleiß) Die Fasern, aus denen die Gurte und Gewebe des DELIGHT 4 SPORT bestehen, wurden so ausgewählt und gewebt, dass sie den bestmöglichen Kompromiss zwischen Leichtigkeit und Lebensdauer garantieren. Unter bestimmten Bedingungen, z.B. nach einer sehr langen UVBestrahlung und/oder einem starken Abrieb oder Kontakt mit chemischen Substanzen, muss jedoch unbedingt eine Kontrolle deines Gurtzeuges in einer zugelassenen Werkstatt in Betracht gezogen werden.
  • Seite 172: Reparatur

    Alle unsere Materialien werden aufgrund ihrer hervorragenden technischen und ökologischen Eigenschaften ausgewählt. Keine der in unseren Gurtzeugen enthaltenen Komponenten sind umweltschädlich. Viele unserer Komponenten sind recycelbar. Wenn du der Meinung bist, dass dein DELIGHT 4 SPORT ausgedient hat, kannst du alle Metall- und Kunststoffteile trennen und die in deinem Land geltenden Müllsortiervorschriften befolgen.
  • Seite 173: Garantie

    Betriebshandbuch Gurtzeuge | DELIGHT 4 SPORT GARANTIE “SUP’AIR achtet besonders auf die Entwicklung und Produktion seiner Produkte. SUP’AIR gibt 5 Jahre (vom Verkaufsdatum) Garantie auf seine Produkte, sei es wegen irgendwelchen Defekten oder Konstruktionsfehlern, die unter normalem Gebrauch auftreten. Bei irgendeinem unsachgemäßen Gebrauch, starker Abnutzung oder abnormaler Aussetzung/bei überdurchschnittlich hoher Aussetzung schädlicher Faktoren wie z.B.
  • Seite 174: Bumpair Delight 4 Sport Schock-Absorbierer

    Betriebshandbuch Gurtzeuge | DELIGHT 4 SPORT BUMPAIR DELIGHT 4 SPORT Schock-Absorbierer Der von Dir erworbene Gurt verfügt über ein Schock-Absorptions-System / Protektor vom Typ BUMPAIR. Es entspricht den EU-Richtlinien 2016/425 für persönliche Schutzausrüstung (PSA) Und durch Experten bestätigt durch folgendes Protokoll CRITT-SP SL-003 09/2021.
  • Seite 175 Lagere den Schutz an einem trockenen und belüfteten Ort, bei Raumtemperatur und unkomprimiert. Es sollte nur mit Wasser gereinigt werden. Si votre amortisseur de choc est endommagé, faites-le expertiser et réparer par un professionnel ou contactez-nous à sav@supair.com. Les rapports de test et la déclaration UE de conformité sont disponibles à l’adresse: www.supair.com •...
  • Seite 176: Im Falle Eines Zwischenfalls

    Betriebshandbuch Gurtzeuge | DELIGHT 4 SPORT IM FALLE EINES ZWISCHENFALLS Kommunikation bei einem Unfall Notrufnummern EUROPE / INDIA Hilfe benötigt? USA / CANADA CHINA / JAPAN NEPAL IRAN AUSTRALIA NEW ZEALAND SOS-Signal : Revisiondatum: V1 25/08/2022 SUPAIR | DELIGHT 4 SPORT| Seite 54...
  • Seite 177: Service Heft

    Name der Werkstatt / Name des Käufers: Name der Werkstatt / Name des Käufers: fers: Wartung Wartung Wiederverkauf Wiederverkauf Datum Datum Name der Werkstatt / Name des Käufers: Name der Werkstatt / Name des Käufers: Revisiondatum: V1 25/08/2022 SUPAIR | DELIGHT 4 SPORT| Seite 55...
  • Seite 178: Anhang

    Betriebshandbuch Gurtzeuge | DELIGHT 4 SPORT ANHANG ANHANG BEDIENUNGSANLEITUNG COBRA® KOMPONENTEN BENENNUNG DER TEILE BENENNUNG DER TEILE COBRA® Quick Release (Abb. 1) COBRA® Quick Release (Abb. 1) Die COBRA® Komponenten von AUSTRIALPIN sind zur Verwendung (1) Körper bestehend aus (a) weiblichem Teil (b) männlichem Teil; (2) in Produkten der Absturzsicherung, Persönliche Schutzausrüstung...
  • Seite 179 Betriebshandbuch Gurtzeuge | DELIGHT 4 SPORT ANHANG ANHANG MATERIALIEN b) Nur bei COBRA® Komponenten mit Verstell-/ Mittelsteg: Achten Körper: Aluminium Sie darauf, dass das Gurtband richtig durch den Verstellmechanismus Nieten, Verstellsteg, intergrierter D-Ring: Edelstahl gefädelt wird und stellen Sie sicher, dass ein nicht korrektes Einfädeln.
  • Seite 180 Betriebshandbuch Gurtzeuge | DELIGHT 4 SPORT ANHANG ANHANG Dokumentieren Sie das Datum der Erstbenutzung. Sollten Produkte von mehreren Personen verwendet werden, empfehlen wir eine systematische Außergewöhnliche Umstände können die Lebensdauer der COBRA® Überprüfung und Dokumentation vor und nach jedem Einsatz.
  • Seite 181 Betriebshandbuch Gurtzeuge | DELIGHT 4 SPORT ANHANG ANHANG ÄNDERUNGEN UND REPARATUREN Wenn Originalbestandteile der COBRA® Komponenten verändert oder entfernt werden, können die Sicherheitseigenschaften dadurch eingeschränkt werden. AUFBEWAHRUNG, TRANSPORT UND WARTUNG Lagern Sie Ihre Ausrüstung trocken und vor Tageslicht geschützt in normaler Umgebungstemperatur (-10 °C bis +30 °C), ohne echanische...
  • Seite 182 Betriebshandbuch Gurtzeuge | DELIGHT 4 SPORT Revisiondatum: V1 25/08/2022 SUPAIR | DELIGHT 4 SPORT| Seite 60...
  • Seite 183 SUPAIR s.a.s Parc Altaïs 34 rue Adrastée 74650 Chavanod, Annecy FRANCE www.supair.com info@supair.com +334 50 45 75 29 RCS ANNECY 387956790...

Inhaltsverzeichnis