Herunterladen Inhalt Inhalt Diese Seite drucken
Emerson AVENTICS ST4-2P Betriebsanleitung

Emerson AVENTICS ST4-2P Betriebsanleitung

Sensor mit und ohne i/o-link
Inhaltsverzeichnis

Werbung

Verfügbare Sprachen
  • DE

Verfügbare Sprachen

  • DEUTSCH, seite 1
Betriebsanleitung | Operating instructions | Notice d'instruction
Istruzioni per l'uso | Instrucciones de servicio | Bruksanvisning | Инструкция по
эксплуатации
R412012414-BAL-001-AF
2022-03; Replaces: 2016-09
DE/EN/FR/IT/ES/SV/RU
AVENTICS™ ST4-2P
Sensor mit und ohne I/O-Link
Sensor with and without IO-Link
Capteur avec et sans lien E/S
Sensore con e senza I/O-Link
Sensor con y sin enlace E/S
Sensor med och utan I/U-länk
Датчик с I/O-Link и без I/O-Link

Werbung

Inhaltsverzeichnis
loading

Inhaltszusammenfassung für Emerson AVENTICS ST4-2P

  • Seite 1 Betriebsanleitung | Operating instructions | Notice d’instruction Istruzioni per l'uso | Instrucciones de servicio | Bruksanvisning | Инструкция по эксплуатации R412012414-BAL-001-AF 2022-03; Replaces: 2016-09 DE/EN/FR/IT/ES/SV/RU AVENTICS™ ST4-2P Sensor mit und ohne I/O-Link Sensor with and without IO-Link Capteur avec et sans lien E/S Sensore con e senza I/O-Link Sensor con y sin enlace E/S Sensor med och utan I/U-länk...
  • Seite 2: Inhaltsverzeichnis

    Inhaltsverzeichnis Zu dieser Anleitung ........................................... Weiterführende Dokumentation....................................... Zu Ihrer Sicherheit ..........................................Bestimmungsgemäßer Gebrauch ..................................... Nicht bestimmungsgemäßer Gebrauch .................................... Qualifikation des Personals ....................................... Darstellung von Informationen ......................................2.4.1 Warnhinweise ........................................2.4.2 Symbole..........................................Das müssen Sie beachten........................................2.5.1 Allgemeine Hinweise:......................................2.5.2 Bei der Montage: ........................................ 2.5.3 Während des Betriebs: .......................................
  • Seite 3: Zu Dieser Anleitung

    Bedeutung der Signalwörter 1 Zu dieser Anleitung WARNUNG Die Anleitung enthält wichtige Informationen, um den Sensor ST4-2P sicher und sachgerecht zu installieren und zu bedienen. Möglicherweise drohende Gefahr für das Leben und die Gesundheit von Perso- Lesen Sie diese Anleitung vollständig, bevor Sie mit dem Sensor ST4-2P arbei- nen.
  • Seite 4: Montage Und Inbetriebnahme

    Drehmodul, Serie RCM 5 Montage und Inbetriebnahme WARNUNG Verletzungsgefahr durch Montage unter Druck! Wenn Sie den Druck vor Montagebeginn nicht abschalten, können Sie sich ver- letzen und das Gerät oder Anlagenteile beschädigen. Schalten Sie den relevanten Anlagenteil drucklos, bevor Sie das Produkt Die Hubmitte (X) wird gemessen ab dem Abschlussdeckel.
  • Seite 5: Schaltpunkte Speichern

    LED 1 blinkt. 5.3 Schaltpunkte speichern Teach-Taster loslassen. 1. Schaltpunkt ist gespeichert, LED 2 blinkt (für 2. Schaltpunkt). Legen Sie die zweite Kolbenposition für den Arbeitshub (2. Schaltpunkt) fest Drücken Sie den Teach-Taster 1 s lang (B). Der 2. Schaltpunkt ist gespeichert. Wenn sich der Schaltpunkt außerhalb des Detektionsbereichs des Sen- sors befindet, wird der Einlernvorgang abgebrochen.
  • Seite 6: Direkte Parameter-Seite

    Bit 7 ... 2: reserviert 9 Technische Daten Bit 1 ... 0: 0 = inaktiv, 1 = aktiv Messbereich 0 … 50 mm Elektrische Ausführung DC 4 (Leiter) 8.3 Direkte Parameter-Seite Versorgungsspannung DC 12 … 30 V Hersteller ID 001F hex Restwelligkeit ≤ 10 % Produkt ID ST4-2P 0021505 (Bezogen auf die Betriebsspannung) Spannungsabfall ≤ 2,2 V 8.4 Servicedaten (I/O-Link)
  • Seite 7: Abmessungen

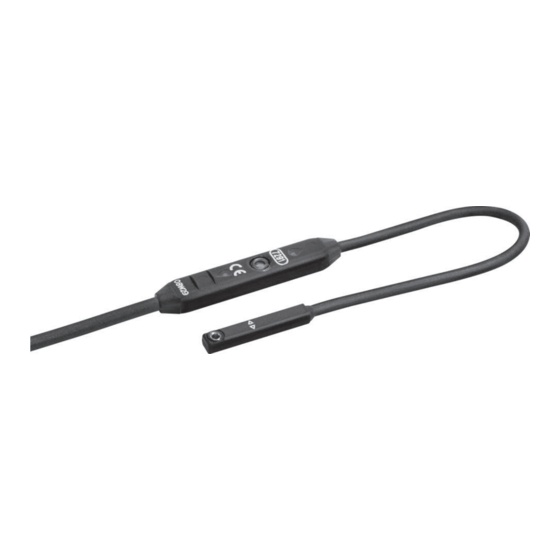
    Abmessungen 19,5 2,95 LED 2/Out 2 LED 1/Out 1 47,5 Abb. 5: Abmessungen 4 x 0,14 mm Abb. 6: Anschluss freie Aderenden Aderfarbe, siehe g Tab. 5. AVENTICS™ ST4-2P | R412012414-BAL-001-AF | Deutsch...
  • Seite 8 Contents About this document......................................... Related documents........................................... For your safety........................................... Intended use ............................................. Improper use ............................................ Personnel qualifications ........................................Presentation of information ......................................2.4.1 Warnings..........................................2.4.2 Symbols ..........................................The following must be observed: ...................................... 2.5.1 General information ......................................2.5.2 During assembly: ....................................... 2.5.3 During operation:.......................................
  • Seite 9: About This Document

    1 About this document CAUTION These instructions contain important information on the safe and appropriate in- Possible dangerous situation. stallation and operation of the ST4-2P sensor. Failure to observe these notices may result in minor injuries or damage to Read these instructions completely before working with the ST4-2P sensor. property.
  • Seite 10: Mechanically Adjusting The St4-2P Sensor

    RCM variants Stroke center (X) in mm 35.5 38.5 82.5 5.2 Electronically adjusting the ST4-2P sensor 1. Set your handling device to the center of the working stroke. 2. Connect the sensor to a suitable operating voltage. See g 9. Key technical data.
  • Seite 11: Storing Switching Points

    Release the teach-in button. 5.3 Storing switching points Switching point 1 is stored. LED 2 will flash (for switching point 2). Set the second piston position for the working stroke (switching point 2) (B). Press and hold the teach-in button for 1 second (B). Switching point 2 is stored.
  • Seite 12: Direct Parameter Page

    Bit 7 ... 2: reserved 9 Key technical data Bit 1 ... 0: 0 = inactive, 1 = active Measuring range 0 … 50 mm Electrical version DC 4 (wire) 8.3 Direct parameter page Supply voltage DC 12 … 30 V Manufacturer ID 001F hex Residual ripple ≤ 10 % Product ID ST4-2P 0021505 (Based on the operating voltage) Voltage drop ≤ 2.2 V...
  • Seite 13 Dimensions 19,5 2,95 LED 2/Out 2 LED 1/Out 1 47,5 Fig. 5: Dimensions 4 x 0,14 mm Fig. 6: Port with free wire ends Wire color, see g Table 5. AVENTICS™ ST4-2P | R412012414-BAL-001-AF | English...
  • Seite 14 Sommaire À propos de cette notice ........................................Documentation supplémentaire ....................................... Pour votre sécurité ..........................................Utilisation conforme ......................................... Utilisation non conforme ........................................Qualification du personnel ........................................ Présentation des informations ......................................2.4.1 Mises en garde ........................................2.4.2 Symboles ........................................... À respecter............................................2.5.1 Remarques générales : .......................................
  • Seite 15: Propos De Cette Notice

    Signification des mots-clés 1 À propos de cette notice AVERTISSEMENT Cette notice contient des informations importantes pour installer et utiliser le capteur ST4-2P de manière sûre et conforme. Danger potentiellement imminent menaçant la vie et la santé de personnes. Lire la présente notice avant de travailler avec le capteur ST4-2P. Voir égale- Le non-respect de ces consignes peut entraîner de lourdes répercussions sur la ment en particulier g 2. Pour votre...
  • Seite 16: Montage Et Mise En Service

    5 Montage et mise en service Course 10  20  30  40  50  AVERTISSEMENT Module rotatif, série RCM Risque de blessure dû à un montage sous pression ! Si la pression n’est pas coupée avant d’entamer le montage, il existe un risque de blessures et d’endommagement de l’appareil ou de certaines parties de l’installation.
  • Seite 17: Enregistrement Des Points De Commutation

    4. Maintenir la touche d’apprentissage enfoncée pendant 3 s (A). 5.3 Enregistrement des points de commutation La LED 1 clignote. Relâcher la touche d’apprentissage. Le 1er point de commutation est mémorisé, la LED 2 clignote (pour le 2e point de commutation). Déterminer la deuxième position du piston pour la course de service (2e point de commutation) (B) Maintenir la touche d’apprentissage enfoncée pendant 1 s (B).
  • Seite 18: Page De Paramètres Directe

    Tab. 4: Données d'événement Bit 7 Bit 6 Bit 5 Bit 4 Bit 3 Bit 2 Meaning Mode Type Instance Error code Bit 1 Bit 0 Parameter chan- Once Info Application 0xFF10 Bit 7 ... 2 : réservé Communication Once Error Unknown 0xFF10 Bit 1 ... 0 : 0 = inactif, 1 = actif error 8.3 Page de paramètres directe ID fabricant 001F hex 9 Données techniques...
  • Seite 19 Dimensions 19,5 2,95 LED 2/Out 2 LED 1/Out 1 47,5 Fig. 5: Dimensions 4 x 0,14 mm Fig. 6: Raccord avec extrémités de fils libres Couleur de fil, voir g Tab. 5. AVENTICS™ ST4-2P | R412012414-BAL-001-AF | Français...
  • Seite 20 Indice Spiegazione delle istruzioni ....................................... Ulteriore documentazione ........................................ Per la vostra sicurezza........................................Utilizzo a norma ..........................................Utilizzo non a norma ......................................... Qualifica del personale ........................................Presentazione delle informazioni ...................................... 2.4.1 Avvertenze di sicurezza ...................................... 2.4.2 Simboli..........................................Cosa bisogna osservare ........................................2.5.1 Indicazioni generali: ......................................
  • Seite 21: Ulteriore Documentazione

    1 Spiegazione delle istruzioni ATTENZIONE Queste istruzioni contengono informazioni importanti per installare ed azionare il Situazione potenzialmente pericolosa. sensore ST4-2P nel rispetto delle norme e della sicurezza. La non osservanza di queste avvertenze può avere come conseguenze lievi le- Leggere attentamente queste istruzioni in ogni parte prima di adoperare il sioni personali o danni materiali.
  • Seite 22: Montaggio E Messa In Funzione

    Modulo di rotazione, serie RCM 5 Montaggio e messa in funzione AVVERTENZA Pericolo di lesioni dovuto al montaggio in pressione! Se prima di cominciare il montaggio la pressione non viene disattivata, sussiste pericolo di lesioni e di danni all’apparecchio o alle parti dell’impianto. Togliere l’alimentazione pneumatica dalla parte rilevante dell’impianto pri- Il centro della corsa (X) viene misurato a partire dal coperchio terminale.
  • Seite 23: Cura E Manutenzione

    4. Premere il pulsante Teach per 3 s (A). 5.3 Memorizzare i punti di commutazione Il LED 1 lampeggia. Rilasciare il pulsante Teach. Il 1° punto di commutazione è memorizzato, il LED 2 lampeggia (per il 2° punto di commutazione). Stabilire la seconda posizione del pistone per la corsa utile (2° punto di com- mutazione) (B) Premere il pulsante Teach per 1 s (B).
  • Seite 24: Dati Tecnici

    Tab. 4: Event data Bit 7 Bit 6 Bit 5 Bit 4 Bit 3 Bit 2 Meaning Mode Tipo Instance Error code Bit 1 Bit 0 Parameter chan- Once Info Application 0xFF10 Bit 7 ... 2: riservato Communication Once Error Unknown 0xFF10 Bit 1 ... 0: 0 = inattivo, 1 = attivo error 8.3 Pagina dei parametri diretti ID produttore...
  • Seite 25 Dimensioni 19,5 2,95 LED 2/Out 2 LED 1/Out 1 47,5 Fig. 5: Dimensioni 4 x 0,14 mm Fig. 6: Collegamento terminali dei conduttori liberi Colore filo, ved g Tab. 5. AVENTICS™ ST4-2P | R412012414-BAL-001-AF | Italiano...
  • Seite 26 Índice Acerca de estas instrucciones ......................................Documentación adicional ......................................... Para su seguridad ..........................................Utilización conforme a las especificaciones ..................................Utilización no conforme a las especificaciones .................................. Cualificación del personal........................................Presentación de la información ......................................2.4.1 Indicaciones de advertencia ....................................2.4.2 Símbolos ..........................................
  • Seite 27: Acerca De Estas Instrucciones

    Significado de las palabras de aviso 1 Acerca de estas instrucciones ADVERTENCIA Estas instrucciones contienen información importante para instalar y utilizar el sensor ST4-2P de un modo seguro y apropiado. Peligro posible para la vida y la salud de las personas. Por tanto, lea estas instrucciones por completo antes de trabajar con el sensor El incumplimiento de este aviso puede tener consecuencias graves para la sa- ST4-2P.
  • Seite 28: Montaje Y Puesta En Servicio

    Módulo giratorio de la serie RCM 5 Montaje y puesta en servicio ADVERTENCIA Peligro de lesiones durante el montaje bajo presión. Si no desconecta la presión antes de iniciar el montaje, puede lesionarse a sí mismo o dañar el aparato o piezas de la instalación. Desconecte siempre la presión de todas las piezas de la instalación relevan- El centro de la carrera (X) se mide a partir de la tapa de cierre.
  • Seite 29: Cuidado Y Mantenimiento

    El LED 1 parpadea. 5.3 Memorizar puntos de conmutación Suelte la tecla Teach. El 1.er punto de conmutación está guardado, el LED 2 parpadea (para el 2.º punto de conmutación). Determine la segunda posición de émbolo para la carrera de trabajo (2.º pun- to de conmutación) (B) Pulse la tecla Teach durante 1 s (B).
  • Seite 30: Datos Técnicos

    Tab. 4: Event data Bit 7 Bit 6 Bit 5 Bit 4 Bit 3 Bit 2 Meaning Mode Type Instance Error code Bit 1 Bit 0 Parameter chan- Once Información Application 0xFF10 Bit 7 ... 2: reservado Communication Once Error Unknown 0xFF10 Bit 1 ... 0: 0 = inactivo, 1 = activo error 8.3 Página de parámetros directos ID del fabricante...
  • Seite 31 Dimensiones 19,5 2,95 LED 2/Out 2 LED 1/Out 1 47,5 Fig. 5: Dimensiones 4 x 0,14 mm Fig. 6: Conexión con extremos de conductor libres Color del cable, véase g Tab. 5. AVENTICS™ ST4-2P | R412012414-BAL-001-AF | Español...
  • Seite 32 Innehåll Om denna bruksanvisning ......................................... Övrig dokumentation........................................Säkerhetsanvisningar ........................................Tillåten användning .......................................... Ej tillåten användning........................................Personalens kvalifikationer........................................ Återgivning av information ....................................... 2.4.1 Varningsinformation ......................................2.4.2 Symboler..........................................Detta ska observeras......................................... 2.5.1 Allmän information: ......................................2.5.2 Vid montering: ........................................2.5.3 Under drift: ........................................Beskrivning av apparaten ........................................
  • Seite 33: Om Denna Bruksanvisning

    1 Om denna bruksanvisning SE UPP Denna bruksanvisning innehåller viktig information om hur man installerar och Eventuellt farlig situation. använder sensorn ST4-2P säkert och fackmannamässigt. Underlåtenhet att följa dessa instruktioner kan leda till mindre personskador Läs igenom hela bruksanvisningen innan du börjar arbeta med sensorn eller sakskador.
  • Seite 34: Mekanisk Justering Av Sensor St4-2P

    RCM-varianter Slaglängdscentrum (X) i mm 35,5 38,5 82,5 5.2 Elektronisk justering av sensor ST4-2P 1. Ställ in hanteringsutrustningen på mitten av arbetsslaget. 2. Se till att sensorn har lämplig driftspänning. Se g 9. Tekniska data. Sensorn måste kopplas till utanför påverkande magnetfält. 3.
  • Seite 35: Spara Kopplingspunkterna

    Släpp upp Teach-knappen. 5.3 Spara kopplingspunkterna 1:a kopplingspunkten är lagrad, LED 2 blinkar (för den 2:a kopplingspunkten). Fastställ den andra kolvpositionen för arbetsslaget (2:a kopplingspunkten) (B) Håll Teach-knappen nedtryckt i 1 sek (B). 2:a kopplingspunkten är lagrad. Om kopplingspunkten ligger utanför sensorns detektionsområde, avbryts programmeringsproceduren.
  • Seite 36: Direkt Parametersida

    9 Tekniska data 8.3 Direkt parametersida Mätområde 0 … 50 mm Tillverkar-ID 001F hex Produkt-ID ST4-2P 0021505 Elektriskt utförande DC 4 (ledare) Matningsspänning DC 12 … 30 V 8.4 Servicedata (I/U-länk) Rippel ≤ 10 % (Relaterad till driftspänningen) Tab. 1: SPDU-index Spänningsfall ≤ 2,2 V Index Meaning Format Access Example Range Remark Strömförbrukning (ej manövrerad) ≤ 15 mA Bytes...
  • Seite 37 Mått 19,5 2,95 LED 2/Out 2 LED 1/Out 1 47,5 Bild 5: Mått 4 x 0,14 mm Bild 6: Anslutning fria trådändar Trådfärg, se g Tab. 5. AVENTICS™ ST4-2P | R412012414-BAL-001-AF | Svenska...
  • Seite 38 Оглавление О данном руководстве ........................................Дополнительная документация ....................................Для вашей безопасности ....................................... Применение по назначению....................................... Использование не по назначению..................................... Квалификация персонала ......................................Отображение информации ......................................2.4.1 Предупреждающие указания ..................................2.4.2 Условные обозначения ....................................Пожалуйста, учитывайте следующее: ..................................2.5.1 Общие указания: ......................................2.5.2 Во...
  • Seite 39: Применение По Назначению

    Структура предупреждений 1 О данном руководстве СИГНАЛЬНОЕ СЛОВО Данное руководство содержит важную информацию о безопасной и правильной установке и эксплуатации датчика ST4-2P. Тип и источник опасности Полностью прочтите данное руководство перед началом работы с Последствия несоблюдения датчиком ST4-2P. Особенно внимательно ознакомьтесь также с со- держанием...
  • Seite 40: Описание Устройства

    Мини-ползун, серия MSC 3 Описание устройства Датчик ST4-2P – это магнитный датчик положения с двумя точками переключения. Он служит для определения конечного положения, а также для распознавания промежуточных положений пневматиче- ских цилиндров. Датчик ST4-2P определяет положения бесконтактно. Точки переключения могут быть точно установлены для любых поло- жений...
  • Seite 41: Уход И Техническое Обслуживание

    3. Установите первое положение поршня для рабочего хода (1-я точ- 5.3 Сохранение точек переключения ка переключения). 4. Нажмите и удерживайте кнопку обучения (Teach) в течение 3 с (A). Светодиод 1 мигает. Отпустите клавишу обучения (Teach). 1-я точка переключения сохранена, светодиод 2 мигает (для 2-й точки переключения). Установите...
  • Seite 42: Технические Характеристики

    Index Subindex 8.2 Данные процесса 0x8023 Access denied Датчики с технологией I/O-Link имеют 2-битные данные процесса в 0x8030 Parameter value out of бит 0 и бит 1. range Доступ Данные Тип данных По умолчанию Табл. 4: Event data 1 байт UINT8 Meaning Mode Type Instance Error code Parameter...
  • Seite 43 Размеры 19,5 2,95 LED 2/Out 2 LED 1/Out 1 47,5 Рис. 5: Размеры 4 x 0,14 mm Рис. 6: Подключение свободных концов жил Цвет жилы, см. g Табл. 5. AVENTICS™ ST4-2P | R412012414-BAL-001-AF | Русский...
  • Seite 44 The Emerson logo is a trademark and service mark of Emerson Electric Co. AVENTICS is a mark Further addresses: of one of the Emerson Automation Solutions family of business units. All other marks are pro- www.emerson.com/contactus...

Inhaltsverzeichnis