Herunterladen Inhalt Inhalt Diese Seite drucken

Werbung

Verfügbare Sprachen
  • DE

Verfügbare Sprachen

  • DEUTSCH, seite 1
PURISTA
Dunstabzugshaube
Range Hood
Campana extractora
Hotte aspirante
Cappa aspirante
10030001
www.klarstein.com

Werbung

Inhaltsverzeichnis
loading

Inhaltszusammenfassung für Klarstein PURISTA

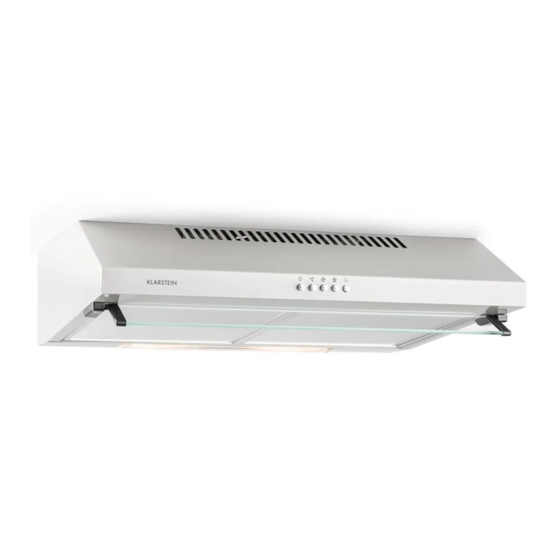
  • Seite 1 PURISTA Dunstabzugshaube Range Hood Campana extractora Hotte aspirante Cappa aspirante 10030001 www.klarstein.com...
  • Seite 3: Inhaltsverzeichnis

    Sehr geehrter Kunde, wir gratulieren Ihnen zum Erwerb Ihres Gerätes. Lesen Sie die folgenden Hinweise sorgfältig durch und befolgen Sie diese, um möglichen Schäden vorzubeugen. Für Schäden, die durch Missachtung der Hinweise und unsachgemäßen Gebrauch entstehen, übernehmen wir keine Haftung. Scannen Sie den folgenden QR-Code, um Zugriff auf die aktuellste Bedienungsanleitung und weitere Informationen rund um das Produkt zu erhalten.
  • Seite 4: Sicherheitshinweise

    SICHERHEITSHINWEISE • Lesen Sie sich alle Hinweise vor der Benutzung sorgfältig durch und bewahren Sie die Bedienungsanleitung zum späteren Nachschlagen gut auf. • Die Montagearbeiten dürfen nur von einer Elektrofachkraft oder einer qualifizierten Person durchgeführt werden. Bevor Sie die Dunstabzugshaube verwenden, stellen Sie sicher, dass die Spannung (V) und die auf der Dunstabzugshaube angegebene Frequenz (Hz) der Spannung und Frequenz der Stromversorgung in Ihrem Haushalt entsprechen.
  • Seite 5 Wichtige Hinweise zum Abluftbetrieb WARNUNG Vergiftungsgefahr durch zurückgesaugte Abgase! Betreiben Sie das Gerät nicht im Abluftbetrieb, wenn es zusammen mit einer raumluftabhängigen Feuerstätte betrieben wird und keine ausreichende Luftzirkulation garantiert wird. Raumluftabhängige Feuerstätten wie Gas-, Öl-, Holz- oder Kohleheizungen, Boiler oder Durchlauferhitzer beziehen die Luft aus dem Raum und führen sie durch ein Abluftrohr oder einen Kamin ins Freie.
  • Seite 6 Installation mit Abluft Hinweis: Beachten Sie die Sicherheitshinweise zur Bedienung des Gerätes, wenn die Luft nach außen abgeführt wird. Wenn die Dunstabzugshaube gleichzeitig mit einem Gerät in Betrieb ist, das seine Energie aus einer anderen Quelle als Strom bezieht, darf der Unterdruck im Raum 4 Pa nicht übersteigen (4 x 10⁻⁵ Bar).
  • Seite 7: Wandmontage

    WANDMONTAGE Die Dunstabzugshaube muss einen Abstand von 65-70 cm über dem Kochfeld haben, um die beste Wirkung zu entfalten. Zeichnen Sie an der Wand 2 Löcher an, die denselben Abstand der Löcher auf der Rückseite der Dunst- abzugshaube haben. Bohren Sie zur Wandmontage an einen geeigneten Ort 4 Löcher mit einem Durchmesser von 8 mm.
  • Seite 8: Unterbaumontage

    UNTERBAUMONTAGE Bohren Sie auf der Unterseite des Hängeschranks 4 Löcher mit 6 mm Durchmesser. Führen Sie das Einwegventil in den Luftauslass der Dunstabzugshaube ein. Montieren Sie die Dunstabzugs- haube unter den Hängeschrank. Befestigen Sie die Haube mit den 4 beiliegenden Schrauben. Montieren Sie das zugeschnittene Regal hinter die Dunstabzugshaube, um die Lücke zwischen der Rückseite der Haube und dem Schrank zu schließen.
  • Seite 9: Vertikale Und Horizontale Umluft

    VERTIKALE UND HORIZONTALE UMLUFT Es gibt zwei Möglichkeiten der Ventilation: die horizontale und die vertikale. Achten Sie bei der Montage auf die Art der Ventilation. • Horizontale Ventilation: Verwenden Sie die Abdeckung, um den Auslass oben zu verdecken. Dann kann die Luft hinten entweichen. •...
  • Seite 10: Bedienfeld

    BEDIENFELD Schalten Sie mit diesem Knopf die Lüftung aus. Verwenden Sie die niedrige Stufe zum Durchlüften Ventilator niedrige der Küche. Sie eignet sich zum Köcheln und Kochen Stufe ohne viel Dampf. Erneut drücken, um das Gebläse auszuschalten. Ventilator mittlere Die mittlere Stufe ist ideal für das normale Kochen. Stufe Erneut drücken, um das Gebläse auszuschalten.
  • Seite 11: Reinigung Und Wartung

    REINIGUNG UND WARTUNG Reinigung des Filtergitters. • Entfernen Sie das Gitter wie im Bild unten. • Methode 1: Legen Sie das Gitter in für 3 Minuten in warmes Wasser von 40-50 °C. Geben Sie ein Reinigungsmittel hinzu und lassen Sie das Gitter 2-3 Minuten einweichen.
  • Seite 12: Produktdatenblatt

    PRODUKTDATENBLATT Angaben nach Verordnung (EU) Nr. 65/2014 Mess- und Berechnungsmethoden nach EN 61591:1997+A1:2006+A2:2011+A11:20 14+A12:2015 Artikelnummer 10030001 Bezeichnung Symbol Wert Einheit Jährlicher Energieverbrauch AEC hood 30,6 kWh/Jahr Energieeffizienzklasse Fluiddynamische Effizienz FDE hood Klasse für die fluiddynamische Effizienz Beleuchtungseffizienz LE hood Lux/W Beleuchtungseffizienzklasse Fettabscheidegrad GFE hood...
  • Seite 13 Angaben nach Verordnung (EU) Nr. 66/2014 Mess- und Berechnungsmethoden nach EN 61591:1997+A1:2006+A2:2011+A11:20 14+A12:2015 Artikelnummer 10030001 Bezeichnung Symbol Wert Einheit Jährlicher Energieverbrauch AEC hood 30,6 kWh/Jahr Zeitverlängerungsfaktor Fluiddynamische Effizienz FDE hood Energieeffizienzindex EEI hood 72,3 Gemessener Luftvolumenstrom Q BEP 74,4 m³/h im Bestpunkt Gemessener Luftdruck im P BEP...
  • Seite 14: Hinweise Zum Umweltschutz

    HINWEISE ZUM UMWELTSCHUTZ • Achten Sie während des Kochens auf eine ausreichende Luftzufuhr, damit die Dunstabzugshaube effizient und mit einem geringen Betriebsgeräusch arbeiten kann. • Passen Sie die Gebläsedrehzahl an die beim Kochen entstehende Dampfmenge an. Verwenden Sie den Intensivmodus nur bei Bedarf. Je niedriger die Gebläsedrehzahl ist, desto weniger Energie wird verbraucht.
  • Seite 15: Technical Data

    Dear Customer, Congratulations on purchasing this device. Please read the following instructions carefully and follow them to prevent possible damages. We assume no liability for damage caused by disregard of the instructions and improper use. Scan the QR code to get access to the latest user manual and more product information.
  • Seite 16: Safety Instructions

    SAFETY INSTRUCTIONS • Thank you for purchasing this cooker hood. Please read the instruction manual carefully before you use the cooker hood, and keep it in a safe place. • The installation work must be carried out by a qualified electrician or competent person.
  • Seite 17 Important notes about the extraction mode WARNING Risk of poisoning from exhaust gases sucked back. Never operate the device in extraction mode simultaneously with an open fl ue appliance when there is not adequate airfl ow guaranteed. Open fl ue combustion equipment (for example, gas, oil, wood or coal-fi red heaters, tankless water heaters, water heaters) pulls combustion air from the room and runs it through an exhaust pipe or chimney to the outside.
  • Seite 18 Important notes about the extraction mode WARNING Risk of poisoning from exhaust gases sucked back. Never operate the device in extraction mode simultaneously with an open fl ue appliance when there is not adequate airfl ow guaranteed. Open fl ue combustion equipment (for example, gas, oil, wood or coal-fi red heaters, tankless water heaters, water heaters) pulls combustion air from the room and runs it through an exhaust pipe or chimney to the outside.
  • Seite 19: Wall Mounting

    WALL MOUNTING The cooker hoods should be placed at a distance of 65-75cm from the cooking surface for best effect. To install onto the wall, drill 4 holes of Ø 8mm on a suitable place ac- cording with the centre distance of hole in the back of the cooker hood. Insert the nut into the holes Insert the screws into the nuts and tight.
  • Seite 20: Substructure

    SUBSTRUCTURE Drill 4 holes of Ø 6mm at the bottom of the hanging cupboard. Put the one way valve on the air outlet of cooker hood, then install the cooker hood on the bottom of the cupboard, tighten the cooker hood with enclosed 4 screws.
  • Seite 21: Vertical And Horizontal Indoor Ventilation

    VERTICAL AND HORIZONTAL INDOOR VENTILATION There are two ways of ventilation: horizontal and vertical. Pay attention to the type of ventilation when mounting. • Horizontal ventilation: use the cover to cover the outlet at the top. Then the air can escape at the back. •...
  • Seite 22: Control Panel

    CONTROL PANEL Turn off the ventilation with this button. Use the low level to ventilate the kitchen. It is Fan low level suitable for simmering and cooking without much steam. Press again to turn off the fan. Fan medium The medium level is ideal for normal cooking. Press speed again to turn off the blower.
  • Seite 23: Cleaning And Maintenance

    CLEANING AND MAINTENANCE Cleaning the filter grid. • Remove the grid as shown in the picture below. • Method 1: Place the grid in warm water of 40-50 °C for 3 minutes. Add a detergent and let the grid soak for 2-3 minutes. It is best to put on gloves and clean the grille with a soft brush.
  • Seite 24: Product Data Sheet

    PRODUCT DATA SHEET Information according to Regulation (EU) No. 65/2014 Measurement and calculation methods according to EN 61591:1997+A1:2006+A2:2 011+A11:2014+A12:2015 Item number 10030001 Description Symbol Value Unit Annual Energy Consumption AEC hood 30,6 kWh/Jahr Energy Efficiency class Fluid Dynamic Efficiency FDE hood Fluid Dynamic Efficiency class Lighting Efficiency LE hood...
  • Seite 25 Information according to Regulation (EU) No. 66/2014 Measurement and calculation methods according to EN 61591:1997+A1:2006+A2:2 011+A11:2014+A12:2015 Item number 10030001 Description Symbol Value Unit Annual Energy Consumption AEC hood 30,6 kWh/Jahr Time increase factor Fluid Dynamic Efficiency FDE hood Energy Efficiency Index EEI hood 72,3 Measured air flow rate at best...
  • Seite 26: Notes On Environmental Protection

    NOTES ON ENVIRONMENTAL PROTECTION • During cooking, make sure that there is sufficient air supply so that the cooker hood can operate efficiently and with low operating noise. • Adjust the fan speed to the amount of steam produced during cooking. Use the intensive mode only when necessary.
  • Seite 27 Estimado cliente, Le felicitamos por la adquisición de este producto. Lea atentamente las siguientes instrucciones y sígalas para evitar posibles daños. No asumimos ninguna responsabilidad por los daños causados por el incumplimiento de las instrucciones y el uso inadecuado. Escanee el siguiente código QR para obtener acceso a la última guía del usuario y más información sobre el producto.
  • Seite 28: Indicaciones De Seguridad

    INDICACIONES DE SEGURIDAD • Lea atentamente todas las indicaciones y conserve este manual para consultas posteriores. • Los trabajos de montaje deben ser realizados solamente por un electricista u otro profesional. Antes de utilizar la campana extractora, asegúrese de que la tensión (V) y la frecuencia indicada en la campana extractora (Hz) coinciden con la tensión (V) y frecuencia (Hz) de su suministro eléctrico.
  • Seite 29 Notas importantes acerca del modo de extracción ADVERTENCIA Peligro de muerte, riesgo de intoxicación provocado por gases en combustión aspirados. Nunca ponga en funcionamiento la función de extracción simultáneamente con un dispositivo que genere calor en una estancia estanca si no se ha garantizado una ventilación sufi ciente.
  • Seite 30 Instalación con ventilación exterior Nota: consulte las indicaciones de seguridad para utilizar el aparato si el aire se conduce hacia el exterior. Si la campana extractora se pone en funcionamiento al mismo tiempo que otro dispositivo desde la misma fuente de energía, la presión de la estancia no debe superar los 4 Pa (4 x 10 Bar).
  • Seite 31: Montaje En Pared

    MONTAJE EN PARED La campana extractora debe contar con una distancia de 65-70 cm con respecto a la superficie de cocción para conseguir un funcionamiento eficiente. Realice dos agujeros en la pared que se sitúen a la misma distancia que los orificios situados en la parte tra- sera de la campana extractora.
  • Seite 32: Montaje Bajo Mueble

    MONTAJE BAJO MUEBLE Perfore cuatro agujeros con 6 mm de diámetro en la parte inferior de un mueble de cocina. Introduzca la válvula desechable en la salida de aire de la campana extractora. Monte la campana extractora bajo el mueble. Fije la campana con los cuatro tornillos incluidos.
  • Seite 33: Ventilación Vertical Y Horizontal

    VENTILACIÓN VERTICAL Y HORIZONTAL Existen dos posibilidades de ventilación: la horizontal y la vertical. A la hora de montar el aparato, tenga en cuenta el tipo de ventilación. • • Ventilación horizontal: utilice la cubierta para cubrir la salida superior. Así el aire puede fluir hacia la parte trasera.
  • Seite 34: Funcionamiento

    FUNCIONAMIENTO Con este botón puede activar el ventilador. Utilice el nivel bajo de ventilación para ventilar Potencia de la cocina. Es apropiado para hervir sin crear ventilación baja demasiado vapor. Pulse de nuevo para apagar el ventilador. Potencia de ven- El nivel medio es ideal para una cocción normal.
  • Seite 35: Limpieza Y Mantenimiento

    LIMPIEZA Y MANTENIMIENTO Limpieza de la rejilla del filtro. • Retire la rejilla como se muestra en la ilustración inferior. • Método 1: sumerja la rejilla en agua tibia (40-50 °C) durante tres minutos. Añada limpiador y deje a remojo la rejilla durante 2-3 minutos. Utilice guantes y limpie la rejilla con un cepillo de cerdas blandas.
  • Seite 36: Ficha Técnica Del Producto

    FICHA TÉCNICA DEL PRODUCTO Información según el Reglamento (UE) nº 65/2014 Métodos de medición y cálculo según EN 61591:1997+A1:2006+A2:2011+A11:2014 +A12:2015 Número de artículo 10030001 Descripción Símbolo Valor Unidad Consumo anual de energía AEC hood 30,6 kWh/Jahr Clase de eficiencia energética eficiencia fluidodinámica FDE hood Clase de eficiencia fluidodinámica...
  • Seite 37 Datos según el Reglamento (UE) nº 66/2014 Métodos de medición y cálculo según EN 61591:1997+A1:2006+A2:2011+A11:2014 +A12:2015 Número de artículo 10030001 Descripción Símbolo Valor Unidad Consumo anual de energía AEC hood 30,6 kWh/Jahr Factor de extensión temporal eficiencia fluidodinámica FDE hood Índice de eficiencia energética EEI hood 72,3...
  • Seite 38: Notas Para Cuidar Del Medio Ambiente

    NOTAS PARA CUIDAR DEL MEDIO AMBIENTE • Durante la cocción, asegúrese de que haya un flujo de aire suficiente para que la campana extractora funcione eficazmente y con poco ruido de funcionamiento. • Ajuste la velocidad del ventilador a la cantidad de vapor producida durante la cocción.
  • Seite 39: Fiche Technique

    Chère cliente, cher client, Toutes nos félicitations pour l’acquisition de ce nouvel appareil. Veuillez lire attentivement et respecter les instructions de ce mode d’emploi afin d’éviter d’éventuels dommages. Nous ne saurions être tenus pour responsables des dommages dus au non-respect des consignes et à la mauvaise utilisation de l’appareil.
  • Seite 40: Consignes De Sécurité

    CONSIGNES DE SÉCURITÉ • Lisez attentivement toutes les consignes avant d’utiliser l’appareil et conservez ce mode d’emploi pour vous y référer ultérieurement. • Les travaux de montage doivent être effectués uniquement par électricien professionnel ou un spécialiste. Avant d‘utiliser la hotte aspirante, assurez- vous que la tension (V) et la fréquence indiquée sur la hotte aspirante (Hz) correspondent à...
  • Seite 41 Remarques importantes concernant le mode d‘extraction MISE EN GARDE Danger de mort, risques d‘intoxication ! Par la ré-aspiration de gaz de combustion. Ne jamais utiliser la fonction d’aspiration de l’appareil en même temps qu’un foyer dépendant de l’air ambiant si l’air frais est insuffi sant. Les foyers dépendants de l’air ambiant (par ex.
  • Seite 42 Installation avec évacuation extérieure de l’air Attention: respecter les consignes de sécurité pour l’utilisation de l’appareil avec évacuation extérieure de l’air. Si la hotte aspirante est utilisée simultanément avec un autre appareil qui tire son énergie d’une source autre qu’électrique, la dépression de la pièce ne doit pas excéder 4 Pa (4 x 10 Bar).
  • Seite 43: Montage Mural

    MONTAGE MURAL La hotte aspirante doit être montée 65-70 cm au-dessus de la cuisinière pour assurer une efficacité optimale. Marquer 2 trous au mur dont l’écart correspond à celui des trous situés à l’arrière de la hotte aspirante. Puis percer 4 trous d’un diamètre de 8 mm à un endroit adapté...
  • Seite 44: Montage Sous Meuble

    MONTAGE SOUS MEUBLE Percer 4 trous d’un diamètre de 6 mm dans la partie inférieure du placard. Introduire le clapet anti-retour dans la sortie d’air de la hotte aspirante. Monter la hotte aspirante sous le placard. Fixer la hotte avec les 4 vis fournies. Monter l’étagère découpée derrière la hotte aspirante pour fermer l’espace entre l’arrière de la hotte et le placard.
  • Seite 45: Ventilation Verticale Et Horizontale

    VENTILATION VERTICALE ET HORIZONTALE Il existe deux possibilités de ventilation : la verticale et l’horizontale. Faire attention au type de ventilation au moment du montage. • Ventilation verticale : utiliser le couvercle pour boucher la sortie du haut. L’air peut alors s’échapper à l’arrière. Ventilation horizontale : utiliser le couvercle pour boucher la sortie de l’arrière.
  • Seite 46: Panneau De Commande

    PANNEAU DE COMMANDE Éteindre la ventilation en appuyant sur cette ÉTEINT touche. Utiliser la vitesse faible pour aérer la cuisine. Elle Ventilateurt est adaptée pour la cuisson à feu doux ou sans trop vitesse faible de vapeur. Appuyer de nouveau pour éteindre le ventilateur.
  • Seite 47: Nettoyage Et Entretien

    NETTOYAGE ET ENTRETIEN Nettoyage de la grille du filtre • Retirer la grille comme illustré ci-dessous. • Méthode 1 : plonger la grille dans de l’eau chaude 40-50 °C pendant 3 minutes. Verser un produit nettoyant dans l’eau et laisser la grille tremper pendant 2-3 minutes.
  • Seite 48: Fiche De Données Produit

    FICHE DE DONNÉES PRODUIT Informations selon le règlement (UE) n ° 65/2014 Méthodes de mesure et de calcul selon EN 61591:1997+A1:2006+A2:2011+A11:20 14+A12:2015 Numéro d‘article 10030001 Description Symbole Valeur Unité Consommation annuelle AEC hood 30,6 kWh/Jahr d'énergie Classe d'efficacité énergétique Efficacité dynamique des fluides FDE hood Classe d'efficacité...
  • Seite 49 Informations selon le règlement (UE) n ° 66/2014 Méthodes de mesure et de calcul selon EN 61591:1997+A1:2006+A2:2011+A11:20 14+A12:2015 Numéro d‘article 10030001 Description Symbole Valeur Unité Consommation annuelle AEC hood 30,6 kWh/Jahr d'énergie Facteur d'extension de temps Efficacité dynamique des fluides FDE hood Indice d'efficacité...
  • Seite 50: Informations Sur La Protection De L'environnement

    INFORMATIONS SUR LA PROTECTION DE L‘ENVIRONNEMENT • Assurez-vous qu‘il y a une ventilation suffisante pendant la cuisson pour que la hotte aspirante puisse fonctionner efficacement et avec un faible niveau sonore. • Ajustez la vitesse du ventilateur à la quantité de vapeur produite pendant la cuisson.
  • Seite 51: Dati Tecnici

    Gentile cliente, La ringraziamo per aver acquistato il dispositivo. La preghiamo di leggere attentamente le seguenti istruzioni per l’uso e di seguirle per evitare possibili danni. Non ci assumiamo alcuna responsabilità per danni scaturiti da una mancata osservazione delle avvertenze di sicurezza e da un uso improprio del dispositivo.
  • Seite 52: Avvertenze Di Sicurezza

    AVVERTENZE DI SICUREZZA • Leggere attentamente tutte le istruzioni prima dell´uso e conservare il manuale per consultazioni future. • Il montaggio può essere eseguito solo da un tecnico qualificato. Prima di utilizzare la cappa aspirante, accertarsi che la tensione (V) e la frequenza (Hz) indicate corrispondano alla tensione (V) e alla frequenza (Hz) domestiche.
  • Seite 53 Note importanti circa la modalità di estrazione AVVERTENZA Pericolo di morte, pericolo di intossicazione da gas di scarico! Non azionare l´apparecchio con funzione di scarico mentre è attivo un impianto di riscaldamento che utilizza l´aria ambiente, se l´areazione non è suffi ciente. Gli impianti di riscaldamento che sfruttano l´aria ambiente (ad es.
  • Seite 54 Installazione con scarico all’esterno Nota: prestare attenzione alle avvertenze di sicurezza se si utilizza lo scarico all’esterno. Se la cappa aspirante è in funzione contemporaneamente con un altro dispositivi che trae energia da un’altra fonte di corrente, la depressione nella stanza non deve superare i 4 Pa (4 x 10 bar).
  • Seite 55: Montaggio Alla Parete

    MONTAGGIO ALLA PARETE Affinché la cappa aspirante funzio- ni al meglio, la distanza tra la cappa aspirante e il piano cottura deve es- sere di 65-70 cm. Segnare 2 fori da eseguire sulla pare- te che abbiano la stessa distanza dei fori sul retro della cappa aspirante.
  • Seite 56: Montaggio Sottopensile

    MONTAGGIO SOTTOPENSILE Eseguire 4 fori con 6 mm di diametro nella parte inferiore del pensile. Introdurre la valvola unidirezionale sull’uscita dell’aria della cappa aspirante. Montare la cappa aspirante sul fondo del pensile. Fissare la cappa utilizzando 4 viti incluse nella consegna. Montare sul fondo della cappa aspirante il ripiano tagliato in modo da riempire gli spazi vuoti tra la cappa aspirante e il pensile.
  • Seite 57: Ricircolo Aria Verticale E Orizzontale

    RICIRCOLO ARIA VERTICALE E ORIZZONTALE Ci sono due possibilità di ventilazione: orizzontale e verticale. Durante il montaggio, prestare attenzione al tipo di ventilazione. • Ventilazione orizzontale: utilizzare il coperchio per coprire l’uscita sulla parte superiore. Ora l’aria può fuoriuscire sul retro. •...
  • Seite 58: Pannello Dei Comandi

    PANNELLO DEI COMANDI Spegnere la ventola con questo tasto. Utilizzare il livello basso per arieggiare la cucina. Ventola Livello Questo livello è adatto per cucinare senza troppo basso vapore. Premere di nuovo per spegnere la ventola. Ventola Livello Il livello medio è ideale per cucinare normalmente. medio Premere di nuovo per spegnere la ventola.
  • Seite 59: Pulizia E Manutenzione

    PULIZIA E MANUTENZIONE Pulizia della griglia del filtro • Rimuovere la griglia come mostrato nella figura sottostante. • Metodo 1: mettere la griglia del filtro per 3 minuti in acqua calda a 40-50°C. Aggiungere un detergente e lasciare la griglia in ammollo per 2-3 minuti. Si consiglia di indossare dei guanti e di lavare la griglia con una spazzola morbida.
  • Seite 60: Scheda Dati Del Prodotto

    SCHEDA DATI DEL PRODOTTO Indicazioni conformi alla direttiva (UE) N° 65/2014 Metodi di misurazione e calcolo conformi a EN 61591:1997+A1:2006+A2:2011+A11: 2014+A12:2015 Numero articolo 10030001 Definizione Simbolo Valore Unità Consumo energetico annuale AEC hood 30,6 kWh/Jahr Classe di efficienza energetica Efficienza fluidodinamica FDE hood Classe di efficienza fluidodinamica...
  • Seite 61 Indicazioni conformi alla direttiva (UE) N° 66/2014 Metodi di misurazione e calcolo conformi a EN 61591:1997+A1:2006+A2:2011+A11: 2014+A12:2015 Numero articolo 10030001 Definizione Simbolo Valore Unità Consumo energetico annuale AEC hood 30,6 kWh/Jahr Fattore di incremento nel tempo Efficienza fluidodinamica FDE hood Indice di efficienza energetica EEI hood 72,3...
  • Seite 62: Indicazioni Per La Tutela Dell'ambiente

    INDICAZIONI PER LA TUTELA DELL’AMBIENTE • Mentre si cucina, assicurare un sufficiente flusso d’aria, in modo che la cappa aspirante possa funzionare in modo efficiente e con bassa rumorosità operativa. • Regolare la velocità della ventola in base alla quantità di vapore generato durante la cottura.

Diese Anleitung auch für:

10030001

Inhaltsverzeichnis