Herunterladen Inhalt Inhalt Diese Seite drucken
Klarstein 10011462 Bedienungsanleitung
Vorschau ausblenden Andere Handbücher für 10011462:

Werbung

Verfügbare Sprachen

Verfügbare Sprachen

Dunstabzugshaube
10008166
10011462
10026366
10011483
10026367
10011484
10026368
Zitruspresse orange
10008167
10008168

Werbung

Inhaltsverzeichnis
loading

Inhaltszusammenfassung für Klarstein 10011462

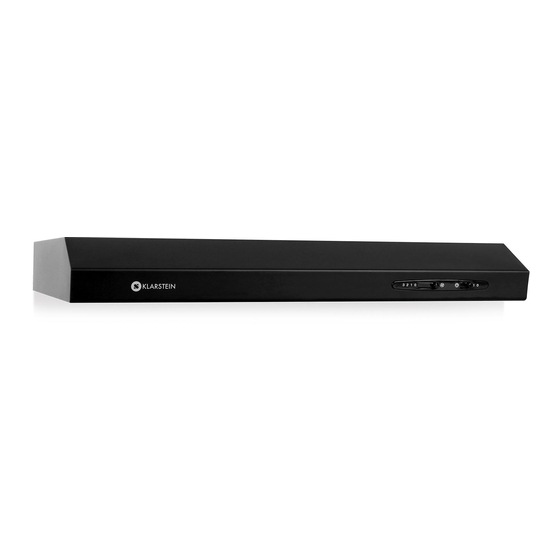
  • Seite 1 Zitruspresse orange Dunstabzugshaube 10008166 10008167 10008168 10011462 10026366 10011483 10026367 10011484 10026368...
  • Seite 2: Für Ihre Sicherheit

    Sehr geehrter Kunde, zunächst möchten wir Ihnen zum Erwerb Ihres Gerätes gratulieren. Bitte lesen Sie die folgenden Anschluss- und Anwendungshinweise sorgfältig durch und befolgen Sie diese um möglichen technischen Schäden vorzubeugen. Für Ihre Sicherheit Installation • Das Gerät muss durch einen qualifizierten Techniker installiert werden. • Es ist gefährlich, irgendein Teile des Gerätes zu modifizieren. In diesen Fällen lehnt der Hersteller jegliche Verantwortung im Falle eines Fehlers ab. •...
  • Seite 3 • Versuchen Sie niemals das Gerät selbst zu reparieren. Ziehen Sie immer einen qualifizierten Techniker hinzu. • Für Ihre eigene Sicherheit, bestehen Sie immer auf Original-Ersatzteile. • Schalten Sie immer das Gerät erst aus und ziehen Sie den Stecker aus der Steckdose, bevor das Gerät gereinigt oder gewartet wird. • Oberflächen: Waschen Sie Oberflächen mit einer warmen Seifenlauge und einem weichen Schwamm ab. Verwenden Sie niemals ein Scheuermittel, Stahlwolle oder Lösungsmittel zum reinigen irgendeiner Oberfläche des Gerätes, da dies zu irreparablen Schäden führen kann.
  • Seite 4: Für Den Installateur

    Für den Installateur Verbindung mit dem elektrischen Versorgungsnetz • Die elektrischen Anschlüsse dürfen nur entsprechend der lokalen Normen und Gesetze durchgeführt werden. • Stellen Sie sicher, dass die Versorgungsspannung mit der Nennspannung auf dem Typenschild des Gerätes übereinstimmen. Falls dies nicht der Fall ist, schließen Sie das Gerät nicht an. • Stellen Sie sicher, dass Leitungen nicht mit den sich bewegenden Teilen in Kontakt kommen und nicht gequetscht werden.
  • Seite 5 Variante 2: 2.1 Bohren Sie vier Löcher mit einem Durchmesser von 6mm an der Unterseite des Küchen schrankes. Sollten Sie eine Rohrverlängerung mitbestellt haben sägen/bohren Sie entsprechende Öffnungen für das Abluftrohr (siehe „Pic 5“). 2.2 Führen Sie zuerst das Abluftrohr durch und anschließend bringen Sie die Haube an. Anmerkung: Anmerkung: 1. Die gezeigte Rohr-Verlängerung ist ein optionales Teil und nicht im Lieferumfang enthalten. 2. Bitte entfernen Sie den Schutzfi lm bevor Sie mit der Installation beginnen. 3. Es gibt zwei Möglichkeiten der Ventilation (horizontale und vertikale). • Je nachdem für welche Variante Sie sich entscheiden müssen Sie ein der Abdeckungen entfernen/ einsetzen (siehe „Pic 6“).
  • Seite 6 Installation (10011462/10011483) WARNUNG: Halten Sie sich bei der Befestigung genau an die Anleitung. Falsche Befestigung der Schrau- ben oder des Geräts kann zu Stromschlägen führen. Variante 1: 1.1 Die Distanz zwischen der Kochfl äche und der untersten Kante der Dunstabzugshaube muss mindestens 65 cm betragen. 1.2 Um die Haube anzubringen, bohren Sie bitte 4 Löcher mit einem Durchmesser von 8mm. Bitte entnehmen Sie die Abstände der folgenden Abbildung: 1.3 Setzen Sie die Dübel in die Löcher ein und ziehen Sie die Schrauben fest. Anschließend bringen Sie die Haube an.
  • Seite 7: Fehlerbehebung

    2.2 Führen Sie zuerst das Abluftrohr durch und anschließend bringen Sie die Haube an. Fehlerbehebung Problem Das Gerät funktioniert nicht Grund Keine elektrische Versorgung vorhanden Lösung Überprüfen Sie, ob der Stecker eingesteckt ist Überprüfen Sie, ob der Hauptschalter eingeschaltet ist. Problem Geringer Luftfluss Grund Aluminium Fettfilter ist verstopft Lösung Reinigen Sie den Filter und setzen Sie ihn wieder ein, wenn er getrocknet ist. Problem Geringer Luftfluss Grund Aktivkohlefilter ist verstopft Lösung Tauschen Sie den Aktivkohlefilter durch einen neuen Filter aus.
  • Seite 8: Sicherheitshinweise Und Gewährleistung

    Problem Kein Luftfl uss Grund Drosselklappe blockiert Lösung Kontaktieren Sie Ihren Service-Fachmann Problem Der Motor schaltet sich nach wenigen Minuten aus Grund Übertemperaturschutz wird ausgelöst Lösung Die Dunstabzugshaube ist zu dicht an Ihrer Kochfl äche montiert worden. Die Küche wird nicht ausreichend belüftet Kontaktieren Sie Ihren Service-Fachmann Sicherheitshinweise und Gewährleistung • Diese Bedienungsanleitung dient dazu, Sie mit der Funktionsweise dieses Produktes vertraut zu machen. Bewahren Sie diese Anleitung daher stets gut auf, damit Sie jederzeit darauf zugreifen können.
  • Seite 9: Technische Daten

    Technische Daten Symbol Wert Artikel Artikel Artikel Artikel Artikel Artikelnummer 10011462 10011484 10026367 10026368 10026366 10011483 Jährlicher Ener- AEChood kWh/a 93,6 90,5 83.5 61.2 81.8 gieverbrauch Zeitverlänge- rungsfaktor Fluiddynami- FDEhood sche Effizienz Energieeffizien- EEIhood 105,3 105,3 99.3 92.5 98.8 zindex Gemessener QBEP...
  • Seite 10: Safety Precaution

    General Carefully read the following important information regarding installation, safety and maintenance. Keep this information booklet accessible for further consultations. The appliance has been designed as a exhausting version (external exhaust ) or as a filter version (internal air recycle) cooker hood. Safety precaution Take care when the cooker hood is operating simultaneously with an open fireplace or burner that depend on the environment and are supplied by other than electrical energy, as the cooker hood removes the air from the environment which a burner or fireplace need for combustion. The negative pressure in the environment must not exceed 4 Pa (4*10-5 bar).Provide adequate ventilation in the environment for a safe operation of the cooker hood.Follow the local laws applicable for external air evacuation. Warning • Young children should be supervised to ensure that they do not play with the appliance. • The appliance is not intended for use by persons (including children) with reduced physical, sensory or mental capabilities, or lack of experience and knowledge, unless they have been given supervised or instruction concerning use of the appliance by a responsible person for their safely.
  • Seite 11: Installation Instructions

    Special Hints on Safety • If the supply cord is damaged, it must be replaced by the manufacturer, its service agent or simi- larly qualified persons in order to avoid a hazard. • This appliance can be used by children aged from 8 years and above and persons with reduced physical, sensory or mental capabilities or lack of experience and knowledge if they have been given supervision or instruction concerning use of the appliance in a safe way and understand the hazards involved. Children shall not play with the appliance. Cleaning and user maintenance shall not be made by children without supervision The instructions shall state the substance of the following: • There shall be adequate ventilation of the room when the range hood is used at the same time as appliances burning gas or other fuels • There is a fire risk if cleaning is not carried out in accordance with the instructions; • Do not flambé under the range hood; . •...
  • Seite 12 Way two: • Drill 4 holes of 6mm diameter at the bottom of the hanging cupboard • Put the one way valve on the cooker hood, then install the cooker hood on the bottom of the cupboard, tighten the hood with enclosed 4 screws. • Install the adjusted board on the bottom of the hood in order to keep out the gap between hood back and cupboard. back and cupboard. Note: Note: 1. The extensible pipe are optional accessory, not supplied. 1. The extensible pipe are optional accessory, not supplied. 2. Take off protection fi lm before installation. 3. There are 2 methods for ventilation , including ‚ horizontal ventilation‘ and ‚ vertical ventilation‘. Please pay attention to the ventilation method when installation. See Pic 6...
  • Seite 13 The square air outlet for horizontal ventilation is not supplied. The square air outlet for horizontal ventilation is not supplied. Installation instructions (10011462/10011483) Warning: Failure to install the screws or fi xing device in accordance with these instructions may result in electrical hazards. Way one: • The cooker hoods should be placed at a distance of 65-75cm from the cooking surface for best effect. • To install onto the wall drill 4 holes of Ø8mm on a suitable place according with the centre distance of hole in the back of the cooker hood.
  • Seite 14: Operation

    Way two: • Drill 6 holes of 4mm diameter at the bottom of the hanging cupboard • Put the one way valve on the cooker hood, then install the cooker hood on the bottom of the cupboard, tighten the hood with enclosed 6 screws. • Install the adjusted board on the bottom of the hood in order to keep out the gap between hood back and cupboard. Operation • Connect the plug into the power. • Push the switch ② into “1, 2, 3”, the motor will be on “low, mid, high” three speeds, push into “0”, • Push the switch ① into “I”, the lamp be on; push into “0”, the lamp be off.
  • Seite 15 Use and maintance • It is recommended to operate the appliance prior to cooking. • It is recommended to leave the appliance in operation for 15 minutes after cooking is terminated in order to completely eliminate cooking vapours and odours. • The proper function of the cooker hood is conditioned by the regularity of the maintenance operations, in particular, the active carbon fi lter. • The auti-grease fi lters capture the grease particles suspended in the air, and are therefore subject to clogging according to the frequency of the use of the appliance. • In order to prevent fi re hazard, it is recommendable to clean the fi lter at a maximum of 2 months by carrying out the following instructions. See Pic 8 Soak them for about 3 minute in hot water (40-50 degrees) with a grease-loosening detergent then brush it gently with a soft brush. Please do not apply too much pressure, avoid damaging it.
  • Seite 16: Troubleshooting

    Changing and cleaning the fi lter for ACV-61A & ACV-61B: • Put the fi lter into the water of 40-50℃,Put some detergent in, and leave it for 2-3 minutes. Then use the soft brush to clean it with proper strength, in order not to damage the fi lter. • The fi lter can be cleaned by dish washer. Put the fi lter into the dish washer and put some detergent in, then turn the temperature to 60℃. All the fi lters are made of metal. Please do not use any corrosive detergent when cleaning. All the fi lters are made of metal. Please do not use any corrosive detergent when cleaning. •...
  • Seite 17: Technical Data

    Technical Data Symbol Value Item Item Item Item Item Model 10011462 10011484 10026367 10026368 10026366 identifi cation 10011483 Annual Energy AEChood kWh/a 93,6 90,5 109,7 87,3 108,1 Consumption Time increase factor Fluid Dynamic FDEhood Effi ciency Energy EEIhood 105,3 105,3 105,7 101,6...
  • Seite 18: Hints On Disposal

    Hints on Disposal According to the European waste regulation 2002/96/EC this symbol on the product or on its packaging indicates that this product may not be treated as household was- te. Instead it should be taken to the appropriate collection point for the recycling of electrical and electronic equipment. By ensuring this product is disposed of correctly, you will help prevent potential negative consequences for the environment and hu- man health, which could otherwise be caused by inappropriate waste handling of this product. For more detailed information about recycling of this product, please contact your local council or your household waste disposal service. Your product contains batteries covered by the European Directive. 2006/66/EC, which cannot be disposed of with normal household waste. Please check local rules on separate collection of batteries. The correct disposal of batteries helps prevent potentially negative consequences on the environment and human health. Declaration of Conformity Producer: Chal-Tec GmbH, Wallstraße 16, 10179 Berlin, Germany. This product is conform to the following European Directives: 2004/108/EC (EMC) 2011/65/EU (RoHS) 2006/95/EC (LVD) 2014/66/EU (ErP)

Inhaltsverzeichnis