Herunterladen Inhalt Inhalt Diese Seite drucken

Werbung

Verfügbare Sprachen

Verfügbare Sprachen

Dunstabzugshaube
10030272
10030275
10030273
10030276
10030274
10030300
10031905
10031906
10031910

Werbung

Inhaltsverzeichnis
loading

Inhaltszusammenfassung für Klarstein 10030272

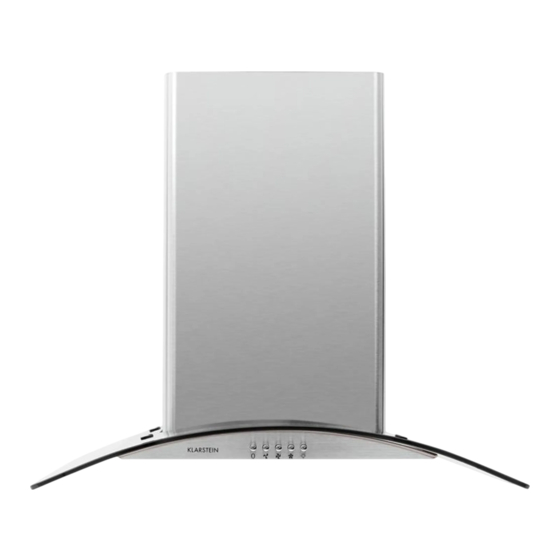
  • Seite 1 Dunstabzugshaube 10030272 10030275 10031905 10030273 10030276 10031906 10030274 10030300 10031910...
  • Seite 2: Inhaltsverzeichnis

    Sehr geehrter Kunde, wir gratulieren Ihnen zum Erwerb Ihres Klarstein Gerätes. Lesen Sie die folgenden Anschluss- und Anwen- dungshinweise sorgfältig durch und befolgen Sie diese, um möglichen technischen Schäden vorzubeugen. Für Schäden, die durch Missachtung der Sicherheitshinweise und unsachgemäßen Gebrauch entstehen, übernehmen wir keine Haftung.
  • Seite 3: Sicherheitshinweise

    Sicherheitshinweise • Diese Bedienungsanleitung dient zu Ihrer Sicherheit. Lesen Sie Anleitung sorgfältig und bewahren Sie diese Anleitung stets gut auf, damit Sie jederzeit darauf zurückgreifen können. Kinder im Haushalt • Kleine Kinder müssen vom Gerät fern gehalten werden. Sie müssen beaufsichtigt werden, so dass sie die heißen Teile nicht berühren.
  • Seite 4: Montage

    • Benutzen Sie das Gerät nicht, wenn es Anzeichen von Beschädigungen oder Fehlern gibt. Setzen Sie sich in dem Fall mit dem Kundendienst in Verbindung. Montage Für das Modell ohne Glas (10030272) 1. Der Abstand zwischen der Kochfläche und der untersten Kante der Dunstabzugshaube muss 65-75 cm betragen (siehe Bild 1) 2.
  • Seite 5 Innenseite Halterung für die Kaminverblendung Rohrverbindung Haltung für die Außenverblendung Außenseite Bild 2 Bild 3 Sicherheitsschrauben Bild 5 Bild 4 Für das Model mit Glas (10030273) 1. Die Distanz zwischen der Kochfläche und der untersten Kante der Dunstabzugshaube muss 65-75 cm betragen (siehe Bild 1) 2.
  • Seite 6 Rohrverbindung Halterung für die Kaminverblendung Bild 3 Bild 2 Innenseite Haltung für die Sicherheitsschrauben Außenverblen- dung Außenseite Bild 4 Bild 5...
  • Seite 7 1. Achten Sie vor der Montage darauf, dass der Bereich sauber ist, um das Einsaugen von Rückständen von Holzsplittern und Staub zu vermeiden. 2. Die Dunstabzugshaube darf sich keinen Abzug mit einem gasbetriebenen Gerät, einem Ofen oder anderer zugeführter heißer Abluft teilen. 3.
  • Seite 8 Für das Model 10031905 1. Die Distanz zwischen der Kochfläche und der un- tersten Kante Dunstabzugshaube muss 65-75 cm betragen. 2. Ist die Höhe definiert, bringen Sie die Verankerungs- chrauben an der entsprechenden Stellen an. Dazu müssen Sie zuerst Bohrungen für die 8 Löcher setzen (Sie benötigen eine Bohrmaschine, passende Bohrer, Dübel und Schrauben).
  • Seite 9 Für das Model 10031910 1. Der Abstand zwischen der Kochfläche und der un- tersten Kante der Dunstabzugshaube muss 65-75 cm betragen (siehe Bild 1) 2. Ist die Höhe definiert, bringen Sie die Veran- kerung an der entsprechenden Stelle an. Dazu müssen Sie zuerst Bohrungen setzen (Sie benöti- gen eine Bohrmaschine, passende Bohrer, Dübel und Schrauben) und anschließend die Verankerung...
  • Seite 10: Bedienung

    Bedienung Bedienfeld für Artikelnummer 10030272, 10031905, 10031910 Nach dem Anschluss an die Stromversorgung leuchtet das Bedienfeld auf. Das Gerät geht in den Standby- Modus und die Bedienfeld-Beleuchtung erlischt nach 30 Sekunden. Ein/Aus Ein- und Ausschalten des Ventilators. Licht Zum Ein- und Ausschalten Es gibt 3 Gebläse-Stufen:...
  • Seite 11 Bedienfeld für Artikelnummer 10030273, 10030274, 10030275, 10031906 Schalten Sie mit diesem Knopf die Lüftung aus. Ventilator Verwenden Sie die niedrige Stufe zum Durchlüften der Küche. Sie eignet sich niedrige Stufe zum Köcheln und Kochen ohne viel Dampf. Erneut drücken, um das Gebläse auszuschalten.
  • Seite 12 Bedienfeld für Artikelnummer 10030276 Nach dem Anschluss an die Stromversorgung leuchtet das Bedienfeld auf. Das Gerät geht in den Standby- Modus und die Bedienfeld-Beleuchtung erlischt nach 5 Sekunden. Beim Betätigen der jeweilige Taste leuchtet sie. Licht Zum Ein- und Ausschalten Einschalten der niedrigen Stufe.
  • Seite 13: Reinigung Und Wartung

    Reinigung und Wartung Reinigung des Fettfilters Das Filtergitter besteht aus rostfreiem Stahl. Verwenden Sie daran keine ätzenden Reinigungsmittel. Die Rein- haltung des Filters sorgt für den reibungslosen Betrieb. Befolgen Sie die Hinweise unten genau. Methode 1 Legen Sie das Gitter in klares warmes Wasser (Temperatur 40-50 °C). Ein Reinigungsmittel hinzugeben und 2-3 Minuten einweichen lassen.
  • Seite 14: Fehlerbehebung

    Einsetzen des Aktivkohlfilters Nehmen Sie den Fettfilter heraus. Die Kohlfilter befinden sich an beiden Enden des Motors. Drehen Sie die Kohlefilter entegen dem Uhrzeiger- sinn, bis sie abgedreht sind. öffnen schließen Die Aktivkohlfilter sollten alle 3-6 Monate herausgenommen werden und immer, wenn sie beschädigt sind. Fehlerbehebung Fehler Grund...
  • Seite 15: Hinweise Zur Entsorgung

    Hinweise zur Entsorgung Befindet sich die linke Abbildung (durchgestrichene Mülltonne auf Rädern) auf dem Produkt, gilt die Europäische Richtlinie 2012/19/EU. Diese Produkte dürfen nicht mit dem normalen Hausmüll entsorgt werden. Informieren Sie sich über die örtlichen Regelungen zur getrennten Sammlung elektrischer und elektronischer Gerätschaften. Richten Sie sich nach den örtlichen Regelungen und entsorgen Sie Altgeräte nicht über den Hausmüll.
  • Seite 16 Dear Customer, Congratulations on purchasing this equipment. Please read this manual carefully and take care of the follow- ing hints on installation and use to avoid technical damages. Any failure caused by ignoring the items and cautions mentioned in the operation and installation instructions are not covered by our warranty and any liability.
  • Seite 17: Safety Instructions

    Safety Instructions • These instructions are for your safety. Please read through them thoroughly prior to installation and retain them for future reference. Children in the household • Young children should be kept away. Care should be taken to avoid touching the appliance. •...
  • Seite 18: Installation

    • Do not use the hood if it shows signs of damage or imperfection. Contact customer services. Installation Models without glass (10030272) 1. The cooker hood should be placed at a distance of 65-75cm (26-30inch) from the cooking surface for the best effect.
  • Seite 19 For models with glass (10030273) 1. The cooker hood should be placed at a distance of 65-75cm (26-30inch) from the cooking surface for the best effect. See Pic 1. 2. Install the hook on a suitable place once the installation height is fixed, and keep it in line. The fixed position of the inside chimney bracket is the place of chimney.
  • Seite 21 1. Connect the plug into the power. 2. Press the button “Stop”, the motor is stopped then 3. Press the button “Low”, the motor is running at low speed. Press the button “Mid”, the motor is running at medium speed. Press the button “High”, the motor is running at high speed. 4.
  • Seite 22 For the model 10031905 1. The cooker hood should be placed at a distance of 65-75cm (26-30inch) from the cooking surface for the best effect. 2. Install the hanging screw on a suitable place once the instal- lation height is fixed, and keep it in line. The fixed position of the inside chimney bracket is the place of chimney.
  • Seite 23 Für das Model 10031910 1. The cooker hood should be placed at a distance of 65-75cm (26-30inch) from the cooking surface for the best effect. See Pic 1. 2. Install the hanging screw on a suitable place once the installation height is fixed, drill 2 holes and in- sert the Wall plug.put 2pcs screws(ST4*30mm)into wall plug, and keep it in line.
  • Seite 24: Operation

    Operation Control panel for Item 10030272, 10031905, 10031910 After connecting power to power, the control panel will be lightet. The light will shut off automatically after 30 seconds if without any operation. On/Off Switches the ventilation on and off. Light Switches the light on and off.
  • Seite 25 Control panel for Item 10030273, 10030274, 10030275, 10031906 Switches the ventilation off. Low Speed It is used for Ventilation on the kitchen. It is suitable for simmering and cook- button ing which do not make much steam. Press again to stop the motor. Medium Speed Airflow speed is ideally for ventilation in standard cooking operation.
  • Seite 26 Control panel for Item 10030276 Power on: After you have connected the cooker hood to the mains supply the backlight will turn on. The backlight will turn off after 5s without any operation and hood will enter stand-by mode. When pressing a key it is lit. Light Switches light on and off.
  • Seite 27: Cleaning And Maintenance

    Cleaning and Maintenance The cleaning of the carbon grease filter mesh The filter mesh is made of high-density stainless steel. Please do not use the corrosive detergent on it. Keeping this filter clean will keep the appliance running correctly. Please strictly follow the guidelines below. Method 1: Put the mesh into 40-50 c clean water, pour on detergent, and soak for 2-3 mins.
  • Seite 28: Troubleshooting

    Installation of the carbon filter Remove the grease filters The charcoal filters are located at both end of the motor. Turn the charcoal filters until they are unscrewed. The carbon filters should be replaced every 3 - 6 months or if they show signs of damage. Troubleshooting Fault Cause...
  • Seite 29: Declaration Of Conformity

    Declaration of Conformity According to the European waste regulation 2012/19/EU this symbol on the product or on its packaging indicates that this product may not be treated as household waste. Instead it should be taken to the appropriate collection point for the recycling of electrical and electron- ic equipment.
  • Seite 30 Chère cliente, cher client Toutes nos félicitations pour l’ a cquisition de ce nouvel appareil. Veuillez lire attentivement les instructions suivantes de branchement et d’utilisation afin d’ é viter d’ é ventuels dommages. Le fabricant ne saurait être tenu pour responsable des dommages dus au non-respect des consignes de sécurité et à la mauvaise utili- sation de l’...
  • Seite 31: Consignes De Sécurité

    Consignes de sécurité Ce manuel d‘instructions a pour objectif votre sécurité. Lisez attentivement les instructions et conservez toujours ce manuel dans un endroit sûr pour pouvoir toujours vous y référer. Enfants à la maison • Les jeunes enfants doivent être tenus à l‘écart de l‘appareil. Ils doivent être surveillés afin qu‘ils ne touchent pas les parties chaudes.
  • Seite 32: Montage

    Montage Pour le modèle sans vitre (10030272) 1. La distance entre la surface de cuisson et le bord inférieur de la hotte doit être de 65-75 cm (voir figure 1). 2. Une fois la hauteur déterminée, attachez le support d‘ancrage à...
  • Seite 33 face intérieure support du parement de cheminée connecteur de tuyau support de parement externe face extérieure crochet figure 2 figure 3 vis de sécurité figure 5 figure 4 Für das Model mit Glas (10030273) 1. La distance entre la surface de cuisson et le bord inférieur de la hotte doit être de 65-75 cm (voir figure 1). 2.
  • Seite 34 connecteur de tuyau support du parement de che- minée figure 3 crochet figure 2 face intérieure support de parement externe Sicherheitsschrauben face extérieure figure 4 figure 5...
  • Seite 35 1. Avant le montage, assurez-vous que la zone est propre pour éviter d‘aspirer les débris de copeaux de bois et de la poussière. 2. La hotte ne doit pas partager une évacuation d‘air avec un appareil alimenté au gaz, un four ou un autre appareil produisant de l‘air chaud.
  • Seite 36 Pour le modèle 10031910 1. La distance entre la surface de cuisson et le bord inférieur de la hotte doit être de 65-75 cm (voir figure 1) 2. Une fois la hauteur définie, attachez le support d‘ancrage à l‘endroit approprié. Pour ce faire, vous devez d‘abord percer des trous (vous avez besoin d‘une perceuse, de forets adap- tés, de chevilles et de vis), puis fixer le support d‘ancrage au mur à...
  • Seite 37 Pour le modèle 10031910 1. La distance entre la surface de cuisson et le bord inférieur de la hotte doit être de 65-75 cm (voir figure 1) 2. Une fois la hauteur définie, attachez le support d‘ancrage à l‘endroit approprié. Pour ce faire, vous devez d‘abord percer des trous (vous avez besoin d‘une perceuse, de forets adaptés, de chevilles et de vis), puis fixer le support d‘ancrage au mur à...
  • Seite 38: Fonctionnement

    Fonctionnement Panneau de commande pour les articles de numéros 10030272, 10031905, 10031910 Lorsque vous branchez l‘appareil sur l‘alimentation, le panneau de commande s‘allume. L‘appareil passe en mode veille et l‘éclairage du panneau de commande s‘éteint au bout de 30 secondes.
  • Seite 39 Panneau de commande pour les articles de numéros 10030273, 10030274, 10030275, 10031906 arrêt Eteignez le ventilateur avec ce bouton. Ventilateur basse Utilisez la vitesse lente pour ventiler la cuisine. Celui-ci convient pour mijoter vitesse et cuire sans beaucoup de vapeur. Appuyez à nouveau pour éteindre le ventilateur.
  • Seite 40 Panneau de commande pour l‘article numéro 10030276 Une fois l‘appareil branché sur l‘alimentation, le panneau de commande s‘allume. L‘appareil passe en mode veille et l‘éclairage du panneau avant s‘éteint au bout de 5 secondes. Il s‘allume lorsque vous appuyez sur un bouton. Eclairage Allumer ou éteindre Allumez le ventilateur à...
  • Seite 41: Nettoyage Et Maintenance

    Nettoyage et maintenance Nettoyage du filtre à graisses La grille de filtre est en acier inoxydable. N‘utilisez pas de produits de nettoyage corrosifs. La propreté du filtre assure un bon fonctionnement. Suivez les instructions ci-dessous attentivement. Méthode 1 Placez la grille dans de l‘eau chaude et claire (température 40-50°C). Ajoutez un détergent et laissez tremper pendant 2-3 minutes.
  • Seite 42: Résolution Des Problèmes

    Installation du filtre à charbon actif Retirez le filtre à graisse. Les filtres à charbon sont situés aux deux extrémités du moteur. Tournez les filtres à charbon dans le sens antihoraire jusqu‘à ce qu‘ils soient dévissés. ouvrir fermer Les filtres à charbon actif doivent être retirés tous les 3-6 mois et chaque fois qu‘ils sont endommagés. Résolution des problèmes Problème Cause...
  • Seite 43: Conseils Pour Le Recyclage

    Conseils pour le recyclage Le pictogramme ci-contre apposé sur le produit signifie que la directive européenne 2012/19/UE (DEEE) s’ a pplique (poubelle à roues barrée d’une croix). Ces produits ne peuvent être jetés dans les poubelles domestiques courantes. Renseignez-vous concernant les règles appliquées pour la collecte d’...

Inhaltsverzeichnis