Herunterladen Inhalt Inhalt Diese Seite drucken
Inhaltsverzeichnis

Werbung

Verfügbare Sprachen
  • DE

Verfügbare Sprachen

  • DEUTSCH, seite 1
MARIANA NEO
Dunstabzugshaube
Range Hood
Campana extractora
Hotte aspirante
Cappa aspirante
10035925 10035926
www.klarstein.com

Werbung

Inhaltsverzeichnis
loading

Inhaltszusammenfassung für Klarstein MARIANA NEO

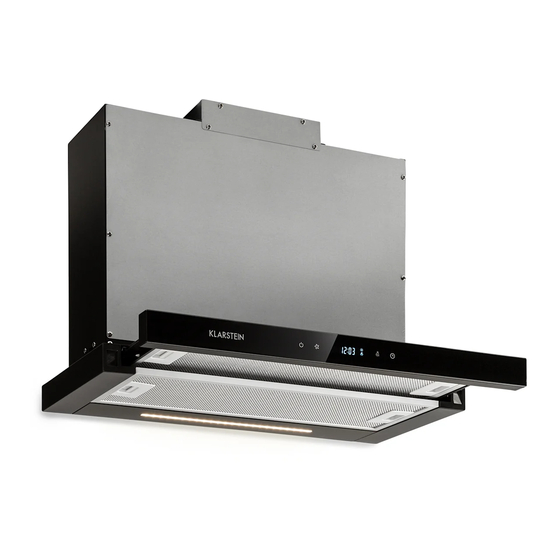
  • Seite 1 MARIANA NEO Dunstabzugshaube Range Hood Campana extractora Hotte aspirante Cappa aspirante 10035925 10035926 www.klarstein.com...
  • Seite 3: Inhaltsverzeichnis

    Sehr geehrter Kunde, wir gratulieren Ihnen zum Erwerb Ihres Gerätes. Lesen Sie die folgenden Hinweise sorgfältig durch und befolgen Sie diese, um möglichen Schäden vorzubeugen. Für Schäden, die durch Missachtung der Hinweise und unsachgemäßen Gebrauch entstehen, übernehmen wir keine Haftung. Scannen Sie den folgenden QR-Code, um Zugriff auf die aktuellste Bedienungsanleitung und weitere Informationen rund um das Produkt zu erhalten.
  • Seite 4: Sicherheitshinweise

    SICHERHEITSHINWEISE • Lesen Sie sich alle Hinweise vor der Benutzung sorgfältig durch und bewahren Sie die Bedienungsanleitung zum späteren Nachschlagen gut auf. • Die Montagearbeiten dürfen nur von einer Elektrofachkraft oder einer qualifizierten Person durchgeführt werden. Bevor Sie die Dunstabzugshaube verwenden, stellen Sie sicher, dass die Spannung (V) und die auf der Dunstabzugshaube angegebene Frequenz (Hz) der Spannung und Frequenz der Stromversorgung in Ihrem Haushalt entsprechen.
  • Seite 5 Wichtige Hinweise zum Abluftbetrieb WARNUNG Vergiftungsgefahr durch zurückgesaugte Abgase! Betreiben Sie das Gerät nicht im Abluftbetrieb, wenn es zusammen mit einer raumluftabhängigen Feuerstätte betrieben wird und keine ausreichende Luftzirkulation garantiert wird. Raumluftabhängige Feuerstätten wie Gas-, Öl-, Holz- oder Kohleheizungen, Boiler oder Durchlauferhitzer beziehen die Luft aus dem Raum und führen sie durch ein Abluftrohr oder einen Kamin ins Freie.
  • Seite 6: Installation

    INSTALLATION Vorbereitung Falls sie über einen Abzug nach außen verfügen, können Sie die Abzugshaube wie auf dem Bild rechts installieren. Der Abzugskanal sollte einen Durchmesser von mindestens 150 mm haben und aus Emaille, Aluminium oder einem fl exiblen, hitzebeständigen Rohr bestehen. •...
  • Seite 7 • Bohren Sie zwei Löcher am hinteren Küchenschrank. Der Abstand zwischen den beiden Löchern sollte 430 mm betragen. • Die Fixierhalterung kann von 6 mm auf 25 mm angepasst werden. • Der Ausschnitt des Küchenschranks ist 520 mm x 180 mm. •...
  • Seite 8 Hinweis: Das ausziehbare Abluftrohr ist nicht im Lieferumfang enthalten, sondern ein optionales Zubehör. Ziehen Sie die Schutzfolie vor der Installation ab. • Befestigen Sie das Rückschlagventil am Luftauslass der Dunstabzugshaube. Bringen Sie das Ablassrohr, wie unten gezeigt, am Rückschlagventil an. Abluftrohr Dunstabzugshaube...
  • Seite 9: Bedienung

    Installation mit Umfl uft Falls Sie nicht über einen Außenabzug verfügen, benötigen Sie kein Abluftrohr. Die Installation entspricht der Installation mit Außenentlüftung. BEDIENUNG Nach dem Anschluss an die Stromversorgung ist das Gerät im Bereitschaftsmodus. Ein-/Ausschalten: Das Gerät wird mit der Taste ein- und ausgeschaltet.
  • Seite 10 zu gelangen. Die Stundenanzeige blinkt dann auf. Drücken Sie zur Einstellung entweder die Licht- oder die Geschwindigkeitstaste. Sobald Sie die Stunden eingestellt haben, blinkt die Minutenanzeige auf. Drücken Sie zur Einstellung eingestellt haben, blinkt die Minutenanzeige auf. Drücken Sie zur Einstellung eingestellt haben, blinkt die Minutenanzeige auf.
  • Seite 11: Lcd-Anzeige

    LCD-ANZEIGE Ventilationsbetrieb Zeitanzeige Timer Licht Ventilatorstufe Wecker Reinigungsanzeige erscheint, wenn die Betriebszeit 14 Stunden erreicht hat. LAMPENWECHSEL 1. Entfernen Sie die beiden Filter und die 3 Schrauben auf der Rückseite der Lampenplatine.
  • Seite 12: Austausch Des Aktivkohlefilters

    2. Klappen Sie die Lampenplatine um, nachdem Sie die Schrauben entfernt haben.. 3. Entfernen Sie die 4 Schrauben auf der LED-Streifenplatine und ersetzen Sie den LED- Streifen. AUSTAUSCH DES AKTIVKOHLEFILTERS Aktivkohlefilter Carbon filter Abdeckung Outlet cover 4 Schrauben ST4*8 screw ST4x8 Entfernen Sie 4 Schrauben von der Abdeckung.
  • Seite 13: Reinigung Und Pflege

    REINIGUNG UND PFLEGE Hinweis: Schalten Sie die Dunstabzugshaube vor der Reinigung und Wartung aus und ziehen Sie den Stecker aus der Steckdose. Regelmäßige Reinigung Verwenden Sie ein weiches, mit handwarmem mildem Seifenwasser angefeuchtetes Tuch oder einen milden Haushaltsreiniger. Verwenden Sie niemals Metallschwämme oder abreibende oder chemische Materialien, um das Gerät zu reinigen.
  • Seite 14: Fehlerbehebung

    FEHLERBEHEBUNG Fehler Ursache Lösung Das Rotorblatt des Reparatur und Wartung Das Licht ist an Ventilators ist blockiert. des Geräts darf aber der Ventilator ausschließlich durch läuft nicht. hierfür qualifiziertes The motor is damaged Servicepersonal erfolgen. Die Glühbirne ist Ersetzen Sie die durchgebrannt.
  • Seite 15: Hinweise Zum Umweltschutz

    HINWEISE ZUM UMWELTSCHUTZ • Achten Sie während des Kochens auf eine ausreichende Luftzufuhr, damit die Dunstabzugshaube effizient und mit einem geringen Betriebsgeräusch arbeiten kann. • Passen Sie die Gebläsedrehzahl an die beim Kochen entstehende Dampfmenge an. Verwenden Sie den Intensivmodus nur bei Bedarf. Je niedriger die Gebläsedrehzahl ist, desto weniger Energie wird verbraucht.
  • Seite 16: Produktdatenblatt

    PRODUKTDATENBLATT Angaben nach Verordnung (EU) Nr. 65/2014 Mess- und Berechnungsmethoden nach EN 61591:1997+A1:2006+A2:201 1+A1 1:201 4+A12:2015 Artikelnummer 10035926, 10035925 Bezeichnung Symbol Wert Einheit Jährlicher Energieverbrauch 40,8 kWh/Jahr hood Energieeffizienzklasse fluiddynamische Effizienz 30,9 hood Klasse für die fluiddynamische Effizienz Beleuchtungseffizienz Lux/W hood Beleuchtungseffizienzklasse Fettabscheidegrad...
  • Seite 17 Angaben nach Verordnung (EU) Nr. 66/2014 Mess- und Berechnungsmethoden nach EN 61591:1997+A1:2006+A2:201 1+A1 1:201 4+A12:2015 Artikelnummer 10035926, 10035925 Bezeichnung Symbol Wert Einheit Jährlicher Energieverbrauch 40,8 kWh/Jahr hood Zeitverlängerungsfaktor Fluiddynamische Effizienz 30,9 hood Energieeffizienzindex 50,1 hood Gemessener Luftvolumenstrom im 338,8 m³/h Bestpunkt Gemessener Luftdruck im Bestpunkt Maximaler Luftstrom...
  • Seite 18: Hinweise Zur Entsorgung

    HINWEISE ZUR ENTSORGUNG Wenn es in Ihrem Land eine gesetzliche Regelung zur Entsorgung von elektrischen und elektronischen Geräten gibt, weist dieses Symbol auf dem Produkt oder auf der Verpackung darauf hin, dass dieses Produkt nicht im Hausmüll entsorgt werden darf. Stattdessen muss es zu einer Sammelstelle für das Recycling von elektrischen und elektronischen Geräten gebracht werden.
  • Seite 19 Dear Customer, Congratulations on purchasing this device. Please read the following instructions carefully and follow them to prevent possible damages. We assume no liability for damage caused by disregard of the instructions and improper use. Scan the QR code to get access to the latest user manual and more product information.
  • Seite 20: Safety Instructions

    SAFETY INSTRUCTIONS • Thank you for purchasing this cooker hood. Please read the instruction manual carefully before you use the cooker hood, and keep it in a safe place. • The installation work must be carried out by a qualified electrician or competent person.
  • Seite 21 Important notes about the extraction mode WARNING Risk of poisoning from exhaust gases sucked back. Never operate the device in extraction mode simultaneously with an open flue appliance when there is not adequate airflow guaranteed. Open fl ue combustion equipment (for example, gas, oil, wood or coal-fi red heaters, tankless water heaters, water heaters) pulls combustion air from the room and runs it through an exhaust pipe or chimney to the outside.
  • Seite 22: Installation

    INSTALLATION Preparation If you have an outlet to the outside, your cooker hood can be connected as below picture by means of an extraction duct (enamel, aluminium, fl exible pipe or infl ammable material with an interior diameter of 150 mm). •...
  • Seite 23 Drill 2 holes of top of the back kitchen cabinet. The distance between two holes should be 430mm. Fixing clip can be adjust from 6mm to 25mm.. Kitchen cabinet cut out size is 520mm*180mm. Fix the bracket on hood body first, and then insert the body into the cut out cabinet. Raise the hood until fixing clip also come through the kitchen cabinet, so that the clip can seat on top of the cabinet, avoid unit falling.
  • Seite 24 Note: The extensible pipe are optional accessory, not supplied. Take off protection film before installation. Fix the one-way-valve to the air outlet of the cooker hood. Then, attached the exhaust pipe onto the one-way-valve as shown below. Exhaust pipe Cooker hood...
  • Seite 25 Installation (vent inside) If you do not have an outlet to the outside, exhaust pipe is not required and the installation is similar to the one show in section “Installation (Vent outside)”.
  • Seite 26: Touch Control

    TOUCH CONTROL After plug in power, will into Stand By mode automatic. On/Off button: It is used for turning on/off the fan. FAN SPEED key: Button for changing the speed of motor following cycle "Low-Middle- Hight-Low". Light button Short press for lamp power control. Kelvin adjustable function .
  • Seite 27: Lcd Display

    LCD DISPLAY Fan symbol, will turn when the fan is working Time display Timer Light Fan speed Alarm symbol Cleaning symbol, appears when total working time up to 14 hours. LAMP REPLACEMENT 1. Remove the two filters and the 3pcs screws on the back of the lamp board.
  • Seite 28: Replacing The Carbon Filter

    2.Flip the lamp board after remove the screws. 3. Remove the 4pcs screws on the strip LED board and replace the strip LED. REPLACING THE CARBON FILTER Carbon filter Outlet cover ST4*8 screw Remove the 4 screws from outlet cover first. Take down the outltet cover. Install or replace the carbon filter as shown in above picture.
  • Seite 29: Cleaning And Care

    CLEANING AND CARE Note: Turn off the cooker hood before cleaning and maintenance and unplug the appliance from the wall outlet. Regular cleaning Use a soft cloth moistened with hand-warm mildly soapy water or household cleaning detergent. Never use metal pads, chemical, abrasive material or stiff brush to clean the unit.
  • Seite 30: Troubleshooting

    TROUBLESHOOTING Fault Cause Solution Light on, but motor Light on, but fan Switch of the unit and does not work. does not work repair by qualified service personnel only. The motor is damaged Both light and fan Light damaged. Replace the bulb do not work with correct rating.
  • Seite 31: Notes On Environmental Protection

    NOTES ON ENVIRONMENTAL PROTECTION • During cooking, make sure that there is sufficient air supply so that the cooker hood can operate efficiently and with low operating noise. • Adjust the fan speed to the amount of steam produced during cooking. Use the intensive mode only when necessary.
  • Seite 32: Product Data Sheet

    PRODUCT DATA SHEET Information according to Regulation (EU) No. 65/2014 Measurement and calculation methods according to EN 61591:1997+A1:2006+A2:20 1 1+A1 1:2014+A12:2015 Item number 10035926, 10035925 Description Symbol Value Unit Annual Energy Consumption 40,8 kWh/Year hood Energy Efficiency class Fluid Dynamic Efficiency 30,9 hood Fluid Dynamic Efficiency class...
  • Seite 33 Information according to Regulation (EU) No. 66/2014 Measurement and calculation methods according to EN 61591:1997+A1:2006+A2:20 1 1+A1 1:2014+A12:2015 Item number 10035926, 10035925 Description Symbol Value Unit Annual Energy Consumption 40,8 kWh/Year hood Time increase factor Fluid Dynamic Efficiency 30,9 hood Energy Efficiency Index 50,1 hood...
  • Seite 34: Disposal Considerations

    DISPOSAL CONSIDERATIONS If there is a legal regulation for the disposal of electrical and electronic devices in your country, this symbol on the product or on the packaging indicates that this product must not be disposed of with household waste. Instead, it must be taken to a collection point for the recycling of electrical and electronic equipment.
  • Seite 35 Estimado cliente: Le felicitamos por la adquisición de este producto. Lea atentamente el siguiente manual y siga cuidadosamente las instrucciones de uso con el fin de evitar posibles daños. La empresa no se responsabiliza de los daños ocasionados por un uso indebido del producto o por haber desatendido las indicaciones de seguridad.
  • Seite 36: Indicaciones De Seguridad

    INDICACIONES DE SEGURIDAD • Lea atentamente todas las instrucciones antes de utilizarlo y guarde el manual en un lugar seguro para futuras consultas. • Los trabajos de instalación sólo pueden ser realizados por un electricista cualificado o una persona cualificada. Antes de utilizar la campana extractora, asegúrese de que la tensión (V) y la frecuencia (Hz) indicadas en la campana extractora se corresponden con la tensión y la frecuencia de la red eléctrica de su hogar.
  • Seite 37 Notas importantes sobre el funcionamiento del extractor de aire ADVERTENCIA ¡Peligro de intoxicación por la recirculación de gases! No utilice el aparato en modo de extracción de aire si lo utiliza junto a chimenea que depende del aire ambiente ya que no se garantiza una circulación sufi ciente de aire.
  • Seite 38: Instalación

    INSTALACIÓN Preparación Si tiene salida al exterior, puede instalar la campana extractora como se muestra en la imagen de la derecha. El conducto de humos debe tener un diámetro de al menos 150 mm y ser de esmalte, aluminio o un tubo fl exible y resistente al calor.
  • Seite 39 • Perfore dos agujeros en la parte trasera del armario de la cocina. La distancia entre los dos agujeros debe ser de 430 mm. • El soporte de fijación puede ajustarse de 6 a 25 mm. • El recorte del armario de cocina es de 520 mm x 180 mm. •...
  • Seite 40 Nota: El tubo de escape extensible no está incluido en el volumen de suministro, sino que es un accesorio opcional. Retire la película protectora antes de la instalación. • Coloque la válvula de retención en la salida de aire de la campana extractora. Conecte el tubo de drenaje a la válvula de retención como se muestra a continuación.
  • Seite 41: Funcionamiento

    Instalación con salida de aire Si no tiene un escape exterior, no necesita un tubo de escape. La instalación corresponde a la instalación con ventilación externa. FUNCIONAMIENTO Tras la conexión a la red eléctrica, el aparato está en modo de espera. Encendido y apagado: El dispositivo se enciende y apaga con el botón.
  • Seite 42 botón de luz o de velocidad para ajustar. Una vez que haya ajustado las horas, botón de luz o de velocidad para ajustar. Una vez que haya ajustado las horas, botón de luz o de velocidad para ajustar. Una vez que haya ajustado las horas, la indicación de los minutos parpadea.
  • Seite 43: Pantalla Lcd

    PANTALLA LCD Modo de ventilación Visualización de la hora Temporizador Nivel del ventilador Despertador El indicador de limpieza aparece cuando el tiempo de funcionamiento ha alcanzado las 14 horas. CAMBIAR LA LÁMPARA 1. Retire los dos filtros y los 3 tornillos de la parte posterior de la placa de la lámpara.
  • Seite 44: Sustitución Del Filtro De Carbón Activado

    2. dé la vuelta a la placa de la lámpara después de retirar los tornillos. Retire los 4 tornillos de la placa de la tira de LED y vuelva a colocar la tira de LED. SUSTITUCIÓN DEL FILTRO DE CARBÓN ACTIVADO Carbon filter Filtro de...
  • Seite 45: Limpieza Y Cuidado

    LIMPIEZA Y CUIDADO Nota: Apague y desenchufe la campana extractora antes de proceder a su limpieza y mantenimiento. Limpieza habitual Utilice un paño suave humedecido con agua jabonosa tibia o un limpiador doméstico suave. No utilice nunca esponjas metálicas ni materiales abrasivos o químicos para limpiar el aparato.
  • Seite 46: Reparación De Anomalías

    REPARACIÓN DE ANOMALÍAS Error Causa Solución El aspa del ventilador La reparación y el La luz está encendida está bloqueada. mantenimiento del pero el ventilador aparato sólo pueden ser no funciona. realizados por personal El motor está dañado de servicio cualificado. La bombilla se ha fundido.
  • Seite 47: Notas Sobre La Protección Del Medio Ambiente

    NOTAS SOBRE LA PROTECCIÓN DEL MEDIO AMBIENTE • Cuando cocine, asegúrese de que hay suficiente suministro de aire para que la campana extractora pueda trabajar de forma eficiente y con un bajo nivel de ruido. • Ajuste la velocidad del ventilador a la cantidad de vapor producida durante la cocción.
  • Seite 48: Ficha Técnica Del Producto

    FICHA TÉCNICA DEL PRODUCTO Información según el Reglamento (UE) nº 65/2014 Métodos de medición y cálculo según EN 61591:1997+A1:2006+A2:201 1+A1 1:2014 +A12:2015 Número de artículo 10035926, 10035925 Descripción Símbolo Valor Unidad Consumo anual de energía 40,8 kWh/Año hood Clase de eficiencia energética eficiencia fluidodinámica 30,9 hood...
  • Seite 49 Datos según el Reglamento (UE) nº 66/2014 Métodos de medición y cálculo según EN 61591:1997+A1:2006+A2:201 1+A1 1:2014 +A12:2015 Número de artículo 10035926, 10035925 Descripción Símbolo Valor Unidad Consumo anual de energía 40,8 kWh/Año hood Factor de extensión temporal eficiencia fluidodinámica 30,9 hood Índice de eficiencia energética...
  • Seite 50: Retirada Del Aparato

    RETIRADA DEL APARATO Si en su país existe una disposición legal relativa a la eliminación de aparatos eléctricos y electrónicos, este símbolo estampado en el producto o en el embalaje advierte que no debe eliminarse como residuo doméstico. En lugar de ello, debe depositarse en un punto de recogida de reciclaje de aparatos eléctricos y electrónicos.
  • Seite 51 Cher client, chère cliente, Toutes nos félicitations pour l’acquisition de ce nouvel appareil. Lisez attentivement les indications suivantes et suivez-les pour éviter d'éventuels dommages. Nous ne saurions être tenus pour responsables des dommages dus au non-respect des consignes et à la mauvaise utilisation de l’appareil. Scannez le QR-Code pour obtenir la dernière version du mode d'emploi ainsi que d'autres informations concernant le produit.
  • Seite 52: Consignes De Sécurité

    CONSIGNES DE SÉCURITÉ • Lisez attentivement toutes les consignes avant d'utiliser l'appareil et conservez le mode d'emploi pour vous y référer ultérieurement. • Les travaux de montage ne doivent être effectués que par un électricien ou une personne qualifiée. Avant d'utiliser la hotte, assurez-vous que la tension (V) et la fréquence (Hz) indiquées sur la hotte correspondent à...
  • Seite 53 Remarques importantes pour l'utilisation en extraction d'air MISE EN GARDE Risque d‘intoxication par ré-aspiration de gaz de combustion Ne jamais utiliser la fonction d’extraction de l’appareil en même temps qu’un foyer dépendant de l’air ambiant si un apport suffi sant en air frais n'est pas garanti.
  • Seite 54: Installation

    INSTALLATION Préparation Si vous disposez d'une extraction vers l'extérieur, vous pouvez installer la hotte comme indiqué sur l'image de droite. Le conduit d'extraction doit avoir un diamètre d'au moins 150  mm et être en émail, en aluminium ou en un tuyau fl exible résistant à...
  • Seite 55 • Percez deux trous à l'arrière de votre caisson mural. L'écart entre les deux trous doit être de 430 mm. • Le support de fixation est ajustable entre 6 mm et 25 mm. • La découpe de l'armoire de cuisine est de 520 mm x 180 mm. •...
  • Seite 56 Remarque le conduit d'extraction extensible n'est pas fourni, il s'agit d'un accessoire en option. Retirez le film de protection avant de procéder à l'installation. • Fixez le clapet anti-retour à la sortie d'air de la hotte. Fixez le tube de sortie d'air au clapet anti retour comme illustré...
  • Seite 57: Utilisation

    Installation en mode recyclage d'air Si vous ne disposez pas d'une extraction vers l'extérieur, vous n'avez pas besoin de conduit. L'installation correspond au mode d'extraction vers l'extérieur. UTILISATION L'appareil se trouve en mode veille lorsque vous le branchez sur l'alimentation. Marche/arrêt : l'appareil s'allume et s'éteint avec la touche Réglage de la vitesse de ventilation : réglez la vitesse du moteur avec la touche dans l'ordre suivant : "lente - moyenne - rapide - lente..."...
  • Seite 58 sur la touche d'éclairage, soit sur la touche de vitesse. Une fois que vous avez sur la touche d'éclairage, soit sur la touche de vitesse. Une fois que vous avez réglé les heures, les chiffres des minutes clignotent. Pour régler, appuyez sur réglé...
  • Seite 59: Affichage Lcd

    AFFICHAGE LCD Fonctionnement de la ventilation Affichage de la durée Minuterie Éclairage Vitesse de ventilation Alarme Le témoin de nettoyage apparaît lorsque la durée de fonctionnement a atteint 14 heures. REMPLACEMENT DES LAMPES 1. Retirez les deux filtres et les 3 vis à l'arrière de la carte de la lampe.
  • Seite 60: Remplacement Du Filtre À Charbon Actif

    2. Retournez la carte de la lampe après avoir retiré les vis. 3. Retirez les 4 vis de la carte de bande LED et remplacez la bande LED. REMPLACEMENT DU FILTRE À CHARBON ACTIF Carbon filter Filtre à Cache Outlet cover charbon actif 4 vis ST4*8 screw...
  • Seite 61: Nettoyage Et Entretien

    NETTOYAGE ET ENTRETIEN Remarque : Éteignez la hotte avant le nettoyage et l'entretien et débranchez la fiche de la prise. Nettoyage courant Utilisez un chiffon doux imbibé d'eau savonneuse tiède et douce ou d'un nettoyant ménager doux. N'utilisez jamais d'éponges métalliques ou de matériaux abrasifs ou chimiques pour nettoyer l'appareil.
  • Seite 62: Résolution Des Problèmes

    RÉSOLUTION DES PROBLÈMES Problème Cause Solution La pale du ventilateur La réparation et la L'éclairage est allumé est bloquée. maintenance de l'appareil mais le ventilateur ne doivent être effectuées ne fonctionne pas. que par du personnel Le moteur est endommagé de service qualifié.
  • Seite 63: Remarques Sur La Protection De L'environnement

    REMARQUES SUR LA PROTECTION DE L'ENVIRONNEMENT • Assurez-vous qu'il y a une ventilation suffisante pendant la cuisson pour que la hotte aspirante puisse fonctionner efficacement et avec un faible niveau sonore. • Ajustez la vitesse du ventilateur à la quantité de vapeur produite pendant la cuisson.
  • Seite 64: Fiche De Données Produit

    FICHE DE DONNÉES PRODUIT Informations selon le règlement (UE) n ° 65/2014 Méthodes de mesure et de calcul selon EN 61591: 1997 + A1: 2006 + A2: 201 1 + A1 1: 2014 + A12: 2015 Numéro d'article 10035926, 10035925 Description Symbole Valeur...
  • Seite 65 Informations selon le règlement (UE) n ° 66/2014 Méthodes de mesure et de calcul selon EN 61591: 1997 + A1: 2006 + A2: 201 1 + A1 1: 2014 + A12: 2015 Numéro d'article 10035926, 10035925 Description Symbole Valeur Unité Consommation annuelle d'énergie 40,8 kWh/Jahr...
  • Seite 66: Informations Sur Le Recyclage

    INFORMATIONS SUR LE RECYCLAGE Si l'élimination des appareils électriques et électroniques est réglementée dans votre pays, ce symbole sur le produit ou sur l'emballage indique qu'il ne doit pas être jeté avec les ordures ménagères. Vous devez l'acheminer vers un point de collecte pour le recyclage des équipements électriques et électroniques.
  • Seite 67 Gentile Cliente, La ringraziamo per aver acquistato il dispositivo. La preghiamo di leggere attentamente le seguenti istruzioni per l’uso e di seguirle per evitare possibili danni tecnici. Non ci assumiamo alcuna responsabilità per danni scaturiti da una mancata osservazione delle avvertenze di sicurezza e da un uso improprio del dispositivo.
  • Seite 68: Avvertenze Di Sicurezza

    AVVERTENZE DI SICUREZZA • Leggere attentamente tutte le istruzioni prima dell´uso e conservare il manuale per consultazioni future. • Il montaggio può essere eseguito solo da un tecnico qualificato. Prima di utilizzare la cappa aspirante, accertarsi che la tensione (V) e la frequenza (Hz) indicate corrispondano alla tensione (V) e alla frequenza (Hz) domestiche.
  • Seite 69 Note importanti sulla modalità di estrazione AVVERTENZA pericolo di intossicazione da gas di scarico! Non mettere in funzione il dispositivo con funzione di scarico mentre è attivo un impianto di riscaldamento che utilizza l´aria ambiente e se non è presente un´areazione suffi ciente.
  • Seite 70: Installazione

    INSTALLAZIONE Preparazione Se si dispone di uno scarico verso l´esterno, installare la cappa aspirante come mostrato nella fi gura a destra. Il canale di scarico deve avere un diametro di almeno 150 mm ed essere fatto di smalto, alluminio o composto da un tubo fl essibile e resistente al calore.
  • Seite 71 • Eseguire due fori sul mobile posteriore della cucina. La distanza tra i due fori deve essere di 430 mm. • La staffa di fissaggio può essere regolata da 6 mm a 25 mm. • Il taglio del mobile da cucina é di 520 mm x 180 mm. •...
  • Seite 72 Nota: il tubo di scarico estensibile non é incluso nella consegna, si tratta di un accessorio opzionale. Rimuovere la pellicola protettiva prima dell´installazione. • Fissare la valvola di non ritorno all´uscita dell´aria della cappa. Collegare il tubo di scarico alla valvola di non ritorno come mostrato sotto. Tubo di scarico Cappa aspirante...
  • Seite 73: Utilizzo

    Installazione con ricircolo dell´aria Se non si dispone di uno scarico esterno, non è necessario un tubo di scarico. L´installazione è la stessa dell´installazione con ventilazione esterna. UTILIZZO Una volta collegato all´alimentazione, il dispositivo si trova in modalità stand-by. Accensione/spegnimento: il dispositivo si accende e si spegne con il tasto Regolazione della velocità...
  • Seite 74 per le impostazioni. Premendo , il numero diventa più piccolo, premendo , il numero diventa più grande. 2. Premendo brevemente il tasto mentre il dispositivo è in funzione, é possibile predefi nita: OFF → 15 min → 30 min → 45 min → 60min. impostare il conto alla rovescia fi no allo spegnimento automatico.
  • Seite 75: Spia Lcd

    SPIA LCD Funzione ventola Spia orario Timer Luce Livello ventola Allarme L'indicatore di pulizia appare quando il tempo di funzionamento ha raggiunto le 14 ore. CAMBIARE LA LAMPADINA 1. Rimuovere i due filtri e le 3 viti sul retro del vano della lampadina.
  • Seite 76: Sostituire Il Filtro A Carboni Attivi

    2. Aprire il vano della lampadina dopo aver rimosso le viti. 3. Rimuovere le 4 viti sulla piastrina a LED e sostituire le strisce a LED. SOSTITUIRE IL FILTRO A CARBONI ATTIVI Carbon filter Filtro a Coperchio Outlet cover carboni attivi 4 viti ST4*8 screw ST4x8...
  • Seite 77: Pulizia E Manutenzione

    PULIZIA E MANUTENZIONE Nota : Spegnere e scollegare la cappa prima della pulizia e della manutenzione. Pulizia regolare Usare un panno morbido inumidito con acqua tiepida e sapone leggero o un detergente per la casa delicato. Non usare mai spugne metalliche o materiali abrasivi o chimici per pulire il dispositivo.
  • Seite 78: Correzione Degli Errori

    CORREZIONE DEGLI ERRORI Errore Causa Soluzione La pala della ventola La riparazione e La luce è accesa é bloccata. la manutenzione ma la ventola dell'apparecchio possono non funziona. essere eseguite solo da Il motore é danneggiato. personale qualificato. La lampadina é bruciata. Sostituire la lampadina.
  • Seite 79: Note Per La Tutela Dell´ambiente

    NOTE PER LA TUTELA DELL´AMBIENTE • Quando si cucina, assicurarsi che ci sia una circolazione dell´aria sufficiente in modo che la cappa possa funzionare in modo efficiente e silenzioso. • Regolare la velocità della ventola in base alla quantità di vapore prodotto durante la cottura.
  • Seite 80: Scheda Informativa Del Prodotto

    SCHEDA INFORMATIVA DEL PRODOTTO Informazioni secondo il regolamento (EU) Nr. 65/2014 Metodi di misurazione e di calcolo secondo EN 61591:1997+A1:2006+A2:201 1+A1 1 :2014+A12:2015 Numero articolo 10035926, 10035925 Denominazione Simbolo Valore Unità Consumo energetico annuale 40,8 kWh/anno hood Classe di efficienza energetica Efficienza fluidodinamica 30,9 hood...
  • Seite 81 Informazioni secondo il regolamento (EU) Nr. 66/2014 Metodi di misurazione e di calcolo secondo EN 61591:1997+A1:2006+A2:201 1+A1 1 :2014+A12:2015 Numero articolo 10035926, 10035925 Denominazione Simbolo Valore Unità Consumo energetico annuale 40,8 kWh/anno hood Fattore di incremento nel tempo Efficienza fluidodinamica 30,9 hood Indice di efficienza energetica...
  • Seite 82: Avviso Di Smaltimento

    AVVISO DI SMALTIMENTO Se nel vostro Paese sono vigenti regolamenti legislativi relativi allo smaltimento di dispositivi elettrici ed elettronici, questo simbolo sul prodotto o sull'imballaggio indica che non è consentito smaltire questo prodotto nei rifiuti casalinghi. Il dispositivo deve invece essere portato in un centro di raccolta per il riciclaggio di dispositivi elettrici ed elettronici.

Diese Anleitung auch für:

1003592510035926

Inhaltsverzeichnis