Herunterladen Inhalt Inhalt Diese Seite drucken
Klarstein 10030001 Anschluss- Und Anwendungshinweise
Vorschau ausblenden Andere Handbücher für 10030001:

Werbung

Verfügbare Sprachen
  • DE

Verfügbare Sprachen

  • DEUTSCH, seite 1
Dunstabzugshaube
10030001

Werbung

Inhaltsverzeichnis
loading

Inhaltszusammenfassung für Klarstein 10030001

  • Seite 1 Dunstabzugshaube 10030001...
  • Seite 2: Inhaltsverzeichnis

    Sehr geehrter Kunde, wir gratulieren Ihnen zum Erwerb Ihres Klarstein Gerätes. Lesen Sie die folgenden Anschluss- und Anwen- dungshinweise sorgfältig durch und befolgen Sie diese, um möglichen technischen Schäden vorzubeugen. Für Schäden, die durch Missachtung der Sicherheitshinweise und unsachgemäßen Gebrauch entstehen, übernehmen wir keine Haftung.
  • Seite 3: Sicherheitshinweise

    Sicherheitshinweise • Diese Bedienungsanleitung dient zu Ihrer Sicherheit. Lesen Sie Anleitung sorgfältig und bewahren Sie diese Anleitung stets gut auf, damit Sie jederzeit darauf zurückgreifen können. Kinder im Haushalt • Kleine Kinder müssen vom Gerät fern gehalten werden. Sie müssen beaufsichtigt werden, so dass sie die heißen Teile nicht berühren.
  • Seite 4 Volumen des Anzapfstroms des Gerätes nicht 4 Pa (0,04 mbar) übersteigt. Der Raum muss angemessen belüftet sein, wenn die Dunstabzugshaube gleichzeitig mit Geräten betrieben wird, die Gas oder andere Brennstoffe verbrennen. Die Luft darf nicht in eine Abzugsleitung abgeführt werden, die als Rauchabzug für Geräte verwendet wird, die Gas oder andere Brennstoffe verbrennen.
  • Seite 5: Montage

    Montage Wandmontage 1. Die Dunstabzugshaube muss einen Abstand von 65-70 cm über dem Kochfeld haben, um die beste Wir- kung zu entfalten. 2. Zeichnen Sie an der Wand 2 Löcher an, die denselben Abstand der Lö- cher auf der Rückseite der Dunst- abzugshaube haben.
  • Seite 6 Unterbau 1. Bohren Sie auf der Unterseite des Hängeschranks 4 Löcher mit 6 mm Durchmesser. 2. Führen Sie das Einwegventil in den Luftauslass der Dunstabzugshaube ein. Montieren Sie die Dunstabzugs- haube unter den Hängeschrank. Befestigen Sie die Haube mit den 4 beiliegenden Schrauben. 3.
  • Seite 7: Betrieb

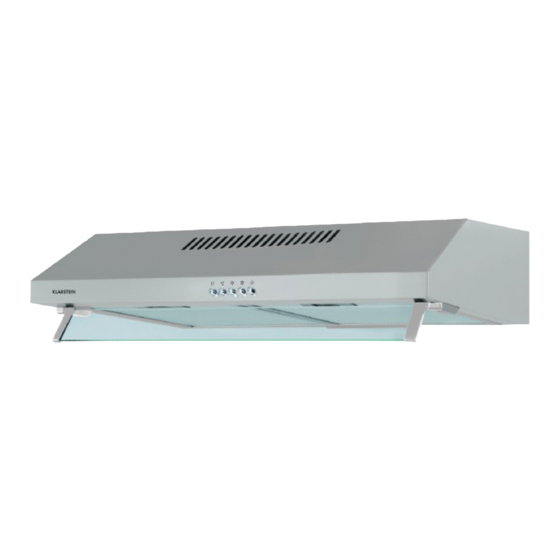
    Betrieb Bedienfeld Schalten Sie mit diesem Knopf die Lüftung aus. Ventilator Verwenden Sie die niedrige Stufe zum Durchlüften der Küche. Sie eignet sich niedrige Stufe zum Köcheln und Kochen ohne viel Dampf. Erneut drücken, um das Gebläse auszuschalten. Ventilator Die mittlere Stufe ist ideal für das normale Kochen. Erneut drücken, um das mittlere Stufe Gebläse auszuschalten.
  • Seite 8: Reinigung Und Wartung

    Reinigung und Wartung Reinigung des Filtergitters. • Entfernen Sie das Gitter wie im Bild unten. • Methode 1: Legen Sie das Gitter in für 3 Minuten in warmes Wasser von 40-50 °C. Geben Sie ein Reinigungsmittel hinzu und lassen Sie das Gitter 2-3 Minuten einweichen. Ziehen Sie am besten Handschuhe an und reinigen Sie das Gitter mit einer weichen Bürste.
  • Seite 9: Hinweise Zur Entsorgung

    Warnung: Brandgefahr Reinigen Sie häufig den Fettfilter (mindestens einmal im Monat), starke Fettablagerungen kön- nen ein Brandrisiko darstellen. Schalten Sie immer das Gerät erst aus und ziehen Sie den Stecker aus der Steckdose, bevor das Gerät gereinigt oder gewartet wird. Warnung: Stromschlaggefahr Trennen Sie vor der Reinigung und dem Austausch der Glühlampe den Netzstecker.
  • Seite 10 Dear Customer, Congratulations on purchasing this equipment. Please read this manual carefully and take care of the follow- ing hints on installation and use to avoid technical damages. Any failure caused by ignoring the items and cautions mentioned in the operation and installation instructions are not covered by our warranty and any liability.
  • Seite 11: Safety Instructions

    Safety Instructions • These instructions are for your safety. Please read through them thoroughly prior to installation and retain them for future reference. Children in the household • Young children should be kept away. Care should be taken to avoid touching the appliance. •...
  • Seite 12 burning gas or other fuels. Regulations regarding air extraction must be complied with. • Before connecting the hood: switch off the electricity supply and check that the supplied voltage and frequency coincide with that indicated on the appliance nameplate. • The hood may stop working during an electrostatic discharge (e.g. lightning). This involves no risk of damage.
  • Seite 13: Installation

    Installation Wandmontage 1. The cooker hoods should be placed at a distance of 65-75cm from the cooking surface for best effect. 2. To install onto the wall, drill 4 holes of Ø 8mm on a suitable place ac- cording with the centre distance of hole in the back of the cooker hood.
  • Seite 14 Substructure 1. Drill 4 holes of Ø 6mm at the bottom of the hanging cupboard. 2. Put the one way valve on the air outlet of cooker hood, then install the cooker hood on the bottom of the cupboard, tighten the cooker hood with enclosed 4 screws. 3.
  • Seite 15: Operation

    Operation Control panel Off button It is used for turning off the fan. Low Speed It is used for Ventilation on the kitchen. It is suitable for simmering and cook- button ing which do not make much steam. Press again to stop the motor. Medium Speed Airflow speed is ideally for ventilation in standard cooking operation.
  • Seite 16: Cleaning And Maintenance

    Cleaning and Maintenance Reinigung des Filtergitters. • Removing the filters as the instruction in picture below. • Method 1:Soak them for about 3 minute in hot water (40-50 degrees) with a grease-loosening detergent then brush it gently with a soft brush. Please do not apply too much pressure, avoid damaging it. •...
  • Seite 17: Declaration Of Conformity

    Warning: Danger of fire To avoid the risk of fire, clean the metal filter regularly and closely watch and regulate pans containing hot oil. Warning: Danger of electric shock Separate the mains supply before cleaning and changing the light bulb. Declaration of Conformity According to the European waste regulation 2002/96/EC this symbol on the product or on its packaging indicates that this product may not be treated as household waste.
  • Seite 18 Chère cliente, cher client, Toutes nos félicitations pour l’acquisition de ce nouvel appareil. Veuillez lire attentivement et respecter les instructions de ce mode d’ e mploi afin d’ é viter d’ é ventuels dommages. Nous ne saurions être tenus pour responsables des dommages dus au non-respect des consignes et à...
  • Seite 19: Consignes De Sécurité

    Consignes de sécurité • Ce mode d’ e mploi sert à garantir la sécurité de l’utilisateur. Le lire attentivement et le conserver en lieu sûr pour pouvoir s’y référer ultérieurement. Enfants dans le foyer • Tenir les jeunes enfants à l’ é cart de l’ a ppareil. Les surveiller pour qu’ils ne touchent pas les parties chaudes de l’...
  • Seite 20 de combustion de gaz ou d’ a utres substances. L’ a ir ne doit pas être aspiré par un conduit servant de conduit de cheminée pour des appareils de combustion de gaz ou d’ a utres substances. Respecter les normes de régulation en matière d’ é vacuation de l’ a ir. •...
  • Seite 21: Montage

    Montage Montage mural 1. La hotte aspirante doit être montée 65-70 cm au-dessus de la cuisinière pour assurer une efficacité optimale. 2. Marquer 2 trous au mur dont l’ é cart correspond à celui des trous situés à l’ a rrière de la hotte aspirante. Puis percer 4 trous d’un diamètre de 8 mm à...
  • Seite 22: Installation Du Ventilateur

    Montage sous meuble 1. Percer 4 trous d’un diamètre de 6 mm dans la partie inférieure du placard. 2. Introduire le clapet anti-retour dans la sortie d’ a ir de la hotte aspirante. Monter la hotte aspirante sous le placard. Fixer la hotte avec les 4 vis fournies. 3.
  • Seite 23: Fonctionnement

    Fonctionnement Panneau de commande ÉTEINT Éteindre la ventilation en appuyant sur cette touche. Ventilateurt Utiliser la vitesse faible pour aérer la cuisine. Elle est adaptée pour la cuisson vitesse faible à feu doux ou sans trop de vapeur. Appuyer de nouveau pour éteindre le ventilateur.
  • Seite 24: Nettoyage Et Entretien

    Nettoyage et entretien Nettoyage de la grille du filtre • Retirer la grille comme illustré ci-dessous. • Méthode 1 : plonger la grille dans de l’ e au chaude 40-50 °C pendant 3 minutes. Verser un produit nettoyant dans l’ e au et laisser la grille tremper pendant 2-3 minutes. Il est préférable d’ e nfiler des gants de ménage et de nettoyer la grille avec une brosse douce.
  • Seite 25: Information Sur Le Recyclage

    Avertissement : risques d’incendie Nettoyer régulièrement les filtres à graisse (au moins une fois par mois), car les dépôts de graisse peuvent présenter des risques d’incendie. Toujours éteindre et débrancher l’ a ppareil avant de le nettoyer ou de l’ e ntretenir. Avertissement : risques d’électrocution Débrancher l’...
  • Seite 26 Gentile cliente, La ringraziamo per aver acquistato il nostro prodotto. La preghiamo di leggere attentamente le seguenti istruzioni e di seguirle per evitare eventuali danni. Non ci assumiamo alcuna responsabilità per danni derivati da una mancata osservazione delle avvertenze di sicurezza e da un uso improprio del dispositivo. Indice Avvertenze di sicurezza .
  • Seite 27: Avvertenze Di Sicurezza

    Avvertenze di sicurezza • Il presente manuale di istruzione serve alla sicurezza dell’utente. Leggere il manuale con attenzione e conservarlo per consultazioni future. Presenza di bambini in casa • Tenere il dispositivo fuori dalla portata dei bambini. Sorvegliare i bambini affinché non tocchino le parti calde del dispositivo.
  • Seite 28 • Prima di collegare il dispositivo, staccare la corrente. Assicurarsi inoltre che la tensione dell’ a limentazione sia conforme alla tensione nominale indicata sulla targhetta identificativa del dispositivo. • Durante una scarica elettrostatica (ad es. un temporale), il dispositivo può arrestarsi. Ciò non rappresenta nessun pericolo o danno.
  • Seite 29: Montaggio

    Montaggio Montaggio alla parete 1. Affinché la cappa aspirante funzio- ni al meglio, la distanza tra la cappa aspirante e il piano cottura deve es- sere di 65-70 cm. 2. Segnare 2 fori da eseguire sulla pare- te che abbiano la stessa distanza dei fori sul retro della cappa aspirante.
  • Seite 30 Montaggio sottopensile 1. Eseguire 4 fori con 6 mm di diametro nella parte inferiore del pensile. 2. Introdurre la valvola unidirezionale sull’uscita dell’ a ria della cappa aspirante. Montare la cappa aspirante sul fondo del pensile. Fissare la cappa utilizzando 4 viti incluse nella consegna. 3.
  • Seite 31: Funzionamento

    Funzionamento Pannello dei comandi Spegnere la ventola con questo tasto. Ventola Livello Utilizzare il livello basso per arieggiare la cucina. Questo livello è adatto per basso cucinare senza troppo vapore. Premere di nuovo per spegnere la ventola. Ventola Livello Il livello medio è ideale per cucinare normalmente. Premere di nuovo per medio spegnere la ventola.
  • Seite 32: Pulizia E Manutenzione

    Pulizia e manutenzione Pulizia della griglia del filtro • Rimuovere la griglia come mostrato nella figura sottostante. • Metodo 1: mettere la griglia del filtro per 3 minuti in acqua calda a 40-50°C. Aggiungere un detergente e lasciare la griglia in ammollo per 2-3 minuti. Si consiglia di indossare dei guanti e di lavare la griglia con una spazzola morbida.
  • Seite 33: Smaltimento

    Attenzione: pericolo di incendio Pulire spesso il filtro antigrasso (almeno una volta al mese), in quanto l’ a ccumulo di grasso può comportare il rischio di incendio. Spegnere sempre il dispositivo e staccare la spina dalla presa prima di pulire il dispositivo o di effettuarne la manutenzione.
  • Seite 34 Estimado cliente: Le felicitamos por la adquisición de este producto. Lea atentamente el siguiente manual y siga cuidadosa- mente las instrucciones de uso con el fin de evitar posibles daños. La empresa no se responsabiliza de los daños ocasionados por un uso indebido del producto o por haber desatendido las indicaciones de seguridad. Índice Indicaciones de seguridad .
  • Seite 35: Indicaciones De Seguridad

    Indicaciones de seguridad • Este manual de instrucciones se ha creado para su seguridad. Lea atentamente el manual y consérvelo para consultarlo en cualquier momento. Niños en el hogar • Los niños pequeños deben mantenerse alejados del aparato. Debe prestar atención de no tocar las piezas que se encuentran a altas temperaturas.
  • Seite 36 para salida de humos de aparatos que funcionan con gas u otras sustancias inflamables. La regulación vigente relacionada con la ventilación debe cumplirse. • Antes de desconectar el aparato del suministro eléctrico, apáguelo en el interruptor. Compruebe que la tensión de suministro se adecua a los valores indicados en la placa técnica del aparato. •...
  • Seite 37: Montaje

    Montaje Montaje en pared 1. La campana extractora debe contar con una distancia de 65-70 cm con respecto a la superficie de cocción para conseguir un funcionamiento eficiente. 2. Realice dos agujeros en la pared que se sitúen a la misma distancia que los orificios situados en la parte tra- sera de la campana extractora.
  • Seite 38 Montaje bajo mueble 1. Perfore cuatro agujeros con 6 mm de diámetro en la parte inferior de un mueble de cocina. 2. Introduzca la válvula desechable en la salida de aire de la campana extractora. Monte la campana extractora bajo el mueble. Fije la campana con los cuatro tornillos incluidos. 3.
  • Seite 39: Funcionamiento

    Funcionamiento Panel de control Con este botón puede activar el ventilador. Potencia de Utilice el nivel bajo de ventilación para ventilar la cocina. Es apropiado para ventilación baja hervir sin crear demasiado vapor. Pulse de nuevo para apagar el ventilador. Potencia de ven- El nivel medio es ideal para una cocción normal.
  • Seite 40: Limpieza Y Mantenimiento

    Limpieza y mantenimiento Limpieza de la rejilla del filtro. • Retire la rejilla como se muestra en la ilustración inferior. • Método 1: sumerja la rejilla en agua tibia (40-50 °C) durante tres minutos. Añada limpiador y deje a remojo la rejilla durante 2-3 minutos.
  • Seite 41: Indicaciones Para La Retirada Del Aparato

    Advertencia: Riesgo de incendio Limpie el filtro antigrasa al menos una vez al mes, una acumulación de grasa podría representar un riesgo de incendio. Apague siempre el aparato y desconecte el enchufe de la toma de corriente antes de limpiar el aparato o de realizar labores de mantenimiento.

Inhaltsverzeichnis