Herunterladen Inhalt Inhalt Diese Seite drucken

Werbung

Verfügbare Sprachen
  • DE

Verfügbare Sprachen

  • DEUTSCH, seite 1
Dunstabzugshaube
Cooker Hood
Campana extractora
Hotte aspirante
Cappa aspirante
10031697

Werbung

Inhaltsverzeichnis
loading

Inhaltszusammenfassung für Klarstein 10031697

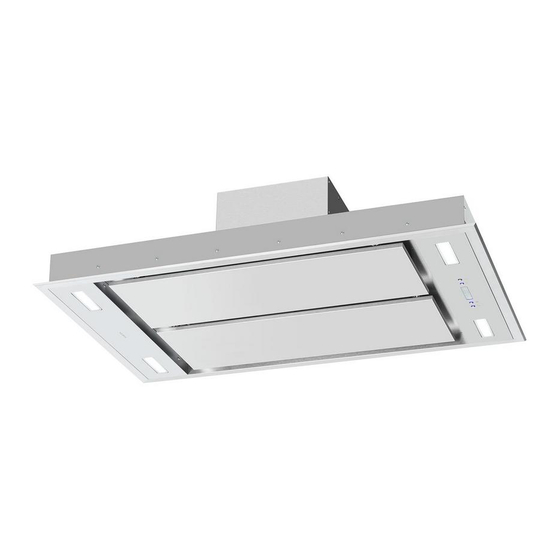
  • Seite 1 Dunstabzugshaube Cooker Hood Campana extractora Hotte aspirante Cappa aspirante 10031697...
  • Seite 3: Inhaltsverzeichnis

    Bedienfeld und Funktionen 10 Fernbedienung und Funktionen 1 1 Filterinstallation und Filterwechsel 12 Reinigung und Pflege 12 Hinweise zur Entsorgung 13 TECHNISCHE DATEN Artikelnummer 10031697 Stromversorgung 220-240 V ~ 50-60 Hz KONFORMITÄTSERKLÄRUNG Hersteller: Chal-Tec GmbH, Wallstraße 16, 10179 Berlin, Deutschland. Dieses Produkt entspricht den folgenden Europäischen...
  • Seite 4: Sicherheitshinweise

    SICHERHEITSHINWEISE • Lesen Sie sich alle Hinweise vor der Benutzung sorgfältig durch und bewahren Sie die Bedienungsanleitung zum späteren Nachschlagen gut auf. • Die Montagearbeiten dürfen nur von einem Elektrofachmann oder einer Fachkraft durchgeführt werden. Bevor Sie die Dunstabzugshaube verwenden, stellen Sie sicher, dass die Spannung (V) und die auf der Dunstabzugshaube angegebene Frequenz (Hz) der Spannung (V) und Frequenz (Hz) ihrer Stromversorgung entsprechen.
  • Seite 5 Wichtige Hinweise zum Abluftbetrieb WARNUNG Vergiftungsgefahr durch zurückgesaugte Abgase! Betreiben Sie das Gerät nicht im Abluftbetrieb, wenn es zusammen mit einer raumluftabhängigen Feuerstätte betrieben wird und keine ausreichende Luftzirkulation garantiert wird. Raumluftabhängige Feuerstätten, wie Gas-, Öl-, Holz- oder Kohleheizungen, Boiler oder Durchlauferhitzer) beziehen die Luft aus dem Raum und führen Sie durch ein Abluftrohr oder eine Kamin ins Freie.
  • Seite 6: Installation

    INSTALLATION Wenn Sie eine Abzug nach außen besitzen, kann Ihre Dunstabzugshaube wie auf dem Bild dargestellt mit Hilfe eines Abzugskanals (aus Emaille, Aluminium oder einem unbrennbaren Material mit einem Innendurchmesser von 150/120 mm) angeschlossen werden. Installation Schalten Sie die Abzugshaube vor der Installation aus und ziehen Sie den Stecker aus der Steckdose.
  • Seite 7 Schritt 3 Aufhängung Befestigen Sie dann die 1 Meter langen Aufhängungs-Streben an der Decke. Schritt 4 Auslass Befestigen Sie den Auslass mit 4 ST4*8mm Schauben oben an der Abzugshaube. Schritt 5 Öffnen Sie die dekorative Abdeckung unten an der Abzugshaube und entnehmen Sie die Filter in der angegebenen Reihenfolge.
  • Seite 8 Schritt 6 Lösen Sie die Schrauben, mit denen der Auslass befestigt ist und drehen Sie ihn in die gewünschte Richtung (1, 2, 3 oder 4). Schrauben Sie dann den Auslass und die Mittel-Leiste wieder an und setzen Sie die Filter wieder ein. Schritt 7 Abluftrohr Befestigen das Abluftrohr bzw.
  • Seite 9 Schritt 9 Heben Sie das Gehäuse an und schieben Sie die Streben durch die Installationslöcher. Wenn sich das Gehäuse auf der Richtigen Höhe befindet, fixieren Sie es mit 4 M8-Schrauben an den Streben. Versichern Sie sich, dass die Abzugshaube gerade hängt und verbinden Sie den Abluftschlauch mit Ihrem Abzug nach außen.
  • Seite 10: Bedienfeld Und Funktionen

    BEDIENFELD UND FUNKTIONEN Stecken Sie den Stecker in die Steckdose. Das Display geht an und leuchtet blau. Nach 30 Sekunden erlischt die Hintergrundbeleuchtung, solange keine Taste gedrückt wird. Drücken Sie 1 Mal auf LICHT. Das Licht geht an und das Display im Display geht das Licht-Symbol an.
  • Seite 11: Fernbedienung Und Funktionen

    Wenn das Gerät eingeschaltet ist, können Sie über die Timer-Taste einen Ausschalt-Timer einstellen. Der Timer kann von 1-60 Minuten eingestellt werden. Drücken Sie während die Abzugshaube läuft auf einmal auf die Timer-Taste, das Display zeigt [05:00] an. Drücken Sie auf die Taste GESCHWINDIGKEIT, um die Zeit in 1-Minuten-Schritten bis maximal 60 Minuten einzustellen.
  • Seite 12: Filterinstallation Und Filterwechsel

    FILTERINSTALLATION UND FILTERWECHSEL Aktivkohlefilter werden verwendet, um die Luft von Gerüchen zu befreien. In der Regel sollte der Aktivkohlefilter alle 3-6 Monate, je nach Ihren Kochgewohnheiten, gewechselt werden. Aktivkohlefilter können nicht gewaschen oder recycelt werden! Entfernen Sie den Filter, wie auf der Abbildung dargestellt: Die Kohlefilter befinden sich am Ende des Motors über der Abzugshaube.
  • Seite 13: Hinweise Zur Entsorgung

    So wechseln Sie die Birne Lösen Sie mit dem Schraubenzieher die 2 Schrauben von der Lampenabdeckung und der Lampenhalterung und wechseln Sie die Birne aus. Hinweis: Ziehen Sie den Stecker aus der Steckdose, bevor Sie die Birne wechseln! Wichtige Hinweise zur Reinigung •...
  • Seite 14: Technical Data

    Remote Control and Functions 22 Installation of the Filter 23 Care and Cleaning 23 Hints on Disposal 24 TECHNICAL DATA Item number 10031697 Power supply 220 V ~ 50-60 Hz DECLARATION OF CONFORMITY Producer: Chal-Tec GmbH, Wallstraße 16, 10179 Berlin, Germany. This product is conform to the following European...
  • Seite 15: Safety Instructions

    SAFETY INSTRUCTIONS • Thank you for purchasing this cooker hood. Please read the instruction manual carefully before you use the cooker hood, and keep it in a safe place. • The installation work must be carried out by a qualified electrician or competent person.
  • Seite 16 Important notes about the extraction mode WARNING Risk of poisoning from exhaust gases sucked back. Never operate the device in extraction mode simultaneously with an open flue appliance when there is not adequate airflow guaranteed. Open fl ue combustion equipment (for example, gas, oil, wood or coal-fi red heaters, tankless water heaters, water heaters) pulls combustion air from the room and runs it through an exhaust pipe or chimney to the outside.
  • Seite 17: Installation

    INSTALLATION If you have an outlet to the outside, your cooker hood can be connected as below picture by means of an extraction duct (enamel, aluminum or incombustible flexible pipe with an interior diameter of 150/120mm). Installation Before installation, turn the unit off and unplug it from the outlet. Step 1 Step 2 Ceiling...
  • Seite 18 Step 3 Hanging board Fix the 1 meter length anchor bolts with srews on the ceiling.( Step 4 Outlet Refer to pic 4,use 4 pcs ST4*8mm big flat screws to fix the outlet onto the cooker hood housing. Step 5 Open the decorative plate in order and take out the filter;...
  • Seite 19 Step 6 Unscrew the 8pcs machine silk from the housing and rotate it to choose the direction (1, 2, 3 or 4) of the outlet, then screw the 8 pcs machine silk in order to fix the housing well. Install the panel decorative strip and filter well.
  • Seite 20 Step 9 Lift up the housing, let the 4 anchor bolts on the ceiling to cross the corresponding installation hole of the housing. Use 4 pcs M8 screw with gasket to fix the housing well, ensure the bottom of the hood is level with the decorative plate bottom of the ceiling.
  • Seite 21: Control Panel And Functions

    CONTROL PANEL AND FUNCTIONS Plug the hood; LCD will display 24-hour system with blue backlight. Backlight will be extinguished after 30 seconds without any operation. Press LIGHT button once; lights will be on and LCD will show the light sign. Press LIGHT button again; lights will be off and light sign on LCD will disappear.
  • Seite 22: Remote Control And Functions

    When the hood is in ON mode, TIMER button is used for delay timer function. Delay timer function allows you to set the hoods automatically power off according to the delay timer you set from 1 minute to 60 minutes. Press TIMER button once;...
  • Seite 23: Installation Of The Filter

    INSTALLATION OF THE FILTER Activated carbon filter can be used to trap odors. Normally the activated carbon filter should be changed at three or six months according to your cooking habit. Activated carbon filter cannot be washed or recycled. Remove the filters like the picture: The carbon filters are located at either end of the motor.
  • Seite 24: Hints On Disposal

    Change the lamp Using screwdriver to loosen the 2screws from the lamp cover and the lamp bracket and get off the lamp. Notice: Please make sure that the power has been cut off before changing lamp. Important Hints on Cleaning •...
  • Seite 25: Datos Técnicos

    Mando a distancia y funciones 33 Instalación de filtro y cambio de filtro 34 Limpieza y cuidado 34 Retirada del aparato 35 DATOS TÉCNICOS Número de artículo 10031697 Suministro eléctrico 220-240 V - 50-60 Hz DECLARACIÓN DE CONFORMIDAD Fabricante: Chal-Tec GmbH, Wallstraße 16, 10179 Berlín (Alemania).
  • Seite 26: Indicaciones De Seguridad

    INDICACIONES DE SEGURIDAD • Lea atentamente todas las indicaciones y conserve este manual para consultas posteriores. • Los trabajos de montaje deben ser realizados solamente por un electricista u otro profesional. Antes de utilizar la campana extractora, asegúrese de que la tensión (V) y la frecuencia indicada en la campana extractora (Hz) coinciden con la tensión (V) y frecuencia (Hz) de su suministro eléctrico.
  • Seite 27 Notas importantes acerca del modo de extracción ADVERTENCIA Peligro de muerte, riesgo de intoxicación provocado por gases en combustión aspirados. Nunca ponga en funcionamiento la función de acción simultáneamente con un dispositivo que genere calor en una estancia estanca si no se ha garantizado una ventilación sufi ciente. Los dispositivos no estancos que generan calor (por ejemplo, radiadores que funcionan con gas, aceite, madera o carbón, calentadores, calentadores de agua) extraen el aire de combustión de la estancia correspondiente y canalizan el aire de salida por medio...
  • Seite 28: Instalación

    INSTALACIÓN Cuando el tiro se conduzca al exterior, su campana extractora puede conectarse como se muestra en la imagen con ayuda de un canal de extracción (de esmaltado, aluminio o un mateiral no inflamable con un diámetro interior de 150/120 mm). Instalación Apague la carcasa y desconecte el enchufe antes de la instalación.
  • Seite 29 Paso 3 Bisagra Fije los puntales de las bisagras de 1 metro de largo al techo. Paso 4 Salida Fije la salida con 4 tornillos ST4*8mm en la parte superior de la campana extractora. Paso 5 Abra la cubierta decorativa situada bajo la campana y retire el filtro en el orden indicado.
  • Seite 30 Paso 6 Suelte los tornillos con los que la salida está fijada y gírelos en la dirección deseada (1, 2, 3 o 4). Atornille luego la salida y el listón central de nuevo y coloque los filtros. Paso 7 Conducto de extracción Fije el conducto de extracción a la salida de aire.
  • Seite 31 Paso 9 Levante la carcasa y desplace los puntales por los orificios de instalación. Cuando la carcasa se encuentre a la altura correcta, fíjela a los puntales con 4 tornillos M8. Asegúrese de que la carcasa esté recta y conecte el conducto de extracción con su tiro hacia afuera.
  • Seite 32: Panel De Control Y Funciones

    PANEL DE CONTROL Y FUNCIONES Conecte el enchufe a la toma de corriente. El display se enciende y se ilumina en color azul. Después de 30 segundos, se apaga la iluminación de fondo si no pulsa ningún botón. Pulse 1 vez el botón LUZ. La luz se enciende y en el display aparece el símbolo correspondiente.
  • Seite 33: Mando A Distancia Y Funciones

    Si el aparato está encendido, puede ajustar el temporizador de apagado con el botón TIMER. El temporizador puede ajustarse de 1 a 60 minutos. Pulse una vez el botón Timer con la campana en marcha y el display muestra [05:00]. Pulse el botón VELOCIDAD para regular los minutos en intervalos de 1 minuto hasta un máximo de 60.
  • Seite 34: Instalación De Filtro Y Cambio De Filtro

    INSTALACIÓN DE FILTRO Y CAMBIO DE FILTRO Los filtros de carbón activo se utilizan para liberar el aire de olores. Normalmente, el filtro de carbón activo debe cambiarse cada 3-6 meses en función del uso de su cocina. El filtro de carbón activo no puede lavarse ni reciclarse. Retire el filtro como se muestra en la imagen: abierto cerrado...
  • Seite 35: Retirada Del Aparato

    Cómo cambiar las bombillas Afloje con un destornillador los 2 tornillos de la cubierta y de la sujeción de la lámpara y cambie la bombilla. Advertencia: Desconecte el enchufe de la toma de corriente antes de cambiar la bombilla. Indicaciones de limpieza importantes •...
  • Seite 36: Fiche Technique

    Télécommande et fonctions 44 Installation et changement du filtre 45 Nettoyage et entretien 45 Conseils pour le recyclage 46 FICHE TECHNIQUE Numéro d’article 10031697 Alimentation 220-240 V ~ 50-60 Hz DÉCLARATION DE CONFORMITÉ Fabricant : Chal-Tec GmbH, Wallstraße 16, 10179 Berlin, Allemagne. Ce produit est conforme aux directives européennes...
  • Seite 37: Consignes De Sécurité

    CONSIGNES DE SÉCURITÉ • Lisez attentivement toutes les consignes avant d’utiliser l’appareil et conservez ce mode d’emploi pour vous y référer ultérieurement. • Les travaux de montage doivent être effectués uniquement par électricien professionnel ou un spécialiste. Avant d‘utiliser la hotte aspirante, assurez-vous que la tension (V) et la fréquence indiquée sur la hotte aspirante (Hz) correspondent à...
  • Seite 38 Remarques importantes concernant le mode d‘extraction AVERTISSEMENT Danger de mort, risques d‘intoxication ! Par la ré-aspiration de gaz de combustion. Ne jamais utiliser la fonction d’aspiration de l’appareil en même temps qu’un foyer dépendant de l’air ambiant si l’air frais est insuffi sant.
  • Seite 39: Installation

    INSTALLATION Si vous possédez une extraction vers l‘extérieur, vous pouvez y brancher votre hotte aspirante comme illustré sur le schéma à l‘aide d‘une conduite d‘extraction (en émail, aluminium ou autre matériau non inflammable d‘un diamètre intérieur de 150/120 mm). Installation Avant l‘installation, éteignez la hotte aspirante et débranchez la fiche de la prise.
  • Seite 40 Étape 3 Suspension Fixez ensuite les tiges de suspension de 1 mètre de long au plafond. Étape 4 Sortie d‘évacuation Fixez la sortie d‘évacuation avec 4 vis ST4*8mm en haut de la hotte aspirante. Étape 5 Ouvrez le cache décoratif sous la hotte aspirante et retirez le filtre dans l‘ordre indiqué.
  • Seite 41 Étape 6 Desserrez les vis qui tiennent la sortie et tournez celle-ci dans la direction souhaitée (1, 2, 3 ou 4). Revissez ensuite la sortie et la bande centrale décorative et remettez le filtre en place. Étape 7 Tube d‘extraction d‘air Fixez le tube ou le tuyau d‘extraction d‘air sur la sortie d‘air.
  • Seite 42 Étape 9 Soulevez le boîtier et poussez les tiges à travers les trous de montage. Lorsque le boîtier se trouve à la bonne hauteur, fixez- le avec 4 vis M8 sur les tiges. Vérifiez que la hotte aspirante est fixée bien droite branchez le tuyau d‘extraction d‘air avec votre évacuation vers l‘extérieur.
  • Seite 43: Panneau De Commande Et Fonctions

    PANNEAU DE COMMANDE ET FONCTIONS Branchez la fiche dans la prise. L‘écran démarre et s‘allume en bleu. 30 secondes après, le rétroéclairage s‘éteint, si aucune touche n‘a été sollicitée. Appuyez 1 fois sur ECLAIRAGE. La lumière s‘allume et l‘écran affiche l‘icône éclairage.
  • Seite 44: Télécommande Et Fonctions

    Si l‘appareil est allumé, vous pouvez programmer un arrêt automatique avec la touche Timer. Vous pouvez régler le Timer de 1 à 60 minutes. Pendant que la hotte aspirante fonctionne, appuyez une fois sur la touche Timer, l‘écran affiche [05:00]. Appuyez sur la touche VITESSE pour régler la durée par crans d‘1 minute jusqu‘à...
  • Seite 45: Installation Et Changement Du Filtre

    INSTALLATION ET CHANGEMENT DU FILTRE Les filtres à charbon actif sont utilisés pour supprimer les odeurs dans l‘air. En général, un filtre à charbon actif doit être renouvelé tous les 3 à 6 mois selon vos habitudes culinaires. Les filtres à charbon actif ne sont ni lavables ni recyclables ! Démontez le filtre comme indiqué...
  • Seite 46: Conseils Pour Le Recyclage

    Changement d‘une ampoule Avec un tournevis, desserrez les 2 vis du cache des lampes et du support des lampes et changez les ampoules. Remarque : débranchez la fiche de la prise avant de changer les ampoules ! Conseils importants pour le nettoyage •...
  • Seite 47: Dati Tecnici

    Telecomando e funzioni 55 Installare e sostituire il filtro  56 Pulizia e manutenzione  56 Smaltimento 57 DATI TECNICI Articolo numero 10031697 Alimentazione 220-240 V ~ 50-60 Hz DICHIARAZIONE DI CONFORMITÀ Produttore: Chal-Tec GmbH, Wallstraße 16, 10179 Berlino, Germania. Questo prodotto è conforme alle seguenti direttive...
  • Seite 48: Avvertenze Di Sicurezza

    AVVERTENZE DI SICUREZZA • Leggere attentamente tutte le istruzioni prima dell´uso e conservare il manuale per consultazioni future. • Il montaggio può essere eseguito solo da un tecnico qualificato. Prima di utilizzare la cappa aspirante, accertarsi che la tensione (V) e la frequenza (Hz) indicate corrispondano alla tensione (V) e alla frequenza (Hz) domestiche.
  • Seite 49 Note importanti circa la modalità di estrazione AVVERTIMENTO Pericolo di morte, pericolo di intossicazione da gas di scarico! Non azionare l´apparecchio con funzione di scarico mentre è attivo un impianto di riscaldamento che utilizza l´aria ambiente, se l´areazione non è suffi ciente. Gli impianti di riscaldamento che sfruttano l´aria ambiente (ad es.
  • Seite 50: Installazione

    INSTALLAZIONE Se si dispone di uno scarico esterno, la cappa aspirante può essere collegata come mostrato nell‘immagine con l‘aiuto di un canale di scarico (in smalto, in alluminio o in materiale non combustibile con diametro interno di 150/120 mm). Installazione Prima dell´installazione, spegnere la cappa aspirante e staccare la spina dalla presa.
  • Seite 51 Fase 3 Asta di ancoraggio Fissare al soffitto le aste di ancoraggio lunghe 1 metro. Fase 4 Scarico Fissare lo scarico con 4 viti ST4*8mm nella parte superiore della cappa aspirante. Fase 5 Aprire il coperchio decorativo nella parte inferiore della cappa aspirante e rimuovere il filtro nell´ordine indicato.
  • Seite 52 Fase 6 Svitare le viti con le quali è fissato lo scarico e ruotarlo nella direzione desiderata (1,2,3 o 4). Avvitare di nuovo lo scarico e il pannello decorativo. Inserire di nuovo il filtro. Fase 7 Tubo di scarico Fissare il tubo di scarico allo scarico dell´aria.
  • Seite 53 Fase 9 Sollevare l´alloggiamento e inserire le aste di ancoraggio nei fori. Quando l´alloggiamento si trova all´altezza corretta, fissarlo con 4 viti M8 ai montanti. Assicurarsi che la cappa aspirante sia diritta e collegare il tubo di scarico con lo scarico verso l´esterno.
  • Seite 54: Pannello Dei Comandi E Funzioni

    PANNELLO DEI COMANDI E FUNZIONI Inserire la spina nella presa. Il display si accende e diventa blu. Dopo 30 secondi senza premere alcun tasto, la retroilluminazione si spegne. Premere il tasto LIGHT. La luce si accende e sul display compare il simbolo corrispondente.
  • Seite 55: Telecomando E Funzioni

    Quando la cappa aspirante è accesa, è possibile impostare un timer di spegnimento con il tasto timer. Il tempo impostabile è compreso tra 1 e 60 minuti. Premere il tasto timer mentre la cappa aspirante è in funzione: il display indica [05:00].
  • Seite 56: Installare E Sostituire Il Filtro

    INSTALLARE E SOSTITUIRE IL FILTRO I filtri a carbone attivo servono a liberare l´aria dagli odori. Il filtro a carboni attivi deve essere sostituito ogni 3-6 mesi in base alla frequenza con la quale si cucina. I filtri a carbone attivo non possono essere lavati o riciclati! Rimuovere il filtro come rappresentato nella figura: aperto chiuso...
  • Seite 57: Smaltimento

    Sostituire la lampadina Svitare con un cacciavite le 2 viti dal coperchio della lampada e dal portalampada e sostituire la lampadina. Nota: Staccare la spina dalla presa di corrente prima di sostituire la lampadina! Note importanti per la pulizia • Pulire il rivestimento ogni due mesi con acqua calda e un detergente delicato. •...

Inhaltsverzeichnis