Herunterladen Inhalt Inhalt Diese Seite drucken

Advanced Bionics Naida CI Q70 Gebrauchsanweisung

Sound processor
Vorschau ausblenden Andere Handbücher für Naida CI Q70:
Inhaltsverzeichnis

Werbung

Verfügbare Sprachen
  • DE

Verfügbare Sprachen

  • DEUTSCH, seite 189
Naída CI Sound Processor
user guide
English, French, Spanish, German, Dutch, Portuguese

Werbung

Inhaltsverzeichnis
loading

Inhaltszusammenfassung für Advanced Bionics Naida CI Q70

  • Seite 1 Naída CI Sound Processor user guide English, French, Spanish, German, Dutch, Portuguese...
  • Seite 2 user guide for the Naída CI Sound Processor...
  • Seite 3: Warning And Cautions

    Labeling Labeling symbols and their meanings: European Community Mark of Conformity. Authorized to affix the CE Mark in 2013 Model number Date of manufacture Serial number Manufacturer Type of Protection: B Store at temperatures between -20˚C (-4˚F) and +55˚C (131˚F) Fragile Do not get wet See Instructions for Use...
  • Seite 4 Do not use any power supply with the sound processor, AB myPilot remote • control or ComPilot unless it is supplied by Advanced Bionics or Phonak. If needed, contact Advanced Bionics for a power supply replacement. Do not use the AB myPilot or the ComPilot when they are plugged in to power •...
  • Seite 5: Naída Ci Sound Processor User Guide

    If the sound processor or accessories become unusually hot or warm, discontinue • use immediately and contact Advanced Bionics or a clinician. Store additional headpieces away from items with magnetic strips (e.g. credit •...
  • Seite 6 while stimulating the implant. Doing so could cause the implant and sound processor to lose lock. If this happens, power down the processor and power back on (by disengaging the battery and reattaching). The digitally-coded, inductive transmission technology used in this device is •...
  • Seite 7 Remove cochlear implant equipment prior to removing clothing that may contain electric • charge (e.g. sweaters). Do not touch TV or computer screens. If screens are touched, be sure to touch an object • other than your implant system to discharge any charge build-up prior to touching any part of your implant system.
  • Seite 8: Inhaltsverzeichnis

    Table of Contents Introduction ..........................10 Purpose of this Guide ........................10 About the Naída CI Sound Processor ................10-11 The Naída CI Sound Processor ..................11 The Naída CI Sound Processor and Accessories Overview ......12-14 The Naída CI ............................12 The Universal Headpiece ......................13 AB myPilot ............................
  • Seite 9 Removing the Battery ........................23 Replacing the Battery ........................24 Understanding Naída CI LEDs ...................25-26 Understanding Internal Alarms ....................26 Using Naída CI Headpieces ..................26-28 The Universal Headpiece ......................26 Replacing the RF Cables ......................26-27 Adjusting Headpiece Magnet Strength .................27-28 Removing Headpiece Color Caps ....................
  • Seite 10 ComPilot ..............................48 Naída CI Listening Check and Listening Check Earbuds........48-49 Audio Accessories ..........................49 Color Customization ........................49 Naída CI Carrying Case ........................ 50 Zephyr by Dry and Store® ......................50 IP Rating Information ......................51 Care of the Naída CI Sound Processor and Accessories ........51-53 Changing Microphone Covers ....................51-52 Recommended Naída CI Operating and Storage Temperatures ......
  • Seite 11: Introduction

    Advanced Bionics and Phonak for the best possible hearing experience. The Naída CI provides access to the latest sound processing innovations by Advanced Bionics, the market leader in performance. This guide will provide all of the information needed to use and care for the Naída CI and its accessories.
  • Seite 12: The Naída Ci Sound Processor

    ComPilot AB myPilot LeDs Additional features include remote control access through the AB myPilot remote control and the ability to stream from the Phonak ComPilot. The Naída CI Sound Processor This section will familiarize you with the Naída CI Sound Processor and Accessories Volume Control Phonak Dual-Microphone Technology Volume Control and Tri-Colored LeDs...
  • Seite 13: The Naída Ci Sound Processor And Accessories Overview

    The Naída CI is the newest and most advanced cochlear implant sound processor available. As evidence of Advanced Bionics’ dedication to providing the best hearing possible, the Naída CI provides access to AutoSound™ technology, which dynamically adapts to every listening environment, automatically adjusting volume levels to optimize hearing.
  • Seite 14: The Universal Headpiece

    Color Cap Microphone Cable Connection Port The Universal Headpiece (UHP), works with all Advanced Bionics’ sound processors, and is intended for use with the Naída CI processor outside of water environments. Replacing Headpiece Cables For more information, refer to the section of the User Guide or the UHP and/or Cable Instructions for Use.
  • Seite 15: Compilot

    ComPilot The ComPilot allows unparalleled connectivity for Naída CI recipients, connecting them wirelessly to Bluetooth® enabled phones and devices or MP3 players for speech or stereo music. It is also compatible with Phonak’s portfolio of FM receivers via a euro socket. Additionally, when unpaired, the ComPilot is able to stream to compatible Phonak instruments.
  • Seite 16: Performance Technology

    Performance Technology Naída CI allows users access to Phonak’s Binaural VoiceStream Technology including UltraZoom, DuoPhone, QuickSync, and ZoomControl. These programmable features are set by your implant professional in the SoundWave fitting software. UltraZoom Zooms in on the voices of people facing you, while noise from the side and back is reduced.
  • Seite 17: Connecting The Universal Headpiece (Uhp) Color Caps

    Connecting the Universal Headpiece (UHP) Color Caps Small Parts Hazard: The processor, UHP Color Caps, magnets, and WARNING: spacers may cause choking if swallowed. Attaching the UHP Color Cap Align the Color Cap with the headpiece. Gently press the cap and headpiece together. The Color Cap will snap into place.
  • Seite 18: Removing The Headpiece From The Naída Ci

    Removing the Headpiece from the Naída CI Hold the cable’s connector (the right-angled Gently pull the cable’s connector away plastic plug, not the wire). from the Naída CI. Connecting the T-Mic 2/earhook Beginning with either the earhook or Using the provided T-Mic 2/Earhook tool, T-Mic 2 disconnected, align the T-Mic 2 place one of the pins in the small hole on or earhook flush with the processor.
  • Seite 19: Removing The T-Mic 2/Earhook

    Pull the tool away from the processor, leaving the pin inside the Naída CI. Removing the T-Mic 2/earhook Remove the power source. Align the Gently press the tool in the hole, pushing pointed end of the T-Mic 2/Earhook the pin out the other side. tool with the hole on the processor that contains the pin holding the T-Mic 2/ Earhook on the Naída CI processor.
  • Seite 20: Attaching The T-Mic 2 Cover

    Attaching the T-Mic 2 Cover Hold the T-Mic 2 Cover in one hand. In Gently turn the T-Mic 2 Cover clockwise the other hand, hold the T-Mic 2 at the into the T-Mic 2 Cover. Screw until the end that houses the microphone. Align parts meet together flush.
  • Seite 21: Wearing The Naída Ci

    *enlarged view Continue turning until the T-Mic 2 Cover separates from the T-Mic 2. Discard used T-Mic 2 Covers. It is recommended to use the T-Mic 2 only when the T-Mic 2 cover is CAUTION: properly seated. The T-Mic 2 cover should be replaced every 3-4 months or if plugged by earwax.
  • Seite 22: Inserting The Naída Ci In The Clip

    The Naída CI Clip comes in left and right configurations to provide improved wearing flexibility and the ability to wear the processor in a secure, completely off-the-ear style. This need is particularly great for small children and many physically active CI users. The Naída CI Clip is intended to attach directly to clothing, hair or in the preferred wearing location.
  • Seite 23: Removing The Naída Ci From The Clip

    Depress the spring end of the clip to open and secure the sound processor to the desired location on clothing or in hair. Removing the Naída CI from the Clip Carefully remove the Naída CI, leading To disengage the Naída CI processor with the internal earhook portion.
  • Seite 24: Removing The Battery

    The processor is turned ‘on’ when a charged battery is attached to the processor. In order to power ‘off’ the processor, the battery cartridge must be removed. When the battery is engaged the orange LED located in the middle of the volume control will flash to indicate battery charge followed by the green LED to indicate program position.
  • Seite 25: Replacing The Battery

    Replacing the Battery Hold the Naída CI in one hand. Rotate Align the battery cartridge connector the RF cable upward to avoid bumping it with the processor housing side of upon battery placement. the connector. Slide the battery onto the processor until it clicks into place.
  • Seite 26: Understanding Naída Ci Leds

    Understanding Naída CI LeDs The Naída CI LEDs are a programmable feature providing visual information about the Naída CI status, battery life, program position, and error conditions. Naída CI Sound Processor LED Indications Color Behavior Programmable Indication Orange No. Battery indicator is Blinks at start-up 4 quick blinks indicate that the •...
  • Seite 27: Understanding Internal Alarms

    If the user would like to know the battery status of the Zn-Air Battery Pak they are currently using and have an AB myPilot paired to their device, they can conduct a Battery Check readout of the Naída CI. To ensure an accurate reading of the Zn-Air Battery Pak, wait at least 15 minutes after it has been attached to the Naída CI before performing a Battery Check readout.
  • Seite 28: Adjusting Headpiece Magnet Strength

    If it appears damaged, replace it with a new cable. To attach the cable to the headpiece: Hold the headpiece in one hand and the Push the cable connector firmly into the cable connector in the other hand. headpiece connector. To attach the cable to the sound processor: Hold the sound processor in one hand and Push the cable connector firmly into the...
  • Seite 29: Removing Headpiece Color Caps

    CI sound processor. A Color Cap must be in place at all times when using the headpiece. Color Caps can be replaced to change the look and style of the headpiece. To remove the headpiece Color Cap, only use the tool provided by Advanced Bionics. See the Color Cap or...
  • Seite 30: Changing Volume

    The Program Button also allows the user to enter or exit Standby Mode. Standby Mode is a low power state the Naída CI can enter to save power without having to be turned off. Standby mode allows the PowerCel or Zn-Air Battery Pak to remain attached to the processor without causing a major drain on battery life.
  • Seite 31: Changing Sensitivity

    To change volume: Pressing briefly on the bottom Pressing briefly on the top portion of the portion of the volume control will volume control will increase the volume. decrease the volume. The volume range available within a program can be changed or disabled by a hearing care professional in the SoundWave™...
  • Seite 32 ComPilot MLxi The second method to access FM is by having a hearing care professional activate the telecoil in the FM program. The telecoil, used in conjunction with a looped room or the Phonak MyLink, will allow the recipient to hear the speaker without the use of connecting wires. Please see ComPilot User Guide or AB addendum for ComPilot for more information.
  • Seite 33 To attach an FM Receiver to the ComPilot: With the ComPilot turned off, hold the Firmly press the FM receiver into ComPilot in one hand. With the other hand, place on the ComPilot. align the three FM connector pins with the Europort on the ComPilot.
  • Seite 34: Pairing To The Ab Mypilot

    Pairing to the AB myPilot In order for the AB myPilot to control the Naída CI(s), it must be paired to the processor/s. The AB myPilot may be un-paired and paired to multiple Naída CI processors. This allows one AB myPilot to be used with all Naída CI recipients in a classroom.
  • Seite 35 From this menu press the downward When the Naída CI is found, it will arrow button to highlight the Scan for show the recipient’s initials on the AB Devices option. myPilot, as well as the ear it is primarily programmed for. There will be a green circle with a checkmark in it to show that it is paired.
  • Seite 36 The screen will tell you which devices are paired by showing a green circle with a checkmark in it beside the recipient’s initials. Move to highlight the device you would like to un-pair using the downward arrow. Press the center button once you have highlighted the device. The green circle with the checkmark will disappear, and the device will be un-paired and will no longer be controlled by the AB myPilot remote.
  • Seite 37: The Naída Ci Listening Check And Listening Check Earbuds

    The Naída CI Listening Check and Listening Check earbuds Listening to the Microphone(s) and Auxiliary Inputs A convenient test mode is built in to all Naída CI processors to enable individuals with unaided hearing to listen to sound sources. With the AB myPilot Remote Control, all sound sources can be listened to independently.
  • Seite 38 Insert the AB logo portion into the other Connect the top of the Naída CI portion of the Naída CI Listening Check. Listening Check Module to the processor You should feel the two portions snap into place. Once in place, the processor and PowerCel connectors will be exposed.
  • Seite 39 the FM transmitter to assess audio quality. If you select Wireless, you will be listening to whatever audio source is being streamed through the ComPilot (i.e. Bluetooth device, FM, battery-operated device, etc.). To begin the process, have the ComPilot turned on and the desired source streaming. It is a good idea to turn the volume down on any device that is directly connected to the ComPilot.
  • Seite 40: Using The Telephone

    Push them together until they snap into place. The Naída CI Listening Check requires a charged power source to function NOTe: correctly. If the power source being used to conduct the listening check has been depleted to an inadequate charge level, the user will not be able to complete the task. If the user attaches a discharged rechargeable PowerCel, AAA PowerPak or Off-the-Ear Power Option, a solid red LED will light up on the Naída CI.
  • Seite 41: Telephone Tips

    is heard in both ears. Use a patch cable. A patch cable may be used to connect directly to a cellular or cordless • phone. The patch cable connects to the headset jack of the phone on one end and the auxiliary jack of the ComPilot on the other.
  • Seite 42: Battery Information

    Telecoils are known to be susceptible to magnetic noise generated by CAUTION: most industrial lighting fixtures, store and airport security scanners, band scanners, power transformers, motor starters, and monitor screens. Battery Information 170 mAh Li-Ion Zn-Air Zn-Air (Tamperproof Cartridge) 230 mAh Li-Ion 110 mAh Li-Ion The Naída CI sound processor can be used with two disposable Zn-Air batteries, three sizes of rechargeable Lithium Ion PowerCels, the AAA PowerPak, or the PowerCel Adapter.
  • Seite 43: Assembling The Powercel Charger

    Only use the charger provided for charging AB PowerCels. Do not use it CAUTION: to charge other batteries. Do not try to charge Naída CI PowerCels using a charger other than that provided by Advanced Bionics. Power Supply Adapters Battery Charger Power Supply The charging system consists of the charger, power supply, and power supply adapters.
  • Seite 44: Inserting The Powercels Into The Charger

    The PowerCels do not need to be fully depleted before recharging. It is recommended that you use and recharge the PowerCel(s) at least once every three months. Please note that PowerCels will decrease in capacity with age, even if not in use. This is normal for all rechargeable batteries and should not be considered a defect.
  • Seite 45: The Zn-Air Battery Pak

    The Zn-Air Battery Pak The Naída CI uses size 675 Power Implant disposable batteries (675P). Regular size 675 hearing instrument batteries will not be powerful enough for a cochlear implant. Inserting Zn-Air Batteries Holding the Zn-Air Battery Pak in one hand, Pull the battery drawer out of the gently but firmly push down on the lever on cartridge with the other hand.
  • Seite 46: Inserting Zn-Air Batteries (Tamperproof Cartridge)

    Attach the battery cartridge to the Naída CI following the same instructions as attaching the Replacing the Battery. PowerCels to the Naída CI in the section Inserting Zn-Air Batteries (Tamperproof Cartridge) Use the same tool provided for T-Mic 2/ With the tool inserted in the hole, gently Earhook removal and replacement—Insert push in and downward until you feel the pointed end of the tool into the small...
  • Seite 47: Charger Led (Light Emitting Diode) Indicator

    PowerCel. If there is a problem with either the PowerCel or the charger, please contact Advanced Bionics. The charger LED turns off (or may show a faint blue if the room is very dark to indicate either the battery is fully charged or there is a fault with the battery.
  • Seite 48: Warnings

    User Guide. Using Naída CI Accessories Advanced Bionics supplies a range of accessories for use with the Naída CI, although not all accessories may be included in the sound processor kit. Discuss with the recipient’s hearing care professional which accessories are included with the Naída CI sound processor.
  • Seite 49: Headpieces

    Headpieces The Naída CI sound processor is designed for use with the Universal Headpiece (UHP). Universal Headpiece (UHP) The UHP is intended to be used with the Naída CI during daily activities outside of water environments. ComPilot ComPilot MLxi When used with the ComPilot, the Naída CI is compatible with the Phonak MLxi wireless FM Using receiver.
  • Seite 50: Audio Accessories

    The Naída CI has a convenient monitor mode, accessed by using the Naída CI Listening Check and Listening Check Earbuds. This mode enables someone with unaided hearing to listen to the Naída CI input sound sources. For instructions on how to listen to inputs using the Naída Listening to the Microphone(s) CI Listening Check and Listening Check Earphones, refer to the and Auxiliary Inputs...
  • Seite 51: Naída Ci Carrying Case

    Naída CI Carrying Case Naída CI Carrying Case A carrying case is provided with the Naída CI for use when traveling or for storage when the sound processor and accessories are not in use. If the Naída CI is exposed to moisture or high levels of humidity, store components overnight in the Zephyr by Dry &...
  • Seite 52: Ip Rating Information

    The Naída CI has a microphone filter located over the rear microphone to prevent dust and debris from damaging the microphone. Advanced Bionics recommends changing the microphone cover on the Naída CI every three months, or earlier if there is a notice in the degradation of sound quality.
  • Seite 53 Carefully pull the tool out of the opening. The microphone cover should come out with the tool. The cover can be removed from the tool and then disposed of. Replacing the Microphone Cover With the microphone cover on the end Grasping the tool in one hand, use the blunt, of the tool, hold the Naída CI in the non-threaded end to put a new microphone...
  • Seite 54: Recommended Naída Ci Operating And Storage Temperatures

    -20°C (-4°F) 55°C (131°F) Approved Power Sources Advanced Bionics has verified the Naída CI to function with the power sources listed below; behavior when using power sources other than those listed here cannot be guaranteed. Approved Naída CI Power Sources...
  • Seite 55 Replace the cable. Replace the headpiece. If these measures do not resolve the problem, contact a hearing care professional or Advanced Bionics immediately for further assistance. If no sound is heard or a solid red LED is indicated on the Naída CI processor LED, try the following troubleshooting steps: Remove the battery cartridge.
  • Seite 56: Troubleshooting Naída Ci Leds

    Verify that a charged PowerCel or two fully charged Zn-Air batteries are in place. Verify that the PowerCel is seated properly or the Zn-Air batteries are inserted correctly. If the problem continues, contact a hearing care professional or Advanced Bionics for further assistance.
  • Seite 57 LED, replace the T-Mic 2. If the processor microphones do not show a blinking green LED with audio input, contact a hearing care professional or Advanced Bionics. During battery status check, no blink or only one orange blink is observed:...
  • Seite 58: Troubleshooting Naída Ci Internal Alarms

    If there are no blinks after the PowerCel replacement, clean the contacts with a hearing aid brush or dry cotton swab. If the problem continues, contact a hearing care professional or Advanced Bionics for further assistance. If the LED behaves differently following processor replacement or programming: Verify with the recipient’s implant hearing care professional whether any program changes...
  • Seite 59: Guidance And Manufacturer's Declaration

    Guidance and Manufacturer’s Declaration Per IEC 60601-1-2 electromagnetic emissions The Naída CI is intended for use in the electromagnetic environment specified below. The customer or the user of the Naída CI should ensure that it is used in such an environment. emissions Test Compliance electromagnetic environment-Guidance...
  • Seite 60: Separation Distances Between Rf Communications Equipment And Naída Ci

    These guidelines may not apply in all situations. Electromagnetic propagation NOTe: is affected by absorption and reflection from structures, objects and people. a Essential performance of the Naída CI per IEC 60601 requirements is defined as auditory stimulation within safe amplitudes. b Field strengths from fixed transmitters, such as base stations for radio (cellular/cordless) telephones and land mobile radios, amateur radio, AM and FM radio broadcast and TV broadcast cannot be predicted theoretically with accuracy.
  • Seite 61: Compatibility Tables

    Compatibility Tables Implant Type HiRes 90K HiRes 90K Advantage Naída CI ✓ ✓ ✓ Neptune ✓ ✓ ✓ Harmony ✓ ✓ ✓ ✓ Auria ✓ ✓ ✓ Platinum Sound ✓ ✓ ✓ ✓ Processor (PSP) 1 Requires SoundWave 2.1 or later 2 Requires SoundWave 2.0 or later 3 Requires SoundWave 1.4 or later 4 Requires SClin2000 and CPI-11...
  • Seite 62: Cleaning & Maintenance

    Servicing or modification of the Naída CI or its accessories by any entity other than • Advanced Bionics is not permitted and will void the manufacturer’s warranty. Performance Data The HiRes 90K Advantage implant with the HiFocus Electrode and Naída CI processor support the HiResolution family of sound processing strategies including HiRes, HiRes with Fidelity 120 (HiRes 120), and ClearVoice.
  • Seite 63: Contact Us

    AdvancedBionics.com Advanced Bionics, IntelliLink, AutoSound, SoundWave, HiRes, HiRes Fidelity 120, HiRes Optima, CIS, MPS, ClearVoice, and Built Kid Tough are trademarks of Advanced Bionics in the United States of America and other countries. Dry & Store® is a registered trademark of Ear Technology Corporation VELCRO®...
  • Seite 64 Par Advanced Bionics Mode d'emploi du Processeur de Son Naída CI...
  • Seite 65: Avertissements Et Mises En Garde

    Étiquetage Symboles d'étiquetage et leur signification : Marquage de conformité de la Communauté Européenne. Autorisé à apposer le marquage CE en 2013 Numéro de modèle Date de fabrication Numéro de série Fabricant Type de protection : B À entreposer à une température comprise entre -20˚C (-4˚F) et +55˚C (131˚F) Fragile Évitez toute exposition à...
  • Seite 66 Avec le processeur de son, la télécommande AB myPilot ou le ComPilot, n'utilisez pas • d'autre chargeur que ceux fournis par Advanced Bionics ou Phonak. Si besoin, contactez Advanced Bionics pour faire remplacer le chargeur. N'utilisez pas le AB myPilot ou le ComPilot lorsqu'ils sont connectés à des sources •...
  • Seite 67 N’essayez pas de charger les batteries PowerCel du Naída CI à l’aide d’un chargeur autre que celui fourni par Advanced Bionics. Retirez les piles usées de votre processeur de son pour éviter tout risque •...
  • Seite 68 Évitez d'exposer les pièces du processeur de son ou des accessoires du Naída CI à • des températures extrêmes, telles que produites par un four, un micro-ondes ou un sèche-cheveux. Les batteries doivent être rechargées uniquement avec le ou les chargeurs recommandés •...
  • Seite 69 Touchez une personne ou un objet avec vos doigts avant de toucher votre antenne, cordon • ou processeur de son, ou ceux de votre enfant. Posez la main sur les surfaces métalliques avant d'y poser les dispositifs électroniques. Ceci est •...
  • Seite 70 Table des matières Introduction ............................10 Objectifs de ce mode d'emploi ......................10 À propos du processeur de son Naída CI ................10-11 Le processeur de son Naída CI ....................11 Présentation du processeur de son Naída CI et des accessoires ........................12-14 Naída CI ................................12 L'antenne universelle ..........................13 AB myPilot ..............................13...
  • Seite 71 Remplacement de la pile ........................24 Compréhension des voyants lumineux du Naída CI ............25-26 Signification des alarmes internes .....................26 Utilisation des antennes du Naída CI ................26-28 L'antenne universelle ..........................26 Remplacement des cordons d’antenne ..................26-27 Ajustement de l'intensité de l'aimant de l'antenne ............27-28 Retrait des caches colorés de l'antenne ..................28 Ajustement des réglages sur le Naída CI ................
  • Seite 72 Naída CI ..............................59 Tableaux de compatibilité ........................60 Nettoyage et entretien ..........................61 Données de performance ..................... 61-62 Traitement du son HiRes™ et HiRes Fidelity120™ ..............61 Contactez-nous ..........................62 Par Advanced Bionics Mode d'emploi du processeur de son Naída CI...
  • Seite 73: Introduction

    Advanced Bionics et Phonak pour la meilleure expérience d'audition possible. Le Naída CI intègre les dernières innovations en matière de traitement du son d'Advanced Bionics. Ce mode d'emploi contient toutes les informations nécessaires à l'utilisation et à l'entretien du Naída CI et de ses accessoires.
  • Seite 74: Le Processeur De Son Naída Ci

    ComPilot AB myPilot Voyants Les autres fonctionnalités comprennent l'accès à distance par le biais de la télécommande du AB myPilot et la capacité de diffuser à partir du Phonak ComPilot. Le processeur de son Naída CI Cette section présente le processeur de son Naída CI et les accessoires Contrôle du volume Technologie double microphone Phonak Contrôle du volume et voyants tricolores...
  • Seite 75: Présentation Du Processeur De Son Naída Ci Et Des Accessoires

    Le Naída CI est la dernière génération de processeur de son pour implant cochléaire d’AB, il est aussi le plus performant. Preuve du dévouement d'Advanced Bionics à fournir la meilleure audition possible, le Naída CI intègre la technologie AutoSound™, qui s'adapte dynamiquement à chaque situation d'écoute en ajustant automatiquement l'intensité...
  • Seite 76: Naída Ci

    Cache coloré Microphone Port de connexion du cordon L'antenne universelle (AU), compatible avec tous les processeurs de son d'Advanced Bionics, est destinée à être utilisée avec le processeur Naída CI en dehors de l'eau. Remplacement des cordons d'antenne Pour de plus amples informations, consultez la section...
  • Seite 77: Compilot

    ComPilot Le ComPilot offre une connectivité inégalée aux utilisateurs du Naída CI, en les connectant sans fil à des téléphones et dispositifs équipés du Bluetooth® ou des lecteurs MP3 pour la parole ou la musique stéréo. Il est également compatible avec la gamme Phonak de récepteurs FM par le biais d'une prise Euro.
  • Seite 78: Technologie De Performance

    Technologie et performance Le Naída CI intègre Binaural VoiceStream Technology de Phonak, y compris UltraZoom, DuoPhone, QuickSync et ZoomControl. Ces fonctionnalités programmables sont réglées par votre spécialiste des implants dans le logiciel de réglage SoundWave. UltraZoom Cible les voix des personnes face à vous, alors que le bruit du côté et à l'arrière est réduit. DuoPhone DuoPhone permet aux utilisateurs bilatéraux d'écouter les conversations téléphoniques simultanément dans les deux oreilles, tout en réduisant le bruit environnant.
  • Seite 79: Connexion Des Caches Colorés De L'antenne Universelle (Au)

    Connexion des caches colorés de l'Antenne Universelle (AU) Danger provenant des petites pièces : le processeur, les caches colorés AVeRTISSeMeNT : pour AU, les aimants et les espaceurs peuvent provoquer un étouffement s’ils sont ingérés. Fixation du cache coloré sur l'AU Alignez le cache coloré...
  • Seite 80: Retrait De L'antenne Du Naída Ci

    Retrait de l'antenne du Naída CI Tenez le connecteur du cordon (au niveau Tirez doucement le connecteur du cordon de la prise en plastique à angle droit et hors du Naída CI. non du fil). Connexion du T-Mic 2/coude standard Lorsque le T-Mic 2 ou le coude standard sont À...
  • Seite 81: Retrait Du T-Mic 2/Coude Standard

    Retirez l'outil du processeur en laissant l’axe à l'intérieur du Naída. Retrait du T-Mic 2/coude standard Appuyez doucement l'outil dans le trou, tout Débranchez la source d’alimentation. en poussant l’axe de l'autre côté. Alignez l'extrémité pointue de l'outil pour T-Mic 2/coude standard avec le trou du processeur contenant l’axe, qui maintient le T-Mic 2/coude standard sur le processeur Naída CI.
  • Seite 82: Fixation Du Cache Du T-Mic 2

    Fixation du cache du T-Mic 2 Tenez fermement le cache du T-Mic 2 Faites tourner doucement le T-Mic 2 dans avec une main. De l'autre main, tenez le cache du T-Mic 2 dans le sens des aiguilles le T-Mic 2 depuis l'extrémité abritant d'une montre.
  • Seite 83: Port Du Naída Ci

    *Vue agrandie Continuez de tourner jusqu'à ce que le cache du T-Mic 2 soit séparé du T-Mic 2. Jetez les caches de T-Mic 2. nous vous recommandons d'utiliser uniquement le T-Mic 2 lorsque ATTeNTION : le cache du T-Mic 2 est correctement placé. Le cache du T-Mic 2 doit être remplacé...
  • Seite 84: Insertion Du Naída Ci Dans La Pince

    La pince pour Naída CI existe en version droite ou gauche, permettant une utilisation plus pratique et un port sécurisé du processeur, loin de l'oreille. Cela est particulièrement important pour les jeunes enfants et les utilisateurs d'implants cochléaires très actifs. La pince pour Naída CI sert à...
  • Seite 85: Retrait Du Naída Ci De La Pince

    Si la température du dispositif vous incommode ou si vous ressentez une douleur quand vous le portez, débranchez la source d'alimentation et contactez votre représentant local Advanced Bionics. Mode d'emploi du processeur de son Naída CI...
  • Seite 86 Le processeur est allumé lorsqu'une batterie chargée est connectée au processeur. Pour éteindre le processeur, la batterie doit être retirée. Quand la batterie est insérée, le voyant orange situé au milieu de la commande du volume clignote pour indiquer la charge de la batterie, suivi du voyant vert pour indiquer le programme utilisé.
  • Seite 87 Remplacement de la batterie ou du compartiment piles Tenez le Naída CI d'une main. Faites tourner Alignez le connecteur de la batterie et le cordon d’antenne vers le haut afin d'éviter de le côté arrière du processeur. le heurter lors du placement de la batterie. Faites glisser la batterie dans le processeur jusqu’à...
  • Seite 88: Compréhension Des Voyants Lumineux Du Naída Ci

    Compréhension des voyants lumineux du Naída CI Les voyants lumineux du Naída CI sont programmables et fournissent des informations visuelles sur l'état du Naída CI, l'autonomie de la pile, le programme utilisé et d'éventuels états d'erreur. Indications des voyants lumineux du processeur de son Naída CI Couleur effet Programmable...
  • Seite 89: Signification Des Alarmes Internes

    Si l'utilisateur désire connaître l'état de charge du compartiment pile Zinc/Air actuellement utilisé, alors que AB myPilot est apparié à son dispositif, il lui est possible d'effectuer un contrôle des piles du Naída CI. Afin d'assurer une lecture précise du compartiment pile Zinc/Air, attendez au moins 15 minutes après sa connexion au Naída CI avant d'effectuer un contrôle des piles.
  • Seite 90: Ajustement De L'intensité De L'aimant De L'antenne

    S'il semble endommagé, remplacez-le par un cordon neuf. Pour attacher le cordon à l'antenne : Tenez l'antenne dans une main et Insérez le connecteur du cordon dans le connecteur du cordon dans l'autre. le connecteur de l'antenne en poussant fermement. Pour attacher le cordon au processeur de son : Tenez le processeur de son dans une main et Insérez le connecteur du cordon dans...
  • Seite 91: Retrait Des Caches Colorés De L'antenne

    Les caches colorés peuvent être remplacés pour modifier l'apparence et le style de l'antenne. Pour retirer le cache coloré de l'antenne, seul l'outil fourni par Advanced Bionics doit être utilisé. Consultez Instructions d'utilisation des caches colorés ou de l'AU, ou la Connexion de l'antenne universelle (AU) du présent mode d'emploi pour des informations supplémentaires concernant le retrait et...
  • Seite 92: Réglage Du Volume

    Le bouton de programmation permet également à l'utilisateur d'entrer ou de sortir du mode Attente. Le mode Attente est un état à faible consommation activé par le Naída CI pour économiser de l'énergie sans l'éteindre. Le mode Attente permet de laisser la PowerCel ou compartiment pile Zinc/Air connecté au processeur sans épuiser l'autonomie de la pile.
  • Seite 93: Réglage De La Sensibilité

    Pour régler le volume : Une brève pression sur la partie Une brève pression sur la partie supérieure inférieure du contrôle du volume du contrôle du volume augmente le volume. diminue le volume. La plage de volume disponible pour un programme peut être modifiée ou désactivée par un audiologiste spécialiste de l'implantation cochléaire à...
  • Seite 94 ComPilot MLxi La deuxième méthode d'accès à la FM est l'activation par un audioprothésiste de la boucle magnétique dans le programme FM. La boucle magnétique, utilisée avec une boucle publique (dans une pièce par exemple) ou MyLink de Phonak par exemple, permet à l'utilisateur d'entendre l'orateur sans câbles de Mode d'emploi de ComPilot ou l'addendum d'AB pour ComPilot connexion.
  • Seite 95 Pour connecter un récepteur FM au ComPilot : Le ComPilot éteint, tenez-le d'une main. De l'autre Appuyez fermement le récepteur FM main, alignez les trois broches de connexion à sa place sur le ComPilot. du récepteur FM avec le connecteur Europort sur le ComPilot.
  • Seite 96: Appariage Au Ab Mypilot

    Appariage au AB myPilot Pour que le AB myPilot contrôle les Naída CI, il doit être connecté aux processeur(s). Le AB myPilot peut être déconnecté et connecté à plusieurs processeurs Naída CI. Ceci permet d'utiliser un AB myPilot avec tous les utilisateurs du Naída CI dans une salle de classe. Cela peut aussi être pratique pour un soignant s'occupant de plusieurs enfants implantés.
  • Seite 97 Dans ce menu, appuyez sur la touche fléchée Une fois le Naída CI trouvé, les initiales vers le bas pour mettre en surbrillance l'option de l'utilisateur apparaîtront sur le AB myPilot, Rech. Appareils ainsi que l'oreille pour laquelle il est principalement programmé.
  • Seite 98 L'écran vous indique quels appareils sont appariés en affichant un cercle vert contenant une coche à côté des initiales de l'utilisateur. Mettez ensuite en surbrillance l'appareil que vous voulez déconnecter à l'aide de la flèche vers le bas. Appuyez sur le bouton central après avoir mis le dispositif en surbrillance.
  • Seite 99: Le Testeur D'écoute Du Naída Ci Et Écouteurs Pour Testeur D'écoute

    Le testeur d'écoute du Naída CI et écouteurs pour testeur d'écoute Contrôle du/des microphone(s) et des entrées auxiliaires Un mode de test pratique est intégré à tous les processeurs Naída CI afin de permettre aux personnes normoentendantes d'écouter les sources sonores. Avec la télécommande AB myPilot, toutes les sources sonores peuvent être entendues individuellement.
  • Seite 100 Insérez la partie dotée du logo AB dans Connectez la partie supérieure du l'autre partie du Testeur d'écoute Naída CI. module de Testeur d'écoute Naída CI Vous devez sentir les deux parties s'emboîter au processeur. parfaitement. Une fois en place, le processeur et les connecteurs PowerCel seront exposés.
  • Seite 101 Si vous sélectionnez Sans fil, vous écouterez une source audio diffusée par le ComPilot (ex.: appareil Bluetooth, FM, appareil à piles, etc.). Pour lancer le processus, allumez le ComPilot et la source de diffusion désirée. Il est préférable de baisser le volume sur tout dispositif directement connecté...
  • Seite 102: Utilisation Du Téléphone

    Assemblez les pièces jusqu'à ce qu'elles s'emboîtent. le Testeur d'écoute du Naída CI nécessite une source d'alimentation chargée ReMARQUe : pour fonctionner correctement. Si la source d'alimentation utilisée pour effectuer le Testeur d'écoute n'est pas assez chargée, l'utilisateur ne pourra pas effectuer le test dans son intégralité.
  • Seite 103: Conseils Pour Le Téléphone

    Utiliser DuoPhone (pour les utilisateurs bilatéraux). Votre audiologiste peut programmer DuoPhone • dans le logiciel de réglage SoundWave. Avec le téléphone placé près d'une oreille, la conversation est audible dans les deux oreilles. Utiliser un cordon de raccordement. Un cordon de raccordement peut être utilisé pour relier votre •...
  • Seite 104: Informations Relatives À La Pile

    les boucles magnétiques sont sensibles au bruit magnétique généré par ATTeNTION : la plupart des appareils d’éclairage industriels fixes, les scanners des aéroports et des magasins, les scanners à bande, les transformateurs, les démarreurs et les écrans. Informations relatives à la pile 170 mAh Li-ion Zinc/Air Zinc/Air (compartiment inviolable)
  • Seite 105: Assemblage Du Chargeur Powercel

    ATTeNTION : AB PowerCel. Ne l'utilisez pas pour charger d’autres batteries/piles. N’essayez pas de charger les batteries PowerCel du Naída CI au moyen d’un chargeur autre que celui fourni par Advanced Bionics. Adaptateurs pour bloc d'alimentation Chargeur de Batterie Alimentation électrique...
  • Seite 106 batteries PowerCel. Il faut 2 à 3 heures pour charger complètement une batterie PowerCel déchargée. Cela varie légèrement selon les différents types de batterie PowerCel. Il n’est pas nécessaire que les batteries PowerCel soient complètement déchargées pour que vous les rechargiez. Nous vous recommandons d’utiliser et de recharger les batteries PowerCel au moins une fois tous les trois mois.
  • Seite 107: Le Compartiment Pile Zinc/Air

    Le compartiment pile Zinc/Air Le Naída CI utilise des piles jetables 675 Power Implant (675P). Les piles d'aides auditives normales de taille 675 ne seront pas assez puissantes pour un implant cochléaire. Insertion des piles Zinc/Air Tout en tenant le compartiment pile Sortez le tiroir du compartiment Zinc/Air d'une main, poussez doucement mais à...
  • Seite 108: Insertion Des Piles Zinc/Air (Compartiment Inviolable)

    Fixez le compartiment piles au Naída CI en suivant les mêmes instructions que pour fixer Remplacement de la batterie ou du compartiment les PowerCels au Naída CI dans la section piles. Insertion des piles Zinc/Air (compartiment inviolable) À l'aide du même outil fourni avec le T-Mic 2/ Une fois l'outil inséré...
  • Seite 109: Voyant Led (Diode Électroluminescente) Du Chargeur

    à être utilisée. Si passée une minute le voyant ne devient pas vert, la batterie doit être considérée comme défaillante et vous devez contacter Advanced Bionics pour obtenir une batterie de rechange. Mode d'emploi du processeur de son Naída CI...
  • Seite 110: Avertissements

    Utilisation des accessoires du Naída CI Advanced Bionics propose une gamme d'accessoires pour le Naída CI, bien que certains de ces accessoires ne sont pas fournis dans votre mallette de processeur de son. Discutez avec l'audiologiste en charge des réglages du processeur des accessoires inclus avec le processeur de son Naída CI.
  • Seite 111: Antennes

    Antennes Le processeur de son Naída CI est conçu pour être utilisé avec l'antenne universelle (AU). Antenne universelle (AU) L'AU est conçue pour être utilisée avec le Naída CI lors des activités quotidiennes hors de l'eau. ComPilot ComPilot MLxi Utilisé avec le ComPilot, le Naída CI est compatible avec le récepteur du système FM sans fil MLxi de Phonak.
  • Seite 112: Accessoires Audio

    Le Naída CI est doté d'un mode de contrôle utile accessible grâce au Testeur d'écoute Naída CI et aux écouteurs pour testeur d'écoute. Ce mode permet à une personne non appareillée d'entendre les sources sonores d'entrée du Naída CI. Pour les instructions sur la manière d'écouter les entrées à...
  • Seite 113: Étui De Transport Naída Ci

    Étui de transport Naída CI Étui de transport Naída CI Un étui de transport est fourni avec le Naída CI pour transporter ou ranger le processeur de son et les accessoires lorsqu'ils ne sont pas utilisés. Si le Naída CI a été exposé à l'eau ou à des taux d'humidité...
  • Seite 114: Informations Relatives À L'indice De Protection

    Le Naída CI comprend un filtre de microphone situé sur le microphone arrière pour empêcher la poussière et les impuretés d'endommager le microphone. Advanced Bionics recommande de changer tous les trois mois la protection du microphone sur le Naída CI, ou plus tôt en cas de dégradation de la qualité...
  • Seite 115 Tirez doucement l'outil hors de l'ouverture. La protection du microphone doit sortir avec l'outil. La protection peut être retirée de l'outil puis jetée. Remplacement de la protection du microphone Avec la protection du microphone sur En tenant l'outil d'une main, utilisez l'extrémité l'extrémité...
  • Seite 116: Températures De Fonctionnement Et De Stockage Du Naída Ci Recommandées

    -20°C (-4°F) 55°C (131°F) Sources d'alimentation approuvées Advanced Bionics a vérifié le fonctionnement du Naída CI avec les sources d'alimentation énumérées ci-dessous. Le comportement du système avec des sources d'alimentation autres que celles énumérées ci-dessous ne peut être garanti. Sources d'alimentation approuvées pour le Naída CI Source d'alimentation Numéro de modèle...
  • Seite 117 Si ces étapes ne suffisent pas à résoudre le problème, contactez immédiatement un audiologiste ou Advanced Bionics pour solliciter une assistance supplémentaire. Si vous n'entendez aucun son ou si le voyant lumineux du processeur Naída CI émet une lumière rouge continue, entreprenez les étapes de dépannage suivantes :...
  • Seite 118: Dépannage Des Voyants Lumineux Du Naída Ci

    Vérifiez que le collier inductif ComPilot est porté correctement autour du cou et que le ComPilot se situe approximativement à mi-hauteur du torse. Si ces étapes ne suffisent pas à résoudre le problème, contactez un audiologiste ou Advanced Bionics pour solliciter une assistance supplémentaire.
  • Seite 119 T-Mic 2. Si les microphones de processeur n'ont pas un voyant clignotant en vert avec entrée audio, contactez un audiologiste ou Advanced Bionics. Pendant le contrôle de l'état de la pile, aucun flash ou seulement un seul flash orange est observé : les piles Zinc/Air n'indiquent PAS l'état de la pile sur le voyant lors du...
  • Seite 120: Dépannage Des Alarmes Internes Du Naída Ci

    Vérifiez auprès de l'audiologiste de l'utilisateur si des changements de programme pouvant affecter le comportement du voyant ont été effectués. Si ces étapes ne suffisent pas à résoudre le problème, contactez un audiologiste ou Advanced Bionics pour solliciter une assistance supplémentaire.
  • Seite 121: Recommandations Et Déclaration Du Fabricant

    Recommandations et déclaration du fabricant, conforme à la norme CEI 60601-1-2 Émissions électromagnétiques Le Naída CI est destiné à être utilisé dans l'environnement électromagnétique indiqué ci-dessous. Le client ou l'utilisateur du Naída CI doit s'assurer qu'il est utilisé dans un tel environnement. environnement Test d'émissions Conformité...
  • Seite 122: Distances De Séparation Entre Les Dispositifs De Communication Rf Et Le Naída Ci

    ces recommandations pourraient ne pas s'appliquer dans toutes ReMARQUe : les situations. La propagation des ondes électromagnétiques est influencée par l'absorption et la réflexion de celles-ci par différents objets, structures et personnes. a. Conformément aux exigences de la norme CEI 60601, les performances essentielles de l'aide auditive Naída CI sont définies comme la stimulation auditive à...
  • Seite 123: Tableaux De Compatibilité

    Tableaux de compatibilité Type d'implant HiRes 90K HiRes 90K Advantage Naída CI ✓ ✓ ✓ Neptune ✓ ✓ ✓ Harmony ✓ ✓ ✓ ✓ Auria ✓ ✓ ✓ Processeur de Son ✓ ✓ ✓ ✓ Platinum (PSP) 1 Nécessite SoundWave 2.1 ou une version ultérieure 2 Nécessite SoundWave 2.0 ou une version ultérieure 3 Nécessite SoundWave 1.4 ou une version ultérieure 4 Nécessite SClin2000 et l'interface de programmation CPI-11...
  • Seite 124: Nettoyage Et Entretien

    La maintenance ou la modification du Naída CI ou de ses accessoires par toute autre entité • qu'Advanced Bionics n'est pas autorisée et annulera la garantie du fabricant. Performances L'implant HiRes 90K Advantage accompagné de l'électrode HiFocus et du processeur de son Naída CI prend en charge toute la gamme HiResolution de stratégies de traitement du son, dont les appareils...
  • Seite 125: Contactez-Nous

    Advanced Bionics peut annuler l’autorisation pour l’utilisateur de faire fonctionner cet appareil. Contactez-nous Advanced Bionics s'engage à proposer à ses clients des produits et des prestations de la meilleure qualité. Nous vous invitons à nous faire part de vos observations concernant le processeur de son Naída CI ou vos suggestions pour améliorer nos produits.
  • Seite 126 Advanced Bionics guía de usuario del procesador de sonido Naída CI...
  • Seite 127: Advertencias Y Precauciones

    etiquetado Símbolos de las etiquetas y sus significados: Marca de conformidad de la Comunidad Europea. Autorizado para incluir la marca CE en 2013. REF. Número de modelo Fecha de fabricación Número de serie Fabricante Tipo de protección: B Almacenar a temperaturas de entre -20 °C (-4 °F) y +55 °C (131 °F) Frágil No mojar Consultar las instrucciones de uso...
  • Seite 128 • el mando a distancia AB myPilot o con ComPilot, a menos que se la proporcione Advanced Bionics o Phonak. Si es necesario, póngase en contacto con Advanced Bionics si desea sustituir la fuente de alimentación. No utilice el AB myPilot ni el ComPilot cuando estén conectados a fuentes de •...
  • Seite 129 Utilice únicamente el cargador proporcionado para cargar las pilas PowerCel de • Advanced Bionics. No lo utilice para cargar otras pilas. No intente cargar las pilas PowerCel del procesador Naída CI con un cargador distinto del proporcionado por Advanced Bionics.
  • Seite 130 El AB myPilot debe encontrarse a más de 1 cm (1/2 pulgadas) del procesador • Naída CI mientras se estimula el implante. De lo contrario, el implante y el procesador de sonido podrían perder el bloqueo. Si esto ocurre, apague el procesador y vuelva a encenderlo (para ello, retire la pila y vuelva a colocarla).
  • Seite 131 No toque pantallas de televisión o de ordenador. Si se tocan las pantallas, antes de tocar un • componente del sistema del implante, asegúrese de tocar un objeto que no sea el sistema del implante para descargar cualquier acumulación de carga. Utilice suavizante para la ropa de vestir y de cama.
  • Seite 132 Índice Introducción ..........................10 Objetivo de la guía ........................... 10 Acerca del procesador de sonido Naída CI ..............10-11 Procesador de sonido Naída CI ..................11 Descripción general del procesador de sonido Naída CI y sus accesorios 12-14 Procesador de sonido Naída CI ....................12 Antena receptora universal ......................
  • Seite 133 Sustitución de la pila ........................24 Cómo funcionan los LED del procesador Naída CI ..........25-26 Cómo funcionan las alarmas internas .................. 26 Uso de las antenas receptoras del procesador Naída CI ........26-28 Antena receptora universal ......................26 Sustitución de los cables de RF ..................26-27 Ajuste de la intensidad de los imanes de la antena receptora ......27-28 Extracción de las carcasas de color de la antena receptora ........
  • Seite 134 RF y el procesador Naída CI ....................59 Tablas de compatibilidad ......................60 Limpieza y mantenimiento ......................61 Datos de rendimiento .....................61-62 Procesamiento de sonido HiRes™ y HiRes Fidelity120™ ..........61 Contacto .............................62 de Advanced Bionics Guía de usuario del procesador de sonido Naída CI...
  • Seite 135: Introducción

    Advanced Bionics. Se trata del más avanzado que ha desarrollado Advanced Bionics, así como de la última generación en soluciones auditivas. Con el objetivo de obtener la mejor experiencia auditiva posible, incluye tecnologías innovadoras que solamente se encuentran disponibles a partir de Advanced Bionics y Phonak.
  • Seite 136: Procesador De Sonido Naída Ci

    Control de volumen Tecnología de doble micrófono de Phonak Control de volumen e indicadores LeD (micrófonos trasero y delantero) tricolores (verde, naranja, rojo) T-Mic 2 patentado de Advanced Bionics Botón de programa Procesador de sonido Antena receptora universal (UHP) Cartucho de pilas Micrófono...
  • Seite 137: Descripción General Del Procesador De Sonido Naída Ci Y Sus Accesorios

    Naída CI es el procesador de sonido para implantes cocleares más reciente y avanzado. Como muestra de la dedicación de Advanced Bionics a la hora proporcionar la mejor audición posible, el procesador Naída CI ofrece la tecnología AutoSound™, que se adapta dinámicamente a cada entorno sonoro de forma automática mediante el ajuste de los niveles de volumen.
  • Seite 138: Antena Receptora Universal

    Puerto de conexión del cable La antena receptora universal (UHP) funciona con todos los procesadores de sonido de Advanced Bionics y está diseñada para ser utilizada con el procesador Naída CI fuera de los entornos acuáticos. Sustitución de los cables de la antena receptora Para obtener más información, consulte la sección...
  • Seite 139: Compilot

    ComPilot El ComPilot ofrece una conectividad sin parangón a los usuarios del procesador Naída CI. Permite que se conecten de forma inalámbrica a los teléfonos y los dispositivos con Bluetooth®, así como a los reproductores de MP3, con el fin de escuchar conversaciones o música en estéreo. También es compatible con los receptores FM de Phonak con la ayuda de un enchufe europeo.
  • Seite 140: Tecnología De Rendimiento

    Tecnología de rendimiento El procesador Naída CI ofrece a los usuarios acceso a la tecnología binaural VoiceStream de Phonak, incluidas las funciones UltraZoom, DuoPhone, QuickSync y ZoomControl. Un profesional especializado en implantes debe configurar estas funciones programables con el software de programación SoundWave. UltraZoom Acerca las voces de las personas que se encuentran enfrente del usuario, mientras que el ruido lateral y de la parte de atrás se reduce.
  • Seite 141: Conexión De Las Carcasas De Color De La Antena Receptora Universal (Uhp)

    Conexión de las carcasas de color de la antena receptora universal (UHP) peligro por la presencia de piezas pequeñas. El procesador, las ADVeRTeNCIA: carcasas de color de la antena receptora universal, los imanes y los espaciadores pueden provocar asfixia si se ingieren. Colocación de la carcasa de color de la antena receptora universal Alinee la carcasa de color con la antena Presione con cuidado la carcasa y la antena...
  • Seite 142: Extracción De La Antena Receptora Del Procesador Naída Ci

    extracción de la antena receptora del procesador Naída CI Sujete el conector del cable (el enchufe derecho Saque con cuidado el conector del cable acodado de plástico, no el cable). del procesador Naída CI. Conexión del T-Mic 2 o del gancho de la oreja Con el T-Mic 2 o el gancho de la oreja Con la herramienta proporcionada del T-Mic desconectados, alinee el T-Mic 2 o el gancho...
  • Seite 143: Extracción Del T-Mic 2 O Del Gancho De La Oreja

    Retire la herramienta del procesador y deje la clavija dentro del Naída CI. extracción del T-Mic 2 o del gancho de la oreja Retire la fuente de alimentación. Alinee Presione con cuidado la herramienta hacia el extremo puntiagudo de la herramienta el orificio y empújela hacia fuera del T-Mic 2 o del gancho de la oreja por el otro lado.
  • Seite 144: Extracción De La Cubierta Del T-Mic 2

    Colocación de la cubierta del T-Mic 2 Sujete la cubierta del T-Mic 2 con una Gire con cuidado la cubierta del T-Mic 2 mano. Con la otra mano, sujete el T-Mic 2 hacia la derecha. Gire hasta que por el extremo que contiene el micrófono. los componentes encajen.
  • Seite 145: Colocación Del Procesador De Sonido Naída Ci

    *Vista ampliada Siga girando hasta que la cubierta del T-Mic 2 se separe del dispositivo. Deseche las cubiertas usadas del T-Mic 2. se recomienda usar el T-Mic 2 solamente cuando su cubierta esté PReCAUCIóN: correctamente colocada. La cubierta del T-Mic 2 se debe sustituir cada 3 o 4 meses o si se encuentra taponada por la cera de los oídos.
  • Seite 146: Colocación Del Procesador Naída Ci En El Clip

    El clip del procesador Naída CI ofrece configuraciones tanto para el lado derecho como para el izquierdo. Por consiguiente, se proporciona una mayor flexibilidad durante la colocación, así como la posibilidad de llevar el procesador completamente fuera de la oreja de forma segura. Esta necesidad es especialmente importante en el caso de niños pequeños y de muchos usuarios de implantes cocleares físicamente activos.
  • Seite 147: Extracción Del Procesador Naída Ci Del Clip

    Si la temperatura del dispositivo causa incomodidad o dolor, desconecte la fuente de alimentación y póngase en contacto con el representante local de Advanced Bionics. Guía de usuario del procesador de sonido Naída CI...
  • Seite 148: Extracción De La Pila

    El procesador se enciende cuando se le coloca una pila cargada. Para apagar el procesador, se debe extraer el cartucho de pilas. Cuando la pila esté correctamente colocada, el LED de color naranja ubicado en la sección intermedia del control de volumen parpadeará para indicar la carga de la pila.
  • Seite 149: Sustitución De La Pila

    Sustitución de la pila Sujete el procesador Naída CI con una mano. Alinee el conector del cartucho de pilas Gire el cable de RF hacia arriba para evitar con el lado de la carcasa del procesador golpearlo al colocar la pila. donde se encuentra el conector.
  • Seite 150: Cómo Funcionan Los Led Del Procesador Naída Ci

    Cómo funcionan los LeD del procesador Naída CI Los LED del procesador Naída CI constituyen una función programable que proporciona información visual sobre el estado del procesador Naída CI, la duración de la pila, la posición del programa y las condiciones de error. Indicaciones de los LED del procesador de sonido Naída CI Color Comportamiento...
  • Seite 151: Cómo Funcionan Las Alarmas Internas

    Si el usuario quiere conocer el estado del paquete de pilas de zinc-aire que está usando y emparejar un AB myPilot con el dispositivo, puede realizar una lectura de comprobación de la pila del procesador Naída CI. Antes de realizar una lectura de comprobación de la pila y con el fin de garantizar una lectura precisa del paquete de pilas de zinc-aire, espere al menos 15 minutos después de efectuar la conexión al procesador Naída CI.
  • Seite 152: Ajuste De La Intensidad De Los Imanes De La Antena Receptora

    regularmente para asegurarse de que esté en buenas condiciones. Si parece que está dañado, sustitúyalo por un nuevo cable. Para conectar el cable a la antena receptora: Sostenga la antena receptora con una Empuje el conector del cable firmemente mano y el conector del cable con la otra. hacia el conector de la antena receptora.
  • Seite 153: Extracción De Las Carcasas De Color De La Antena Receptora

    Para extraer la carcasa de color de la antena receptora, utilice solamente la herramienta proporcionada por Advanced Bionics. Instrucciones de uso de la antena receptora universal o de las carcasas de color o Consulte las la sección Conexión de la antena receptora universal (UHP)
  • Seite 154: Cambio Del Volumen

    Funcionalidad adicional del botón de programa: El botón de programa también permite que el usuario entre o salga del modo de espera. El modo de espera es un estado de bajo consumo de energía con el cual el procesador Naída CI puede ahorrar energía sin tener que apagarse.
  • Seite 155: Cambio De La Sensibilidad

    Para cambiar el volumen: Si pulsa brevemente la parte inferior del Si pulsa brevemente la parte superior del control control de volumen, se disminuirá el volumen. de volumen, se incrementará el volumen. Un audioprotesista puede cambiar o desactivar el intervalo de volumen de un programa con ayuda del software de programación SoundWave™.
  • Seite 156 MyLink de Phonak, permitirá que el usuario oiga al orador sin tener la Guía de usuario de ComPilot o el Apéndice de ComPilot que conectar los cables. Consulte publicado por Advanced Bionics para obtener más información. MyLink para evitar sonidos desagradables, asegúrese de que el procesador de sonido...
  • Seite 157 Para conectar un receptor FM al ComPilot: Apague el ComPilot y sujételo con una mano. Presione firmemente el receptor FM Con la otra mano, alinee las tres clavijas del para conectarlo al ComPilot. conector FM con el Europort del ComPilot. Asegúrese de que las clavijas del receptor FM coincidan con el tamaño y la orientación de los orificios del ComPilot.
  • Seite 158: Emparejamiento Con El Ab Mypilot

    emparejamiento con el AB myPilot Para que el AB myPilot controle los procesadores Naída CI, se debe emparejar con dichos procesadores. El AB myPilot se puede emparejar o desemparejar con varios procesadores Naída CI. Esto permite que se pueda usar un AB myPilot con todos los usuarios de procesadores Naída CI que se encuentren en una misma aula.
  • Seite 159 En este menú, pulse el botón de Cuando se encuentre el procesador Naída CI, la flecha hacia abajo para resaltar se mostrarán las iniciales del usuario la opción Buscar dispositivos. en el AB myPilot. Asimismo, se indicará el oído para el cual se ha programado principalmente.
  • Seite 160 La pantalla le indicará cuáles son los dispositivos que están emparejados mediante un círculo de color verde con una marca de verificación al lado de las iniciales del usuario. Desplácese con la flecha hacia abajo para resaltar el dispositivo que desea desemparejar. Pulse el botón central una vez que haya resaltado el dispositivo.
  • Seite 161: Comprobación De La Audición Del Procesador Naída Ci Y Auriculares De Botón Para La Comprobación De La Audición

    Con la otra mano, agarre el módulo de comprobación de la audición del procesador Naída CI por el logotipo de Advanced Bionics y tire hacia fuera. Guía de usuario del procesador de sonido Naída CI...
  • Seite 162 Introduzca la parte del logotipo de Advanced Bionics Conecte la parte superior del módulo de dentro de la otra parte del módulo de comprobación comprobación de la audición del procesador de la audición del procesador Naída CI. Debe notar Naída CI al procesador.
  • Seite 163 Si selecciona el programa de la bobina inductiva, asegúrese de estar sincronizado a un bucle o a myLink. Proporcione una entrada al transmisor FM para evaluar la calidad sonora. Si selecciona el programa inalámbrico, escuchará cualquier fuente de sonido que se esté transmitiendo mediante el ComPilot (por ejemplo, un dispositivo Bluetooth, un dispositivo FM que funcione con pilas, etc.).
  • Seite 164: Uso Del Teléfono

    Empújelas hasta que encajen correctamente. el módulo de comprobación de la audición del procesador Naída CI requiere NOTA: una fuente de alimentación cargada para funcionar correctamente. Si la fuente de alimentación que se usa para efectuar la comprobación de la audición se ha agotado hasta un nivel de carga insuficiente, el usuario no podrá...
  • Seite 165: Sugerencias De Telefonía

    ComPilot. Advanced Bionics dispone de un cable de interfaz de audio, pero también se puede adquirir un cable de conexión hecho a medida a partir de un vendedor independiente.
  • Seite 166: Información Sobre La Pila

    Para poder utilizar la bobina inductiva, el usuario debe tener acceso a un sistema de bucle o a un teléfono compatible con audífonos. Esto permitirá que la bobina inductiva reciba el campo electromagnético que generan estos dispositivos. Si el usuario intenta usar la bobina inductiva con un dispositivo de audio que no sea compatible, es posible que no perciba ningún sonido o que oiga un zumbido.
  • Seite 167: Montaje Del Cargador Powercel

    únicamente el cargador proporcionado para cargar las pilas PReCAUCIóN: PowerCel de Advanced Bionics. No lo utilice para cargar otras pilas. No intente cargar las pilas PowerCel del procesador Naída CI con un cargador distinto del proporcionado por Advanced Bionics.
  • Seite 168: Colocación De Las Pilas Powercel En El Cargador

    NOTA PARA LOS USUARIOS De eUROPA: de las pilas recargables, envíe las pilas agotadas al representante de Advanced Bionics más cercano o al centro especificado de seguimiento o programación. En los Estados Unidos y Canadá, llame a la línea de asistencia de Rechargeable Battery Recycling Corporation (Corporación de reciclaje de pilas recargables) al 877-273-2925 o...
  • Seite 169: Paquete De Pilas De Zinc-Aire

    Paquete de pilas de zinc-aire El procesador Naída CI utiliza pilas desechables para implantes de tamaño 675P (675 Power). El tamaño normal de las pilas para audífonos, es decir, 675, no tendrá la potencia suficiente para un implante coclear. Colocación de las pilas de zinc-aire Sujete el paquete de pilas de zinc-aire con una Tire con la otra mano del compartimento mano;...
  • Seite 170: Colocación De Las Pilas De Zinc-Aire (Cartucho Antihumedad)

    Coloque el cartucho de pilas en el procesador Naída CI. Para ello, siga las mismas instrucciones sobre cómo colocar las pilas PowerCel en el procesador Naída CI. Dichas instrucciones se encuentran en la sección Sustitución de la pila. Colocación de las pilas de zinc-aire (cartucho antihumedad) Use la misma herramienta proporcionada Una vez que tenga la herramienta dentro del para la extracción y la sustitución del T-Mic 2...
  • Seite 171: Indicador Led (Diodo Emisor De Luz) Del Cargador

    PowerCel. Si el problema se debe tanto al cargador como a la pila PowerCel, póngase en contacto con Advanced Bionics. Para indicar que la pila está cargada completamente o que existe un fallo de la pila, el LED del cargador se apaga o puede mostrar un azul tenue si la sala está...
  • Seite 172: Advertencias

    Advanced Bionics para sustituirla. ADVeRTeNCIAS: No recargue las pilas desechables. • No introduzca las pilas en la boca. • No mastique ni trague las pilas. Si esto ocurre, busque atención médica inmediata.
  • Seite 173: Antenas Receptoras

    Uso de FM de la guía de usuario o las Instrucciones de uso de ComPilot y el Apéndice de ComPilot publicado por Advanced Bionics. Comprobación de la audición del procesador Naída CI y auriculares de botón para la comprobación de la audición Auriculares de botón para...
  • Seite 174: Accesorios De Audio

    El procesador Naída CI dispone de un cómodo modo de supervisión al que se accede mediante el módulo de comprobación de la audición del procesador Naída CI y los auriculares de botón para la comprobación de la audición. Este modo permite que una persona que no requiere ayuda auditiva pueda escuchar las fuentes de entrada de audio del procesador Naída CI.
  • Seite 175: Estuche De Transporte Del Procesador Naída Ci

    estuche de transporte del procesador Naída CI estuche de transporte del procesador Naída CI El procesador Naída CI dispone de un estuche de transporte que puede utilizarse durante los viajes o para guardar el procesador de sonido y los accesorios cuando no se utilicen. Si el procesador Naída CI se expone a altos niveles de humedad, puede guardar los componentes durante la noche en el Zephyr de Dry &...
  • Seite 176: Información Sobre La Clasificación Ip

    El procesador Naída CI dispone de un filtro del micrófono ubicado sobre el micrófono trasero para evitar que el polvo y las impurezas dañen el micrófono. Advanced Bionics recomienda que se cambie la tapa del micrófono del procesador Naída CI cada tres meses o antes si se observa cualquier degradación de la calidad sonora.
  • Seite 177 Retire con cuidado la herramienta del orificio. La tapa del micrófono debe extraerse con la herramienta. La tapa se puede extraer de la herramienta y, a continuación, desecharse. Sustitución de la tapa del micrófono Con la tapa del micrófono sujeta al extremo Sujete la herramienta con una mano y use de la herramienta, sujete el procesador el extremo romo y sin rosca de la herramienta...
  • Seite 178: Temperaturas Recomendadas De Funcionamiento Y Almacenamiento Del Procesador Naída Ci

    55 °C (131 °F) Fuentes de alimentación aprobadas Advanced Bionics ha comprobado el funcionamiento del procesador Naída CI con las fuentes de alimentación indicadas a continuación; no puede garantizarse el funcionamiento si se utilizan fuentes de alimentación diferentes de las especificadas.
  • Seite 179 Si estas medidas no resuelven el problema, póngase en contacto inmediatamente con un audioprotesista o con Advanced Bionics para obtener ayuda adicional. Si no oye ningún sonido o si un LED fijo de color rojo se ilumina en el procesador Naída CI, siga los siguientes pasos para solucionar el problema: Extraiga el cartucho de pilas.
  • Seite 180: Solución De Problemas De Los Led Del Procesador Naída Ci

    Si estas medidas no resuelven el problema, póngase en contacto inmediatamente con un audioprotesista o con Advanced Bionics para obtener ayuda adicional. Si los sonidos están amortiguados o distorsionados: Compruebe que ni la ropa ni ningún otro material estén obstruyendo el orificio del micrófono.
  • Seite 181 LED de color verde parpadee con la entrada de audio, póngase en contacto con un audioprotesista o con Advanced Bionics. Durante la comprobación del estado de la pila, no se observa ningún parpadeo, o bien, se observa solamente un parpadeo naranja: las pilas de zinc-aire NO activarán el LED de estado de la pila después...
  • Seite 182: Solución De Problemas De Las Alarmas Internas Del Procesador Naída Ci

    Consulte la sección las entradas auxiliares de la guía de usuario. únicamente Advanced Bionics puede reparar el procesador o la antena ADVeRTeNCIA: receptora. No intente abrir ni reparar los componentes. No continúe utilizando el procesador o la antena receptora si algún componente está...
  • Seite 183: Emisiones Electromagnéticas

    Consejos y declaración del fabricante de acuerdo con IEC 60601-1-2 emisiones electromagnéticas El Naída CI está diseñado para utilizarse en los entornos electromagnéticos especificados a continuación. El cliente o el usuario del procesador Naída CI deben asegurarse de que se utiliza en uno de estos entornos.
  • Seite 184: Distancias De Separación Entre Los Equipos De Comunicaciones Por Rf Y El Procesador Naída Ci

    estas directrices quizás no sean aplicables a todos los contextos. La propagación NOTA: electromagnética se ve afectada por la absorción y la reflexión de las estructuras, los objetos y las personas. a El rendimiento esencial del procesador Naída CI de acuerdo con los requisitos de IEC 60601 se define como estímulo auditivo dentro de amplitudes seguras.
  • Seite 185: Tablas De Compatibilidad

    Tablas de compatibilidad Tipo de implante HiRes 90K HiRes 90K Advantage Naída CI ✓ ✓ ✓ Neptune ✓ ✓ ✓ Harmony ✓ ✓ ✓ ✓ Auria ✓ ✓ ✓ Procesador de sonido ✓ ✓ ✓ ✓ Platinum (PSP) 1 Requiere SoundWave 2.1 o posterior 2 Requiere SoundWave 2.0 o posterior 3 Requiere SoundWave 1.4 o posterior 4 Requiere SClin2000 y CPI-11...
  • Seite 186: Limpieza Y Mantenimiento

    No está permitida la reparación ni la modificación del procesador Naída CI o sus accesorios • por parte de otra entidad que no sea Advanced Bionics. De lo contrario, se anulará la garantía del fabricante. Datos de rendimiento El implante HiRes 90K Advantage con el electrodo HiFocus y el procesador Naída CI funcionan...
  • Seite 187: Contacto

    AdvancedBionics.com Advanced Bionics, IntelliLink, AutoSound, SoundWave, HiRes, HiRes Fidelity 120, HiRes Optima, CIS, MPS, ClearVoice y Built Kid Tough son marcas comerciales de Advanced Bionics en los Estados Unidos de América y en otros países. Dry & Store® es una marca comercial registrada de Ear Technology Corporation.
  • Seite 188 Advanced Bionics Gebrauchsanweisung für den Naída CI Soundprozessor...
  • Seite 189: Warn- Und Sicherheitshinweise

    Produktkennzeichnung Etikettensymbole und ihre Bedeutung: EU-Prüfzeichen. Anbringung des CE-Zeichens 2013 genehmigt Modellnummer Herstellungsdatum Serien-Nummer in Europa Schutzart: B Lagerung bei Temperaturen zwischen -20˚C (-4˚F) und +55˚C (131˚F) Zerbrechlich Vor Nässe schützen Siehe Gebrauchsanweisung Geeignet für atmosphärischen Bereich zwischen 70 kPa und 106kPa (entspricht max. 3000 m über dem Meeresspiegel und max.
  • Seite 190 Verwenden Sie für den Soundprozessor, die AB myPilot Fernsteuerung oder den • ComPilot ausschließlich Netzteile von Advanced Bionics oder Phonak. Wenn Sie ein Ersatznetzteil brauchen, wenden Sie sich direkt an Advanced Bionics. AB myPilot und ComPilot dürfen nicht verwendet werden, wenn sie an einer •...
  • Seite 191 Überträgermagnetstärke finden Sie in der Gebrauchsanweisung des Überträgers. Wenn sich der Soundprozessor oder dessen Zubehör zu stark erhitzt, sehen Sie • sofort von einer weiteren Nutzung ab und wenden Sie sich an Advanced Bionics oder Ihre betreuende Klinik. Bewahren Sie Ersatz-Überträger stets fern von Gegenständen mit Magnetstreifen •...
  • Seite 192: Die Digitalkodierte, Induktive Übertragungstechnologie, Die In Diesem Gerät

    Verwenden Sie AB myPilot oder ComPilot nicht in Umgebungen, in denen die • Nutzung elektronischer Geräte verboten ist, z.B. in Flugzeugen. Während einer Stimulation des Implantats darf AB myPilot nicht zu nah an den • Naída CI Soundprozessor gehalten werden (Mindestabstand 1cm), da sonst die Verbindung zwischen Implantat und Soundprozessor unterbrochen werden kann.
  • Seite 193 Berühren Sie jede Metalloberfläche zuerst mit der Hand, bevor Sie Soundprozessor/Kabel/ • Überträger in Kontakt mit dieser bringen. Dies ist auf dem Spielplatz besonders wichtig, wo schnell starke statische Ladung entstehen kann. Es ist sehr wichtig, zuerst den Leiter (z.B. Metall) zu berühren, bevor Sie Ihren Soundprozessor, Ihre Kabel oder den Überträger in Kontakt mit der Metalloberfläche bringen.
  • Seite 194 Inhalt einleitung ...........................10 Zweck dieser Gebrauchsanweisung ..................10 Über den Naída CI Soundprozessor ................10-11 Der Naída CI Soundprozessor ....................11 Der Naída CI Soundprozessor und Zubehör - Übersicht ........12-14 Das Naída CI ............................12 Der Universalüberträger ....................... 13 AB myPilot ............................13 ComPilot ..............................
  • Seite 195 Batterie wechseln ..........................24 Bedeutungen der Naída CI Signalleuchten (LEDs) ..........25-26 Bedeutungen der Naída CI Signaltöne ................. 26 Naída CI-Überträger verwenden ................26-28 Der Universalüberträger ....................... 26 Überträgerkabel ersetzen ......................26-27 Stärke der Überträgermagneten anpassen ..............27-28 Überträger-Farbkappen abnehmen ..................28 Steuerelemente am Naída CI anpassen ..............28-30 Das Programm wechseln .......................28-29 Lautstärke ändern ........................29-30 Empfindlichkeit ändern ........................
  • Seite 196 Elektromagnetische Emissionen ....................58 Elektromagnetische Immunität ....................58 Trennabstände bei RF-Kommunikationen Ausrüstung und Naída CI ......................59 Kompatibilitätstabellen ........................60 Reinigung & Wartung ........................61 Performance-Daten ......................61-62 HiRes™- und HiRes 120™-Klangverarbeitung ..............61 Kontakt ............................62 von Advanced Bionics Naída CI Soundprozessor - Gebrauchsanweisung...
  • Seite 197: Einführung

    In dieser Gebrauchsanweisung erfahren CI-Anwender, Eltern und audiologische Fachkräfte, wie der Naída CI Soundprozessor optimal verwendet und gepflegt wird. Naída CI ist das neueste Cochlea-Implantat von Advanced Bionics. Es enthält neben dem leistungsfähigsten Soundprozessor, der jemals von AB angeboten wurde, auch die neuesten Hörfunktionen und modernste Hörtechnologie von Phonak - für Ihr bestmögliches Hören.
  • Seite 198: Der Naída Ci Soundprozessor

    ComPilot AB myPilot LeDs Zusätzlich bietet das Naída CI die Möglichkeit, die Fernsteuerung AB myPilot und das Streaming-Gerät Phonak ComPilot zu verwenden. Der Naída CI Soundprozessor In diesem Kapitel werden der Naída CI Soundprozessor und sein Zubehör erklärt Lautstärkesteller Phonak Dual-Mikrofon-Technologie Lautstärkesteller und 3-farbige LeDs (vorderes und hinteres Mikrofon) (grün, orange, rot)
  • Seite 199: Der Naída Ci Soundprozessor Und Zubehör - Übersicht

    Das Naída CI enthält den neuesten und fortschrittlichsten CI-Soundprozessor, den es momentan auf dem Markt gibt. Advanced Bionics hat sich dem Ziel verschrieben, CI-Trägern beste Hörleistung zu ermöglichen. Aus diesem Grund enthält das Naída CI die AutoSound™-Funktion, die das Hören dynamisch an jede Hörumgebung anpasst, indem sie die Lautstärke automatisch auf ein optimales Level...
  • Seite 200: Der Universalüberträger

    -farben zur Verfügung. Der Naída CI Soundprozessor verwendet den Universalüberträger. Farbkappen Mikrofon Kabelanschluss Der Universalüberträger (UHP) kann mit allen Advanced Bionics Soundprozessoren verwendet werden und ermöglicht die Nutzung des Naída CI in trockener Umgebung (außerhalb von Wasser). Überträgerkabel ersetzen Weitere Informationen finden Sie im Kapitel oder in der UHP und/oder Kabels.
  • Seite 201: Compilot

    ComPilot ComPilot ermöglicht Naída CI-Anwendern eine ausgezeichnete drahtlose Anbindung an Bluetooth®-fähige Kommunikations- und Unterhaltungsgeräte (Telefone, MP3-Player usw.). Über die Euro-Buchse ist ComPilot auch mit Phonak FM-Empfängern kompatibel. In ungekoppeltem Zustand kann ComPilot auch Audio-Streamings auf kompatible Phonak Hörsysteme durchführen. Dadurch steht bimodalen Anwendern -- Personen, die ein Naída CI auf dem einen und ein Phonak Hörgerät auf dem anderen Ohr tragen -- die Möglichkeit bilateralen, drahtlosen Streamings zur Verfügung.
  • Seite 202: Performance-Technologie

    Performance-Technologie Naída CI enthält die Binaurale VoiceStream Technologie von Phonak, mit Funktionen wie UltraZoom, DuoPhone, QuickSync und ZoomControl. Diese Funktionen können von einer CI-Fachkraft über die Anpasssoftware SoundWave aktiviert und eingestellt werden. UltraZoom Fokussiert eine von vorne kommende Stimme, während Störgeräusche, die von der Seite oder von hinten kommen, reduziert werden.
  • Seite 203: Die Farbkappen Des Universalüberträgers (Uhp) Aufsetzen

    Die Farbkappen des Universalüberträgers (UHP) aufsetzen Gefahr durch kleine Teile: Bei Verschlucken des Prozessors, WARNUNG: der UHP-Farbkappen, der Magnete oder der Einlagen besteht Erstickungsgefahr. Anbringen der UHP-Farbkappe Legen Sie die Farbkappe bündig auf den Drücken Sie die Kappe und den Überträger Überträger.
  • Seite 204: Den Überträger Vom Naída Ci Abtrennen

    Den Überträger vom Naída CI abtrennen Halten Sie den Kabelanschluss (den Ziehen Sie den Kabelstecker rechteckigen Stecker, nicht das Kabel). vom Naída CI ab. T-Mic™ 2/Ohrbügel anschließen Richten Sie den Anschluss des T-Mic 2 Führen Sie nun mit dem Werkzeug für das oder Ohrbügels bündig zum Anschluss des T-Mic 2/ den Ohrbügel einen der Stifte in Prozessormoduls aus.
  • Seite 205: T-Mic 2/ Ohrbügel Entfernen

    Legen Sie nun das Werkzeug weg und belassen den Stift im Naída CI. T-Mic 2/ Ohrbügel entfernen Entfernen Sie das Batteriemodul. Stecken Sie Schieben Sie nun das Werkzeug die Spitze des Werkzeugs in das Prozessorloch vorsichtig vor, bis der Stift auf der mit dem Stift, der das T-Mic 2/ den Ohrbügel gegenüberliegenden Seite hervortritt.
  • Seite 206: Die T-Mic 2 Schutzkappe Aufsetzen

    Die T-Mic 2 Schutzkappe aufsetzen Halten Sie die T-Mic 2 Schutzkappe Schrauben Sie nun vorsichtig die mit der einen Hand. Halten Sie mit Schutzkappe im Uhrzeigersinn auf der anderen Hand das T-Mic 2 an das T-Mic 2 auf, bis Sie den Anschlag dem Ende, an dem das Mikrofon erreichen.
  • Seite 207: Das Naída Ci Tragen

    *Vergrößerte Ansicht Schrauben Sie weiter, bis sich die T-Mic 2 Schutzkappe vom T-Mic 2 abnehmen lässt. Entsorgen Sie die benutzte Schutzkappe. Das T-Mic 2 sollte nur verwendet werden, wenn die T-Mic 2 Schutzkappe VORSICHT: ordnungsgemäß aufgesetzt ist. Die T-Mic 2 Schutzkappe sollte alle 3-4 Monate ausgewechselt werden bzw.
  • Seite 208: Naída Ci In Den Clip Einfügen

    Mit dem Naída CI Clip (in links- und rechtsseitiger Konfiguration) erhalten Anwender größere Trageflexibilität, denn der Soundprozessor kann mithilfe des Clips komplett ohrfern getragen werden. Er ist daher besonders gut für Kleinkinder und sportlich aktive CI-Anwender geeignet. Der Naída CI Clip kann an einer beliebigen Stelle am Körper befestigt werden (Kleidung, Haar usw.). Er ist sowohl in linksseitiger als auch in rechtsseitiger Ausführung erhältlich.
  • Seite 209: Naída Ci Vom Clip Abtrennen

    Befestigen Sie den Clip mit dem Soundprozessor an der gewünschten Stelle (Kleidung oder Haar). Naída CI vom Clip abtrennen Entnehmen Sie dann das Naída CI Ziehen Sie zuerst an der vorsichtig, mit dem internen Ohrbügelteil Entriegelungslasche des Clips, um das zuerst.
  • Seite 210 Der Prozessor wird durch das Anschließen des Akkus / Batteriefachs eingeschaltet. Um den Prozessor auszuschalten, trennen Sie den Akku / das Batteriefach vom Prozessor. Sobald der Akku / das Batteriefach richtig eingelegt ist, leuchtet die LED auf dem Lautstärkesteller orange auf und zeigt damit den Ladestand der Batterie an.
  • Seite 211 Akku / Batteriefach anschließen Halten Sie das Naída CI mit einer Hand. Setzen Sie den Anschluss des Drehen Sie den Stecker des Überträgerkabels Akkus / Batteriefachs bündig an den nach oben, um den Akku / das Batteriefach Anschluss des Prozessormoduls. ungehindert anschließen zu können.
  • Seite 212: Bedeutungen Der Naída Ci Signalleuchten (Leds)

    Bedeutungen der Naída CI Signalleuchten (LeDs) Die Naída CI LEDs sind programmierbar und geben visuelle Informationen über Status, Batteriestand, Programmposition und Fehler am Naída CI. LED-Anzeigen am Naída CI Soundprozessor Farbe Verhalten Programmierbar Bedeutung Orange No. Die Batterieanzeige Blinkt beim Starten 4x kurzes Blinken zeigt an, dass die •...
  • Seite 213: Bedeutungen Der Naída Ci Signaltöne

    Der Anwender kann einen Batteriecheck am Naída CI ausführen, um den Batteriestatus des verwendeten Zink-Luft Batterieeinsatzes abzulesen; Voraussetzung ist, dass das Gerät mit AB myPilot gekoppelt ist. Um ein richtiges Ablesen des Zink-Luft Batterieeinsatzes zu gewährleisten, warten Sie nach dessen Anschluss 15 Minuten ab, ehe Sie den Batteriecheck durchführen. Batteriecheck AB myPilot Gebrauchsanweisung Im Kapitel...
  • Seite 214: Stärke Der Überträgermagneten Anpassen

    beschädigt ist. Das Kabel an den Überträger anschließen: Das Kabel am Soundprozessor anschließen: Halten Sie den Überträger in einer Hand Stecken Sie den Kabelstecker fest in den und den Kabelstecker in der anderen. entsprechenden Überträgeranschluss. Halten Sie den Soundprozessor in einer Stecken Sie den Kabelstecker in den Hand und den Kabelstecker in der anderen.
  • Seite 215: Überträger-Farbkappen Abnehmen

    Farben zur Verfügung, um den Überträger je nach Geschmack zu gestalten. Um eine Farbkappe abzunehmen, verwenden Sie ausschließlich das speziell für diesen Zweck gelieferte Werkzeug von Advanced Bionics. Nähere Informationen zur Farbkappen oder Universalüberträger Verwendung der Farbkappen finden Sie in den Kapiteln (UHP) anschließen, oder in der UHP...
  • Seite 216: Lautstärke Ändern

    Die Programmtaste dient auch zur Aktivierung oder Deaktivierung des Standby-Modus. Der Standby-Modus ist ein Energiesparmodus, in den das Naída CI versetzt werden kann, um Energie zu sparen, ohne den Prozessor auszuschalten. Im Standby-Modus kann der PowerCel-Akku oder Zink-Luft Batterieeinsatz ohne Auswirkungen auf die Batterielebensdauer am Prozessor angeschlossen bleiben.
  • Seite 217: Empfindlichkeit Ändern

    Die Lautstärke ändern: Durch kurzes Drücken an der Durch kurzes Drücken an der oberen Seite des unteren Seite des Lautstärkestellers Lautstärkestellers wird die Lautstärke erhöht. wird die Lautstärke reduziert. Ihr Audiologe kann den Lautstärkebereich der einzelnen Programme in der SoundWave™ Anpasssoftware deaktivieren oder ändern.
  • Seite 218 ComPilot MLxi FM-Systeme können auch mittels der Aktivierung der Telefonspule im FM-Programm erreicht werden (nur durch Audiologen). Die Telefonspule wird in Verbindung mit einer Induktionsschleife oder Phonak MyLink verwendet und ermöglicht dem Anwender, den Sprecher ohne die Nutzung von Verbindungskabeln zu hören. Weitere Informationen finden Gebrauchsanweisung des ComPilot oder dem AB Addendum für ComPilot.
  • Seite 219 Den FM-Empfänger an den ComPilot anschließen: Halten Sie den ausgeschalteten ComPilot Drücken Sie den FM-Empfänger, bis er in einer Hand. Führen Sie mit der anderen fest mit dem ComPilot verbunden ist. Hand die drei FM-Stifte über die Euro-Buchse des ComPilot. Achten Sie darauf, die Stifte des FM-Empfängers in die jeweils richtigen ComPilot-Buchsen zu stecken.
  • Seite 220: Mit Ab Mypilot Koppeln

    Mit AB myPilot koppeln Um die AB myPilot als Fernsteuerung für das Naída CI nutzen zu können, muss sie zuerst mit dem/n Prozessoren gekoppelt werden. Die AB myPilot kann mit mehreren Naída CI Prozessoren gekoppelt bzw. ungekoppelt sein. Dadurch kann AB myPilot mit allen Naída CI Anwendern in einem Raum verwendet werden (z.B.
  • Seite 221 Klicken Sie in diesem Menü auf den Sobald das Naída CI erkannt wird, nach unten zeigenden Pfeil, um die erscheinen auf dem AB myPilot Bildschirm Option Geräte suchen zu markieren. die Initialien des Anwenders und das Ohr, für welches dieses primär programmiert ist. Ein grüner Kreis mit einem Häkchen zeigt an, dass das Gerät gekoppelt ist.
  • Seite 222 Auf dem Bildschirm wird angezeigt, welche Geräte gekoppelt sind (gekoppelt = neben den Initialien des Anwenders erscheint ein Häkchen in grünem Kreis). Markieren Sie das Gerät, das Sie entkoppeln wollen. Verwenden Sie dazu die Pfeiltaste mit dem nach unten zeigenden Pfeil. Drücken Sie anschließend die mittlere Taste. Der grüne Kreis mit dem Häkchen erlischt und das Gerät wird entkoppelt.
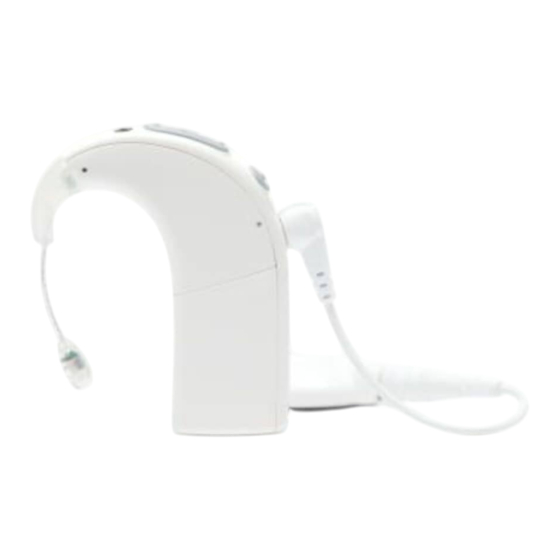
  • Seite 223: Naída Ci Listening Check Und Listening Check Ohrhörer

    Naída CI Listening Check und Listening Check Ohrhörer Mikrofon(e) und Audioeingänge überprüfen Das Naída CI verfügt über ein integriertes Testmodul, das normalhörenden Personen ermöglicht, die Schallquellen zu überprüfen. Mit der AB myPilot Fernsteuerung können alle Audioeingänge separat gehört werden. Ohne die Fernsteuerung AB myPilot können die Audioeingänge gemäß der jeweiligen Programmkonfiguration gehört werden.
  • Seite 224 Stecken Sie den Teil mit dem AB Logo in Schließen Sie das Naída CI Listening den anderen Teil des Naída CI Listening Check Modul an der oberen Seite an Check. Die zwei Teile sollten spürbar den Prozessor an ineinander einrasten. An der oberen und unteren Seite erscheinen die Anschlüsse für das Prozessor- und das Batteriemodul.
  • Seite 225 myLink synchronisiert zu sein. Sprechen Sie in den FM-Sender, um die Audioqualität zu überprüfen. Über die Option "Drahtlos" können Sie die Audioquellen überprüfen, die über den ComPilot übertragen werden (z. B. Bluetooth-Gerät, FM, batteriebetriebenes Gerät). Um diesen Prozess zu starten, schalten Sie den ComPilot und das Gerät ein, dessen Ton übertragen werden soll.
  • Seite 226 Drücken Sie die Teile zusammen, bis sie ineinander einrasten. Achten Sie darauf, eine möglichst volle Batterie für den Listening Check HINWeIS: zu verwenden. Mit einer leeren oder fast leeren Batterie kann der Listening Check nicht ausgeführt werden. Beim Anschluss eines leeren PowerCel-Akkus, einer leeren AAA PowerPak-Batterie oder ohrfern getragenen Energieoption leuchtet auf dem Naída CI eine rote LED auf.
  • Seite 227: Telefon-Tipps

    Ein Verbindungskabel verwenden.Die Anbindung an ein Mobil- oder Schnurlostelefon kann • über ein Verbindungskabel erfolgen. Schließen Sie ein Ende des Verbindungskabels am Kopfhörer-Anschluss Ihres Telefons und das andere Ende an der Audio-Buchse Ihres ComPilot an. Sie können entweder das von AB angebotene Audio-Schnittstellen-Kabel nutzen, oder ein Verbindungskabel von einem anderen Hersteller verwenden.
  • Seite 228: Telefonspulen Sind Bekanntermaßen Empfindlich Für Magnetisches

    Telefonspulen sind bekanntermaßen empfindlich für magnetisches ACHTUNG: Rauschen, das durch die meisten Industrieleuchten, Laden- und Flughafensicherheits- Scanner, Bandscanner, Transformatoren, Motoranlasser und Bildschirme entsteht. Informationen zur Batterie 170 mAh Li-Ion Zink-Luft Zink-Luft (Batterieeinsatz mit 230 mAh Li-Ion 110 mAh Li-Ion Kindersicherung) Der Naída CI Soundprozessor kann mit zwei Zink-Luft-Batterien, Lithium-Ionen PowerCel-Akkus in drei Größen, dem AAA PowerPak oder dem PowerCel-Adapter betrieben werden.
  • Seite 229: Das Powercel-Ladegerät Vorbereiten

    Schließen Sie den Zink-Luft Batterieeinsatz nicht am Ladegerät an. ARNUNG: Das Ladegerät darf nur zum Aufladen von wiederaufladbaren Lithium-Ionen- Batterien (Akkus) verwendet werden. Am PowerCel-Ladegerät können alle drei Akku-Größen aufgeladen werden. Das PowerCel-Ladegerät vorbereiten Netzteile und Akku-Ladegeräte sollten nur freistehend verwendet WARNUNG: werden, um eine ausreichende Luftzufuhr zu gewährleisten.
  • Seite 230 Die PowerCel-Akkus müssen vor dem Wiederaufladen nicht ganz leer sein. Wir empfehlen, nicht verwendete PowerCel-Akkus mindestens einmal alle 3 Monate aufzuladen. Beachten Sie bitte, dass die Leistung von PowerCel-Akkus nach einer gewissen Zeit nachlässt, selbst wenn sie nicht genutzt werden. Dies gilt für alle Akkus und ist kein Defekt. Gemäß...
  • Seite 231: Der Zink-Luft Batterieeinsatz

    Der Zink-Luft Batterieeinsatz Das Naída CI wird mit 675er Power-Implantatbatterien (675P) betrieben. Normale 675er Hörgerätebatterien reichen für ein Cochlea-Implantat nicht aus. Zink-Luft-Batterien einlegen Drücken Sie mit Ihrem Finger den Riegel Ziehen Sie das Batteriefach aus dem am oberen Rand des Batteriemoduls Batterieeinsatz heraus.
  • Seite 232: Zink-Luft-Batterien Einlegen (Batterieeinsatz Mit Kindersicherung)

    Schließen Sie den Batterieeinsatz am Naída CI an. Folgen Sie dazu den Anweisungen zum Batterie ersetzen. Anschließen des PowerCel-Akkus im Kapitel Zink-Luft-Batterien einlegen (Batterieeinsatz mit Kindersicherung) Verwenden Sie das Werkzeug, das für die Schieben Sie das Werkzeug vorsichtig Entfernung und den Ersatz des T-Mic 2/ vor und nach unten, bis sich das Ohrbügels vorgesehen ist.
  • Seite 233: Leuchtanzeigen (Leds) Am Ladegerät

    Defekt angezeigt wird. Wenn die LED weiterhin rot leuchtet, ist das Ladegerät defekt. Wenn die LED nicht rot aufleuchtet, ist der PowerCel-Akku defekt. Wenden Sie sich in jedem Fall für weitere Hilfe an Advanced Bionics. Die LED erlischt (oder leuchtet in einem dunklen Raum schwach blau) und zeigt damit an, dass der Akku voll geladen ist oder dass ein Batteriedefekt vorliegt.
  • Seite 234: Warnhinweise

    WARNHINWeISe: Einwegbatterien nicht wiederaufladen. • Batterien niemals in den Mund nehmen. • Niemals auf Batterien beißen oder gar diese schlucken. Wenn dies der Fall ist, • sofort ärztliche Hilfe holen. Austretende Batterieflüssigkeit darf niemals in Kontakt mit der Haut, dem Mund •...
  • Seite 235: Die Überträger

    Die Überträger Der Naída CI Soundprozessor nutzt den Universalüberträger (UHP). Universalüberträger (UHP) Der Universalüberträger ist für die tägliche Nutzung des Naída CI geeignet (nur in trockenen Umgebungen). ComPilot ComPilot MLxi Bei Verwendung des ComPilot ist das Naída CI mit MLxi, dem drahtlosen FM-Empfänger von Phonak, kompatibel.
  • Seite 236: Audio-Zubehör

    Mit dem Listening Check und den Listening Check Ohrhörern können normalhörende Personen die Eingangssignale des Naída CI überprüfen. Wie Sie den Naída CI Listening Check und die Listening Check Ohrhörer im Einzelnen verwenden, erfahren Sie im Kapitel Mikrofon(e) und Audioeingänge überprüfen.
  • Seite 237: Naída Ci Tragetasche

    Naída CI Tragetasche Naída CI Tragetasche Im Lieferumfang des Naída CI ist eine Tragetasche enthalten, die Sie auf Reisen oder für die Aufbewahrung Ihres Soundprozessors und der Zubehörteile nutzen können. Wenn Ihr Naída CI hoher (Luft-)feuchtigkeit ausgesetzt war, sollten Sie die Komponenten nachts in das mitgelieferte Trockengerät Zephyr by Dry &...
  • Seite 238: Informationen Zur Ip-Klassifizierung

    Das Naída CI verfügt über einen Mikrofonfilter, der am hinteren Mikrofon angebracht ist, um das Mikrofon vor Staub und Schmutz zu schützen. Advanced Bionics empfiehlt, diese Mikrofon- Schutzkappen des Naída CI alle drei Monate auszuwechseln, oder eher, wenn Sie merken, dass die Klangqualität nachlässt.
  • Seite 239 Ziehen Sie das Werkzeug vorsichtig aus der Öffnung. Die Mikrofon-Schutzkappe sollte, am Werkzeug haftend, mit herausgezogen werden. Trennen Sie die Schutzkappe vom Werkzeug ab und entsorgen Sie sie. Mikrofon-Schutzkappe ersetzen Halten Sie das Werkzeug mit Stecken Sie eine neue Mikrofon-Schutzkappe aufgesetzter Mikrofon-Schutzkappe auf das nicht-gewundene Ende des in der einen Hand und das...
  • Seite 240: Empfohlene Betriebs- Und Lagerungstemperaturen Für Das Naída Ci

    -20°C (-4°F) 55°C Zugelassene Stromquellen Advanced Bionics gewährleistet den richtigen Betrieb des Naída CI mit den im Folgenden aufgelisteten Energiequellen. Wird eine andere als eine dieser Energiequellen verwendet, so kann der richtige Betrieb nicht garantiert werden. Zugelassene Energiequellen für das Naída CI...
  • Seite 241 Ersetzen Sie das Kabel. Ersetzen Sie den Überträger. Sollten all diese Maßnahmen nicht zur Lösung Ihres Problems führen, wenden Sie sich bitte umgehend an Ihren Audiologen oder an den AB-Kundenservice. Wenn kein Ton zu hören ist oder die LED des Naída CI Prozessors dauerhaft rot leuchtet, gehen Sie bitte wie folgt vor: Trennen Sie das Batteriemodul ab.
  • Seite 242: Fehlerbehebung An Den Naída Ci Leds

    Sollten all diese Maßnahmen nicht zur Lösung Ihres Problems führen, wenden Sie sich bitte umgehend an Ihren Audiologen oder an den AB-Kundenservice. Wenn Töne gedämpft oder verzerrt sind: Stellen Sie sicher, dass die Mikrofonöffnung nicht durch ein Kleidungsstück oder sonstiges Material abgedeckt wird.
  • Seite 243 T-Mic 2 nicht blinkt, ersetzen Sie das T-Mic 2. und/oder das Kabel. Wenn die grüne LED nur nach Eingängen aus den Prozessormikrofonen nicht blinkt, wenden Sie sich an Ihren Audiologen oder an Advanced Bionics. Wenn während der Überprüfung des Batteriestatus keine LED oder nur eine orangefarbene...
  • Seite 244: Fehlerbehebung An Den Signaltönen Des Naída Ci

    Mikrofon(e) und Audioeingänge zu überprüfen. Nähere Informationen finden Sie im Kapitel überprüfen. Prozessoren oder Überträger dürfen nur von Advanced Bionics repariert WARNUNG: werden. Versuchen Sie nicht, die Teile selbst zu öffnen oder zu reparieren. Wenn ein Teil des Soundprozessors oder des Überträgers beschädigt ist, sehen Sie von der weiteren Nutzung ab.
  • Seite 245: Leitlinie Und Erklärung Des Herstellers

    Leitlinie und erklärung des Herstellers gemäß IEC 60601-1-2 elektromagnetische emissionen Das Naída CI ist für die Verwendung in der unten beschriebenen elektromagnetischen Umgebung vorgesehen. Anwender des Naída CI sollten darauf achten, es in einer solchen elektromagnetischen Umgebung zu verwenden. emissionstest Konformität elektromagnetische Umgebung - Leitlinie HF-Energie wird nur zum internen Betrieb des...
  • Seite 246 Es ist möglich, dass diese Spezifikationen nicht für alle Situationen gelten. HINWeIS: Die elektromagnetische Ausbreitung wird durch die Absorption und die Reflexion von Strukturen, Gegenständen und Personen beeinflusst. a. Die grundsätzliche Leistung des Naída CI ist, nach IEC 60601 Anforderungen, die auditorische Stimulation innerhalb von sicheren Amplituden.
  • Seite 247: Kompatibilitätstabellen

    Kompatibilitätstabellen Implantattyp HiRes 90K HiRes 90K Advantage Naída CI ✓ ✓ ✓ Neptune ✓ ✓ ✓ Harmony ✓ ✓ ✓ ✓ Auria ✓ ✓ ✓ Platinum ✓ ✓ ✓ ✓ Soundprozessor (PSP) 1 SoundWave 2,1 oder neuere Version erforderlich 2 SoundWave 2,0 oder neuere Version erforderlich 3 SoundWave 1.4 oder neuere Version erforderlich 4 SClin2000 und CPI-11 erforderlich 5 SoundWave 2.2 oder neuere Version und CPI-3 erforderlich...
  • Seite 248: Reinigung & Wartung

    Prozessormikrofons. Reparaturen oder Modifizierungen des Naída CI oder seines Zubehörs dürfen nur von • Advanced Bionics vorgenommen werden; anderenfalls erlischt die Herstellergarantie. Leistungsdaten Das HiRes 90K™ Advantage Implantat mit HiFocus™ Elektrode und der Naída CI Prozessor unterstützen sämtliche HiResolution Klangverarbeitungsstrategien, einschließlich HiRes, HiRes mit Fidelity 120 (HiRes 120) und ClearVoice.
  • Seite 249: Kontakt

    Advanced Bionics, IntelliLink, AutoSound, SoundWave, HiRes, HiRes Fidelity 120, HiRes Optima, CIS, MPS, ClearVoice und Built Kid Tough sind Marken von Advanced Bionics in den USA und anderen Ländern. Dry & Store® ist ein eingetragenes Warenzeichen der Ear Technology Corporation VELCRO®...
  • Seite 250 Advanced Bionics gebruiksaanwijzing voor de Naída CI-spraakprocessor...
  • Seite 251: Waarschuwingen En Voorzorgsmaatregelen

    Labeling Labelsymbolen en betekenissen: Conformiteitsmarkering van de Europese Gemeenschap. Geautoriseerd om de CE-markering te gebruiken in 2013 Modelnummer Fabricagedatum Serienummer Fabrikant Beschermingstype: B Opslaan bij temperaturen tussen -20°C (-4°F) en +55°C (131°F) Breekbaar Droog houden Zie gebruiksaanwijzing Geschikt voor een atmosferisch bereik tussen 70kPa en 106kPa, wat gelijk staat aan een bereik van 3000 m boven tot 380 m onder zeeniveau.
  • Seite 252 Gebruik geen stroomvoorziening voor de spraakprocessor, de myPilot-afstandsbediening • van AB of de ComPilot, tenzij deze is verstrekt door Advanced Bionics of Phonak. Indien nodig kunt u contact opnemen met uw CI-centrum of Advanced Bionics voor het vervangen van een stroomvoorziening.
  • Seite 253 Als de spraakprocessor of de accessoires ongewoon heet of warm worden, dient u • het gebruik onmiddellijk te staken en contact op te nemen met Advanced Bionics of de audioloog. Bewaar extra zendspoelen uit de buurt van voorwerpen met magnetische strips (bijv.
  • Seite 254 Wanneer de Naída CI niet reageert op het implantaat door een ongebruikelijk storingsveld, ga dan verder van het storingsveld weg. Wanneer de myPilot van Advanced Bionics niet meer in staat is om commando's te • verzenden naar de spraakprocessor, dan moet u mogelijk de myPilot opnieuw koppelen met de spraakprocessor.
  • Seite 255 Raak metalen oppervlakken met uw hand aan voordat apparatuur contact maakt met het metalen • oppervlak. Dit is vooral belangrijk op speelplaatsen waar hoge niveaus statische elektriciteit kunnen worden gegenereerd. Het is belangrijk om statische elektriciteit te ontladen door een metalen oppervlak met uw hand aan te raken voordat de spraakprocessor, kabel of zendspoel in contact komen met het metalen oppervlak.
  • Seite 256 Inhoudsopgave Introductie ............................10 Doel van deze gids .............................10 Over de Naída CI-spraakprocessor ...................10-11 De Naída CI-spraakprocessor ....................11 Overzicht van de Naída CI-spraakprocessor en accessoires ........12-14 De Naída CI ..............................12 De universele zendspoel .........................13 AB myPilot ..............................13 ComPilot ................................14 Naída CI Listening Check ........................14 Prestatietechnologie ........................
  • Seite 257 Naída CI-zendspoelen gebruiken ..................26-28 De universele zendspoel .........................26 De RF-kabels vervangen .........................26-27 De magneetsterkte van de zendspoel aanpassen .............27-28 Kleurkapjes van de zendspoel verwijderen ...................28 Regelaars op de Naída CI aanpassen ................28-30 Van programma veranderen ......................28-29 Het volume veranderen........................29-30 De sensitiviteit veranderen ........................30 Verbinding ...........................
  • Seite 258 Elektromagnetische emissies .......................58 Elektromagnetische immuniteit ......................58 Scheidingsafstanden tussen RF-communicatie- apparatuur en de Naída CI ........................59 Tabellen over compatibiliteit .........................60 Reiniging en onderhoud .........................61 Prestatiegegevens ........................61-62 HiRes™ en HiRes 120™ geluidsverwerking ...................61 Contact ..............................62 Van Advanced Bionics Gebruiksaanwijzing Naída CI-spraakprocessor...
  • Seite 259: Doel Van Deze Gids

    Advanced Bionics en Phonak voor de best mogelijke hoorervaring. De Naída CI levert de nieuwste innovaties in geluidsverwerking van Advanced Bionics, de marktleider in prestaties. Deze gebruiksaanwijzing geeft alle informatie die nodig is om de Naída CI en de accessoires te gebruiken en te verzorgen.
  • Seite 260: De Naída Ci-Spraakprocessor

    Dit deel maakt u vertrouwd met de Naída CI-spraakprocessor en accessoires Volumeregelaar Dubbele microfoontechnologie van Volumeregelaar en driekleurige LeD's Phonak (microfoons voorin en achterin) (groen, oranje, rood) Door Advanced Bionics Programmaknop gepatenteerde T-Mic 2 Spraakprocessor Universele zendspoel (UHP) Batterijcartridge Microfoon Zendspoelkabel Gebruiksaanwijzing Naída CI-spraakprocessor...
  • Seite 261: Overzicht Van De Naída Ci-Spraakprocessor En Accessoires

    De Naída CI is de nieuwste en meest geavanceerde cochleair implantaat-spraakprocessor die verkrijgbaar is. Als bewijs van de toewijding van Advanced Bionics voor het leveren van de best mogelijke hoorprestatie, geeft de Naída CI toegang tot de AutoSound™-technologie die zich dynamisch aanpast aan elke luisteromgeving, en automatisch de volumeniveaus aanpast om uw gehoor te optimaliseren.
  • Seite 262: De Universele Zendspoel

    De Naída CI-spraakprocessor werkt samen met de Universele zendspoel. Kleurkapje Microfoon Kabelaansluitpoort De Universele zendspoel (UHP), die met alle spraakprocessoren van Advanced Bionics werkt, is bedoeld voor gebruik met de Naída CI-processor buiten het water. Zendspoelkabels vervangen Gebruiksaanwijzing van Zie het deel van de gebruiksaanwijzing of de de UHP en/of kabel voor meer informatie.
  • Seite 263: Compilot

    ComPilot Met de ComPilot is ongeëvenaarde verbinding mogelijk voor Naída CI-gebruikers, zodat ze draadloos verbinding kunnen maken met Bluetooth®-compatibele telefoons en apparaten of mp3-spelers voor spraak of stereomuziek. De ComPilot is ook compatibel met de Phonak-portfolio van FM-ontvangers via een euro-aansluiting. Daarnaast kan de ComPilot wanneer deze niet gekoppeld is compatibele Phonak-toestellen streamen.
  • Seite 264: Prestatietechnologie

    Prestatietechnologie De Naída CI biedt gebruikers toegang tot de Binaurale VoiceStream Technology van Phonak, waaronder UltraZoom, DuoPhone, QuickSync en ZoomControl. Deze programmeerbare functies worden door uw CI-professional ingesteld in de SoundWave-aanpassoftware. UltraZoom Zoomt in op de stemmen van mensen die u aankijken, terwijl omgevingsgeluid van de zij- en achterkant gereduceerd wordt.
  • Seite 265: De Kleurkapjes Van De Universele Zendspoel (Uhp) Bevestigen

    De kleurkapjes van de universele zendspoel (UHP) bevestigen Gevaar van kleine onderdelen: De processor, UHP-kleurkapjes, WAARSCHUWING: magneten en vilten afstandsstukken kunnen bij inslikken verstikking veroorzaken. Het vastmaken van het UHP-kleurkapje Lijn het kleurkapje uit met de zendspoel. Druk het kapje en de zendspoel zachtjes samen.
  • Seite 266: De Zendspoel Verwijderen Van De Naída Ci

    De zendspoel verwijderen van de Naída CI Houd de stekker van de kabel vast (de rechte Trek de stekker van de kabel voorzichtig weg plastic plug, niet de draad). van de Naída CI. De T-Mic 2/oorhaak aansluiten Om de T-Mic 2 of oorhaak aan te sluiten, Maak gebruik van het meegeleverde hulpmiddel houdt u deze op één lijn voor de processor.
  • Seite 267: De T-Mic 2/Oorhaak Verwijderen

    Trek het hulpmiddel weg van de processor, waarbij u het pinnetje in de Naída CI laat zitten. De T-Mic 2/oorhaak verwijderen Verwijder de stroomvoorziening. Houd de punt Druk het hulpmiddel voorzichtig van het hulpmiddel voor de T-Mic 2/oorhaak in de opening, en druk zo het pinnetje recht voor de opening van de processor er aan de andere kant uit.
  • Seite 268: De T-Mic 2 Cover (Beschermkapje) Bevestigen

    De T-Mic 2 cover (beschermkapje) bevestigen Houd de T-Mic 2 cover in één hand. Draai de T-Mic 2 cover voorzichtig rechtsom Houd in de andere hand de T-Mic 2 vast in de T-Mic 2. Draai tot ze goed tegen aan het uiteinde waar de microfoon zit. elkaar zitten.
  • Seite 269: De Naída Ci Dragen

    *Vergrote weergave Ga door met draaien tot de T-Mic 2 cover loskomt van de T-Mic 2. Gebruik oude T-Mic 2 covers niet meer. We raden aan de T-Mic 2 alleen te gebruiken als de T-Mic 2 cover VOORZICHTIG: (beschermkapje) correct geplaatst is. De T-Mic 2 cover moet elke 3-4 maanden vervangen worden, of eerder indien verstopt door oorsmeer.
  • Seite 270: De Naída Ci In De Clip Plaatsen

    De Naída CI-clip is verkrijgbaar voor linker en rechter configuraties en biedt zo verbeterde draagflexibiliteit en de mogelijkheid om de processor veilig los van het oor te dragen. Deze mogelijkheid is vooral prettig voor kleine kinderen en fysiek actieve CI-gebruikers. De Naída CI-clip is bedoeld om rechtstreeks vast te maken aan uw kleding, in uw haar of op de door u gewenste draaglocatie.
  • Seite 271: De Naída Ci Uit De Clip Verwijderen

    Druk het veeruiteinde van de clip in om hem te openen en maak de spraakprocessor vast op de gewenste plek op de kleding of in het haar. De Naída CI uit de clip verwijderen Verwijder de Naída CI voorzichtig, Om de Naída CI processor los te beginnend met het interne oorhaakdeel.
  • Seite 272: De Batterij Verwijderen

    De processor is 'aangezet' wanneer er een opgeladen batterij is aangesloten op de processor. Om de processor 'uit te schakelen' dient de PowerCel-batterij verwijderd te worden. Wanneer de batterij is aangesloten, knippert het oranje LED-lampje in het midden van de volumeregelaar om de batterijstatus aan te geven.
  • Seite 273 De batterij vervangen Houd de Naída CI in één hand. Roteer Lijn de batterij uit met de zijde van de de RF-kabel naar boven om er niet tegenaan processorbehuizing van de aansluiting. te stoten bij het plaatsen van de batterij. Schuif de batterij op de processor tot deze vastklikt.
  • Seite 274: Naída Ci Led's Begrijpen

    Naída CI LeD's begrijpen De LED-lampjes van de Naída CI vormen een programmeerbare functie die visuele informatie geeft over de status van de Naída CI, batterijstatus, programmapositie en foutomstandigheden. LED-indicaties van de Naída CI spraakprocessor Kleur Gedrag Programmeerbaar Indicatie Oranje Knippert bij Nee.
  • Seite 275: Interne Alarmen Begrijpen

    Als de gebruiker een AB myPilot gekoppeld heeft aan zijn/haar toestel en de batterijstatus wil controleren van het Zn-luchtbatterijpak waar op dat moment gebruik van wordt gemaakt, dan kan een Batterijcontrole voor de Naída CI uitgevoerd worden. Om het Zn-luchtbatterijpak correct te kunnen controleren, dient u minimaal 15 minuten te wachten nadat het batterij pak aangesloten is op de Naída CI voordat u de batterijcontrole uitvoert.
  • Seite 276: De Magneetsterkte Van De Zendspoel Aanpassen

    De kabel met de zendspoel verbinden: Houd de zendspoel in één hand en de Druk de kabelaansluiting stevig in kabelaansluiting in de andere hand. de zendspoelaansluiting. De kabel met de spraakprocessor verbinden: Houd de spraakprocessor in één hand en Druk de kabelaansluiting stevig in de kabelaansluiting in de andere hand.
  • Seite 277: Kleurkapjes Van De Zendspoel Verwijderen

    Om het kleurkapje van de zendspoel te verwijderen, dient u alleen het gereedschap te gebruiken dat door Advanced Bionics Gebruiksaanwijzing van het kleurkapje of van de UHP of het gedeelte is geleverd.
  • Seite 278: Het Volume Veranderen

    Met de programmaknop kan de gebruiker ook van en naar de Standby-modus gaan. De Standby-modus is een staat waarin de Naída CI slechts weinig stroom verbruikt zonder dat de processor uitgeschakeld hoeft te worden. In de Standby-modus kan de PowerCel-batterij of het Zn-luchtbatterijpak aangesloten blijven op de processor zonder dat de levensduur van de batterij sterk verslechtert.
  • Seite 279: De Sensitiviteit Veranderen

    Het volume veranderen: Door kort te drukken op het onderste Door kort te drukken op het bovenste gedeelte van de volumeregelaar wordt gedeelte van de volumeregelaar wordt het het volume verlaagd. volume verhoogd. Het volumebereik binnen een programma kan worden veranderd of uitgeschakeld door uw audioloog in de SoundWave™...
  • Seite 280 ComPilot MLxi Een audioloog de luisterspoel laten activeren in het FM-programma is de tweede methode voor het beluisteren van FM-signalen. De luisterspoel wordt gebruikt in combinatie met een ringleiding of de Phonak MyLink en stelt de gebruiker in staat om de spreker te horen zonder aansluitkabels te hoeven Gebruiksaanwijzing ComPilot of AB addendum voor ComPilot gebruiken.
  • Seite 281 Een FM-ontvanger aansluiten op de ComPilot: Houd de uitgeschakelde ComPilot in een Druk de FM-ontvanger stevig op zijn hand. Breng de drie FM-aansluitpinnen met plaats op de ComPilot. de andere hand op één lijn met de Europoort op de ComPilot. Zorg ervoor dat de pinnen van de FM-ontvanger overeenkomen met de grootte en de oriëntatie van de gaatjes op de ComPilot.
  • Seite 282: Koppelen Aan De Ab Mypilot

    Koppelen aan de AB myPilot Voor de bediening van de Naída CI('s) via de AB myPilot, moet deze laatste worden gekoppeld aan de processor(en). De AB myPilot dient mogelijk ontkoppeld te worden van en gekoppeld te worden aan meerdere Naída CI-processoren. Hierdoor kan er één AB myPilot gebruikt worden voor alle Naída CI- gebruikers in een klaslokaal.
  • Seite 283 Druk in dit menu op de pijl omlaag Wanneer de Naída CI gevonden is, om de optie Scan for Devices (Zoek apparaten) worden de initialen van de gebruiker op te markeren. de AB myPilot weergegeven en ook het oor waarvoor deze geprogrammeerd is. U ziet een groen rondje met een vinkje om de koppeling aan te geven.
  • Seite 284 Het scherm geeft aan welke processoren gekoppeld zijn aan de hand van een groene cirkel met een vinkje daarin, naast de initialen van de gebruiker. Selecteer met het pijltje omlaag de processor die u wilt ontkoppelen. Druk op de middelste knop nadat u de processor geselecteerd hebt. De groene cirkel met het vinkje verdwijnt en de processor wordt ontkoppeld.
  • Seite 285: De Naída Ci Listening Check En Oordopjes Van De Listening Check

    De Naída CI Listening Check en oordopjes van de Listening Check Naar microfoon(s) en externe invoer luisteren Er is een handige testmodus ingebouwd in alle Naída CI-spraakprocessoren zodat personen zonder CI kunnen luisteren naar geluidsbronnen. Met behulp van de afstandsbediening van de AB myPilot kunnen alle geluidsbronnen afzonderlijk beluisterd worden.
  • Seite 286 Wanneer de Naída CI Listening Check verbonden is, start de processor onmiddellijk de modus Listening Check. Wanneer u niet de MyPilot van Advanced Bionics gebruikt voor het selecteren van de geluidsbron, zult u op dat moment luisteren naar de configuratie van de inputgeluidsbron van het eerste programma.
  • Seite 287 Wanneer u Wireless (Draadloos) selecteert, luistert u naar de audiobron die via de ComPilot gestreamd wordt (bijv. Bluetooth-apparaat, FM, apparaat op batterijen, enz.). Om dit proces te starten, dient u ervoor te zorgen dat de ComPilot aanstaat en de gewenste bron streamt. Het wordt aanbevolen om het volume van elk apparaat dat direct is aangesloten op de ComPilot te verlagen.
  • Seite 288: De Telefoon Gebruiken

    Duw ze naar elkaar toe totdat ze vastklikken. De Naída CI Listening Check heeft een geladen stroombron nodig OPMeRKING: om naar behoren te kunnen functioneren. Als de stroombron die gebruikt wordt voor het uitvoeren van de Listening Check niet meer genoeg is opgeladen, zal de gebruiker niet in staat zijn de taak te voltooien.
  • Seite 289: Telefoontips

    DuoPhone gebruiken (voor bilaterale gebruikers). DuoPhone kan geprogrammeerd worden door • uw audioloog in de SoundWave-aanpassoftware. Wanneer de telefoon aan een oor geplaatst wordt, is het gesprek in beide oren hoorbaar. Een patchkabel gebruiken. U kunt een patchkabel gebruiken om rechtstreeks te verbinden •...
  • Seite 290: Batterij-Informatie

    geluid of een laag gonzend of zoemend geluid hoort. Bekend is dat luisterspoelen gevoelig zijn voor magnetisch VOORZICHTIG: ruis die wordt gegenereerd door de meeste industriële lichtnetleidingen, beveiligingsscanners in winkels en luchthavens, bandscanners, stroomomvormers, motorstarters en monitorschermen. Batterij-informatie 170 mAh Li-ion Zn-lucht Zn-lucht (kindveilige cartridge) 230 mAh Li-ion...
  • Seite 291: Het In Elkaar Zetten Van De Powercel-Batterijlader

    Gebruik alleen de meegeleverde oplader voor het opladen van VOORZICHTIG: de PowerCels van Advanced Bionics. Niet gebruiken om andere batterijen op te laden. Probeer geen Naída CI PowerCels op te laden met een andere oplader dan die door Advanced Bionics meegeleverd wordt.
  • Seite 292 Voor het deponeren van oplaadbare OPMeRKING VOOR eUROPeSe KLANTeN: PowerCel-batterijen kunt u lege PowerCel-batterijen terugsturen naar uw plaatselijke vertegenwoordiger van Advanced Bionics of het aangewezen CI-centrum. De PowerCels in de oplader plaatsen Zoek de glijgroeven van de oplader op. Schuif de PowerCel langs de groeven Plaats de PowerCel zodanig dat het totdat hij vastzit.
  • Seite 293: Het Zn-Luchtbatterijpak

    Het Zn-luchtbatterijpak De Naída CI maakt gebruik van maat 675 Power Implant-wegwerpbatterijen (675P). De gangbare hoortoestelbatterijen van maat 675 zijn niet krachtig genoeg voor een cochleair implantaat. Zn-luchtbatterijen plaatsen Houd het Zn-luchtbatterijpak in de ene Trek met de andere hand de batterijlade uit hand, en druk voorzichtig de grendel op de de cartridge.
  • Seite 294 Verbind de batterijcartridge met de Naída CI volgens dezelfde instructies als het verbinden van de De batterij vervangen. PowerCels met de Naída CI in het gedeelte Zn-luchtbatterijen plaatsen (kindveilige cartridge) Gebruik hetzelfde hulpmiddel dat u gebruikt Druk het hulpmiddel in de opening voor het verwijderen en vervangen van de voorzichtig naar binnen en naar T-Mic 2/oorhaak;...
  • Seite 295: Led-Opladerindicator

    LeD-opladerindicator LeD-poortlampjes LeD Micro USB-lampje De batterijlader heeft verschillende indicatoren op de basis van iedere PowerCel oplaadpoort en bij de aansluiting van de stroomkabel op de oplader. Als het groene lampje van de micro-USB brandt, dan betekent dit dat de oplader verbonden is met een stroombron en klaar is om PowerCels op te laden. De LED-indicatoren op de basis van iedere PowerCel-oplaadpoort hebben 3 kleuropties.
  • Seite 296: Waarschuwingen

    Naída CI-accessoires gebruiken Advanced Bionics levert een serie accessoires voor gebruik met het Naída CI-systeem, hoewel misschien niet alle accessoires zijn opgenomen in de spraakprocessorset. Bespreek met uw audioloog welke accessoires inbegrepen zijn bij de Naída CI-spraakprocessor.
  • Seite 297: Zendspoelen

    Zendspoelen De Naída CI-spraakprocessor is ontworpen voor gebruik met de Universele zendspoel (UHP). Universele zendspoel (UHP) De UHP is bestemd voor gebruik met de Naída CI tijdens dagelijkse activiteiten behalve in het water. ComPilot ComPilot MLxi Bij gebruik met de ComPilot is de Naída CI compatibel met de Phonak MLxi draadloze FM-ontvanger. FM gebruiken ComPilot en Zie het deel...
  • Seite 298: Audio-Accessoires

    De Naída CI beschikt over een handige Microfoontest-modus waar u toegang toe heeft door gebruik te maken van de Naída CI Listening Check en de Listening Check oordopjes. Deze functie zorgt ervoor dat iemand zonder CI kan luisteren naar de inputgeluidsbronnen van de Naída CI. Zie het deel Naar microfoon(s) en externe invoer luisteren van de Gebruiksaanwijzing voor instructies over het luisteren...
  • Seite 299: Naída Ci-Draagetui

    Naída CI-draagetui Naída CI-draagetui Er wordt een etui geleverd bij de Naída CI voor gebruik tijdens reizen of voor opslag als de spraakprocessor en accessoires niet gebruikt worden. Als de Naída CI blootgesteld is aan vocht of een hoge vochtigheid, moeten de componenten 's nachts worden opgeborgen in de geleverde Zephyr van Dry &...
  • Seite 300: Informatie Over De Ip-Classificatie

    Bij de Naída CI is een microfoonfilter geplaatst over de achterste microfoon om te voorkomen dat stof en vuil de microfoon beschadigen. Advanced Bionics raadt aan het microfoonfilter op de Naída CI om de drie maanden te vervangen, of eerder indien een vermindering in geluidskwaliteit bemerkt wordt.
  • Seite 301 Trek het gereedschap voorzichtig uit de opening. Het microfoonfilter moet naar buiten komen samen met het gereedschap. Het filter kan verwijderd worden van het gereedschap en dan worden weggegooid. Het microfoonfilter vervangen Terwijl u het microfoonfilter aan het Neem het gereedschap vast in een hand en uiteinde van het gereedschap in de ene gebruik het botte uiteinde zonder schroefdraad hand hebt, houdt u de Naída CI in de...
  • Seite 302: Aanbevolen Temperaturen Voor Gebruik En Opslag Van De Naída Ci

    -20°C (-4°F) 55°C (131°F) Goedgekeurde stroombronnen Advanced Bionics heeft de werking van de Naída CI gecontroleerd met de hieronder aangegeven stroombronnen; goede werking bij het gebruik van andere stroombronnen dan hier aangegeven, kan niet worden gegarandeerd. Goedgekeurde stroombronnen voor de Naída CI...
  • Seite 303 Vervang de kabel. Vervang de zendspoel. Als deze maatregelen het probleem niet oplossen, neem dan onmiddellijk contact op met uw CI-centrum voor verdere hulp. Als u geen geluid hoort of er een rode LED brandt op de LED van de Naída CI-processor, probeert u de volgende stappen om het probleem op te lossen: Verwijder de batterij.
  • Seite 304: Problemen Oplossen Omtrent De Naída Ci Led's

    Als deze maatregelen het probleem niet oplossen, neem dan onmiddellijk contact op met uw CI-centrum voor verdere hulp. Als geluiden gedempt of vervormd zijn: Controleer of de microfoonopening niet verstopt wordt door materiaal of kleding. Herhaal de hierboven beschreven stappen voor het oplossen van problemen voor het geval dat ruis of vervormde geluiden gehoord worden.
  • Seite 305 Als er geen lampjes branden: Controleer of de LED niet verborgen is door kleding of haren van de gebruiker en/of de draagwijze van de processor. Controleer of de PowerCel juist geplaatst is op de processor of, indien het Zn-luchtbatterijpak gebruikt wordt, of de batterijen juist zijn ingestoken. Vervang de batterij.
  • Seite 306 De processor of zendspoel mag alleen worden onderhouden WAARSCHUWING: door Advanced Bionics. Probeer geen onderdelen te openen of te repareren. Gebruik de processor of zendspoel niet meer als er een onderdeel beschadigd is. Het ongeoorloofd openen van de processor, zendspoel of andere apparatuur maakt de garantie ongeldig en kan de prestaties van het systeem in gevaar brengen.
  • Seite 307: Richtlijnen En Verklaring Van De Fabrikant

    Richtlijnen en verklaring van de fabrikant per IEC 60601-1-2 elektromagnetische emissies De Naída CI is bedoeld voor gebruik in de hieronder gespecificeerde elektromagnetische omgeving. De klant of de gebruiker van de Naída CI moet ervoor zorgen dat deze in een dergelijke omgeving gebruikt wordt. Overeenstem- emissietest elektromagnetische omgeving-Richtlijn...
  • Seite 308: Scheidingsafstanden Tussen Rf-Communicatieapparatuur En De Naída Ci

    Deze richtlijnen zijn niet van toepassing in alle omstandigheden. OPMeRKING: Elektromagnetische propagatie wordt beïnvloed door absorptie en reflectie van structuren, objecten en personen. a Essentiële prestaties van de Naída CI volgens IEC 60601-vereisten zijn vastgesteld als auditieve stimulering binnen veilige amplitudes. b Veldsterktes van vaste zenders, zoals basisstations voor radio, (mobiele/draadloze) telefoons en mobiele landtelefoons, zendamateurs, AM- en FM-radio-uitzendingen en TV-uitzendingen kunnen niet theoretisch, accuraat worden voorspeld.
  • Seite 309: Tabellen Over Compatibiliteit

    Tabellen over compatibiliteit Implantaattype HiRes 90K HiRes 90K Advantage Naída CI ✓ ✓ ✓ Neptune ✓ ✓ ✓ Harmony ✓ ✓ ✓ ✓ Auria ✓ ✓ ✓ Platinum-spraakpro- ✓ ✓ ✓ ✓ cessor (PSP) 1 SoundWave 2.1 of nieuwer vereist 2 SoundWave 2.0 of nieuwer vereist 3 SoundWave 1.4 of nieuwer vereist 4 SClin2000 en CPI-11 vereist...
  • Seite 310: Reiniging En Onderhoud

    Reiniging en onderhoud Met een vochtige doek schoonmaken. Niet onderdompelen. • Volg het voorgestelde routine-onderhoud van microfooncovers voor de T-Mic 2 en processormicrofoon. • De service of wijziging van de Naída CI of zijn accessoires door een andere entiteit dan Advanced •...
  • Seite 311: Contact

    Bionics kan de FCC-goedkeuring om dit toestel te mogen hanteren ongeldig maken. Contact Advanced Bionics zet zich in voor het leveren van producten en service van de beste kwaliteit aan haar klanten. Wij stellen het op prijs als u uw opmerkingen met betrekking tot de Naída CI-spraakprocessor of suggesties ter verbetering van onze producten aan ons doorgeeft.
  • Seite 312: Manual Do Usuário

    Da Advanced Bionics manual do usuário para o Processador de Som Naída CI...
  • Seite 313 etiquetagem Símbolos das etiquetas e significado: Marca de conformidade da Comunidade Europeia. Autorizada a afixação da Marca CE em 2013 Número do modelo Data de fabricação Número de série Fabricante Tipo de Proteção: B Armazene em temperaturas situadas entre os -20 ˚C (-4 ˚F) e os +55 ˚C (131 ˚F) Frágil Não molhar Consulte as Instruções de Uso...
  • Seite 314 • de som, controle remoto AB myPilot ou ComPilot, a não ser que tenham sido fornecidos pela Advanced Bionics ou Phonak. Se necessário, entre em contato com a Advanced Bionics para substituição da fonte de alimentação. Não utilize o AB myPilot ou o ComPilot quando estiverem conectados a fontes de •...
  • Seite 315 Use somente o carregador fornecido para as PowerCels AB. Não o use para • carregar outras pilhas. Não tente carregar Naída CI PowerCels com outros carregadores que não os fornecidos pela Advanced Bionics. Retire as pilhas do seu processador de som quando estiverem descarregadas, •...
  • Seite 316 Não exponha qualquer parte do processador de som Naída CI ou seus acessórios • ao calor extremo, tal como o de um forno, microondas ou secador de cabelo. Apenas carregue as pilhas utilizando o(s) carregador(es) recomendado(s) pelo • fabricante. Não utilize os acessórios do seu AB myPilot ou ComPilot quando instruído a não •...
  • Seite 317 Toque em superfícies de metal com a sua mão antes de permitir que o equipamento entre • em contato com a superfície de metal. Isto é particularmente importante no recreio, local no qual podem ser gerados elevados níveis de eletricidade estática. É importante a descarga de qualquer eletricidade estática, tocando uma superfície de metal com a sua mão antes de permitir que o processador de som, o cabo ou antena toquem na superfície de metal.
  • Seite 318 Índice Introdução ..........................10 Objetivo deste Guia ......................... 10 Sobre o Processador de Som Naída CI ................10-11 O Processador de Som Naída CI ..................11 Visão Geral do Processador de Som Naída CI e Acessórios ......12-14 O Naída CI ............................12 A Antena Universal .......................... 13 AB myPilot ............................
  • Seite 319 Substituindo a bateria ........................24 Entendendo as Luzes LED do Naída CI .................25-26 Entendendo os Alarmes Internos ..................... 26 Utilizando as Antenas do Naída CI ................26-28 A Antena Universal .......................... 26 Substituindo os Cabos RF .....................26-27 Ajustando a Intensidade Magnética da Antena ............27-28 Remover as Capas de Cor da Antena ..................
  • Seite 320 Equipamento e Naída CI ......................59 Tabelas de Compatibilidade ......................60 Limpeza e Manutenção ........................ 61 Dados de Desempenho....................61-62 Processamento de Som HiRes™ e HiRes Fidelity120™ ..........61 entre em Contato Conosco ....................62 Da Advanced Bionics Manual do Usuário do Processador de Som Naída CI...
  • Seite 321: Introdução

    O Naída CI oferece acesso às mais recentes inovações no processamento de som por parte da Advanced Bionics, a líder do mercado em desempenho. Este manual vai lhe fornecer toda a informação necessária para utilizar e cuidar do Naída CI e seus acessórios. Além disso, este manual fornece informações para soluções de problemas básicos relacionados ao Naída CI, assim...
  • Seite 322: O Processador De Som Naída Ci

    ComPilot AB myPilot LeDs Recursos adicionais incluem acesso por controle remoto através do controle remoto AB myPilot e a capacidade de controle pelo Phonak ComPilot. O Processador de Som Naída CI esta seção irá lhe familiarizar com Processador de Som CI e seus Acessórios Controle de Volume Tecnologia Microfone Duplo Phonak Controle de Volume e Luzes de LeD...
  • Seite 323: Visão Geral Do Processador De Som Naída Ci E Acessórios

    O Naída CI é o mais recente e mais avançado processador de som de implante coclear disponível. Como prova da dedicação da Advanced Bionics em lhe oferecer a melhor audição possível, o Naída CI disponibiliza o acesso à tecnologia AutoSound™, que se adapta de forma dinâmica a todos os ambientes auditivos, ajustando automaticamente os níveis de volume para...
  • Seite 324: A Antena Universal

    Tampa Colorida Microfone Porta de Conexão do Cabo A Antena Universal (UHP) funciona com todos os processadores de som da Advanced Bionics, destina-se a ser utilizada com o processador Naída CI, fora de ambientes aquáticos. Substituir os Cabos da Antena Para mais informações, consulte a seção...
  • Seite 325: Compilot

    ComPilot O ComPilot permite conectividade inigualável dos usuários Naída CI, conectando-os sem fio aos telefones com Bluetooth® e dispositivos ou MP3 players para fala ou música estéreo. O ComPilot também é compatível com a linha Phonak de receptores FM através de plugue euro.
  • Seite 326: Tecnologia De Desempenho

    Tecnologia de Desempenho O Naída CI permite que os usuários acessem a Tecnologia Binaural VoiceStream da Phonak, incluindo UltraZoom, DuoPhone, QuickSync e ZoomControl. Esses recursos programáveis são ajustados pelo profissional responsável pelo implante, no software de ajuste SoundWave. UltraZoom Aumento das vozes das pessoas na sua frente, enquanto os ruídos de trás e das laterais são reduzidos.
  • Seite 327: Conectando As Capas De Cor (Uhp) Da Antena Universal

    Conectando as Capas de Cor (UHP) da Antena Universal Risco com Peças Pequenas: O processador, a Capa de Cor do UHP, imãs e AVISO: espaçadores podem causar asfixia se engolidos. Colocando a Tampa Colorida da Antena Universal Alinhe a Tampa Colorida com a antena. Pressione suavemente a tampa e a antena juntas.
  • Seite 328: Removendo A Antena Do Naída Ci

    Removendo a Antena do Naída CI Segure o conector do cabo (o plugue de Puxe suavemente o conector do cabo plástico angulado da direita, não o fio). para longe do Naída CI. Conectando o T-Mic 2/Gancho Começando com o gancho ou T-Mic 2 Usando as ferramentas T-Mic 2/Gancho desconectados, alinhe o nível do T-Mic 2 providenciadas, coloque um dos pinos no pequeno...
  • Seite 329: Removendo O T-Mic 2/Gancho

    Puxe a ferramenta do processador, deixando o pino dentro do Naída CI. Removendo o T-Mic 2/Gancho Remova a fonte de energia. Alinhe Pressione suavemente a ferramenta a extremidade pontiaguda da ferramenta no buraco, empurrando o pino para fora T-Mic 2/Gancho com o buraco do do outro lado.
  • Seite 330: Colocando O Revestimento Do T-Mic 2

    Colocando o Revestimento do T-Mic 2 Segure o Revestimento do T-Mic 2 em Gire suavemente o Revestimento do uma mão. Na outra mão, segure o T-Mic 2 em sentido horário. Aperte até T-Mic 2 na extremidade que abriga o que as partes estejam niveladas. microfone.
  • Seite 331: Usando O Naída Ci

    *Visão ampliada Continue girando até que o Revestimento do T-Mic 2 se separe do T-Mic 2. Descarte os Revestimentos do T-Mic 2 usados. É recomendado utilizar o T-Mic 2 somente quando seu revestimento ATeNÇÃO: estiver devidamente no lugar. O revestimento do T-Mic 2 deve ser substituído a cada 3-4 meses, ou se tapado por cerume.
  • Seite 332: Colocando O Naída Ci No Clip

    O Clip do Naída CI vêm com configurações da esquerda e da direita para fornecer melhor flexibilidade de uso e a capacidade de usar o processador em um estilo seguro, completamente fora da orelha. Essa necessidade é ótima, particularmente para crianças pequenas e muitos usuários fisicamente ativos do CI.
  • Seite 333: Removendo O Naída Ci Do Clip

    Dobre a extremidade do clip para abrir e segurar o processador de som no local desejado na roupa ou cabelo. Removendo o Naída CI do Clip Com cuidado, remova o Naída CI, Para soltar o processador Naída CI lidando com a porção do gancho da do clip, primeiro puxe para trás orelha interna.
  • Seite 334: Retirar A Bateria

    O processador é “ligado” quando uma pilha carregada é conectada ao processador. Para “desligar” o processador, a bateria deve ser removida. Quando a bateria é acionada, a luz de LED laranja localizada no meio do controle de volume irá acender para indicar a carga da mesma, seguida pela LED verde para indicar a posição do programa.
  • Seite 335: Substituindo A Bateria

    Substituindo a bateria Segure o Naída CI em uma mão. Alinhe o conector da bateria Gire o cabo RF para cima, para evitar com o conector de encaixe lateral a sua colisão na colocação da mesma. do processador. Deslize a pilha sobre o processador até ela esteja encaixada no lugar.
  • Seite 336: Entendendo As Luzes Led Do Naída Ci

    entendendo as Luzes LeD do Naída CI As luzes de LED do Naída CI são uma característica programável que fornece informação visual acerca do estado do Naída CI, vida útil da pilha, posição do programa e condições de erro. Indicações LED do Processador de Som Naída CI Comportamento Programável Indicação...
  • Seite 337: Entendendo Os Alarmes Internos

    Se o usuário quiser saber o estado da pilha do Pacote de Pilha Zinco-Ar que ela está usando atualmente, e possui um AB myPilot emparelhado com o dispositivo, eles podem conduzir uma leitura de Verificação de Pilha do Naída CI. Para garantir em leitura precisa do Pacote de Pilha de Zinco-Ar, espere pelo menos 15 minutos após ele ter sido anexada ao Naída CI, antes de programar uma leitura de Verificação de Pilha.
  • Seite 338: Ajustando A Intensidade Magnética Da Antena

    Se parecer danificado, substitua-o por um novo cabo. Para anexar o cabo na antena: Segure a antena em uma mão Pressione o conector do cabo firmemente e o conector do cabo na outra. no conector da antena. Para anexar o cabo ao processador de som: Segure o processador de som em uma Pressione o conector do cabo firmemente na mão e o conector do cabo na outra.
  • Seite 339: Remover As Capas De Cor Da Antena

    Não coloque ímãs adicionais na sua antena, exceto sob a ADVeRTêNCIA: orientação de um profissional de cuidados auditivos cocleares. Remover as Capas de Cor da Antena As Capas de Cor do UHP estão disponíveis numa variedade de cores para combinar com o processador de som Naída CI.
  • Seite 340: Alterar Volume

    O Botão do Programa também permite que o usuário entre ou saia do Modo de Espera. O Modo de Espera é um estado de baixo consumo de energia que o Naída CI pode entrar para economizar energia sem ser desligado. O Modo de Espera permite que a PowerCel ou o Pacote de Pilha de Zinco-Ar permaneça anexado ao processador, sem causar grandes gastos do tempo de vida útil da pilha.
  • Seite 341: Alterar A Sensibilidade

    Para alterar o volume: Pressionar suavemente a porção inferior do Pressionar suavemente a porção superior do controle de volume irá diminuir o volume. controle de volume irá aumentar o volume. O alcance de volume disponível dentro de um programa pode ser alterado ou desativado pelo profissional de cuidados auditivos no software de ajuste SoundWave™.
  • Seite 342 ComPilot MLxi O segundo método para acessar o FM é ter um profissional de cuidados auditivos para ativar a bobina telefônica no programa FM. A bobina telefônica, usado junto com esse quarto em loop ou o Phonak MyLink, permitirá que o usuário ouça o interlocutor sem o uso de fios de Manual do Usuário ComPilot ou o adendo AB para ComPilot conexão.
  • Seite 343 Para fixar um Receptor FM no ComPilot: Com o ComPilot desligado, segure-o em uma Pressione firmemente o receptor FM mão. Com a outra mão, alinhe os três pinos para o seu local no ComPilot. conectores FM com o Europort no ComPilot. Tenha cuidado em assegurar que os pinos receptores FM correspondam ao tamanho e orientação dos orifícios no ComPilot.
  • Seite 344: Pareamento Com O Ab Mypilot

    Pareamento com o AB myPilot Para o AB myPilot controlar o Naída CI, ele deve ser pareado com o processador. O AB myPilot pode ser desemparelhado e pareado para diversos processadores Naída CI. Isso permite que um AB myPilot seja usado com todos os usuários do Naída CI em uma sala de aula. Isso pode ser conveniente para um profissional com diversas crianças com o implante.
  • Seite 345 Desse menu, pressione o botão de Quando o Naída CI for encontrado, seta para baixo para realçar a Opção será mostrado as iniciais do usuário Varredura dos Dispositivos. no AB myPilot, assim como o ouvido programado anteriormente. Haverá um círculo verde com uma marca de verificação nele para mostrar que está...
  • Seite 346 A tela lhe dirá quais dispositivos estão pareados, ao mostrar um círculo verde com uma marca de verificação ao lado das iniciais do usuário. Mova para realçar o dispositivo que você gostaria de desemparelhar, usando a seta para baixo. Pressione o botão central uma vez que o dispositivo tenha sido realçado.
  • Seite 347: Verificador De Escuta Naída Ci E Fones De Ouvido De Verificação De Escuta

    Verificador de escuta Naída CI e Fones de Ouvido de Verificação de escuta escutando o Microfone(s) e as entradas Auxiliares Um modo de teste conveniente é construído em todos os processadores Naída CI para permitir que os indivíduos com audição sem dispositivos possam ouvir as fontes de som. Com o Controle Remoto AB myPilot, todos as fontes de som podem ser ouvidas de maneira independente.
  • Seite 348 Insira a porção do logotipo AB na outra Conecte a parte superior do Módulo porção do Verificador de Escuta Naída CI. do Verificador de Escuta Naída CI no Você deve sentir as duas porções se processador. encaixarem. Uma vez no local, o processador e os conectores PowerCel serão expostos.
  • Seite 349 Se você selecionar a Bobina telefônica, garanta que você esteja sincronizado com um gancho ou myLink. Providencie uma entrada para o Transmissor FM para avaliar a qualidade de áudio. Se selecionar Sem Fio, você estará ouvindo a qualquer fonte de áudio sendo transmitida pelo ComPilot (Ex.
  • Seite 350: Usando O Telefone

    Empurre-os juntos até encaixarem no lugar. O Verificador de Escuta Naída CI precisa de uma fonte de energia OBSeRVAÇÃO: carregada para funcionar corretamente. Se a fonte de energia usada para conduzir o Verificador de Escuta foi descarregada até um nível de carregamento inadequado, o usuário não poderá...
  • Seite 351: Dicas Do Telefone

    Utilizar o DuoPhone (para usuários bilaterais). O DuoPhone é programado pelo seu profissional • de cuidados auditivos no software de ajuste SoundWave. Com o telefone posicionado em uma orelha, a conversa é ouvida em ambas as orelhas. Utilizar um cabo de interconexões.Pode ser utilizado um cabo de interconexão diretamente •...
  • Seite 352: Informação Sobre A Pilha

    receba o campo eletromagnético gerado por esses aparelhos. Se o usuário tentar usar a bobina telefônica com um aparelho de áudio não compatível, pode ser que nenhum som ou apenas um ruído baixo, como um zumbido, será ouvido. As bobinas telefônicas são suscetíveis a ruídos eletromagnéticos ATeNÇÃO: gerados pela maioria das luminárias industriais, detectores de segurança de lojas e aeroportos, scanners de banda, transformadores de potência, ignições de motores...
  • Seite 353: Montando O Carregador Powercel

    Use somente o carregador fornecido para as PowerCels AB. Não o use ATeNÇÃO: para carregar outras pilhas. Não tente carregar as Naída CI PowerCels com outros carregadores que não os fornecidos pela Advanced Bionics. Adaptadores da Fonte de Alimentação Carregador de Pilhas Fonte de Alimentação...
  • Seite 354: Inserindo As Powercels No Carregador

    As PowerCels não precisam estar totalmente descarregadas para serem recarregadas. É recomendado usar e recarregar as PowerCels pelo menos uma vez a cada 3 meses. É importante observar que a capacidade das PowerCels diminui com o tempo, mesmo que não sejam usadas. Isso é normal para qualquer pilha recarregável e não deve ser considerado um defeito.
  • Seite 355: Pacote De Pilha De Zinco-Ar

    Pacote de Pilha de Zinco-Ar O Naída CI utiliza pilhas descartáveis Power Implant, tamanho 675 (675P). As pilhas de um aparelho auditivo, de tamanho regular 675, não serão potentes o bastante para um implante coclear. Inserindo as Pilhas de Zinco-Ar Segurando o Pacote de Pilha de Zinco-Ar Puxe o encaixe da pilha para fora do em uma mão, empurre gentilmente, mas...
  • Seite 356: Inserindo As Pilhas De Zinco-Ar (Compartimento Inviolável)

    Coloque o compartimento de pilhas no Naída CI, seguindo as mesmas instruções de instalação Substituir a Pilha. das PowerCels no Naída CI, na seção Inserindo as Pilhas de Zinco-Ar (Compartimento Inviolável) Utilize a mesma ferramenta providenciada para Com a ferramenta no orifício, empurre a remoção e substituição do T-Mic 2/Gancho - gentilmente para dentro e para baixo, Insira a extremidade pontiaguda da ferramenta...
  • Seite 357: Led (Light Emitting Diode - Diodo Emissor De Luz) Indicador Do Carregador

    Se a luz de LED vermelha não acender, o problema é com a PowerCel. Se houver um problema com a PowerCel ou com o carregador, entre em contato com a Advanced Bionics. A LED do carregador se desliga (ou pode exibir um azul fraco, se a sala estiver muito escura para indicar se a pilha está...
  • Seite 358: Avisos

    Manual do Usuário. Utilizando os Acessórios Naída CI A Advanced Bionics fornece uma gama de acessórios para utilização com o Naída CI, apesar de nem todos os acessórios poderem estar incluídos no kit de processador de som ou listados aqui.
  • Seite 359: Antenas

    Antenas O Processador de Som Naída CI foi projetado para o uso junto com a Antena Universal (UHP). Antena Universal (UHP) O UHP destina-se a ser utilizado com o Naída CI durante as atividades diárias fora de ambientes aquáticos. ComPilot ComPilot MLxi Quando utilizado com o ComPilot, o Naída CI é...
  • Seite 360: Acessórios Áudio

    O Naída CI possui um conveniente modo monitor, acessado ao usar o Verificador de Escuta Naída CI e os Fones de Ouvido de Verificação de Escuta. Esse modo permite que alguém com audição normal escute as fontes de entrada de som do Naída CI. Para instruções de como escutar as entradas usando o Verificador de Escuta Naída CI e Fones do Verificador de Escuta, Escutando o(s) Microfone(s) e as Entradas Auxiliares consulte a seção...
  • Seite 361: Case Naída Ci

    Case Naída CI Case Naída CI Uma case é fornecida com o Naída CI para o uso durante viagens, ou para armazenamento quando o processador de som e seus acessórios não estiverem em uso. Se o Naída CI for exposto a umidades ou a altos níveis de umidade, armazene os componentes durante a noite no Zephyr by Dry &Store®...
  • Seite 362: Informação De Classificação Ip

    O Naída CI possui um filtro do microfone sobre o microfone traseiro, para prevenir que a poeira e fragmentos o danifiquem. A Advanced Bionics recomenda substituir o revestimento do microfone no Naída CI a cada três meses, ou antes, se houver degradação da qualidade sonora.
  • Seite 363 Puxe com cuidado a ferramenta para fora da abertura. O revestimento do microfone deve sair junto com a ferramenta. O revestimento pode ser removido da ferramenta e, então, ser descartado. Substituindo o Revestimento do Microfone Com o revestimento do microfone Apertando a ferramenta em uma mão, use na extremidade da ferramenta, segure a extremidade lisa, sem encadeamentos, para...
  • Seite 364: Temperaturas De Operação E Armazenamento Recomendadas Do Naída Ci

    -20 °C (-4 °F) 55 °C (131 °F) Fontes de Alimentação Aprovadas A Advanced Bionics verificou o funcionamento do Naída CI com as fontes de alimentação listadas abaixo; o comportamento com fontes de alimentação que não as listadas aqui, não pode ser garantido.
  • Seite 365 Se estas medidas não resolverem o problema, entre em contato imediatamente com um profissional de cuidados auditivos ou a Advanced Bionics para maior assistência. Se forem escutados sons distorcidos ou estática, tente os seguintes passos de resolução de problemas: Retire quaisquer materiais (chapéu, cachecol, faixa de cabeça, etc.) que podem estar...
  • Seite 366: Solução De Problemas Naída Ci Leds

    Se estas medidas não resolverem o problema, entre em contato imediatamente com seu profissional de cuidados auditivos ou a Advanced Bionics para maior assistência. Se os sons forem abafados ou distorcidos: Confirme se nenhum vestuário ou material está obstruindo a abertura do microfone.
  • Seite 367 LED verde piscante com entrada de áudio, entre em contato com um profissional de cuidados auditivos ou com a Advanced Bionics. Durante a verificação do estado da pilha, não é observado qualquer piscar ou é observado apenas um piscar cor-de-laranja: As pilhas de Zinco-Ar NÃO fornecerão o status da pilha do LED após...
  • Seite 368: Solução De Problemas Dos Alarmes Internos Do Naída Ci

    Consulte a seção Auxiliares do Manual do Usuário. O processador ou antena apenas deve ser reparado pela Advanced Bionics. AVISO: Não tente abrir nem reparar as peças. Não continue a utilizar o processador ou a antena se qualquer uma das suas peças estiver danificada. A abertura não autorizada do processador, antena ou outro equipamento, irá...
  • Seite 369: Orientação E Declaração Do Fabricante

    Orientação e Declaração do Fabricante Pela IEC 60601-1-2 emissões eletromagnéticas O uso do Naída CI é destinado a ambientes eletromagnéticos especificados abaixo. O cliente ou o usuário do Naída CI deverá assegurar a sua utilização em tal ambiente. Teste de emissões Cumprimento Orientação-Ambiente eletromagnético O Naída CI utiliza energia RF somente para sua...
  • Seite 370 Estas orientações podem não se aplicar a todas as situações. OBSeRVAÇÃO: A propagação eletromagnética é afetada por absorção e reflexo a partir de estruturas, objetos e pessoas. a O desempenho essencial do Naída CI, segundo os requisitos IEC 60601, está definido como um estímulo auditivo dentro de amplitudes seguras.
  • Seite 371: Tabelas De Compatibilidade

    Tabelas de Compatibilidade Tipo de Implante HiRes 90K HiRes 90K Advantage Naída CI ✓ ✓ ✓ Neptune ✓ ✓ ✓ Harmony ✓ ✓ ✓ ✓ Auria ✓ ✓ ✓ Processador de Som ✓ ✓ ✓ ✓ Platinum (PSP) 1 Exige o SoundWave 2,1 ou posterior 2 Exige o SoundWave 2,0 ou posterior 3 Exige o SoundWave 1,4 ou posterior 4 Exige SClin2000 e CPI-11...
  • Seite 372: Limpeza E Manutenção

    Serviços ou modificação no Naída CI, ou seus acessórios, por qualquer entidade que não for • a Advanced Bionics, não são permitidas e irá invalidar a garantia do fabricante. Dados de Desempenho O implante HiRes 90K, com o Eletrodo HiFocus e o processador Naída CI suportam a família HiResolution de estratégias de processamento de som, incluindo HiRes, HiRes com Fidelity...
  • Seite 373: Entre Em Contato Conosco

    AdvancedBionics.com Advanced Bionics, IntelliLink, AutoSound, SoundWave, HiRes, HiRes Fidelity 120, HiRes Optima, CIS, MPS, ClearVoice, e Built Kid Tough são marcas registradas da Advanced Bionics nos Estados Unidos da América e outros países. Dry & Store® é uma marca registada da Ear Technology Corporation VELCRO®...
  • Seite 374 AdvancedBionics.com Advanced Bionics AG Laubisrütistrasse 28 8712 Stäfa, Switzerland +41.58.928.78.00 Manufactured by: Advanced Bionics, LLC California, U.S.A. +1.661.362.1400 029-M303-85 Rev A 2013 ©2013 Advanced Bionics AG and affi liates. All rights reserved.

Inhaltsverzeichnis