Herunterladen Inhalt Inhalt Diese Seite drucken

Werbung

Verfügbare Sprachen
  • DE

Verfügbare Sprachen


Technical manual
Technisches Handbuch
Livret technique
Technisch boek
Manuel tehnic


EN
DE
FR
NL
RO




Werbung

Inhaltsverzeichnis
loading

Inhaltszusammenfassung für Mark MARK PINTHERM INFRA HE CONNECT

  • Seite 1 Technical manual Technisches Handbuch Livret technique Technisch boek Manuel tehnic               ...
  • Seite 3: Technical Specifications

    Read through this document before you begin installation and commissioning Warning! Incorrect installation, adjustment, alteration, repair or maintenance work may lead to material damage or injury. All work must be carried out by certified, qualified professionals. If the appliance is not positioned in accordance with the instructions, the warranty shall be rendered void.
  • Seite 4 • Reset option to release a burner malfunction per zone • PIN security to modify for example switching times and temperatures • Languages: English, French, German and Dutch • Calibration temperature sensor: range from -3°C to +3°C per 0,5°C • Power: 230Vac / 50Hz •...
  • Seite 5: Installation

    3.0 Installation 3.1 Mounting PinTherm Infra HE Connect Determine a suitable place for installing the PinTherm Infra HE Connect. ount the PinTherm Infra HE Connect on a solid surface that can carry a minimum of 4 kg. We recommend mounting the PinTherm Infra HE Connect at a height of ±1.5m from the floor, at a well reachable place. For cable gland use only cable glands fitted with strain relief, with a minimum fire class of UL94V2.
  • Seite 6            3.2 Connection options                   Supply 1~230V +N +PE  Infra HE (Modbus) External globe sensor ...
  • Seite 7: Operation And Display

    4.0 Operation and display                4.1 Operation         • LED red = malfunction    • LED green = in operation ...
  • Seite 8: Menu Structure

    4.2 Menu structure                                       ...
  • Seite 9: Operating Mode

                                            ...
  • Seite 10                                         ...
  • Seite 11   Software version                       The actual software version. 4.4 Reset password to factory setting 1 To reset the password to the factory setting, first remove the ...
  • Seite 12: Operation With A Computer

    4.5 Operation with a computer The unit can be operated using a PC or laptop. Connect your PC or laptop by means of an Ethernet jack on the display. Once you have connected both, start your internet browser* and enter the IP address (Default address: 192.168.1.100).
  • Seite 13 4.5.1 Dashboard 4.5.2 Status menu 4.5.3 Temperature menu 4.5.4 Clock programm...
  • Seite 14 5.0 Malfunctions Image Alert Where Meaning              #####ºC Display No sensor connected.                 ...
  • Seite 15: Technische Daten

    Standardbedingungen unserer allgemeinen Verkaufs- und Lieferbedingungen (auf Anfrage erhältlich) entgegengenommen. Die Informationen in diesem Dokumente können sich ohne vorherige Ankündigung ändern. Die neuste Version dieses Handbuches finden Sie immer auf unserer Interseite unter www.mark.de/downloads. 1.2 llgemeine Warnhinweise Die Installation muss den geltenden landesweiten und örtlichen Bestimmungen entsprechen.
  • Seite 16 • Tag-/Nachttemperatur Überwachung mit Anzeige und ablesen der aktuellen Raumtemperatur auf dem Display • automatische Anpassung der Sommer-/Winterzeit • Regelung: modulierend • Schaltuhr mit Wochenprogramm (7 Schaltblöcke) • Überstundentimer: 0-180 Minuten pro Zone • Signalisierung einer Brennerstörung pro Zone • Resetmöglichkeit zur Entriegelung einer Brennerstörung pro Zone •...
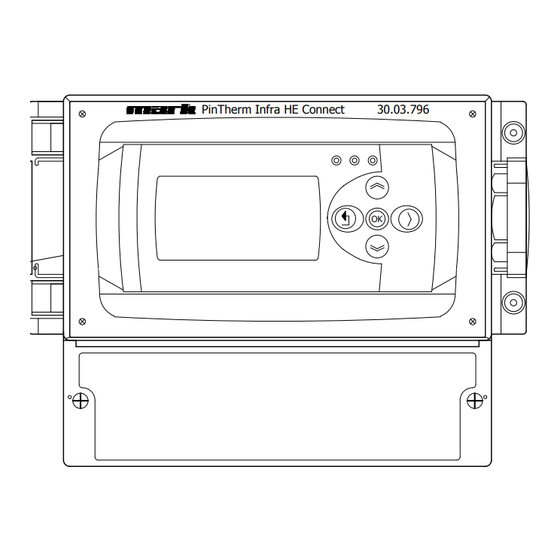
  • Seite 17 3.0 Installation 3.1 Montage PinTherm Infra HE Connect Ermitteln Sie einen geeigneten Ort für die Montage des PinTherm Infra Connect. Montieren Sie den PinTherm Infra Connect auf einer Oberfläche, die mindestens 4kg tragen kann. Es wird empfohlen, die PinTherm Infra Connect auf ± 1,5 m über dem Fußboden anzubringen, an einem leicht zugänglichen Ort.
  • Seite 18            3.2 Anschlussmöglichkeit                   Stromversorgung 1~230V +N +PE  Infra HE (Modbus) externer Schwarzkugelfühler ...
  • Seite 19: Bedienung Und Display

    4.0 Bedienung und Display                4.1 Bedienung         • LED rot = Fehler    • LED grün = in Betrieb ...
  • Seite 20 4.2 Menüstruktur                                       ...
  • Seite 21                                         ...
  • Seite 22: Passwort Ändern

                                            ...
  • Seite 23   Softwareversion                       Die aktuelle Softwareversion. 4.4 Passwort auf Werkseinstellung zurücksetzen 1 Um das Passwort auf Werkseinstellung zurückzusetzen, nehmen Sie zuerst die Regelung vom Stromnetz und schalten Sie ...
  • Seite 24 4.5 Bedienung mit dem Computer Das Gerät kann mit dem PC oder Laptop bedient werden. Verbinden Sie den PC oder Laptop mithilfe eines LAN-Kabels (Ethernet) mit dem Display. Nachdem die Verbindung steht, starten Sie Ihren Internetbrowser* und geben Sie die IP Adresse ein (standardmäßig eingestellte Adresse: 192.168.1.100). Sobald Sie verbunden sind, erscheint ein Fenster zum Einloggen.
  • Seite 25 4.5.1 Dashboard 4.5.2 Menü Status 4.5.3 Menü Temperatur 4.5.4 Menü Zeitprogramm...
  • Seite 26 5.0 Störung Abbildung Meldung Bedeutung              #####ºC Display Kein Fühler angeschlossen.                  ...
  • Seite 27: Informations Générales

    Lire attentivement cette notice avant d’installer et de mettre l’appareil en service Avertissement! Une installation, un réglage, une modification, une réparation ou un entretien mal exécuté(s) peut entraîner des dommages matériels ou des blessures. Tous les travaux doivent être exécutés par des professionnels reconnus et qualifiés.
  • Seite 28 • Adaptation automatique heure d’été/hiver • Réglage : modulant • Minuterie avec programme hebdomadaire (7 blocs d’activation) • Minuterie d’heures supplémentaires : 0-180 min • Signalement défaut brûleur • Possibilité de réarmement pour déverrouillage du défaut brûleur • Protection par code PIN pour modifier entre autres les heures de fonctionnement et les températures.
  • Seite 29 3.0 Installation 3.1 Montage du PinTherm Infra HE Connect Déterminez un endroit adapté pour monter le PinTherm Infra Connect. Monter le PinTherm Infra Connect sur une surface solide qui peut soutenir au minimum 4kg. Il est conseillé de placer le Pin Therm+ à une distance de ± 1,5m du sol, à un endroit accessible. Pour le raccordement de câble, veuillez seulement utiliser des raccordements de câble adaptés avec un réducteur de tension et avec une classe de feu minimale d’UL94V2.
  • Seite 30            3.2 Possibilités de connexion                   Alimentation 1~230V +N +PE  Infra HE (Modbus) Connection capteur externe ...
  • Seite 31: Bediening En Display

    4.0 Bediening en display                4.1 Bediening         • LED rouge = mauvais fonctionnement    • LED verte = en entreprise ...
  • Seite 32: Structure Du Menu

    4.2 Structure du menu                                       ...
  • Seite 33                                         ...
  • Seite 34: Date Et Heure

                                            ...
  • Seite 35   Version du logiciel                       La version actuelle du logiciel. 4.4 Réinitialiser le mot de passe au réglage d’usine 1 Pour réinitialiser le mot de passe au réglage d’usine, débranchez d’abord l’alimentation du thermostat, puis ...
  • Seite 36 4.5 Opérer avec un ordinateur L’unité peut être contrôlée avec un ordinateur Connectez votre ordinateur au moyen d’un câble Ethernet à l’écran. Une fois que les deux sont connectés, lancez votre navigateur internet* et entrez l’adresse IP (adresse par défaut : 192.168.1.100). Quand il y a une connexion, un écran de connexion apparaît Entrez le nom d’utilisateur et le mot de passe Nom d’utilisateur: user...
  • Seite 37 4.5.1 Dashboard 4.5.2 Statut de l’écran 4.5.3 Menu de température 4.5.4 Menu du programme horloge...
  • Seite 38 5.0 Dysfonctionnements Image Alerte Où? Signification              #####ºC écran Pas de capteur connecté                ...
  • Seite 39: Technische Gegevens

    (op aanvraag leverbaar). De informatie in dit document kan zonder voorafgaande kennisgeving worden gewijzigd. De meest recente versie van deze handleiding is altijd beschikbaar op www.mark.nl/downloads. 1.2 Algemene waarschuwingen De installatie moet voldoen aan de geldende plaatselijke en/of landelijke voorschriften. Laat daarom de Pintherm Infra HE Connect door een vakbekwaam en gekwalificeerd installateur installeren met inachtneming van de nationale en internationale regelgeving.
  • Seite 40 • Regeling: modulerend • Schakelklok met weekprogramma (7 schakelblokken) • Overwerktimer: 0-180 min. • Signalering van een brander storing. • Resetmogelijkheid voor ontgrendeling van een storing. • Pincodebeveiliging om o.a. de schakeltijden en temperaturen te kunnen wijzigen. • Talen: Engels, Frans, Duits en Nederlands •...
  • Seite 41 3.0 Installatie 3.1 Montage PinTherm Infra HE Connect Bepaal een geschikte plaats om de PinTherm Infra HE Connect te monteren. Bevestig de PinTherm Infra HE Connect op een stevige ondergrond, die minimaal 4kg kan dragen. Geadviseerd wordt om de PinTherm Infra HE Connect op een afstand van ±1.5m vanaf de vloer te plaatsen, op een goed bereikbare plaats.
  • Seite 42            3.2 Aansluitmogelijkheden                   Voeding 1~230V +N +PE  Infra HE (Modbus) Aansluiting zwarte bol voeler ...
  • Seite 43 4.0 Bediening en display                4.1 Bediening         • LED rood = storing    • LED groen = in bedrijf ...
  • Seite 44 4.2 Menustructuur                                       ...
  • Seite 45: Systeem Menu

                                            ...
  • Seite 46                                         ...
  • Seite 47: Software Versie

      Software versie                       De actuele softwareversie 4.4 Wachtwoord resetten naar fabrieksinstelling 1 Om het wachtwoord te resetten naar de fabrieksinstelling dient men eerst de spanning van de thermostaat af te halen en ...
  • Seite 48 4.5 Bediening met een computer De unit kan met een PC of laptop worden bediend. Verbind de PC of laptop d.m.v. een ethernet aansluiting op het display. Nadat u de verbinding heeft gemaakt start u uw internetbrowser* op en voert u het IP adres in. (Standaard ingestelde adres: 192.168.1.100) Wanneer u verbinding heeft zal een inlogscherm in beeld verschijnen.
  • Seite 49 4.5.1 Dashboard 4.5.2 Status menu 4.5.3 Menu temperatuur 4.5.4 Menu klokprogramma...
  • Seite 50 5.0 Storingen Afbeelding Melding Waar Betekenis              #####ºC Display Geen voeler aangesloten.                 ...
  • Seite 51: Informaţii Generale

    Citiţi acest document înainte de a începe instalarea şi operarea Avertisment! Instalarea, setarea, modificarea, repararea sau întreţinerea incorectă poate duce la daune materiale sau la răniri. Toate activităţile trebuie efectuate de către personal calificat, aprobat. Dacă dispozitivul nu este aşezat conform instrucţiunilor, garanţia va fi anulată. Acest aparat nu este destinat utilizării de către copii sau persoane cu un handicap fizic, senzorial sau mintal, sau care nu au experienţa necesară, cu excepţia cazurilor în care sunt supravegheate, sau au fost instruite să...
  • Seite 52 • Semnalizarea defecţiunii arzătorului • Opţiune de resetare pentru a elibera o defecţiune a arzătorului pe zonă • Securitate PIN pentru a modifica, de exemplu, timpii de comutare şi temperaturile • Opţiuni limbă: EN/FR/DE/NL • Senzor de temperatură de calibrare: interval de la -3°C la +3°C la 0,5°C •...
  • Seite 53 3.0 Instalarea 3.1 Asamblarea PinTherm Infra HE Connect Stabiliţi un loc corespunzător pentru asamblarea PinTherm Infra Connect. Montati PinTherm Infra Connect pe o suprafata solida care poate suporta minim 4 kg. Este recomandabil ca PinTherm Infra Connect să fie plasat la o distanţă de ±1,5m de podea, intr-un loc bine accesibil.. Pentru cablurile de etansare utilizati numai cabluri de etansare prevazute cu izolatie de tensiune, cu o clasa minima de incendiu UL94V2.
  • Seite 54            3.2 Optiuni de conectare                   Alimentare electrică 1~230V +N +PE  Infra HE (Modbus) Senzorul glob extern ...
  • Seite 55: Manual Depanare

    4.0 Manual depanare                4.1 Explicarea butoanelor şi LED-urilor         • LED roşu = defecţiune    • LED verde = in operare ...
  • Seite 56: Structura Meniului

    4.2 Structura meniului                                       ...
  • Seite 57                                         ...
  • Seite 58                                         ...
  • Seite 59   Versiune software                       Versiunea actuală a software-ului. 4.4 Resetare parola la setarile din fabrica 1 Pentru a reseta termostatul la setarile din fabrică, mai întâi ...
  • Seite 60 4.5 Operare cu un computer Unitatea poate fi operata folosind un PC sau laptop. Conectaţi-vă computerul sau laptopul prin intermediul unei mufe Ethernet de pe afişaj. După ce le-aţi conectat pe ambele, porniţi browserul de internet* şi introduceţi adresa IP (adresă implicită: 192.168.1.100). Când aveţi o conexiune, va apărea un ecran de conectare.
  • Seite 61 4.5.1 Dashboard 4.5.2 Meniul Stare 4.5.3 Meniul de temperatură 4.5.4 Program ceas...
  • Seite 62 5.0 Defecţiuni Imagine Alerta Unde Semnificatie              #####ºC Afişaj Niciun senzor conectat.                 ...
  • Seite 64 MODBUS TABLE Modbus TCP/IP Address 255 Display Modbus Holding registers Value Operating mode select 16504 R/LW 1=clock 2=constant day 3= constant night 4 = off Actual temperatuur 9004 value /10 Setpoint day 16507 R/LW value *10 Setpoint night 16510 R/LW value *10 Overtime minutes 9007...
  • Seite 65 program Modbus Holding registers Value Clock block 1 Monday 16552 R/LW Clock block 1 Tuesday 16553 R/LW Clock block 1 Wednesday 16554 R/LW Clock block 1 Thursday 16555 R/LW Clock block 1 Friday 16556 R/LW Clock block 1 Saturday 16557 R/LW Clock block 1 Sunday 16558...
  • Seite 66 Select the right drawing! der richtigen schaltplan Wählen! Choisir schema electrique! Kies het juiste elektrische schema! Wybierz schemat Selectati schema corecta! 1x Infra HE 35-9/50-12 max. 8x Infra HE 35-9/50-12           ...
  • Seite 67 [2] 1x Infra HE 35-9 / 50-12                                  ...
  • Seite 68 [3] max. 8x Infra HE 35-9 / 50-12                                 ...
  • Seite 69 [4] 1x Infra HE 35-9+ / 50-12+                                  ...
  • Seite 70 [5] max. 8x Infra HE 35-9+ / 50-12+                                 ...
  • Seite 71 [6] Multiple black bulb sensors                                    ...
  • Seite 72 FAX +31 (0)598 624584 TELEFAX +49 (0)2822 97728-10 info@mark.nl info@mark.de www.mark.nl www.mark.de MARK EIRE BV MARK POLSKA Sp. z o.o COOLEA, MACROOM UL. JASNOGÓRSKA 27 CO. CORK 42-202 CZĘSTOCHOWA (POLSKA) P12 W660 (IRELAND) PHONE +48 34 3683443 PHONE +353 (0)26 45334...

Diese Anleitung auch für:

0664048

Inhaltsverzeichnis