Herunterladen Inhalt Inhalt Diese Seite drucken

Werbung

Verfügbare Sprachen
  • DE

Verfügbare Sprachen

  • DEUTSCH, seite 1
DR. BEEF II
Elektro-Grill
Electric Grill
Parrilla eléctrica
Grill électrique
Griglia elettrica
10028472
www.klarstein.com

Werbung

Inhaltsverzeichnis
loading

Inhaltszusammenfassung für Klarstein DR. BEEF II

  • Seite 1 DR. BEEF II Elektro-Grill Electric Grill Parrilla eléctrica Grill électrique Griglia elettrica 10028472 www.klarstein.com...
  • Seite 3: Technische Daten

    Sehr geehrter Kunde, wir gratulieren Ihnen zum Erwerb Ihres Gerätes. Lesen Sie die folgenden Hinweise sorgfältig durch und befolgen Sie diese, um möglichen Schäden vorzubeugen. Für Schäden, die durch Missachtung der Hinweise und unsachgemäßen Gebrauch entstehen, übernehmen wir keine Haftung. Scannen Sie den folgenden QR-Code, um Zugriff auf die aktuellste Bedienungsanleitung und weitere Informationen rund um das Produkt zu erhalten.
  • Seite 4: Sicherheitshinweise

    SICHERHEITSHINWEISE • Schließen Sie das Gerät so an, dass der Netzstecker jederzeit leicht zugänglich ist. • Untersuchen Sie das Netzkabel regelmäßig auf Beschädigungen. Falls das Netzkabel beschädigt ist, muss es vom Hersteller oder einem autorisierten Fachbetrieb oder einer ähnlich qualifizierten Person ersetzt werden. •...
  • Seite 5 Besondere Sicherheitsvorkehrungen • Das Gerät kann bei trockenem Wetter draußen verwendet werden. Es darf allerdings nicht nass werden. • Während des Grillens muss das Gerät auf einem festen, flachen Untergrund stehen und einen Mindestabstand von 30 cm von der Wand und entflammbaren Gegenständen haben.
  • Seite 6: Gerätebeschreibung

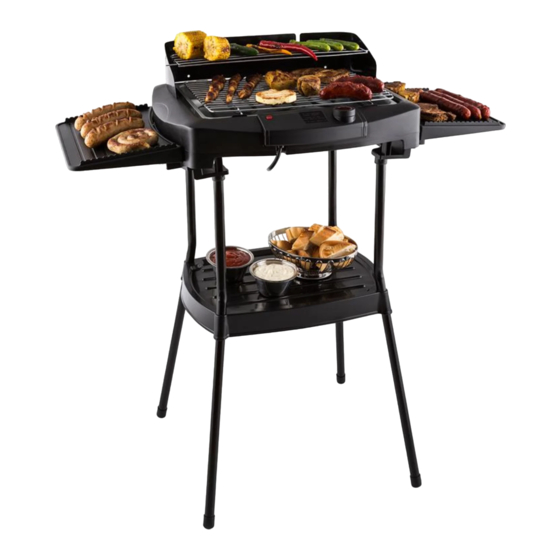
    GERÄTEBESCHREIBUNG Grillrost Kontrollleuchte Netzstecker und Netzkabel Basis Griff Auffangschale Temperaturregler/ Ein/Aus- Heizelement Schalter Steuerelement...
  • Seite 7: Bedienung

    INBETRIEBNAHME Entfernen Sie das Verpackungsmaterial. Reinigen Sie das Gerät wie beschrieben (siehe Wartung und Reinigung). Legen Sie von oben die Auffangschale in das Gerät. Der Temperaturregler sollte ausgeschaltet sein. Legen Sie die Steuereinheit mit dem Heizelement in das Gerät ein. Füllen Sie die Auffangschale (8) mit kaltem Wasser, so dass es einen Abstand von ca.
  • Seite 8: Reinigung Und Pflege

    REINIGUNG UND PFLEGE • Lassen Sie das Gerät vor der Reinigung vollständig abkühlen und ziehen Sie den Netzstecker (2). • Verwenden Sie zur Reinigung der äußeren Bereiche ein leicht feuchtes Tuch. • Sie können den Grillrost (1) und die Auffangschale (8) mit heißen Wasser und einer sanften Waschlösung reinigen.
  • Seite 9 SPEZIELLE ENTSORGUNGSHINWEISE FÜR VERBRAUCHER IN DEUTSCHLAND Entsorgen Sie Ihre Altgeräte fachgerecht. Dadurch wird gewährleistet, dass die Altgeräte umweltgerecht verwertet und negative Auswirkungen auf die Umwelt und menschliche Gesundheit vermieden werden. Bei der Entsorgung sind folgende Regeln zu beachten: • Jeder Verbraucher ist gesetzlich verpflichtet, Elektro- und Elek- tronikaltgeräte (Altgeräte) sowie Batterien und Akkus getrennt vom Hausmüll zu entsorgen.
  • Seite 10 • Bei einem Vertrieb unter Verwendung von Fernkommunikationsmitteln ist die unentgeltliche Abholung am Ort der Abgabe auf Elektro- und Elektronikgeräte der Kategorien 1, 2 und 4 gemäß § 2 Abs. 1 ElektroG, nämlich „Wärmeüberträger“, „Bildschirmgeräte“ (Oberfläche von mehr als 100 cm²) oder „Großgeräte“...
  • Seite 11: Technical Information

    Dear customer, Congratulations on the purchase of your appliance. Please read the following instructions carefully and follow them to prevent potential damage. We accept no liability for damage caused by disregarding the instructions and improper use. Please scan the QR code to access the latest operating instructions and further information about the product.
  • Seite 12: Safety Instructions

    SAFETY INSTRUCTIONS • Connect the unit so that the power cord plug is easily accessible at all times. • Check the power cord regularly for damage. If the power cord is damaged, it must be replaced by the manufacturer, an authorised specialist company or a similarly qualified person.
  • Seite 13 Special safety precautions • The unit can be used outdoors in dry weather. However, it must not get wet. • During grilling, the appliance must be placed on a firm, flat surface and have a minimum distance of 30 cm from the wall and flammable objects. •...
  • Seite 14: Device Description

    DEVICE DESCRIPTION Grill grate Indicator lights Power plug and cable Base Handle Drip tray Temperature control dial / on/ Heating element off switch Control element...
  • Seite 15: Getting Started

    GETTING STARTED Remove all packaging material. Clean the unit as described (see Maintenance and Cleaning). Place the drip tray in the appliance from above. The temperature controller should be switched off. Insert the control unit with the heating element into the unit. Fill the drip tray (8) with cold water so that there is a distance of approx.
  • Seite 16: Cleaning And Care

    CLEANING AND CARE • Before cleaning, allow the device to cool down completely and pull out the mains plug (2). • Use a slightly damp cloth to clean the outer areas. • You can clean the grill grate (1) and the drip tray (8) with hot water and a gentle washing solution.
  • Seite 17: Datos Técnicos

    Estimado cliente: Le felicitamos por la adquisición de este producto. Lea atentamente el siguiente manual y siga cuidadosamente las instrucciones de uso con el fin de evitar posibles daños. La empresa no se responsabiliza de los daños ocasionados por un uso indebido del producto o por haber desatendido las indicaciones de seguridad.
  • Seite 18: Indicaciones De Seguridad

    INDICACIONES DE SEGURIDAD • Conecte el aparato de modo que el enchufe esté accesible en todo momento. • Examine el cable periódicamente para detectar daños. Si el cable de alimentación está dañado, deberá ser sustituido por el fabricante, una empresa autorizada o una persona cualificada. •...
  • Seite 19 Indicaciones especiales de seguridad • Puede utilizar el aparato al aire libre si el tiempo es seco. Sin embargo, evite que el aparato se moje. • Durante el asado, el aparato debe colocarse sobre una superficie firme y plana, y estar a una distancia mínima de 30 cm de la pared y de los objetos inflamables.
  • Seite 20: Descripción Del Aparato

    DESCRIPCIÓN DEL APARATO Parrilla Indicadores luminosos Cable de alimentación y Base enchufe Bandeja de goteo Regulador de temperatura/ Resistencia Interruptor ON/OFF Elemento de control...
  • Seite 21: Puesta En Funcionamiento

    PUESTA EN FUNCIONAMIENTO Retire el material del embalaje. Limpie el aparato como se ha descrito (véase «Mantenimiento y limpieza»). Coloque la bandeja de goteo en el aparato desde arriba. El regulador de temperatura debe estar apagado. Introduzca el elemento de control con la resistencia en el aparato.
  • Seite 22: Limpieza Y Cuidado

    LIMPIEZA Y CUIDADO • Antes de limpiar el aparato, deje que se enfríe completamente y desconecte el enchufe de la red (2). • Utilice un paño ligeramente húmedo para limpiar la parte exterior del aparato. • Puede limpiar la rejilla (1) y la bandeja de goteo (8) con agua caliente y una solución de jabón suave.
  • Seite 23: Fiche Technique

    Cher client, chère cliente, Toutes nos félicitations pour l’acquisition de ce nouvel appareil. Lisez attentivement les indications suivantes et suivez-les pour éviter d'éventuels dommages. Nous ne saurions être tenus pour responsables des dommages dus au non-respect des consignes et à la mauvaise utilisation de l’appareil.
  • Seite 24: Consignes De Sécurité

    CONSIGNES DE SÉCURITÉ • Connectez l'appareil de manière à ce que la prise d'alimentation reste facilement accessible à tout moment. • Contrôlez régulièrement le bon état du câble d'alimentation. Si le cordon d'alimentation est endommagé, il doit être remplacé par le fabricant, un centre de service agréé...
  • Seite 25 Précautions particulières • L'appareil peut être utilisé à l'extérieur par temps sec. Il ne doit toutefois pas être mouillé. • Pendant la cuisson au barbecue, l'appareil doit être placé sur une surface solide et plane, à une distance minimale de 30 cm du mur et de tout objet inflammable.
  • Seite 26: Description De L'appareil

    DESCRIPTION DE L'APPAREIL Grille de cuisson Voyants de contrôle Fiche et câble secteur Base Poignée Bac de récupération Régulateur de température / Élément chauffant interrupteur de marche/arrêt Élément de contrôle...
  • Seite 27: Mise En Marche

    MISE EN MARCHE Retirez tous les matériaux d'emballage. Nettoyez l'appareil comme décrit (voir Entretien et nettoyage). Placez le bac de récupération par le haut dans l'appareil. Le régulateur de température doit être éteint. Insérez l'unité de contrôle avec l'élément chauffant dans l'appareil. Remplissez le bac de récupération (8) d'eau froide de manière à...
  • Seite 28: Nettoyage Et Entretien

    NETTOYAGE ET ENTRETIEN • Avant le nettoyage, laissez l'appareil refroidir complètement et débranchez la fiche (2). • Utilisez un chiffon légèrement humide pour nettoyer les surfaces externes de l'appareil. • Vous pouvez nettoyer la grille de cuisson (1) et le bac de récupération (8) avec de l'eau chaude et une solution savonneuse douce.
  • Seite 29: Dati Tecnici

    Gentile cliente, La ringraziamo per l'acquisto del dispositivo. La preghiamo di leggere attentamente le seguenti istruzioni per l'uso e di seguirle per evitare possibili danni. Non ci assumiamo alcuna responsabilità per danni scaturiti da una mancata osservanza delle avvertenze di sicurezza e da un uso improprio del dispositivo.
  • Seite 30: Avvertenze Di Sicurezza

    AVVERTENZE DI SICUREZZA • Collegare il dispositivo in modo che la spina possa essere raggiunta facilmente in ogni momento. • Controllare regolarmente se il cavo di alimentazione è danneggiato. Se il cavo di alimentazione è danneggiato, deve essere sostituito dal produttore, da un'azienda tecnica autorizzata o da una persona con qualifica equivalente.
  • Seite 31 Misure speciali di sicurezza • Il dispositivo può essere usato all'aperto con tempo asciutto. Tuttavia, non deve bagnarsi. • Mentre si griglia, il dispositivo deve essere posto su una superficie solida e piana e avere una distanza minima di 30 cm dalla parete e dagli oggetti infiammabili.
  • Seite 32: Descrizione Del Dispositivo

    DESCRIZIONE DEL DISPOSITIVO Griglia Spia luminosa Cavo d'alimentazione e spina Base Impugnatura Vaschetta raccogligocce Regolazione della temperatura Elemento riscaldante / Interruttore on/off Elemento di controllo...
  • Seite 33: Messa In Funzione

    MESSA IN FUNZIONE Rimuovere il materiale d'imballaggio. Pulire il dispositivo come descritto (vedi Manutenzione e pulizia). Posizionare la vaschetta raccogligocce nel dispositivo dall'alto. Il regolatore di temperatura deve essere spento. Inserire l'unità di controllo con l'elemento riscaldante nel dispositivo. Riempire la vaschetta raccogligocce (8) con acqua fredda in modo che ci sia una distanza di circa 1 cm tra la superficie dell'acqua e gli elementi riscaldanti.
  • Seite 34: Pulizia E Manutenzione

    PULIZIA E MANUTENZIONE • Prima della pulizia, staccare la spina (2) e lasciar raffreddare completamente il dispositivo. • Pulire l'esterno del dispositivo con un panno leggermente inumidito. • È possibile pulire la griglia (1) e la vaschetta raccogligocce (8) con acqua calda e una soluzione di lavaggio delicata.

Diese Anleitung auch für:

10028472

Inhaltsverzeichnis