Inhaltsverzeichnis
Werbung
Verfügbare Sprachen
Verfügbare Sprachen
Quicklinks
Werbung
Inhaltsverzeichnis

Verwandte Anleitungen für AsViva MG6


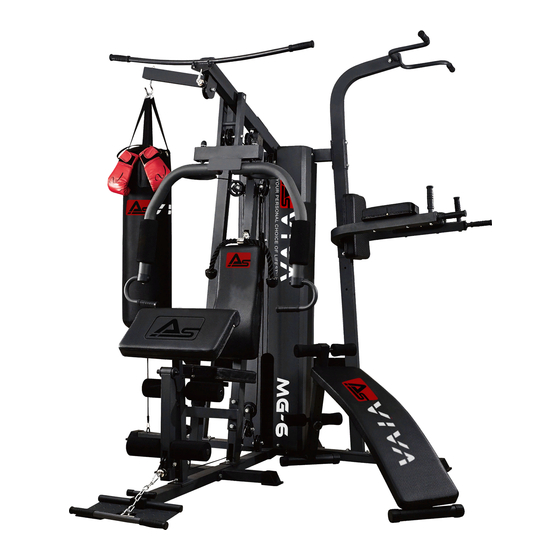
Inhaltszusammenfassung für AsViva MG6
- Seite 1 BENUTZERHANDBUCH / MANUAL VERSION: B-BU www.AsVIVA.de...
-
Seite 2: Inhaltsverzeichnis
INHALTSVERZEICHNIS ALLGEMEINE HINWEISE GEWÄHRLEISTUNGSBESTIMMUNGEN ............3 WICHTIGE SICHERHEITSHINWEISE ..............4 AUFWÄRMEN UND DEHNEN ................6 GEWÄHRLEISTUNGSRECHT ................8 MONTAGE / ÜBUNGEN EXPLOSIONSZEICHNUNG................16 TEILELISTE .......................20 MONTAGE ......................22 ÜBUNGSVORSCHLÄGE ..................40 TABLE OF CONTENTS GENERAL INFORMATION WARRANTY TERMS ..................10 IMPORTANT SAFETY INSTRUCTIONS ............11 EXERCISE INSTRUCTIONS ................13 WARRANTY DEVICE ..................15 ASSEMBLY / EXERCISES EXPLODED DIAGRAMM ..................16 PARTS LIST .......................20... -
Seite 3: Gewährleistungsbestimmungen
Ersatzteilbestellungen und Reparaturaufträge richten Sie bitte unter Angabe der Kundennummer bzw. Rechnungsnummer an Ihren Händler oder direkt an uns. Unsere Serviceadresse: http://www.asviva.de/kontakt Damit Ihnen unsere Service-Mitarbeiter optimal weiterhelfen können, beachten Sie bitte folgende Vorgehensweise: Ist ein bestimmtes Teil beschädigt? Teilen Sie uns bitte anhand der Teileiste die genaue Teilenummer mit. -
Seite 4: Wichtige Sicherheitshinweise
WICHTIGE SICHERHEITSHINWEISE • Das Sicherheitsniveau des Gerätes kann nur gehalten werden, wenn es regelmäßig auf Schäden und Verschleiß geprüft wird. Dabei ist ein besonderes Augenmerk auf die Endkappen / Rollen der Standfüße, die Trittpedale, die Handgriffe und die beweglichen Elemente zu richten. • Wenn Sie dieses Gerät weitergeben oder von einer anderen Person benutzen lassen, stellen Sie sicher, dass derjenige den Inhalt dieser Gebrauchsanleitung kennt. - Seite 5 WICHTIGE SICHERHEITSHINWEISE Bitte lesen Sie die Anleitung genau durch, bevor Sie mit den Zusammenbau beginnen! Achten Sie beim Anziehen der Schraubverbindungen darauf, dass der Bewegungsablauf nicht durch zu festes anziehen beeinträchtigt wird. Bewegliche Gelenkteile ( Gleitträger usw. ) müssen von Zeit zu Zeit mit handelsüblichem Schmierfett eingefettet werden.
-
Seite 6: Aufwärmen Und Dehnen
AUFWÄRMEN UND DEHNEN Aufwärmphase und Abkühlphase 1. Aufwärmphase 5 bis 10 Minuten Gymnastik und Stretching. Vorbereitung des Organismus auf die bevorstehende Traingsleistung. 2. Trainingsphase 15 bis 40 Minuten intensives aber nicht zu überfordendes Training 3. Abkühlphase 5 bis 10 Minuten Gymnastik und Stretching um die Muskulatur zu lockern und Muskelkater vorzu- beugen. - Seite 7 AUFWÄRMEN UND DEHNEN Dehnung der hinteren Oberschenkmuskulatur: Setzen Sie sich auf den Boden und strecken Sie Ihrrechtes Bein. Winkeln Sie Ihr linkes Bein so an, dass die Fußsohle die Innenseite Ihres rechten Oberschenkels berührt. Beugen Sie sich nun so weit wie möglich nach vorne und versuchen Sie, die Zehen an Ihrem rechten Bein zu berühren.
-
Seite 8: Gewährleistungsrecht
GEWÄHRLEISTUNGSRECHT Herzlichen Glückwunsch zu Ihrer Entscheidung zum Kauf eines Gerätes aus dem Hause AsVIVA. Gemäß des zum 01. Januar 2002 geänderten europäischen Gewährleistungsrechts, steht Ihnen eine gesetzliche Gewährleistungsfrist von 2 Jahren zu. Die Gewährleistungsfrist beginnt mit der Übergabe des Fahrrades durch den Fachhändler. -
Seite 10: Warranty Terms
For our equipment we provide the leaga warranty of 2 years. For spare parts and repair orders, please contact your dealer or directly to AsVIVA, indictating the customer number or invoice number. Our service is available 24 hours. -
Seite 11: Important Safety Instructions
IMPORTANT SAFETY INSTRUCTIONS • The safety level of the device can only be held if it is regularly tested for damage and wear. Particu- lar attention must be paid to the end caps / castors of the feet, the pedals, the handles and the m- ving elements. - Seite 12 IMPORTANT SAFETY INSTRUCTIONS Please read the instructions carefully before you start the assembly! When tightening the screw connections, make sure that the movement is not affected by exces- sive tightening. Movable gel parts ( plain bearings, etc. ) must be greased from time to time with standard lub- cricating grease.
-
Seite 13: Exercise Instructions
EXERCISE INSTRUCTIONS Warm-up and cooling phase 1. Warm up phase This stage helps get the blood flowing around the body and the muscles working properly. It will also reduce the risk of cramp and muscle injury. It is advisable to do a few stretching exercises as shown below. Each stretch should be held for approximately 30 seconds, do not force or jerk your muscles into a stretch - if it hurts, STOP. - Seite 14 EXERCISE INSTRUCTIONS Forward bends: Slowly bend forward with your knees bent, letting your shoulders and back relax as you try to touch your toes. Go down as far as you can and hold the position for 15 seconds. shoulder lift: Lift your right shoulder up, towards your ear and hold the position for a moment.
-
Seite 15: Warranty Device
WARRANTY DEVICE Congratulations on your decision to purchase a device from AsVIVA. According to the European guarantee law, amended as of January 1, 2002, You have a legal warranty period of 2 years. The guarantee period begins with the handover of the device by the specialist dealer. -
Seite 16: Explosionszeichnung Exploded Diagramm
EXPLOSIONSZEICHNUNG EXPLODED DIAGRAMM... - Seite 17 EXPLOSIONSZEICHNUNG EXPLODED DIAGRAMM...
- Seite 18 EXPLOSIONSZEICHNUNG EXPLODED DIAGRAMM...
- Seite 19 EXPLOSIONSZEICHNUNG EXPLODED DIAGRAMM...
-
Seite 20: Parts List
TEILELISTE / PARTS LIST Beschreibung Menge Beschreibung Menge Description Qty. Description Qty. Rear Bottom Frame Small Backrest Pad Main Bottom Frame Big Arm Pad Guide Rod Small Arm Pad Main Upright Pulley φ90 Main Top Beam Top weight plate Rear Top Beam Weight plate Left Top Beam Weight Washer... - Seite 21 TEILELISTE / PARTS LIST Beschreibung Menge Beschreibung Menge Description Qty. Description Qty. End Cap with hole 2# Left Weight Stack Cover Foot End Cap Right Weight Stack Cover Rubber Plate Bottom Cover Support Locking Pin Nut Cap M16 Cross Bolt M6*12 Sleeve 50 * 45 Countersunk Bolt M10*20 Bearing Socket Bolt M10*45...
-
Seite 22: Assembly
MONTAGE / ASSEMBLY Schritt 1 / Step 1 #97 #97 #100 #97 #97 #100... - Seite 23 MONTAGE / ASSEMBLY Schritt 2 / Step 2...
- Seite 24 MONTAGE / ASSEMBLY Schritt 3 / Step 3 #97 #97 #100 #97 #100...
- Seite 25 MONTAGE / ASSEMBLY Schritt 4 / Step 4 #97 #97 #100 #97 #97 #100...
- Seite 26 MONTAGE / ASSEMBLY Schritt 5 / Step 5 #97 #97 #100 #97 #100...
- Seite 27 MONTAGE / ASSEMBLY Schritt 6 / Step 6 #97 #97 #100...
- Seite 28 MONTAGE / ASSEMBLY Schritt 7 / Step 7 #98 #101...
- Seite 29 MONTAGE / ASSEMBLY Schritt 8 / Step 8 #97 #97 #100 #97 #100...
- Seite 30 MONTAGE / ASSEMBLY Schritt 9 / Step 9 #97 #97 #100...
- Seite 31 MONTAGE / ASSEMBLY Schritt 10 / Step 10...
- Seite 32 MONTAGE / ASSEMBLY Schritt 11 / Step 11...
- Seite 33 MONTAGE / ASSEMBLY Schritt 12 / Step 12 #97 #97 #100...
- Seite 34 MONTAGE / ASSEMBLY Schritt 13 / Step 13 #97 #97 #100 #97 #97 #100 LAT CABLE Lösen Sie die Nuss und den Gewindebolzen. Loosen nut and thread bold in / out of top plate to give the cable...
- Seite 35 MONTAGE / ASSEMBLY Schritt 14 / Step 14 #97 #97 #100 #97 #97 #100...
- Seite 36 MONTAGE / ASSEMBLY Schritt 15 / Step 15 #97 #55 #55 #97 #100 #97 #97 #100 PEC CABLE...
- Seite 37 MONTAGE / ASSEMBLY Schritt 16 / Step 16...
- Seite 38 MONTAGE / ASSEMBLY Schritt 17 / Step 17...
- Seite 39 MONTAGE / ASSEMBLY Schritt 18 / Step 18...
-
Seite 40: Exercise Suggestions
ÜBUNGSVORSCHLÄGE EXERCISE SUGGESTIONS Die Übungen, die in diesem Übungsplan dargestellt sind, sind nur eine der vielen Übungen, die an diesem Gerät durchgeführt werden können. Der Hersteller behält sich das Recht vor, das Gerät zu modifzieren. Daher ist es möglich, das dargestellte Übungen nicht so durchgeführt werden können, wie Sie dargestellt werden. - Seite 41 ÜBUNGSVORSCHLÄGE EXERCISE SUGGESTIONS Übung / Exercise Muskelgruppe / Musclegroup...
- Seite 42 ÜBUNGSVORSCHLÄGE EXERCISE SUGGESTIONS Übung / Exercise Muskelgruppe / Musclegroup...
- Seite 43 ÜBUNGSVORSCHLÄGE EXERCISE SUGGESTIONS Übung / Exercise Muskelgruppe / Musclegroup...
- Seite 44 ÜBUNGSVORSCHLÄGE EXERCISE SUGGESTIONS Übung / Exercise Muskelgruppe / Musclegroup...