Herunterladen Inhalt Inhalt Diese Seite drucken
Inhaltsverzeichnis

Werbung

Verfügbare Sprachen
  • DE

Verfügbare Sprachen

  • DEUTSCH, seite 3
Gebrauchsanleitung | Operating manual |
Mode d'emploi | Instrucciones de manejo |
Istruzione | Instruções | 操作手册
macro
Pipettierhelfer | Pipetting aids

Werbung

Inhaltsverzeichnis
loading

Inhaltszusammenfassung für BRAND macro

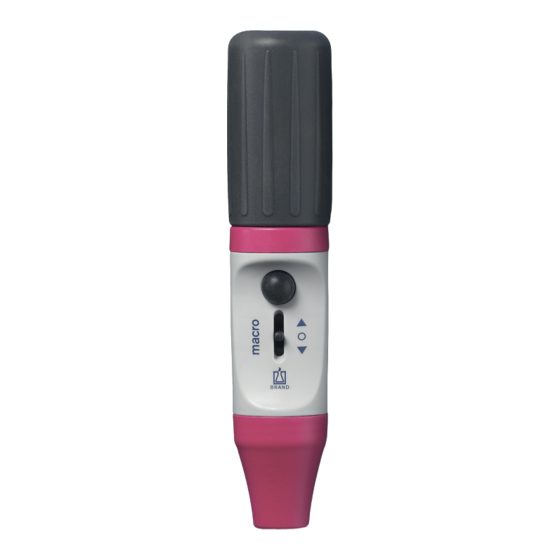
  • Seite 1 Gebrauchsanleitung | Operating manual | Mode d'emploi | Instrucciones de manejo | Istruzione | Instruções | 操作手册 macro Pipettierhelfer | Pipetting aids...
  • Seite 2 Impressum BRAND GMBH + CO KG Otto-Schott-Str. 25 97877 Wertheim (Germany) T +49 9342 808 0 F +49 9342 808 98000 info@brand.de www.brand.de Gebrauchsanleitung 9976 40...
  • Seite 3: Inhaltsverzeichnis

    Inhaltsverzeichnis 1 Gebrauchsbestimmung ............Gefährdungsstufen ..............Symbole der Gebrauchsanleitung..........Darstellung ................... 2 Sicherheit ................Funktion..................Einsatzgrenzen ................Einsatzausschlüsse ..............Lagerbedingungen ............... 3 Funktions- und Bedienelemente ..........4 Pipettieren................5 Reinigung ................13 Autoklavieren ................13 Filter austauschen und Adapter reinigen ........13 Ventilsystem austauschen............
  • Seite 4: Gebrauchsbestimmung

    • Die Gebrauchsanleitung ist Teil des Geräts und muss leicht zugäng- lich aufbewahrt werden. • Legen Sie die Gebrauchsanleitung bei, wenn Sie dieses Gerät an Drit- te weitergeben. • Sie finden aktualisierte Versionen der Gebrauchsanleitung auf unse- rer Homepage www.brand.de. 1.1 Gefährdungsstufen Folgende Signalworte kennzeichnen mögliche Gefährdungen: Signalwort Bedeutung GEFAHR Führt zu schwerer Verletzung oder Tod.
  • Seite 5: Darstellung

    1 Gebrauchsbestimmung 1.3 Darstellung Darstellung Bedeutung Darstellung Bedeutung 1. Task Kennzeichnet eine Auf- > Kennzeichnet eine Voraussetzung. gabe. a., b., c. Kennzeichnet einzelne Kennzeichnet ein Ergebnis. Schritte der Aufgabe. Gebrauchsanleitung 9976 40...
  • Seite 6: Sicherheit

    2 Sicherheit 2 Sicherheit Bitte unbedingt sorgfältig durchlesen! Das Laborgerät macro kann in Kombination mit gefährlichen Materialien, Arbeitsvorgängen und Apparaturen verwendet werden. Die Gebrauchsan- leitung kann jedoch nicht alle Sicherheitsprobleme aufzeigen, die hierbei eventuell auftreten. Es liegt in der Verantwortung des Anwenders, die Ein- haltung der Sicherheits- und Gesundheitsvorschriften sicherzustellen und die entsprechenden Einschränkungen vor Gebrauch festzulegen.
  • Seite 7: Funktion

    2 Sicherheit 2.1 Funktion Das Gerät dient als Hilfe zum Pipettieren von Flüssigkeiten mit Mess- und Vollpipetten aus Glas oder Kunststoff im Volumenbereich von 0,1 ml bis 200 ml und mit einem Saugrohr-Außendurchmesser < 9,2 mm. Bei richti- ger Handhabung kommt die pipettierte Flüssigkeit nur mit der Pipette in Kontakt.
  • Seite 8: Funktions- Und Bedienelemente

    3 Funktions- und Bedienelemente 3 Funktions- und Bedienelemente Saugbalg (SI) Membranfilter (PP/PTFE) Schraubring (PP) Adaper (SI) Blow-out Blase (SI) Adaptergehäuse (PP) Pipettierhebel Ventilsystem (PP; SI, PTFE) Gehäuse (PP) Gehäuse (PP) Abk. Material Polypropylen PTFE Polytetrafluorethylen Silikon Gebrauchsanleitung 9976 40...
  • Seite 9: Pipettieren

    4 Pipettieren 4 Pipettieren 1. Saugbalg entlüften Vor dem Aufstecken der Pipette den Saugbalg zusammendrücken. 2. Pipette aufstecken WARNUNG Auf festen Sitz der Pipette achten. Nie Gewalt anwenden! Be- sonders bei dünnen Pipetten besteht die Gefahr von Glas- bruch! Verletzungsgefahr! Pipette stets möglichst dicht am obe- ren Ende halten und vorsichtig in den Adapter einschieben, bis sie fest sitzt.
  • Seite 10: Pipette Füllen

    4 Pipettieren 3. Pipette füllen Pipettenspitze in die Flüssigkeit ein- tauchen. Pipettierhebel vorsichtig nach oben drücken und die Pipette etwas über die gewünschte Marke füllen. HINWEIS Darauf achten, dass keine Flüssigkeit in das Gerät gelangt! Die Funktion des Membranfilters wird beeinträchtigt und die Saugleistung lässt nach. In diesem Fall Membranfilter auswechseln, siehe Filter austauschen und Adapter reinigen, S. 13 .
  • Seite 11: Pipette Entleeren

    4 Pipettieren 5. Pipette entleeren Auffanggefäß schräg halten. Pipet- tenspitze an der Innenwand anlegen und Pipettierhebel nach unten drücken. bei Pipetten mit Wartezeit (Auf- druck z.B. 'Ex + 5 s'): Sobald der Meniskus in der Pipette zum Stillstand kommt, die auf der Pi- pette angegebene Wartezeit (hier 5 s) einhalten.
  • Seite 12: Nach Dem Pipettieren

    4 Pipettieren 6. Nach dem Pipettieren Pipette möglichst weit oben anfassen und aus dem Adapter herausziehen. Gebrauchsanleitung 9976 40...
  • Seite 13: Reinigung

    5 Reinigung 5 Reinigung Gehäuseteile gelegentlich mit einem feuchten Tuch abwischen. Bei ord- nungsgemäßer Benutzung ist das Gerät wartungsfrei. 5.1 Autoklavieren Vor dem Autoklavieren muss das Gerät sorgfältig gereinigt werden. Die Gehäuseteile mit einem feuchten Tuch abwischen. Das Gerät ist autokla- vierbar bei 121 °C (250 °F), 2 bar und einer Haltezeit von mindestens 15 Mi- nuten nach DIN EN 285.
  • Seite 14 5 Reinigung Zur Reinigung Adapter sorgfältig mit einer Spritzflasche ausspülen, die mit einer geeigneten Reinigungsflüssig- keit, z.B. Wasser, gefüllt ist. Anschlie- ßend ausblasen und trocknen. Neuen Membranfilter mit dem dicke- ren Anschluss nach unten zuerst in den Adapter eindrücken (die dünne- re, konische Seite nach oben).
  • Seite 15: Ventilsystem Austauschen

    5 Reinigung 5.3 Ventilsystem austauschen Saugbalg und Adaptergehäuse ab- schrauben. Zum Austauschen Oberteil des Ge- häuses abnehmen. Vorsichtig das Ventilsystem herausnehmen und aus- tauschen. Gerät in umgekehrter Reihenfolge wieder komplettieren und Dichtigkeit prüfen. Gebrauchsanleitung 9976 40...
  • Seite 16: Dichtigkeit Prüfen

    5 Reinigung 5.4 Dichtigkeit prüfen Nach dem Einstellen des Meniskus darf ohne Betätigung der Ventile keine Flüs- sigkeit aus der Pipette tropfen. Sollte die Pipette tropfen, siehe Störung - Was tun?, S. 17 Gebrauchsanleitung 9976 40...
  • Seite 17: Störung - Was Tun

    6 Störung - Was tun? 6 Störung - Was tun? Störung Mögliche Ursache Was tun Saugleistung beeinträchtigt Filter verschmutzt oder Ven- Filter auswechseln, Filter tilsystem defekt austauschen und Adapter reinigen, S. 13 . Pipette tropft Filter sitzt nicht richtig oder Filter richtig einsetzen oder Ventilsystem defekt Ventilsystem austauschen, siehe Filter austauschen...
  • Seite 18: Kennzeichnung Auf Dem Produkt

    7 Kennzeichnung auf dem Produkt 7 Kennzeichnung auf dem Produkt Zeichen oder Nummer Bedeutung Allgemeines Warnzeichen Gebrauchsanleitung beachten XXZXXXXX Chargennummer Gebrauchsanleitung 9976 40...
  • Seite 19: Bestellinformationen

    8 Bestellinformationen 8 Bestellinformationen macro-Pipettierhelfer Beschreibung Farbe* Best.-Nr. macro-Pipettierhelfer,inkl. Ersatz- grau 262 00 Membranfilter 3 µm und Ge- grün 262 01 brauchsanleitung. blau 262 02 magenta 262 03 * Die Farben betreffen das Adaptergehäuse und den Schraubring. Gebrauchsanleitung 9976 40...
  • Seite 20: Ersatzteile

    9 Ersatzteile 9 Ersatzteile Adaptergehäuse Farbe* Länge mm Material Best.-Nr. grau 262 20 grün 262 23 blau 262 21 magenta 262 22 Saugbalg mit Schraubring Farbe* Best.-Nr. grau 262 25 grün 262 28 blau 262 26 magenta 262 27 * Die Farben betreffen das Adaptergehäuse und den Schraubring. Ersatz-Membranfilter 3 µm Verp.
  • Seite 21 9 Ersatzteile Ventilsystem Beschreibung Best.-Nr. Ventilsystem 261 28 Gebrauchsanleitung 9976 40...
  • Seite 22: Reparatur

    Gerät an Hersteller oder Händler senden. Vordrucke können beim Händler oder Hersteller angefordert werden, bzw. stehen unter www.brand.de zum Download bereit. Innerhalb der USA und Kanada Bitte klären Sie mit BrandTech Scientific, Inc. die Voraussetzungen für die Rücksendung bevor Sie das Gerät zum Service einschicken.
  • Seite 23 10 Reparatur Kontaktadressen Deutschland: USA und Kanada: ® BRAND GMBH + CO KG BrandTech Scientific, Inc. Otto-Schott-Straße 25 11 Bokum Road 97877 Wertheim (Germany) Essex, CT 06426-1506 (USA) T +49 9342 808 0 T +1-860-767 2562 F +49 9342 808 98000 F +1-860-767 2563 info@brand.de...
  • Seite 24: Mängelhaftung

    11 Mängelhaftung 11 Mängelhaftung Wir haften nicht für Folgen unsachgemäßer Behandlung, Verwendung, Wartung, Bedienung oder nicht autorisierter Reparatur des Gerätes oder für Folgen normaler Abnutzung, insbesondere von Verschleißteilen wie z.B. Kolben, Dichtungen, Ventilen sowie bei Glasbruch. Gleiches gilt für die Nichtbeachtung der Gebrauchsanleitung.
  • Seite 25: Entsorgung

    12 Entsorgung 12 Entsorgung Beachten Sie vor Entsorgung die entspre- chenden nationalen Entsorgungsvor- schriften und führen Sie das Produkt ei- ner fachgerechten Entsorgung zu. Technische Änderungen, Irrtum und Druckfehler vorbehalten. Gebrauchsanleitung 9976 40...
  • Seite 26 Operating manual 9976 40...
  • Seite 27 Table of Contents Table of Contents 1 Terms of use................28 Hazard levels ................28 Operating manual symbols ............28 Format ..................29 2 Safety..................30 Function..................31 Limitations of use................. 31 Operating exclusions ..............31 Storage Conditions ..............31 3 Functional and operating elements...........
  • Seite 28: Terms Of Use

    • Be sure to include the operating manual if you transfer possession of this device to a third party. • You can find up-do-date versions of the operating manual on our website: www.brand.de. 1.1 Hazard levels The following signal words identify possible hazards:...
  • Seite 29: Format

    1 Terms of use 1.3 Format Format Meaning Icon Meaning 1. Task Indicates a task. > Indicates a condition. a., b., c. Indicates the individ- Indicates a result. ual steps of a task. Operating manual 9976 40...
  • Seite 30: Safety

    2 Safety Please read carefully! The macro can be used in combination with hazardous materials, work processes and equipment. However, the operating manual cannot cover all of the safety issues that may occur in doing so. It is the user’s responsi- bility to ensure compliance with the safety and health regulations and to specify the corresponding restrictions before use.
  • Seite 31: Function

    2 Safety 2.1 Function The device serves as an aid for pipetting liquids with graduated and volu- metric pipettes made of glass or plastic in the volume range from 0.1 ml to 200 ml and with a suction tube outer diameter < 9.2 mm. When the de- vice is handled correctly, the pipetted liquid comes into contact with the pipette only.
  • Seite 32: Functional And Operating Elements

    3 Functional and operating elements 3 Functional and operating elements Suction bellows (SI) Membrane filter (PP/PTFE) Screw ring (PP) Adapter (SI) Blow-out bubble (SI) Adapter housing (PP) Pipetting lever Valve system (PP; SI, PTFE) Housing (PP) Housing (PP) Abbreviation Material Polypropylene PTFE Polytetrafluoroethylene...
  • Seite 33: Pipetting

    4 Pipetting 4 Pipetting 1. Vent the suction bellows Press the suction bellows together before inserting the pipette. 2. Attach pipette WARNING Ensure that the pipette is firmly in place. Never use force! Es- pecially with thin pipettes, there is a risk of glass breakage! Risk of injury! Always hold the pipette as close as possible to the upper end and push it...
  • Seite 34: Set Volume

    4 Pipetting 3. Fill pipette Immerse pipette tip into the test liq- uid. Carefully push the pipetting lever up- wards, and fill the pipette slightly above the desired mark. NOTICE Make sure that no liquid gets into the device! The function of the mem- brane filter is impaired, and the suction capacity decreases.
  • Seite 35 4 Pipetting 5. Empty pipette Hold collecting vessel at an angle. Place the pipette tip against the inner wall and press the pipetting lever down. For pipettes with waiting time (im- print e.g., 'Ex + 5 s'): As soon as the meniscus in the pipette comes to a standstill, observe the waiting time indicated on the pipette (here 5 s).
  • Seite 36: After Pipetting

    4 Pipetting 6. After pipetting Grip the pipette as high up as possi- ble, and pull it out of the adapter. Operating manual 9976 40...
  • Seite 37: Cleaning

    5 Cleaning 5 Cleaning Occasionally clean the housing parts with a damp cloth. When used prop- erly, the device is maintenance-free. 5.1 Autoclaving The device must be carefully cleaned before it is autoclaved. Clean the housing parts with a damp cloth. The device can be autoclaved at 121°C (250°F), 2 bar, and a holding time of at least 15 minutes according to DIN EN 285.
  • Seite 38 5 Cleaning For cleaning, rinse the adapter care- fully with a spray bottle filled with a suitable cleaning liquid (e.g., water). Then blow out and dry. First press the new membrane filter into the adapter with the thicker con- nection facing downwards (the thin- ner, conical side facing upwards).
  • Seite 39: Replace Valve System

    5 Cleaning 5.3 Replace valve system Unscrew suction bellows and adapter housing. Remove the upper part of the hous- ing for replacement. Carefully remove and replace the valve system. Reassemble the unit in reverse order and check for leaks. Operating manual 9976 40...
  • Seite 40: Check Tightness

    5 Cleaning 5.4 Check tightness After adjusting the meniscus, no liquid should drip from the pipette without op- erating the valves. If the pipette drips; see Malfunction – what to do?, p. 41 Operating manual 9976 40...
  • Seite 41: Malfunction - What To Do

    6 Malfunction – what to do? 6 Malfunction – what to do? Fault Possible cause What to do Suction capacity impaired Filter dirty or valve system de- Replace filter, Replace filter and fective clean adapter, p. 37 . Pipette drips Filter not placed correctly or Insert filter correctly, or replace valve system defective valve system;...
  • Seite 42: Product Markings

    7 Product markings 7 Product markings Symbol or number Meaning General warning signs Follow the operating instructions XXZXXXXX Batch number Operating manual 9976 40...
  • Seite 43: Ordering Information

    8 Ordering Information 8 Ordering Information macro pipette aid Description Color* Order no. macro pipetting aid, including. Re- gray 262 00 placement membrane filter (3 µm) Green 262 01 and operating instructions. Blue 262 02 magenta 262 03 * The colors refer to the adapter housing and screw ring.
  • Seite 44: Spare Parts

    9 Spare parts 9 Spare parts Adapter housing Color* Length (mm) Material Order no. gray 262 20 Green 262 23 Blue 262 21 magenta 262 22 Suction bellows with screw ring Color* Order no. gray 262 25 Green 262 28 Blue 262 26 magenta...
  • Seite 45: Valve System

    9 Spare parts Valve system Description Order no. Valve system 261 28 Operating manual 9976 40...
  • Seite 46: Repairs

    Send only cleaned and decontaminated devices to the address, which you received together with the return number. Attach the return number in a clearly visible place on the package. Contact addresses Germany: USA and Canada: ® BRAND GMBH + CO. KG BrandTech Scientific, Inc. Operating manual 9976 40...
  • Seite 47 F +1-860-767 2563 info@brand.de info@brandtech.com www.brand.de www.brandtech.com India: China: BRAND Scientific Equipment Pvt. Ltd. BRAND (Shanghai) Trading Co., Ltd. 303, 3rd Floor, ‘C‘ Wing, Delphi Guangqi Culture Plaza Hiranandani Business Park, Room 506, Building B Powai No. 2899, Xietu Road Mumbai–400 076 (India)
  • Seite 48: Warranty

    11 Warranty 11 Warranty We shall not be liable for the consequences of improper handling, use, servicing, operating or unauthorized repairs of the device or for the con- sequences of normal wear and tear, especially of wearing parts such as pistons, seals, valves and the breakage of glass.
  • Seite 49: Disposal

    12 Disposal 12 Disposal Before disposal, observe the relevant na- tional disposal regulations and ensure that the product is disposed of properly. Subject to technical changes, errors, and misprints. Operating manual 9976 40...
  • Seite 50 Mode d'emploi 9976 40...
  • Seite 51 Sommaire Sommaire 1 Conditions d'utilisation............52 Classes de danger................. 52 Symboles du mode d’emploi............52 Représentation................53 2 Sécurité .................. 54 Fonction..................55 Limites d'utilisation ..............55 Exclusions d'utilisation ..............55 Conditions de stockage ............... 55 3 Éléments fonctionnels et de commande ........56 4 Pipetage .................
  • Seite 52: Conditions D'utilisation

    • Veuillez joindre le mode d'emploi lorsque vous remettez cet appareil à des tiers. • Vous trouverez des versions mises à jour du mode d'emploi sur notre site www.brand.de. 1.1 Classes de danger Les mots de signalisation suivants caractérisent des dangers potentiels :...
  • Seite 53: Représentation

    1 Conditions d'utilisation 1.3 Représentation Représenta- Signification Représen- Signification tion tation 1. Task Caractérise une tâche. > Caractérise une condition. a., b., c. Caractérise une étape Caractérise un résultat. individuelle de la tâche. Mode d'emploi 9976 40...
  • Seite 54: Sécurité

    2 Sécurité 2 Sécurité À lire attentivement ! L’appareil de laboratoire macro peut être utilisé avec des matériaux, des procédés et des appareillages dangereux. Le mode d'emploi n'a pas pour but d'exposer tous les problèmes de sécurité susceptibles de se présen- ter.
  • Seite 55: Fonction

    2 Sécurité 2.1 Fonction L’appareil sert d’aide au pipetage de liquides avec des pipettes de mesure et pleines en verre ou en plastique, d’un volume compris entre 0,1 ml et 200 ml et avec un diamètre extérieur du tube d’aspiration < 9,2 mm. Si l’appareil est utilisé...
  • Seite 56: Éléments Fonctionnels Et De Commande

    3 Éléments fonctionnels et de commande 3 Éléments fonctionnels et de commande Soufflet (SI) Filtre à membrane (PP/PTFE) Bague filetée (PP) Adaptateur (SI) Bulle de soufflage (SI) Boîtier d’adaptateur (PP) Levier de pipetage Système de soupape (PP; SI, PTFE) Boîtier (PP) Boîtier (PP) Abr.
  • Seite 57: Pipetage

    4 Pipetage 4 Pipetage 1. Purger le soufflet Comprimer le soufflet avant d’insérer la pipette. 2. Insérer la pipette AVERTISSEMENT Veiller à la bonne assise de la pipette. Ne jamais employer la force ! Il existe un risque de bris de verre, en particulier pour les pipettes fines ! Risque de blessures ! Toujours tenir la pipette le plus près possible de l’extrémité...
  • Seite 58: Régler Le Volume

    4 Pipetage 3. Remplissage de la pipette Plonger la pointe de la pipette dans le liquide. Appuyer prudemment le levier de pi- petage vers le haut et remplir la pi- pette un peu au-dessus de la marque souhaitée. AVIS Veiller à ce que le liquide ne parvienne pas dans l’appareil ! La fonction du filtre à...
  • Seite 59 4 Pipetage 5. Vidage de la pipette Tenir le bac récupérateur à l’oblique. Appliquer la pointe de la pipette sur la paroi intérieure et appuyer le levier de pipetage vers le bas. Pour les pipettes avec temps d’at- tente (impression par ex. « Ex + 5 s ») : Dès que le ménisque s’arrête dans la pipette, respecter le temps d’attente indiqué...
  • Seite 60 4 Pipetage 6. Après le pipetage Saisir la pipette le plus haut possible et la retirer de l’adaptateur. Mode d'emploi 9976 40...
  • Seite 61: Nettoyage

    5 Nettoyage 5 Nettoyage Essuyer les pièces du boîtier de temps en temps avec un chiffon humide. L'appareil ne requiert pas d’entretien s’il est utilisé correctement. 5.1 Autoclavage L’appareil doit être nettoyé soigneusement avant l’autoclavage. Essuyer les pièces du boîtier avec un chiffon humide. L’appareil est autoclavable à 121 °C (250 °F), 2 bar et une durée de maintien d’au moins 15 minutes se- lon la DIN EN 285.
  • Seite 62 5 Nettoyage Pour le nettoyage de l’adaptateur, rincer soigneusement avec un flacon pulvérisateur rempli d’un liquide de nettoyage approprié, par ex. de l’eau. Puis, souffler et sécher. Enfoncer le nouveau filtre à mem- brane tout d'abord dans l’adapta- teur, avec le raccord plus épais vers le bas (le côté...
  • Seite 63: Remplacer Le Système De Soupape

    5 Nettoyage 5.3 Remplacer le système de soupape Dévisser le soufflet et le boîtier d’adaptateur. Pour le remplacement, retirer la par- tie supérieure du boîtier. Retirer pru- demment le système de soupape et remplacer. Réassembler l’appareil dans l’ordre inverse et contrôler l’étanchéité. Mode d'emploi 9976 40...
  • Seite 64: Contrôler L'étanchéité

    5 Nettoyage 5.4 Contrôler l’étanchéité Après le réglage du ménisque, le liquide ne doit pas goutter hors de la pipette sans actionnement des soupapes. Si la pipette goutte, voir Dérangement - que faire ?, p. 65 Mode d'emploi 9976 40...
  • Seite 65: Dérangement - Que Faire

    6 Dérangement - que faire ? 6 Dérangement - que faire ? Dérangement Cause possible Que faire Puissance d’aspiration compromise Filtre encrassé ou système Remplacer le filtre, Rempla- de soupape défectueux cer le filtre et nettoyer l’adaptateur, p. 61 . La pipette goutte Le filtre n’est pas correcte- Installer correctement le ment installé...
  • Seite 66: Marquage Sur Le Produit

    7 Marquage sur le produit 7 Marquage sur le produit Symbole ou numéro Signification Avertissements généraux Respecter le mode d’emploi XXZXXXXX Numéro de lot Mode d'emploi 9976 40...
  • Seite 67: Informations Pour La Commande

    8 Informations pour la commande 8 Informations pour la commande Auxiliaire de pipetage macro Description Couleur* N° de commande Auxiliaire de pipetage macro, com- gris 262 00 pris Filtre à membrane de rechange vert 262 01 3 µm et mode d’emploi.
  • Seite 68: Pièces Détachées

    9 Pièces détachées 9 Pièces détachées Boîtier d’adaptateur Couleur* Longueur mm Matériau N° de commande gris 262 20 vert 262 23 bleu 262 21 magenta 262 22 Soufflet avec bague filetée Couleur* N° de commande gris 262 25 vert 262 28 bleu 262 26 magenta 262 27...
  • Seite 69 9 Pièces détachées Système de soupape Description N° de commande Système de soupape 261 28 Mode d'emploi 9976 40...
  • Seite 70: Réparation

    Remplir « l’Attestation de Décontamination » et la retourner avec l’appa- reil au fabricant ou au revendeur. Demander le formulaire au fournisseur ou au fabricant ou bien en téléchargement gratuit sous www.brand.de. Aux États-Unis et au Canada : Merci de contacter BrandTech Scientific, Inc. pour demander les condi- tions de retour de l’appareil avant de le renvoyer au service après-vente.
  • Seite 71 F +1-860-767 2563 info@brand.de info@brandtech.com www.brand.de www.brandtech.com Inde : Chine : BRAND Scientific Equipment Pvt. Ltd. BRAND (Shanghai) Trading Co., Ltd. 303, 3rd Floor, ‘C‘ Wing, Delphi Guangqi Culture Plaza Hiranandani Business Park, Room 506, Building B Powai No. 2899, Xietu Road Mumbai–400 076 (Inde)
  • Seite 72: Responsabilité Pour Défauts

    11 Responsabilité pour défauts 11 Responsabilité pour défauts Nous déclinons toute responsabilité en cas de conséquences d'un traite- ment, d'une utilisation, d'un entretien et d'une manipulation incorrects, d'une réparation non autorisée de l'appareil ou d'une usure normale, no- tamment des pièces d'usure, telles que les pistons, les joints d'étanchéité, les soupapes, et de rupture de pièces en verre.
  • Seite 73: Évacuation

    12 Évacuation 12 Évacuation Avant l’élimination, respectez les direc- tives d’élimination nationales correspon- dantes et déposez le produit auprès d'un centre de traitement des déchets. Sous réserve de modifications, d'erreurs et d'erreurs d'impression. Mode d'emploi 9976 40...
  • Seite 74 Instrucciones de manejo 9976 40...
  • Seite 75 Índice Índice 1 Información general sobre las instrucciones de uso ....76 Niveles de riesgo ................76 Símbolos del manual de instrucciones de uso ......76 Visualización................. 77 2 Seguridad ................78 Función ..................79 Límites de empleo................ 79 Condiciones de empleo ............... 79 Condiciones de almacenamiento..........
  • Seite 76: Información General Sobre Las Instrucciones De Uso

    • Adjuntar el manual de instrucciones cuando se entregue este equipo a un tercero. • En nuestro sitio web https://www.brand.de/es/, encontrará versio- nes actualizadas del manual de instrucciones. 1.1 Niveles de riesgo Las siguientes palabras de advertencia hacen referencia a posibles ries-...
  • Seite 77: Visualización

    1 Información general sobre las instrucciones de uso 1.3 Visualización Viñeta Significado Viñeta Significado 1. Tarea Hace referencia a una > Hace referencia a un requisito. tarea. a., b., c. Hace referencia a cada Hace referencia a un resultado. uno de los pasos para realizar una tarea.
  • Seite 78: Seguridad

    2 Seguridad ¡Leer todo el manual con atención por favor! El equipo de laboratorio macro puede utilizarse en combinación con ma- teriales, procesos de trabajo y aparatos riesgosos. No obstante, el manual de instrucciones no puede hacer referencia a todas las cuestiones que, eventualmente, podrían afectar la seguridad.
  • Seite 79: Función

    2 Seguridad 8. Comprobar siempre que el equipo esté en buenas condiciones antes de utilizarlo. Si se detectan fallas en el equipo, cesar el pipeteo de in- mediato y seguir las instrucciones del capítulo «¿Qué hacer en caso de averías?» en el apartado ¿Qué hacer en caso de averías?, p. 91 o, eventualmente, contactar con el fabricante.
  • Seite 80: Elementos De Mando Y Funcionamiento

    3 Elementos de mando y funcionamiento 3 Elementos de mando y funcionamiento Pera de succión (SI) Filtro de membrana (PP/PTFE) Anillo roscado (PP) Adaptador (SI) Pulsador de soplado (SI) Carcasa del adaptador (PP) Mando de pipeteo Sistema de válvulas (PP; SI, PTFE) Carcasa (PP) Carcasa (PP) Abrev.
  • Seite 81 3 Elementos de mando y funcionamiento Abrev. Material PTFE Politetrafluoroetileno Silicona Instrucciones de manejo 9976 40...
  • Seite 82: Pipeteo

    4 Pipeteo 4 Pipeteo 1. Evacuar el aire de la pera de succión Antes de colocar la pipeta, apretar la pera de succión. 2. Insertar la pipeta ADVERTENCIA Verificar que la pipeta se haya ajustado con firmeza. ¡No utili- zar nunca la fuerza! ¡En especial, en el caso de las pipetas del- gadas, existe el riesgo de rotura del vidrio! ¡Riesgo de lesiones! En lo posible, sujetar siempre la pipe- ta por el extremo superior con firme-...
  • Seite 83: Configurar Volumen

    4 Pipeteo 3. Llenar la pipeta Sumergir la punta de la pipeta en el líquido. Presionar el mando de pipeteo con cuidado hacia arriba y llenar la pipeta apenas por arriba de la marca desea- AVISO ¡Asegurarse de que no ingrese líquido en el equipo! Esto afecta la función del filtro de membrana y disminuye la capacidad de succión.
  • Seite 84 4 Pipeteo 5. Vaciar la pipeta Mantener inclinado el recipiente de recogida. Colocar la punta de la pipe- ta contra la pared interior y presionar el mando de pipeteo hacia abajo. En caso de pipetas con tiempo de espera (por ejemplo, con la inscrip- ción «Ex + 5 s»): En cuanto el menisco en la pipeta se encuentre en reposo, respetar el...
  • Seite 85 4 Pipeteo 6. Tras pipetear Sujetar la pipeta lo más arriba posi- ble y extraerla del adaptador. Instrucciones de manejo 9976 40...
  • Seite 86: Limpieza

    5 Limpieza 5 Limpieza Limpiar las partes de la carcasa con un paño húmedo de forma esporádi- ca. Si el equipo se utiliza de manera adecuada, no requiere mantenimien- 5.1 Esterilización en autoclave Antes de esterilizar en autoclave, el equipo se debe limpiar con cuidado. Limpiar las partes de la carcasa con un paño húmedo.
  • Seite 87 5 Limpieza Extraer la pipeta. Desenroscar la carcasa del adapta- dor. Retirar el filtro de membrana dañado. Retirar el adaptador de la carcasa del adaptador presionando hacia arriba. Limpiar el adaptador con cuidado uti- lizando una piseta llena de un líquido de limpieza adecuado, como, por ejemplo, agua.
  • Seite 88 5 Limpieza AVISO ¡No todos los filtros de membrana son adecuados! Utilizar solo accesorios ori- ginales. El equipo se entrega con filtros con poros de 3 µm de ancho. El filtro de membrana se puede esterilizar en auto- clave hasta cinco veces a 121 °C. La efi- cacia de la esterilización en autoclave debe ser comprobada en cada caso por el usuario.
  • Seite 89: Cambio Del Sistema De Válvulas

    5 Limpieza 5.3 Cambio del sistema de válvulas Desenroscar la pera de succión y la carcasa del adaptador. Para el cambio, retirar la parte supe- rior de la carcasa. Retirar con cuidado el sistema de válvulas y sustituirlo. Volver a ensamblar el equipo proce- diendo de manera inversa y compro- bar la estanqueidad.
  • Seite 90: Control De Estanqueidad

    5 Limpieza 5.4 Control de estanqueidad Tras ajustar el menisco, la pipeta no debe gotear ningún líquido en tanto no se ac- cione ninguna válvula. Si la pipeta gotea, contemplar el apartado ¿Qué hacer en caso de averías?, p. 91 Instrucciones de manejo 9976 40...
  • Seite 91: Qué Hacer En Caso De Averías

    6 ¿Qué hacer en caso de averías? 6 ¿Qué hacer en caso de averías? Avería Posible causa ¿Qué hacer? La capacidad de succión se encuentra El filtro está sucio o el siste- Cambiar el filtro, contem- afectada ma de válvulas dañado plar el apartado Cambio del filtro y limpieza del adapta- dor, p. 86 .
  • Seite 92: Marcado En El Producto

    7 Marcado en el producto 7 Marcado en el producto Marcado o número Significado Advertencia general Contemplar el manual de instrucciones XXZXXXXX Número de lote Instrucciones de manejo 9976 40...
  • Seite 93: Información Para Pedidos

    8 Información para pedidos 8 Información para pedidos Auxiliar de pipeteado macro Descripción Color* N.° de pedido Auxiliar de pipeteado macro con fil- gris 262 00 tro de membrana de repuesto de verde 262 01 3 µm y manual de instrucciones.
  • Seite 94: Piezas De Repuesto

    9 Piezas de repuesto 9 Piezas de repuesto Carcasa del adaptador Color* Longitud en mm Material N.° de pedido gris 262 20 verde 262 23 azul 262 21 magenta 262 22 Pera de succión con anillo roscado Color* N.° de pedido gris 262 25 verde...
  • Seite 95: Sistema De Válvulas

    9 Piezas de repuesto Sistema de válvulas Descripción N.° de pedido Sistema de válvulas 261 28 Instrucciones de manejo 9976 40...
  • Seite 96: Reparación

    Completar la «Declaración de inocuidad» y enviarla al fabricante o distri- buidor junto con el equipo. Los formularios pueden solicitarse al distri- buidor o al fabricante, o descargarse en www.brand.de/es/. Dentro de EE. UU. y Canadá Consultar las condiciones para el envío con BrandTech Scientific, Inc. an- tes de enviar el equipo al servicio técnico.
  • Seite 97: Direcciones De Contacto

    10 Reparación Direcciones de contacto Alemania: EE. UU. y Canadá: ® BRAND GMBH + CO KG BrandTech Scientific, Inc. Otto-Schott-Straße 25 11 Bokum Road 97877 Wertheim (Germany) Essex, CT 06426-1506 (USA) Tel.: +49 9342 808 0 Tel.: +1-860-767 2562 Fax: +49 9342 808 98000 Fax: +1-860-767 2563 info@brand.de...
  • Seite 98: Responsabilidad Por Defectos

    Tampoco seremos provocados de los daños resultados de acciones no descritas en las instrucciones de manejo o por el uso piezas de requesto o comonentes no originales. EE.UU. y Canadá: Encontrará informaciones sobre la garantía en el sitio www.brand- tech.com. Instrucciones de manejo 9976 40...
  • Seite 99: Eliminación

    12 Eliminación 12 Eliminación Antes de desechar el equipo, contemplar las respectivas normas nacionales de eli- minación de residuos y desecharlo de manera correspondiente. Todos los derechos reservados en caso de modificaciones técnicas, errores y errores de impresión. Instrucciones de manejo 9976 40...
  • Seite 100 Istruzione 9976 40...
  • Seite 101 Indice dei contenuti Indice dei contenuti 1 Destinazione d'uso ..............102 Livelli di pericolo ................102 Simboli delle istruzioni per l'uso..........102 Rappresentazione ................ 103 2 Sicurezza ................104 Funzioni ..................105 Limiti di impiego ................105 Usi non previsti................105 Condizioni per lo stoccaggio ............
  • Seite 102: Destinazione D'uso

    • Accludere queste istruzioni per l'uso quando si passa questo stru- mento a terzi. • Trovate versioni aggiornate di queste istruzioni per l'uso sulla nostra homepage www.brand.de. 1.1 Livelli di pericolo I seguenti pittogrammi segnalano i possibili pericoli: Pittogramma (parola chiave)
  • Seite 103: Rappresentazione

    1 Destinazione d'uso 1.3 Rappresentazione Rappresen- Significato Rappresen- Significato tazione tazione 1. Task Indica un compito da > Indica un presupposto da rispettare. espletare. a., b., c. Indica singoli passaggi Indica un risultato. di un compito. Istruzione 9976 40...
  • Seite 104: Sicurezza

    2 Sicurezza 2 Sicurezza Leggere attentamente prima dell'uso! Lo strumento da laboratorio macro può essere utilizzato con materiali, procedure di lavoro e apparecchiature pericolose. Le istruzioni per l'uso non possono però coprire tutte le eventuali problematiche di sicurezza che possono eventualmente presentarsi. È responsabilità dell'utilizzatore osservare adeguate prescrizioni per la sicurezza e la salute e definire pri- ma dell'uso le opportune limitazioni.
  • Seite 105: Funzioni

    2 Sicurezza 2.1 Funzioni Lo strumento serve come ausilio per il dosaggio di liquidi con pipette gra- duate e tarate di vetro o plastica con un volume da 0,1 ml fino a 200 ml e con un diametro esterno del tubo di aspirazione < 9,2 mm. Con un utilizzo corretto dello strumento il liquido dosato viene a contatto solo con la pi- petta.
  • Seite 106: Condizioni Per Lo Stoccaggio

    2 Sicurezza 2.4 Condizioni per lo stoccaggio Conservare l'apparecchio e gli accessori perfettamente puliti in un luogo fresco e asciutto. Temperatura di immagazzinamento: da -20 °C a 50 °C (da -4 °F a 122 °F). Umidità relativa dell'aria: dal 5 % al 95 %. Istruzione 9976 40...
  • Seite 107: Elementi Di Funzionamento E Di Comando

    3 Elementi di funzionamento e di comando 3 Elementi di funzionamento e di comando Pompetta di aspirazione (SI) Filtro a membrana (PP/PTFE) Ghiera filettata (PP) Adattatore (SI) Soffietto (SI) Alloggiamento adattatore (PP) Levetta della pipetta Sistema di valvole (PP, SI, PTFE) Alloggiamento (PP) Alloggiamento (PP) Abbrev.
  • Seite 108: Aspirazione Con Pipetta

    4 Aspirazione con pipetta 4 Aspirazione con pipetta 1. Sfiatare la pompetta di aspirazione Comprimere la pompetta di aspira- zione prima di innestare la pipetta. 2. Innestare la pipetta AVVERTENZA! Assicurarsi della salda sede della pipetta. Non applicare mai forza eccessiva! Sussiste il pericolo di rottura del vetro, in par- ticolare in caso di pipette sottili! Pericolo di lesioni! Afferrare la pipetta il più...
  • Seite 109: Regolare Il Volume

    4 Aspirazione con pipetta 3. Riempire la pipetta Immergere la punta della pipetta nel liquido. Premere la levetta della pipetta con cautela in alto e riempirla fino a supe- rare di poco la marcatura desiderata. AVVISO! Prestare attenzione che non giunga del liquido nello strumento! La fun- zione del filtro a membrana viene compromessa e la potenza di aspira- zione diminuisce.
  • Seite 110 4 Aspirazione con pipetta 5. Svuotare la pipetta Tenere il recipiente di raccolta in mo- do obliquo. Appoggiare la punta della pipetta alla parete interna e premere la levetta verso il basso. in caso di pipette con tempo di at- tesa (Dicitura ad es.
  • Seite 111 4 Aspirazione con pipetta 6. Dopo il pipettaggio Afferrare la pipetta quanto più possi- bile in alto ed estrarla dall'adattato- Istruzione 9976 40...
  • Seite 112: Pulizia

    5 Pulizia 5 Pulizia Pulire occasionalmente i componenti dell'alloggiamento con un panno umido. Con un utilizzo conforme, lo strumento non necessita di manuten- zione. 5.1 Sterilizzazione in autoclave Prima di utilizzare l'autoclave occorre pulire accuratamente lo strumento. Pulire i componenti dell'alloggiamento con un panno umido. Lo strumen- to può...
  • Seite 113 5 Pulizia Estrarre la pipetta. Svitate l'alloggiamento dell'adattato- Rimuovere il filtro a membrana difet- toso. Estrarre l'adattatore dall'alloggia- mento, premendolo verso l'alto. Per pulire l'adattatore, sciacquarlo accuratamente con l'aiuto di uno spruzzino riempito con un liquido de- tergente adatto, ad es. acqua. Suc- cessivamente soffiarlo con aria e asciugarlo.
  • Seite 114 5 Pulizia AVVISO! Non tutti i filtri a membrana sono adatti! Utilizzare solo accessori originali. Lo strumento è dotato di serie con filtri con un'ampiezza dei pori di 3 µm. Il filtro a membrana può essere sterilizzato in au- toclave per cinque volte a 121 °C. È re- sponsabilità...
  • Seite 115: Sostituzione Del Sistema Di Valvole

    5 Pulizia 5.3 Sostituzione del sistema di valvole Svitare il soffietto di aspirazione e l'alloggiamento dell'adattatore. Rimuovere la parte superiore dell'al- loggiamento per la sostituzione. Estrarre con cautela il sistema di val- vole e sostituirlo. Rimontare lo strumento in ordine in- verso e controllarne la tenuta.
  • Seite 116: Controllare La Tenuta

    5 Pulizia 5.4 Controllare la tenuta Dopo la regolazione del menisco e senza azionare le valvole non deve fuoriuscire del liquido dalla pipetta. Nel caso in cui la pipetta dovesse gocciolare, vedere Ano- malia - Cosa fare?, p. 117 Istruzione 9976 40...
  • Seite 117: Anomalia - Cosa Fare

    6 Anomalia - Cosa fare? 6 Anomalia - Cosa fare? Anomalia Possibile causa Soluzione Potenza di aspirazione compromessa Filtro sporco o sistema di Sostituire il filtro, Sostitu- valvole difettoso zione del filtro e pulizia dell'adattatore, p. 112 . La pipetta gocciola Il filtro non è...
  • Seite 118: Marcatura Sul Prodotto

    7 Marcatura sul prodotto 7 Marcatura sul prodotto Simbolo o numero Significato Segnali di avvertimento generali Rispettare le istruzioni per l'uso XXZXXXXX Numero del lotto Istruzione 9976 40...
  • Seite 119: Informazioni Ordinazione

    8 Informazioni ordinazione 8 Informazioni ordinazione Ausilio di pipettaggio macro Descrizione Colore* Nr. ord. Ausilio di pipettaggio macro, incl. grigio 262 00 Filtro a membrana sostitutivo 3 µm verde 262 01 e istruzioni per l'uso. 262 02 magenta 262 03 * I colori si riferiscono all'alloggiamento dell'adattatore e alla ghiera filet- tata.
  • Seite 120: Pezzi Di Ricambio

    9 Pezzi di ricambio 9 Pezzi di ricambio Alloggiamento dell'adattatore Colore* Lunghezza mm Materiale Nr. ord. grigio 262 20 verde 262 23 262 21 magenta 262 22 Soffietto di aspirazione con ghiera filettata Colore* Nr. ord. grigio 262 25 verde 262 28 262 26 magenta...
  • Seite 121: Sistema Di Valvole

    9 Pezzi di ricambio Adattatore di silicone Lunghezza mm Nr. ord. 261 46 Sistema di valvole Descrizione Nr. ord. Sistema di valvole 261 28 Istruzione 9976 40...
  • Seite 122: Riparazione

    Compilare la 'Dichiarazione di assenza di rischi per la salute' ed inviarla con lo strumento al distributore o al produttore. I moduli possono essere richiesti al distributore o al produttore, oppure si possono scaricare dal si- to www.brand.de. Istruzione 9976 40...
  • Seite 123: Indirizzi Di Contatto

    Applicare il numero di reso bene in vista sull'esterno del pacco. Indirizzi di contatto Germania: Stati Uniti e Canada: ® BRAND GMBH + CO KG BrandTech Scientific, Inc. Otto-Schott-Straße 25 11 Bokum Road 97877 Wertheim (Germania)
  • Seite 124: Garanzia

    11 Garanzia 11 Garanzia Non ci assumiamo alcuna responsabilità per le conseguenze di manipola- zione, uso, manutenzione e impiego non corretti, o per riparazioni non autorizzate dello strumento o per le conseguenze del normale consumo, in particolare dei componenti soggetti ad usura, come ad esempio pisto- ni, guarnizioni e valvole, e in caso di rottura del vetro.
  • Seite 125: Smaltimento

    12 Smaltimento 12 Smaltimento Prima di smaltire lo strumento consulta- re le disposizioni nazionali in materia di smaltimento e conferire il prodotto ad un idoneo centro di smaltimento rifiuti. Salvo modifiche tecniche, errori e refusi. Istruzione 9976 40...
  • Seite 126 Instruções 9976 40...
  • Seite 127 Índice remissivo Índice remissivo 1 Regras de utilização..............128 Níveis de perigo................128 Símbolos das instruções de utilização........128 Representação ................129 2 Segurança................130 Função ..................131 Limites de aplicação ..............131 Exclusões de aplicação ..............131 Condições de armazenamento ........... 132 3 Elementos de funções e de comando .........
  • Seite 128: Regras De Utilização

    • Se entregar o aparelho a terceiros, inclua também as instruções de utilização. • Encontra versões atualizadas das instruções de utilização na nossa página inicial www.brand.de. 1.1 Níveis de perigo As seguintes palavras-chave identificam possíveis perigos: Palavra-chave...
  • Seite 129: Representação

    1 Regras de utilização 1.3 Representação Representaç Significado Representa Significado ão ção 1. Task Identifica uma tarefa. > Identifica um requisito. a., b., c. Identifica passos Identifica um resultado. individuais da tarefa. Instruções 9976 40...
  • Seite 130: Segurança

    2 Segurança 2 Segurança Ler obrigatoriamente com atenção! O aparelho de laboratório macro pode ser utilizado em combinação com materiais perigosos, processos de trabalho e equipamentos. No entanto, as instruções de utilização não podem mostrar todos os problemas de segurança que possam ocorrer. É da responsabilidade do utilizador assegurar o cumprimento das prescrições segurança e de saúde e...
  • Seite 131: Função

    2 Segurança 2.1 Função O aparelho é utilizado como auxiliar na pipetagem de líquidos com pipetas com e sem graduação de vidro ou de plástico na gama de volume de 0,1 ml até 200 ml e com um tubo de sucção de diâmetro exterior < 9,2 mm.
  • Seite 132: Condições De Armazenamento

    2 Segurança 2.4 Condições de armazenamento Armazenar o aparelho e os acessórios apenas enquanto limpos em local fresco e seco. Temperatura de armazenamento: de -20 °C até + 50 °C (de -4 °F até 122 °F). Humidade relativa do ar: 5 % até 95 %. Instruções 9976 40...
  • Seite 133: Elementos De Funções E De Comando

    3 Elementos de funções e de comando 3 Elementos de funções e de comando Fole de sucção (SI) Filtro de membrana (PP/PTFE) Anel roscado (PP) Adaptador (SI) Bolha Blow-out (SI) Caixa do adaptador (PP) Alavanca de pipetagem Sistema de válvula (PP; SI, PTFE) Caixa (PP) Caixa (PP) Abreviatura...
  • Seite 134: Pipetagem

    4 Pipetagem 4 Pipetagem 1. Ventilar fole de sucção Pressionar o fole de sucção antes de inserir a pipeta. 2. Inserir pipeta ATENÇÃO! Verificar se a pipeta está bem assente. Nunca utilizar a força! Especialmente em pipetas finas existe o perigo de quebra do vidro! Perigo de ferimentos! Segurar sempre a pipeta o mais estanque possível na extremidade...
  • Seite 135 4 Pipetagem 3. Encher pipeta Mergulhar a ponta da pipeta no líquido. Pressionar cuidadosamente a alavanca de pipetagem para cima e encher a pipeta ligeiramente acima da marca pretendida. AVISO Garantir que nenhum líquido entre no aparelho! A função do filtro de membrana é...
  • Seite 136 4 Pipetagem 5. Esvaziar pipeta Segurar o recipiente de recolha obliquamente. Colocar a ponta da pipeta na parede interior e pressionar a alavanca da pipetagem para baixo. no caso de pipetas com tempo de espera (impressão por ex. 'Ex + 5 s'): Assim que o menisco na pipeta ficar imobilizado, respeitar o tempo de espera indicado na pipeta (aqui 5...
  • Seite 137 4 Pipetagem 6. Após a pipetagem Segurar a pipeta o mais alto possível e retirá-la do adaptador. Instruções 9976 40...
  • Seite 138: Limpeza

    5 Limpeza 5 Limpeza Ocasionalmente limpar as peças da caixa com um pano húmido. Em caso de utilização correta, o aparelho é isento de manutenção. 5.1 Autoclavagem Antes da autoclavagem, o aparelho deve ser cuidadosamente limpo. Limpar as peças da caixa com um pano húmido. O aparelho é autoclavável a 121°C (250 °F), 2 bar e um tempo de paragem de pelo menos 15 minutos de acordo com a DIN EN 285.
  • Seite 139 5 Limpeza Para a limpeza, enxaguar cuidadosamente o adaptador com um vaporizador cheio com um líquido de limpeza adequado, por ex., água. De seguida, soprar e secar. Pressione primeiro o novo filtro de membrana no adaptador com a ligação mais grossa virada para baixo (o lado mais fino e cónico virado para cima).
  • Seite 140: Substituir O Sistema De Válvula

    5 Limpeza 5.3 Substituir o sistema de válvula Desaparafusar o fole de sucção e a caixa do adaptador. Retirar a parte superior da caixa para a substituição. Remover e substituir cuidadosamente o sistema de válvulas. Completar o aparelho novamente na ordem inversa e verificar a estanqueidade.
  • Seite 141: Verificar A Estanqueidade

    5 Limpeza 5.4 Verificar a estanqueidade Após ajustar o menisco, nenhum líquido deve gotejar da pipeta sem acionar as válvulas. Se a pipeta gotejar, ver Avaria - O que fazer?, p. 142 Instruções 9976 40...
  • Seite 142: Avaria - O Que Fazer

    6 Avaria - O que fazer? 6 Avaria - O que fazer? Avaria Causa possível O que fazer Capacidade de sucção prejudicada Filtro sujo ou sistema de Substituir o filtro, Substituir válvulas com defeito o filtro e limpar o adaptador, p. 138 . A pipeta goteja Filtro não encaixado Inserir corretamente o filtro...
  • Seite 143: Identificação No Produto

    7 Identificação no produto 7 Identificação no produto Carateres ou números Significado Sinais de aviso gerais Respeitar as instruções de utilização XXZXXXXX Número de lote Instruções 9976 40...
  • Seite 144: Informações De Encomenda

    8 Informações de encomenda 8 Informações de encomenda Assistente de pipetagem da macro Descrição Cor* N.º Enc. Assistente de pipetagem da macro, cinzento 262 00 incl. Filtro de membrana de verde 262 01 substituição de 3 µm e instruções azul 262 02 de utilização.
  • Seite 145: Peças De Substituição

    9 Peças de substituição 9 Peças de substituição Caixa do adaptador Cor* Comprimento mm Material N.º Enc. cinzento 262 20 verde 262 23 azul 262 21 magenta 262 22 Fole de sução com anel roscado Cor* N.º Enc. cinzento 262 25 verde 262 28 azul...
  • Seite 146 9 Peças de substituição Adaptador de silicone Comprimento mm N.º Enc. 261 46 Sistema de válvula Descrição N.º Enc. Sistema de válvula 261 28 Instruções 9976 40...
  • Seite 147: Reparação

    Fora dos EUA e do Canadá Preencher a "Declaração relativa à segurança sanitária" e enviá-la juntamente com o aparelho ao fabricante ou distribuidor. Os formulários podem ser solicitados ao distribuidor ou fabricante ou podem ser descarregados em www.brand.de. Instruções 9976 40...
  • Seite 148 Colocar o número de devolução no exterior do pacote de modo bem visível. Endereço de contacto Alemanha: EUA e Canadá: ® BRAND GMBH + CO KG BrandTech Scientific, Inc. Otto-Schott-Straße 25 11 Bokum Road 97877 Wertheim (Alemanha)
  • Seite 149: Responsabilidade Por Defeitos

    11 Responsabilidade por defeitos 11 Responsabilidade por defeitos Não assumimos responsabilidade pelas consequências de manuseamento, utilização, manutenção, operação incorretos ou reparação não autorizada do aparelho, nem pelas consequências do desgaste normal, especialmente de peças de desgaste como, por ex., êmbolos, vedantes, válvulas, assim como em caso de quebra de vidro. O mesmo se aplica à...
  • Seite 150: Eliminação

    12 Eliminação 12 Eliminação Antes da eliminação, respeitar as respetivas prescrições nacionais relativamente à eliminação e assegurar que o produto é eliminado de forma adequada. Reserva-se o direito a alterações técnicas, erros e erros de impressão. Instruções 9976 40...
  • Seite 151 目录 1 使用规定 ..........152 危险等级 ...........152 使用说明书的符号 ........152 图示 ..........152 2 安全 ............ 153 功能 ..........153 使用限制条件 ........153 使用排除范围 ........154 储存条件 ...........154 3 功能和操作元件 .......... 155 4 吸移 ............ 156 5 清洁 ............ 159 高压消毒处理 ........159 更换过滤器和清洁适配器 ......159 更换阀系统 .........161 检查密封性...
  • Seite 152: 使用规定

    1 使用规定 • 在第一次使用前请认真阅读本使用说明书。 • 该使用说明书是此设备所包含的部分,必须妥善保存并且易于取 阅。 • 如果将本设备交予第三方,须随附本使用说明书。 • 在我方官网中可查阅更新版的使用说明书:www.brand.de。 1.1 危险等级 下列信号词提示可能存在的危险: 信号词 含义 危险 将导致重伤或死亡。 警告 可能导致重伤或死亡。 小心 可能导致轻伤或中度伤害。 提示 可能导致损失财物。 1.2 使用说明书的符号 图标 含义 图标 含义 危险位置 戴防护手套 戴护目镜 1.3 图示 图示 含义 图示 含义 表示一项任务。...
  • Seite 153: 使用限制条件

    2 安全 2 安全 务必请仔细通读! 实验室设备 macro 可与危险材料、工作过程和配件结合使用。本使用 说明书未展示可能出现的安全问题。用户有责任确保遵守安全法规和 健康法规,并在使用前确定存在的限制条件。 1. 在使用设备之前,每个用户都必须阅读并遵循本使用说明书。 2. 遵守一般危险提示和安全法规,例如穿戴防护服、护目镜和防护 手套。 3. 请遵守试剂制造商的信息。 4. 仅将设备用于液体计量,并且仅在规定的使用限制内使用。注意 使用排除范围,参见使用排除范围, 页 154 。如有疑问,请联 系制造商或经销商。 5. 工作时请始终确保不得危及用户或者其他人员。避免飞溅。仅使 用合适的容器。 6. 切勿使用暴力。 7. 只能使用原装配件和原装备件。不得进行任何技术更改。不得违 背使用说明书的说明进一步拆解设备! 8. 使用前请务必检查设备的状态是否正常。如果设备出现故障预 兆,立即停止吸移,并注意章节故障——如何处理?, 页 163 ,必要时联系制造商。 2.1 功能 该设备用作容量范围在 0.1 ml 至 200 ml 之间且吸管外径小于 9.2 mm 的玻璃或塑料测量和容量移液器吸移液体的辅助工具。在正确处理...
  • Seite 154: 使用排除范围

    2 安全 • 密度最大 2.4 g/cm 。 2.3 使用排除范围 该设备不得用于其蒸汽会侵蚀硅胶或者 PP 材质的液体。 该设备不适用于巴氏移液器。 2.4 储存条件 该设备和配件必须在清洁后进行冷却、干燥式存放。 存放温度:-20 °C 至 +50 °C(-4 °F 至 122 °F)。 相对空气湿度:5 % 至 95 %。 操作手册 9976 40...
  • Seite 155: 功能和操作元件

    3 功能和操作元件 3 功能和操作元件 吸球 (SI) 膜片过滤器 (PP/PTFE) 螺纹环 (PP) 适配器 (SI) 吹出式气囊 (SI) 适配器外壳 (PP) 吸移手柄 阀系统 (PP; SI, PTFE) 外壳 (PP) 外壳 (PP) 缩写 材料 聚丙烯 PTFE 聚四氟乙烯 硅胶 9976 40 操作手册...
  • Seite 156 4 吸移 4 吸移 1.为吸球排气 插上移液器之前,挤压吸球。 2.插上移液器 警告 注意移液器位置是否固定。切勿使用暴力!尤其是薄壁移液 器,存在玻璃断裂危险!受伤危险! 始终尽可能密封地抓住移液器的上 部末端,并小心地推入到适配器 中,直到停止不动。 始终保持插有移液器的设备垂直, 吸头朝下。 操作手册 9976 40...
  • Seite 157 4 吸移 3.填充移液器 将移液器吸头浸入液体中。 将吸移手柄小心地向上压并填充移 液器至稍微超过所需量标记处。 注意 此时注意,液体不得进入设备中!膜片过滤器的功能会受到不利影 响,且抽吸功能会下降。这种情况下,更换膜片过滤器,参见 更换 过滤器和清洁适配器, 页 159 。 注意 将吸移手柄向上移动地越多,那么抽吸效果越强,即弯月面上升得越 快! 针对容量大于 50 ml 的移液器,吸球中现有的真空不足以一次性吸 取足够的液体。这种情况下:重新挤压吸球并再次拉起。 4.调节体积 必要时用无纤维的毛巾擦拭移液器吸头。 将吸移手柄小心地向下压,直到弯月面调整正确。 9976 40 操作手册...
  • Seite 158 4 吸移 5.排空移液器 倾斜稳住收集容器。将移液器吸头 靠在内壁上,向下压吸移手柄。 针对有等待时间的移液器(例如 'Ex + 5 s' 字样): 一旦移液器中的弯月面静止,遵守 移液器上给定的等待时间(此处为 5 s)。 将移液器吸头在管壁上向上拉几毫 米。 注意 使用第三方制造的吹出式移液器时 吹出 一旦移液器中的弯月面静止,按一下小号吹出式吸球。将移液器吸头 在管壁上向上拉几毫米。 6.吸移后 尽可能抓住移液器上部位置,然后 将其从适配器中拉出。 操作手册 9976 40...
  • Seite 159: 高压消毒处理

    5 清洁 5 清洁 时不时用沾湿的毛巾擦拭外壳部件。常规使用时设备无需维护。 5.1 高压消毒处理 进行高压消毒前必须仔细清洁设备。用沾湿的毛巾擦拭外壳部件。设 备可完全在 121 °C (250 °F),2 bar 下高压消毒处理,依据 DIN EN 285,保持时间至少为 15 分钟。 5.2 更换过滤器和清洁适配器 警告 污染和感染的风险 戴防护手套和护目镜。 注意 只有在移液器过度填充或者抽吸功能受不利影响时才必要。 抽出移液器。 拧下适配器外壳。 抽出有缺陷的膜片过滤器。 将适配器从适配器外壳中向上抽 出。 清洁适配器时,使用例如水等适当 的清洁液体小心地冲洗吸头瓶。之 后吹干并晾放。 9976 40 操作手册...
  • Seite 160 5 清洁 首先将具有更厚接口的新膜片过滤 器向下压入适配器中(更薄的锥形 侧朝上)。 手动拧紧适配器外壳。 包括膜片过滤器在内的整套设备可 在 121 ℃ (2 bar) 条件下按照 DIN EN 285 标准进行高压消毒。 进行高温消毒时拧下吸球。 注意 并非每一个膜片过滤器都适合!仅使用 原装配件。该设备配有标准孔径为 3 µm 的过滤器。膜片过滤器在 121 ℃ 条件下最多可以高温消毒五次。用户每 次应自行对高压消毒处理的有效性进行 仔细检查。 操作手册 9976 40...
  • Seite 161: 更换阀系统

    5 清洁 5.3 更换阀系统 拧下吸球和适配器外壳。 更换时去取出外壳的上半部分。小 心地取出和更换阀系统。 按相反顺序再次组装设备并检查密 封性。 9976 40 操作手册...
  • Seite 162: 检查密封性

    5 清洁 5.4 检查密封性 调整弯月面之后,如果不致动阀,则不 得有液体从移液器中滴落。如果移液器 滴液,参见 故障——如何处理?, 页 163 操作手册 9976 40...
  • Seite 163: 故障--如何处理

    6 故障——如何处理? 6 故障——如何处理? 故障 可能的原因 如何处理 抽吸功率受到不利影响 过滤器脏污或阀系统有缺 更换过滤器,更换过滤器 陷 和清洁适配器, 页 159 。 移液器滴液 过滤器位置不正确或阀系 正确放入过滤器或更换阀 统有缺陷 系统,参见 更换过滤器和 清洁适配器, 页 159 。 移液器无法被稳住 硅胶适配器损坏 拧下外壳下半部分,更换 硅胶适配器 吸球自动通风 吸球或阀系统有缺陷 更换带有吸球或阀系统的 上接头 注意 设备只需要频繁进行目视检查,即可检查出损坏的部件,并轻松更换 为备件。自行维修的优点非常明显:节约成本和时间。 9976 40 操作手册...
  • Seite 164: 产品上的标识

    7 产品上的标识 7 产品上的标识 字符或编号 含义 一般警告标识 注意使用说明书 XXZXXXXX 批次号 操作手册 9976 40...
  • Seite 165: 订购信息

    8 订购信息 8 订购信息 macro 移液管助吸器 描述 颜色* 订购号 macro 移液管助吸器,包括3 µm 灰 262 00 备用膜片过滤器和使用说明书。 绿 262 01 蓝 262 02 洋红 262 03 * 颜色是指适配器外壳和螺纹环。 9976 40 操作手册...
  • Seite 166 9 备件 9 备件 适配器外壳 颜色* 长度 mm 材料 订购号 灰 262 20 绿 262 23 蓝 262 21 洋红 262 22 带螺纹环的吸球 颜色* 订购号 灰 262 25 绿 262 28 蓝 262 26 洋红 262 27 * 颜色是指适配器外壳和螺纹环。 3 µm 备用膜片过滤器 包装单位...
  • Seite 167 9 备件 阀系统 描述 订购号 阀系统 261 28 9976 40 操作手册...
  • Seite 168 载。 美国和加拿大之内 在将设备送修之前,请了解 BrandTech Scientific, Inc. 的退货条 件。 请仅将经过清洁和消毒的设备寄送到与寄回编号一起收到的地址处。 寄回编号标记在包装外部,可轻松查看到。 联系地址 德国: 美国和加拿大: BRAND GMBH + CO KG BrandTech ® Scientific, Inc. Otto-Schott-Straße 25 11 Bokum Road 97877 Wertheim (Germany) Essex, CT 06426-1506 (USA) 电话 +49 9342 808 0 电话 +1-860-767 2562 传真...
  • Seite 169 10 维修 BRAND Scientific Equipment Pvt.Ltd. 普兰德(上海)贸易有限公司 303, 3rd Floor, ‘C‘ Wing, Delphi 广汽文化广场 B 栋 Hiranandani Business Park, 506 室, Powai 斜土路2899 号, Mumbai–400 076 (India) 上海 200030(中华人民共和国) 电话 +91 22 42957790 电话 +86 21 6422 2318 传真 +91 22 42957791 传真...
  • Seite 170: 缺陷责任

    11 缺陷责任 11 缺陷责任 我们不承担由于不当拿取,使用,服务,操作或未授权的仪器维修产 生的 结果,我们同样不承担由于正常易损件如活塞,密封垫圈,阀门 的磨损或 者玻璃破损而产生的结果。我们也不承担由于不按照操作手 册/使用说明指 导的操作而产生的结果。我们不承担由于进行任何操 作手册未描述的拆卸 或由于非原装配件的使用而产生的结果。 美国和加拿大: 有关保修责任的 信息 请参见 www.brandtech.com。 操作手册 9976 40...
  • Seite 171: 废弃处理

    12 废弃处理 12 废弃处理 废弃处理前,请注意国内相应的处理法 规,对产品进行专业地废弃处理。 保留进行技术变更、出错和打印错误的权利。 9976 40 操作手册...
  • Seite 172 9976 40 | Printed in Germany | 22-0920-7...

Inhaltsverzeichnis