Herunterladen Inhalt Inhalt Diese Seite drucken
roco EDK 750 ÖBB Handbuch

roco EDK 750 ÖBB Handbuch

Eisenbahndrehkran
Vorschau ausblenden Andere Handbücher für EDK 750 ÖBB:
Inhaltsverzeichnis

Werbung

Verfügbare Sprachen

Verfügbare Sprachen

Eisenbahndrehkran EDK 750, ÖBB
Railway crane EDK 750, ÖBB
Otočného železničního jeřábu EDK 750, ÖBB
73038.indd 1
73038.indd 1
73038
Handbuch
Manual
Manuál
CZ
www.roco.cc
22.04.2021 06:46:02
22.04.2021 06:46:02

Werbung

Inhaltsverzeichnis
loading

Inhaltszusammenfassung für roco EDK 750 ÖBB

  • Seite 1 Eisenbahndrehkran EDK 750, ÖBB Railway crane EDK 750, ÖBB Otočného železničního jeřábu EDK 750, ÖBB 73038 Handbuch Manual Manuál www.roco.cc 73038.indd 1 73038.indd 1 22.04.2021 06:46:02 22.04.2021 06:46:02...
  • Seite 2: Enthaltenes Zubehör

    Enthaltenes Zubehör ▪ 1 x Traverse ......▪ 1 x Sicherungsbügel A ..▪ 2 x Sicherungsbügel B ..▪ 4 x Stützenbock ....▪ 4 x Unterlegbock klein ..▪ 4 x Unterlegbock groß ..▪ 6 x Hebeöse ......▪...
  • Seite 3: Inhaltsverzeichnis

    Inhaltsverzeichnis Einleitung ........................4 Inbetriebnahme ▪ Vor der ersten Inbetriebnahme ................7 ▪ Warnhinweise und Betriebsbedingungen ..............7 ▪ Aufrüstung.......................8 Allgemeine Bedienungshinweise ▪ Freilauf ........................9 ▪ Gegengewicht ......................9 ▪ Kranstützen ......................10 ▪ Traverse und Hebegurt ..................11 ▪ Technische Daten ....................12 ▪ Arbeitsmaße ......................12 ▪...
  • Seite 4: Einleitung

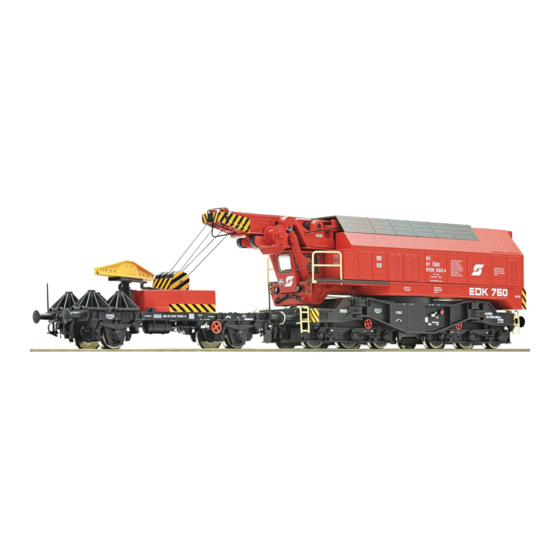
    Die vorliegende Betriebsanleitung soll Ihnen helfen, die umfangreichen Funktionen des Eisenbahndrehkranes zu nutzen. Wir wünschen viel Vergnügen und eine Gute Fahrt! Ihr Roco-Team Zum Vorbild Der Eisenbahndrehkran EDK 750 ist ein sechsachsiger Dieselkran. Der von VEB Schwer- maschinenbau S. M. Kirow Leipzig, Teil des Kombinats TAKRAF, Maschinenbau Kirow in Leipzig gebaute Kran kann, entsprechend abgestützt, Lasten bis 125 Tonnen heben.
  • Seite 5 Bildautor: F. Ratzenböck Bilder zeigen abweichende Farbvariante 73038.indd 5 73038.indd 5 22.04.2021 06:48:54 22.04.2021 06:48:54...
  • Seite 6 Bilderautoren: P. Pötzelsberger, H. Gogg 73038.indd 6 73038.indd 6 22.04.2021 06:50:11 22.04.2021 06:50:11...
  • Seite 7: Inbetriebnahme

    Stützen, kann der Kran umkippen und beschädigt werden! Bitte beachten Sie hierzu das Lastendiagramm auf Seite 12. ▪ Betriebsbedingungen Der kleinste befahrbare Radius für dieses Modell ist R2 (358 mm) des ROCO-Gleissystems. Aufgrund des hohen Eigengewicht und des Einachsantriebes, sind Steigungen nur bedingt be- fahrbar.
  • Seite 8: Aufrüstung

    ▪ Aufrüstung Sie können für Ihren Fahrbetrieb unter verschiedenen Kupplungen wählen. Wir empfehlen den Einsatz der ROCO-Kurzkupplung. Im beigelegten Zurüstbeutel finden Sie auch vorbildgetreue Teile für eine erweiterte Aufrüstung des Beiwagen bzw. Kranes, die Sie bitte vorsichtig montieren. Wahlweise Nur für Vitrine 73038.indd 8...
  • Seite 9: Allgemeine Bedienungshinweise

    Allgemeine Bedienungshinweise ▪ Freilauf Der Kran kann auch im Zugverband eingesetzt werden. Dazu muss zwingend der Freilauf an der Unterseite aktiviert werden. Hierfür ist der Verriegelungshebel am Antriebsdrehgestell nach vorne zu ziehen. Freilauf deaktiviert Der Kran ist selbstfahrend. Freilauf aktiviert Der Kran kann im Zugverband eingesetzt werden.
  • Seite 10: Kranstützen

    ▪ Kranstützen Beim Heben von Lasten müssen die Kranstützen ausgeklappt und die Stützenböcke untergelegt werden. Um einen Niveauausgleich (z. B. Gleisbettung) vorzunehmen, verwenden Sie bitte die Unter- stellböcke bzw. die Stellschrauben zur Feinjustierung. Achtung! Bei unsachgemäßer Handhabung kann der Kran umkippen und beschädigt werden. Bitte beachten Sie hierzu das Lastendiagramm auf Seite 12.
  • Seite 11: Traverse Und Hebegurt

    ▪ Traverse und Hebegurt Bei Verwendung der Traverse, diese am Kranhaken mit dem Sicherungsbügel A befestigen. Den Hebegurt auf gewünschte Länge abschneiden und in die Hebeösen einfädeln. Anschließend den Hebegurt an der Traverse mit dem Sicherungsbügel B befestigen oder direkt am Haken einhängen.
  • Seite 12: Technische Daten

    ▪ Technische Daten Länge über Puffer Beiwagen 98 mm Gewicht Kran 436 g Länge über Puffer Kran 136,5 mm Gewicht Beiwagen 42 g Länge über Puffer gesamt 235,5 mm Gegengewicht 36 g Gesamtgewicht: 514 g ▪ Arbeitsmaße (Angaben in mm) ▪...
  • Seite 13 ▪ Arbeitsvariante 1 mit Abstützung mit Gegengewicht 73038.indd 13 73038.indd 13 22.04.2021 06:52:18 22.04.2021 06:52:18...
  • Seite 14 ▪ Arbeitsvariante 2 ohne Abstützung mit Gegengewicht 80 g 240 g Achtung! Beim Drehen des Kranes mit Gegengewicht, aber ohne ausgeklappte Stützen, kann der Kran umkippen und beschädigt werden! 73038.indd 14 73038.indd 14 22.04.2021 06:52:19 22.04.2021 06:52:19...
  • Seite 15 ▪ Arbeitsvariante 3 ohne Abstützung ohne Gegengewicht 60 g 140 g 73038.indd 15 73038.indd 15 22.04.2021 06:52:21 22.04.2021 06:52:21...
  • Seite 16: Der Sounddecoder ▪ Funktionstastenbelegung

    Der Sounddecoder ▪ Funktionstastenbelegung (Auslieferungszustand) Der Kran ist ab Werk auf die Adresse 03 eingestellt F-Taste Funktion Licht vorne und hinten weiß Sound ein = Drehen, aus = Fahren (Geschwindigkeiten u. Richtung regelbar) Seilwinde heben (wenn F6 aus) Ausleger einfahren (wenn F5 aus) Ausleger ausfahren (wenn F4 aus) Seilwinde senken (wenn F3 aus) Ausleger senken (wenn F8 aus)
  • Seite 17: Funktionen

    ▪ Lichtfunktionen Die Lichtfunktionen sind mittels der F-Tasten schaltbar. F0 Licht hinten und vorne F11 Licht hinten aus F10 Arbeitsbeleuchtung 73038.indd 17 73038.indd 17 22.04.2021 06:52:31 22.04.2021 06:52:31...
  • Seite 18 F2 ein = Drehen F20 Endlageabschaltung Bei gleichzeitiger Aktivierung mit F2 wird das F2 aus = Fahren Drehen in die jeweilige Richtung nach errei- Die Steuerung erfolg mit dem Drehregler. chen der Endlage automatisch gestoppt. Das Drehen u. Fahren ist gleichzeitig nicht möglich.
  • Seite 19 F8 Ausleger heben / F7 Ausleger senken Nach erreichen der max. Hubhöhe bzw. der unteren Position wird die Funktion automatisch gestoppt. max. 30° F3 Haken heben / F6 Haken senken Nach erreichen der max. Hubhöhe wird die Funktion automatisch gestoppt. An der untersten Position muss die Funktion manuell per F-Taste gestoppt werden.
  • Seite 20: Kraneinstellungen, Cv-Liste

    ▪ Kraneinstellungen Der in diesem Kran enthaltene Sounddecoder der Firma ZIMO wurde optimal auf den Kran eingestellt. Dennoch können Sie viele Decoder-Eigenschaften Ihren Wünschen anpassen. Dazu lassen sich bestimmte Parameter (die so genannten CVs – Configuration Variable – oder Regi- ster) verändern.
  • Seite 21: Betrieb Mit Dcc-Zentrale (Multimaus)

    ▪ Firmware Update Der Krandecoder und die Hauptplatine sind mittels schwarzer Z21 updatefähig. Um Schäden zu vermeiden, darf auch für den Decoder nur die von Roco freigegebene Firm- ware Version verwendet werden. Die aktuellste Version steht auf Z21.eu zur Verfügung.
  • Seite 22: Wartung Und Pflege Des Modells

    Wartung und Pflege des Modells Damit Ihnen Ihr Kran lange Freude bereitet, sind regelmäßig gewisse Servicearbeiten zweck- mäßig. ▪ Reinigung der Kerben für Endlageabschaltung Sollte der Kran nicht mehr in der Endlage stehen bleiben (F2 + F20), müssen die Kerben für die Endlagenabschaltung gereinigt werden.
  • Seite 23: Reinigung Der Radstromkontakte

    ▪ Getriebedeckel abnehmen Beim Zusammenbau bitte auf die richtige Lage der Freilaufschaltnocke achten. Fig. 1. Freilaufschaltnocke ▪ Reinigung der Radstromkontakte Radstromkontakte können auf unsauberen Schienen leicht verschmutzen. Bitte nehmen Sie zu- erst den Getriebedeckel ab (Fig. 1). Dann entfernen Sie vorsichtig mit einem kleinen Pinsel den Schmutz an den gekennzeichneten Stellen.
  • Seite 24: Schmierung

    ▪ Schmierung Versehen Sie die im Schmierplan gekennzeichneten Stellen mit nur kleinen Öltropfen. Wir empfehlen den ROCO-Öler Art. Nr. 10906. Zur Schmierung der Getriebeteile (Zahnräder, Schnecke) empfehlen wir das ROCO-Spezialfett Art. Nr. 10905. Im Falle der Schmierung diese Teile bitte nicht ölen.
  • Seite 25: Haftreifenwechsel

    ▪ Haftreifenwechsel Die Haftreifen mit einer Nadel oder mit einem feinen Schraubendreher abziehen. Beim Aufzie- hen der neuen Haftreifen bitte darauf achten, dass dieser sich nicht verdreht. siehe Fig. 1 voir 73038.indd 25 73038.indd 25 22.04.2021 06:53:38 22.04.2021 06:53:38...
  • Seite 26: Mögliche Ursache

    Fehler Mögliche Ursache Lösung Beim Drehen bleibt Kerben für die Endlagenab- Kerben reinigen der Kran nicht mehr an schaltung sind verschmutzt Siehe Seite 22 der Endposition stehen (F2+F20) Kran fährt nicht Freilauf aktiv Freilauf deaktivieren Siehe Seite 9 Kran läßt sich nicht Freilauf deaktiviert Freilauf aktivieren ziehen...
  • Seite 27 Notizen / Notes 73038.indd 27 73038.indd 27 22.04.2021 06:53:42 22.04.2021 06:53:42...
  • Seite 28: Accessories Included

    Accessories included ▪ 1 x Crossbeam ....▪ 1 x Securing bracket A ..▪ 2 x Securing bracket B ..▪ 4 x Support block ....▪ 4 x Spacer block small ..▪ 4 x Spacer block large ..▪...
  • Seite 29 Table of Content Introduction ......................30 Commissioning ▪ Prior to initial commissioning ................31 ▪ Safty and operating instructions ................31 ▪ Fittings ........................32 General operating inctructions ▪ Freewheel ......................33 ▪ Counterweight .......................33 ▪ Crane supports ......................34 ▪ Crossbeam and sling ....................35 ▪ Technical data .......................36 ▪...
  • Seite 30: Introduction

    We wish you lots of enjoyment and a good journey! Your Roco Team The Original The EDK 750 railway slewing crane is a six-axle diesel crane. The archetype crane built by Maschinenbau Kirow in Leipzig can, if appropriately supported, lift loads of up to 125 metric tons.
  • Seite 31: Commissioning

    For this purpose, please observe the load diagram on page 36. ▪ Operating instructions The smallest radius this model should run is R2 (358 mm) of the ROCO track system (mo- del without tubes protecting pistons). Due to the high dead weight and the single-axle drive, gradients are only conditionally passable.
  • Seite 32: Fittings

    ▪ Fittings You can choose between various couplings for operation. We recommend the use of the ROCO close coupling. You can also find prototypical reproduction parts for extended equipment of the trailer or crane in the enclosed equipment bag. Please mount these carefully!
  • Seite 33: General Operating Inctructions

    General operating instructions ▪ Freewheel The crane can also travel as part of the train. For this purpose, it is essential that the freewheel on the underside is activated. For this purpose, pull the locking lever forward. Freewheel deactivated The crane is self-propelled. Freewheel activated The crane can travel as part of the train.
  • Seite 34: Crane Supports

    ▪ Crane supports When lifting loads, the crane supports must be unfolded and the support blocks placed under it. Please use the stands or the adjusting screws for level compensation. Warning! If handled incorrectly, the crane may tip and be damaged! For this purpose, please observe the load diagram on page 36.
  • Seite 35: Crossbeam And Sling

    ▪ Crossbeam and sling When using the crossbeam, fasten it to the crane hook using the securing bracket A. Cut off the sling to the required length and thread it into the lifting eyes. Then fasten the sling onto the crossbeam using the securing bracket B or hang it directly onto the hook.
  • Seite 36: Technical Data

    ▪ Technical data Length over buffer carriage 98 mm Weight Crane 436 g Length over buffer crane 136.5 mm Weight trolley 42 g Total length over buffer 235.5 mm Counterbalance 36 g Total weight: 514 g ▪ Working dimensions (specifications in mm) ▪...
  • Seite 37 ▪ Working variant 1 with support with counterweight 73038.indd 37 73038.indd 37 22.04.2021 06:56:55 22.04.2021 06:56:55...
  • Seite 38 ▪ Working variant 1 without support with counterweight 80 g 240 g Warning! If handled incorrectly and when turning the crane with counterweight without the supports being unfolded, the crane may tip and be damaged! 73038.indd 38 73038.indd 38 22.04.2021 06:56:55 22.04.2021 06:56:55...
  • Seite 39 ▪ Working variant 1 without support without counterweight 60 g 140 g 73038.indd 39 73038.indd 39 22.04.2021 06:56:57 22.04.2021 06:56:57...
  • Seite 40: The Sounddecoder

    The Sounddecoder ▪ Function key allocation (delivery state) The factory-set default adress of the crane is 03. F key Function Light front and rear white Sound On = Turn, Off = Drive (Speed and direction adjustable) Lift rope winch (if F6 off) Retract boom (if F5 off) Extend boom (if F4 off) Lower rope winch (if F3 off)
  • Seite 41: Light Functions

    ▪ Light functions The light functions can be switched using the F keys. F0 Lights at rear and front F11 Light at rear off F10 Work lighting 41 41 73038.indd 41 73038.indd 41 22.04.2021 06:57:14 22.04.2021 06:57:14...
  • Seite 42 F2 on = Turn F20 End position shutdown In case of simultaneous activation with F2 off = Travel F2, turning is stopped automatically on Control takes place using rotary control reaching the end position. Simultaneous turning and driving is not possible. End position End position F5 Extend boom / F4 Retract boom...
  • Seite 43 Lift F8 boom / Lower F7 boom After reaching the maximum stroke height or the lower position, the function is automatically stopped. max. 30° F3 Lift hook / F6 Lower hook After reaching the max. stroke height, the function is automatically stopped. At the lowest position, the function must be stopped manually using the F key.
  • Seite 44: Crane Settings, Cv- List

    ▪ Crane Settings The Sounddecoder has been optimally adjusted to this crane. You can still adapt numerous decoder properties to your wishes however. Certain parameters (referred to as CVs – Configu- ration Variable – or register) can be amended. Please check before each programming if this is really necessary. Incorrect settings can result in the decoder not reacting correctly.
  • Seite 45: Operation With A Dcc Command Station (Multimaus)

    ▪ Firmware Update The crane decoder and the main board can be updated with black Z21. To avoid damage, only the firmware version released by Roco may be used for the decoder. The latest version is available on Z21.eu. ▪ More Functions This can be downloaded as a pdf document MX659 from www.zimo.at.
  • Seite 46: Maintenance And Care Of The Model

    Maintenance and care of the model So that your crane continues to provide you with enjoyment, a certain amount of service work is expedient. ▪ Cleaning of the notches for end position shutdown Should the crane no longer stop in end position (F2 + F20), then the notches for end posi- tion shutdown must be cleaned.
  • Seite 47 ▪ Remove gearbox cover During assembly, please ensure that the freewheel switch cam is in the right position. Fig. 1. Freewheel switch cam ▪ Cleaning of wheel contacts Wheel contacts easily get dirty on tracks which are not entirely clean. First remove the gear cover (fig.
  • Seite 48: Lubrication

    Only apply small oil droplets onto the positions as marked in the lubrication plan. We recom- mend ROCO oiler Art. No. 10906. In order to lubricate the transmission parts (gear wheel, screw), we recommend using ROCO special grease Art. No.10905. If lu- bricated, do not oil these parts. siehe Fig. 1 voir 73038.indd 48...
  • Seite 49: Replacement Of Traction Tyres

    ▪ Replacement of traction tyres Remove the traction tyres using a needle or a thin screwdriver. When applying the new traction tyres, please ensure that they do not rotate. siehe Fig. 1 voir 73038.indd 49 73038.indd 49 22.04.2021 06:58:21 22.04.2021 06:58:21...
  • Seite 50: Troubleshooting Table

    Error Possible causes Solution When turning, the crane Notches for end position Clean notches no longer stops at the switch-off are dirty See Page 46 end position (F2+F20) Crane does not move Free-running is active Deactivate free-running See Page 33 Crane can not be pulled Free-running deactivated Enable free-running...
  • Seite 51 Notizen / Notes 73038.indd 51 73038.indd 51 22.04.2021 06:58:22 22.04.2021 06:58:22...
  • Seite 52: Accessoires Fournis

    Accessoires fournis ▪ 1x traverza ......▪ 1x zajišťovací třmen A ..▪ 2x zajišťovací třmen B ..▪ 4x podpěrný stojan ..... ▪ 4x malý podpěrný blok ..▪ 4x velký podpěrný blok ..▪ 6x oko pro zvedání ....▪...
  • Seite 53 Obsah Úvod.........................54 Uvedení do provozu ▪ Před prvním uvedením do provozu ................55 ▪ Výstražná upozornění a provozní podmínky ............55 ▪ Vystrojení ......................56 Obecné pokyny k ovládání ▪ Volnoběh .......................57 ▪ Protizávaží ......................57 ▪ Opěry jeřábu ......................58 ▪ Traverza a popruh pro zvedání ................59 ▪...
  • Seite 54: Úvod

    EDK 750. Tento návod k obsluze by Vám měl pomoci využívat rozsáhlé funkce otočného železničního jeřábu. Přejeme Vám mnoho potěšení a šťastnou cestu! Vám tým Roco O předloze Otočný železniční jeřáb EDK 750 je šestinápravový jeřáb poháněný vznětovým moto- rem.
  • Seite 55: Uvedení Do Provozu

    Z důvodu vysoké vlastní hmotnosti a pohonu jedné nápravy jsou stoupání sjízdná pouze za určitých podmínek. Bezchybná jízda jeřábu je zaručena pouze na čistých kolejnicích. K tomu účelu doporučujeme čisticí vůz na kolejnice ROCO č. art. 46400 a při trochu silnějším znečištění čisticí gumu na kolejnice ROCO č. art. 10002. 73038.indd 55 73038.indd 55...
  • Seite 56: Vystrojení

    ▪ Vystrojení Pro jízdní provoz můžete volit různé spojky. Doporučujeme použít krátkou spojku ROCO. V přiloženém sáčku s dodatečně montovanými díly naleznete i díly věrně napodobující předlohu pro rozšířené vystrojení pomocného vozu, případně jeřábu; tyto díly opatrně namontujte. Volitelně Pouze do vitríny 73038.indd 56...
  • Seite 57: Obecné Pokyny K Ovládání

    Obecné pokyny k ovládání ▪ Volnoběh Jeřáb se může používat i ve vlakové soupravě. K tomu účelu se musí bezpodmínečně aktivo- vat volnoběh ve spodní části. Toto se provádí zatažením zajišťovací páčky na poháněném podvozku směrem dopředu. Volnoběh deaktivovaný Jeřáb je samojízdný. Volnoběh aktivovaný...
  • Seite 58: Opěry Jeřábu

    ▪ Opěry jeřábu Při zvedání břemen je nutné odklopit opěry jeřábu a podložit podpěrné stojany. Za účelem vyrovnání do vodorovné polohy (např. kolejového lože) použijte podpěrné bloky a případně stavěcí šrouby pro jemné nastavení. Pozor! Při neodborné manipulaci se jeřáb může převrátit a poškodit. Věnujte pozornost diagramu nosnosti na straně...
  • Seite 59: Traverza A Popruh Pro Zvedání

    ▪ Traverza a popruh pro zvedání Při použití traverzu připojte k jeřábovému háku zajišťovacím třmenem A. Popruh pro zvedání zastřihněte na požadovanou délku a provlékněte oky pro zvedání. Následně popruh pro zvedání připojte k traverze zajišťovacím třmenem B nebo zavěste přímo na hák.
  • Seite 60: Technické Údaje

    ▪ Technické údaje Délka pomocného vozu přes Hmotnost jeřábu 436 g 98 mm nárazníky Hmotnost pomocného vozu 42 g Délka jeřábu přes nárazníky 136,5 mm Protizávaží 36 g Celková délka přes nárazníky 235,5 mm Celková hmotnost: 514 g ▪ Rozměry při práci (údaje v mm) ▪...
  • Seite 61 ▪ Varianta práce 1 s podepřením s protizávažím 73038.indd 61 73038.indd 61 22.04.2021 07:01:36 22.04.2021 07:01:36...
  • Seite 62 ▪ Varianta práce 2 bez podepření s protizávažím 80 g 240 g Pozor! Při otáčení jeřábu s protizávažím, ale bez odklopených podpěr, se jeřáb může převrátit a poškodit! 73038.indd 62 73038.indd 62 22.04.2021 07:01:37 22.04.2021 07:01:37...
  • Seite 63 ▪ Varianta práce 3 bez podepření bez protizávaží 60 g 140 g 73038.indd 63 73038.indd 63 22.04.2021 07:01:39 22.04.2021 07:01:39...
  • Seite 64: Dekodér Zvuku

    Dekodér zvuku ▪ Obsazení funkčních tlačítek (stav při dodání) Jeřáb je z výroby nastaven na adresu 03. Tlačít- Funkce ko F Bílé přední a zadní světlo Zvuk zapnuto = otáčení, vypnuto = jízda (rychlosti a směr jsou nastavitelné) Zvedání navijáku (když F6 vypnuto) Zasouvání...
  • Seite 65 ▪ Funkce světel Funkce světel se ovládají pomocí tlačítek F. F0 přední a zadní světlo F11 vypnuté zadní světlo F10 pracovní světlo 73038.indd 65 73038.indd 65 22.04.2021 07:01:50 22.04.2021 07:01:50...
  • Seite 66 F2 zapnuto = otáčení F20 vypínání v koncové poloze Při současné aktivaci s F2 se otáčení v přísluš- F2 vypnuto = jízda ném směru automaticky zastaví po dosažení Ovládání se provádí otočným regulátorem. koncové polohy. Nelze současně provádět jízdu a otáčení. Koncová...
  • Seite 67 F8 zvedání výložníku / F7 spouštění výložníku Po dosažení maximální výšky zdvihu, případně spodní polohy se funkce automaticky zastaví. max. 30° F3 zvedání výložníku háku F6 spouštění háku Po dosažení maximální výšky zdvihu se funkce automaticky zastaví. V nejspodnější poloze se funkce musí manuálně zastavit tlačítkem F. NOUZOVÉ...
  • Seite 68: Funkce

    ▪ Nastavení jeřábu Dekodér zvuku tohoto jeřábu od firmy ZIMO byl optimálně nastaven na tento jeřáb. Přesto však lze mnoho vlastností dekodéru přizpůsobit vašim potřebám. Za tím účelem lze měnit určité parametry (takzvané CV – Configuration Variable nebo registry). Před každým programováním však zkontrolujte, zda je to skutečně nutné. Nesprávná nastavení mohou vést k nesprávným reakcím dekodéru.
  • Seite 69: Provoz S Centrálou Dcc (Multimaus)

    ▪ Aktualizace firmwaru Dekodér jeřábu a hlavní desky lze aktualizovat pomocí černého Z21. Aby se předešlo škodám, smí se i pro dekodér používat pouze firmware schválený firmou Roco. Nejaktuálnější verze je k dispozici na Z21.eu. ▪ Doplňkové funkce Věnujte pozornost návodu MX659 na www.zimo.at 73038.indd 69...
  • Seite 70: Údržba A Ošetřování Modelu

    Údržba a ošetřování modelu Aby byl jeřáb připraven poskytovat vám dlouhodobou radost, je vhodné provádět určité servis- ní práce. ▪ Čištění žeber pro vypínání v koncové poloze Pokud se jeřáb již nezastavuje v koncové poloze (F2 + F20), je nutné očistit žebra pro vypínání v koncové...
  • Seite 71 ▪ Sejmutí víka převodovky Při sestavování věnujte pozornost správné poloze spínací vačky volnoběhu. Obr. 1. Spínací vačka volnoběhu ▪ Čištění stíracích kontaktů kol Stírací kontakty kol se mohou na znečištěných kolejnicích mírně znečistit. Nejprve sejměte víko převodovky (obr. 1). Potom malým štětečkem důkladně odstraňte nečistoty z vyznačených míst.
  • Seite 72: Mazání

    Na místa vyznačená v mazacím plánu aplikujte pouze malé kapky oleje. Doporučujeme olejničku ROCO č. art. 10906. Pro mazání dílů převodovky (ozubená kola, šne- ky) doporučujeme speciální mazací tuk ROCO č. art. 10905. V případě namazání tukem tyto díly nemažte olejem.
  • Seite 73: Výměna Adhezních Obručí

    ▪ Výměna adhezních obručí Adhezní obruč sejměte pomocí jehly nebo tenkého šroubováku. Při nasazení nové adhezní ob- ruče dbejte na to, aby se neprotáčela. siehe Obr. 1 73038.indd 73 73038.indd 73 22.04.2021 07:02:52 22.04.2021 07:02:52...
  • Seite 74: Tabulka Závad

    Chyba Možná příčina Řešení Jeřáb se při otáčení již Žebra pro vypínání v koncové Očistěte žebra nezastavuje v koncové poloze jsou znečištěná Viz strana 22 poloze (F2+F20) Jeřáb nejede Volnoběh aktivní Deaktivujte volnoběh Viz strana 9 Jeřáb nelze táhnout Volnoběh deaktivovaný Aktivujte volnoběh Viz strana 9 Protáčející...
  • Seite 75 Notizen / Notes 73038.indd 75 73038.indd 75 22.04.2021 07:02:55 22.04.2021 07:02:55...
  • Seite 76: Ersatzteilliste

    Symbolische Darstellung Symbolic Illustration Illustration figurative o. Abb. / not illustrated Kranseil 1m Crane rope 1 m Pos. Nr. Beschreibung Art.-Nr. Preisgruppe Pos.no. Description Art.no. Price bra cket Position Désignation Réf. Catég. de pr. Krangehäuse lackiert u. bedruckt / Body painted a. printed 146413 Dachdeckel lackiert / Roof cover painted 146400...
  • Seite 77 Symbolische Darstellung Symbolic Illustration Illustration figurative Pos. Nr. Beschreibung Art.-Nr. Preisgruppe Pos.no. Description Art.no. Price bracket Position Désignation Réf. Catég. de pr. TS - Hubzylinder / Part set lifting cylinder 146399 TS - Lichtleiter+Linsen / Part set lens 144946 Antriebswelle Kran Schlitten / Drive shaft crane sled 144975 Zurreinheit / Part 146403...
  • Seite 78 Symbolische Darstellung Symbolic Illustration Illustration figurative Pos. Nr. Beschreibung Art.-Nr. Preisgruppe Pos.no. Description Art.no. Price bra cket Position Désignation Réf. Catég. de pr. Getriebeblock+Windengetriebe / Part set gear 144958 GF-Schraube M1,6x4 / GF-Screw M1,6x4 114850 Motor Kran Seilwinde / Motor 85153 Motor Kran Schlitten ausfahren / Motor 85154...
  • Seite 79 Symbolische Darstellung Symbolic Illustration Illustration figurative Pos. Nr. Beschreibung Art.-Nr. Preisgruppe Pos.no. Description Art.no. Price bra cket Position Désignation Réf. Catég. de pr. Grundrahmen Aufbau / Main frame 146417 GF-Schraube M1,6x4 / GF-Screw M1,6x4 114850 TS - Tritte schwarz/ Part set steps black 144944 Decoderdeckel und Abdeckung / Part set cover 144952...
  • Seite 80 Symbolische Darstellung Symbolic Illustration Illustration figurative rot / red Pos. Nr. Beschreibung Art.-Nr. Preisgruppe Pos.no. Description Art.no. Price bra cket Position Désignation Réf. Catég. de pr. Motor / Motor 143770 Federblech Motor / Spring 144964 DG-Blende Kran komplett / Bogie complete 146401 TS - Handräder rot / Part set handwheel red 146406...
  • Seite 81 Symbolische Darstellung Symbolic Illustration Illustration figurative rot / red Pos. Nr. Beschreibung Art.-Nr. Preisgruppe Pos.no. Description Art.no. Price bra cket Position Désignation Réf. Catég. de pr. Grundrahmen / Main frame 146418 TS - Stützen, Auflage / Part set pillar 144949 SK-Schraube M1,6x4 / SK-Screw M1,6x4 115161 Puffer / Buffer...
  • Seite 82 Symbolische Darstellung Symbolic Illustration Illustration figurative Pos. Nr. Beschreibung Art.-Nr. Preisgruppe Pos.no. Description Art.no. Price bracket Position Désignation Réf. Catég. de pr. Zurüstbeutel - Kran Zubehör / Bag with 144991 Zurüstbeutel - Unterstellböcke 144992 Zurüstbeutel - Hebegurte+Ösen 144993 Kran-Styropor Unterteil o. Abb. / Crane styrofoam base no. ill. 96343 Kran-Styropor Oberteil o.
  • Seite 83 Notizen / Notes 73038.indd 83 73038.indd 83 22.04.2021 07:05:02 22.04.2021 07:05:02...
  • Seite 84 (des tampons p. e.) ne sont pas moulées d’un seul bloc avec leurs bases, mais séparément rapportées en vue d’une réalisation plus détaillée. Cela implique le risque de perte de ces composants. Dans ce cas, vous pouvez commander ces pièces aux S.A.V. ROCO; nous ne pouvons cependant pas donner suite à une 8073038920 VI / 2021 réclamation èventuelle à...

Diese Anleitung auch für:

73038

Inhaltsverzeichnis