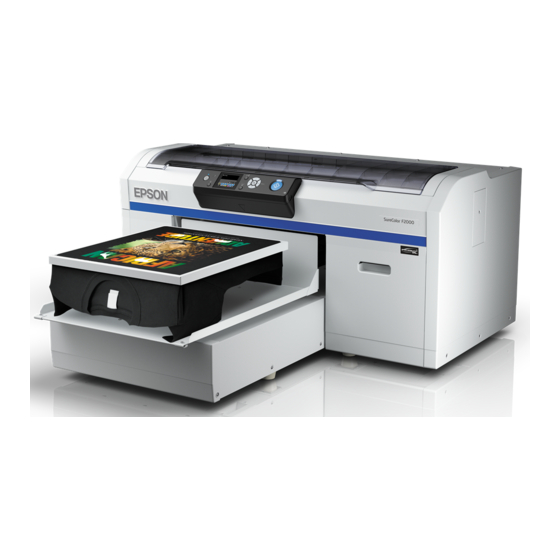
Epson SC-F2000 series Installationshandbuch
Vorschau ausblenden
Andere Handbücher für SC-F2000 series:
- Benutzerhandbuch (128 Seiten) ,
- Handbuch (120 Seiten)
Inhaltsverzeichnis
Quicklinks
Setup Guide
EN
Guide d'installation
FR
Installationshandbuch
DE
Installatiehandleiding
NL
Guida di installazione
IT
Guía de instalación
ES
Manual de instalação
PT
EN
Assembly
FR
Assemblage
DE
Montage
10
NL
Montage
EN
Initial Ink Charging
FR
Chargement initial de l'encre
DE
Erste Tintenbefüllung
18
NL
Eerste installatie van cartridges
EN
Printing a Test Pattern
FR
Impression d'un motif de test
DE
Drucken eines Testbilds
24
NL
Een testpatroon afdrukken
EN
Installing the Software
FR
Installation du logiciel
DE
Installieren der Software
26
NL
De software installeren
EN
About Maintenance
FR
A propos de la maintenance
DE
Info zur Wartung
29
NL
Onderhoud
IT
Montaggio
ES
Ensamblaje
PT
Montagem
IT
Caricamento iniziale di inchiostro
ES
Carga inicial de tinta
PT
Carregamento inicial de tinta
IT
Stampa di un motivo di prova
ES
Impresión de un patrón de prueba
PT
Imprimir um padrão de teste
IT
Installazione del software
ES
Instalación del software
PT
Instalar o Software
IT
Informazioni sulla manutenzione
ES
Acerca del mantenimiento
PT
Acerca da manutenção
Inhaltsverzeichnis

Verwandte Anleitungen für Epson SC-F2000 series


Inhaltszusammenfassung für Epson SC-F2000 series
- Seite 1 Assembly Montaggio Assemblage Ensamblaje Montage Montagem Montage Initial Ink Charging Caricamento iniziale di inchiostro Chargement initial de l'encre Carga inicial de tinta Erste Tintenbefüllung Carregamento inicial de tinta Eerste installatie van cartridges Printing a Test Pattern Stampa di un motivo di prova Impression d'un motif de test Impresión de un patrón de prueba Setup Guide...
- Seite 2 Lors des opérations de maintenance it at your local Epson Web site. Should fluid such as ink, waste ink, etc. contact your skin or enter your Portez des lunettes de protection et des gants lors du remplacement de la bouteille d'encre usée ou eyes or mouth, take the following actions: de la manipulation du pre-treatment liquid ou du ink cleaner.
-
Seite 3: Veiligheidsvoorschriften
Tragen Sie Augenschutz und Handschuhe, wenn Sie die Tintenabfallpatrone wechseln pre-treatment voor gebruik. U kunt het downloaden via uw lokale Epson-website. Als vloeistof zoals inkt, afvalinkt, liquid sowie ink cleaner. Lesen Sie vor der Ingebrauchnahme das Sicherheitsdatenblatt. Sie können es enz. - Seite 4 È possibile scaricare la scheda nel sito Web Epson locale. Se l'inchiostro, l'inchiostro di uso. Puede descargarla en el sitio web local de Epson. Si algún líquido como la tinta entra en contacto scarto o un altro fluido entra a contatto con la pelle o penetra negli occhi o nella bocca, adottare le...
- Seite 5 Assegure-se de que lê a Ficha de dados de segurança antes da utilização. Pode transferi-la no seu site local da Epson. Caso líquidos como tinta, desperdício de tinta, etc., entrem em contacto com a pele, olhos ou boca, realize as seguintes acções: ❏...
-
Seite 6: Choosing A Place For The Printer
Choosing a Place for the Printer Choix d'un emplacement pour l'imprimante Auswählen des Druckerstandorts Een plaats kiezen voor de printer Elección de un lugar para la impresora Escolher um local para a impressora Scelta del luogo di installazione della stampante Space between rubber feet Espace entre les pieds en caoutchouc Platz zwischen den Gummifüßen... - Seite 7 Choosing a Place for the Printer Choix d'un emplacement pour l'imprimante Auswählen des Druckerstandorts Een plaats kiezen voor de printer Scelta del luogo di installazione della stampante Elección de un lugar para la impresora Escolher um local para a impressora Instructions for Placing the Printer Istruzioni per la collocazione della stampante Place the printer in an environment that meets the following specifications.
- Seite 8 Unpacking Déballage Beim Auspacken Uitpakken Disimballaggio Desembalaje Desembalagem Information on using maintenance tools can be found in the User’s Guide. Des informations sur l'utilisation des outils de maintenance sont disponibles dans le Guide d'utilisation. Informationen zur Verwendung der Wartungswerkzeuge können Sie dem Benutzerhandbuch entnehmen. Informatie over het gebruik van hulpmiddelen voor onderhoud vindt u in de Gebruikershandleiding.
- Seite 9 Unpacking Déballage Beim Auspacken Uitpakken Disimballaggio Desembalaje Desembalagem Caution: Before assembling the printer, clear the work area by putting away the removed packing materials and bundled items. Avant d'assembler l'imprimante, nettoyez la zone de travail en éloignant tous les matériaux d'emballage et les éléments inclus. Attention : Befreien Sie den Arbeitsbereich von jeglichen Verpackungsmaterialien und Einzelteilen, bevor Sie mit dem Aufbau des Druckers beginnen.
-
Seite 10: Montage
Assembly Assemblage Montage Montage Montaggio Ensamblaje Montagem Printer setup takes approximately 40 minutes for the initial ink charging. L'installation de l'imprimante prend environ 40 minutes pour le chargement initial de l'encre. Das Einrichten des Druckers bis zur ersten Tintenbefüllung dauert ca. 40 min. De set-up van de printer duurt ongeveer 40 minuten voor de eerste installatie van cartridges. - Seite 11 Assembly Assemblage Montage Montage Montaggio Ensamblaje Montagem ❏ When lifting the printer unit, only hold the highlighted area. Otherwise, it may affect normal operation and printing. If sides A and C are not lifted at the same time, the printer could tilt and trap your hand. ❏...
- Seite 12 Assembly Assemblage Montage Montage Montaggio Ensamblaje Montagem Remove all protective tape and protective materials. Be careful not to trap your hands or fingers when opening or closing the Caution: printer cover. Retirez le ruban et autres matériaux de protection. Veillez à ne pas coincer vos mains ou vos doigts lors de l'ouverture ou de la Attention : fermeture du capot de l'imprimante.
- Seite 13 Assembly Assemblage Montage Montage Montaggio Ensamblaje Montagem Press down on the parts to make sure they have not come loose. Appuyez sur les pièces afin de vous assurer qu'elles soient bien fixées. Drücken Sie die Teile fest nach unten und stellen Sie sicher, dass sie sich nicht gelöst haben.
- Seite 14 Assembly Assemblage Montage Montage Montaggio Ensamblaje Montagem You need these removed parts when transporting the printer. Store them in a safe place. Ces pièces retirées seront nécessaires lors du transport de l'imprimante. Rangez-les dans un endroit sûr. Sie benötigen diese entfernten Teile zum Transportieren des Druckers. Bewahren Sie sie an einem sicheren Ort auf. U heeft deze verwijderde onderdelen nodig wanneer u de printer transporteert.
- Seite 15 Assembly Assemblage Montage Montage Montaggio Ensamblaje Montagem The lid of the Waste Ink Bottle is required when disposing of the waste ink. Keep the lid. Do not throw it away. Le couvercle de la bouteille d'encre usée est requis lors de la mise au rebut de l'encre usée. Conservez-le. Ne le jetez pas. Der Deckel des Tintenabfallkanisters wird bei der Entsorgung benötigt.
- Seite 16 Assembly Assemblage Montage Montage Montaggio Ensamblaje Montagem [10] Insert the waste ink tube into the waste ink bottle so that it is lower than the place the tube connects to the printer. ❏ The waste ink tube should be slanted towards the waste ink bottle. It should not be slanted in the opposite direction. ❏...
- Seite 17 Assembly Assemblage Montage Montage Montaggio Ensamblaje Montagem [13] Use only the type of power source indicated on the printer’s label. Caution: Utilisez uniquement le type de source d'alimentation électrique indiquée sur l'étiquette de l'imprimante. Attention : Verwenden Sie ausschließlich die auf dem Druckeretikett angegebene Stromversorgung. Achtung: Gebruik alleen het type stroombron dat staat vermeld op het etiket op de printer.
- Seite 18 Initial Ink Charging Chargement initial de l'encre Erste Tintenbefüllung Eerste installatie van cartridges Caricamento iniziale di inchiostro Carga inicial de tinta Carregamento inicial de tinta After opening the ink cartridge, be sure to shake it as shown in the figure. (You do not need to do this for cleaning cartridges.) Do not touch the IC chip on the cartridge.
- Seite 19 Initial Ink Charging Chargement initial de l'encre Erste Tintenbefüllung Eerste installatie van cartridges Caricamento iniziale di inchiostro Carga inicial de tinta Carregamento inicial de tinta White/Blanc/Weiß/Wit/Bianco/Blanco/Branco Others/Autres/Andere/Andere/Altri/Otros/Outros ❏ ❏ A lot of ink is used during the initial ink charging. The supplied ink cartridges will require replacement relatively quickly. Une grande quantité...
- Seite 20 Initial Ink Charging Chargement initial de l'encre Erste Tintenbefüllung Eerste installatie van cartridges Caricamento iniziale di inchiostro Carga inicial de tinta Carregamento inicial de tinta White Ink mode / Color Ink mode Mode Encre blanche / Mode Encre couleur Weiß /Farbmodus Witte inkt/Gekleurde inkt Modalità...
- Seite 21 Initial Ink Charging Chargement initial de l'encre Erste Tintenbefüllung Eerste installatie van cartridges Caricamento iniziale di inchiostro Carga inicial de tinta Carregamento inicial de tinta High Speed Color mode Mode Couleur haute vitesse Farbmodus Schnell Hoge snelheid (kleur) Modalità colore ad alta velocità Modo de color de alta velocidad Modo de cor de alta velocidade You cannot change to White Ink mode or Color Ink mode after installing inks...
- Seite 22 Initial Ink Charging Chargement initial de l'encre Erste Tintenbefüllung Eerste installatie van cartridges Caricamento iniziale di inchiostro Carga inicial de tinta Carregamento inicial de tinta Turn on the power and configure the initial settings such as the language and date and make sure that a waste ink bottle is set. Then, follow the instructions on the control panel screen to perform the initial ink charging.
- Seite 23 Initial Ink Charging Chargement initial de l'encre Erste Tintenbefüllung Eerste installatie van cartridges Caricamento iniziale di inchiostro Carga inicial de tinta Carregamento inicial de tinta Observe the following precautions when charging the ink. If these precautions are not observed, the work may be interrupted and require redoing, resulting in more ink being consumed than normal. Do not disconnect the power cable from the outlet or turn off the power.
- Seite 24 Printing a Test Pattern Impression d'un motif de test Drucken eines Testbilds Een testpatroon afdrukken Stampa di un motivo di prova Impresión de un patrón de prueba Imprimir um padrão de teste...
- Seite 25 Printing a Test Pattern Impression d'un motif de test Drucken eines Testbilds Een testpatroon afdrukken Stampa di un motivo di prova Impresión de un patrón de prueba Imprimir um padrão de teste If it prints correctly, attach the frame to the platen. If you cannot print properly, see “Problem Solver” in the User’s Guide to solve the problem. Si l'impression fonctionne correctement, fixez le cadre à...
-
Seite 26: Installieren Der Software
Installing the Software Installation du logiciel Installieren der Software De software installeren Installazione del software Instalación del software Instalar o Software Network Follow the on-screen instructions to complete the installation. Suivez les instructions à l'écran pour terminer l'installation. Folgen Sie den Bildschirmanweisungen, um die Installation fertig zu stellen. Volg de instructies op het scherm om de software te installeren. - Seite 27 Si aparece este cuadro de diálogo, compruebe que el editor sea SEIKO EPSON y haga clic en Desbloquear. Se for apresentada a seguinte caixa de diálogo, assegure-se de que o editor é a SEIKO EPSON e clique em Desbloquear. In a network connection, continue by setting a password for protecting the network settings.
- Seite 28 Installing the Software Installation du logiciel Installieren der Software De software installeren Installazione del software Instalación del software Instalar o Software Open your Web browser, and enter the IP address of the printer in the address bar. Setting a Password (Networks Only) Ouvrez votre navigateur Web et saisissez l'adresse IP de l'imprimante dans la barre d'adresse.
-
Seite 29: Maintenance
About Maintenance A propos de la maintenance Info zur Wartung Onderhoud Informazioni sulla manutenzione Acerca del mantenimiento Acerca da manutenção Maintenance Maintenance To maintain optimum print quality, make sure you perform the correct maintenance procedure at the Pour maintenir une qualité d'impression optimale, assurez-vous d'effectuer une procédure de necessary time. - Seite 30 About Maintenance A propos de la maintenance Info zur Wartung Onderhoud Informazioni sulla manutenzione Acerca del mantenimiento Acerca da manutenção Wartung Onderhoud Um auch langfristig eine optimale Druckqualität zu gewährleisten, müssen Sie zu bestimmten U behoudt een optimale afdrukkwaliteit door de juiste onderhoudsprocedure uit te voeren wanneer Zeitpunkten die entsprechenden Wartungsvorgänge ausführen.
-
Seite 31: Manutenzione
About Maintenance A propos de la maintenance Info zur Wartung Onderhoud Informazioni sulla manutenzione Acerca del mantenimiento Acerca da manutenção Manutenzione Mantenimiento Per garantire una qualità di stampa ottimale, eseguire le procedure di manutenzione adeguate nei Para mantener una calidad de impresión óptima, cerciórese de realizar el procedimiento de tempi indicati. - Seite 32 About Maintenance A propos de la maintenance Info zur Wartung Onderhoud Informazioni sulla manutenzione Acerca del mantenimiento Acerca da manutenção Manutenção Para manter uma qualidade de impressão ideal, certifique-se de que executa os procedimentos de manutenção correctos no tempo devido. Esta secção explica a frequência dos procedimentos principais.
- Seite 33 Seeing the Online Guide Consultation du guide en ligne Anzeigen des Online-Handbuchs De online handleiding lezen Consultazione della Guida in linea Consulta del manual en línea Consultar o Guia Interactivo De online handleiding De volgende online handleidingen staan op de meegeleverde software-cd. Klik op weergeven in het scherm Software selecteren van de software-cd om de handleidingen te zien.