Herunterladen Inhalt Inhalt Diese Seite drucken
Grundig DKR 2000 Bedienungsanleitung
Vorschau ausblenden Andere Handbücher für DKR 2000:

Werbung

Verfügbare Sprachen

Verfügbare Sprachen

Kitchen Radio
User Manual
DKR 2000
DE - EN - FR
01M-GKR1020-4620-05

Werbung

Inhaltsverzeichnis
loading

Inhaltszusammenfassung für Grundig DKR 2000

  • Seite 1 Kitchen Radio User Manual DKR 2000 DE - EN - FR 01M-GKR1020-4620-05...
  • Seite 2: Grundig Kundenberatungszentrum

    GRUNDIG-Kundenberatungszentrum Haben Sie Fragen? Montag­bis­Freitag­ von­8.00­bis­18.00­Uhr Unser Kundenberatungszentrum steht Ihnen Deutschland: 0911 / 59 059 730 werktags stets von 8.00 – 18.00 Uhr zur Österreich: 0820 / 220 33 22 * Verfügung. * gebührenpflichtig (0,145 €/Min. aus dem Festnetz, Mobilfunk: max. 0,20 €/Min.)
  • Seite 3 ----------------------------------------------------------------------------------------------------------------------------------------------------------------------------- Back View Rückansicht Front View Vorderansicht Bottom View Unteransicht ­ 3...
  • Seite 4 ----------------------------------------------------------------------------------------------------------------------------------------------------------------------------- DEUTSCH­ ­ 02-34 ENGLISH­ ­ 35-60 FRANÇAIS­ ­ 61-90 ­ 4...
  • Seite 5: Warnung­zur­hf-Exposition

    EINRICHTUNG­UND­SICHERHEIT ­ - ------------------------------------------------ Bitte beachten Sie bei der Einrichtung des kommen, die ein Abspielen verhindert. Systems die folgenden Hinweise: Der CD-Mechanismus enthält selbstschmie- rende Lager, die nicht geölt oder gefettet wer- Dieses Gerät dient der Wiedergabe von Au- diosignalen. Jeglicher anderer Einsatz ist aus- den dürfen.
  • Seite 6 EINRICHTUNG­UND­SICHERHEIT ­ - ------------------------------------------------ und betrieben werden. Das Gerät besitzt eine integrierte Antenne und darf nicht in der Nähe von anderen Antennen oder Sendern aufge- stellt und betrieben werden. Das Gerät lässt sich nur durch Ziehen des Netzsteckers vollständig von der Stromversor- gung trennen.
  • Seite 7: Auf­einen­blick

    AUF­EINEN­BLICK ­--------------------------------------------------------------------------------------------------------- Arti- Beschreibung Montageplatte für Wandschrankmontage Hauptgerät Drahtantenne für DAB/UKW Gleichspannungseingang für DC 6V, 2A - Netzteilanschluss Micro USB nur für „Service Updates“ im Produktionsbetrieb Anzeige Anzeige des aktuellen Status Im CD/BT-Modus: Drücken Sie kurz, um zum Anfang des Tracks / vorherigen Tracks zu springen.
  • Seite 8 AUF­EINEN­BLICK ­--------------------------------------------------------------------------------------------------------- PROG/MEM Im DAB/UKW-Modus: Drücken Sie kurz, um die Senderliste/ Voreinstellung-Abruf zu öffnen. Drücken Sie lang, um als Voreinstellung zu speichern. Im CD-Modus: Drücken Sie lang, um Tracks zu programmie- ren. Im Radiomodus: Drücken Sie lang, um direkt als Voreinstellung 1, 2, 3, 4 oder 5 zu speichern Drücken Sie kurz, um direkt auf die Voreinstellungen 1, 2, 3, 4 oder 5 zuzugreifen...
  • Seite 9: Übersicht Fernbedienung

    ÜBERSICHT­-­FERNBEDIENUNG ­ - ------------------------------------------------------ Installieren Sie die Batterie in der Fernbedienung Drücken Sie mit dem Daumen auf den Deckel des Batteriefachs und ziehen Sie es heraus. Legen Sie 2 x 1,5V-Batterie Typ AAA in das Batteriefach ein und achten Sie darauf, dass Sie sie mit der richtigen Polarität und Position einsetzen.
  • Seite 10 ÜBERSICHT­-­FERNBEDIENUNG ­ - ------------------------------------------------------ Kurzes­Drü- Langes­Drü- cken cken Ein- und Aus- schalten (Stand- Disc-Fach Öff- nen/Schließen LIGHT TIMER MODE DAB: Nächsten Sender aufrufen UKW: Manuell Automatische Einstellen+ Sendereinstel- lung (niedrig) BT: null CD: null Menü/Option nach oben ver- schieben DAB: Vorherigen Sender aufrufen UKW: Manuelle Auto-Einstel-...
  • Seite 11 ÜBERSICHT­-­FERNBEDIENUNG ­ - ------------------------------------------------------ DAB: null DAB/UKW: Informations- Radio: Manuell Auto-Einstel- schalter Einstellen+ lung eines Senders INFO BT: Status-/Da- (hoch) tumsschalter BT: Nächster CD: Informati- Track onsschalter CD: Nächster Vorspulen CD: Wählen Sie Track FOLD­-­ den vorherigen Ordner Menü/Option: Eingeben/nach CD: Wählen Sie rechts bewegen FOLD­+...
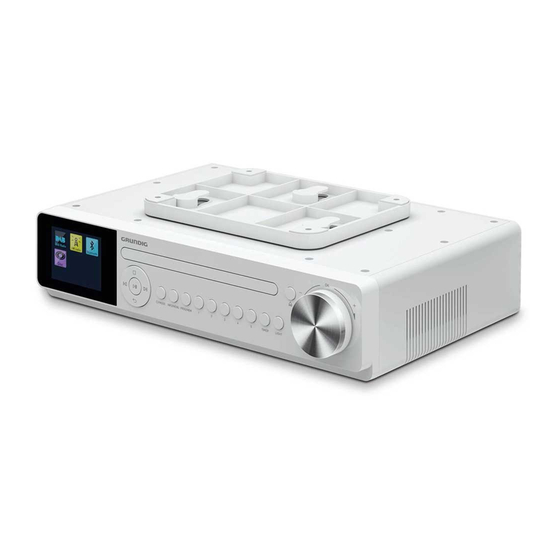
  • Seite 12: Montage Des Gerätes

    MONTAGE­DES­GERÄTES­ ­ - --------------------------------------------------------------------------- Das Gerät ist für die Montage an der Unterseite eines Wandschranks oder Regals vorgesehen. Sie benötigen die vier mitgelieferten Schrauben zur Montage des Gerätes. Ausrichtung/Befestigung­der­ Wählen Sie einen Standort in der Nähe einer Netzsteckdose. Antenne­(Drahttyp) Entfernen Sie die Halterung vom Gerät, indem Die Anzahl und Qualität der Rundfunksender Sie sie nach hinten ziehen.
  • Seite 13 Drücken Sie die Taste » Modus. den lang, um das Gerät einzuschalten. - Anzeige: < GRUNDIG > und dann < 00:00 Das Gerät startet die Funktionen des Auto-Tu- (blinkend) > und < Uhrzeit ist nicht eingestellt ning-Systems zum Durchsuchen der gesamten >.
  • Seite 14 MONTAGE­DES­GERÄTES­ ­ - --------------------------------------------------------------------------- Speichern­von­DAB- Speichern­Sie­die­ Radiosendern­als­ Voreinstellungen­1,­2,­3,­4­oder­ Voreinstellungen Nach der automatischen Sendersuche werden Direktes­Speichern­als­Voreinstellung alle Radiosender in der Senderliste (Programm- Wenn Sie während des Hörens einen bevor- liste) gespeichert. Sie können Ihre bevorzugten zugten DAB- oder UKW-Sender gefunden ha- DAB-Radiosender Voreinstellung-Speicher ben.
  • Seite 15 MONTAGE­DES­GERÄTES­ ­ - --------------------------------------------------------------------------- Sender >. Wählen Sie durch » « / » « den gewünsch- ten Kanal/Frequenz oder drehen Sie den Wählen Sie die gewünschte Option (z.B. Nur Knopf »OK« und drücken Sie kurz »OK« zur starke Sender) durch » « /, » « oder drehen Bestätigung.
  • Seite 16 MONTAGE­DES­GERÄTES­ ­ - --------------------------------------------------------------------------- - Anzeige: < Modusauswahl Schnittstelle >. Wählen Sie das Symbol DAB / UKW-Modus mit » « / » « oder drehen Sie den Knopf »OK« und drücken Sie kurz »OK« zur Bestäti- gung. Drücken Sie im DAB / UKW-Modus lang die Taste »OK«...
  • Seite 17: Allgemeine Funktionen

    RADIO ­-------------------------------------------------------------------------------------------------------------------------------------------------- Allgemeine­Funktionen - Anzeige: < Senderliste >. Dann drücken Sie » «/ » « oder drehen Sie Ein-­und­Ausschalten den Knopf »OK«, um den gewünschten Sender Drücken Sie die Taste » /­MODE« 3 Sekun- auszuwählen, und drücken Sie kurz »OK« zur den lang, um das Gerät ein- und auszuschalten Bestätigung.
  • Seite 18 RDS (Radio Data System) ist ein Informationssys- tem, das von den meisten UKW-Sendern zusätz- lich übertragen wird. Hinweis:­ Es kann eine Weile dauern, bis alle RDS- Informationen verfügbar sind. GRUNDIG hat keinen Einfluss auf die Richtigkeit dieser Informationen. ­ ­ 1 8...
  • Seite 19: Bluetooth-Modus

    Ihrem externen Gerät und führen Sie den Kopplungsvorgang durch. Weitere Informatio- nen finden Sie in der Anleitung Ihres externen Geräts. Der Name dieses Gerätesystems lautet "Grundig DKR 2000". Der Kopplungsvorgang ist nun abgeschlossen, und das externe Gerät kann nun mit dem Kü- chenradio verwendet werden.
  • Seite 20: Allgemeine­kontrolle

    BLUETOOTH-MODUS ­-------------------------------------------------------------------------------------------- Trennen­Sie­die­Verbindung­zu­ Drehen Sie den OK-Knopf einem­gekoppelten­externen­ gegen den Uhrzeigersinn, um die Lautstärke zu verringern. Gerät­(für­eine­neue­Kopplung) OK-Knopf Drehen Sie den OK-Knopf Drücken Sie die Taste » «, um die Bluetooth- im Uhrzeigersinn, um die Verbindung direkt zu trennen; in diesem Fall Lautstärke zu erhöhen.
  • Seite 21: Verwendung­von­cds

    CD-MODUS --------------------------------------------------------------------------------------------------------------------------------- Verwendung­von­CDs Legen Sie eine CD mit der Labelseite nach Das Gerät ist geeignet für oben in das Disc-Fach ein. Musik-CDs mit dem hier Drücken Sie kurz die Taste » «, um das Disc- gezeigten Logo (CD-DA) Fach wieder in das CD-Fach zu schieben, und und für CD-Rs und CD- die CD wird automatisch geladen und gelesen.
  • Seite 22 CD-MODUS --------------------------------------------------------------------------------------------------------------------------------- Programmieren,­Speichern­und­ Tracks­hinzufügen­-­Programmtrack Abspielen­eines­Tracks Die Trackspeicher werden im Display angezeigt. Wenn der 20-Track-Speicher nicht vollständig Sie können einen Trackspeicher von bis zu 20 genutzt wird, können Sie die gewünschten Tracks Tracks für die aktuelle CD in beliebiger Reihenfol- weiter hinzufügen und im verbleibenden Pro- ge erstellen und diese dann in dieser Reihenfolge grammspeicher speichern.
  • Seite 23 CD-MODUS --------------------------------------------------------------------------------------------------------------------------------- Löschen­des­Trackspeichers­ So­beenden­Sie­den­ (Programmspeicher­beenden) Wiederholungsmodus­(Zurück­ zur­normalen­Reihenfolge­der­ Drücken Sie die Taste » «: Trackwiedergabe) - Während der Programmierung. Um die Wiederholungsfunktion zu beenden, - Das Programm befindet sich in der Wiederga- drücken Sie die Taste »REP« auf der Fernbe- dienung wiederholt kurz, bis alle Wiederho- lungssymbole auf der Anzeige verschwinden.
  • Seite 24 CD-MODUS --------------------------------------------------------------------------------------------------------------------------------- MP3­Disc Hinweis:­ Im CD-Modus schaltet das Küchenradio Das Gerät ist für CDRs nach 15 Minuten wieder in den Standby- und CD-RWs mit den Da- Modus, wenn sich die CD-Funktion im inak- teiformaten tiven Modus befindet. WMA geeignet. Im MP3-Modus sind die Auswählen­von­Dateien Begriffe "Album"...
  • Seite 25: Timer-Modus

    TIMER-MODUS ­ - ------------------------------------------------------------------------------------------------------------------- Überprüfung­der­verbleibenden­Zeit Die erste Datei des ausgewählten Ordners (Al- bums) beginnt automatisch mit der Wiederga- Im aktuellen Modus drücken Sie wiederholt kurz die Taste »TIMER« , um die Timer-Schnittstelle zu Um die gewünschte Datei (Track) auszuwählen, öffnen und zu schließen. drücken Sie wiederholt kurz die Taste »...
  • Seite 26 TIMER-MODUS ­ - ------------------------------------------------------------------------------------------------------------------- Alarm:­Alarm­1­und­Alarm­2 Wählen Sie die Option < Schlaf >, indem Sie - Anzeige: < den Knopf »OK« drehen oder drücken Sie » > » « / » « und drücken Sie kurz die Taste Schalten­Sie­die­Funktion­Alarm­1/2­ein »OK«, um die Funktion des Schlaftimers auszu- Alarm1/2 Wählen Sie die Option <...
  • Seite 27 TIMER-MODUS ­ - ------------------------------------------------------------------------------------------------------------------- Alarm­unterbrechen­(Snooze) drehen oder » « / » « drücken und drü- cken Sie kurz »OK«zur Bestätigung. Hinweis: Die Taste » « auf der Fernbedienung hat die gleiche Funktion wie die Taste »OK« Alarmquelle­auswählen am Produkt. Wählen Sie die Option < Source >, indem Während der Alarm ertönt, drücken Sie kurz...
  • Seite 28: Spezielle Funktionen

    SPEZIELLE­FUNKTIONEN ­ - ------------------------------------------------------------------------------ DAB/UKW/BT/CD-Modus Drücken Sie im Equalizer lang die Taste »INFO/MENU« oder kurz die Umschalten­des­Equalizers Taste »MENU«, um das Menü zu öffnen. Um verschiedene EQ-Effekte auszuwählen, drü- DAB/UKW/BT/CD Anzeige: < >. cken Sie einfach wiederholt kurz die Taste »EQ« Systemeinstellun- Wählen Sie die Option <...
  • Seite 29 SPEZIELLE­FUNKTIONEN ­ - ------------------------------------------------------------------------------ On­Level Wählen Sie die gewünschte Sprache aus, in- dem Sie den Knopf »OK« drehen oder » « / Drehen Sie den Knopf »OK« oder drücken Sie » « drücken und drücken Sie kurz auf »OK« » «...
  • Seite 30 SPEZIELLE­FUNKTIONEN ­ - ------------------------------------------------------------------------------ Anzeige: < aktuelle­Versionsnummer­>. Drücken Sie im DAB-Modus lang die Tas- te »INFO/MENU« oder kurz die Taste Drücken Sie kurz die Taste »INFO/MENU« »MENU«, um das Menü Digital Radio zu öff- oder »MENU«, um das Menü zu schließen. nen.
  • Seite 31 SPEZIELLE­FUNKTIONEN ­ - ------------------------------------------------------------------------------ 12­oder­24­Stunden­einstellen 10­Wählen Sie die Option < Auto-Update >, in- dem Sie den Knopf »OK« drehen oder » « / 12/24­ Stunden­ Wählen Sie die Option < » « drücken und drücken Sie kurz »OK« zur einstellen >, indem Sie den Knopf »OK«...
  • Seite 32: Problemlösung

    PROBLEMLÖSUNG ­ - --------------------------------------------------------------------------------------------------- Wenn ein Fehler auftritt, prüfen Sie zunächst, ob Sie das Problem selbst lösen können. Diese Übersicht könnte Ihnen nützlich sein. VORSICHT!­Verletzungsge- fahr! Das Öffnen des Gerätes kann zu Verletzungen führen. Fehler Mögliche­Ursachen/Behebungen ALLGEMEINE­ - Wenn das Gerät durch ein Gewitter, eine statische INFORMATIONEN­...
  • Seite 33: Entsorgung Von Altgeräten

    Handhabung. ISO 9660 Level 1 kompatibel Die CE-Konformitätserklärung für das Gerät finden Fernbedienung: Sie in Form einer PDF-Datei auf der Grundig Home- page www.grundig.com/downloads/doc. Regelbereich: Max. 5 Meter Luftlinienentfernung Batterie: Größe AAA, DC 1,5V x 2 Stück Das Typenschild befindet sich an der Unterseite des Betriebsfeuchtigkeit:­...
  • Seite 34 SICHERHEIT­UND­INFORMATIONEN­ ___________ Betriebsumgebungstemperatur:­ 10 - 40° C Abmessungen­und­Gewicht:­ B x H x T: 296 x 77 x 202,5 mm Gewicht ca.: 1,4 kg Technische und optische Änderungen vorbehal- ten. Allgemeine­Informationen­zu­ Lasergeräten Dieses Gerät ist ein CLASS1 CLASS 1 Laserprodukt. LASERPRODUKT Das bedeutet, dass der Laser so ausgelegt ist...
  • Seite 35: Set-Up­and­safety

    SET-UP­AND­SAFETY ­----------------------------------------------------------------------------------------------- Please note the following instructions when set- life the whole luminaire shall be replaced. if ting up the system: the external flexible cable or cord of this This device is designed for the playback of luminaire is damaged, it shall be exclusively audio signals.
  • Seite 36 OVERVIEW ­ - --------------------------------------------------------------------------------------------------------------------------------- Item Description Mounting Plate for wall cupboard mount Main Device Wire Antenna for DAB/FM DC IN for DC 6V, 2A – mains adapter connection Micro USB for factory service use only Display Display the current status In CD/BT mode: Short press to beginning of track/previous track.
  • Seite 37 OVERVIEW ­ - --------------------------------------------------------------------------------------------------------------------------------- Rotates the knob: adjust the volume. - /+ Confirms the setting: In DAB/FM mode: Long press to enter ATS/AMS mode. In Menu page: rotates knob clockwise or anticlockwise to scoll the menu/option or adjusts option value. Short press the knob to confirm the selection.
  • Seite 38 OVERVIEW­-­REMOTE­CONTROL ­--------------------------------------------------- Short­press Long­press Power On/ Off (Standby) Disc tray Open/Close LIGHT TIMER MODE DAB: Call next station FM: Manual Auto tune a tune+ station (low) BT: nil CD: nil Menu/Op- tion move up DAB: Call previous sta- tion FM: Manual Auto tune a tune- station (high)
  • Seite 39 OVERVIEW­-­REMOTE­CONTROL ­--------------------------------------------------- DAB: nil DAB/FM: Information Radio: Man- Auto tune a switch ual tune+ station (high) INFO BT: Status/ BT: Next Date switch track CD: Informa- CD: Next Fast forward tion switch track CD: select Menu/Op- FOLD­-­ Previous tion: Enter/ folder Move right CD: select...
  • Seite 40: Mounting­the­device

    MOUNTING­THE­DEVICE­ ­----------------------------------------------------------------------------- The device is designed to be mounted on the underside of a wall cupboard or shelf unit. You will need the four supplied screws to mount the device. Adjusting/Fixing­the­antenna­ Select a space close to a mains power socket. (wire­type) Remove the bracket from the device by pulling it to the rear.
  • Seite 41 The device starts the Auto Tuning System func- – Display: < GRUNDIG > and then < 00:00 tions to scan the whole DAB bandwidth and (blinking) > and < Time is not set >.
  • Seite 42 MOUNTING­THE­DEVICE­ ­----------------------------------------------------------------------------- Storing­DAB­radio­stations­to­ You can use this function whatever you want, however the previous record will be overwrit- presets ten if used. After the automatic station search, all radio sta- Access­preset­1,­2,­3,­4­or­5 tions will be stored in the station list (program list). You can store your favored DAB radio stations Directly­access­preset into presets memory 1-30.
  • Seite 43 MOUNTING­THE­DEVICE­ ­----------------------------------------------------------------------------- Tuning­and­storing­FM­radio­sta- tions Press briefly the » « / » « or » « / » « button until you have found the frequency In FM mode, long press the »OK« on product you want. (The frequency changes in steps of »AUTO­...
  • Seite 44: General Functions

    RADIO ­-------------------------------------------------------------------------------------------------------------------------------------------------- General­functions Displaying­DAB­station­information To display information on the current DAB sta- Switching­On­and­Off tion, short press the »INFO/MENU« button /­MODE« button, for 3 sec- Long press the » on product or »INFO« button on remote con- ond, to switch the device On/Off (standby). trol repeatedly.
  • Seite 45 FM stations. Note:­ It may take some time before all RDS infor- mation is available. GRUNDIG has no influ- ence on the correctness of such information. Short press the »INFO/MENU« or »INFO« button repeatedly to display information on the current FM station.
  • Seite 46: Bluetooth Mode

    Refer to the instructions for your external device are intended for control via Bluetooth: device for more information. This device sys- Rotates anti-clockwise to tem’s name is “Grundig DKR 2000”. reduce volume. OK knob The pairing process is now complete, and the...
  • Seite 47 BLUETOOTH­MODE ­--------------------------------------------------------------------------------------------------- You also can control when you use remote con- trol. VOL­- Short press to reduce volume. Short press to increase VOL­+ volume. Short press to pause/resume playback. Short press to previous file. Buttons (If you use Apple Music APP to play music, short press to playback current file from beginning, Short press twice...
  • Seite 48 CD­MODE ­--------------------------------------------------------------------------------------------------------------------------------------- Using­CDs After the reading, the CD playback is starting The device is suitable for automatically. music CDs displaying the – Display: < Track, Time plays >; < information logo shown here (CD-DA) (if available)/Date >. and for CD-Rs and CD- RWs with audio data.
  • Seite 49 CD­MODE ­--------------------------------------------------------------------------------------------------------------------------------------- Program­a­track­memory­and­playback­ Adding­tracks­–­Program­track a­track­memory During track memory keep show in display and 20 programs memory is not fully utilized, and You can create a track memory of up to 20 tracks then you can continue to add the desired tracks for the current CD in any order you choose and and save them in the remaining program memory.
  • Seite 50 CD­MODE ­--------------------------------------------------------------------------------------------------------------------------------------- Intro­(Playing­tracks­introduc- Deleting­the­track­memory­(To­end­pro- gram­memory) tion) Press the » « button: The CD function provided 10 seconds introduc- tion tracks play. INTRO function is only possible – While in programming. on Remote Control. – Program is in playback. Start­Intro­playback Repeat­Mode­(Repeating­track) During playback, short press the »INTRO«...
  • Seite 51 CD­MODE ­--------------------------------------------------------------------------------------------------------------------------------------- MP3­Disc Selecting­files The device is suitable for During playback, short press the » « / » « CDRs and CD-RWs with button until the number of the file (track) file you MP3 and WMA file for- want to hear and appears in the display. mats.
  • Seite 52: Timer Mode

    TIMER­MODE ­-------------------------------------------------------------------------------------------------------------------------- < Remaining­time­in­countdown­> Note:­ Rotates the »OK« knob or press » « / » « » « button on remote control is same function to set the timer time back to 00:00. as »OK« button on product. Cooking­timer­(Countdown) Long press the » /­MODE« button to switch The device has a cooking timer function, which off (standby) the device to switch off the coo- allows up to 300 minutes countdown time until...
  • Seite 53 TIMER­MODE ­-------------------------------------------------------------------------------------------------------------------------- Deactivating­the­sleep­timer the »OK« knob or press» « / » « and short press the »OK« button to confirm. To switch off the sleep timer early, long press the » /­MODE« button on product or short Select­wake­up­time press the » « on remote control to switch off the Select the option <...
  • Seite 54 TIMER­MODE ­-------------------------------------------------------------------------------------------------------------------------- DAB/FM/BT/CD mode, long press the Rotates the »OK« knob or press » « / » »INFO/MENU« or short press »MENU« but- « to select the desired volume level for alarm, ton to open the menu. and then short press the »OK« button to con- firm.
  • Seite 55: Special Functions

    SPECIAL­FUNCTIONS ­-------------------------------------------------------------------------------------------- Equaliser Adjust­the­display­lighting­settings. Switching­Equaliser Note: » « button on remote control is same function as »OK« button on product. To select different EQ effects, simply short press the »EQ« button repeatedly on remote control DAB/FM/BT/CD mode, long press the until the satisfy EQ effect is heard.
  • Seite 56 SPECIAL­FUNCTIONS ­-------------------------------------------------------------------------------------------- Display: < Restarting­> appear for seconds »OK« to confirm. 10­The display lighting setting is completed. Short The device will turn back to standby automati- press the »INFO/MENU« or »MENU« button cally. to close the menu. Removing­DAB­radio­stations­from Call­up­the­software­version the­program­list Note: »...
  • Seite 57 SPECIAL­FUNCTIONS ­-------------------------------------------------------------------------------------------- Set­12­or­24­hours update function) 12/24­hour 12.Short press the »INFO/MENU« or »MENU« Select the option < Set > by ro- button to close the menu. tates the »OK« knob or press » « / » « and short press the »OK« button to confirm. 12­hour >...
  • Seite 58: Troubleshooting

    TROUBLESHOOTING ­ - -------------------------------------------------------------------------------------------- If a fault occurs, first see whether you can resolve the problem yourself. You might find this overview useful. CAUTION!­Risk­of­injury! Opening the device can cause injuries. Fault Possible­cause/action GENERAL­INFORMATION­ - If the device has been disrupted by a thun- derstorm, a static charge or another external No function factor, follow this procedure to resolve the...
  • Seite 59: Compliance With Rohs Directive

    Battery: Size AAA, DC 1.5V x 2 pcs You can find the CE declaration of conformity for the Operating­Humidity:­ 40 - 85% device in the form of a pdf file on the Grundig Home- Operating­Ambient­Temperature:­ page www.grundig.com/downloads/doc. 10 - 40° C The type plate is located on the bottom of the device Dimension­and­weight:­...
  • Seite 60: General­information­on­laser­ Devices

    SAFETY­AND­INFORMATION­__________________ Weight approx.: 1.4 kg Technical and design modifications reserved. General­information­on­laser­ devices This device is a CLASS1 LASER CLASS 1 PRODUCT. LASER PRODUCT This means that the laser is designed in such a way as to ensure that the maximum permissible emission value cannot be exceeded under any circumstances.
  • Seite 61 INSTALLATION ET SÉCURITÉ -------------------------------- N'utilisez aucun produit de nettoyage, car cela Veuillez noter les instructions suivantes lors de la pourrait endommager le boîtier. Nettoyez l'ap- configuration du système: pareil avec un chiffon propre et sec. Cet appareil est conçu pour la lecture de si- N'ouvrez jamais le boîtier de l'appareil.
  • Seite 62 INSTALLATION ET SÉCURITÉ -------------------------------- NE PAS INGÉRER LA BATTERIE, RISQUE DE BRÛLURE CHIMIQUE. Les orages représentent un danger pour tous les appareils électriques. Même si le produit est éteint, il peut être endommagé par un coup de foudre sur le secteur. Retirez toujours la fiche d'alimentation pendant un orage.
  • Seite 63 APERÇU ------------------------------------------------------------------- Article Description Plaque de fixation pour montage mural Le dispositif principal Antenne filaire pour DAB/FM DC IN pour DC 6V, 2A - raccordement de l'adaptateur secteur Micro USB pour une utilisation en usine uniquement Écran Afficher l'état actuel En mode CD/BT: Appuyez brièvement sur le début de la piste/ piste précédente.
  • Seite 64 APERÇU ------------------------------------------------------------------- En mode Radio: Appuyez longuement pour stocker directement dans le prérégla- ge 1, 2, 3, 4 ou 5 Appuyez brièvement pour accéder directement au préréglage 1, 2, 3, 4 ou 5 TIMER Appuyez brièvement pour appeler la minuterie de cuisson. LIGHT Appuyez brièvement pour allumer et éteindre l'éclairage tiroir à...
  • Seite 65 APERÇU - TÉLÉCOMMANDE --------------------------------- Appui court. Appui long Mise sous/hors tension (veille) Plateau de disque Ouvrir/ Fermer LIGHT TIMER MODE DAB: Appeler la station sui- vante FM: Réglage Syntonisation manuel+ automatique d'une station (faible) BT: nul CD: nul Monter dans le menu/option DAB: Appeler la station précé-...
  • Seite 66 APERÇU - TÉLÉCOMMANDE --------------------------------- DAB: nul DAB/FM/BT/ Radio: Réglage Syntonisation MENU manuel+ automatique Menu du mode d'une station Appel/Sortie (haute) DAB/FM: BT: Piste sui- Commutateur vante d'information CD: Piste sui- Avance ra- BT: Commuta- vante pide INFO teur état/date Option du CD: Commuta- menu: Entrer/ teur d'informa-...
  • Seite 67 MONTAGE DE L'APPAREIL ---------------------------------- L'appareil est conçu pour être monté sur la face inférieure d'une armoire murale ou d'une éta- gère. Vous aurez besoin des quatre vis fournies pour monter l'appareil. Réglage / fixation de l'antenne Sélectionnez un espace à proximité d'une prise secteur.
  • Seite 68 » /MODE« pendant 3 secondes pour allu- – Écran: Puis <GRUNDIG> <00:00 (cligno- mer l'appareil. tant)> et <L'heure n'est pas réglée>. L'appareil lance les fonctions du système de – En arrière-plan, l'appareil commence à re-...
  • Seite 69 MONTAGE DE L'APPAREIL ---------------------------------- Enregistrement des stations de Mémoriser le préréglage 1, 2, 3, radio DAB dans les préréglages 4 ou 5 Après la recherche automatique des stations, Stocker directement dans le préréglage toutes les stations de radio seront enregistrées Lorsque vous avez trouvé...
  • Seite 70 MONTAGE DE L'APPAREIL ---------------------------------- Appuyez à nouveau brièvement sur »OK« Et maintenant, appuyez longuement sur le bou- pour confirmer. ton »OK« pour redémarrer l'Auto Memory Station (AMS) pour balayer la bande d'ondes La station de radio DAB du canal sélectionné FM et mémoriser les 30 premières stations de sera enregistrée dans la liste des stations (liste radio avec un signal fort comme préréglages 1...
  • Seite 71 MONTAGE DE L'APPAREIL ---------------------------------- En mode DAB/FM, appuyez longuement sur la touche »OK« ou »AUTO/ « pour démarrer directement le système de recherche automa- tique. – La recherche automatique des stations dé- marre pour les recherches et mémorise les stations de radio. Une fois le processus de balayage terminé, l'appareil a défini la première station reçue de DAB/FM pour l'écoute.
  • Seite 72: Fonctions Générales

    RADIO --------------------------------------------------------------------- Fonctions générales Appuyez ensuite sur » «/» « ou tournez le bouton »OK« pour sélectionner la station "Allumer et éteindre" souhaitée et appuyez brièvement sur »OK« Appuyez longuement touche pour confirmer. » /MODE« pendant 3 secondes pour allu- L'appareil passe en même temps à...
  • Seite 73 RADIO --------------------------------------------------------------------- Mode FM Appuyez brièvement touche MENU« ou »INFO« à plusieurs re- »INFO/ Remarque : prises pour afficher les informations sur la sta- La touche » « de la télécommande a la tion FM actuelle. même fonction que la touche »OK« du pro- –...
  • Seite 74: Connexion D'appareils Bluetooth

    Le nom de ce système d'appareil est «Grundig DKR 2000». Le processus de jumelage est maintenant ter- miné et l'appareil externe peut maintenant être utilisé avec la radio de la cuisine.
  • Seite 75 MODE BLUETOOTH ----------------------------------------------- Contrôle général Vous pouvez également contrôler lorsque vous utilisez la télécommande. Vous pouvez contrôler la lecture des pistes et la plage de volume sur votre appareil externe et sur Appuyez brièvement pour VOL - la radio de la cuisine. En principe, ces boutons réduire le volume.
  • Seite 76 EN MODE CD: --------------------------------------------------------- Utilisation des CD sa face imprimée vers le haut. L'appareil est adapté aux Appuyez brièvement sur la touche » « pour CD de musique affichant faire glisser le plateau de disque dans le com- le logo présenté ici (CD- partiment et le CD sera chargé...
  • Seite 77 EN MODE CD: --------------------------------------------------------- – La lecture démarre à partir du passage sélec- Appuyez sur la touche » « pour mettre fin à la tionné lorsque vous relâchez le bouton. fonction de piste de programme Programmer une mémoire de pistes et Ajout de pistes - Piste de programme lire une mémoire de pistes Pendant la mémoire de pistes, l'affichage de...
  • Seite 78 EN MODE CD: --------------------------------------------------------- Pour mettre fin au mode de répétition Ensuite, vous pouvez modifier ou regrouper (retour aux pistes de lecture dans ces plages et programmes à votre guise en ap- l'ordre) puyant brièvement sur la touche » «/» «...
  • Seite 79 EN MODE CD: --------------------------------------------------------- Disque MP3 Remarque : En mode CD, l'enceinte de la cuisine repasse L'appareil convient aux en mode veille au bout de 15 minutes si la CDR et CD-RW aux for- fonction CD est en mode déconnecté ou en mats de fichier MP3 et l'absence d'activité.
  • Seite 80 EN MODE CD: --------------------------------------------------------- »FOLD« ou »FOLD« de la télécommande jusqu'à ce que le numéro du dossier (album) que vous voulez écouter et apparaisse sur l'affichage. Le premier fichier du dossier sélectionné (al- bum) démarre automatiquement la lecture. Pour sélectionner le fichier (plage) souhaité, appuyez brièvement sur la touche »...
  • Seite 81 MODE MINUTERIE ------------------------------------------------- Remarque : Désactiver le minuteur de cuisson Appuyez brièvement sur le bouton «TIMER« La touche » « de la télécommande a la même pour ouvrir l'interface de la minuterie. fonction « comme bouton »OK« sur le produit. - Écran: Minuterie de cuisson (compte à...
  • Seite 82 MODE MINUTERIE ------------------------------------------------- accéder à l'option > Sélectionnez l'option souhaitée (par exemple 60 minutes) en tournant le bouton »OK« ou Alarme activée/ Écran: Alarme 1/2 info. < appuyez sur » «/» « et appuyez brièvement désactivée, fréquence, heure de réveil, sur le bouton »OK«...
  • Seite 83 MODE MINUTERIE ------------------------------------------------- Interrompre l'alarme (Snooze) Sélectionnez la source d'alarme Remarque : La touche » « de la télécomman- Source Sélectionnez l'option < > en tournant de a la même fonction que la touche »OK« le bouton »OK« ou appuyez sur » «/»...
  • Seite 84 FONCTIONS SPÉCIALES --------------------------------------- Menu DAB/FM/BT/CD Écran: < >. »OK« pour confirmer. Paramètres Sélectionnez l'option < Éclairage système > en tournant le bouton »OK« ou Activation et désactivation de l'éclairage appuyez sur » «/» « et appuyez briève- Appuyez brièvement bouton ment sur le bouton »OK«...
  • Seite 85 FONCTIONS SPÉCIALES --------------------------------------- brièvement sur la touche »MENU« pour ouvrir Sélectionnez l'option souhaitée en tournant le le menu. bouton »OK« ou appuyez sur » «/» « et appuyez brièvement sur le bouton »OK« pour Écran: < Menu DAB/FM/BT/CD >. confirmer. Sélectionnez l'option <...
  • Seite 86 FONCTIONS SPÉCIALES --------------------------------------- en tournant le bouton »OK« ou appuyez sur yez brièvement sur la touche »INFO/MENU« ou »MENU« pour fermer le menu. »«/»« et appuyez brièvement sur le bouton »OK« pour confirmer. Réglages de l'heure et de la date Options Écran: <...
  • Seite 87 FONCTIONS SPÉCIALES --------------------------------------- Réglez 12 ou 24 heures «/» « et confirmez en appuyant brièvement sur »OK« pour confirmer. 12/24 heures Sélectionnez l'option < Régler Écran: <de Tout, de la radio numérique, > en tournant le bouton »OK« ou appuyez sur de la FM et Pas de mise à...
  • Seite 88 DÉPANNAGE ---------------------------------------------------------- En cas de panne, vérifiez d'abord si vous pouvez résoudre le problème vous-même. Vous pourriez trouver cet aperçu utile. ATTENTION ! Risque de blessures ! L'ouverture de l'appareil peut provoquer des blessures. Défaut Cause possible/action INFORMATIONS GÉNÉRALES - Si l'appareil a été perturbé par un orage, une charge statique ou un autre facteur extérieur, Aucune fonction suivez cette procédure pour résoudre le prob-...
  • Seite 89: Conformité Avec La Directive Rohs

    Plage de réglage: Max. 5 mètres de distance positif sous la forme d'un fichier pdf sur la page d'ac- linéaire cueil de Grundig www.grundig.com/downloads/doc. Pile : Taille AAA, DC 1.5V x 2 pièces La plaque signalétique se trouve sous l'appareil...
  • Seite 90 SÉCURITÉ ET INFORMATION __________________ Taux d'humidité de fonctionnement: 40 - 85% Température ambiante de fonction- nement: 10 - 40° C Dimension et poids: L x H x P: 296 x 77 x 202.5 mm Poids approx.: 1.4 kg Modi fi cations techniques et de conception ré- servées.
  • Seite 91 Beko Grundig Deutschland GmbH Thomas-Edison-Platz 3 D-63263 Neu-Isenburg www.grundig.com...

Diese Anleitung auch für:

Dkr 2000 bt dab+ cd

Inhaltsverzeichnis