Inhaltsverzeichnis
Werbung
Verfügbare Sprachen
Verfügbare Sprachen
Quicklinks
Werbung
Kapitel
Inhaltsverzeichnis

Verwandte Anleitungen für Videotec HEG Serie


Inhaltszusammenfassung für Videotec HEG Serie
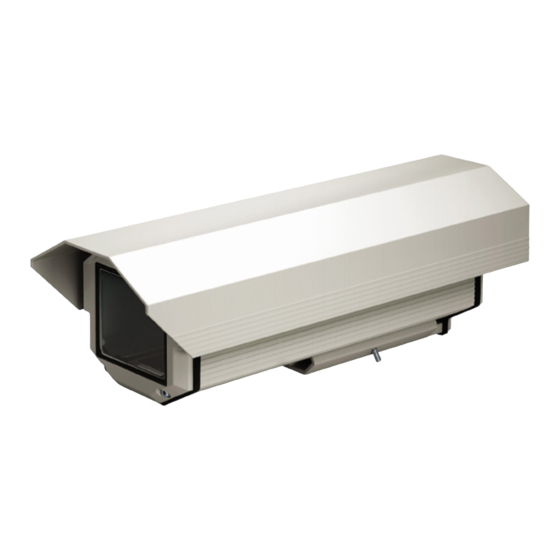
- Seite 1 Large-sized aluminium camera housing English - Instruction manual Italiano - Manuale di istruzioni Français - Manuel d’instructions Deutsch - Bedienungsanleitung Русский - Руководство по эксплуатации...
- Seite 3 ENGLISH Large-sized aluminium camera housing English - Instruction manual...
-
Seite 4: Inhaltsverzeichnis
Contents E N G L I S H 1 About this manual ........................3 1.1 Typographical conventions ..............................3 2 Notes on copyright and information on trademarks ............. 3 3 Safety rules..........................3 4 Identification ..........................4 4.1 Product description and type designation ........................4 4.2 Product marking .................................. -
Seite 5: About This Manual
1 About this manual 3 Safety rules Read all the documentation supplied carefully before CAUTION! Device installation and installing and using this unit. Keep the manual in a maintaining must be performed by convenient place for future reference. specialist technical staff only. 1.1 Typographical conventions •... -
Seite 6: Identification
4 Identification 5.2 Unpacking When the product is delivered, make sure that the 4.1 Product description and type package is intact and that there are no signs that it designation has been dropped or scratched. If there are obvious signs of damage, contact the Robust and large aluminium housing designed to supplier immediately. -
Seite 7: Installation
6 Installation 6.2 How to install the camera 6.1 How to open the housing Power supply can be provided by the board supplied with the product. Make sure the Unscrew the screws on the rear cover plate and voltage values are appropriate. loosen the 2 dowels on the outer slide. -
Seite 8: Board Description
6.3 Board description 6.4 Connection of the power supply line The board may appear different to that illustrated. CAUTION! The type of cable used must be compatible with the planned use. Comply Depending on the product version, the with the national regulations in force on board may not be equipped with all electrical installation. -
Seite 9: Installation Of The Version With Double Filter For Air Renewal
6.5 Installation of the version 7 Accessories with double filter for air renewal For further details on configuration and use, refer to the relative manual. During installation pay attention to the orientation of the air inlet filter fins. 7.1 Heater 7.1.1 Heater installation At the end of istallation, connect the wiring to the terminal (heater power supply, 6.3 Board description,... -
Seite 10: Maintenance And Cleaning
8 Maintenance and cleaning 9 Information on disposal and recycling Before doing any technical work on the device, disconnect the power supply. The European Directive 2012/19/EU on Waste Electrical and Electronic Equipment (WEEE) mandates 8.1 Cleaning that these devices should not be disposed of in the normal flow of municipal solid waste, but they should 8.1.1 Cleaning the window and plastic be collected separately in order to optimize the... -
Seite 11: Technical Data
10 Technical data Supply voltage/Current consumption (version with triple heater, continuous duty fan , Ton 15°C±3°C (59°F ±5°F), Toff 22°C±3°C (72°F±5°F)): 10.1 General • 120Vac, 1A max, 50/60Hz Constructed from aluminium • 230Vac, 0.52A max, 50/60Hz Epoxypolyester powder painting, RAL9002 colour Supply voltage/Current consumption (version with Stainless steel external screws heater, blower and thermostat for models with... -
Seite 12: Technical Drawings
Email: info@videotec.com Tel. +33 1 60491816 - Fax +33 1 69284736 Email: info.fr@videotec.com Asia Pacific Videotec (HK) Ltd Americas Videotec Security, Inc. Flat 8, 19/F. On Dak Industrial Building, No. 2-6 Wah Sing Street Gateway Industrial Park, 35 Gateway Drive, Suite 100 Kwai Chung, New Territories - Hong Kong Plattsburgh, NY 12901 - U.S.A. - Seite 13 ITALIANO Custodia per telecamera di grandi dimensioni Italiano - Manuale di istruzioni...
- Seite 14 Sommario I T A L I A N O 1 Informazioni sul presente manuale ..................3 1.1 Convenzioni tipografiche ..............................3 2 Note sul copyright e informazioni sui marchi commerciali ........... 3 3 Norme di sicurezza ........................3 4 Identificazione .......................... 4 4.1 Descrizione e designazione del prodotto ........................
-
Seite 15: Informazioni Sul Presente Manuale
1 Informazioni sul presente 3 Norme di sicurezza manuale ATTENZIONE! L'installazione e la manutenzione del dispositivo devono Prima di installare e utilizzare questa unità, leggere essere eseguite solo da personale tecnico attentamente tutta la documentazione fornita. Tenere specializzato. il manuale a portata di mano per consultazioni successive. -
Seite 16: Identificazione
4 Identificazione 5.2 Disimballaggio Alla consegna del prodotto verificare che l'imballo 4.1 Descrizione e designazione sia integro e non presenti segni evidenti di cadute o del prodotto abrasioni. In caso di danni evidenti all'imballo contattare Robusta e spaziosa custodia in alluminio adatta ad immediatamente il fornitore. -
Seite 17: Installazione
6 Installazione 6.2 Installazione della telecamera 6.1 Apertura della custodia L'alimentazione può essere fornita dalla scheda in dotazione al prodotto. Accertarsi Svitare le viti poste sul fondo posteriore e allentare i che i valori di tensione siano adeguati. 2 grani posti sulla slitta esterna. Sfilare il corpo della Aprire la custodia come descritto nel relativo capitolo custodia. -
Seite 18: Descrizione Della Scheda
6.3 Descrizione della scheda 6.4 Collegamento della linea di alimentazione L'aspetto della scheda potrebbe differire da quello illlustrato. ATTENZIONE! La tipologia di cavo utilizzata deve essere compatibile con l'impiego La scheda, a seconda della versione del previsto. Attenersi alle regole nazionali in prodotto, potrebbe non essere dotata di vigore riguardanti le installazioni elettriche. -
Seite 19: Installazione Della Versione Con Doppio Filtro Per Ricambio Dell'aria
6.5 Installazione della versione 7 Accessori con doppio filtro per ricambio Per ulteriori dettagli sulla configurazione dell'aria e l’utilizzo fare riferimento al manuale del relativo accessorio. Durante l'installazione prestare attenzione 7.1 Riscaldamento all'orientamento delle alette del filtro di ingresso dell'aria. 7.1.1 Installazione del riscaldamento Terminata l'installazione, collegare il cablaggio al morsetto (alimentazione del riscaldamento, 6.3... -
Seite 20: Manutenzione E Pulizia
8 Manutenzione e pulizia 9 Informazioni sullo smaltimento e il riciclo Prima di effettuare interventi tecnici sull’apparecchio togliere l’alimentazione La Direttiva Europea 2012/19/UE sui Rifiuti di elettrica. Apparecchiature Elettriche ed Elettroniche (RAEE) prevede che questi apparecchi non debbano essere 8.1 Pulizia smaltiti nel normale flusso dei rifiuti solidi urbani, ma che vengano raccolti separatamente per ottimizzare 8.1.1 Pulizia della finestra e delle parti... -
Seite 21: Dati Tecnici
10 Dati tecnici Tensione di alimentazione/Corrente assorbita (versione con triplo riscaldamento, ventola a ciclo continuo , Ton 15°C±3°C, Toff 22°C±3°C): 10.1 Generale • 120Vac, 1A max, 50/60Hz Costruzione in alluminio • 230Vac, 0.52A max, 50/60Hz Verniciatura a polveri di epossipoliestere, colore Tensione di alimentazione/Corrente assorbita RAL9002 (versione con riscaldamento, ventilatore e termostato... -
Seite 22: Disegni Tecnici
Email: info@videotec.com Tel. +33 1 60491816 - Fax +33 1 69284736 Email: info.fr@videotec.com Asia Pacific Videotec (HK) Ltd Americas Videotec Security, Inc. Flat 8, 19/F. On Dak Industrial Building, No. 2-6 Wah Sing Street Gateway Industrial Park, 35 Gateway Drive, Suite 100 Kwai Chung, New Territories - Hong Kong Plattsburgh, NY 12901 - U.S.A. - Seite 23 FRANÇAIS Caisson pour caméra de grandes dimensions Français - Manuel d’instructions...
- Seite 24 Sommaire F R A N Ç A I S 1 À propos de ce mode d’emploi ....................3 1.1 Conventions typographiques ............................3 2 Notes sur le copyright et informations sur les marques de commerce ........ 3 3 Normes de securité ........................3 4 Identification ..........................
-
Seite 25: Propos De Ce Mode D'emploi
1 À propos de ce mode 3 Normes de securité d’emploi ATTENTION! L’installation et l’entretien du dispositif doivent être effectués Avant d'installer et d'utiliser cette unité, lire exclusivement par un personnel technique attentivement toute la documentation fournie. qualifié. Garder le manuel à portée de main pour des consultations successives. -
Seite 26: Identification
4 Identification 5.2 Déballage Lors de la livraison du produit, vérifier que 4.1 Description et désignation du l’emballage est en bon état et l’absence de tout signe produit évident de chute ou d’abrasion. En cas de dommages évidents, contacter Caisson robuste et spacieux en aluminium adapté immédiatement le fournisseur. -
Seite 27: Installation
6 Installation 6.2 Installation de la caméra 6.1 Ouverture du caisson L'alimentation peut être dotée de la carte fournie avec le produit fournie. Desserrer les vis placées sur le panneau postérieur S'assurer que les valeurs de tension soient ainsi que les 2 vis sans tête de la glissière externe. appropriées. -
Seite 28: Description De La Carte
6.3 Description de la carte 6.4 Connexion de la ligne d'alimentation L'aspect de la carte pourrait être différer de celui qui est illustré. ATTENTION! Le type de câble utilisé doit être compatible avec l'usage prévu. La carte, selon la version du produit, Respectez les règles nationales en vigueur pourrait ne pas être munie de toutes les en matière d'installations électriques. -
Seite 29: Installation De La Version Avec Double Filtre Pour Le Changement D'air
6.5 Installation de la version avec 7 Accessoires double filtre pour le changement Pour de plus amples informations sur la d'air configuration et l'utilisation, consulter le manuel de l'accessoire correspondant. Durant l'installation prêter l'installation à 7.1 Chauffage l'orientation des ailettes du filtre d'entrée de l'air. -
Seite 30: Entretien Et Nettoyage
8 Entretien et nettoyage 9 Informations sur l'élimination et le recyclage Sectionner l’alimentation électrique avant toute intervention technique sur l’appareil. La Directive Européenne 2012/19/UE sur les déchets d'équipements électriques et électroniques (DEEE) 8.1 Nettoyage exige que ces dispositifs ne doivent pas être éliminés dans le flux normal de déchets solides municipaux, 8.1.1 Nettoyage de la fenêtre et des mais ils doivent être collectés séparément afin... -
Seite 31: Données Techniques
10 Données techniques Tension d’alimentation/Courant absorbé (version avec triple chauffage, ventilateur à cycle continu , Ton 15°C±3°C, Toff 22°C±3°C): 10.1 Généralités • 120Vac, 1A max, 50/60Hz Construction en aluminium • 230Vac, 0.52A max, 50/60Hz Vernissage avec poudres époxypolyester, couleur Tension d’alimentation/Courant absorbé (version RAL9002 avec chauffage, ventilateur et thermostat avec Visserie extérieure en acier inox... -
Seite 32: Dessins Techniques
Email: info@videotec.com Tel. +33 1 60491816 - Fax +33 1 69284736 Email: info.fr@videotec.com Asia Pacific Videotec (HK) Ltd Americas Videotec Security, Inc. Flat 8, 19/F. On Dak Industrial Building, No. 2-6 Wah Sing Street Gateway Industrial Park, 35 Gateway Drive, Suite 100 Kwai Chung, New Territories - Hong Kong Plattsburgh, NY 12901 - U.S.A. -
Seite 33: Grosses Kameragehäuse
DEUTSCH Grosses Kameragehäuse Deutsch - Bedienungsanleitung... - Seite 34 Inhaltsverzeichnis D E U T S C H 1 Allgemeines ..........................3 1.1 Schreibweisen..................................3 2 Anmerkungen zum Copyright und Informationen zu den Handelsmarken ......3 3 Sicherheitsnormen ........................3 4 Identifizierung .......................... 4 4.1 Beschreibung und Bezeichnung des Produktes ......................4 4.2 Kennzeichnung des Produkts ............................
-
Seite 35: Allgemeines
1 Allgemeines 3 Sicherheitsnormen Vor Installation und Anwendung der Einheit ist die ACHTUNG! Die Installation und Wartung gesamte gelieferte Dokumentation aufmerksam zu der Vorrichtung ist technischen Fachleuten lesen. Zum späteren Nachschlagen das Handbuch in vorbehalten. Reichweite aufbewahren. • Der Hersteller lehnt jede Haftung für eventuelle 1.1 Schreibweisen Schäden ab, die aufgrund unsachgemäßer Anwendung der in diesem Handbuch erwähnten... -
Seite 36: Identifizierung
4 Identifizierung 5.2 Entfernen der Verpackung Bei der Lieferung des Produktes ist zu prüfen, ob die 4.1 Beschreibung und Verpackung intakt ist oder offensichtliche Anzeichen Bezeichnung des Produktes von Stürzen oder Abrieb aufweist. Bei offensichtlichen Schadensspuren an der Robustes, geräumiges Aluminiumgehäuse für die Verpackung muss umgehend der Lieferant Aufnahme von Kameras der Typen 1/2", 1/3"... -
Seite 37: Installation
6 Installation 6.2 Installation der Kamera 6.1 Öffnung des Schutzgehause Die Stromversorgung muss über die Karte erfolgen, die im Lieferumfang des Werden die Schrauben aus der hinteren Abdeckplatte Geräts enthalten ist. Prüfen, dass die entfernt und die 2 Gewindestifte auf dem Spannungswerte angemessen sind. -
Seite 38: Beschreibung Der Platine
6.3 Beschreibung der Platine 6.4 Anschluss der Stromversorgung Die Abbildung kann von der tatsächlichen Karte abweichen. ACHTUNG! Der verwendete Kabeltyp muss mit dem vorgesehenen Einsatz kompatibel Je nach Geräteausführung verfügt die Karte sein. An die geltenden nationalen möglicherweise nicht über alle Funktionen. Vorschriften in Bezug auf elektrische Installationen halten. -
Seite 39: Installation Der Version Mit Doppelfilter Für Den Luftaustausch
6.5 Installation der Version 7 Zubehör mit Doppelfilter für den Für weitere Details zur Konfiguration und Luftaustausch zum Gebrauch beachten Sie bitte das Handbuch des entsprechenden Geräts. Während der Installation auf die 7.1 Heizung Ausrichtung der Luftklappen am Lufteinlassfilter achten. 7.1.1 Installation der Heizung Am Ende der Montage die Verkabelung an die Klemme verinden (Heizungsversorgung, 6.3... -
Seite 40: Wartung Und Reinigung
8 Wartung und Reinigung 9 Informationen bezüglich Entsorgung und Recycling Vor technischen Eingriffen am Gerät muss die Stromversorgung unterbrochen Die EU-Richtlinie 2012/19/ЕU über Elektro- und werden. Elektronik-Altgeräte (WEEE) verpflichtet, dass diese Geräte nicht zusammenn mit festen 8.1 Reinigung Haushaltsabfällen entsorgt werden sollten. Diese besonderen Abfällen müssen separat gesammelt 8.1.1 Reinigung des Fensters und der werden, um den Rückgewinnungsstrom und das... -
Seite 41: Technische Daten
10 Technische Daten Versorgungsspannung/Stromaufnahme (Ausführung mit Dreifacheheizung, Lüfter im Dauerbetrieb , Ton 15°C±3°C, Toff 22°C±3°C): 10.1 Allgemeines • 120Vac, 1A max, 50/60Hz Aus Aluminium • 230Vac, 0.52A max, 50/60Hz Pulverlackierung mit Epoxydpolyester, Farbe RAL9002 Versorgungsspannung/Stromaufnahme (Version mit Externe Schrauben aus rostfreiem Stahl Heizung, Lüfter und Thermostat mit Doppelfilter für Luftwechsel, Ton 35°C±3°C, Toff 20°C±3°C): 10.2 Mechanik... -
Seite 42: Technische Zeichnungen
Email: info@videotec.com Tel. +33 1 60491816 - Fax +33 1 69284736 Email: info.fr@videotec.com Asia Pacific Videotec (HK) Ltd Americas Videotec Security, Inc. Flat 8, 19/F. On Dak Industrial Building, No. 2-6 Wah Sing Street Gateway Industrial Park, 35 Gateway Drive, Suite 100 Kwai Chung, New Territories - Hong Kong Plattsburgh, NY 12901 - U.S.A. - Seite 43 РУССКИЙ Алюминиевый кожух для камеры большого размера Русский - Руководство по эксплуатации...
- Seite 44 Комплект оборудования Р У С С К И Й 1 О настоящем руководстве ..................... 3 1.1 Типографские условные обозначения ........................3 2 Примечания в отношении авторского права и информация о торговых марках..3 3 Правила техники безопасности ................... 3 4 Обозначение ..........................4 4.1 Описание...
-
Seite 45: О Настоящем Руководстве
1 О настоящем 3 Правила техники руководстве безопасности Внимательно ознакомьтесь со всей ПРЕДУПРЕЖДЕНИЕ! Установка документацией, входящей в комплект поставки, и обслуживание устройства перед тем как приступить к установке и должны осуществляться только эксплуатации данного оборудования. Всегда специализированным персоналом. держите руководство под рукой, чтобы им можно было... -
Seite 46: Обозначение
4 Обозначение 5.2 Распаковка При получении устройства убедитесь, что 4.1 Описание и обозначение упаковка не повреждена и не имеет явных типа устройства признаков падения или царапин. В случае наличия видимых повреждений Надежный и вместительный алюминиевый незамедлительно свяжитесь с поставщиком. кожух для размещения камер 1/2", 1/3" и 1/4" и В... -
Seite 47: Монтаж
6 Монтаж 6.2 Установка камеры 6.1 Как открыть кожух Питание может обеспечиваться платой, предоставляемой вместе с устройством Отвинтите винты, установленные в задней Убедитесь в правильности значений части днища и ослабьте 2 установочных винта, напряжения. установленных н внешних салазках. Снимите Откройте кожух, следуя указаниям в корпус... -
Seite 48: Описание Платы
6.3 Описание платы 6.4 Подключение линии питания Плата может отличаться от той, что указана на рисунке. ПРЕДУПРЕЖДЕНИЕ! Тип используемого кабеля должен быть совместимым с Плата, в зависимости от версии предполагаемым видом использования. устройства, может не обладать всеми Соблюдайте действующие в вашей функциями. -
Seite 49: Установка Модели С Двойным Фильтром Для Воздухообмена
6.5 Установка модели с 7 Комплектующие двойным фильтром для Дополнительная информация по воздухообмена конфигурации и использованию представлена в соответствующем Во время установки обратите внимание руководстве. на направление ребер впускного 7.1 Нагреватель воздушного фильтра. 7.1.1 Установка нагревателя По завершении монтажа подключите кабель к клемме... -
Seite 50: Техническое Обслуживание И Очистка
8 Техническое 9 Информация об обслуживание и очистка утилизации и переработке Европейская директива 2012/19/ЕС Об Отходах Отключите источник питания, перед тем Электрического и Электронного оборудования как приступить к проведению каких- (RAEE) предписывает, что данные устройства либо технических работ на устройстве. не... -
Seite 51: Технические Характеристики
10 Технические Напряжение сети питания/Потребляемый ток (модель с тройным нагревателем, вентилятор характеристики непрерывного цикла , Ton 15°C±3°C, Toff 22°C±3°C): • 120Vac, 1A max, 50/60Hz 10.1 Общие сведения • 230Vac, 0.52A max, 50/60Hz Модель без дополнительного оборудования Напряжение сети питания/Потребляемый ток (версия... -
Seite 52: Технические Чертежи
Email: info@videotec.com Tel. +33 1 60491816 - Fax +33 1 69284736 Email: info.fr@videotec.com Asia Pacific Videotec (HK) Ltd Americas Videotec Security, Inc. Flat 8, 19/F. On Dak Industrial Building, No. 2-6 Wah Sing Street Gateway Industrial Park, 35 Gateway Drive, Suite 100 Kwai Chung, New Territories - Hong Kong Plattsburgh, NY 12901 - U.S.A. - Seite 54 Email: info@videotec.com Tel. +33 1 60491816 - Fax +33 1 69284736 Email: info.fr@videotec.com Asia Pacific Videotec (HK) Ltd Americas Videotec Security, Inc. Flat 8, 19/F. On Dak Industrial Building, No. 2-6 Wah Sing Street Gateway Industrial Park, 35 Gateway Drive, Suite 100 Kwai Chung, New Territories - Hong Kong Plattsburgh, NY 12901 - U.S.A.