Villeroy & Boch ProDetect 2 Installationsanleitung
Vorschau ausblenden
Andere Handbücher für ProDetect 2:
- Bedienungsanleitung (121 Seiten) ,
- Installationsanleitung (30 Seiten) ,
- Bedienungsanleitung (114 Seiten)

Verwandte Anleitungen für Villeroy & Boch ProDetect 2


Inhaltszusammenfassung für Villeroy & Boch ProDetect 2
-
Seite 1: Titelseite
Installationsanleitung DE Installation instructions EN-UK Manuel d'installation FR ProDetect 2... - Seite 3 Contents Contents Installationsanleitung Installation instructions Manuel d'installation S. 3...
-
Seite 4: Titelseite
Installationsanleitung Elektronisches Urinalspülsystem ProDetect 2... -
Seite 5: Impressum
Impressum 3 Impressum Villeroy & Boch AG Saaruferstraße 66693 Mettlach Deutschland Telefon: +49 (0) 68 64 / 8 10 E-Mail: information@villeroy-boch.com www.villeroy-boch.com Das Herunterladen und Verwenden von Bildern unserer Seiten ist ohne die schriftliche Zustimmung der Villeroy & Boch AG nicht gestattet. Vorstand Frank Göring (Vorsitzender) Andreas Pfeiffer... -
Seite 6: Inhaltsverzeichnis
Inhaltsverzeichnis Inhaltsverzeichnis Titelseite......................1 Titelseite......................4 Impressum......................5 Allgemeine Angaben..................7 Verwendete Darstellung..................7 Zielgruppen......................7 Gewährleistung....................... Sicherheit......................8 Bestimmungsgemäßer Gebrauch................8 Vernünftigerweise vorhersehbare Fehlanwendung..........8 Allgemeine Sicherheitshinweise................9 Technische Daten..................... 10 Lieferumfang....................13 Standard Lieferumfang................... 13 Optionale Bauteile....................15 Installation...................... -
Seite 7: Allgemeine Angaben
Allgemeine Angaben 4 Allgemeine Angaben 4.1 Verwendete Darstellung Handlungsanweisungen Auszuführende Schritte sind als nummerierte Liste dargestellt. Die Reihenfolge der Schritte ist einzuhalten. Beispiel: 1. Handlungsschritt 2. Handlungsschritt Ergebnisse einer Handlungsanweisung werden wie folgt dargestellt: Pfeil Pfeil Aufzählungen Aufzählungen ohne zwingende Reihenfolge sind als Liste mit Aufzählungspunkten dargestellt. Beispiel: Punkt 1 •... -
Seite 8: Sicherheit
Für Schäden aus nicht bestimmungsgemäßer Verwendung trägt der Betreiber die alleinige Verantwortung und der Hersteller übernimmt keinerlei Haftung. Aufgrund des geringen Bauraums der Urinale ist bei der Installation des ProDetect 2 sorgfältig zu arbeiten. Folgende Hinweise beachten: Kabel dürfen nicht gequetscht werden •... -
Seite 9: Allgemeine Sicherheitshinweise
Sicherheit 5.3 Allgemeine Sicherheitshinweise Warnung! Stromschlag durch Berühren stromführender Komponenten! Schwere Verletzungen bis hin zum Tod können die Folge sein. Im Falle einer Netzvariante den Netzanschluss ausschließlich von einer Elektrofachkraft ausführen lassen. Den Netzstecker nicht mit nassen Händen einstecken oder abziehen. Sicherstellen, dass während der Arbeiten die Leitung stromfrei geschaltet und gegen Wiedereinschalten gesichert ist. -
Seite 10: Technische Daten
Technische Daten 6 Technische Daten Sensorfunktion Erkennen des Urinflusses in der Keramik Sensorprinzip HF Sensor 5,8 GHz Spannungsversorgung Schaltnetzteil (Varianten) primär: 100-240V, +/- 10%, 50 - 60 • sekundär: 12V DC, 1A • Batterie 6 x 1,5V Alkali (Typ AA / LR6) Lebensdauer Batterie ca. - Seite 11 Technische Daten Einstellfunktionen: Spülmenge 0,8 / 2 / 3 / 4 l (bei 3 bar) Detailierte Einstellungen über App (optional) (Werkseinstellung fett) Hygienespülung ein / aus Detailierte Einstellungen über App (optional) Stadionmodus ein / aus Detailierte Einstellungen über App (optional) Basis-Empfindlichkeit niedrig / normal Auch über App Mindest-Nutzungsdauer 9 / 7 / 5 / 3 s...
- Seite 12 Technische Daten Hybridmodus ein / aus sowie Intervalle 1 / Auch über App 3 / 6 / 12 / 24 / 48 h Auf Werkseinstellung zurücksetzen Auch über App Reinigungs-/Sperrmodus (ein / aus) Nur über App Schutzgrad der Elektronik IP 64 Staubdicht, Schutz gegen Spritzwasser aus allen Richtungen...
-
Seite 13: Lieferumfang
Lieferumfang 7 Lieferumfang 7.1 Standard Lieferumfang Lieferumfang vor Ort auf Vollständigkeit und evtl. Schäden prüfen. Urinalspülsystem mit Netzteil Bauteil Bezeichnung Artikelnummer Stück Gesamtsystem 9190N100 Steuereinheit 91906800 220V Netzteil 91906400 HF-Sensor 91906000 Verschlauchung / Wasserstrecke inkl. 91906600 Magnetventil Abdichtungsgummi 91905500 Terostat Tape Installationsanleitung Bedienungsanleitung S. - Seite 14 Lieferumfang Urinalspülsystem mit Batterie Bauteil Bezeichnung Artikelnummer Stück Gesamtsystem 9190B100 Steuereinheit 91906800 Batteriefach 91906500 HF-Sensor 91906000 Verschlauchung / Wasserstrecke inkl. 91906600 Magnetventil Abdichtungsgummi 91905500 Terostat Tape Installationsanleitung Bedienungsanleitung S. 14...
-
Seite 15: Optionale Bauteile
Lieferumfang 7.2 Optionale Bauteile Bauteil Bezeichnung Artikelnummer Bluetooth-Adapter (nur möglich bei Netzvariante) 91906100 Adapter für Netzanschluss 91905700 Bauteil Bezeichnung Artikelnummer Stück Bluetooth-Adapter 91906100 (nur möglich bei Netzvariante) Bluetooth-Adapter Terostat Tape Adapter für Netzanschluss 91905700 Adapter für Netzanschluss Einbauanleitung S. 15... -
Seite 16: Installation
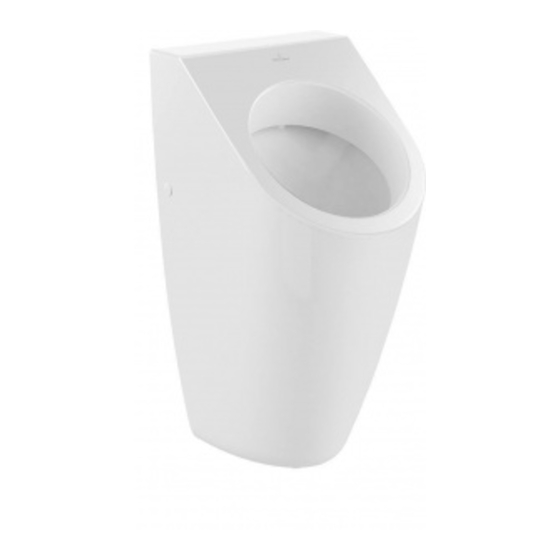
Bei Urinalen mit senkrechtem Abgang nur die Netzvariante verwenden. Wir empfehlen den optionalen Bluetooth-Adapter zu installieren. Dadurch wird die einfache Bedienung des Systems, ohne Demontage des Urinals, sichergestellt. ProDetect 2 nur in Verbindung mit nachfolgend aufgeführten Urinalen verwenden: Architectura 5586 / 5587 / 5574 •... - Seite 17 Installation 1. Das Gewinde am Anschlussstutzen der Verschlauchung mit Teflonband abdichten und den Anschlussstutzen in den Wasseranschluss eindrehen. 2. Abdichtungsgummi aufstecken. S. 17...
-
Seite 18: Urinal Montieren
Installation Hinweis Die Verschlauchung muss parallel zur Wand Das Magnetventil darf nicht von der Wand ausgerichtet sein. wegstehen. 3. Beide Kontermuttern am Aufnahmegehäuse des Magnetventils fest anziehen. 4. Anschliessend Dichtigkeitstest durchführen. 5. Je nach Urinaltyp ggf. die Urinal-Befestigungen anschrauben. 8.3 Urinal montieren Für die Montage des Urinals, siehe separate Montageanleitung des verwendeten Urinals. -
Seite 19: Einbaupositionen
Installation Einbaupositionen S. 19... -
Seite 20: Bluetoothadapter Installieren (Optional)
2. Je nach verwendetem Urinal den HF-Sensor an die markierte Stelle an der Keramik kleben und festdrücken. 8.5 Bluetoothadapter installieren (optional) Hinweis Netzvariante Der Bluetooth-Adapter kann nur bei Netzbetrieb verwendet werden. ProDetect 2 ist für den Anschluss eines Bluetooth-Adapters vorgerüstet. Der Bluetooth-Adapter ist permanent im Urinal verbaut. S. 20... -
Seite 21: Einbauposition
Installation Einbauposition Bluetooth-Adapter befestigen Hinweis Die Keramik und das zu befestigende Bauteil müssen im Klebebereich sauber, trocken und staubfrei sein. 1. Das mitgelieferte Terostat-Tape am Bluetooth-Adapter befestigen. Die beschriftete Seite muss sichtbar sein. 2. Den Bluetooth-Adapter an die vorgesehene Stelle an der Keramik kleben und festdrücken. S. -
Seite 22: Anschlussschema
Installation Anschlussschema Steuereinheit Spannungsversorgung Verschlauchung inkl. Magnetventil Bluetooth-Adapter Sensor Bei Anschluss ohne Bluetooth-Adapter Das Netzteil direkt mit der Steuereinheit verbinden (Pfeil). 8.6 Anschluss Netzvariante vorbereiten Hinweis Es darf keine Aufputzdose gesetzt werden und es dürfen keine Abdeckungen über die Wandebene hinaus stehen! S. - Seite 23 Installation Montagemaße für Netzanschluss Montagemaße + Position Stromauslass für Netzvariante Art.-Nr. Collection A [mm] B [mm] C [mm] D [mm] E [mm] F [mm] 5586 Architectura 5587 Architectura 5574 Architectura 7507 O.novo / Omnia 7557 O.novo / Omnia 7527 O.novo / Omnia 7513 Subway 5504...
-
Seite 24: Urinalspülsystem Installieren
Installation 8.7 Urinalspülsystem installieren Vorarbeiten bei Netzvariante Stromanschluss herstellen. Montage des Netzadapters bei Netzvariante S. 24... - Seite 25 Installation Urinale mit waagerechtem Abgang Typ 5586, 5587 S. 25...
- Seite 26 Installation 1. Klemmbügel auf dem Netzteil und der Steuereinheit montieren. 2. Steuereinheit seitlich an das Siphonrohr klemmen. Bluetooth-Adapter, sofern dieser verwendet wird, und HF- Sensor an die Steuereinheit anschließen. 3. Magnetventilkabel und Spannungsversorgungskabel der Steuereinheit (bzw. Bluetoothkabel bei Verwendung des Bluetooth-Adapters) durch die Revisionsöffnung nach unten führen.
- Seite 27 Installation Urinale mit waagerechtem Abgang Typ 5574, 7507, 7557, 7527, 7513, 5504 S. 27...
- Seite 28 Installation 1. Siphon montieren, ggf. Netzanschluss herstellen (nur bei Netzvariante). 2. Klemmbügel auf dem Netzteil montieren und die Steuereinheit auf dem Netzteil aufrasten. 3. Magnetventilkabel, Sensorkabel und Steuereinheit inkl. Netzteil/Batteriefach durch die Revisionsöffnung nach unten führen. Bei Verwendung eines Bluetooth-Adapters ebenfalls die Anschlusskabel durch die Revisionsöffnung nach unten führen.
- Seite 29 Installation Urinale mit senkrechtem Abgang Typ 5574, 7507, 7557, 7527, 7513, 5504 Hinweis Urinale mit senkrechtem Abgang Bei Urinalen mit senkrechtem Abgang nur die Netzvariante verwenden. Wir empfehlen den optionalen Bluetooth-Adapter zu installieren. Dadurch wird die einfache Bedienung des Systems, ohne Demontage des Urinals, sichergestellt. S.
- Seite 30 Installation S. 30...
- Seite 31 Installation 1. Rastnasen an der Steuereinheit wegbrechen. Hinweis Die Keramik und das zu befestigende Bauteil müssen im Klebebereich sauber, trocken und staubfrei sein. 2. Das mitgelieferte Terostat-Tape an der Gehäuseunterseite der Steuereinheit und des Netzteils anbringen. 3. Steuereinheit und Netzteil an der Keramik anbringen, Positionen siehe "Gehäusepositionen Urinale mit senkrechtem Abgang", Seite Hinweis...
- Seite 32 Installation Gehäusepositionen Urinale mit senkrechtem Abgang S. 32...
-
Seite 33: Außerbetriebnahme
Außerbetriebnahme 9 Außerbetriebnahme Vorsicht! Gefahr für die Umwelt durch falsche Handhabung von umweltgefährdenden Stoffen! Bei falschem Umgang mit umweltgefährdenden Stoffen, insbesondere bei falscher Entsorgung, können erhebliche Schäden für die Umwelt entstehen. Elektronikgeräte recyclen oder fachgerecht entsorgen. Elektronikgeräte nie über den Hausmüll entsorgen! Die vor Ort gültigen Vorschriften beachten. -
Seite 34: Ersatzteile
Ersatzteile 10 Ersatzteile Ersatzteil Bezeichnung Artikelnummer Abdichtungsgummi 91905500 Verschlauchung / Wasserstrecke inkl. Magnetventil 91906600 220V Netzteil 91906400 Batteriefach 91906500 Steuereinheit 91906800 HF-Sensor 91906000 Magnetventil 91906700 Rückflussverhinderer (Einsatz in Einlaufstutzen) 91906300 S. 34... - Seite 35 Ersatzteile Ersatzteil Bezeichnung Artikelnummer Siebdichtung (Einsatz in Verschlauchung) 91906200 Ersatzteil Bezeichnung Artikelnummer Abdichtungsgummi 91905500 Verschlauchung / Wasserstrecke inkl. Magnetventil (vormontiert) 91906600 220V Netzteil 91906400 Batteriefach 91906500 Steuereinheit 91906800 HF-Sensor 91906000 Magnetventil 91906700 S. 35...
- Seite 36 Ersatzteile Ersatzteil Bezeichnung Artikelnummer Rückflussverhinderer (Einsatz in Einlaufstutzen) 91906300 Siebdichtung (Einsatz in Verschlauchung) 91906200 S. 36...