Herunterladen Inhalt Inhalt Diese Seite drucken
tau K892M Installationsanleitung
Vorschau ausblenden Andere Handbücher für K892M:

Werbung

Verfügbare Sprachen
  • DE

Verfügbare Sprachen

  • DEUTSCH, seite 16
K892M
SCHEDA COMANDO PER 1 O 2 MOTORI MONOFASE 230 Vac
CONTROL CARD FOR ONE OR TWO 230 Vac SINGLE-PHASE MOTORS
STEUERKARTE FÜR EINEN ODER ZWEI EINPHASIGE 230Vac MOTOREN
CARTE DE COMMANDE POUR UN OU DEUX MOTEURS MONOPHASÉS 230 Vca
TARJETA DE CONTROL PARA UNO O DOS MOTORES MONOFÁSICOS 230 Vac
>ITALIANO
PER PORTE BASCULANTI
>ENGLISH
FOR OVERHEAD DOORS
>DEUTSCH
FÜR SCHWINGTORE
>FRANÇAIS
POUR PORTES BASCULANTES
>ESPAÑOL
PARA PUERTAS BASCULANTES
GUIDA ALL'INSTALLAZIONE
INSTALLATION GUIDE
INSTALLATIONSANLEITUNG
NOTICE D'INSTALLATION
GUÍA PARA LA INSTALACIÓN
TAU
srl
via E. Fermi, 43 - 36066 Sandrigo (VI) Italia - Tel ++390444750190 - Fax ++390444750376 - E-mail: info@tauitalia.com
Edizione 02 - anno 2007
http://www.tauitalia.com
rev. 02 del 16/02/2007
K892M
1

Werbung

Inhaltsverzeichnis
loading

Inhaltszusammenfassung für tau K892M

  • Seite 1 K892M SCHEDA COMANDO PER 1 O 2 MOTORI MONOFASE 230 Vac CONTROL CARD FOR ONE OR TWO 230 Vac SINGLE-PHASE MOTORS STEUERKARTE FÜR EINEN ODER ZWEI EINPHASIGE 230Vac MOTOREN CARTE DE COMMANDE POUR UN OU DEUX MOTEURS MONOPHASÉS 230 Vca TARJETA DE CONTROL PARA UNO O DOS MOTORES MONOFÁSICOS 230 Vac...
  • Seite 2 This manual has been especially written for use by qualifi ed fi tters. No information given in this manual can be considered as being of interest to end users. This manual is enclosed with control unit K892M and may therefore not be used for different products! Important information: Disconnect the panel from the power supply before opening it.
  • Seite 3 Le présent manuel est destiné exclusivement au personnel technique qualifi é pour l’installation. Aucune information contenue dans ce fascicule ne peut être considérée comme intéressante pour l’utilisateur fi nal. Ce manuel est joint à l’armoire de commande K892M, il ne doit donc pas être utilisé pour des produits différents ! Recommandations importantes : Couper l’alimentation électrique de l’armoire avant d’y accéder.
  • Seite 4 Este manual está destinado sólo al personal técnico cualifi cado para la instalación. Ninguna información contenida en este manual puede ser considerada interesante para el usuario fi nal. Este manual acompaña a la central K892M; por lo tanto, ¡no debe utilizarse para otro tipo de producto! Advertencias importantes: Corte la alimentación de red a la tarjeta antes de acceder a ella.
  • Seite 5 LA INOBSERVANCIA DE LAS INSTRUCCIONES ANTEDICHAS PUEDE PERJUDICAR EL FUNCIONAMIENTO CORRECTO DEL EQUIPO Y CONSTITUIR UN PELIGRO PARA LAS PERSONAS; EL “FABRICANTE” NO SE CONSIDERA RESPONSABLE POR POSIBLES PROBLEMAS DE FUNCIONAMIENTO Y DAÑOS QUE DE ELLOS SE DERIVEN. K892M...
  • Seite 6 STOP su ingresso esterno (morsetto 17) led rosso di segnalazione APRE/CHIUDE led verde di segnalazione BORDO SENSIBILE RESISTIVO led rosso di segnalazione Indicazioni di programmazione del ricevitore radio led verde di segnalazione Stop pulsantiera integrata K892M...
  • Seite 7: Collegamenti Alla Morsettiera

    K797M o K898M) la morsettiera M5 non è presente. Al suo posto c’è una morsettiera da 3 unità a vite, da cablare come segue: 25-26 ingresso Finecorsa di Chiusura (contatto Normalmente Chiuso); 25 = Comune; 25-27 ingresso Finecorsa di apertura (contatto Normalmente Chiuso); 25 = Comune. K892M...
  • Seite 8: Regolazione Logiche

    180 sec. (tempo fi sso non variabile per il comando temporizzato delle luci). OFF: con il dip-switch 6 in ON (funzione monostabile) il contatto N.A. rimane chiuso per 2 sec. (tempo fi sso non variabile per il comando di una seconda automazione). K892M...
  • Seite 9 7_ se si desidera uscire dalla modalità di apprendimento senza memorizzare un codice, premere brevemente il tasto P1 o il tasto P2. N.B.: nel caso di superamento del nr massimo di codici (nr 8), il led DL8 inizierà a lampeggiare velocemente per circa 3 secondi senza però eseguire la memorizzazione. K892M...
  • Seite 10 Controllare lo stato delle pile del radiocomando. 3_ I motori funzionano al contrario a_ Invertire tra loro i collegamenti del motore sulla morsettiera (morsetti 19 e 21 per il motore 1; morsetti 22 e 24 per il motore 2); K892M...
  • Seite 11: Diagnostics Led

    OPEN LIMIT SWITCH green LED signal CLOSE LIMIT SWITCH green LED signal External input STOP green LED signal (terminal 17) OPEN/CLOSE button red LED signal PRESSURE-SENSITIVE EDGE green LED signal Radio receiver programming red LED signal Integrated push button panel Stop green LED signal K892M...
  • Seite 12 M5 terminal block. In its place is a terminal block with 3 screw units that must be wired as follows: 25-26 Close limit switch input (Normally Closed contact) FCC; 25= Common; 25-27 Open limit switch input (Normally Closed contact) FCA; 25= Common. K892M...
  • Seite 13: Dip-Switches

    (fi xed invariable delay for the timed control of the lights). OFF: with dip-switch 6 ON (monostable function), the N.O. contact remains closed for 2 secs. (fi xed invariable delay for commanding a second automatic system). n°8 not used. K892M...
  • Seite 14: 433.92 Mhz Built-In Radio Receiver

    2_ LED DL8 fl ashes slowly to indicate that the cancellation mode has been activated; 3_ press button P1 again for 3 seconds; 4_ LED DL8 turns off for approx. 3 seconds and then remains steady to indicate that the code has been cancelled; K892M...
  • Seite 15 Check the state of the radio control batteries. 3_ The motors function in reverse a_ Invert the motor connections on the terminal block (terminals 19 and 21 for motor 1; termi- nals 22 and 24 for motor 2); K892M...
  • Seite 16: Endprüfung

    LED für ENDSCHALTER IN ÖFFNUNG grüne LED für ENDSCHALTER IN SCHLIEßUNG grüne LED für STOPP an externem Eingang (Klemme 17) rote LED für Taste AUF/ZU grüne LED für RESISTIVE SCHALTLEISTE rote LED Programmierungsanweisungen für Funkempfänger grüne LED für Stopp durch integrierte Tastatur K892M...
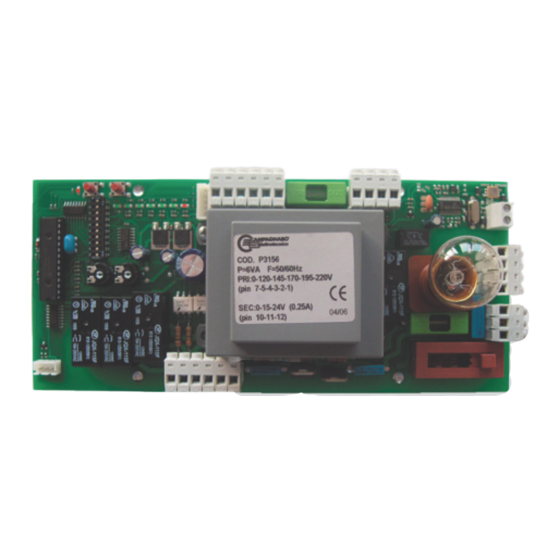
  • Seite 17: Anschlüsse Am Klemmenbrett

    Klemmenbrett mit 3 Einheiten, das festgeschraubt wird und wie folgend verdrahtet werden muss: 25-26 Eingang für Endschalter in Schließung (normal geschlossener Kontakt); 25 = gemeinsamer Leiter; 25-27 Eingang für Endschalter in Öffnung (normal geschlossener Kontakt); 25 = gemeinsamer Leiter. K892M...
  • Seite 18: Einstellung Der Logik

    Sekunden lang geschlossen (fi xe, nicht veränderbare Zeit für die Zeitgebung der Beleuchtung). OFF: mit Dip-Switch 8 auf ON (monostabile Funktion) bleibt der NO-Kontakt 2 Sekunden lang geschlossen (fi xe, nicht veränderbare Zeit für die Steuerung einer zweiten Automatisierung). K892M...
  • Seite 19: Eingebauter 433,92 Mhz Funkempfänger

    7_ wenn man den Erlernungsmodus ohne Speichern eines Codes verlassen will, kurz auf Taste P1 oder P2 drücken. N.B.: wird die Höchstzahl an Funksteuerungen (Nr. 8) überschritten, so wird die LED DL8 ca. 3 Sekunden lang schnell blinken, ohne eine Speicherung auszuführen. K892M...
  • Seite 20: Löschen Von Funksteuerungen

    Den Zustand der Batterien in der Funksteuerung überprüfen. 3_ Verkehrter Drehsinn der Motoren a_ Die Anschlüsse des Motors am Klemmenbrett untereinander umkehren (Klemmen 19 und 21 für Motor Nr. 1; Klemmen 22 und 24 für Motor Nr. 2); K892M...
  • Seite 21 STOP sur entrée extérieure (borne 17) led rouge de signalisation touche OUVRE/FERME led verte de signalisation BORD SENSIBLE À VARIATION DE RÉSISTANCE led rouge de signalisation indications de programmation du récepteur radio led verte de signalisation Stop clavier intégré K892M...
  • Seite 22 K898M) le bornier M5 n’est pas présent. Il est remplacé par un bornier de 3 unités à vis, à câbler comme suit: 25-26 Entrée Microinterrupteur de fermeture (contact Normalement Fermé); 25 = Commun; 25-27 Entrée Microinterrupteur d’ouverture (contact Normalement Fermé); 18 = Commun. K892M...
  • Seite 23 OFF: après le start la porte commencera immédiatement sa manœuvre. n°6 la fonction monostable du relais de commande CH2 (bornes 9 et 10) est activée. OFF: la fonction bistable (ou PAS-À-PAS) du relais de commande CH2 (bornes 9 et 10) est activée. K892M...
  • Seite 24 7_ si l’on souhaite sortir du mode d’apprentissage sans mémoriser un code, presser brièvement la touche P1 ou la touche P2. N.B. : en cas de dépassement du nombre maximum de codes (8), la led DL8 commencera à clignoter rapidement pendant environ 3 secondes sans toutefois effectuer la mémorisation. K892M...
  • Seite 25 Contrôler l’état des piles de la radiocommande. 3_ Les moteurs fonctionnent dans le sens contraire a_ Intervertir les connexions du moteur sur le bornier (bornes 19 et 21 pour le moteur 1 ; bornes 22 et 24 pour le moteur 2). K892M...
  • Seite 26: Prueba De Control

    STOP en la entrada externa (borne 17) led rojo de aviso botón ABRE/CIERRA led verde de aviso de BORDE SENSIBLE RESISTIVO led rojo de aviso de Indicaciones de programación del receptor de radio led verde de aviso de Stop del panel de mandos integrado K892M...
  • Seite 27 3 unidades roscadas, que es necesario cablear de la siguiente forma: 25-26 entrada Final de Recorrido de Cierre (contacto Normalmente Cerrado); 25 = Común; 25-27 entrada Final de Recorrido de Apertura (contacto Normalmente Cerrado); 25 = Común; K892M...
  • Seite 28 180 seg. (tiempo fi jo no variable para el control temporizado de las luces). OFF: con el dip-switch 8 en ON (función monoestable) el contacto N.A. permanece cerrado durante 2 seg. (tiempo fi jo no variable para el control de una segunda automatización). K892M...
  • Seite 29 7_ si desea salir de la modalidad de aprendizaje sin memorizar un código, pulse brevemente la tecla P1 o la tecla P2. N.B.: en caso de que se supere el n.º máximo de códigos (n.º 8), el led DL8 empezará a emitir destellos rápidamente durante aproximadamente 3 segundos pero sin efectuar la memorización. K892M...
  • Seite 30 Controle el estado de las pilas del radiocontrol. 3_ Los motores funcionan al contrario a_ Invierta entre ellas las conexiones del motor en el terminal de conexiones (bornes 19 y 21 para el motor 1; bornes 22 y 24 para el motor 2); K892M...
  • Seite 31 DECLARATION OF CONFORMITY KONFORMITÄTSERKLÄRUNG DECLARATlON DE CONFORMITY DECLARACIÓN DE CONFORMIDAD Fabbricante / Manufacturer / Hersteller / Fabricant / Fabricante: TAU s.r.l. Indirizzo / Address / Adresse / Adresse / Dirección: Via E. Fermi, 43 36066 - Sandrigo VICENZA - ITALY Dichiara sotto la propria responsabilità...
  • Seite 32 SCHEMA CABLAGGIO K892M K892M WIRING DIAGRAM SCHALTPLAN DER K892M SCHÉMA CÂBLAGE K892M ESQUEMA DEL CABLEADO K892M DL6 DL1 DL2 DL3 DL4 DL8 DL5 K892M...
  • Seite 33 K892M...
  • Seite 34 La garantie TAU a une durée de 24 mois à compter de la date d’achat des produits (le document fi scal de vente, ticket de caisse ou facture, fait foi et doit être conservé avec la présente garantie). Le client...

Inhaltsverzeichnis