Herunterladen Inhalt Inhalt Diese Seite drucken
Interlogix VE1120 series Installationsanleitung
Vorschau ausblenden Andere Handbücher für VE1120 series:

Werbung

Verfügbare Sprachen
  • DE

Verfügbare Sprachen

  • DEUTSCH, seite 9
VE1120 Series PIR Detector Installation Sheet
EN DA DE ES
FI
FR
IT
NL NO PL PT SV
1
2
3
(1)
(2)
(3)
© 2019 UTC Fire & Security Americas Corporation, Inc.
P/N 146279999-2 (ML) • REV H • ISS 11MAR19
1 / 36

Werbung

Inhaltsverzeichnis
loading

Inhaltszusammenfassung für Interlogix VE1120 series

  • Seite 1 VE1120 Series PIR Detector Installation Sheet EN DA DE ES NL NO PL PT SV © 2019 UTC Fire & Security Americas Corporation, Inc. P/N 146279999-2 (ML) • REV H • ISS 11MAR19 1 / 36...
  • Seite 2 VE1120 VE1120AM 20 m range (65 ft. 7 in.) 12 m (39 ft. 4 in.) 10 m (32 ft. 9 in.) 8 m (26 ft. 2 in.) 6 m (19 ft. 8 in.) 4 m (13 ft. 1 in.) 2 m (6 ft. 6 in.) 2 m (6 ft.
  • Seite 3 Objects within 50 cm (20 in.) of the anti-masking (AM) detector • Installing two detectors facing each other and less than Description 50 cm (20 in.) apart (only AM detectors) The VE1120 series includes: • VE1120 PIR motion sensor Installing the detector • VE1120AM PIR motion sensor with anti-masking...
  • Seite 4: Dip Switch Settings

    Fix the base to the wall. For flat mounting use a minimum D/N and WT functionality of two screws (DIN 7998) in positions A. For corner- The D/N input: mounting use screws in positions B or C (Figure 3). To •...
  • Seite 5: Led Indication

    Off: Signals AM and TF on the AM relay (factory default). Detector PIR with anti- masking SW 5: Setting LEDs Normal current 6.5 mA 10 mA — On: Enables both LEDs on the detector at all times (factory For UL/cUL installations 0.078 W default).
  • Seite 6: Contact Information

    SB01-svingmonteringskonsol. Luk frontlågen. Isæt skruen og anbring dækpladen. Contact information Til EN 50131 Grade 3-installationer må www.utcfireandsecurity.com or www.interlogix.com monteringsposition B ikke anvendes. For customer support, see www.utcfssecurityproducts.eu P/N 146279999-2 (ML) • REV H • ISS 11MAR19 6 / 36...
  • Seite 7 SW 1: Når signal AM (antimaskning) eller TF (teknisk fejl) Jumper-indstillinger udsendes Se jumpernes placeringer i detektoren i figur 5. Til: Viser kun AM eller TF, når systemet er i dagtilstand (fabriksstandard). J1: Bruges ikke Fra: Viser altid AM eller TF i nat- eller dagtilstand. J3 og J4: Dobbelt løkkeindstilling SW 2: AM-følsomhed Bruges til indstilling af alarm- og sabotagerelæ.
  • Seite 8: Kontaktinformation

    Kontaktinformation Strøm ved alarm 1,2 mA 3,8 mA Maks. strøm (LED til) 11 mA 24 mA www.utcfireandsecurity.com, www.interlogix.com Monteringshøjde 1,8 til 3,0 m 2,0 til 3,0 m For kundesupport se www.utcfssecurityproducts.dk Indstilling af 30 cm/s til 3 m/s 20 cm/s til 3 m/s...
  • Seite 9: Steckbrücken-Einstellungen

    • J6: Polaritätseinstellung der Steuerspannung (CV) Objekte innerhalb von 50 cm des Melders mit Abdecküberwachung (AM) Ein (Werkseinstellung): • Montage zweier gegenüberliegender Melder in einem • Abstand von weniger als 50 cm (nur AM-Melder) Der Melder befindet sich im Tagbetrieb (System unscharf), wenn der D/N-Eingang mit GND (Anschlussklemme 1) verbunden ist.
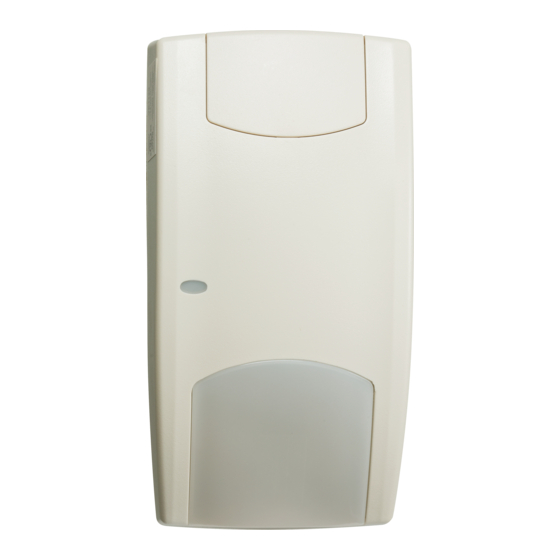
  • Seite 10: Led-Anzeige

    Aus: Signalisiert AM oder TF immer im Scharf- und Zurücksetzen Rote LED Alarmrelais Unscharfbetrieb. Niederspannung Offen (Alarm) Verwenden Sie die korrekte Spannung. SW 2: AM-Empfindlichkeit PIR- Offen (Alarm) Automatisch nach 3 s Ein: Erweiterte AM-Empfindlichkeit. Der Melder signalisiert Einbruchalarm eine Annäherung und die Maskierung des Meldefensters (Werkseinstellung).
  • Seite 11: Instrucciones Para La Instalación

    Kontaktinformation UL/cUL. Conecte los cables del detector (consulte las figuras www.utcfireandsecurity.com oder www.interlogix.com 3 y 7). Kontaktinformationen für den Kundendienst finden Sie unter Instalación de UL/cUL: todas las conexiones se deben www.utcfssecurityproducts.de...
  • Seite 12 más información, consulte “Configuración de puentes” • Restablece la memoria de alarma. más adelante. • Controla la función de relé AM durante el modo NOCHE Retire las máscaras y pegue las etiquetas si es necesario junto con SW1. (consulte la figura 6 como ejemplo). La entrada WT controla la función LED junto con la entrada Para aplicaciones de montaje en el techo que precisen de D/N.
  • Seite 13: Indicación Led

    INTERRUPTOR 4: señalización de salida AM o FT Especificaciones Activado: señala AM en el relé de AM y el relé de alarma. Estado del PIR con AM Señala FT en el relé de AM solamente (EN 50131). Procesamiento de la señal Desactivado: señala AM y FT en el relé...
  • Seite 14: Información De Contacto

    QR. warning/ Información de contacto Certificación www.utcfireandsecurity.com o www.interlogix.com Sólo VE1120. UL/cUL Para acceder al servicio técnico, consulte El producto se debe conectar a una unidad de www.utcfssecurityproducts.es control o unidad de suministro de corriente aprobadas y compatibles con un sistema antirrobo que proporcionen un mínimo de 4 horas...
  • Seite 15 • ohjaa ledien toimintaa yhdessä WT-tulon kanssa. Ilmaisimen asentaminen: • nollaa hälytysmuistin Nosta peitelevy ja avaa ruuvi (kts. kuva 2, vaihe 1). • ohjaa AM-releen toiminnallisuutta yötilan aikana yhdessä Väännä ilmaisin varovasti auki ruuvimeisselin avulla (kts. SW1:n kanssa. kuva 2, vaiheet 2 ja 3). Kiinnitä...
  • Seite 16: Tekniset Tiedot

    UTC Fire & Security ilmoittaa tämän laitteen Tekniset tiedot vastaavan direktiivien 2014/30/EU- ja/tai 2014/35/EU –vaatimuksia. Lisätietoa saat alla Ilmaisin IR + AM olevista osoitteista. Signaalinkäsittely www.utcfireandsecurity.com tai www.interlogix.com. Alue 20 m 11 tiheää peiliverhoa Optiikka Kyllä Muisti Tehonsyöttö 9–15 VDC (12 V nimellisteho) P/N 146279999-2 (ML) •...
  • Seite 17: Instructions D'installation

    Raccordez le détecteur (voir figures 3 et 7). Yhteystiedot Tous les câblages doivent être Installations UL/cUL : réalisés selon le National Electrical Code, NFPA70 et CSA www.utcfireandsecurity.com tai www.interlogix.com C22,1, Canadian Electrical Code Part I, Safety Standards Tietoja asiakastuesta on osoitteessa for Electrical Installations. www.utcfssecurityproducts.fi Réglez les cavaliers et les commutateurs DIP de manière...
  • Seite 18 • Le détecteur est en mode Nuit (système armé) lorsque Remarques l'entrée D/N est connectée à la masse (borne 1). • Pour le réglage avancé (commutateur SW 2 en position • Le détecteur est en mode Test de marche désactivé ON), la source de l'alarme AM doit être retirée pour que (voyants désactivés) lorsque l'entrée WT est connectée vous puissiez réinitialiser l'anti-masque.
  • Seite 19: Caractéristiques Techniques

    Kelvinstraat 7, 6003 DH Weert, Pays-Bas dispositions applicables de la directive 2014/30/EU et / ou 2014/35/EU. Pour plus d'informations, voir www.utcfireandsecurity.com ou www.interlogix.com. P/N 146279999-2 (ML) • REV H • ISS 11MAR19 19 / 36...
  • Seite 20: It: Istruzioni Per L'installazione

    90°, utilizzare il supporto mobile SB01. Informations de contact Il montaggio a soffitto non è una prestazione Nota: certificata EN 50131. www.utcfireandsecurity.com ou www.interlogix.com Chiudere il coperchio. Pour contacter l'assistance clientèle, voir Inserire la vite e posizionare l'inserto di protezione. www.utcfssecurityproducts.fr/mail_support.htm Per installazioni EN 50131 di Grado 3, non utilizzare la posizione di montaggio B.
  • Seite 21: Indicatori Led

    • Ripristina la memoria allarme. SW 5: impostazione dei LED • Controlla la funzionalità del relè AM durante la modalità On: attiva entrambi i LED del rilevatore in qualsiasi momento NOTTE insieme con SW1. (impostazione predefinita). L'ingresso WT controlla la funzionalità del LED insieme con Off: mette entrambi i LED sotto il controllo degli ingressi test di l'ingresso D/N.
  • Seite 22 20 cm/s a 3 m/s Informazioni di contatto Relè antimanomissione/allarme 80 mA, 30 VCC, 80 mA, 30 VCC (NC) caratt. resistivo www.utcfireandsecurity.com o www.interlogix.com Incorporata (sì) Protezione antimanomissione Opzionale Per l'assistenza clienti, vedere www.utcfssecurityproducts.it e antirimozione (ST400) Relè AM caratt.
  • Seite 23 • B of C (afbeelding 3). Gebruik positie A of C om een Bestuurt de LED-functionaliteit samen met de WT-ingang. • afneembeveiliging te installeren. Reset het alarmgeheugen • Sluit de bedrading van de detector aan (zie Bestuurt de AM-relaisfunctionaliteit gedurende de afbeeldingen 3 en 7).
  • Seite 24: Led-Indicatie

    (4 Hz) bepalingen van de Regelgeving 2014/30/EU en/of 2014/35/EU. Voor meer informatie zie * Afhankelijk van de instelling van DIP-switch SW4. www.utcfireandsecurity.com of Specificaties www.interlogix.com. Detector PIR met AM Signaalverwerking Bereik 20 m Optisch...
  • Seite 25 Sett inn skruen og sett innlegget på plass. Monteringsstilling B må ikke brukes for EN 50131 Grad 3- Contactgegevens monteringer. www.utcfireandsecurity.com of www.interlogix.com Jumperinnstillinger Voor klantenondersteuning, zie www.utcfssecurityproducts.nl Se figur 5 for plasseringer av jumpere i detektoren. NO: Installasjonsark...
  • Seite 26 Hvis en PIR-innbruddsalarm registreres i Natt-modus og LED-indikasjon detektoren bytter tilbake til Dag-modus, vil rød LED begynne Rød LED Alarmrelé Tilbakestilles å blinke for å indikere en alarm i minnet. Oppstart Lukket Automatisk etter 25 sek. Alarmminnet tilbakestilles ved å sette detektoren i Natt-modus. Åpen (alarm) Lav spenning Bruk riktig spenning...
  • Seite 27 Rysunek 3 i Rysunek 7). Kontaktinformasjon Wybrać żądane ustawienia zworek i przełączników DIP (patrz rys. 5). Aby uzyskać więcej informacji, zobacz www.utcfireandsecurity.com eller www.interlogix.com „Ustawienia zworek” niżej. For kundestøtte, se www.utcfssecurityproducts.no Zdjąć przesłony i w razie potrzeby dodać naklejki (przykład: rys. 6).
  • Seite 28 Tryb Zdalny test (RT) umożliwia przeprowadzenie testu czujki SW 2: Czułość AM z centrali. Czujka aktywuje przekaźnik alarmu, jeśli wynik testu Włączony: Zaawansowana czułość AM. Czujka sygnalizuje jest pozytywny lub przekaźnik AM, jeśli wynik testu jest maskowanie obszaru AM (domyślne ustawienie fabryczne). negatywny.
  • Seite 29: Informacje Prawne

    1,2 mA 3,8 mA Informacje kontaktowe alarmowym Maksymalne natężenie 11 mA 24 mA www.utcfireandsecurity.com lub www.interlogix.com (dioda LED włączona) Informacje na temat pomocy technicznej można znaleźć na Wysokość montażu Od 1,8 do 3,0 m Od 2,0 do 3,0 m stronie www.utcfssecurityproducts.pl Zakres prędkości celu...
  • Seite 30: Passos De Instalação

    Passos de instalação Definições do jumper A tecnologia utilizada nestes detectores é resistente ao perigo Consulte a Figura 5 para ver as localizações do jumper no de falsos alarmes. No entanto, evite potenciais causas de detector. instabilidade, tais como (ver Figura 1): J1: não utilizado •...
  • Seite 31: Indicação Led

    Configurações de DIP switches poderá ser vulnerável a alarmes AM falsos, os quais poderão ser impossíveis de reinicializar. Predefinição de fábrica: Indicação LED Relé de Para reinicializar vermelho alarme SW 1: quando assinalar uma saída de AM (anti-máscara) Automaticamente após 25 s Arranque Fechado ou TF (falha técnica)
  • Seite 32 A UTC Fire & Security declara que estes União Europeia dispositivo se encontra em conformidade com os requisitos e disposições aplicáveis da Diretiva 2014/30/EU e/ou 2014/35/EU. Para mais informações consulte www.utcfireandsecurity.com ou www.interlogix.com. P/N 146279999-2 (ML) • REV H • ISS 11MAR19 32 / 36...
  • Seite 33: Informação De Contacto

    Sätt i skruven och sätt på täckluckan. Informação de contacto Använd inte monteringsplats B för installationer av typ EN 50131 Grade 3. www.utcfireandsecurity.com ou www.interlogix.com Para assistência ao cliente, consulte Inställning av byglar www.utcfssecurityproducts.eu Se figur 5 för byglarnas placering i detektorn.
  • Seite 34 Under nattläget är LED:erna alltid avstängda. i annat fall kan detektorn vara känslig för falska AM-larm och dessa larm kan vara omöjliga att återställa. Om ett PIR-inkräktarlarm detekteras i nattläget och detektorn kopplas om till dagsläge, börjar den röda LED:en blinka för att indikera att det finns ett larm i minnet.
  • Seite 35 återförsäljare vid köp av liknande ny utrustning eller lämnas till en därför avsedd deponering. För mer information, se: www.utcfssecurityproducts.eu/recycle/ Kontaktinformation www.utcfireandsecurity.com eller www.interlogix.com Kundsupport finns på www.utcfssecurityproducts.se P/N 146279999-2 (ML) • REV H • ISS 11MAR19 35 / 36...
  • Seite 36 P/N 146279999-2 (ML) • REV H • ISS 11MAR19 36 / 36...

Diese Anleitung auch für:

Ve1120Ve1120 am

Inhaltsverzeichnis