Herunterladen Inhalt Inhalt Diese Seite drucken

Werbung

Verfügbare Sprachen
  • DE

Verfügbare Sprachen

  • DEUTSCH, seite 5
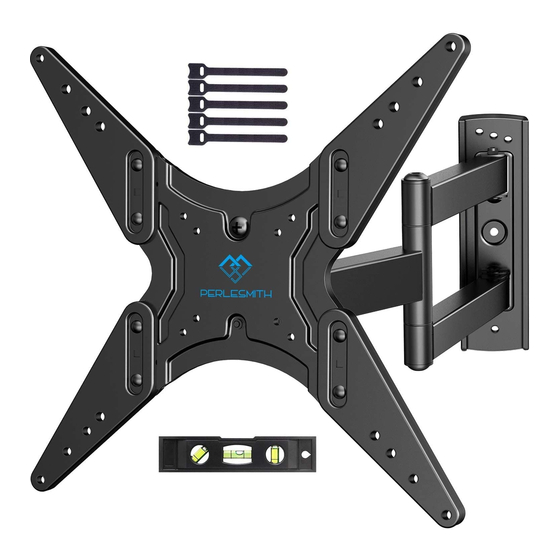
MEDIUM FULL-MOTION TV WALL MOUNT
English
------------------
Deutsch
------------------
Français
------------------
Español
------------------
Italiano
------------------
PSMFK1
supportus@perlesmith.com
Hardw are Included
Extender Brackets
x2
x2
01
02
Wall plate and Arm
03
x1
S TEP 1
Using the Screwdriver , remove the screw
Keep screws for use in Step 6
01-04
05-08
09-12
13-16
17-20
Hardware
(Wall /Product)
Lag Bolts
Washers
Carriage
Ø6mm
Bolts
M8x65
M6 x 12
x4
x4
x8
A2
A1
G
!
CAUTION!
Wall
Anchor
These anchors are for
concrete or brick walls
x4
ONLY. DO NOT use them
A3
in drywall or wood studs.
and washer
S1
[S]
S1
[S]
S2
Thank you for choosing our product! We strive to provide the best quality
and services for our customers. Would you kindly share your experience
on Amazon if you are satisfied? Should you have any issues, please don't
hesitate to contact us.
Telephone:800-5566-806 Mon-Fri 10am - 6pm (PST) (USA) (CAN)
Email:supportus@perlesmith.com (US/CA/DE/UK/FR/IT/ES/JP/AU)
WARNING!
WARNING! SEVERE PERSONAL INJURY AND PROPERTY DAMAGE CAN RESULT FROM IMPROPER
INSTALLATION OR ASSEMBLY. READ THE FOLLOWING WARNINGS BEFORE BEGINNING.
If you do not understand the instructions or have any concerns or questions, please contact a qualified installer.
Do not install or assemble if the product or hardware is damaged or missing. Not all parts and hardware included
must be used. If you require replacement parts, contact customer service at
This product has been designed for use on a vertical wall constructed of wood studs. Wood studs being defined as a
wall consisting of a minimum of 2" x 4" studs with a maximum of 1/2" of wall covering (drywall, lath, plaster).For
custom installations please contact a qualified installer. For safe installation, the wall you are mounting to must
support 4 times the weight of the total load. If not, the surface must be reinforced to meet this standard. The installer
is responsible for verifying that the wall structure/surface will safely support the total load.
Tools Needed (Not Included)
Stud finder
Tape measure
1/8 in. (3.2 mm)
3/8 in. (10 mm)
Wood Drill
Concrete Drill
TV Screws / Washers
Nuts
Washers
Spacers
Level
M6
Ø6mm
L10mm
M4-5-6
x8
H
x4
x8
B1
B2
and separate the faceplate and the plastic parts from the bracket.
S2
supportus@perlesmith.com
Pencil
Hammer
Screw driver
Spacers
Philips Screws
Philips Screws
L5mm
M6 x 15mm
M8 x 15mm
M6 x 30mm
M8 x 45mm
x8
x4
x4
x4
C
D1
D2
E1
V2.0
Drill
3/8 in. (10 mm)
Socket wrench
Philips Screws
M4 x 30mm
x4
x4
F
E2
1

Werbung

Inhaltsverzeichnis
loading

Inhaltszusammenfassung für Perlesmith PSMFK1

  • Seite 1 Amazon if you are satisfied? Should you have any issues, please don't hesitate to contact us. Telephone:800-5566-806 Mon-Fri 10am - 6pm (PST) (USA) (CAN) Email:supportus@perlesmith.com (US/CA/DE/UK/FR/IT/ES/JP/AU) WARNING! WARNING! SEVERE PERSONAL INJURY AND PROPERTY DAMAGE CAN RESULT FROM IMPROPER INSTALLATION OR ASSEMBLY. READ THE FOLLOWING WARNINGS BEFORE BEGINNING.
  • Seite 2 S TEP 2 Measure the distance between the holes located at the back of your TV (these measures may form the shape of a square, or a rectangle) and check that these taken measures are within the VESA(*) range for this wall mount. (*) VESA: International standard established by the TV manufacturers used to determine if LCD / LED TVs are compatible with wall mounts.
  • Seite 3 STEP 4-2 Install TV bracket (b) Round Back / Extra Space (a) Flat Back B illustrated configuration A STEP 5A Wall Plate Install (Concrete or brick) 5A-1 5A-3 5A-2 Position the Use hole A, B, wall plate C, and D. your desired height , level the wall plate...
  • Seite 4: Level Adjustment

    S TEP 6 Level adjustment Place assembled part with TV onto arm and using Screwdriver, secure with screws washers saved from Step 1 DO NOT forget to use the screw [s1 ] and the washers [S2] Post Installation Level If needed, the TV can be leveled +/- 3 degrees. Level the TV Tighten 2 screws [S1] Loosen screw [S1]...
  • Seite 5: Medium Vollbewegung Tv Wandhalterung

    Installieren oder montieren Sie bitte nicht, wenn das Produkt oder die Hardware beschädigt ist oder fehlt. Nicht alle Teile und Hardware enthalten muss verwendet werden. Wenn Sie Ersatzteile benötigen, wenden Sie sich an den Kundenservice unter supportus@perlesmith.com Dieses Produkt wurde für die Verwendung an einer vertikalen Wand aus Holzstollen entwickelt. Holzstollen werden definiert als a Wand bestehend aus mindestens 5 x 10 cm Stollen mit einem Maximum von 1.27 cm Wandverkleidung (Trockenbau, Latte, Putz) .Für...
  • Seite 6 Schritt 2 Messen Sie den Abstand zwischen den Löchern auf der Rückseite Ihres Fernsehgeräts (diese Maße kann die Form eines Quadrats oder eines Rechtecks bilden) und prüfen, ob diese innerhalb der VESA (*) Serie für diese Wandhalterung getroffenen Maßnahmen sind. (*) VESA: Internationaler Standard, der von den TV-Herstellern eingeführt wurde, um festzustellen, ob LCD / LED-Fernseher mit Wandhalterungen kompatibel sind.
  • Seite 7 Schritt 4-2 TV Halterung Installation (a) Curved TV/ Zusatzplatz (a) Flachbildschirm Konfiguration (A)dargestellt Konfiguration B dargestellt Schritt 5A Wandplatte Installation (Beton oder Ziegelstein) 5A-1 5A-3 5A-2 Positionieren Sie Bitte verwenden Sie A, B, C und D Wandplatte [03] auf Ihrer gewünschter Höhe, Wand platte mit...
  • Seite 8 Schritt 6 Wasserwaage Einstellung Stellen Sie das zusammengebaute Teil mit dem Fernseher auf den Arm und verwenden Sie den Schraubenzieher, sichern Sie mit Schrauben und Unterlegscheiben aus Schritt 1. Vergessen Sie nicht, die Schraube [S1] und die Unterlegscheiben [S2] zu verwenden Einstellung nach der Installtion Bei Bedarf kann der Fernseher um +/- 3 Grad geneigt werden.
  • Seite 9 à l'adresse supportus@perlesmith.com Ce produit a été conçu pour une utilisation sur un mur vertical construit avec des poteaux en bois. Les poteaux de bois sont dé finis comme un mur composé d'un minimum de poteaux de 2”x 4” avec un maximum de 1/2 ”de revêtement mural (cloisons sèches, lattes, plâtre).
  • Seite 10 Étape 2 Mesurez la distance entre les trous situés à l'arrière de votre téléviseur (ces mesures auraient la forme d'un carré ou d'un rectangle) et vérifiez que les mesures prises respect ent la plage VESA (*) de ce support mural. (*) VESA: norme internationale établie par les fabricants de téléviseurs pour déterminer si les téléviseurs LCD / LED sont compatibles avec les supports muraux.
  • Seite 11 Étape 4-2 Installez les boulons de la télévision (b) Dos Rond/ Espace Supplémentaire (a) Dos Plat configuration illustrée configuration illustrée Étape 5A Installation de la plaque murale (Béton ou brique) 5A-1 5A-3 5A-2 Positionnez la Utilisez les trous plaque murale A, B, C et D.
  • Seite 12 Étape 6 Réglage du niveau Placez la partie déjà assemblée avec la télévision sur le bras et à l'aide d'un tournevis, fixez-la avec les boulons S1 et les rondelles S2 réservés à l'étape 1. N'oubliez pas d'utiliser les boulons [S1] et les rondelles [S2]. Placez le niveau de l'installation Si besoin, le téléviseur pourrait être nivelé...
  • Seite 13: Equipo Incluido

    Este producto está diseñado para el uso en una pared vertical construida de postes de madera. Los postes de madera se definen c omo una pared que consta de un mínimo de 2”x4” con un máximo de 1/2”...
  • Seite 14 PASO 2 Mida la distancia entre los orificios ubicados en la parte posterior de su TV(estas medidas pueden tener la forma de un cuadrado, o un rectángulo) y verifique que estas medidas tomadas estén dentro del rango VESA (*) para este soporte de pared. (*)VESA: Estándar internacional establecido por los fabricantes de televisiones para determinar si los televisiones LCD / LED son compatibles con los montajes de pared.
  • Seite 15 PASO 4-2 Instalar soporte TV (b) Round Back / Ext ra Space (a) Reverso Plano Configuración (B) ilustrada Configuración (A) ilustrada PASO 5A Instalar la Placa de Pared (Concreto o ladrillo) 5A-1 5A-3 5A-2 Posicione la Usar orificio placa de A, B, C, y D pared [03] en la altura...
  • Seite 16: Ajuste De Inclinación

    PASO 6 Ajuste del nivel Coloque la pieza ensamblada dentro de la televisión en el brazo y utilice la Llave, asegure con los tornillos [S1] y arandelas [S2] sobrantes de Paso 1 NO olvide utilizar el tornillo [S1] y las arandelas [S2] Tras la Instalación de Nivel Si necesario, la televisión se puede nivelar +/- 3 grados.
  • Seite 17 Se si richiede sostituzione di qualsiasi parte, contattare il customer service supportus@perlesmith.com Questo prodotto è inteso per uso su una parete verticale costruito da montanti di legno. Montanti di legno sono definiti come u n muro costruito da montanti di almeno 2” - 4” con rivestimenti (gesso, assicelle, intonaco).
  • Seite 18 PASSO 2 Misurare la distanza tra i fori sul retro della tua TV ( Queste misure potrebbero formare la figura di un quadro od un rettangolo) e verificare se le misure siano all'interno della gamma di VESA(*) per questo supporto a parete. (*) VESA: Standard Internazionale stabilito dai produttori di monitor e utilizzato per determin are se TV LCD / LED sono compatibili con supporti a parete.
  • Seite 19 PASSO 4-2 Installare il supporto per TV (b) Retro Rondo / spazio extra (a) Retro Piatto configurazione (B) illustrata configurazione (A) illustrata PASSO 5A Installazione della piastra a parete (Calcestruzzo o mattone) 5A-1 5A-3 5A-2 Posizionare la Utilizzare buco piastra a A, B, C e D.
  • Seite 20 PASSO 6 REGOLAMENTO DI LIVELLO Mettere le parti montate con TV al braccio utilizzando cacciavite, fissarlo con la vite [S1] e le rondelle S2 riservati da PASSO 1. ! NON dimenticarsi di utilizzare la vite [S1] e le rondelle [S2] Dopo la installazione di livello Se è...

Inhaltsverzeichnis