Herunterladen Inhalt Inhalt Diese Seite drucken
Crivit IAN 300415 Gebrauchsanweisung

Crivit IAN 300415 Gebrauchsanweisung

Arm- und beintrainer
Vorschau ausblenden Andere Handbücher für IAN 300415:
Inhaltsverzeichnis

Werbung

Verfügbare Sprachen
  • DE

Verfügbare Sprachen

  • DEUTSCH, seite 30
DELTA-SPORT HANDELSKONTOR GMBH
Wragekamp 6 • DE-22397 Hamburg
GERMANY
06/2018
Delta-Sport-Nr.: AT-2154
IAN 300415
PEDALEADOR
PEDALIERA PER GAMBE E BRACCIA
PEDALEADOR
PEDALIERA PER GAMBE E BRACCIA
Manual de instrucciones
Istruzioni per l'uso
EXERCITADOR PARA BRAÇOS
ARM & LEG TRAINER
E PERNAS
Instruction for use
Manual de instruções
ARM- UND BEINTRAINER
Gebrauchsanweisung
IAN 300415
Antes de leer, abra la página con las ilustraciones y familiarícese seguidamente con todas las funciones
del aparato.
Prima di leggere ribaltare la pagina con le immagini e familiarizzare poi con tutte le funzioni
dell´apparecchio.
Antes de ler, vire o lado com as imagens para fora e familiarize-se com todas as funções do aparelho.
Before reading, fold out the illustration page and get to know all of the functions of your unit.
Klappen Sie vor dem Lesen die Seite mit den Abbildungen aus und machen Sie sich anschließend mit
allen Funktionen des Artikels vertraut.
ES
Instrucciones de manejo y seguridad
IT/MT
Istruzioni per l'uso e di sicurezza
PT
Manual de instruções e indicações de segurança
GB/MT
Instructions and safety notice
DE/AT/CH
Gebrauchs- und Sicherheitshinweise
Página
8
Pagina
14
Página
20
Page
26
Seite
32

Werbung

Inhaltsverzeichnis

Fehlerbehebung

loading

Inhaltszusammenfassung für Crivit IAN 300415

  • Seite 1 Manual de instruções e indicações de segurança Página E PERNAS Instruction for use Wragekamp 6 • DE-22397 Hamburg GERMANY GB/MT Instructions and safety notice Page Manual de instruções DE/AT/CH Gebrauchs- und Sicherheitshinweise Seite 06/2018 ARM- UND BEINTRAINER Delta-Sport-Nr.: AT-2154 Gebrauchsanweisung IAN 300415 IAN 300415...
  • Seite 3: Inhaltsverzeichnis

    Índice/Indice Contenido del suministro/ Contenuto della confezione / Denominación de las piezas (Imagen A) ... 8 denominazione dei pezzi (imm. A) ....14 Datos técnicos ............8 Dati tecnici ............14 Uso previsto ............8 Utilizzo consono ..........14 Simboli utilizzati ............ 8 Simboli utilizzati ..........
  • Seite 4 Índice/Contents Conteúdo / Designação de peças (fig. A) ..20 Scope of delivery / Part names (figure A) ..26 Especificações técnicas ........20 Technical data .............26 Utilização indicada ..........20 Correct use ............26 Símbolos utilizados ..........20 Symbols used ............26 Indicações de segurança ......20 - 22 Safety notes ..........26 - 28 Montagem ...........22 - 23 Assembly .............28 - 29...
  • Seite 5 Inhaltsverzeichnis Lieferumfang / Teilebezeichnung (Abb. A) ..32 Technische Daten ..........32 Bestimmungsgemäße Verwendung ....32 Verwendete Symbole .........32 Sicherheitshinweise ........32 - 34 Montage ..............35 Fußteile montieren (Abb. B) ......35 Pedale montieren (Abb. C) ......35 Pedalschlaufen einstellen (Abb. D) ....35 Widerstand verringern/erhöhen (Abb. E) ..35 Batterie austauschen ..........35 Trainingshinweise ........35 - 36 Anwendung ............36...
  • Seite 6: Contenido Del Suministro/Denominación De Las Piezas (Imagen A)

    Uso previsto ¡Enhorabuena! No se permite el uso comercial del artículo. Con la compra de este artículo ha adquirido un El articulo entrena los brazos y las piernas. Está producto de excelente calidad. Antes de utili- equipado con un tornillo de resistencia para zarlo por primera vez, familiarícese con mantener y ampliar la movilidad.
  • Seite 7: Peligro De Muerte

    • Tenga en cuenta el desgaste • El artículo no está diseñado de las piezas. Si el artículo no para aguantar todo el peso del ofrece resistencia en el pedal, cuerpo. significa que la cadena está • Pueden utilizar este aparato gastada y por ello el artículo personas de 14 años o más, completo se debe cambiar.
  • Seite 8 • Antes de utilizar el producto, • ¡Aviso! No se permite recar- tenga en cuenta que el artículo gar, ni reactivar las pilas con esté completamente desplega- otros medios, así como tampo- co desmontarlas, tirarlas al • Antes de cada uso compruebe fuego o ponerlas en cortocir- que el artículo no esté...
  • Seite 9: Montaje

    Montaje Reducir/aumentar la resistencia (Imagen E) Montar los soportes (Imagen B) Coloque el artículo ante sí y gire el tornillo de re- 1. Elimine el material de embalaje. sistencia (1a) hacia la derecha, para aumentar la 2. Dé la vuelta al artículo de forma que la parte resistencia, y hacia la izquierda, para reducirla.
  • Seite 10: Uso

    • Le recomendamos entrenar los brazos y las 2. Coloque la palma de la mano sobre los pe- piernas 30 minutos cada día. dales, de forma que los lazos de éstos que- • Mientras use el artículo, póngase ropa den por encima de sus manos. cómoda.
  • Seite 11: Limpieza Y Cuidados

    Medidas para la eliminación Solución Compruebe que el sensor se haya colocado de pilas correctamente si en la pantalla no aparece nada A tener en cuenta: las pilas son basura a pesar de que el pedal esté en movimiento especial y, conforme a lo estipulado en la (Imagen H).
  • Seite 12: Contenuto Della Confezione / Denominazione Dei Pezzi (Imm. A)

    Utilizzo consono Congratulazioni! L’articolo non è destinato all’utilizzo commer- Con il vostro acquisto avete scelto un prodotto al- ciale. L’articolo permette di allenare le braccia tamente qualitativo. Familiarizzate con il prodotto e le gambe; è dotato di una vite di resistenza prima di prenderlo in funzione.
  • Seite 13: Pericolo Di Morte

    • Osservare l’usura dei pezzi. • Questo attrezzo può essere Se l’articolo non dovesse più utilizzato da adolescenti a avere alcuna resistenza alla partire da 14 di età e da per- sone con ridotte facoltà fisiche, pedalata, il nastro di trasmis- sione è...
  • Seite 14: Avvertenze Sulle Batterie

    • Prima di ciascun utilizzo verifi- • Le batterie ricaricabili possono care che l’articolo non presenti essere ricaricate solo sotto la danni o segni di usura. Sostituire sorveglianza di adulti. immediatamente i pezzi dan- • Le batterie ricaricabili devono neggiati o usurati, altrimenti la essere tolte dall’articolo prima funzionalità...
  • Seite 15: Montare I Pedali (Imm. C)

    Montare i pedali (imm. C) Pericolo! Quando si montano i pedali, assicurarsi che il All‘interno dell‘articolo c‘è una batteria. pedale destro sia montato sul braccio destro, e il Se la batteria non dovesse più funzionare, è pedale sinistro sul braccio sinistro. possibile sostituirla.
  • Seite 16: Impiego

    Impiego • U/MIN: in questa modalità vengono visualiz- zati i giri dei pedali al minuto. Mettere l’articolo davanti a sé per il training. • TRAGITTO: in questa modalità viene visualiz- Iniziare con un allenamento leggero a bassa zata la distanza percorsa in chilometri resistenza.
  • Seite 17: Smaltimento

    Conservare l’articolo in un luogo asciutto. I nostri addetti all‘assistenza concorderanno con Pezzi soggetti ad usura: se l’articolo non dovesse voi come procedere nel modo più rapido possibi- più avere alcuna resistenza alla pedalata, il le. In qualsiasi caso vi consiglieremo per le vostre nastro di trasmissione è...
  • Seite 18: Conteúdo / Designação De Peças (Fig. A)

    Utilização indicada Muitos Parabéns! O artigo não foi concebido para o uso industrial. Com a sua compra optou por um produto de alta O artigo permite treino de braços e pernas; está qualidade. Antes de o utilizar pela primeira vez, equipado com um parafuso de ajuste da intensi- familiarize-se o com o produto.
  • Seite 19: Perigo De Morte

    • Preste atenção ao desgaste • Este aparelho pode ser usado das peças. Se o artigo já não por crianças com idade superi- apresentar resistência nos pe- or a 14 anos e por pessoas dais, isso significa que a fita de com capacidades físicas, sen- acionamento está...
  • Seite 20: Montagem

    • Antes de qualquer utilização, • As pilhas recarregáveis apenas verifique se o artigo apresenta devem ser carregadas sob danos ou desgaste. vigilância de um adulto. Troque imediatamente as pe- • As pilhas recarregáveis devem ças danificadas ou gastas do ser removidas do artigo, antes artigo, para não prejudicar o de serem carregadas.
  • Seite 21: Montar Os Pedais (Fig. C)

    Montar os pedais (fig. C) O artigo possui uma pilha. Quando a pilha deixar de funcionar, pode Ao montar os pedais, certifique-se de que monta substituí-la. o pedal direito no braço do pedal direito e o 1. Levante o ecrã (1b) pelo lado de cima com pedal esquerdo no braço do pedal esquerdo.
  • Seite 22: Treino Das Pernas (Fig. I)

    aquecimento. Após o treino, deverá relaxar. maticamente após aprox. quatro minutos. Treino das pernas (fig. I) Repor os valores 1. Coloque o artigo sobre uma base plana, Pressione o botão durante aprox. quatro se- estável e antiderrapante, sente-se de forma gundos para repor o valor em 0.
  • Seite 23: Medidas A Tomar Para A Eliminação Das Pilhas

    Os aparelhos identificados com o símbolo IAN: 300415 ao lado não podem ser eliminados no lixo Assistência Portugal doméstico. Está obrigado a eliminar em Tel.: 70778 0005 separado esses aparelhos elétricos e eletrónicos (0,12 EUR/Min.) em fim de vida. Informe-se na sua entidade E-Mail: deltasport@lidl.pt municipal sobre as opções de eliminação regulada.
  • Seite 24: Scope Of Delivery/Part Names (Figure A)

    Symbols used Congratulations! Date of manufacture (month/year): With your purchase you have decided on a 06/2018 high-quality product. Get to know the product before you start to use it. Carefully read the Safety notes following instructions for use. Use the product only as described and only for Important: Read the instruc- the given areas of application.
  • Seite 25: Risk Of Death

    • Children may not carry out • Consult your doctor before you cleaning and user-maintenance begin use or if you experience without supervision. discomfort. • It is better to train on a slip- Risk of injury! resistant surface. The feet may •...
  • Seite 26: Assembly

    Warning: batteries! Assembly • Only use batteries from the Assembly of foot parts (figure B) 1. Remove the packaging materials. same manufacturer and of the 2. Turn the article over so that the underside is same type. facing upwards. 3. Screw the small foot (2) to the article using •...
  • Seite 27: Reducing/Increasing Resistance (Figure E)

    Training notes Reducing/increasing resistance (figure E) • Consult a doctor before using the article. Stand the article in front of you and turn the • Stop training as soon as you experience resistance screw (1a) to the right to increase resi- discomfort during training.
  • Seite 28: Display Functions

    3. ‘Ride’ the bicycle with your hands. Solution 4. You can cycle forwards or backwards. Check that the sensor is positioned correctly if the display does not show anything even though the Display functions pedals are moving (figure H). The display comprises of a two-line screen with 1.
  • Seite 29: Notes On The Guarantee And Service Handling

    Notes on the guarantee and service handling The product was produced with great care and under constant supervision. You receive a three- year warranty for this product from the date of purchase. Please retain your receipt. The warranty applies only to material and work- manship and does not apply to misuse or impro- per handling.
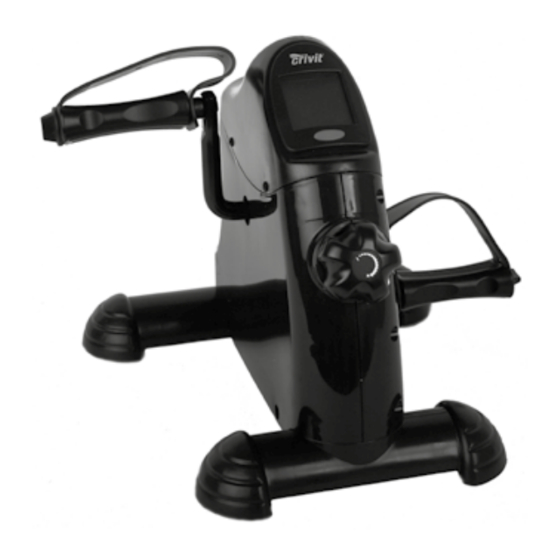
  • Seite 30: Lieferumfang/Teilebezeichnung (Abb. A)

    Bestimmungsgemäße Herzlichen Glückwunsch! Verwendung Mit Ihrem Kauf haben Sie sich für einen hochwer- tigen Artikel entschieden. Machen Sie sich vor der Der Artikel ist nicht für den gewerblichen ersten Verwendung mit dem Artikel vertraut. Gebrauch bestimmt. Der Artikel ermöglicht es, Lesen Sie hierzu aufmerksam die nach- die Arme und Beine zu trainieren;...
  • Seite 31 • Achten Sie auf den Verschleiß • Der Artikel ist nicht für die von Teilen. Sollte der Artikel Belastung durch das gesamte keinen Tretwiderstand mehr Körpergewicht konzipiert. aufweisen, ist das Antriebs- • Dieses Gerät kann von Kindern band verschlissen und der Arti- ab 14 Jahren und darüber so- kel muss ausgetauscht werden.
  • Seite 32: Warnhinweise Batterien

    • Stellen Sie den Artikel auf • Warnung! Batterien dürfen nicht einen ebenen Untergrund. geladen oder mit anderen Mit- • Achten Sie darauf, dass der teln reaktiviert, nicht auseinan- Artikel vollständig ausgespannt der genommen, nicht ins Feuer wurde, bevor Sie ihn benutzen. geworfen oder kurzgeschlossen •...
  • Seite 33: Montage

    Montage Widerstand verringern/erhöhen (Abb. E) Fußteile montieren (Abb. B) Stellen Sie den Artikel vor sich auf und drehen Sie 1. Entfernen Sie das Verpackungsmaterial. die Widerstandsschraube (1a) nach rechts, um 2. Drehen Sie den Artikel um, sodass die den Widerstand zu erhöhen, und nach links, um Unterseite nach oben zeigt.
  • Seite 34: Anwendung

    • Sobald Sie während des Trainings ein Unwohl- 2. Legen Sie Ihre Handfläche so auf die Pedale, sein verspüren, brechen Sie das Training ab. dass sich die Pedalschlaufe über Ihrer Hand • Starten Sie langsam das Training und steigern befindet. Sie bei Bedarf die Intensität.
  • Seite 35: Reinigung Und Pflege

    Lösung Sie können ausgediente Batterien unentgeltlich bei den kommunalen Sammelstellen oder Überprüfen Sie den korrekten Sitz des Sensors, im Handel abgeben. Hier stehen spezielle wenn das Display trotz Pedalbewegung nichts Sammelbehälter bereit. anzeigt (Abb. H). 1. Öffnen Sie wie beim Batteriewechsel das Hinweise zur Garantie Display und nehmen Sie es vorsichtig ab.

Inhaltsverzeichnis