Invacare Personal Back Anbau, Installations-Bedienungsanleitung
Verfügbare Sprachen
Verfügbare Sprachen
NOTE: Check all parts for shipping damages before us-
ing. In case of damage, do NOT use the equipment. Con-
tact the Equipment Supplier for further instructions.
SAFETY SUMMARY
WARNING/CAUTIONS notices apply to
hazards or unsafe practices which could
result in minor personal injury and/or prop-
erty damage.
WARNING
DO NOT install this equipment without first
reading and understanding this instruction
sheet. If you are unable to understand
these instructions, contact a healthcare
professional, dealer or technical person-
nel if applicable before attempting to in-
stall this equipment - otherwise, injury or
damage may occur.
The position of the Personal Back in the
three (3) different mounting bracket slots
is directly related to the chair's stability.
When the Personal Back is added to a
TILT and/or RECLINING chair, it may cause
a decrease in the chair's stability. It may
be necessary to reposition the FRONT
CASTERS, REAR WHEELS, BACK ANGLE, TILT-
IN-SPACE, RECLINE POSITION and/or SEAT
DEPTH before use. Use EXTREME caution
when using a new seating position.
Your therapist and physician should be
consulted if you have any questions re-
garding individual limitations and needs.
Working with your therapist, physician,
and equipment supplier is the best way
to assure that a Personal Back choice
matches your individual needs.
As the needs of the individual become
more complex, the Personal Back evalu-
ation becomes more important.
NOTICE
Information contained in this document
is subject to change without notice.
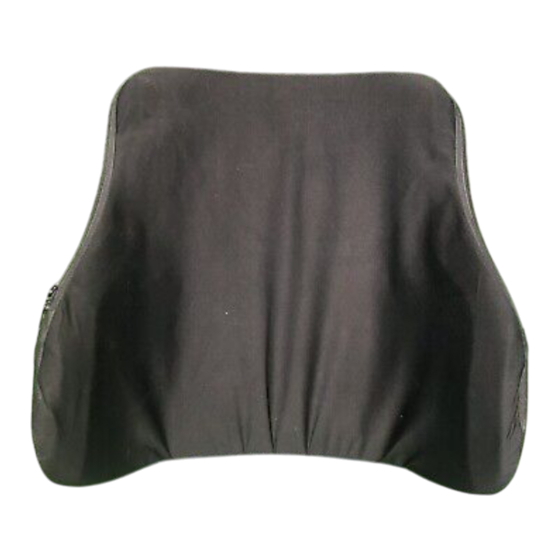
INTRODUCTION
The Personal Back is designed to provide the user with
posture support and spinal alignment. The cover is made
from a water repellant fabric to protect the foam.
DETERMINING THE MOUNTING
POSITION FOR INSTALLATION OF
PERSONAL BACK (FIGURE 1)
1. Remove back from the shipping container.
2. Remove hardware that secures the upholstery to the
back canes.
3. To obtain back height required after physical as-
sessment by therapist (A), use the following for-
mula (FIGURE 1):
Total Back Height
Height of Personal
(-)
Required by
Back (Area B)
Therapist - (A)
(+)
Distance
Distance from
between
Bottom of Back to
Personal Back
Top Mounting
and Seat Cushion
Hardware
(Area C)
(Area D)
4. Measure the Total Height of the Personal Back (Area B).
5. Subtract the Total Height of the Personal Back (Area
B) from the Total Back Height Required by the Thera-
pist (A). This gives you Distance between the bot-
tom of the Personal Back and Cushion (Area C).
6. Measure the Distance from the Bottom of Back to
Top Mounting Hardware (Area D).
7. Add Area D (STEP 6) and Area C (STEP 5) together.
This will determine how much additional height is needed
and Location of Mounting Bracket (Area E).
8. Measure the distance from the cushion to the chair
frame/back canes (Area E, STEP 7) and mark (both
sides) on the inside of the chair frame/back canes.
Zipper Faces UP
D = Distance from
Bottom of Back to
Top of Mounting
B
B = Height of
Personal Back
FIGURE 1 - DETERMINING THE MOUNTING
POSITION FOR INSTALLATION OF PERSONAL
1
Distance between
(=)
Personal Back
and Seat Cushion
(Area C)
(=)
Location of
Mounting Bracket
(Area E)
E = Location
of Mounting
Hardware
Bracket
D
C = Distance
between
Personal
C
Back and
Cushion
Cushion
BACK
USA/UK ENGLISH
Inhaltsverzeichnis

Verwandte Anleitungen für Invacare Personal Back


Inhaltszusammenfassung für Invacare Personal Back
-
Seite 19: Sicherheit-Zusammenfassung
HINWEIS: Überprüfen Sie alle Teile auf evtl. EINFÜHRUNG Transportbeschädigungen. Im Falle einer Beschädigung Die PERSONAL BACK ist dazu entworfen, die Haltung und die sollten Sie die Teile NICHT BENUTZEN. Wenden Sie Wirbelsäulenausrichtung des Anwenders zu verbessern. Der sich an Ihren Lieferanten. - Seite 20 1. Ermittlung der Rückenhöhe: Siehe hierzu Reißverschluß zeigt nach OBEN "ERMITTLUNG DER BEFESTIGUNGSPOSITION Distanz Unterkante ZUR MONTAGE DES PERSONAL BACK" in dieser PERSONAL BACK zur Anleitung. Oberkante der Befestigungsteile 2. Führen Sie zwei lange Schrauben (von der Innenseite Plazierung her) in die kleinen Löcher auf dem Montageblech ein, führen Sie diese dann durch die Klemmschellen.
- Seite 21 Höhe auf beiden Seiten gleich ausgerichtet ABBILDUNG 3 - MONTAGE AN ROLLSTÜHLEN ist, und das sie parallel zueinander liegen. MIT RÜCKENROHREN VON 7/8 ZOLL (22 7. Befestigung des PERSONAL BACK. Beachten Sie MM) DURCHMESSER die MONTAGE DES PERSONAL BACK / PER- SONAL BACK PLUS 3.
- Seite 22 Sie den Rollstuhl weiter benutzen. Üben Sie äußerste Sorgfalt, wenn Markierung Sie eine neue Sitzposition einstellen. 1. Befestigen Sie den PERSONAL BACK so auf dem Montageblech, daß die oberen Stehbolzen in die zugehörigen Schlitze eingreifen. ABBILDUNG 4 - MONTAGE AN EINEM 2.
-
Seite 23: Wartung Des Personal Back
Bezug eingesetzt werden. Wenn der BACK/PERSONAL BACK PLUS Bezug eingerissen ist, sollte er ausgetauscht werden. ANBAU EINER KOPFSTÜTZE Sie können am PERSONAL BACK eine Kopfstütze anbringen. Sie MÜSSEN dazu die Kopfstützen Verstärkungsplatte benutzen, die als Option erhältlich ist. WARTUNG DES PERSONAL BACK WARNUNG Verwenden Sie das Produkt nicht weiter, wenn Sie Fehler entdeckt haben. -
Seite 24: Hinweis Zur Garantie
Diese Gewährleistung erstreckt sich nur auf den Erstkäufer dieses Produktes und hat keinerlei einschränkende Wirkung auf die normalen Konsumentenrechte. Invacare garantiert für die Dauer von einem (1) Jahr seit dem Kaufdatum, daß die Schaumstoffkissen keinerlei materielle Defekte haben. Der Kissenbezug hat eine Garantie für einen Zeitraum von neunzig (90) Tagen ab Kaufdatum. - Seite 62 NOTES...
- Seite 63 NOTES...