
Verwandte Anleitungen für VWR SAS ISO 100 Contact


Inhaltszusammenfassung für VWR SAS ISO 100 Contact
- Seite 1 ® Microbiological Air Sampler SAS Super ISO INSTRUCTION MANUAL European catalogue numbers: 710-0871 710-0872 710-0869 710-0870 Version: Issued: July 2016...
- Seite 2 Legal address of manufacturer Europe VWR International Srl Via S. Giusto 85 20153 Milano Italy Tel.: + 39 0233 203 11 http://it.vwr.com Country of origin Italy...
-
Seite 3: Inhaltsverzeichnis
Table of contents Warning ............................5 Safety information ........................5 References ........................... 5 Technical features ........................6 Intended use ..........................6 Principle ............................6 The basic idea..........................6 Models available ..........................7 Brief instructions ........................7 Operating instructions for SAS Super ISO 100 and 180 ..............7 ... - Seite 4 “LANGUAGE” ..........................18 “DISPLAY RECORD” ........................18 “CLEAR RECORD” ........................19 “REMOTE CONTROL” ........................19 “CALIBRATION”..........................19 “AUTOSWITCH” ..........................20 “MULTI MODE” function ........................ 20 “CONFIGURATION” function ......................22 “POWER OFF” function ......................... 26 ...
-
Seite 5: Warning
Warning This document is the property of VWR International S.r.l. - Milan - Italy It may not be duplicated or distributed without the owner’s authorisation. Patent Pending Manufactured by VWR International S.r.l. - Milan, Italy Safety information Please use this device only for the purposes indicated. -
Seite 6: Technical Features
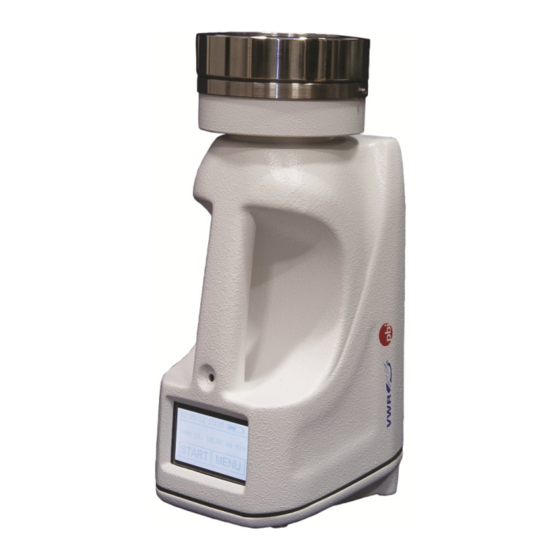
Technical features Feature SAS ISO 100 Contact SAS ISO 180 Contact SAS ISO 100 Petri SAS ISO 180 Petri Cat. No. 710-0871 710-0872 710-0869 710-0870 Air flow 100 l/min 180 l/min 100 l/min 180 l/min Use with 55 mm contact plates... -
Seite 7: Models Available
To take advantage of advanced electronics for more reliable results in different operating conditions. To have the flexibility to choose between 55 mm contact plates or 90 mm standard disposable Petri dishes. To apply cGLP and cGMP to air sampling operations. To organise sequential sampling to obtain a more representative sample under actual operating conditions. -
Seite 8: Visual Display Presentation
Visu ual display (Tou uch the scree en for at leas st two second ds). h time the in nstrument is t turned on, a five second visual displa ay presentatio on will ppear disp playing follo owing informa ation. N.B: : In the follow wing display,... -
Seite 9: List Of Menus And Utility Sub Menus
Replace the aspirating head. Select required volume and start the unit. The airflow is directed into the agar surface of the plate. At the end of the cycle, remove the aspirating head. Close and remove the plate. Incubate. Count the colonies, record the results on the microbiological air sampling report and read the results. List of menus and utility sub menus START Press to repeat the same volume of prior sampling... -
Seite 10: Autoswitch-Off
To calibrate the volume of aspirated air AUTOSWITCH-OFF To disable the autoswitch off POWER OFF The air sampler can be switched off by pressing the ENTER button Preliminary inspection The apparatus is subject to specific working tests before shipping and it is carefully packed to avoid possible damages during transportation. -
Seite 11: Function
The SAS SUPER ISO 100 and SAS SUPER ISO 180 can be fixed to a table/floor tripod or a wall support. The screw thread connection is located underneath the unit, between the two front feet. Functions Software function Touch the screen for at least two seconds to switch the unit on. The air sampler is supplied with eight programmable air volumes (“Select volume”) stored in the memory and eight sampler configuration (“Configuration”) selectable by the operator. -
Seite 12: Select Volume" Function (To Start With One Of The Eight Memorised Volume)
08/31/06 11.31 TIME [ 0023 ] 0500 Lt. ‐ > Target volume Current aspirated of air START STOP volume of air “SELECT VOLUME” function (to start with one of the eight memorised volumes) Switch the unit on by touching the screen for at least two seconds. After the visual display presentation you will see the following display with the last aspirated volume of air. -
Seite 13: Program Volume" Function (Modification Of The Value Of A Stored Volume)
Press ENTER to select the volume and the display will show the selected volume. 08/31/06 11.31 1250 Lt. DELAY 00 MIN START MENU Press START to aspirate the selected volume of air. “PROGRAM VOLUME” function (modification of the value of a stored volume) Using this procedure, it is possible to memorise up to eight different volumes (from 1 to 1999 litres of air). -
Seite 14: Using A "Set Delay" Programme To Delay Instrument Start
Change the digit indicated by pressing the “UP” or “DOWN” arrows and presses ENTER to go to the next figure. Repeat until you reach the last digit and then confirm by pressing ENTER. Note: The maximum air volume is 1999 litres. Using a “SET DELAY”... -
Seite 15: Utility Mode" Function
08/31/06 11.31 TIME * * D E L A Y * * START MENU “UTILITY MODE” function In this programme the following SUB-MENUS are listed: Set time, Site, Identify, Language, Display Record, Clear Record, Remote Control, Calibration and Autoswitch. Always start from UTILITY MODE to reach one of these SUB-MENUS. Switch on the unit by touching the screen for at least two seconds. -
Seite 16: Utility Mode
MM/DD/YY HH:mm 08/31/06 11:33 CLEAR ENTER Change the number indicated by “^^” by pressing the “UP” or “DOWN” arrows and press ENTER to go to the next number. MM/DD/YY HH:mm 08/31/06 11:33 CLEAR ENTER Repeat until you reach the last number, confirm by pressing ENTER. “SITE”... -
Seite 17: Identify
SITE [ LABOEFGH ] CLEAR ENTER Repeat until you reach the last figure and then confirm by pressing ENTER. “IDENTIFY” This option is used to identify the operator. This should be changed if different operators use the sampler and especially if the date is to be printed. The data is recorded in the file “DISPLAY RECORD”. Select IDENTIFY function from UTILITY MODE programme. -
Seite 18: Language
“LANGUAGE” Menu text can be selected choosing from different languages. Select LANGUAGE function from UTILITY MODE programme. UTILITY MODE LANGUAGE CLEAR ENTER Press ENTER to modify the language. LANGUAGE ENGLISH CLEAR ENTER Change the language by pressing the “UP” or “DOWN” arrows and press ENTER to select the desired language; the display will then show the selected language. -
Seite 19: Clear Record
Press ENTER to display the following data. Date End sampling time DISPLAY RECORD Record position 08/31/06 11.31 number Multimode indicator BBCD/3345 Lt. 1250 * Site/Identity CLEAR Aspirated Liters You can view all completed cycles by pressing the “UP” or “DOWN” arrows. The symbol “*” is displayed near the volume aspirated if the volume was aspirated with the multimode function. -
Seite 20: Autoswitch
“AUTOSWITCH” In order to save battery power, after 5 minutes of inactivity the instrument turns itself off. With the “Autoswitch” function is possible to disable this feature. “MULTI MODE” function This programme is very useful for extending the time of sampling with the purpose of obtaining a more representative environmental sample “in actual operating conditions”... - Seite 21 NUMBERS OF RUN [ 01 ] RUN CLEAR ENTER Select the desired number of sampling cycles by pressing the “UP” or “DOWN” arrows. Press the ENTER button to go to the next digit. The maximum numbers of cycle is 19. Press ENTER to confirm. SINGLE RUN VOLUME [ 0000 ...
-
Seite 22: Configuration" Function
08/31/06 11.31 RUN 05 x 200 Lt. START MENU Press START to run multi mode. 08/31/06 11.31 [ 0023 ] ‐> 200 Lt. START STOP At the end of the run the SAS will display a flashing delay before the next cycle; number of completed cycles and residual cycles (runs) are also displayed. -
Seite 23: Configuration
MENU' CONFIGURATION CLEAR ENTER Press ENTER to go to the function. CONFIGURATION SELECT CLEAR ENTER Select the SELECT function by pressing the “UP” or “DOWN” arrows and press ENTER. Record position number CONFIGURATION [1] Site/Identity Total air ABCDEFGH/1234568 volume Start delay 01 02 0111 0222 Numbers of ... - Seite 24 CONFIGURATION MODIFY CLEAR ENTER Select the SET function by pressing the “UP” or “DOWN” arrows and press ENTER. MODIFY CONFIGURATION [1] CLEAR ENTER You must choose the configuration that you want to modify function by pressing the “UP” or “DOWN” arrows and press ENTER.
- Seite 25 IDENTIFY [ 12345678] CLEAR ENTER Change the figure indicated by “^” by pressing the “UP” or “DOWN” arrows and press ENTER to go to the next figure. IDENTIFY [ 35345678] CLEAR ENTER Repeat until you reach the last figure and then confirm by pressing ENTER; you can now choose to programme the SAS in single mode or multi mode.
-
Seite 26: Power Off" Function
Press ENTER to confirm. SINGLE RUN VOLUME [ 0000 ] Litres CLEAR ENTER Select the desired volume of aspirated air for each sampling by pressing the “UP” or “DOWN” arrows. Press the ENTER button to go to the next digit. The maximum aspirated volume of cycle is 1999 litres. Press ENTER to confirm. -
Seite 27: Troubleshooting
“LOW BATTERY” message Battery is low Recharge battery “CALIBRATION EXPIRED” message Instrument needs to be calibrated Send the instrument to VWR International or an authorised dealer Infrared remote switch doesn’t switch Remote control battery is low Replace infrared remote battery... - Seite 28 Sterile daily head 710-0891 Other accessories Soft carrying case 710-0896 Aluminium carrying case 710-0875 Bio-Transport autoclavable carrying case 113-8185 Handle for Bio-Transport carrying case 113-8186 Floor tripod 710-0889 SAS-Holder table and wall stainless steel 710-0963 Battery charger with universal plug for both models 710-0973 Adapter* to convert contact plate model to accept 90 mm Petri dishes 710-0882...
-
Seite 29: Technical Service
(2) years from date of delivery. If a defect is present, VWR will, at its discretion and cost, repair, replace, or refund the purchase price of this product to the customer, provided it is returned during the warranty period. This warranty does not apply if the product has been damaged by accident, abuse, misuse, or misapplication, or from ordinary wear and tear. -
Seite 30: Equipment Disposal
Equipment disposal This equipment is marked with the crossed out wheeled bin symbol to indicate that this equipment must not be disposed of with unsorted waste. Instead it's your responsibility to correctly dispose of your equipment at lifecycle end by handing it over to an authorised facility for separate collection and recycling. - Seite 32 Inhaltsverzeichnis Hinweis ............................33 Sicherheitshinweise ........................33 Referenzen ..........................33 Technische Daten ........................34 Verwendungszweck ........................34 Kurzanleitung ..........................35 Installation ..........................36 Funktionen ..........................39 Operative Bereiche ........................55 Problembehebung ........................55 Zubehör ............................56 ...
-
Seite 33: Hinweis
Hinweis Das vorliegende Dokument ist Eigentum von VWR International S.r.l., Mailand, Italien Es darf ohne Genehmigung des Eigentümers nicht dupliziert oder verteilt werden. Zum Patent angemeldet Hergestellt von VWR International S.r.l., Mailand, Italien Sicherheitshinweise Bitte das Gerät nur für den vorgesehenen Zweck verwenden. -
Seite 34: Technische Daten
CEN/TC 243 Normen für Reinraumtechnologie Technische Daten Merkmal SAS ISO 100 SAS ISO 180 SAS ISO 100 SAS ISO 180 Contact Contact Petri Petri Best.-Nr. 710-0871 710-0872 710-0869 710-0870 Luftstrom 100 l/min 180 l/min 100 l/min 180 l/min Verwendung mit 55-mm-Abklatschplatt 55-mm-Abklatschplatt 90-mm-Petrischal... -
Seite 35: Erhältliche Modelle
Oberflächen-, Hand- oder Luftsteuerung. Diese gängigen und problemlos erhältlichen Platten können mit unterschiedlichen Nährmedien vorgefüllt erworben werden. Entnahme eines bekannten Luftvolumens über einen variablen Zeitraum zur Bereitstellung eines breiten Spektrums an Probenvolumen. Ansaugung von Luft in einer Laminarströmungsstruktur mit ausreichender Geschwindigkeit, um Organismen auf eine Agar-Oberfläche zu schießen. -
Seite 36: Installation
Zum Ändern des Luftvolumens MENU drücken, um „Select Volume“ aufzurufen. Dann ENTER drücken und mit Hilfe der Pfeile das neue gewünschte Luftvolumen auswählen. Hinweise zum Ändern der Einstellungen finden Sie in der Bedienungsanleitung. Zur Bestätigung der Auswahl ENTER drücken. MENU drücken und mit Hilfe der Pfeile Menüs auswählen, um weitere voreingestellte Parameter zu ändern. ENTER drücken, um das Untermenü... - Seite 37 Den S Sammelkopf abnehmen. Eine g gekennzeich hnete, geschl lossene und vorbereitete Platte einse etzen und de n Plattendec ckel entferne Den S Sammelkopf wieder aufse etzen. Das g gewünschte L Luftvolumen auswählen u und das Ger rät starten. D Der Luftstrom m wird auf die Agar-...
- Seite 38 SINGLE RUN VOLUME Kann von 1 bis 1999 Liter programmiert werden. TOTAL RUNS Zeigt das Gesamtvolumen der angesaugten Luft an. CONFIGURATION Sie können acht programmierbare Konfigurationen für das SAS vorgeben. UTILITY MODE SET TIME Zum Einstellen von Datum und Uhrzeit. SITE Zur Angabe des Ortes für die Probenahme.
-
Seite 39: Funktionen
DATUM ZEIT [ XXXX ] ‐ > XXXX Lt. START STOP Halteranpassung Die Abklatschplatten- und Petrischalenhalter können verstellt werden (mit einem Inbusschlüssel) falls sich der Durchmesser verfügbaren Platten geringfügig 55-mm-Standard-Abklatschplatte oder 90-mm-Petrischale unterscheidet. Petrischalenadapter (optional) Ein Adapter aus Aluminium oder Edelstahl ist erhältlich, der die Verwendung von 90-mm-Standard-Petrischalen mit dem SAS für Abklatschplatten ermöglicht. - Seite 40 Starten mit dem gleichen Luftvolumen wie bei der vorherigen Probe Das Gerät durch Berühren des Bildschirms über zwei Sekunden einschalten. Nach der automatischen Anzeigeabfolge wird das folgende Bild mit dem zuletzt angesaugten Luftvolumen angezeigt: Zeit Datum 08/31/06 11.31 Akkuladestand 500 Lt. DELAY 00 MIN Zuletzt eingestellte ...
-
Seite 41: Funktion "Program Volume" (Zum Ändern Des Werts Eines Gespeicherten Volumens)
MENU' SELECT VOLUME CLEAR ENTER ENTER drücken und ein Volumen durch Drücken der Pfeile nach oben oder unten wählen (zum Beispiel 1250 Liter). SELECT VOLUME [ 1250 ] Litres CLEAR ENTER ENTER drücken, um das Volumen auszuwählen, worauf das gewählte Volumen auf dem Display angezeigt wird. 08/31/06 11.31 1250 Lt. ... -
Seite 42: Verwenden Der Funktion "Set Delay" Zum Verzögern Des Gerätestarts
MENU' PROGRAM VOLUME CLEAR ENTER ENTER drücken, um die Volumen zu ändern. SELECT VOLUME [ 1250 ] Litres CLEAR ENTER Ein Volumen durch Drücken der Pfeile nach oben oder unten wählen und ENTER drücken. MODIFY RUN [ 1250 ] CLEAR ENTER Die Ziffer, die durch „^“ markiert ist, durch Drücken der Pfeile nach oben oder unten ändern und anschließend ENTER drücken, um zur nächsten Ziffer zu wechseln. - Seite 43 ENTER drücken, um die Verzögerungszeit zu ändern. SET DELAY [ 00 ] Minutes CLEAR ENTER Die gewünschte Verzögerungszeit durch Drücken der Pfeile nach oben oder unten auswählen. Die verfügbaren Verzögerungszeiten sind 0/1/2/3/4/5/6/7/8/9/10/20/30/40/50/60 Minuten. Zur Bestätigung ENTER drücken. Wenn eine Verzögerung eingestellt ist (zum Beispiel 5 Minuten), wird diese Verzögerungszeit auf dem Hauptbildschirm angezeigt.
- Seite 44 MENU' UTILITY MODE CLEAR ENTER ENTER drücken, um das Untermenü aufzurufen. „SET TIME“ Diese Option dient zur Einstellung von Tag, Monat, Jahr und Uhrzeit. UTILITY MODE SET TIME CLEAR ENTER ENTER drücken, um die Uhrzeit zu ändern. MM/DD/YY HH:mm 08/31/06 11:33 CLEAR ENTER Die Zahl, die durch „^^“...
- Seite 45 sollte für Proben geändert werden, die an verschiedenen Orten entnommen wurden, insbesondere dann, wenn die Ergebnisse für den Druck bestimmt sind. Die Funktion SITE aus dem Menü UTILITY MODE wählen. UTILITY MODE SITE CLEAR ENTER ENTER drücken, um den Ort zu ändern. SITE [ ABCDEFGH ...
- Seite 46 UTILITY MODE IDENTIFY CLEAR ENTER ENTER drücken, um die Identität zu ändern. IDENTIFY [ 12345678 ] CLEAR ENTER Die Ziffer, die durch „^“ markiert ist, durch Drücken der Pfeile nach oben oder unten ändern und anschließend ENTER drücken, um zur nächsten Ziffer zu wechseln. IDENTIFY [ 34345678 ...
-
Seite 47: Display Record
ENTER drücken, um die Sprache zu ändern. LANGUAGE ENGLISH CLEAR ENTER Die Sprache durch Drücken der Pfeile nach oben oder unten ändern und anschließend ENTER drücken, um die gewünschte Sprache auszuwählen. Die Anzeige auf dem Display erscheint in der gewünschten Sprache. CLEAR drücken, um diese Funktion zu beenden. - Seite 48 Multimodus-Funktion angesaugt wurde. CLEAR drücken, um diese Funktion zu beenden. „CLEAR RECORD“ Diese Option dient zum Löschen aller unter „DISPLAY RECORD“ gespeicherten Daten. Vor dem Starten dieses Vorgangs darauf achten, dass alle gespeicherten Daten nicht mehr benötigt werden bzw. heruntergeladen wurden. Die Funktion CLEAR RECORD im Menü...
-
Seite 49: Multi Mode
gesamte zu entnehmende Luftvolumen wird in zwei oder mehr Teilvolumen angesaugt, z. B. 1000 Liter in zehn Durchläufen à 100 Liter in Fünf-Minuten-Intervallen. Vor Aufruf der Funktion MULTI MODE sollten Sie deshalb Folgendes entscheiden: (a) das Gesamt-Luftvolumen, das auf die Abklatschplatte gelenkt werden soll, (b) die Anzahl der Durchläufe und (c) das Zeitintervall. - Seite 50 SINGLE RUN VOLUME [ 0000 ] Litres CLEAR ENTER Das gewünschte Volumen angesaugter Luft pro Entnahme durch Drücken der Pfeile nach oben oder unten wählen. ENTER drücken, um zur nächsten Ziffer zu wechseln. Das maximale Ansaugvolumen pro Zyklus beträgt 1999 Liter. Zur Bestätigung ENTER drücken. Auf dem Display wird das gesamte Luftvolumen am Ende der Zyklen angezeigt.
- Seite 51 Am Ende des Durchlaufs blinkt das Display während der Wartezeit vor dem nächsten Zyklus, und die Anzahl der abgeschlossenen Zyklen und der verbleibenden Zyklen (Durchläufe) wird angezeigt. 08/31/06 11.31 DELAY RUNS 02/05 START STOP Funktion „CONFIGURATION“ Starten mit einer der acht durch den Benutzer programmierbaren, gespeicherten Konfigurationen.
- Seite 52 Record position number CONFIGURATION [1] Site/Identity Total air ABCDEFGH/1234568 volume Start delay 01 02 0111 0222 Numbers of Air volume per cycle ENTER CLEAR cycle Die gewünschte voreingestellte Konfiguration (zwischen 1 und 8) durch Drücken der Pfeile nach oben oder unten auswählen und durch Drücken von ENTER bestätigen. START drücken, um den Entnahmezyklus durchzuführen.
- Seite 53 SITE [ ABCDEFGH ] CLEAR ENTER Den Buchstaben, der durch „^“ markiert ist, durch Drücken der Pfeile nach oben oder unten ändern und anschließend ENTER drücken, um zum nächsten Buchstaben zu wechseln. SITE [ LABOEFGH ] CLEAR ENTER Vorgang bis zum Erreichen des letzten Buchstabens wiederholen und mit ENTER bestätigen. Nun kann die Identität geändert werden.
- Seite 54 INTERVAL TIME [ 00 ] Minutes CLEAR ENTER Das gewünschte Zeitintervall zwischen den Probenahmen durch Drücken der Pfeile nach oben oder unten auswählen. ENTER drücken, um zur nächsten Ziffer zu wechseln. Das Zeitintervall kann zwischen 0 und 59 Minuten eingestellt werden. Hinweis: Wenn ein einzelner Zyklus programmiert werden soll, INTERVAL TIME auf 0 Minuten setzen. Zur Bestätigung ENTER drücken.
-
Seite 55: Operative Bereiche
TOTAL RUN RECORD MODE [ 1000 ] Litres CLEAR ENTER ENTER drücken, um zu bestätigen und die Konfiguration speichern. Funktion „POWER OFF“ MENU drücken und die Funktion POWER OFF durch Drücken der Pfeile nach oben oder unten wählen. MENU' POWER OFF CLEAR ENTER ENTER drücken, um das Gerät auszuschalten. -
Seite 56: Zubehör
Der Akku ist leer. Akku aufladen. Meldung „LOW BATTERY“ Meldung „CALIBRATION EXPIRED“ Das Gerät muss kalibriert werden. Gerät an VWR International oder einen autorisierten Händler senden. Gerät lässt sich mit Die Batterie der Fernbedienung ist leer. Batterie der Infrarot-Fernbedienung Infrarot-Fernbedienung ersetzen. - Seite 57 Akkuladegerät mit Universalstecker für beide Modelle 710-0973 Adapter* für Abklatschmodelle zur Aufnahme von 90-mm-Petrischalen 710-0882 SAS-Petrischale + Adapter, Edelstahl 710-0877 SAS-Petrischale + Adapter, Aluminium 710-0879 IQ-/OQ-/PQ-Validierungsprotokolle für SAS Super ISO 100 und 180 710-0956 SAS-Software zum Herunterladen von Daten von SAS Super ISO (zur Verwendung mit 710-0970 Schnittstelle) Schnittstelle für SAS-Software für SAS Super ISO...
- Seite 58 Table des matières Avertissement..........................59 Informations de sécurité ......................59 Références ..........................59 Caractéristiques techniques ....................60 Usage prévu ..........................60 Instructions simplifiées ......................61 Installation ..........................62 Fonctions ........................... 65 Opérations ..........................81 Résolution des problèmes ....................... 81 Accessoires ..........................82 ...
-
Seite 59: Avertissement
Avertissement Ce document est la propriété de VWR International S.r.l. - Milan - Italie Il ne peut pas être reproduit ni distribué sans l'autorisation du propriétaire. Brevet en attente Fabriqué par VWR International S.r.l. - Milan, Italie Informations de sécurité... -
Seite 60: Caractéristiques Techniques
Caractéristiques techniques Caractéristique SAS SUPER ISO 100 SAS SUPER ISO 180 SAS SUPER ISO 100 SAS SUPER ISO 180 pour boîtes pour boîtes pour boîtes de Petri pour boîtes de Petri contacts contacts Code article 710-0871 710-0872 710-0869 710-0870 Débit d'air 100 l/min 180 l/min 100 l/min... -
Seite 61: Modèles Disponibles
de l'air. Ces boîtes sont très répandues et faciles à trouver, et peuvent être achetées prêtes à l'emploi avec différents milieux. Échantillonnage d'un volume d'air connu sur une durée variable pour fournir une vaste plage de volumes d'échantillonnage. Aspiration de l'air selon un débit laminaire à une vitesse suffisante pour l'impaction des micro-organismes présents à... -
Seite 62: Installation
Appuyez sur START pour prélever le même volume d'air que lors du dernier cycle d'échantillonnage. Pour modifier le volume d'air, appuyez sur MENU pour accéder à « la sélection du volume», puis appuyez sur ENTER et sélectionnez le nouveau volume d'air de votre choix à l'aide des flèches. Pour modifier les réglages, reportez-vous au manuel d'instructions. - Seite 63 Retire ez la tête d'as spiration. Insére ez une boîte contact pré- -coulée, ferm mée et identif fiée, et retirez z son couver rcle. Reme ettez la tête d d'aspiration e en place. Sélec ctionnez le vo olume désiré é et démarrez z l'échantillon nnage.
- Seite 64 TOTAL RUNS Affiche le volume total d'air aspiré CONFIGURATION Vous pouvez utiliser le préleveur SAS avec huit configurations programmables UTILITY MODE SET TIME Permet de programmer la date et l'heure SITE Permet d'identifier le point d'échantillonnage IDENTIFICATION Permet d'identifier le nom de l'opérateur LANGUAGE Permet d'afficher un texte dans différentes langues DISPLAY RECORD...
-
Seite 65: Réglage Du Support
DATE TIME [ XXXX ] ‐ > XXXX Lt. START STOP Réglage du support Les supports pour boîtes contact et boîtes de Petri peuvent être réglés (à l'aide d'une clé Allen) si les boîtes disponibles présentent un diamètre légèrement différent par rapport à la boîte contact standard de 55 mm ou la boîte de Petri de 90 mm. - Seite 66 Pour commencer avec le même volume d'air que l'échantillon précédent Mettez l'unité sous tension en touchant l'écran pendant au moins deux secondes. L'affichage ci-dessous succède à la présentation de l'affichage visuel et indique le dernier volume d'air aspiré : Durée Date 08/31/06 11.31...
- Seite 67 MENU' SELECT VOLUME CLEAR ENTER Appuyez sur ENTER et sélectionnez un volume en appuyant sur les flèches « UP » ou « DOWN » (par exemple, 1250 l) SELECT VOLUME [ 1250 ] Litres CLEAR ENTER Appuyez sur ENTER pour sélectionner le volume. L'affichage indique le volume sélectionné. 08/31/06 11.31 1250 Lt. ...
- Seite 68 MENU' PROGRAM VOLUME CLEAR ENTER Appuyez sur ENTER pour modifier les volumes. SELECT VOLUME [ 1250 ] Litres CLEAR ENTER Sélectionnez un volume en appuyant sur les flèches « UP » ou « DOWN », puis appuyez sur ENTER. MODIFY RUN [ 1250 ] CLEAR ENTER Modifiez le chiffre indiqué...
- Seite 69 Appuyez sur ENTER pour modifier le délai. SET DELAY [ 00 ] Minutes CLEAR ENTER Sélectionnez le délai souhaité en appuyant sur les flèches « UP » ou « DOWN ». Les délais disponibles sont 0 – 1 – 2 – 3 – 4 – 5 – 6 – 7 – 8 – 9 – 10 – 20 – 30 – 40 – 50 – 60 minutes. Appuyez sur ENTER pour confirmer.
- Seite 70 MENU' UTILITY MODE CLEAR ENTER Appuyez sur ENTER pour accéder au sous-menu. SET TIME Cette option permet de programmer le jour, le mois, l'année et l'heure. UTILITY MODE SET TIME CLEAR ENTER Appuyez sur ENTER pour modifier l'heure. MM/DD/YY HH:mm 08/31/06 11:33 CLEAR ENTER Modifiez le nombre désigné...
- Seite 71 être modifiée pour les échantillons prélevés sur différents sites, notamment si les résultats doivent être imprimés. Dans le programme UTILITY MODE, sélectionnez la fonction SITE. UTILITY MODE SITE CLEAR ENTER Appuyez sur ENTER pour modifier le site. SITE [ ABCDEFGH ] CLEAR ENTER Modifiez le chiffre désigné...
- Seite 72 Appuyez sur ENTER pour modifier l'identité. IDENTIFY [ 12345678 ] CLEAR ENTER Modifiez le chiffre désigné par « ^ » en appuyant sur les flèches « UP » ou « DOWN », et appuyez sur ENTER pour passer au chiffre suivant. IDENTIFY [ 34345678 ...
-
Seite 73: Display Record
Modifiez la langue en appuyant sur les flèches « UP » ou « DOWN », et appuyez sur ENTER pour sélectionner la langue de votre choix. L'affichage apparaît dans la langue sélectionnée. Appuyez sur CLEAR pour quitter cette fonction. DISPLAY RECORD Les 300 derniers échantillons sont mémorisés dans le fichier «... -
Seite 74: Remote Control
UTILITY MODE CLEAR RECORD CLEAR ENTER Appuyez sur ENTER pour supprimer les données. CLEAR RECORD CONFIRM CLEAR ENTER Appuyez sur ENTER pour confirmer la suppression des données ou sur CLEAR pour quitter la fonction. REMOTE CONTROL La fonction REMOTE CONTROL permet de connecter le préleveur SAS à un dispositif de téléchargement de données infrarouge en option. - Seite 75 MENU' MULTI MODE CLEAR ENTER Appuyez sur ENTER pour accéder à la fonction multimode. INTERVAL TIME [ 01 ] minutes CLEAR ENTER Sélectionnez l'intervalle désiré entre les prélèvements en appuyant sur les flèches « UP » ou « DOWN ». Appuyez sur le bouton ENTER pour passer au chiffre suivant. Vous pouvez définir l'intervalle entre 0 et 59 min.
- Seite 76 Le volume maximal d'air aspiré du cycle est de 1999 l. Appuyez sur ENTER pour confirmer. L'affichage indique le volume TOTAL d'air à aspirer à la fin des cycles. Vérifiez si le volume est correct. S'il est incorrect, appuyez sur le bouton CLEAR et recommencez. Par exemple, si vous définissez 5 cycles de 200 l chacun, vous allez aspirer un volume total de 1000 litres d'air.
-
Seite 77: Configuration
Fonction CONFIGURATION Permet de commencer avec l'une des huit configurations mémorisées programmables par l'opérateur. Si l'opérateur souhaite utiliser une configuration prédéfinie (qui inclut le site, l'identité, le nombre de prélèvements, le nombre de cycles), jusqu'à 8 configurations supplémentaires peuvent être programmées sur l'unité. Mettez l'unité... - Seite 78 Modifiez l'une des huit configurations mémorisées programmables par l'opérateur. Pour modifier la configuration prédéfinie (qui inclut le site, l'identité, le nombre de prélèvements, le nombre de cycles), vous devez utiliser la fonction MODIFY. Mettez l'unité sous tension en touchant l'écran pendant au moins deux secondes. Appuyez sur MENU et sélectionnez la fonction CONFIGURATION en appuyant sur les flèches «...
- Seite 79 SITE [ LABOEFGH ] CLEAR ENTER pour passer à la lettre suivante. Répétez l'opération jusqu'à la dernière lettre, puis appuyez sur ENTER pour confirmer. Vous pouvez à présent modifier l'identité. IDENTIFY [ 12345678] CLEAR ENTER Modifiez le chiffre désigné par « ^ » en appuyant sur les flèches « UP » ou « DOWN », puis appuyez sur ENTER pour passer au chiffre suivant.
- Seite 80 NUMBER OF RUNS [ 01] RUN CLEAR ENTER Sélectionnez le nombre de cycles d'échantillonnage en appuyant sur les flèches « UP » ou « DOWN ». Appuyez sur le bouton ENTER pour passer au chiffre suivant. Le nombre maximal de cycles est de 19. Remarque : pour programmer un seul cycle, définissez le paramètre NUMBER OF RUNS sur 1.
-
Seite 81: Opérations
MENU' POWER OFF CLEAR ENTER Appuyez sur ENTER pour mettre l'instrument hors tension. Remarque : l'instrument est mis hors tension automatiquement après 5 min. Opérations Supports pour boîtes réglables Les préleveurs d'air SAS SUPER ISO 100 et SAS SUPER ISO 180 sont conçus pour être utilisés avec des boîtes contact standard ou des boîtes de Petri. -
Seite 82: Accessoires
Message « LOW BATTERY » Niveau de batterie faible Rechargez la batterie Message « CALIBRATION EXPIRED » L'instrument doit être étalonné Envoyez l'instrument à VWR International ou à un revendeur autorisé L'interrupteur de la télécommande Niveau de batterie de la télécommande... - Seite 84 Índice Advertencia ..........................85 Información de seguridad ......................85 Referencias ..........................85 Características técnicas ......................86 Uso previsto ..........................86 Instrucciones breves ........................ 87 Instalación ..........................88 Funciones ..........................91 Operaciones ..........................106 Resolución de problemas ...................... 107 Accesorios ..........................108 ...
-
Seite 85: Advertencia
Advertencia Este documento es propiedad de VWR International S.r.l. - Milán - Italia Queda prohibida su reproducción o distribución sin la autorización del propietario. Pendiente de patente Fabricado por VWR International S.r.l. - Milán, Italia Información de seguridad Use este dispositivo solamente para los fines indicados. -
Seite 86: Características Técnicas
Características técnicas Característica SAS ISO 100 SAS ISO 180 SAS ISO 100 Petri SAS ISO 180 Petri Contact Contact Referencia 710-0871 710-0872 710-0869 710-0870 Flujo de aire 100 l/min 180 l/min 100 l/min 180 l/min Usar con Placas de contacto de Placas de contacto de Placas Petri de Placas Petri de... -
Seite 87: Modelos Disponibles
comprarse ya montadas con diferentes medios. Puede tomar muestras de un volumen de aire conocido durante un tiempo variable para proporcionar una amplia gama de volúmenes de muestra. Permite aspirar aire en un patrón de flujo laminar con velocidad suficiente para afectar organismos en una superficie de agar. -
Seite 88: Instalación
y use las flechas para elegir el nuevo volumen de aire deseado. Consulte el manual de instrucciones para cambiar la configuración. Pulse ENTER para confirmar la selección. Pulse MENU y use las flechas para desplazarse por la selección de menús y modificar otros parámetros preconfigurados. - Seite 89 Retire e el cabezal d de aspiració Introd duzca una pla aca identifica ada, cerrada y preparada a, y retire la t tapa de la pla aca. Sustit tuya el cabez zal de aspira ación. Selec ccione el volu umen requer ido e inicie la a unidad.
- Seite 90 Muestra el volumen total de aire aspirado CONFIGURATION Puede usar el SAS con ocho configuraciones programables UTILIY MODE SET TIME Programa la fecha y la hora SITE Identifica el punto de muestreo IDENTIFY Identifica el nombre del operario LANGUAGE Muestra el texto en diferentes idiomas DISPLAY RECORD Muestra los datos de muestreo registrados CLEAR RECORD...
-
Seite 91: Funciones
DATE TIME [ XXXX ] ‐ > XXXX Lt. START STOP Ajuste del soporte Los soportes de la placa de contacto y de la placa de Petri pueden ajustarse (con una llave hexagonal), en caso de que las placas disponibles tengan un diámetro ligeramente diferente al estándar de placa de contacto de 55 mm o placa de Petri de 90 mm. - Seite 92 verá la siguiente información con el último volumen de aire aspirado: Hora Fecha 08/31/06 11.31 Estado de la batería 500 Lt. DELAY 00 MIN Último tiempo Último volumen de retraso establecido de aire aspirado START MENU Pulse START en la pantalla para empezar la toma de muestras de aire con el último ciclo. El motor estará en marcha hasta que las cifras entre corchetes sean las mismas que las que se muestran a la derecha.
- Seite 93 MENU' SELECT VOLUME CLEAR ENTER Pulse ENTER y seleccione el volumen pulsando las flechas “ARRIBA” o “ABAJO" (por ejemplo, 1250 litros). SELECT VOLUME [ 1250 ] Litres CLEAR ENTER Pulse ENTER para seleccionar el volumen y la pantalla mostrará el volumen seleccionado. 08/31/06 11.31 1250 Lt. ...
- Seite 94 Pulse ENTER para modificar los volúmenes. SELECT VOLUME [ 1250 ] Litres CLEAR ENTER Seleccione un volumen indicado por “^” pulsando las flechas “ARRIBA” o “ABAJO” y pulse ENTER. MODIFY RUN [ 1250 ] CLEAR ENTER Cambie el dígito indicado pulsando las flechas “ARRIBA” o “ABAJO” y pulse ENTER para pasar a la siguiente cifra. Repita la operación hasta llegar al último dígito y confirme pulsando ENTER.
- Seite 95 Seleccione el tiempo de retaso deseado pulsando las flechas “ARRIBA” o “ABAJO”. Los tiempos de retraso disponibles son: 0 – 1 – 2 – 3 – 4 – 5 – 6 – 7 – 8 – 9 – 10 – 20 – 30 – 40 – 50 - 60 minutos. Pulse ENTER para confirmar.
- Seite 96 “SET TIME” Esta opción se usa para programar el día, mes, año y hora. UTILITY MODE SET TIME CLEAR ENTER Pulse ENTER para modificar la hora. MM/DD/YY HH:mm 08/31/06 11:33 CLEAR ENTER Cambie el número indicado con “^^” pulsando las flechas “ARRIBA” o “ABAJO” y pulse ENTER para ir número siguiente.
- Seite 97 Pulse ENTER para modificar el lugar. SITE [ ABCDEFGH ] CLEAR ENTER Cambie la cifra indicada con el símbolo “^” pulsando las flechas “ARRIBA” o “ABAJO” y pulse ENTER para ir a la siguiente cifra. SITE [ LABOEFGH ] CLEAR ENTER Repita la operación hasta llegar a la última cifra y confirme pulsando ENTER. “IDENTIFY”...
- Seite 98 Cambie la cifra indicada con el símbolo “^” pulsando las flechas “ARRIBA” o “ABAJO” y pulse ENTER para pasar a la siguiente cifra. IDENTIFY [ 34345678 ] CLEAR ENTER Repita la operación hasta llegar a la última cifra y confirme pulsando ENTER. “LANGUAGE”...
- Seite 99 orden cronológico de fecha y muestra la fecha, hora, operario, lugar y volumen de aire muestreado (solo después de que se haya completado un ciclo de series). Seleccione la función DISPLAY RECORD desde el programa UTILITY MODE. UTILITY MODE DISPLAY RECORD ...
- Seite 100 CLEAR RECORD CONFIRM CLEAR ENTER Pulse ENTER para confirmar el borrado de los datos o bien pulse CLEAR para salir de la función. “REMOTE CONTROL” La función REMOTE CONTROL se usa para conectar el SAS a un dispositivo infrarrojo opcional de descarga de datos.
- Seite 101 INTERVAL TIME [ 01 ] Minutes CLEAR ENTER Seleccione el intervalo de tiempo entre muestreos pulsando las flechas “ARRIBA” o “ABAJO”. Pulse el botón ENTER para pasar al siguiente dígito. El intervalo de tiempo que se puede establecer es de 0 a 59 minutos. Pulse ENTER para confirmar.
- Seite 102 TOTAL RUN [ 1000 ] Litres CLEAR ENTER Si pulsa ENTER para confirmar, configurará el SAS en multimodo. 08/31/06 11.31 RUN 05 x 200 Lt. START MENU Pulse START para ejecutar el multimodo. 08/31/06 11.31 [ 0023 ] ‐> ...
-
Seite 103: Configuration
dispositivo. Si el operador quiere usar una configuración predeterminada (formada por el lugar, identidad, número de series y número de ciclos), en la unidad pueden programarse hasta 8 configuraciones adicionales. Para encender la unidad, toque la pantalla durante al menos dos segundos. Pulse MENU y seleccione la función CONFIGURATION pulsando las flechas “ARRIBA”... - Seite 104 Pulse ENTER para acceder a esta función. CONFIGURATION MODIFY CLEAR ENTER Seleccione la función SET pulsando las flechas “ARRIBA” o “ABAJO” y pulse ENTER. MODIFY CONFIGURATION [1] CLEAR ENTER Debe elegir la configuración cuya función desea modificar pulsando las flechas “ARRIBA” o “ABAJO” y pulse ENTER.
- Seite 105 IDENTIFY [ 12345678] CLEAR ENTER Cambie la cifra indicada con el símbolo “^” pulsando las flechas “ARRIBA” o “ABAJO” y pulse ENTER para pasar a la siguiente cifra. IDENTIFY [ 35345678] CLEAR ENTER Repita hasta llegar a la última cifra y confirme pulsando ENTER, ahora ya puede elegir programar el SAS en modo único o múltiple.
-
Seite 106: Operaciones
Pulse ENTER para confirmar. SINGLE RUN VOLUME [ 0000 ] Litres CLEAR ENTER Seleccione el volumen de air aspirado deseado para cada muestreo pulsando las flechas “ARRIBA” o “ABAJO”. Pulse el botón ENTER para pasar al dígito siguiente. El volumen aspirado máximo que admite un ciclo es de 1999 litros. Pulse ENTER para confirmar. -
Seite 107: Resolución De Problemas
Mensaje “BATERÍA AGOTADA” La batería está agotada Recargue la batería Mensaje “LA CALIBRACIÓN HA Hay que calibrar el instrumento Envíe el instrumento a VWR International CADUCADO” o a un distribuidor autorizado. El interruptor infrarrojo remoto no La batería del control remoto está... -
Seite 108: Accesorios
Accesorios Descripción Referencia Cabezales de aspiración de aluminio para placas de contacto de 55 mm de Ø Acero inoxidable 710-0880 Aluminio 710-0892 Estéril de uso diario 710-0890 Cabezales de aspiración de aluminio para placas de Petri de 90 mm de Ø Acero inoxidable 710-0878 Aluminio... - Seite 109 Indice Avvertenze ..........................111 Informazioni di Sicurezza ....................... 111 Referenze ..........................111 Caratteristiche tecniche ......................112 Introduzione ..........................112 Principio ............................112 L’idea di base ..........................113 Modelli di SAS SUPER ISO disponibili ..................113 Istruzioni brevi ......................... 113 Istruzioni brevi per SAS Super ISO 100 and 180 ................
- Seite 110 “LINGUA” ............................. 124 “MOSTRA DATI IN MEMORIA” ....................124 “CANCELLA DATI IN MEMORIA” ....................125 “COLLEGAMENTO REMOTO” ....................126 “CALIBRAZIONE” ........................126 “AUTOSPEGNIMENTO” ......................126 Funzione “MULTIASPIRAZIONE” ....................126 Funzione “CONFIGURAZIONE” ....................128 ...
-
Seite 111: Avvertenze
Avvertenze Questo documento è proprietà di VWR International S.r.l. - Milano - Italia Non può essere duplicato o distribuito senza l’autorizzazione del proprietario. Patent Pending Prodotto da VWR International S.r.l. - Milano, Italia Informazioni di Sicurezza Utilizzare lo strumento solo per lo scopo indicato. -
Seite 112: Caratteristiche Tecniche
Caratteristiche tecniche Caratteristica SAS ISO 100 Contact SAS ISO 180 Contact SAS ISO 100 Petri SAS ISO 180 Petri N° Catalogo 710-0871 710-0872 710-0869 710-0870 Flusso 100 Litri/minuto 180 Litri/minuto 100 Litri/minuto 180 Litri/minuto Tipo piastra Piastre Contact 55mm Piastre Contact 55mm... -
Seite 113: L'idea Di Base
L’idea di base I concetti di base del sistema SURFACE AIR SYSTEM sono: Utilizzare lo stesso tipo di piastra per il controllo dell’aria, delle superfici e delle mani (Piastre a contatto “Surfair Plate” e “Agar Contact”). Queste piastre sono ben conosciute, facilmente disponibili e possono essere acquistate sia vuote che riempite di terreno. -
Seite 114: Presentazione Iniziale
Premere ENTER per confermare una selezione Premere il tasto MENU ed utilizzare le frecce per selezionare un menu o modificare i parametri: Premere ENTER per entrare in un sotto-menu Premere STOP ogni volta che si si vuole fermare il campionamento. Lo strumento ritornerà nella configurazione originale Per spegnere lo strumento premere MENU, poi con le frecce cercare la funzione SPEGNIMENTO e premere ENTER... -
Seite 115: Installazione
stallazio piego pratic co delle pia astre a con ntatto Rimuo overe la test ata d’aspiraz zione. Inseri re una piastr ra pronta e r imuoverne il coperchio. Ripos sizionare la te estata d’aspi irazione. Selez zionare il volu ume desider rato e preme ere start. -
Seite 116: Configurazione
SINGOLO VOLUME Può essere impostato tra 1 e 1999 litri ASPIRAZIONE TOTALE Mostra il volume totale di aria da aspirare CONFIGURAZIONE Con questa funzione si possono scegliere o impostare le 8 configurazioni dello strumento OPZIONI INIZIAL. OROLOGIO Per modificare la data e l’ora LUOGO Per identificare il luogo di campionamento IDENTIFICATIVO... -
Seite 117: Regolazioni Piedini Porta-Piastra
DATA [ XXXX ] ‐ > XXXX Lt. START STOP Regolazioni piedini porta-piastra La posizione dei tre piedini di fissaggio della piastra può richiedere una regolazione in funzione del diametro della piastra utilizzata La regolazione si esegue con una piccola chiave a brugola. Adattatore testate Petri (Optional) Un SAS destinato all’uso di piastre Contact può... -
Seite 118: Campionamento Con Lo Stesso Volume D'aria Dell'ultimo
Campionamento con lo stesso volume d’aria dell’ultimo Accendere il campionatore tenendo premuto il display touch-screen per almeno due secondi. Dopo la presentazione verrà visualizzata la seguente schermata: Data 31/08/06 11.31 Stato Batteria 500 Lt. Rit. 00 MIN Ritardo Volume d’aria impostato Impostato START MENU Premere START per iniziare il campionamento con gli ultimi parametri impostati. Il motore funzionerà finché la cifra in parentesi non sarà... -
Seite 119: Funzione "Modifica Volume" (Modifica Di Uno Dei Valori Memorizzati)
MENU' SELEZIONE VOLUME CLEAR ENTER Premere ENTER e selezionare un volume con le frecce “▲” or “▼” (ad esempio 1250 Litri) SELEZIONE VOLUME [ 1250 ] LitrI CLEAR ENTER Premere ENTER per selezionare il volume, il display visualizzerà il volume impostato 31/08/06 11.31 1250 Lt. ... -
Seite 120: Impostazione Volume
Premere ENTER per modificare i volumi: SELEZIONE VOLUME [ 1250 ] Litri CLEAR ENTER selezionare un volume muovendosi con le frecce e premere ENTER: IMPOSTAZIONE VOLUME [ 1250 ] CLEAR ENTER Cambiare il carattere indicato con “^” servendosi delle frecce e premere ENTER per passare al carattere seguente ripetere fino al raggiungimento dell’ultimo carattere e confermare premendo ENTER. -
Seite 121: Funzione "Opzioni
servendosi delle frecce, selezionare il ritardo desiderato. I possibili valori impostabili sono: 0-1-2-3-4-5-6-7-8-9-10-20-30-40-50-60 minuti. Premere ENTER per confermare. Quando è stato impostato un ritardo (per esempio 5 minuti), sullo schermo principale è visibile il ritardo impostato. 31/08/06 11.31 0250 Lt. RIT. 05 MIN START MENU Il messaggio “RITARDO”... -
Seite 122: Luogo
OPZIONI INIZIAL. OROLOGIO CLEAR ENTER Premere ENTER per modificare la data e l’ora: GG/MM/AA HH:mm 31/08/06 11:33 CLEAR ENTER Cambiare il numero indicato con “^” servendosi delle frecce e premere ENTER per passare al numero seguente: GG/MM/AA HH:mm 31/08/06 11:33 CLEAR ENTER ripetere fino al raggiungimento dell’ultimo carattere e confermere premendo ENTER.. -
Seite 123: Identificativo
LUOGO [ ABCDEFGH ] CLEAR ENTER Cambiare il carattere indicato con “^” servendosi delle frecce e premere ENTER per passare al carattere seguente: LUOGO [ LABOEFGH ] CLEAR ENTER ripetere fino al raggiungimento dell’ultimo carattere e confermere premendo ENTER. “IDENTIFICATIVO” Questa opzione è utilizzata per identificare l’operatore. Questo dato deve essere variato se diversi operatori usano lo stesso campionatore ed, in modo particolare, se i dati devono essere stampati. -
Seite 124: Lingua
IDENTIFICATIVO [ 34345678 ] CLEAR ENTER ripetere fino al raggiungimento dell’ultimo carattere e confermare premendo ENTER.. “LINGUA” Il testo dei menù può essere visualizzato in diverse lingue. Selezionare la funzione LINGUA dal menù OPZIONI: OPZIONI LINGUA CLEAR ENTER Premere ENTER per modificare la lingua:... -
Seite 125: Cancella Dati In Memoria
OPZIONI MOSTRA DATI IN MEM. CLEAR ENTER Premere ENTER per visualizzare i dati: Data Ora fine campionamento MOSTRA DATI IN MEM. Numero posizione 31 /08 /06 11 . 31 registrazione Indicatore Multimodo BBCD/3345 Lt . 1250 * Luogo/Identificativo CLEAR Litri aspirati Si possono visualizzare tutti i cicli completati muovendosi con le frecce. Il simbolo “*”... -
Seite 126: Collegamento Remoto
“COLLEGAMENTO REMOTO” La funzione COLLEGAMENTO REMOTO è utilizzata per connettere il SAS ad un PC tramite un dispositivo ad infrarossi opzionale. “CALIBRAZIONE” La funzione CALIBRAZIONE è protetta da password ed è utilizzabile solo da tecnici autorizzati. “AUTOSPEGNIMENTO” Dopo un periodo di inattività di 5 minuti, lo strumento si spegne automaticamente per risparmiare il consumo della batteria. - Seite 127 NUMERO DI CICLI [ 01 ] Cicli CLEAR ENTER selezionare il numero di cicli desiderato utilizzando le frecce. Premere ENTER per passare alla cifra successiva. Il numero massimo di cicli è 19. Premere ENTER per confermare: SINGOLO VOLUME [ 0000 ] Litres CLEAR ENTER selezionare il volume d’aria da aspirare nel singolo ciclo utilizzando le frecce.
-
Seite 128: Funzione "Configurazione
31/08/06 11.31 [ 0023 ] ‐> 200 Lt. START STOP Alla fine del ciclo il display mostrerà il ritardo tra i cicli con una scritta lampeggiante con il numero di cicli completati e quelli impostati. 11.31 31/08/06 RITARDO CICLO 02/05 START STOP Funzione “CONFIGURAZIONE”... - Seite 129 Numero di registrazione CONFIGURAZIONE [1] Luogo/Identificativo Volume d’aria totale ABCDEFGH/1234568 Ritardo partenza 01 02 0111 0222 Numero di Volume d’aria cicli ENTER CLEAR per ciclo Selezionare con le frecce la configurazione desiderata (tra 1 e 8) e premere ENTER per confermare Premere START per iniziare il campionamento.
- Seite 130 Cambiare il carattere indicato con “^” servendosi delle frecce e premere ENTER per passare al carattere seguente: LUOGO [ LABOEFGH ] CLEAR ENTER Ripetere fino al raggiungimento dell’ultimo carattere e confermare premendo ENTER. Ora è possibile modificare l’identificativo IDENTIFICATIVO [ 12345678] CLEAR ENTER Cambiare il carattere indicato con “^”...
-
Seite 131: Funzione "Spegnimento
NUMERO DI CICLI [ 01] CICLI CLEAR ENTER Premer ENTER per confermare. Nota: Se si vuole programmare un singolo ciclo impostare l’ INTERVALLO a 0 minuti. Premere ENTER per confermare. SINGOLO VOLUME [ 0000 ] Litri CLEAR ENTER selezionare il volume d’aria da aspirare nel singolo ciclo utilizzando le frecce. Premere ENTER per passare alla cifra successiva. -
Seite 132: Operazioni
Nota: Lo strumento si spegnerà automaticamente dopo 5 minuti di inattività. Operazioni Regolazione piedini porta piastra Il SAS SUPER ISO 100 e SAS SUPER ISO 180 possono essere utilizzati con piastra a contatto o Petri standard. I piedini porta piastra possono essere regolati per permettere l’alloggiamento di piastre di diverse marche che possono avere diametri leggermente diversi. -
Seite 133: Accessori
• Informazioni complete sui contatti dell'Assistenza tecnica • Accesso al catalogo on-line VWR e ad ogni altra informazione relativa agli accessori e ai prodotti collegati • Ulteriori informazioni sui prodotti e sulle promozioni Contatti Per informazioni o assistenza tecnica, contattare i nostri uffici VWR o visitare il sito. -
Seite 134: Garanzia
VWR International garantisce per questo prodotto l'assenza da difetti nei materiali e di fabbricazione per un periodo di due (2) anni dalla data di consegna. In caso contrario, VWR provvederà, a sua discrezione e a proprie spese, alla riparazione, sostituzione o al rimborso del prezzo di acquisto del prodotto al cliente, purché... -
Seite 135: Smaltimento Dell'apparecchio
Smaltimento dell’apparecchio Questo apparecchio è provvisto del simbolo del cassonetto barrato, il che significa che il prodotto non può essere smaltito con i rifiuti non riciclabili. Avete invece la responsabilità di smaltire regolarmente il prodotto al termine della vita in servizio, consegnandolo ad un servizio autorizzato che lo raccolga separatamente e lo avvii al riciclaggio. Siete inoltre responsabili della decontaminazione dell’apparecchio in caso di inquinamento biologico, chimico o radiologico, per non danneggiare la salute delle persone incaricate dello smaltimento e del riciclaggio. - Seite 136 Your Distributor Australia Germany Poland VWR International Pty. LTD VWR International GmbH VWR International Sp. z o.o. Level 1, Unit 1a/60 Enterprise Place Hilpertstraße 20a Limbowa 5 Tingalpa D - 64295 Darmstadt 80-175 Gdansk QLD 4173 Australia Freecall: 0800 702 00 07 Tel.: 058 32 38 200...