Herunterladen Inhalt Inhalt Diese Seite drucken
Inhaltsverzeichnis

Werbung

Verfügbare Sprachen
  • DE

Verfügbare Sprachen

  • DEUTSCH, seite 28

Werbung

Inhaltsverzeichnis
loading

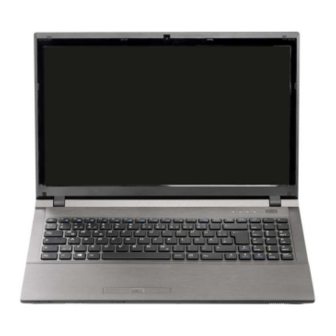
Inhaltszusammenfassung für MAXDATA M-BOOK 6000 G3

  • Seite 2: Inhaltsverzeichnis

    Contents Fehlerbehebung ................44 Technische Daten ................45 About this Concise User Guide ............1 System Startup ..................4 Sommaire System Map: Front View with LCD Panel Open ......5 LED Indicators ..................6 A propos de ce Guide Utilisateur Concis ........49 System Map: Front, Rear, Bottom & Top Views ......7 Guide de démarrage rapide .............52 System Map: Left &...
  • Seite 3 TPM (Trusted Platform Module) ............89 Intel® vPro™ Technology ..............91 Solución de problemas ..............92 Especificaciones ................93 Sommario Informazioni sulla Guida Rapida per l'Utente ........97 Guida di avvio rapido ..............100 Descrizione del sistema: Vista anteriore con pannello LCD aperto ..................101 Indicatori LED ................102 Descrizione del sistema: Vista anteriore, posteriore, inferiore e dall'alto ..................103 Descrizione del sistema: Vista sinistra e destra ......104...
  • Seite 4: About This Concise User Guide

    About this Concise User Guide This quick guide is a brief introduction to getting your system started. This is a supplement, and not a substitute for the expanded English language User’s Manual in Adobe Acrobat format on the Device Drivers & Utilities + User’s Manual disc supplied with your computer.
  • Seite 5: Instructions For Care And Operation

    Instructions for Care and Operation Safety Information • Only use an AC/DC adapter approved for use with this computer. The computer is quite rugged, but it can be damaged. To pre- • Use only the power cord and batteries indicated in this manual. Do vent this, follow these suggestions: not dispose of batteries in a fire.
  • Seite 6 Polymer Battery Precautions Note the following information which is specific to polymer batteries only, and where applicable, this overrides the general battery precaution information. • Polymer batteries may experience a slight expansion or swelling, however this is part of the battery’s safety mechanism and is not a cause for concern.
  • Seite 7: System Startup

    System Startup 1. Remove all packing materials. 2. Place the computer on a stable surface. 3. Insert the battery and make sure it is locked in position. 4. Securely attach any peripherals you want to use with the computer (e.g. keyboard and mouse) to their ports. 5.
  • Seite 8: System Map: Front View With Lcd Panel Open

    System Map: Front View with LCD Panel Open Figure 2 Front View with LCD Panel Open  1. PC Camera (Optional) 2. LCD Wireless Device Operation Aboard 3. Power Button Aircraft 4. LED Indicators 5. Keyboard The use of any portable 6.
  • Seite 9: Led Indicators

    LED Indicators The LED indicators on the computer display helpful infor- Icon Color Description mation about the current status of the computer. Icon Color Description The Wireless LAN Module is Pow- Green ered On The Bluetooth Module is Powered Orange Green Hard Disk Activity Orange...
  • Seite 10: System Map: Front, Rear, Bottom & Top Views

    System Map: Front, Rear, Bot tom & Top Views Figure 3 Front Front, Rear, Bottom & Top Views 1. LED Indicators 2. WLAN Switch Rear 3. Security Lock Slot 4. Battery 5. Docking Port 6. Vent 7. Component Bay Cover 8.
  • Seite 11: System Map: Left & Right Views

    System Map: Left & Right Views Figure 4 Left & Right Views Left 1. DC-In Jack 2. External Monitor Port 3. RJ-45 LAN Jack 4. e-SATA Port 5. Vent Right 6. Powered USB 3.0 Port 7. 2 * USB 3.0 Ports 8.
  • Seite 12: Keyboard & Function Keys

    Keyboard & Function Keys The keyboard includes a numeric keypad for easy numeric data input. Pressing NumLk turns on/off the numeric key- NumLk & Function Keys ScrLk pad. It also features function keys to allow you to change operational features instantly. The function keys (F1 - F12 etc.) will act as hot keys when pressed while Fn is held Numeric 3G Module Power Toggle...
  • Seite 13: Control Center

    Control Center Press the Fn + Esc key combination to toggle the Control Center on/off. The Control Center gives quick access to frequently used controls, and enables you to quickly turn modules on/off.  Undocking Click the Docking button to hot undock the system (if your computer sup- ports hot undocking).
  • Seite 14 Power Modes You can set a Power Mode by clicking the appropriate icon at the top of the Control Center. Each power mode will affect the power status of modules (e.g. WLAN, Bluetooth, 3G or Camera), screen brightness, TouchPad power and Silent Mode.
  • Seite 15: Power Status

    Power Status The Power Status icon will show whether you are currently powered by the battery, or by the AC/DC adapter plugged in to a working power outlet. The power status bar will show the current battery charge state. Brightness The Brightness icon will show the current screen brightness level.
  • Seite 16 Display Switch Click the Display Switch button to access the menu (or use the + P key combination) and select the appropriate display mode. Time Zone Clicking the Time Zone button will access the Date and Time Windows control panel. Desktop Background Clicking the Desktop Background button will allow you to change the desktop background picture.
  • Seite 17: 3G Module

    3G Module Insert the USIM card as illustrated below until it clicks into position, and replace the battery. If you have included an optional 3G module in your pur- chase option, follow the instructions below to install the USIM card (which will be provided by your service pro- vider), and then run the appropriate application supplied with your module.
  • Seite 18: Driver Installation

    Driver Installation  The Device Drivers & Utilities + User’s Manual disc contains the drivers and utilities necessary for the proper operation of the computer. This setup will probably have al- Driver Installation General Guidelines ready been done for you. If this is not the case, insert the disc and click Install Driv- ers (button), or Option Drivers (button) to access the Optional driver menu.
  • Seite 19: Fingerprint Reader

    Fingerprint Reader Enroll your fingerprints as instructed below before use.  User Enrollment Fingerprint Enrollment 1. Click Start > Programs/All Programs > Protector Suite > Note that it is strongly recom- Control Center, or double click the taskbar icon mended that enroll 2.
  • Seite 20: Trusted Platform Module

    Trusted Platform Module Initializing TPM Run the application from the Infineon Security Platform Solu- Before setting up the TPM functions you must initialize tion > Manage Security Platform item in the Start > Pro- the security platform. grams/All Programs menu. Click User Settings (tab) and click Yes, or right-click the icon Activating TPM in the notification area of the taskbar, and select Security...
  • Seite 21 Infineon Security Platform Settings 6. Choose the Security Platform Features you want to use by clicking the appropriate tickbox. Tool 7. Enter a Basic User Password (and re-type to confirm it) and click Next. The Infineon Security Platform Settings Tool allows you 8.
  • Seite 22: Intel® Vpro™ Technology

    Intel® vPro™ Technology Intel® vPro™ Technology is supported by Model B computers only. This set of technology features, built into the computer’s motherboard, allows Information Technology departments remote access to the computer. This allows the IT department to monitor, maintain and manage computers regardless of the state of the operating system or the computer’s power state.
  • Seite 23: Troubleshooting

    Troubleshooting Problem Possible Cause - Solution The Wireless LAN/Bluetooth/3G The modules are off. Check the LED indicator and/or function key indicator to see if the modules cannot be detected. WLAN/Bluetooth/3G module is on or off (see Table 2 on page 6 Table 3 on page 9).
  • Seite 24: Specifications

    Specifications Processor Options Intel® Pentium™ Processor B980 (2.40GHz), B970 (2.30GHz), B960 Model A: (2.20GHz), B950 (2.10GHz) Intel® Core™ i7 Processor  2MB L3 Cache, 32nm, DDR3-1333MHz, i7-3612QM (2.10GHz) TDP 35W Latest Specification Information 6MB L3 Cache, 22nm, DDR3-1600MHz, TDP 35W Model B: The specifications listed in this here i7-3520M (2.90GHz)
  • Seite 25 Video Adapter (Model A) Audio Communication Intel Integrated GPU High Definition Audio Compliant Interface Built-In Gigabit Ethernet LAN (GPU is Dependent on Processor) 2 * Built-In Speakers (Factory Option) 2M HD PC Camera Mod- Intel® HD Graphics Built-In Microphone Dynamic Frequency (Intel Dynamic Video (Factory Option) 3G Module (UMTS/HSPA Security Memory Technology for up to 1.7GB)
  • Seite 26 Interface Environmental Spec Three USB 3.0 Ports (Including one AC/DC Temperature Powered USB port) ° ° Operating: 5 C - 35 One USB 2.0 Port Non-Operating: -20°C - 60°C One eSATA Port Relative Humidity One HDMI-Out Port Operating: 20% - 80% One Headphone-Out Jack Non-Operating: 10% - 90% One Microphone-In Jack...
  • Seite 28: Über Das Ausführliche Benutzerhandbuch

    Über das Ausführliche Benutzerhandbuch Diese Kurzanleitung soll einen Überblick über die Schritte geben, die dazu notwendig sind, das System zu starten. Dieses ist nur eine Ergänzung und kein Ersatz für das erweiterte englischsprachige Benutzerhandbuch, das auf der mitgelieferten Disc Device Drivers & Utilities + User's Manual im Adobe-Acrobat-Format vorliegt. Diese Disc enthält auch die Treiber und Utility-Programme, die für einen einwandfreien Betrieb des Computers notwendig sind (Hinweis: Das Unternehmen behält sich das Recht vor, diese Publikation ohne Vorankündigung zu überarbeiten und den Inhalt zu verändern).
  • Seite 29: Sicherheitsinformationen

    Hinweise zu Pflege und Betrieb • Wenn der Computer heruntergefallen ist oder beschädigt wurde (berüh- ren Sie nicht die giftige Flüssigkeit des LCD-Bildschirms). Das Notebook ist zwar sehr stabil, kann aber dennoch be- • Wenn ein ungewöhnlicher Geruch, Hitze oder Rauch aus dem Computer schädigt werden.
  • Seite 30 Polymer Akku Sicherheitshinweise Beachten Sie die folgenden Hinweise, die sich speziell auf Polymer Akkus beziehen. Diese Hinweise haben zudem Vor- rang gegenüber den Allgemeinen Akku Sicherheitshinweisen. • Polymer Akkus können sich etwas ausdehnen oder anschwellen. Dies ist Teil des Sicherheitsmechanismus des Akkus und kein Anlass zur Sorge. •...
  • Seite 31: Schnellstart

    Schnellstart 1. Entfernen Sie das gesamte Verpackungsmaterial. 2. Legen Sie den Computer auf eine stabile Unterlage. 3. Setzen Sie den Akku ein, und stellen Sie sicher, dass sie fest sitzt. 4. Schließen Sie alle Peripheriegeräte, die Sie mit dem Computer verwenden wollen (z.
  • Seite 32: Systemübersicht: Ansicht Von Vorne Mit Geöffnetem Lcd-Bildschirm

    Systemübersicht: Ansicht von vorne mit geöffnetem LCD-Bildschirm Abb. 2  Ansicht von vorne mit ge- öffnetem LCD-Bildschirm Die Benutzung drahtlos 1. PC-Kamera (optional) angeschlossener Geräte in Flugzeugen 2. LCD-Bildschirm 3. Netzschalter In der Regel ist die Benut- 4. LED-Anzeigen zung jeglicher tragbarer elektronischer Funkgerä- 5.
  • Seite 33: Led-Anzeigen

    LED-Anzeigen Die LED-Anzeigen auf dem Computer zeigen wichtige Symbol Farbe Beschreibung Informationen über den aktuellen Status des Computers. Symbol Farbe Beschreibung Grün Das WLAN-Modul ist eingeschaltet Orange Das Bluetooth-Modul ist eingeschaltet Orange Der AC/DC-Adapter ist angeschlossen Grün Es wird auf die Festplatte zugegriffen Lampe Der eingeschaltete USB Anschluss ist blinkt...
  • Seite 34: Systemübersicht: Ansicht Von Vorne, Hinten, Unten & Oben

    Systemübersicht: Ansicht von vorne, hinten, unten & oben Abb. 3 Vorderseite Ansicht von vorne, hinten, unten & oben 1. LED-Anzeigen 2. WLAN-Schalter 3. Sicherheitsschloß- Hinterseite Buchse 4. Akku 5. Docking-Anschluss 6. Luftungsoffnung 7. Komponen- tenfachabdekkung 8. Abdeckung des Festplat- tenschachts 9.
  • Seite 35: Systemübersicht: Ansicht Von Links Und Rechts

    Systemübersicht: Ansicht von links und rechts Abb. 4 Ansicht von links und rechts Linke Seite 1. DC-Eingangsbuchse 2. Schnittstelle für exter- nen Monitor 3. RJ-45 LAN-Buchse Rechte Seite 4. eSATA-Anschluss 5. Luftungsoffnung 6. Eingeschaltete USB 3.0 Anschluss 7. 2 USB 3.0 Anschlüsse ...
  • Seite 36: Tastatur & Funktionstasten

    Tastatur & Funktionstasten Numeric Die Tastatur hat eine eingebettete Nummerntastatur für einfache Zahleneingabe. Durch Drücken auf Num wird die Num & Funktionstasten Nummerntastatur ein- und ausgeschaltet. Zusätzlich gibt es Rollen Funktionstasten, über die Sie direkt zwischen den Funktionen umschalten können. Wenn die Funktionstasten (F1 - F12) Ein-/Ausschalten des gleichzeitig mit der Fn-Taste gedrückt werden, funktionieren 3G-Moduls...
  • Seite 37: Control Center (Steuerzentrum)

    Control Center (Steuerzentrum) Drücken Sie auf die Tastenkombination Fn + Esc, um das Control Center (Steuerzentrum) ein-/auszuschalten. Das Control Center (Steuerzentrum) bietet den schnellen Zugriff auf häufig verwendete Funktionen, und Sie haben hier die Möglichkeit, Module direkt ein-/auszuschalten.  Abtrennen Klicken Taste Dokking, um das System bei...
  • Seite 38 Energiemodi Sie können einen Energiemodus einstellen, indem Sie im Control Center auf das entsprechende Symbol klicken. Jeder Energiemodus wirkt sich auf den Stromstatus der Module (z. B. WLAN, Bluetooth, 3G oder Kamera), die Bildschir- mhelligkeit, die Stromversorgung des TouchPads und den Lautlos-Modus aus. Klicken Sie auf das Control Center-Symbol, um einen allgemein gültigen Energiemodus einzustellen.
  • Seite 39 Power Status (Energiestatus) Das Energiestatus-Symbol zeigt an, ob die Stromversorgung aktuell über den Akku oder über das an das Stromnetz ange- schlossene Netzteil erfolgt. Die Energiestatus-Anzeige zeigt den aktuellen Akkuladestatus an. Brightness (Helligkeits) Das Helligkeits-Symbol zeigt die aktuell eingestellte Bildschirmhelligkeit an. Sie können die Bildschirmhelligkeit entweder mit dem Schieberegler oder mit der Tastenkombination Fn + F8/F9 ändern.
  • Seite 40 Display Switch (Anzeige wechseln) Klicken Sie auf die Taste zum Wechseln des Anzeigegeräts, um das Menü aufzurufen (Sie können dazu auch die Tastenkombination + P verwenden), und wählen Sie einen Anzeigemodus aus. Time Zone (Zeitzone) Wenn Sie auf die Schaltfläche Zeitzone klicken, wird das Windows-Systemsteuerungsfenster Datum und Uhrzeit aufgerufen. Desktop Background (Desktop-Hintergrund) Wenn Sie auf die Schaltfläche Desktop-Hintergrund klicken, können Sie das Bild für den Desktophintergrund einstellen.
  • Seite 41: 3G-Modul

    3G-Modul 2. Schieben Sie die USIM-Karte wie unten abgebildet hinein, und lassen Sie sie einrasten. Setzen Sie den Akku wieder ein . Wenn Ihr Modell das optionale 3G-Modul enthält, folgen Sie den nachfolgenden Anweisungen, um die USIM-Karte zu installieren (Sie erhalten sie von Ihrem Dienstanbieter). Installieren Sie dann die Anwendung.
  • Seite 42: Installation Der Treiber

    Installation der Treiber  Die Disc Device Drivers & Utilities + User's Manual enthält die Treiber und Hilfspro- gramme, die für das einwandfreie Funktionieren des Computers notwendig sind. Möglicher- Allgemeine Hinweise zur Treiberinstallation weise wurden diese bereits vorinstalliert. Ist das nicht der Fall, legen Sie die Disc ein, und klicken Sie auf Install Drivers (Schaltfläche) oder Option Drivers (Schaltfläche), um das Wenn Sie keine fortge- schrittenen...
  • Seite 43: Fingerabdruckleser

    Fingerabdruckleser 12. Klicken Sie mit der rechten Maustaste auf das Taskleistensymbol , um das Control Center zu starten. Dort Melden Sie Ihre Fingerabdrücke vor dem Benutzen wie un- können Sie Fingerabdrücke bearbeiten, Anwendungen registrieren, auf das Hilfe-Menü zugreifen usw. ten beschrieben an. 13.
  • Seite 44: Tpm (Trusted Platform Module)

    TPM (Trusted Platform Module) Installieren des TPM-Treibers 1. Klicken Sie auf Option Drivers (Schaltfläche). Bevor Sie die TPM-Funktionen einrichten, müssen Sie die 2. Klicken Sie auf 7.Install TPM Driver > Ja. Sicherheitsplattform initialisieren. 3. Klicken Sie auf Installieren > Weiter. Aktivieren der TPM-Funktionen 4.
  • Seite 45 Parametrierungstool der Infineon Secu- Abb. 11 rity Platform Assistent Mit dem Parametrierungstool der Infineon Security Platform für die können Sie den TPM Status verwalten und überprüfen, Ihre schnelle Ini- Kennwortinformationen verwalten und Ihre TPM Daten si- tialisierung chern und wiederherstellen. Da ein TPM normalerweise in der Security Platform großen Unternehmen und Organisationen verwaltet wird, be-...
  • Seite 46: Intel® Vpro™ Technology

    Intel® vPro™ Technology Intel® vPro™ Technology wird nur von Modell B Compu- tern unterstützt. Die auf dem Mainboard des Computers inte- grierten technischen Funktionen ermöglichen es IT- Abteilungen aus der Ferne auf den Computer zuzugreifen. IT-Abteilungen können Computer somit unabhängig vom Zustand des Betriebssystems oder dem Energiestatus des Computers überwachen, warten und verwalten.
  • Seite 47: Fehlerbehebung

    Fehlerbehebung Problem Mögliche Ursache - Lösung Module Wireless-LAN/Bluetooth/3G Das/Die Modul(e) ist/sind ausgeschaltet. Prüfen Sie anhand der LED-Anzeige und/ können nicht erkannt werden. oder Funktionstastenanzeige, WLAN/Bluetooth/3G-Modul ein- oder ausgeschaltet ist (siehe Tabelle 2 auf Seite 30 Tabelle 3 auf Seite 33). Wenn die Anzeige-LED nicht leuchtet, drücken Sie die Tastenkombination Fn + F11 (WLAN), Fn + F12 (Bluetooth) oder Fn + (3G), um das/die Modul(e) zu aktivieren (siehe...
  • Seite 48: Technische Daten

    Technische Daten Prozessor-Optionen Intel® Pentium™ Prozessor B980 (2,40GHz), B970 (2,30GHz), B960 Modell A: (2,20GHz), B950 (2,10GHz) Intel® Core™ i7 Prozessor  2MB L3 Cache, 32nm, DDR3-1333MHz, i7-3612QM (2,10GHz) TDP 35W Aktualität der technischen Daten 6MB L3 Cache, 22nm, DDR3-1600MHz, Modell B: TDP 35W Die in diesem Teil aufgeführten techni- Intel®...
  • Seite 49 Videoadapter (Modell A) Audio Kommunikation Integrierte GPU von Intel® (die GPU ist High-Definition-Audio-kompatible 1 Gbit Ethernet-LAN eingebaut vom Prozessor abhängig) Schnittstelle (Werkseitige Option) 2M HD PC-Kamera- Intel® HD Graphics 2 eingebaute Lautsprecher Modul Dynamische Frequenz (Intel Dynamic Video Eingebautes Mikrofon (Werkseitige Option) 3G-Modul (UMTS/ Memory Technology für bis zu 1,7GB) HSPA oder UMTS/HSPA+)
  • Seite 50 Schnittstellen Umgebungsbedingungen Drei USB 3.0-Anschlüsse (Verfügt über Temperatur einen über den USB-Anschluss mit Strom In Betrieb: 5ºC – 35ºC versorgten USB-Anschluss) Bei Aufbewahrung: -20ºC – 60ºC Ein USB 2.0-Anschluss Relative Luftfeuchtigkeit Ein eSATA-Anschluss In Betrieb: 20 – 80 % Ein HDMI-Ausgangsanschluss Bei Aufbewahrung: 10 –...
  • Seite 52: A Propos De Ce Guide Utilisateur Concis

    A propos de ce Guide Utilisateur Concis Ce guide rapide est une brève introduction à la mise en route de votre système. Il s’agit d’un supplément, et non pas d’une alternative au Manuel de l’Utilisateur en Anglais complet au format Adobe Acrobat sur le disque Device Drivers & Utilities + User's Manual fourni avec votre ordinateur.
  • Seite 53: Instructions D'entretien Et D'utilisation

    Instructions d’entretien et d’utilisation LCD est cassé, ne touchez pas le liquide car il contient du poison). • Si une odeur inhabituel, de la chaleur ou de la fumée apparaissait sor- L’ordinateur est robuste, mais il peut toutefois être endomma- tant de votre ordinateur.
  • Seite 54 Précautions concernant les batteries polymères Notez les informations suivantes spécifiques aux batteries po- lymères, et le cas échéant, celles-ci remplacent les informa- tions générales de précaution sur les batteries. • Les batteries polymères peuvent présenter une légère dilatation ou gonflement, mais cela est inhérent au mécanisme de sécurité de la batterie et ne représente pas une anomalie.
  • Seite 55: Guide De Démarrage Rapide

    Guide de démarrage rapide 1. Enlevez tous les memballages. 2. Posez l’ordinateur sur une surface stable. 3. I nstallez la batterie et assurez-vous qu’elle correctement positionnée. 4. Connectez fermement les périphériques que vous souhaitez utiliser avec votre ordinateur (par ex. clavier et souris) à leurs ports respectifs.
  • Seite 56: Carte Du Système: Vue De Face Avec L'écran Lcd Ouvert

    Carte du système: Vue de face avec l’écran LCD ouvert Figure 2 Vue de face avec l’écran LCD  ouvert Utilisation des 1. Caméra PC (optionnelle) appareils sans fil à 2. Écran LCD bord d'un avion 3. Bouton d'alimentation L'utilisation de tout ap- 4.
  • Seite 57: Indicateurs Led

    Indicateurs LED Les indicateurs LED sur votre ordinateur affichent des infor- Icône Couleur Description mations utiles sur l’état actuel de votre ordinateur. Icône Couleur Description Vert Le module LAN sans fil est allumé Orange Le module Bluetooth est allumé Orange L'adaptateur AC/DC est branché...
  • Seite 58: Carte Du Système: Vues De Face, Arrière, Dessous & Dessus

    Carte du système: Vues de face, arrière, dessous & dessus Figure 3 - Vues de face, ar- Face rière, dessous & dessus 1. Indicateurs LED 2. Commutateur WLAN 3. Fente de verrouillage de Arrière sécurité 4. Batterie 5. Port d’interface 6.
  • Seite 59: Carte Du Système: Vues De Gauche & Droite

    Carte du système: Vues de gauche & droite Figure 4 Vues de gauche & droite Gauche 1. Prise d’entrée DC 2. Port moniteur externe 3. Prise réseau RJ-45 4. Port eSATA 5. Ventilation Droit 6. Port USB 3.0 alimenté 7. 2 Ports USB 3.0 8.
  • Seite 60: Clavier & Touches Fonction

    Clavier & touches fonction Le clavier est doté d'un pavé numérique intégré pour une sai- sie des données numériques plus facile. Le fait d'appuyer sur Touches Fonction Verr Num & Verr Num active ou désactive le pavé numérique. Il est éga- ArrêtDét lement doté...
  • Seite 61: Control Center (Centre De Contrôle)

    Control Center (Centre de contrôle) Appuyer sur la combinaison de touches Fn + Échap pour activer/désactiver le Control Center (Centre de contrôle). Le Control Center (Centre de contrôle) donne un accès rapide aux commandes fréquemment utilisées, et vous permet de rapi- dement d'activer/désactiver des modules.
  • Seite 62: Modes D'alimentation

    Modes d’alimentation Vous pouvez définir un Mode d’alimentation en cliquant sur l'icône appropriée au dessus du Control Center (Centre de contrôle). Chaque mode d'alimentation aura une incidence sur l’état d’alimentation des modules (par exemple WLAN, Blue- tooth, 3G ou Appareil photo), la luminosité de l'écran, le TouchPad et le Mode Silencieux. Vous pouvez cliquer sur l’icône du Control Center (Centre de contrôle) pour définir un mode d'alimentation générale, puis cliquer sur les icônes individuelles dans le Control Center (Centre de contrôle) pour activer/désactiver des modules etc.
  • Seite 63: Brightness (Luminosité)

    Power Status (État d'alimentation) L'icône État d'alimentation indique si vous êtes actuellement alimenté par la batterie, ou par l'adaptateur AC/DC branché à une prise de courant. La barre d’état d’alimentation indiquera l'état de charge actuel de la batterie. Brightness (Luminosité) L'icône Luminosité...
  • Seite 64: Time Zone (Fuseau Horaire)

    Display Switch (Permutation d’affichage) Cliquez sur le bouton Permutation d’affichage pour accéder au menu (ou utilisez la combinaison de touches + P) et sé- lectionnez le mode d'affichage approprié. Time Zone (Fuseau horaire) Cliquer sur le bouton Fuseau horaire permet d’accéder au panneau de configuration de Date et heure de Windows. Desktop Background (Fond d'écran du bureau) Cliquer sur le bouton Fond d'écran du bureau vous permettra de changer l'image du fond d'écran du bureau.
  • Seite 65: Module 3G

    Module 3G 2. Insérez la carte USIM comme illustré ci-dessous jusqu'à ce qu'elle se clique en position, et remettez la batterie . Si votre option d'achat comporte un module 3G optionnel, suivez les instructions ci-dessous pour installer la carte USIM (qui vous sera fournie par votre fournisseur de ser- vice), et installez ensuite l'application.
  • Seite 66: Installation Du Pilote

    Installation du pilote  Le disque Device Drivers & Utilities + User’s Manual contient les pilotes et les utilitaires nécessaires pour un bon fonctionnement de votre ordinateur. Cette installation aura proba- Directives générales pour l'installation du pilote blement déjà été faite pour vous. Si ce n'est pas le cas, insérez le disque et cliquez sur Install Drivers (bouton), ou Option Drivers (bouton) pour accéder au menu des pilotes Option- D'une manière...
  • Seite 67: Lecteur D'empreintes Digitales

    Lecteur d'empreintes digitales 13. Si vous passez votre doigt sur le lecteur, à tout moment, vous pouvez accéder au Biomenu pour Verrouiller l'ordinateur, Enregistrez vos empreintes digitales comme indiqué ci-des- Enregistrer des sites web, accéder aux Enregistrements personnels ou E-Wallet, ouvrir le Centre de contrôle et sus avant utilisation.
  • Seite 68: Tpm (Trusted Platform Module)

    TPM (Trusted Platform Module) 5. Cliquez sur Suivant > Suivant > Installer. 6. Cliquez sur Terminer > Oui pour redémarrer votre ordinateur. Avant de paramétrer les fonctions TPM vous devez initialiser Initialiser TPM la plate-forme de sécurité. 1. Exécutez l'application de la TPM à partir de l'élément Solution Activer TPM Infineon Security Platform >...
  • Seite 69 Outil des paramétrage d’Infineon Securi- 6. Choisissez les Fonctions de Security Platform que vous souhaitez utiliser en cliquant la case correspondante. ty Platform 7. Entrez un Mot de passe utilisateur de base (et retapez-le pour le confirmer) et cliquez sur Suivant. L’Outil des paramétrage d’Infineon Security Platform vous 8.
  • Seite 70: Technologie Intel® Vpro

    Technologie Intel® vPro™ • A au moins un caractère numérique • A au moins un caractère ASCII non-alphanumérique (!, La technologie Intel® vPro™ est prise en charge unique- @, #, $,%, ^, &, *) ment par les ordinateurs de modèle B. Cet ensemble de fonctionnalités technologiques, intégré...
  • Seite 71: Dépannage

    Dépannage Problème Cause possible - résolution Les modules LAN sans fil/ Bluetooth/3G Le(s) module(s) est (sont) désactivé(s). Vérifiez l'indicateur LED et/ou l’indicateur de ne peuvent pas être détectés. la touche de fonction pour voir si le module WLAN/Bluetooth/3G est activé ou désactivé (voir le Tableau 2 à...
  • Seite 72: Spécifications

    Spécifications Options de processeurs Processeur Intel® Pentium Modèle A: B980 (2,40GHz), B970 (2,30GHz), B960 (2,20GHz), B950 (2,10GHz)  Processeur Intel® Core i7 Cache L3 2Mo, 32nm, DDR3-1333MHz, i7-3612QM (2,10GHz) TDP 35W Dernières informations de Cache L3 6Mo, 22nm, DDR3-1600MHz, spécification TDP 35W Modèle B: Les spécifications énumérées dans...
  • Seite 73 Adaptateur vidéo (Modèle A) Communication GPU intégré Intel® (le GPU dépend du Interface conforme HDA (Son Haute 1Gbit réseau Ethernet intégré processeur) Définition) (Option d’usine) 2M HD caméra PC Intel® HD Graphics 2 haut-parleurs intégrés (Option d’usine) Module 3G (UMTS/HSPA Fréquence dynamique (Technologie de Microphone intégré...
  • Seite 74 Interface Mise en marche Trois ports USB 3.0 (comprenant un port Adaptateur AC/DC pleine bande USB alimenté par AC/DC) Entrée AC: 100-240V, 50-60Hz Un port USB 2.0 Sortie DC: 19V, 3,42A ou 18,5V, 3,5A (65W) Un port eSATA Batterie Smart Lithium-Ion à 6 éléments, Un port de Sortie HDMI 62,16WH Une prise de sortie haut-parleurs/casque...
  • Seite 76: Acerca De Esta Guía Del Usuario Concisa

    Acerca de esta Guía del Usuario Concisa Esta guía rápida es una breve introducción para poner su sistema en funcionamiento. Es un suplemento y no un sustituto del Manual del usuario completo en inglés en formato Adobe Acrobat del disco Device Drivers & Utilities + User's Manual suministrado con el ordenador.
  • Seite 77: Instrucciones Para El Cuidado Y Funcionamiento

    Instrucciones para el cuidado y funcio- • Si hay un olor fuera de lo normal, calor o humo que sale del orde- nador. namiento Información de seguridad El ordenador portátil es muy robusto, pero puede dañarse. Para • Utilice solamente un adaptador de alimentación aprobado para su evitar esto, siga estas sugerencias: uso con este ordenador.
  • Seite 78 Precauciones para baterías de polímero Tenga en cuenta la información siguiente específica para bate- rías de polímero; además, donde corresponda, invalida la infor- mación sobre precauciones para baterías normales. • Las baterías pueden aumentar o hincharse ligeramente, sin embargo, esto es parte del mecanismo de seguridad de la batería y o supone un problema.
  • Seite 79: Guía Rápida Para Empezar

    Guía rápida para empezar 1. Quite todos los materiales del embalaje. 2. Coloque el ordenador en una superficie estable. 3. Inserte la batería y asegúrese de que quede bloqueada en su posición. 4. Conecte en los puertos correspondientes los periféricos que desee utilizar con el ordenador (p.
  • Seite 80: Mapa Del Sistema: Vista Frontal Con Panel Lcd Abierto

    Mapa del sistema: Vista frontal con panel LCD abierto Figura 2 Vista frontal con panel LCD  abierto Uso de dispositivos 1. Cámara PC (opcional) inalámbricos a bordo 2. Panel LCD El uso de dispositivos 3. Botón de encendido electrónicos portátiles a 4.
  • Seite 81: Indicadores Led

    Indicadores LED Los indicadores LED en su ordenador muestran una valiosa Icono Color Descripción información sobre el estado actual del ordenador. Icono Color Descripción Verde El módulo LAN wireless está activado Naranja El módulo Bluetooth está activado Naranja El adaptador AC/DC está conectado Verde El disco duro está...
  • Seite 82: Mapa Del Sistema: Vistas Frontal, Posterior, Inferior Y Superior

    Mapa del sistema: Vistas frontal, posterior, inferior y superior Figura 3 - Vistas frontal, pos- Parte frontal terior, inferior y superior 1. Indicadores LED 2. Interruptor WLAN 3. Ranura del cierre de seguridad Parte posterior 4. Batería 5. Conector del soporte 6.
  • Seite 83: Mapa Del Sistema: Vistas Izquierda Y Derecha

    Mapa del sistema: Vistas izquierda y derecha Figura 4 Vistas izquierda y dere- Lateral izquierdo 1. Conector de entrada 2. Puerto para monitor externo 3. Conector LAN RJ-45 Lateral derecho 4. Puerto eSATA 10 11 5. Rejilla 6. Puerto USB 3.0 alimentado 7.
  • Seite 84: Teclado & Teclas De Función

    Teclado & teclas de función El teclado incluye un teclado numérico (en la parte derecha del teclado) para una entrada fácil de datos numéricos. Al Teclas de función Bloq Num & presionar Bloq Num el teclado numérico se habilita o Bloq Despl inhabilita.
  • Seite 85: Control Center (Centro De Control)

    Control Center (Centro de control) Presione la combinación de teclas Fn + Esc para activar o desactivar el Control Center (Centro de control). El Control Center (Centro de control) ofrece un acceso rápido a los controles usados con más frecuencia y le permite activar, y desactivar módulos rápidamente.
  • Seite 86 Modos de energía Puede ajustar el Modo de energía haciendo clic en el icono apropiado en la parte superior del Control Center (Centro de control). Cada modo de energía afecta al estado de energía de los módulos (es decir, WLAN, Bluetooth 3G o Cámara), el brillo de la pantalla, la energía del TouchPad y el Modo silencioso.
  • Seite 87: Brightness (Brillo)

    Power Status (Estado de energía) El icono Estado de energía mostrará si la alimentación actual viene dada por la batería o por el adaptador AC/DC enchufado en una toma de corriente. La barra de estado de energía muestra el estado actual de la carga de la batería. Brightness (Brillo) El icono Brillo mostrará...
  • Seite 88 Display Switch (Cambiar pantalla) Haga clic en el botón Cambiar pantalla para acceder al menú (o utilice la combinación de teclas + P) y seleccione el modo de pantalla apropiado. Time Zone (Zona horaria) Si hace clic en el botón Zona horaria accederá al panel de control Fecha y hora de Windows. Desktop Background (Fondo de pantalla) Si hace clic en el botón Fondo de pantalla podrá...
  • Seite 89: Módulo 3G

    Módulo 3G 2. Inserte la tarjeta USIM como se ilustra a continuación hasta que haga clic en su posición y vuelva a colocar la batería. Si ha incluido un módulo opcional 3G en su opción de compra, siga las instrucciones siguientes para instalar la tarjeta USIM (suministrada por su proveedor de servicios) y luego instale la aplicación.
  • Seite 90: Instalación De Controladores

    Instalación de controladores  El disco Device Drivers & Utilities + User’s Manual contiene los controladores y utilitarios necesarios para utilizar el ordenador correctamente. Inserte el disco y haga clic en Install Directrices generales para la instalación del Drivers (botón), u Option Drivers (botón) para acceder al menú de controladores opcional. controlador Instale los controladores en el orden indicado en la Figura...
  • Seite 91: Lector De Huellas Digitales

    Lector de huellas digitales 13. Si coloca su dedo sobre el lector en cualquier momento, podrá acceder al Biomenú para bloquear el ordenador, registrar Registre sus huellas digitales como se describe a sitios de la web, acceder a seguridad personal o E-Wallet, abrir el Centro de control y acceder al menú...
  • Seite 92: Tpm (Trusted Platform Module)

    TPM (Trusted Platform Module) Inicializar el TPM 1. Ejecute la aplicación del TPM desde la opción La solución Antes de configurar las funciones del TPM deberá iniciar la Infineon Security Platform > Administrar Security Platform en plataforma de seguridad. el menú Inicio > Programas/Todos los programas. 2.
  • Seite 93 Herramienta de configuración de 8. Haga clic en Siguiente para confirmar la configuración. 9. El ordenador inicializará la configuración. Infineon Security Platform 10. Haga clic en Finalizar. La Herramienta de configuración de Infineon Security 11. Haga clic en las fichas y paneles de control para ajustar la configuración.
  • Seite 94: Intel® Vpro™ Technology

    Intel® vPro™ Technology Intel® vPro™ Technology es soportada solamente por ordenadores Modelo B. El conjunto de características de esta tecnología, incorporada en la placa base del ordenador, permite a los departamentos de Tecnología de la Información remotos acceder al ordenador. Esto permite al departamento IT monitorizar, mantener y administrar los ordenadores independientemente del estado del sistema operativo o del estado de energía del ordenador.
  • Seite 95: Solución De Problemas

    Solución de problemas Problema Posible causa - Solución Los módulos WLAN, Bluetooth y 3G no El (Los) módulo(s) está(n) desactivado(s). Compruebe el indicador LED y/o el pueden detectarse. indicador de la tecla de función para ver si el módulo WLAN/Bluetooth/3G está apagado o encendido (vea la Tabla 2 en la página 78 la Tabla 3 en la página...
  • Seite 96: Especificaciones

    Especificaciones Opciones de procesadores Procesador Intel® Pentium™ B980 (2,40GHz), B970 (2,30GHz), B960 Modelo A: (2,20GHz), B950 (2,10GHz) Procesador Intel® Core™ i7  Caché de nivel 3 de 2MB, 32nm, DDR3- i7-3612QM (2,10GHz) 1333MHz, TDP 35W Información actualizada de Caché de nivel 3 de 6MB, 22nm, DDR3- especificaciones 1600MHz, TDP 35W Modelo B:...
  • Seite 97 Adaptador de vídeo (Modelo A) Audio Comunicaciones GPU integrada de Intel® (la GPU depende Interfaz compatible HDA (Sonido de alta LAN Ethernet de 1Gbit incorporada del procesador) definición) (Opción de fábrica) Módulo cámara PC de Intel® HD Graphics 2 altavoces incorporados 2M HD Frecuencia dinámica (Tecnología de Micrófono incorporado...
  • Seite 98 Interfaz Especificaciones del ambiente Tres puertos USB 3.0 (incluyendo un puerto Temperatura USB alimentado por AC/DC) En funcionamiento: 5°C - 35°C Un puerto USB 2.0 Apagado: -20°C - 60°C Un puerto eSATA Humedad relativa Un conector de salida HDMI En funcionamiento: 20% - 80% Un conector de salida de altavoces/ Apagado: 10% - 90% auriculares...
  • Seite 100: Informazioni Sulla Guida Rapida Per L'utente

    Informazioni sulla Guida Rapida per l'Utente Questa guida rapida rappresenta un’introduzione rapida all’avvio del sistema. Si tratta di un supplemento e non di una sostituzione del Manuale per l'utente completo in lingua inglese nel formato Adobe Acrobat, memorizzato sul disco Device Drivers &...
  • Seite 101: Istruzioni Per La Custodia E Il Funzionamento

    Istruzioni per la custodia e il funziona- • Se c'è un odore non usuale, calore o fumo che fuoriesce dal compu- ter. mento Informazioni di sicurezza Il computer notebook è abbastanza rigido, ma è possibile che possa essere danneggiato. Per evitare qualsiasi danno, attenersi •...
  • Seite 102 Precauzioni relative alla batteria ai polimeri Le informazioni seguenti sono molto importanti e si riferisco- no unicamente alle batterie ai polimeri e, ove applicabile, han- no priorità rispetto alle precauzioni generali relative alle batterie. • Le batterie ai polimeri possono espandersi o gonfiarsi leggermente, tuttavia questo fa parte del meccanismo di sicurezza della batteria e non deve essere causa di preoccupazione.
  • Seite 103: Guida Di Avvio Rapido

    Guida di avvio rapido 1. Eliminare tutti i materiali di imballo. 2. Appoggiare il computer su una superficie stabile. 3. Inserire la batteria e verificare che sia bloccata in posizione. 4. Collegare bene le periferiche che si desidera usare con il compu- ter (per esempio tastiera e mouse) alle porte corrispondenti.
  • Seite 104: Descrizione Del Sistema: Vista Anteriore Con Pannello Lcd Aperto

    Descrizione del sistema: Vista anteriore con pannello LCD aperto Figura 2  Vista anteriore con pan- nello LCD aperto Funzionamento del 1. Camera PC (opzionale) dispositivo senza fili a 2. Schermo LCD bordo di un aereo 3. Pulsante di alimentazione Solitamente l’uso 4.
  • Seite 105: Indicatori Led

    Indicatori LED Gli indicatori LED sul computer segnalano importanti Icona Colore Descrizione informazioni relative allo stato corrente del computer. Icona Colore Descrizione Verde Il modulo LAN Wireless è attivo Arancione Il modulo Bluetooth è attivo Verde Il disco rigido è in uso Arancione L'alimentatore è...
  • Seite 106: Descrizione Del Sistema: Vista Anteriore, Posteriore, Inferiore E

    Descrizione del sistema: Vista anteriore, posteriore, inferiore e dall'alto Figura 3 - Vista anteriore, po- Lato anteriore steriore, inferiore e dall'alto 1. Indicatori LED 2. Interruttore WLAN 3. Slot blocco di sicurezza 4. Batteria Lato posteriore 5. Porta di alloggiamento 6.
  • Seite 107: Descrizione Del Sistema: Vista Sinistra E Destra

    Descrizione del sistema: Vista sinistra e destra Figura 4 Vista sinistra e destra 1. Jack di ingresso DC Lato sinistro 2. Porta per monitor esterno 3. Jack RJ-45 per LAN 4. Porta eSATA 5. Ventola Lato destro 6. Porta USB 3.0 alimentata 7.
  • Seite 108: Tastiera & Tasti Funzione

    Tastiera & tasti funzione Numeric La tastiera è dotata di un tastierino numerico (sul lato destro della tastiera) per facilitare l'immissione di dati numerici. Tasti funzione Bloc Num & Premere NumLk per commutare l’attivazione e la Bloc Scorr disattivazione della tastiera numerica. Dispone anche di tasti Attiva/disattiva funzione che consentono di cambiare istantaneamente le modulo 3G...
  • Seite 109: Control Center (Centro Di Controllo)

    Control Center (Centro di controllo) Premere la combinazione di tasti Fn + Esc per attivare/disattivare il Control Center (Centro di controllo). Il Control Center (Centro di controllo) consente di accedere rapidamente ai controlli utilizzati più frequentemente, e di attivare/disattivare velocemente i vari moduli del computer. ...
  • Seite 110: Modalità Risparmio Energia

    Modalità risparmio energia È possibile impostare una Modalità risparmio energia facendo clic sull'icona corrispondente nella parte superiore del Control Center (Centro di controllo). Ciascuna modalità di risparmio energetico influenza lo stato di alimentazione di moduli (WLAN, Bluetooth, 3G o Videocamera), luminosità dello schermo, potenza del TouchPad e Modalità silenziosa. È possibile fare clic su un'icona del Control Center (Centro di controllo) per impostare una modalità...
  • Seite 111: Brightness (Luminosità)

    Power Status (Stato di alimentazione) L'icona Stato di alimentazione viene visualizzata se attualmente il computer è alimentatore con la batteria, oppure mediante l'alimentatore collegato in una presa funzionante. La barra dello stato di alimentazione mostra la carica corrente della batteria. Brightness (Luminosità) L'icona Luminosità...
  • Seite 112 Display Switch (Switch visualizzazione) Fare clic sul pulsante Switch visualizzazione per accedere al menu (o utilizzare la combinazione di tasti + P) e selezionare la modalità di visualizzazione appropriata. Time Zone (Fuso orario) Il pulsante Fuso orario consente di accedere al pannello di controllo di Windows Data e ora. Desktop Background (Sfondo del desktop) Il pulsante Sfondo del desktop consente di cambiare l'immagine sullo sfondo del desktop.
  • Seite 113: Modulo 3G

    Modulo 3G 2. Inserire la carta USIM come illustrato sotto finché non scatta in posizione e installare nuovamente la batteria. Se nell'opzione di acquisto è stato incluso un modulo 3G opzionale, seguire le istruzioni sotto per installare la carta USIM (presumibilmente fornita dal proprio operatore), quindi installare l'applicazione.
  • Seite 114: Installazione Driver

    Installazione driver  Il disco Device Drivers & Utilities + User’s Manual contiene i driver e le utilità necessari per il corretto funzionamento del computer. Inserire il disco e fare clic su Install Drivers Linee guida generali per (pulsante), oppure il pulsante Option Drivers per accedere al menu del driver opzionale. l'installazione dei driver Installare i driver attenendosi all'ordine indicato nella Figura...
  • Seite 115: Lettore D'impronte Digitali

    Lettore d’impronte digitali 13. Se si fa passare il ditto sul lettore ogni volt ache si può accedere al Biomenu per bloccare il computer, registrare siti web, Registrare le proprie impronte seguendo le istruzioni accedere a Personal Safe o E-Wallet, aprire il Control Center e accedere il menu Guida.
  • Seite 116: Tpm (Trusted Platform Module)

    TPM (Trusted Platform Module) Inizializzare TPM 1. Eseguire l'applicazione del TPM dalla voce Infineon Security Prima di configurare le funzioni TPM è necessario Platform Solution > Gestione di Security Platform del menu inizializzare la piattaforma di sicurezza. Start > Programmi/Tutti i programmi. 2.
  • Seite 117 Tool di configurazione di Infineon 8. Fare clic su Avanti per confermare le modifiche di configurazione apportate. Security Platform 9. Il computer inizializza le impostazioni. Il Tool di configurazione di Infineon Security Platform 10. Fare clic su Fine. 11. Selezionare le schede e i pannelli di controllo per regolare le consente all'utente di gestire e controllare lo stato del TPM, impostazioni.
  • Seite 118: Intel® Vpro™ Technology

    Intel® vPro™ Technology Intel® vPro™ Technology è supportata solo dai computer modello B. Questo insieme di caratteristiche della tecnologia, incorporato nella scheda madre del computer, permette ai dipartimenti di Information Technology di accedere in remoto al computer. In questo modo, il reparto IT è...
  • Seite 119: Risoluzione Dei Problemi

    Risoluzione dei problemi Problema Possibile causa - Soluzione Non è possibile rilevare i moduli LAN II/I modulo/i è/sono disattivato/i. Controllare il LED indicatore e/o l'indicatore del tasto Wireless, Bluetooth e 3G. funzione per vedere se il modulo WLAN/Bluetooth/3G è acceso o spento (vedere Tabella 2 a pagina 102 la Tabella 3 a pagina 105).
  • Seite 120: Specifiche Tecniche

    Specifiche tecniche Opzioni di processore Processore Intel® Pentium™ B980 (2,40GHz), B970 (2,30GHz), B960 Modello A: (2,20GHz), B950 (2,10GHz)  Processore Intel® Core™i7 Cache L3 da 2MB, 32nm, DDR3-1333MHz, i7-3612QM (2,10GHz) TDP 35W Ultimi aggiornamenti delle Cache L3 da 6MB, 22nm, DDR3-1600MHz, specifiche tecniche Modello B: TDP 35W...
  • Seite 122 Contents Installation du pilote ................33 Dépannage ..................34 About this Quick Guide ..............1 Spécifications ..................35 System Startup ..................3 System Map: Front View with LCD Panel Open ......4 Contenidos System Map: Front, Left, Right, & Rear Views .......5 System Map: Bottom View ...............6 Acerca de esta guía rápida ...............37 Keyboard &...
  • Seite 123 Overview The docking station provides your computer with an easy connectable desktop environment when portability is not re- quired. This allows for easy connections to external displays, USB devices (with a full range of extra USB ports), audio devices and provides a battery charging facility. Compatibility Note that this docking station is compatible with particular compatible computer models with the appropriate docking connector only.
  • Seite 124 Instructions for Care and Operation Safety Information • Only use an AC/DC adapter approved for use with this device. The docking station is quite rugged, but it can be damaged. To • Before cleaning the device, make sure it is disconnected from any prevent this, follow these suggestions: external power supplies, peripherals and cables.
  • Seite 125 Computer and Docking Station The computer may hot or cold dock/undock with the docking station (see the note below), i.e. the computer may be powered on (hot docking/undocking) or powered off (cold docking/undocking) when docking or undocking. However if you intend to hot dock/undock the system then make sure that the hot key driver, provided on the computer’s Device Drivers &...
  • Seite 126: System Map: Front View

    System Map: Front View Figure 1 Front View 1. Power Button LED 2. Backup Button (if a Hard Disk is installed in the Device Bay) 3. Lock Switch 4. Notebook Eject Latch 5. Notebook Placeholder 6. Retaining Pins 7. Docking Port 8.
  • Seite 127: System Map: Rear View

    System Map: Rear View 11 12 Figure 2 Rear View   1. Security Lock Slot LAN Jack & Docking 2. USB 3.0 Port The USB 3.0 ports are Note that when the computer is docked with the 3. DVI-D Out Port colored blue.
  • Seite 128: System Map: Left & Right Views

    System Map: Left & Right Views Figure 3 Left & Right Views 1. Device Bay (HDD Caddy or Dummy ODD) 2. Device Bay (ODD) 3. Emergency Eject Hole 4. Powered USB 3.0 Port 5. USB 3.0 Ports Left Right...
  • Seite 129 Docking the Computer with the Docking Station 1. Remove all packing materials and place the docking station on a stable surface. 2. Securely attach any peripherals you want to use with the docking station (e.g. keyboard and mouse) to their ports. 3.
  • Seite 130 5. Make sure the computer’s hot key driver is installed if you intend to hot dock the system. 6. Close the notebook computer’s lid/LCD and turn the computer over. 7. Slide the notebook computer’s docking port cover latch in the direction of the arrow at point to open the cover (failure to open the cover of the docking port before connecting the computer to the docking station may result in irreparable damage to the connector on the docking station).
  • Seite 131 8. Make sure that the notebook computer’s AC/DC adapter is NOT ATTACHED to the computer’s DC-In jack. 9. Ensure that the lock switch on the docking station is in the unlock position. 10. Press the computer down onto the docking station so that the docking connectors line up (the Power LED on the docking station will be orange).
  • Seite 132 Cold Undocking the computer from the Docking Station 1. Shut the computer down as per the normal Windows shutdown procedure (select Shut Down from the Start menu in Windows 7). 2. Slide the lock switch in to the unlock position. 3.
  • Seite 133 Hot Undocking the Computer from the Docking Station Hot undocking using Windows: 1. When the system is docked click the the icon in the taskbar notification area and click Safely Remove Hardware and Eject Media from the menu. 2. Select Eject Docking Station and the Undock Complete message will appear in the notification area of the taskbar (the docking power LED will be Orange at this point and the ports, buttons and attached devices on the docking station will not work).
  • Seite 134 Hot undocking using the Control Center: 1. Make sure the computer’s hot key driver is installed for hot docking/undocking the system. 2. Press the Fn + Esc key combination to run the Control Center. 3. Click the docking icon in the Control Center (the icon displays the current docking status). 4.
  • Seite 135 One Button Hard Disk Backup When the system is docked you can press the Hard Disk Backup Button to launch the Windows 7’s Backup and Restore function. If you do not have a hard disk installed in the docking station you can set the Windows 7’s Backup and Restore application to backup to any attached hard disk, CD/DVD or non system partition of your computer.
  • Seite 136 Specifications Interface Environmental Spec Three USB 2.0 Ports Temperature  ° ° Four USB 3.0 Ports (including 1 * powered Operating: 5 C - 35 USB port) Non-Operating: -20°C - 60°C Latest Specification Information One External Monitor Port Relative Humidity The specifications listed in this section One DVI-D Out Port Operating: 20% - 80%...
  • Seite 137: Übersicht

    Übersicht Mit der Dockingstation erhält Ihr Computer eine einfach anschließbare Desktopumgebung, wenn Mobilität nicht erforderlich ist. So können externe Displays, USB-Geräte (mit verschiedenen zusätzlichen USB-Ports) und Audiogeräte angeschlossen werden. Kompatibilität Diese Dockingstation ist nur mit bestimmten Computermodellen kompatibel, die über den dazugehörigen Dockinganschluss verfügen.
  • Seite 138 Hinweise zu Pflege und Betrieb • Wenn das Gerät heruntergefallen ist oder beschädigt wurde. • Wenn ein ungewöhnlicher Geruch, Hitze oder Rauch aus dem Die Dockingstation ist zwar sehr stabil, kann aber dennoch Gerät entweicht. beschädigt werden. Damit es nicht dazu kommt, sollten Sie die folgenden Hinweise beachten: Sicherheitsinformationen •...
  • Seite 139: Computer Und Dockingstation

    Computer und Dockingstation Die Dockingstation kann sowohl an den ausgeschalteten als auch an den eingeschalteten Computer angeschlossen und abgetrennt werden (siehe Hinweis unten). Wenn Sie die Station bei laufendem System anschließen/abtrennen möchten, muss der Hotkey-Treiber (er befindet sich auf der Disc Device Drivers & Utilities + User’s Manual) installiert ist. ...
  • Seite 140: Systemübersicht: Ansicht Von Vorne

    Systemübersicht: Ansicht von vorne Abb. 1 Ansicht von vorne 1. Stromanzeige-LED 2. Backup-Taste (falls eine Festplatte im Geräteschacht installiert ist) 3. Sperrriegel 4. Notebook Auswurfhebel 5. Notebook Platzhalter 6. HaltestifteRetaining Pins 7. Docking-Anschluss 8. Auswurfstifte Stromanzeige-LED Symbol Farbe Beschreibung Der AC/DC-Adapter ist angeschlossen und der Computer ist ausgeschaltet Orange oder im Ruhezustand* Grün...
  • Seite 141: Systemübersicht: Ansicht Von Hinten

    Systemübersicht: Ansicht von hinten 11 12 Abb. 2 Ansicht von hinten   1. Sicherheitsschloß-Buchse 2. USB 3.0 Anschluss LAN-Buchse und Docking 3. DVI-D-Ausgangsanschluss Die USB 3.0 Anschlüsse Wenn der Computer an die Dockingstation 4. HDMI-Ausgangsanschluss sind blau. Die Datenüber- angeschlossen ist, kann die LAN-Buchse des tragung ist bei USB 3.0 5.
  • Seite 142 Systemübersicht: Ansicht von links und rechts Abb. 3 Ansicht von links und rechts 1. Geräteschacht (HDD Gehäus oder Dummy- Laufwerk) ODER 2. Geräteschacht (optisches Laufwerk) 3. Notauswurfloch 4. Eingeschaltete USB 3.0 Anschluss 5. USB 3.0 Anschlüsse Linke Seite Rechte Seite...
  • Seite 143: Anschließen Des Computers An Die Dockingstation

    Anschließen des Computers an die Dockingstation 1. Entfernen Sie das gesamte Verpackungsmaterial und legen Sie die Dockingstation auf eine stabile Unterlage. 2. Schließen Sie alle Peripheriegeräte, die Sie mit der Dockingstation verwenden wollen (z. B. Tastatur und Maus), an die entsprechenden Schnittstellen an.
  • Seite 144 5. Wenn Sie die Station bei laufendem System anschließen möchten, muss der Hotkey-Treiber installiert sein. 6. Schließen Sie den Deckel/LCD-Bildschirm des Notebooks, und drehen Sie es um. 7. Schieben Sie den Riegel des Dockinganschlussfachs in Pfeilrichtung , um das Fach zu öffnen (wird das Fach nicht geöffnet, bevor der Computer an die Dockingstation angeschlossen wird, kann der Stecker der Dockingstation schwer beschädigt werden).
  • Seite 145 8. Stellen Sie sicher, dass der AC/DC-Adapter NICHT an die DC-Eingangsbuchse des Computers angeschlossen ist. 9. Der Sperrriegel der Dockingstation muss sich in entriegelter Position befinden. 10. Drücken Sie das Notebook so weit in die Dockingstation, bis die Dockinganschlüsse ineinander greifen (die Stromanzeige-LED der Dockingstation leuchtet orangefarben).
  • Seite 146: Abtrennen Des Systems Bei Ausgeschaltetem Gerät

    Abtrennen des Systems bei ausgeschaltetem Gerät 1. Schalten Sie den Computer mit der normalen Windows-Ausschaltprozedur aus (wählen Sie bei Windows 7 im Menü Start die Option Her- unterfahren). 2. Schieben Sie den Sperrriegel in entriegelter Position. 3. Heben Sie den Auswurfhebel vollständig in die angegebene Richtung, um die Dockingstation zu entriegeln, während Sie das Notebook vorsichtig mit einer Hand halten.
  • Seite 147: Abtrennen Des Systems Bei Eingeschaltetem Gerät

    Abtrennen des Systems bei eingeschaltetem Gerät Abtrennen bei eingeschaltetem Gerät unter Windows: 1. Wenn das System an die Dockingstation angeschlossen ist, klicken Sie auf das Symbol in der Taskleiste und wählen Sie Hardware sicher entfernen und Medium auswerfen aus dem Menü. 2.
  • Seite 148: Abtrennen Bei Eingeschaltetem Gerät Über Das Control Center

    Abtrennen bei eingeschaltetem Gerät über das Control Center: 1. Stellen Sie sicher, dass der Hotkey-Treiber des Computers installiert ist, damit das System bei eingeschaltetem Gerät abgetrennt werden kann. 2. Drücken Sie auf die Fn + Esc Tastenkombination, um das Control Center aufzurufen. 3.
  • Seite 149: Ein-Tasten Festplattensicherung

    Ein-Tasten Festplattensicherung Wenn das System angedockt ist, können Sie die Festplatten-Backup-Taste drücken, um dieWindows 7 Sichern und Wiederherstellen Funktion auszuführen. Wenn keine Festplatte in der Dockingstation installiert ist, können Sie die Windows 7 Sichern und Wiederherstellen Anwendung für die Sicherung auf eine Festplatte, CD/DVD oder Partition (keine Systempartition) auf Ihrem Computer einstellen.
  • Seite 150: Sicherheit

    Technische Daten Schnittstellen Stromversorgung Drei USB 2.0-Anschlüsse AC/DC-Adapter für den gesamten Spannungsbereich Quatre USB 3.0-Anschlüsse (Verfügt über  einen USB-Anschluss mit Strom) AC-Eingang: 100-240 V, 50-60Hz Aktualität der technischen Daten DC-Ausgang: 19V, 4,74A (90W) Eine Schnittstelle für externen Monitor Umgebungsbedingungen Ein DVI-D-Ausgangsanschluss Die in diesem Teil aufgeführten technischen Daten sind zum Zeitpunkt...
  • Seite 151: Présentation

    Présentation La station d’accueil offre à votre ordinateur un environnement pratique de connectivité de bureau quand la portabilité n’est pas nécessaire. Ceci facilite les connexions à des écrans externes, périphériques USB (avec de nombreux ports USB supplé- mentaires), périphériques audio, et facilite le chargement de la batterie. Compatibilité...
  • Seite 152 Instructions d’entretien et Révision Si vous essayez de réparer le dispositif par vous-même, votre d’utilisation garantie sera annulée et vous risquez de vous exposer et d'ex- poser le dispositif à des chocs électriques. Confiez toute répa- La station d’accueil est robuste, mais il peut toutefois être en- ration à...
  • Seite 153 Ordinateur et station d’accueil L’ordinateur peut se connecter/déconnecter de la station d’accueil à chaud ou à froid (lisez la note ci-dessous). Cela signifie que l’ordinateur peut-être allumé (hot docking/undocking) ou éteint (cold docking/undocking) lors de la connexion/décon- nexion de la station d’accueil. Cependant, si vous souhaitez connecter/déconnecter le système à chaud, vérifiez que le pilote de touche de raccourci du disque Device Drivers &...
  • Seite 154: Carte Du Système: Vue De Face

    Carte du système: Vue de face Figure 1 Vue de face 1. LED du bouton d'alimenta- tion 2. Bouton Sauvegarde (si un disque dur est installé dans la baie de périphérique) 3. Commutateur de verrouillage 4. Loquet d'éjection pour ordinateur portable 5.
  • Seite 155: Carte Du Système: Vue Arrière

    Carte du système: Vue arrière 11 12 Figure 2 Vue arrière   1. Fente de verrouillage de sécu- Prise réseau et connexion à la station rité Quand l’ordinateur est connecté à la station d’ac- Les ports USB 3.0 sont 2.
  • Seite 156: Carte Du Système: Vues Gauche & Droite

    Carte du système: Vues gauche & droite Figure 3 Vues gauche & droite 1. Baie de périphérique (caddy pour disque dur ou dummy ODD) 2. Baie de périphérique (périphérique optique) 3. Trou d’ejection d’urgence 4. Port USB 3.0 alimenté 5. Ports USB 3.0 Gauche Droit...
  • Seite 157 Connecter l’ordinateur à la station d’accueil Enlevez tous les emballages et posez la station d'accueil sur une surface stable. 2. Connectez fermement les périphériques que vous souhaitez utiliser avec la station d'accueil (par ex. clavier et souris) à leurs ports respectifs. 3.
  • Seite 158 5. Pour connecter à chaud le système, vérifiez que le pilote de touche de raccourci (Hot-Key) de l’ordinateur est installé. 6. Fermez le capot/LCD de l’ordinateur portable et retournez-le. 7. Déplacez le loquet du capot du port d’interface de l’ordinateur dans le sens de la flèche pour ouvrir le couvercle (si vous n’ouvrez pas le capot du port d’interface avant de connecter l’ordinateur à...
  • Seite 159 8. Vérifiez que l’adaptateur AC/DC de l’ordinateur portable N'EST PAS CONNECTÉ à la prise d’entrée DC de l'ordinateur. 9. Vérifiez que le commutateur de verrouillage est sur la position déverrouillée. 10. Fermement mais avec précaution, appuyez l'ordinateur dans la station d’accueil pour que les connecteurs d’ancrage s’alignent (la LED du bouton d'alimentation de la station d’accueil deviendra orange).
  • Seite 160 Déconnexion du système Éteignez l’ordinateur en suivant la procédure habituelle d’arrêt de Windows (sélectionnez Arrêter dans le menu Démarrer de Windows 7). 2. Déplacez le commutateur de verrouillage sur la position déverrouillée. 3. Soulevez entièrement le loquet d'éjection dans le sens indiqué pour déverrouiller la station d'accueil tout en prenant soin de maintien de l'ordinateur portable d’une main.
  • Seite 161 Déconnecter le système à chaud Déconnecter à chaud à l'aide de Windows : Lorsque le système est connecté cliquez sur l'icône dans la zone de notification de la barre des tâches et sélectionnez Retirer le péri- phérique en toute sécurité et éjecter le média dans le menu.
  • Seite 162 Déconnexion à chaud en utilisant le Centre de contrôle : Assurez-vous que le pilote de touche de raccourci de l'ordinateur est installé pour permettre la connexion/déconnexion à chaud du système. 2. Appuyez sur la combinaison de touches Fn + Echap pour exécuter le Control Center (Centre de contrôle). 3.
  • Seite 163 Sauvegarde du disque dur à l'aide d'un bouton Lorsque le système est connecté, vous pouvez appuyer sur le Bouton de sauvegarde du disque dur pour lancer la fonc- tion Sauvegarde et restauration de Windows 7. Si vous n'avez pas de disque dur installé dans la station d'accueil vous pou- vez définir l'application Sauvegarde et restauration de Windows 7 pour sauvegarder sur un disque dur, CD/DVD connecté...
  • Seite 164: Spécifications Environnementales

    Spécifications Interface Spécifications environnementales Trois ports USB 2.0 Température  ° ° Quatre ports USB 3.0 (comprenant un port En fonction : 5 C- 35 ° ° USB alimenté) Eteint : -20 C - 60 Dernières informations de Un port moniteur externe spécification Humidité...
  • Seite 165: Vista Previa

    Vista previa La estación soporte ofrece a su ordenador un entorno de sobremesa de fácil conexión cuando no necesita portabilidad. Ésta permite conexiones fáciles a pantallas externas, dispositivos USB (con un rango total de puertos USB extra), dispositivos de audio y además la posibilidad de carga de batería. Compatibilidad Tenga en cuenta que esta estación soporte solamente es compatible con modelos de ordenador que tengan el conector apro- piado para la estación.
  • Seite 166: Información De Seguridad

    Instrucciones para el cuidado y Servicio Si intenta reparar el dispositivo usted mismo, podría anular funcionamiento la garantía y exponerse usted y el dispositivo a descarga eléctrica. Deje que sea personal de reparación cualificado el La estación soporte es muy robusta, pero puede dañarse. que realice las reparaciones, especialmente bajo cualquiera Para evitar esto, siga estas sugerencias: de estas condiciones:...
  • Seite 167 Ordenador y estación soporte El ordenador puede conectarse/desconectarse en caliente o en frío con la estación soporte (ver la nota siguiente), por ejemplo, el ordenador puede estar encendido (conexión/desconexión en caliente) o apagado (conexión/desconexión en frío) cuando se conecta o se desconecta. Sin embargo, si va a conectar o desconectar el sistema en caliente, asegúrese de que el controlador hot key, incluido en el disco Device Drivers &...
  • Seite 168: Mapa Del Sistema: Vista Frontal

    Mapa del sistema: Vista frontal Figura 1 Vista frontal 1. LED del botón de encen- dido 2. Botón de copia de seguridad (si hay un disco duro instalado en la Bahía de dispositivos) 3. Interruptor de bloqueo 4. Pestillo de expulsión del portátil 5.
  • Seite 169: Mapa Del Sistema: Vista Posterior

    Mapa del sistema: Vista posterior 11 12 Figura 2 Vista posterior   1. Ranura del cierre de seguri- Conector LAN y conexión Tenga en cuenta que cuando el ordenador está El color de los puertos 2. Puerto USB 3.0 conectado a la estación soporte, el conector LAN USB 3.0 es azul.
  • Seite 170 Mapa del sistema: Vistas izquierda & derecha Figura 3 Vistas izquierda & dere- 1. Bahía de dispositivos (caja para disco duro u ODD falso) 2. Bahía de dispositivos (dispositivo óptico) 3. Orificio de expulsión de emergencia 4. Puerto USB 3.0 alimentado 5.
  • Seite 171 Conectar el ordenador a la estación soporte 1. Quite todos los materiales del embalaje y coloque la estación soporte en una superficie estable. 2. Conecte en los puertos correspondientes los periféricos que desee utilizar con la estación soporte (p. ej. teclado y ratón). 3.
  • Seite 172 5. Asegúrese de que el controlador hot key está instalado si va a conectar el sistema en caliente. 6. Cierre la tapa/LCD del portátil y gire el ordenador. 7. Deslice el pestillo de la tapa del conector del soporte del ordenador portátil en la dirección de la flecha hasta abrir la tapa (si no abre la tapa del conector del soporte antes de conectar el ordenador a la estación soporte podría provocar daños irreparables en el conector de ésta).
  • Seite 173 8. Asegúrese de que el adaptador AC/DC del ordenador portátil NO ESTÉ ENCHUFADO en el conector de entrada DC del ordenador. 9. Asegúrese de que el interruptor de bloqueo esté en la posición de desbloqueo. 10. Presione el ordenador hacia abajo con firmeza, pero con cuidado, hasta encajar en la estación soporte de manera que los conectores queden alineados (el LED del botón de encendido de la estación soporte cambiará...
  • Seite 174 Desconexión del sistema 1. Apague el ordenador siguiendo el proceso normal para apagar en Windows (seleccione Apagar en el menú Inicio en Windows 7). 2. Deslice el interruptor de bloqueo a la posición de desbloqueo. 3. Levante el pestillo de expulsión en la dirección indicada para desbloquear la estación de soporte mientras sujeta con cuidado el ordenador portátil con una mano.
  • Seite 175 Desconexión en caliente del sistema Desconexión en caliente usando Windows: 1. Con el sistema conectado, haga clic en el icono del área de notificación de la barra de tareas y seleccione Quitar hardware de forma segura y expulsar el medio en el menú.
  • Seite 176 Desconexión en caliente usando el Control Center (Centro de control): 1. Asegúrese de que el controlador de teclas directas del ordenador está instalado para conectar/desconectar el sistema. 2. Pulse la combinación de teclas Fn + Esc para ejecutar el Control Center (Centro de control). 3.
  • Seite 177 Copia de seguridad del disco duro con un botón Con el sistema conectado puede pulsar el botón de copia de seguridad del disco duro para abrir la función de Windows 7 Copia de seguridad y restauración. Si no tiene un disco duro instalado en la estación soporte puede ajustar la aplicación Copia de seguridad y restauración de Windows 7 para realizar una copia de seguridad de un disco duro conectado, un CD/ DVD o una partición que no sea de sistema en el ordenador.
  • Seite 178: Seguridad

    Especificaciones Interfaz Especificaciones del ambiente Tres puertos USB 2.0 Temperatura Cuatro puertos USB 3.0 (incluyendo un En funcionamiento: 5°C - 35°C  puerto USB alimentado) Apagado: -20°C - 60°C Información actualizada de Un puerto para monitor externo Humedad relativa especificaciones Un puerto para salida DVI-D En funcionamiento: 20% - 80% Un conector de salida HDMI...
  • Seite 179: Cenni Generali

    Cenni generali La stazione di alloggiamento fornisce al computer un semplice sistema di collegamento sulla scrivania nelle situazioni in cui non è richiesta la portabilità. Essa consente di collegare facilmente monitor esterni, dispositivi USB (con una gamma com- pleta di porte USB extra), periferiche audio e inoltre è dotata di una funzionalità per la ricarica della batteria. Compatibilità...
  • Seite 180: Informazioni Di Sicurezza

    Istruzioni per la custodia e il funzio- Informazioni di sicurezza • Utilizzare esclusivamente un adattatore approvato per l'utilizzo di que- namento sto dispositivo. • Prima di pulire il dispositivo ricordare sempre di rimuovere la batteria La stazione di alloggiamento è abbastanza rigida, ma è possibile e di scollegare il dispositivo da qualsiasi fonte di alimentazione che possa essere danneggiata.
  • Seite 181 Computer e stazione di alloggiamento Il computer può essere agganciato/sganciato a caldo o a freddo alla stazione di alloggiamento (vedere la nota sotto), ciò si- gnifica che il computer può essere acceso (aggancio/sgancio a caldo) o spento (aggancio/sgancio a freddo) quando lo si ag- gancia o lo si sgancia.
  • Seite 182: Descrizione Del Sistema: Vista Anteriore

    Descrizione del sistema: Vista anteriore Figura 1 Vista anteriore 1. LED del pulsante di ali- mentazione 2. Pulsante di backup (se un disco rigido è installato nel bay periferica) 3. Fermo di blocco 4. Fermo di espulsione del notebook 5. Segnaposto notebook 6.
  • Seite 183: Descrizione Del Sistema: Vista Posteriore

    Descrizione del sistema: Vista posteriore 11 12 Figura 2 Vista posteriore   1. Slot blocco di sicurezza Jack per LAN e aggancio 2. Porta USB 3.0 Si noti che quando il computer è agganciato alla Le porte USB 3.0 sono di 3.
  • Seite 184 Descrizione del sistema: Vista sinistra & destra Figura 3 Vista sinistra & destra 1. Bay periferica (vano per disco rigido od ODD fitti- zio) 2. Bay periferica (unità ottica) 3. Foro di espulsione di emergenza 4. Porta USB 3.0 alimentata 5.
  • Seite 185 Aggancio del computer alla stazione di alloggiamento 1. Eliminare tutti i materiali di imballo e appoggiare la stazione di alloggiamento su una superficie stabile. 2. Collegare bene le periferiche che si desidera usare con la stazione di alloggiamento (per esempio tastiera e mouse) alle porte corrispondenti. 3.
  • Seite 186 5. È necessario che sia installato il driver hot key se però si intende agganciare a caldo il sistema. 6. Chiudere il coperchio/schermo LCD del computer notebook e capovolgere quest'ultimo. 7. Far scorrere il fermo del coperchio della porta per la stazione di alloggiamento del computer notebook nella direzione della freccia , fino ad aprire il coperchio (se non si apre il coperchio della porta per la stazione prima di collegare il computer alla stazione di alloggiamento potrebbe causare un danno irreparabile al connettore della stazione di alloggiamento).
  • Seite 187 8. Assicurarsi che l'alimentatore AC/DC del computer notebook NON SIA COLLEGATO al jack DC-In del computer. 9. Verificare che il fermo di blocco sia nella posizione di sblocco. 10. Spingere il computer verso il basso sulla stazione di alloggiamento allineando i connettori di alloggiamento (il LED del pulsante di alimentazione sulla stazione di alloggiamento è...
  • Seite 188 Sgancio del sistema 1. Spegnere il computer con la normale procedura di spegnimento di Windows (scegliere Arresta il sistema dal menu Start di Windows 7). 2. Spostare il fermo di blocco nella posizione di sblocco. 3. Sollevare completamente il fermo verso la direzione indicata per sbloccare la stazione di alloggiamento tenendo fermo con una mano il notebook.
  • Seite 189 Sgancio a caldo del sistema Sgancio del computer utilizzando Windows: 1. Se il sistema è agganciato, fare clic sull'icona nell'area di notifica e selezionare Rimozione sicura dell'hardware ed espulsione sup- porti dal menu. 2. Selezionare Espelli Alloggiamento di espansione e nell'area di notifica del sistema compare il messaggio Disinserimento dall'alloggiamento di espansione completato (a questo punto, il LED di alimentazione sulla stazione di alloggiamento si accende di colore Arancione e le porte, i pulsanti e le periferiche collegate alla stazione di alloggiamento non funzioneranno).
  • Seite 190 Sganciare a caldo utillizzando il Control Center: 1. Per agganciare/sganciare a caldo il sistema, verificare che il sia stato installato il driver hot key del computer. 2. Premere la combinazione di tasti Fn + Esc per eseguire il Control Center. 3.
  • Seite 191 Backup su disco rigido a un bottone Quando il sistema è agganciato è possibile premere il pulsante di backup su disco rigido per avviare la funzione Backup e ripristino di Windows 7. Se non si dispone di un disco rigido installato nella stazione di alloggiamento, è possibile impo- stare l'applicazione Backup e ripristino di Windows 7 per eseguire il backup su qualsiasi disco rigido collegato, CD / DVD o partizione non di sistema del computer.
  • Seite 192: Requisiti Ambientali

    Specifiche tecniche Interfaccia Requisiti ambientali Trei porte USB 2.0 Temperatura ° °  Quattro porte USB 3.0 (include una porta In esercizio: 5 C - 35 ° ° USB alimentata) Non in esercizio: -20 C - 60 Ultimi aggiornamenti delle Una porta per monitor esterno Umidità...
  • Seite 193 Adattatore video (Modello A) Audio Comunicazione GPU integrata Intel® (la GPU dipende dal Interfaccia conforme HDA Gigabit Ethernet LAN integrata processore) 2 altoparlanti incorporati (Opzione di fabbrica) Modulo di camera PC USB da 2M HD Intel® HD Graphics Microfono incorporato (Opzione di fabbrica) Modulo 3G (UMTS/ Frequenza dinamica (Intel Dynamic Video Sicurezza...
  • Seite 194 Interfaccia Alimentazione Tre porte USB 3.0 (include una porta USB Adattatore AC/DC a pieno campo alimentata AC/DC) Ingresso AC: 100-240V, 50-60Hz Una porta USB 2.0 Uscita DC: 19V, 3,42A/18V, 3,5A (65W) Una porta eSATA Pacco batteria Smart agli ioni di Litio a 6 Una porta uscita HDMI celle, 62,16WH Un jack uscita delle cuffie...

Inhaltsverzeichnis