Herunterladen Inhalt Inhalt Diese Seite drucken
wiking Miro 1 Installations- Und Bedienungsanleitung

wiking Miro 1 Installations- Und Bedienungsanleitung

Vorschau ausblenden Andere Handbücher für Miro 1:

Werbung

Verfügbare Sprachen

Verfügbare Sprachen

WIKING Miro 1
WIKING Miro 2
WIKING Miro 3
WIKING Miro 4
D
Installations- und Bedienungsanleitung . . . . . . . . . . . . . . . . . . . . . 4
GB
Installation- and User's Manual . . . . . . . . . . . . . . . . . . . . . . . . . . 20
IT
Istruzioni per l'installazione e l'uso . . . . . . . . . . . . . . . . . . . . . . . 36
13 .02 .2013 / 53-0682

Werbung

Inhaltsverzeichnis
loading

Inhaltszusammenfassung für wiking Miro 1

  • Seite 1 WIKING Miro 1 WIKING Miro 2 WIKING Miro 3 WIKING Miro 4 Installations- und Bedienungsanleitung . . . . . . . . . . . . . . . . . . . . . 4 Installation- and User’s Manual .
  • Seite 4: Inhaltsverzeichnis

    Inhaltsverzeichnis Abbildungen ......................3 Einleitung .
  • Seite 5: Einleitung

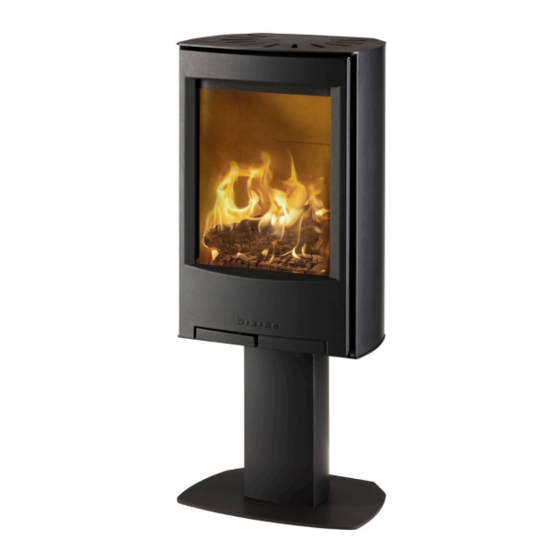
    Die Pluspunkte Ihres Kaminofens Das elegante Modell WIKING Miro passt in jede Wohnlandschaft, in der minimalistisches Design erwünscht ist . Der Kaminofen hat ein großes Sichtfenster, und WIKING Miro 1 und WIKING Miro 3 haben zusätzlich zwei breite Seitenverglasungen, wodurch das Flammenspiel aus vielen Blickwinkeln zu sehen ist .
  • Seite 6: Installationsanleitung

    . Deckplatte Ihr WIKING-Kaminofen wird mit einer losen Deckplatte geliefert, die auf dem Rost am Boden der Brennkammer platziert werden muss. Es empfiehlt sich, die Deckplatte stets zu verwenden, da sie verhindert, dass Glut in die Ascheschublade fällt, und somit wichtig dafür ist, eine gute Glutschicht für das Befeuern zu erhalten .
  • Seite 7 Höhe . Hängen Sie die Abdeckplatte wieder an ihrem Platz ein und ziehen Sie die beiden Schrauben fest . Die Stellfüße des WIKING Miro 1/Miro 2 befinden sich an dem Sockel der ein Zubehör des Ka- minofens ist . Montieren Sie zuerst den Kaminofen auf dem Sockel (siehe separate Anleitung) .
  • Seite 8: Gebrauchsanleitung

    100 cm Anschluss an den Schornstein Den Schornstein für das Modell WIKING Miro lässt sich wahlweise oben und hinten am Ofen anschließen . Darauf lässt sich ein zugelassenes Rauchrohr aufsetzen, oder eine Ableitung mittels Rauchrohr zum gemauerten Schornstein herstellen .
  • Seite 9: Der Luftzufuhrregler

    Stoffe bilden . Da hierbei auch Kaminofen und Schornstein Schaden nehmen können, entfällt die Garantie bei Zuwiderhandlung . Befeuerung mit Kohle und Koks Der WIKING Miro ist nicht für die Verfeuerung von Steinkohle und Koks ausgelegt . Lagerung des Brennholzes Eine Restfeuchte von höchstens 20% kann durch mindestens einjährige (besser zweijährige) Lagerung im Freien erreicht werden, wobei eine Überdachung vorzusehen ist .
  • Seite 10: Tipps Für Das Befeuern

    Wird der Regel ganz nach rechts bewegt, erlischt das Feuer . Diese Einstellung ist nur bei einer Überhitzung oder einem Schornsteinbrand anzuwenden und wenn der Kaminofen ganz aus ist, z . B . bei Reinigen . Tipps für das Befeuern Höchstmenge beim Nachlegen Folgende Mengen dürfen pro Stunde verbrannt werden: Brennstoff...
  • Seite 11: Anheizen Und Nachlegen

    Durchheizen sollte unterbleiben! Vor dem Zubettgehen sollte man kein Brennholz mehr auflegen und die Luftzufuhr drosseln, um bis zum Morgen durchzuheizen . In diesem Fall käme es nämlich zu einer starken Entwick- lung von gesundheitsschädlichem Rauch . Ferner kann sich Ruß im Schornstein ablagern, was wiederum zum Schornsteinbrand führen kann .
  • Seite 12: Zum Thema Rauchrohr

    Schornstein gut durchwärmt wird, bevor Sie die Luftzufuhr drosseln und die Verbrennung im Ofen begrenzen - siehe Abschnitt über das Anheizen und Heizen Ihres WIKING Kaminofens . Dies dauert bei einem gemauerten Schornstein länger als bei einem Stahlschornstein .
  • Seite 13: Reinigung Und Wartung

    Nennleistung 4,9 kW nach EN Norm Rauchgastemperatur Abgasmassenstrom 4,0 g/sek Kontrolle bei Wiederinbetriebnahme Wurde der Kaminofen längere Zeit (z . B . während des Sommers) nicht benutzt, ist das Rauch- rohr auf evtl . Verstopfungen hin zu untersuchen . Wenden Sie sich in dieser Frage an den Schornsteinfegermeister .
  • Seite 14 Kontrollieren Sie, dass sich der Regler mühelos bewegen lässt . • Sichtprüfung der Dichtungen und ggf . Austausch verschlissener Teile Sollten Sie hierzu Fragen haben, können Sie die Rubrik FAQ (häufig gestellte Fragen) auf der Website www .wiking .com aufrufen oder sich an Ihren Ofenhändler wenden .
  • Seite 15 Feder am anderen Befestigungsort (2) angebracht werden . Am WIKING Miro 1/Miro 2 wird dies durch das Loch in der Bodenplatte gemacht . Am WIKING Miro 3/Miro 4 ist die Feder zugänglich, wenn man die Tür unter der Brennkammer öffnet .
  • Seite 16: Fehlersuche Und -Behebung

    Fehlersuche und -behebung Sollten Ihr Kaminofen Funktionsstörungen aufweisen, können Sie zunächst versuchen, diese mithilfe der Angaben in nachfolgender Tabelle zu beheben . Sollte Ihnen das nicht möglich sein, wenden Sie sich bitte an den Händler, bei dem Sie den Ofen erworben haben . Problem Mögliche Ursache Abhilfe...
  • Seite 17: Konformitätserklärung

    RRF - Rhein-Ruhr Feuerstättenprüfstelle Am Technologiepark 1 D-45307 Essen erklärt hierdurch, dass sich das Produkt: Modell: Kaminofen WIKING Miro 1 WIKING Miro 2 WIKING Miro 3 WIKING Miro 4 in Übereinstimmung mit den Vorschriften folgender EU-Richtlinien befindet: Bezeichnung Titel: 89/106/EWG Richtlinie über Bauprodukte...
  • Seite 18: Bedingungen Für Garantie Und Reklamationen

    Bedingungen für Garantie und Reklamationen - erweiterte Gewährleistung (5 Jahre) Wir beglückwünschen Sie zum Erwerb Ihres WIKING Kaminofens! Alle unsere Produkte sind von bester handwerklicher Qualität, hergestellt aus erstklassigen Materialien, und einer gründlichen Qualitätskontrolle unterzogen . Wir sind daher davon über- zeugt, dass Sie ein Produkt erhalten haben, welches über viele Jahre hinweg problemlos...
  • Seite 19: Oberflächenbehandlung

    • Transportschäden . • Kosten in Verbindung mit einem evt . Abbau und einer erneuten Aufstellung • des Kaminofens . • Allen Formen von Zusatzkosten und Folgeschäden, die auftreten mögen . Oberflächenbehandlung Sollte sie werkseitig nicht korrekt ausgeführt worden sein, tritt dies bereits nach kurzer Nut- zungsdauer zutage .
  • Seite 20 Lighting and Firing your WIKING Wood-Burning Stove ....... . .
  • Seite 21: Welcome

    WIKING Miro is a beautiful wood-burning stove that fits in any home where pure and simple lines are desired . This stove has a large front pane, and in addition WIKING Miro 1 and WIKING Miro 3 have two broad side panes allowing the flames to be viewed from many angles. At the same time, air from the ’pane-flush’function ensures that, with proper firing, the glass pane will...
  • Seite 22: Installation Instructions

    . The cover plate Your WIKING wood-burning stove comes with a separate cover plate that should be placed on top of the grate in the bottom of the combustion chamber . It is recommended that the cover plate is always used, since it prevents the embers from falling into the ash pan .
  • Seite 23 The adjustable feet (Figure B) WIKING Miro 3/Miro 4 has four adjustable feet built into the bottom plate . Open the door under the wood section . Loosen the screws in each side of the vertical cover plate in the back of the chamber by using an Allen key .
  • Seite 24 . Height Requirements The WIKING Miro has a smoke outlet at the top and at the back . It can be installed with an approved smoke pipe and a steel chimney, or connected to a brick chimney with a fullform smoke pipe .
  • Seite 25: User Instructions

    . Loosen the screw and pull the little handle gently . On WIKING Miro 3/Miro 4 the type badge and the serial number are placed on the inside of the door below the combustion chamber .
  • Seite 26: Using The Air Damper

    Recommended Dimensions The fuel’s dimensions are important for good combustion, and should be as follows: Fuel type Length in cm Diameter in cm Kindling (finely split firewood) 14-28 Split firewood 14-28 Using the Air Damper To achieve good combustion, which results in better heating efficiency, it is important to add the right amount of air to the fire.
  • Seite 27: Lighting And Firing Your Wiking Wood-Burning Stove

    Lighting and Firing your WIKING Wood-Burning Stove The First Firing The first time you fire your wood-burning stove, you must do so carefully, as all materials need to adjust to the heat .
  • Seite 28: Some Things Worth Knowing About The Smoke Pipe

    The smoke pipe is the duct located between your wood-burning stove and chimney . Your WIKING wood-burning stove is equipped with an exhaust pipe 150 mm in diameter . If your stove is to be connected to a brick chimney, it is best to mount a curved smoke pipe to the stove’s top outlet .
  • Seite 29: Some Things Worth Knowing About The Chimney

    . the section on lighting and fuelling your WIKING stove . Please be aware that it takes longer to heat a brick chimney than a steel chimney .
  • Seite 30 Cleaning the Glass Door Your WIKING wood-burning stove is equipped with a pane-flush system, which reduces the build-up of soot on the glass . If soot somehow accumulates on the pane, it can be cleaned by wiping the glass with a moist paper towel dipped in ash . Afterwards, dry with a clean paper towel .
  • Seite 31 Check that the regulating lever moves smoothly . • Inspection of the seals and the replacement of worn parts . If you have any questions, please consult our FAQ page at www .wiking .com, or contact your local wood-burning stove dealer .
  • Seite 32: Trouble Shooting

    Trouble Shooting If you experience that your wood-burning stove is not functioning optimally, consult this table to find some usual problems that may arise and how to solve them. If you cannot solve them and/ or other problems occur, pleas contact your maintenance man or wood-burning stove dealer . Problem Possible Cause Try the Following...
  • Seite 33: Declaration Of Conformity

    RRF - Rhein-Ruhr Feuerstättenprüfstelle Am Technologiepark 1 D-45307 Essen hereby declares that: Product: Type: Wood-burning stove WIKING Miro 1 WIKING Miro 2 WIKING Miro 3 WIKING Miro 4 was manufactured in accordance with the provisions of the following directive: Reference no . Title:...
  • Seite 34: Guarantee And Claim Conditions

    Guarantee and Claim Conditions - Five Years’ Extended Right to Invoke Lack of Conformity Congratulations on the purchase of your new WIKING wood-burning stove . All of our products are of high-quality craftsmanship, manufactured in first-class materials and subject to a thorough quality control process . That is why we are convinced that you have purchased a product that will function problem-free for many years to come .
  • Seite 35 – you will find it on the type sign on the back of the stove. Unwarranted Claims/Service Calls Before registering a claim, you should inspect your WIKING wood-burning stove for possible faults that you yourself can rectify; consult the enclosed user instruction manual as needed .
  • Seite 36 Accensione e alimentazione della stufa WIKING ........
  • Seite 37: Presentazione Delle Stufe Wiking

    . Da oltre 30 anni WIKING sviluppa e produce stufe a legna di prima qualità ed è nota in tutta Europa per il design e gli elevati standard tecnologici . Una stufa WIKING è garanzia di design senza tempo e lunga durata .
  • Seite 38: Istruzioni Per L'installazione

    Una volta accertata la corretta posizione di tutti i componenti procedere all’installazione della stufa . Piastra di copertura La stufa WIKING viene fornita con una piastra di copertura amovibile da applicare sulla griglia della camera di combustione . Si consiglia di utilizzare sempre la piastra di copertura in quanto impedisce la caduta dei tizzoni nel cassetto raccoglicenere e consente quindi di ottenere un buono strato di tizzoni per l’alimentazione della stufa .
  • Seite 39 Piedini di regolazione (Figura B) WIKING Miro 3/Miro 4 è dotata di 4 piedini di regolazione integrati nella base . Aprire lo sportello sotto al vano portalegna . Allentare la vite su ciascun lato del pannello verticale di copertura sul retro del vano, servendosi di una chiave a brugola .
  • Seite 40 Collegamento alla canna fumaria L’uscita fumi di WIKING Miro si trova sia sulla sommità sia sul retro . Essa può essere collegata a un tubo di uscita omologato e a una canna fumaria in acciaio, oppure una canna fumaria in muratura con tubo di uscita fumi fullform .
  • Seite 41: Istruzioni Per L'uso

    Nella stufa WIKING Miro 3/Miro 4, la targhetta del tipo e del numero di serie sono ubicate sul lato interno dello sportello sotto la camera di combustione . Istruzioni per l’uso Prima di mettere in funzione la stufa È importante verificare quanto segue: •...
  • Seite 42: Azionamento Della Valvola Di Regolazione Dell'aria

    Per ottenere una combustione ottimale con conseguente risparmio sui costi di riscaldamento è importante alimentare le fiamme con il corretto apporto d’aria. La regolazione dell’aria avviene mediante un sistema a manopola di semplice utilizzo, che nel modello WIKING Miro è ubicato sotto lo sportello, cfr . la Figura D .
  • Seite 43: Accensione E Alimentazione Della Stufa Wiking

    . Accensione e alimentazione della stufa WIKING Alla prima accensione Alla prima accensione della stufa è necessario prestare la massima cautela poiché tutti i ma- teriali devono abituarsi al calore.
  • Seite 44: Informazioni Utili Sull'uscita Fumi

    Informazioni utili sull’uscita fumi Descrizione del funzionamento dell’uscita fumi L’uscita fumi è il tubo che collega la stufa alla canna fumaria . Tutte le stufe WIKING sono dotate di un raccordo di uscita del diametro di 150 mm . Se la stufa deve essere collegata a una canna fumaria in muratura è consigliabile applicare alla parte superiore della stufa un’uscita fumi ricurva .
  • Seite 45: Informazioni Utili Sulla Canna Fumaria

    (si veda la sezione relativa all’accensione e all’alimentazione della stufa WIKING) . Ricordare che rispetto a una canna fumaria in acciaio, le canne fumarie in muratura richiedono un tempo maggiore per riscaldarsi uniformemente .
  • Seite 46: Pulizia E Manutenzione Della Stufa

    Non utilizzare acqua, alcool o altri tipi di detergente che potrebbero danneggiare la smaltatura . Pulizia dell’anta di vetro La stufa WIKING è dotata di dispositivo di pulizia dell’anta che riduce gli accumuli di fuliggine sul vetro. Per pulire eventuali depositi di fuliggine già presenti, strofinare il vetro con un pezzo di carta da cucina inumidita e cosparsa di cenere.
  • Seite 47 è necessario montare uno sportello che consenta l’accesso per la pulizia . Assistenza post-vendita WIKING consiglia di sottoporre la stufa a un controllo approfondito ogni due anni in modo da garantire una lunga durata del prodotto . Questo tipo di assistenza può essere svolto da un installatore qualificato utilizzando esclusivamente componenti di ricambio originali.
  • Seite 48: Soluzione Dei Problemi

    Soluzione dei problemi In caso di funzionamento insoddisfacente della stufa, è possibile consultare lo schema seguente che riporta i guasti più diffusi e le relative soluzioni . Nell’impossibilità di risolvere personalmente tali guasti e/o se se ne presentano altri, rivolgersi all’installatore o al rivenditore della stufa . Problema Causa possibile Soluzione...
  • Seite 49: Dichiarazione Di Conformità

    Am Technologiepark 1 D-45307 Essen dichiara con il presente documento che: Prodotto: Modello: Stufa a legna WIKING Miro 1 WIKING Miro 2 WIKING Miro 3 WIKING Miro 4 È fabbricato in conformità con le seguenti direttive: Num . di riferimen-...
  • Seite 50: Garanzia E Regolamentazione Dei Reclami

    Garanzia e regolamentazione dei reclami - diritto di reclamo esteso a 5 anni Congratulazioni per l’acquisto di una stufa a legna WIKING . I nostri prodotti sono tutti realizzati con estrema cura, con materiali di prima qualità e sottoposti a un approfondito controllo della qualità . Siamo pertanto certi che il prodotto che ha acquistato Le garantirà...
  • Seite 51 . Reclami/richiesta di assistenza ingiustificati Prima di sporgere reclamo, La preghiamo di controllare la stufa WIKING per verificare l’eventuale presenza di guasti riparabili personalmente . Qualora il Suo reclamo e la conseguente richiesta...

Diese Anleitung auch für:

Miro 2Miro 3Miro 4

Inhaltsverzeichnis