Herunterladen Inhalt Inhalt Diese Seite drucken
Inhaltsverzeichnis

Werbung

Verfügbare Sprachen
  • DE

Verfügbare Sprachen

  • DEUTSCH, seite 37
Umschlag-multi.fm Seite 1 Freitag, 16. Oktober 2009 1:46 13
Quick Start Guide
Kurzanleitung
Guide de démarrage rapide
Guida di avvio rapida
LA650+ LA800+ Matrix Printer
Guía de instalación

Werbung

Inhaltsverzeichnis
loading

Inhaltszusammenfassung für Dascom Tally LA650+

  • Seite 1 Umschlag-multi.fm Seite 1 Freitag, 16. Oktober 2009 1:46 13 Quick Start Guide Kurzanleitung Guide de démarrage rapide Guida di avvio rapida LA650+ LA800+ Matrix Printer Guía de instalación...
  • Seite 2 U1-2-multi.fm Seite 2 Donnerstag, 16. März 2006 1:05 13 Important Information This device fulfils the European standards requirements by complying with the Directive of the Com- mission dated May 3, 1989 (89/336/EEC) relating to electromagnetic compatibility and the Directive dated This equipment generates and uses radio frequency energy and if not in- February 19, 1973 (73/23/EEC) relating to low-voltage electrical equipment.
  • Seite 3: Inhaltsverzeichnis

    Quick Start-en.book Seite 1 Freitag, 16. Oktober 2009 1:20 13 Quick start guide Table of contents QUICK START GUIDE Table of contents QUICK START GUIDE Introduction Symbols used Important safety instructions Using the Online CD-ROM Contents of the Online CD-ROM Troubleshooting Printer at a glance View from the front...
  • Seite 4 Quick Start-en.book Seite 2 Freitag, 16. Oktober 2009 1:20 13 Table of contents Quick start guide Settings Setting the tear position Setting the first printing line (TOF) Setting the print head gap Selecting character density and font Printing out status page Technical data Printer specifications Paper specifications...
  • Seite 5: Introduction

    Quick Start-en.book Seite 3 Freitag, 16. Oktober 2009 1:20 13 Quick start guide Introduction Introduction This Quick start guide is intended as a quick introduction into working with the printer and also to enable inexperienced users to operate the device properly. It de- scribes the most important functions of the printer and contains the essential infor- mation for your everyday work with the printer.
  • Seite 6: Using The Online Cd-Rom

    Quick Start-en.book Seite 4 Freitag, 16. Oktober 2009 1:20 13 Introduction Quick start guide Using the Online CD-ROM First install the Adobe Acrobat Reader on your hard disk, unless the program has already been installed. To install it, follow the steps described in the README file in the READER directory.
  • Seite 7: Printer At A Glance View From The Front

    Quick Start-en.book Seite 5 Freitag, 16. Oktober 2009 1:20 13 Quick start guide Printer at a glance Printer at a glance View from the front Printer in tractor mode Control panel Soundproofing cover Top cover Front cover Tractors Bottom cover Power switch View from the rear Printer in single-sheet mode...
  • Seite 8: Installation

    Quick Start-en.book Seite 6 Freitag, 16. Oktober 2009 1:20 13 Installation Quick start guide Installation Unpacking the printer Place your packaged printer on a solid base. Make sure that the “Up” symbols point in the correct direc- tion. Open the packaging, take out the accessory cassette and un- pack it.
  • Seite 9: Placing Your Printer

    Quick Start-en.book Seite 7 Freitag, 16. Oktober 2009 1:20 13 Quick start guide Installation Placing your printer Place the printer on a solid, flat, surface, ensuring that the printer is positioned in such a way that it can not topple, and that there is easy access to the control panel and paper input devices.
  • Seite 10: Connecting The Printer

    Quick Start-en.book Seite 8 Freitag, 16. Oktober 2009 1:20 13 Installation Quick start guide Connecting the printer Make sure that the printer is set to the correct voltage (e.g. 230 V in Europe, 120 V in the U.S.A.). To do this, check the plate above the power inlet at the rear of the printer.
  • Seite 11: Switching On The Printer

    Quick Start-en.book Seite 9 Freitag, 16. Oktober 2009 1:20 13 Quick start guide Installation Switching on the printer The power switch for switching on the printer is located at the bottom left at the front of the printer when viewed from the front.
  • Seite 12: Control Panel

    Quick Start-en.book Seite 10 Freitag, 16. Oktober 2009 1:20 13 Control panel Quick start guide Control panel The control panel and the keys are used for controlling the printer operation. The upper line of the display shows whether the printer is in online (Ready) or offline mode (Pause) and the paper path selected (Front1 or Single).
  • Seite 13: Setup Mode

    Quick Start-en.book Seite 11 Freitag, 16. Oktober 2009 1:20 13 Quick start guide Control panel Setup mode In this mode, the following settings are available: Setup key: Sets the printer to setup mode, in which the following settings can Adjust Paprpath be selected: Menu...
  • Seite 14: Changing The Ribbon Cassette

    Quick Start-en.book Seite 12 Freitag, 16. Oktober 2009 1:20 13 Changing the ribbon cassette Quick start guide Changing the ribbon Before opening the cover, make sure that the printer is switched on so that it can cassette execute automatic preparations for ribbon changing (widening the print head gap). During the process of initialization after powering on, the printer checks if a rib- bon cassette is installed.
  • Seite 15 Quick Start-en.book Seite 13 Freitag, 16. Oktober 2009 1:20 13 Quick start guide Changing the ribbon cassette Move the coloured friction tabs on the right and on the left into the direction of the respective arrows shown in the figure and raise the friction mechanism.
  • Seite 16 Quick Start-en.book Seite 14 Freitag, 16. Oktober 2009 1:20 13 Changing the ribbon cassette Quick start guide Raise the coloured insertion tongue Remove the coloured protections Insert the coloured ribbon tension knob into the right-hand front location of the new ribbon cassette. Turn the knob in the direction of the arrow in order to take up slack of the ribbon.
  • Seite 17 Quick Start-en.book Seite 15 Freitag, 16. Oktober 2009 1:20 13 Quick start guide Changing the ribbon cassette Slightly tilt the ribbon cassette forwards and thread in the rib- bon between the coloured insertion tongue and the ribbon support (transparent plastic plate). Align and insert the cassette into the guides on the left and right, then press down until it clicks into place.
  • Seite 18 Quick Start-en.book Seite 16 Freitag, 16. Oktober 2009 1:20 13 Changing the ribbon cassette Quick start guide Press down the coloured insertion tongue Move the print head carriage back and forth several times. If the ribbon is correctly seated, there must be no perceptible resistance.
  • Seite 19 Quick Start-en.book Seite 17 Freitag, 16. Oktober 2009 1:20 13 Quick start guide Changing the ribbon cassette Press the friction mechanism down until it clicks into place. Close the front section of the top cover.
  • Seite 20: Paper Handling

    Quick Start-en.book Seite 18 Freitag, 16. Oktober 2009 1:20 13 Paper handling Quick start guide Paper handling This section describes how to set the paper type, load fanfold paper and single sheets, transport paper and move the paper to the tear position. Changing the paper type You can change the paper type either from an application program, by means of the paper path quick selection feature or in the Setup menu.
  • Seite 21: Changing The Paper Type In The Setup Menu

    Quick Start-en.book Seite 19 Freitag, 16. Oktober 2009 1:20 13 Quick start guide Paper handling Press the Online key to set the printer to ready status. When the printer receives Ready Single data from the computer, the single sheet is automatically loaded. Press the Load Online M1 EPS Load...
  • Seite 22: Loading Paper

    Quick Start-en.book Seite 20 Freitag, 16. Oktober 2009 1:20 13 Paper handling Quick start guide Loading paper Your printer can process both fanfold paper and single sheets. For information on the supported paper sizes, please refer to page 34 (“Paper specifications”). Only use dust-free or low-dust paper.
  • Seite 23 Quick Start-en.book Seite 21 Freitag, 16. Oktober 2009 1:20 13 Quick start guide Paper handling Open the coloured latch lever and align the tractor so that the first printing position on the paper matches the mark on the printer housing. Lock the coloured lever again.
  • Seite 24 Quick Start-en.book Seite 22 Freitag, 16. Oktober 2009 1:20 13 Paper handling Quick start guide Make sure to align the paper stack in parallel with the printer and that the paper flow is unobstructed. Re-install the bottom cover. Ready Front1 Lower the front cover.
  • Seite 25: Single Sheets

    Quick Start-en.book Seite 23 Freitag, 16. Oktober 2009 1:20 13 Quick start guide Paper handling Single sheets Some printer models are designed for fanfold pa- per operation only and therefore do not feature a single sheet feeder. The front cover can therefore not be opened on these models.
  • Seite 26: Paper Transport

    Quick Start-en.book Seite 24 Freitag, 16. Oktober 2009 1:20 13 Paper handling Quick start guide Insert the single sheet straight as far into the input tray as pos- sible. Press the Online key to set the printer to ready status. The sheet is automatically loaded when the printer is in on- line mode and receives data from the computer.
  • Seite 27: Moving The Paper To The Tear Position

    Quick Start-en.book Seite 25 Freitag, 16. Oktober 2009 1:20 13 Quick start guide Paper handling Moving the paper to the tear Your printer by default moves the paper into tear position once paper is loaded. If position you deactivate this feature in the printer’s menu (setting: Manual) you can use the Tear key to move the paper to the tear position (for more information, please refer to the User guide on the Online CD-ROM).
  • Seite 28: Removing Paper

    Quick Start-en.book Seite 26 Freitag, 16. Oktober 2009 1:20 13 Paper handling Quick start guide Removing paper Never use force to remove the paper from the printer. Otherwise the mechanical STOP components may be damaged. Make sure that the printer is in offline mode (Pause); press the Online key, if Pause Front1 necessary.
  • Seite 29: Settings

    Quick Start-en.book Seite 27 Freitag, 16. Oktober 2009 1:20 13 Quick start guide Settings Settings This section describes how to set the tear position, the first printing line, the print head gap as well as the font selection and the character density. Setting the tear position If the tear position of the paper is not aligned with the tear edge of the top cover of the printer, you can adjust it.
  • Seite 30: Setting The First Printing Line (Tof)

    Quick Start-en.book Seite 28 Freitag, 16. Oktober 2009 1:20 13 Settings Quick start guide Setting the first printing line You can use the TOF function for setting the position of the first printing line for (TOF) each paper source and each menu individually. Before using the TOF function (if fanfold paper is used), you first have to set the tear position (see above).
  • Seite 31 Quick Start-en.book Seite 29 Freitag, 16. Oktober 2009 1:20 13 Quick start guide Settings Confirm the input by pressing the Set (1) key. FormAdj= 17/72" Online Press the Setup key. The printer returns to the initial status. < > Exit Setup The setting made will be retained after switching off the printer.
  • Seite 32: Setting The Print Head Gap

    Quick Start-en.book Seite 30 Freitag, 16. Oktober 2009 1:20 13 Settings Quick start guide Setting the print head gap The printer features automatic print head gap adjustment to the thickness of the pa- per used. In setup mode, you can enter a correction value to modify the head gap that is normally determined automatically.
  • Seite 33: Selecting Character Density And Font

    Quick Start-en.book Seite 31 Freitag, 16. Oktober 2009 1:20 13 Quick start guide Settings Selecting character density You can use the CPI (Character Per Inch) key in setup mode to select the number and font of characters per inch to be printed. You can use the Font key to select fonts. Press the Setup key.
  • Seite 34: Printing Out Status Page

    Quick Start-en.book Seite 32 Freitag, 16. Oktober 2009 1:20 13 Printing out status page Quick start guide Printing out status page The status page contains all selected menu settings and the installed control soft- ware and the character generators. Make sure that blank paper is inserted in the valid paper source (default is Status Print Tractor1).
  • Seite 35: Technical Data

    Quick Start-en.book Seite 33 Freitag, 16. Oktober 2009 1:20 13 Quick start guide Technical data Technical data Printer specifications Type LA650+ LA800+ Printing method Serial with 24-needle print head Printing width 136 characters at 10 cpi Print speed (bidirectional mode, 10 cpi) (bidirectional mode, 10 cpi) HSQ (Matrix 12 x 10) 650 cps...
  • Seite 36: Paper Specifications

    Quick Start-en.book Seite 34 Freitag, 16. Oktober 2009 1:20 13 Technical data Quick start guide Paper specifications Fanfold paper Tractor1 Continuous single forms Paper weight 60–120 g/m Single set of forms No. of copies 1 + 6 (LA650+) (requires individual testing) 1 + 5 (LA800+) Form thickness (max.) 0.60 mm...
  • Seite 37 Quick Start-deIVZ.fm Seite 1 Freitag, 16. Oktober 2009 2:14 14 Kurzanleitung Inhaltsverzeichnis Inhaltsverzeichnis KURZANLEITUNG Einleitung Zu den verwendeten Symbolen Wichtige Sicherheitshinweise Arbeiten mit der Online-CD-ROM Was ist auf der Online-CD-ROM Fehlersuche Auf einen Blick Ansicht von vorn Drucker im Traktorbetrieb Drucker im Einzelblattbetrieb Ansicht von hinten Installation...
  • Seite 38 Quick Start-de.book Seite 2 Freitag, 16. Oktober 2009 1:16 13 Inhaltsverzeichnis Kurzanleitung Einstellungen Abreißposition einstellen Erste Druckzeile einstellen (TOF) Druckkopfabstand einstellen Zeichendichte und Schriftart wählen Statusseite beim Einschalten ausdrucken Technische Daten Druckerspezifikationen Papierspezifikationen Daten zur Langlebigkeit und Umweltverträglichkeit Zubehör...
  • Seite 39: Kurzanleitung

    Quick Start-de.book Seite 3 Freitag, 16. Oktober 2009 1:16 13 Kurzanleitung Einleitung Einleitung Die Kurzanleitung dient dem schnellen Einstieg in das Arbeiten mit dem Drucker und soll auch dem ungeübten Benutzer den Umgang mit dem Gerät ermöglichen. Sie beschreibt die wichtigsten Funktionen des Druckers und enthält unerläßliche Informationen für die alltägliche Arbeit mit dem Gerät.
  • Seite 40: Arbeiten Mit Der Online-Cd-Rom

    Quick Start-de.book Seite 4 Freitag, 16. Oktober 2009 1:16 13 Einleitung Kurzanleitung Arbeiten mit der Installieren Sie zuerst den Adobe Acrobat Reader auf Festplatte, falls dieses Pro- Online-CD-ROM gramm nicht schon vorhanden ist. Befolgen Sie zur Installation die in der Readme- Datei im Verzeichnis READER aufgeführten Schritte.
  • Seite 41: Auf Einen Blick Ansicht Von Vorn

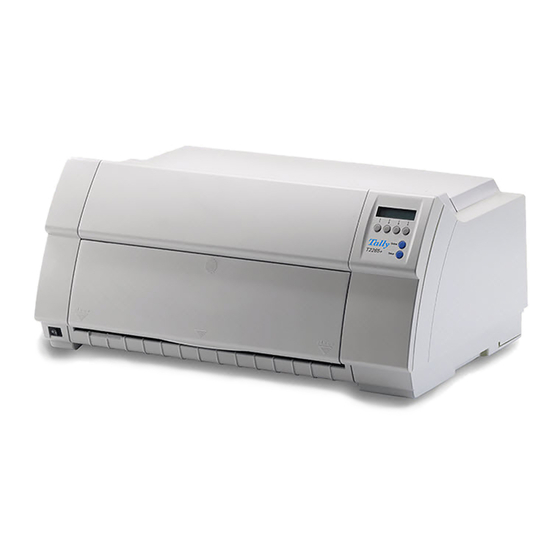
    Quick Start-de.book Seite 5 Freitag, 16. Oktober 2009 1:16 13 Kurzanleitung Auf einen Blick Auf einen Blick Ansicht von vorn Drucker im Traktorbetrieb Bedienfeld Schalldämmelement Obere Abdeckung Vordere Abdeckung Traktoren Untere Abdeckung Netzschalter Ansicht von hinten Drucker im Einzelblattbetrieb Hintere Abdeckung Papierstützen Schnittstellenanschlüsse Randsteller...
  • Seite 42: Installation

    Quick Start-de.book Seite 6 Freitag, 16. Oktober 2009 1:16 13 Installation Kurzanleitung Installation Drucker auspacken Den verpackten Drucker auf eine stabile Unterlage stellen. Darauf achten, daß die Symbole für ,,Oben“ in die richtige Richtung zeigen. Verpackung öffnen, Zubehörkassette entnehmen und aus- packen.
  • Seite 43: Drucker Aufstellen

    Quick Start-de.book Seite 7 Freitag, 16. Oktober 2009 1:16 13 Kurzanleitung Installation Drucker aufstellen Den Drucker auf einer stabilen, ebenen und rutschfesten Oberfläche so aufstellen, daß er nicht herunterfallen kann. Der Zugang zum Bedienfeld und den Papierein- zügen muß gewährleistet und genügend Platz für das ausgeworfene Papier vorhan- den sein.
  • Seite 44: Drucker Anschließen

    Quick Start-de.book Seite 8 Freitag, 16. Oktober 2009 1:16 13 Installation Kurzanleitung Drucker anschließen Vergewissern Sie sich, daß das Gerät auf die richtige Span- nung eingestellt ist (z.B. 230 V in Europa, 120 V in den USA). Siehe dazu das Typenschild über dem Netzanschluß auf der Rückseite des Druckers.
  • Seite 45: Drucker Einschalten

    Quick Start-de.book Seite 9 Freitag, 16. Oktober 2009 1:16 13 Kurzanleitung Installation Drucker einschalten Der Netzschalter, mit dem der Drucker eingeschaltet wird, befindet sich von vorne aus betrachtet links unten auf der Vorderseite des Druckers.
  • Seite 46: Bedienfeld

    Quick Start-de.book Seite 10 Freitag, 16. Oktober 2009 1:16 13 Bedienfeld Kurzanleitung Bedienfeld Über das Bedienfeld und seine Tasten steuern Sie die Arbeit mit dem Drucker. Die obere Zeile der Anzeige gibt Aufschluß darüber, ob der Drucker sich im On- line- (Ready) oder im Offline-Modus (Pause) befindet und welcher Papierweg (Trak1 oder Einzel) gewählt ist.
  • Seite 47: Offline-Modus

    Quick Start-de.book Seite 11 Freitag, 16. Oktober 2009 1:16 13 Kurzanleitung Bedienfeld Offline-Modus Nur in diesem Modus können Schritt-, Zeilen oder Formularvorschübe über das Bedienfeld ausgeführt werden (siehe Seite 20, Papiertransport), Daten können je- doch nicht empfangen werden. Taste Park (1): Macht Papierweg bei eingelegtem Papier frei und aktiviert Pa- Pause pierweg-Schnellanwahl (siehe „Papierart wechseln“, Seite 18).
  • Seite 48: Farbbandkassette Wechseln

    Quick Start-de.book Seite 12 Freitag, 16. Oktober 2009 1:16 13 Farbbandkassette wechseln Kurzanleitung Farbbandkassette Vor dem Öffnen der Abdeckung sicherstellen, daß der Drucker eingeschaltet ist, wechseln damit er automatisch wichtige Vorbereitungen für den Farbbandwechsel (Druck- kopfabstand vergrößern) ausführen kann. Der Drucker prüft während der Initialisierung nach dem Einschalten ob eine Farbbandkassette installiert ist.
  • Seite 49 Quick Start-de.book Seite 13 Freitag, 16. Oktober 2009 1:16 13 Kurzanleitung Farbbandkassette wechseln Den farbigen Schieber der Friktion wie im Bild gezeigt nach links (in Pfeilrichtung) bewegen und die Friktion nach oben klappen. Die verbrauchte Kassette herausnehmen. Wir empfehlen die Benutzung von Original-Farb- bandkassetten.
  • Seite 50 Quick Start-de.book Seite 14 Freitag, 16. Oktober 2009 1:16 13 Farbbandkassette wechseln Kurzanleitung Die farbige Einlegehilfe anheben. Entfernen Sie die farbigen Sicherungen Den farbigen Spannknopf in rechte vordere Aufnahme der neuen Farbbandkassette setzen. Den Knopf in Pfeilrichtung drehen, um das Farbband zu spannen.
  • Seite 51 Quick Start-de.book Seite 15 Freitag, 16. Oktober 2009 1:16 13 Kurzanleitung Farbbandkassette wechseln Die Farbbandkassette etwas nach vorne neigen, das Farb- band zwischen farbiger Einlegehilfe und Farbbandträger (transparente Kunststoffscheibe) einfädeln. Die Kassette parallel in ihre Führung einlegen und nach un- ten drücken, bis sie einrastet.
  • Seite 52 Quick Start-de.book Seite 16 Freitag, 16. Oktober 2009 1:16 13 Farbbandkassette wechseln Kurzanleitung Die farbige Einlegehilfe nach unten drücken. Den Druckkopfschlitten mehrmals hin- und herbewegen. Sitzt das Farbband richtig, darf kein Widerstand spürbar sein. Bei der Bewegung von links nach rechts wird das Farbband transportiert.
  • Seite 53 Quick Start-de.book Seite 17 Freitag, 16. Oktober 2009 1:16 13 Kurzanleitung Farbbandkassette wechseln Die Friktion nach unten drücken bis sie einrastet. Die obere Abdeckung schließen.
  • Seite 54: Papierhandhabung

    Quick Start-de.book Seite 18 Freitag, 16. Oktober 2009 1:16 13 Papierhandhabung Kurzanleitung Papierhandhabung In diesem Abschnitt wird beschrieben, wie Sie die Papierart einstellen, Endlospa- pier und Einzelblätter einlegen, Papier transportieren und Papier in die Abreißpo- sition fahren. Papierart wechseln Der Papierartwechsel kann entweder über ein Anwendungsprogramm oder die Pa- pierweg-Schnellumschaltung erfolgen oder im Menü...
  • Seite 55: Papierartwechsel Im Menü Setup

    Quick Start-de.book Seite 19 Freitag, 16. Oktober 2009 1:16 13 Kurzanleitung Papierhandhabung Die Taste Online drücken, um den Drucker betriebsbereit zu machen. Erhält der Ready Einzel Drucker Daten vom Computer, wird das Einzelblatt automatisch eingezogen. Die Online M1 EPS Load Taste Load (4) drücken, um Einzelblatt vor Druckbeginn zu laden.
  • Seite 56: Papier Einlegen

    Quick Start-de.book Seite 20 Freitag, 16. Oktober 2009 1:16 13 Papierhandhabung Kurzanleitung Papier einlegen Ihr Drucker kann sowohl mit Endlospapier als auch mit Einzelblättern betrieben werden. Informationen über zulässige Papierformate finden Sie auf Seite 34 („Pa- pierspezifikationen“). Bitte verwenden Sie nur staubfreies bzw. staubarmes Papier. Viele Papiersorten sind für diesen Drucker geeignet.
  • Seite 57 Quick Start-de.book Seite 21 Freitag, 16. Oktober 2009 1:16 13 Kurzanleitung Papierhandhabung Den farbigen Verriegelungshebel öffnen und den Traktor so ausrichten, daß die erste Druckposition auf dem Papier mit der Markierung auf dem Druckergehäuse übereinstimmt. Anschließend den farbigen Hebel wieder arretieren. Endlospapier in den linken Traktor einlegen.
  • Seite 58 Quick Start-de.book Seite 22 Freitag, 16. Oktober 2009 1:16 13 Papierhandhabung Kurzanleitung Darauf achten, daß der Papierstapel parallel zum Drucker ausgerichtet ist, und daß der Papierfluß nicht behindert wer- den kann. Die untere Abdeckung anbringen. Ready Trak1 Die vordere Abdeckung nach unten klappen. Online M1 EPS Load...
  • Seite 59: Einzelblätter

    Quick Start-de.book Seite 23 Freitag, 16. Oktober 2009 1:16 13 Kurzanleitung Papierhandhabung Einzelblätter Manche Druckermodelle sind nur für den Endlos- papierbetrieb konzipiert und verfügen deshalb über keine Einzelblattzuführung. Die Klappe kann daher nicht geöffnet werden. Sicherstellen, daß Drucker auf Einzelblattbetrieb eingestellt ist.
  • Seite 60: Papiertransport

    Quick Start-de.book Seite 24 Freitag, 16. Oktober 2009 1:16 13 Papierhandhabung Kurzanleitung Das Einzelblatt parallel bis zum Anschlag in die Papier- führung einführen. Die Taste Online drücken, um den Drucker betriebsbereit zu machen. Das Einzelblatt wird automatisch eingezogen, wenn der Drucker Online ist und Daten vom Computer erhält.
  • Seite 61: Papier In Abreißposition Fahren

    Quick Start-de.book Seite 25 Freitag, 16. Oktober 2009 1:16 13 Kurzanleitung Papierhandhabung Papier in Abreißposition Der Drucker transportiert standardmäßig das Papier nach dem Einlegen in die fahren Tearposition. Wenn Sie diese Funktion im Menü des Druckers deaktivieren (Einstel- lung: Manual), wird Endlospapier mit der Taste Tear (4) in Abreißposition gefah- ren.
  • Seite 62: Papier Entfernen

    Quick Start-de.book Seite 26 Freitag, 16. Oktober 2009 1:16 13 Papierhandhabung Kurzanleitung Papier entfernen Papier niemals aus dem Drucker herausreißen, da sonst die Mechanik beschädigt STOP werden kann. Sicherstellen, daß der Drucker Offline ist (Pause), gegebenenfalls die Taste On- Pause Trak1 line drücken.
  • Seite 63: Einstellungen

    Quick Start-de.book Seite 27 Freitag, 16. Oktober 2009 1:16 13 Kurzanleitung Einstellungen Einstellungen In diesem Abschnitt wird beschrieben, wie Sie die Abreißposition, die erste Druck- zeile, den Druckkopfabstand sowie die die Schriftart und die Zeichendichte ein- stellen. Abreißposition einstellen Stimmt die Abreißposition des Papiers nicht mit der Abreißkante des Druckers überein, kann sie eingestellt werden.
  • Seite 64: Erste Druckzeile Einstellen (Tof)

    Quick Start-de.book Seite 28 Freitag, 16. Oktober 2009 1:16 13 Einstellungen Kurzanleitung Erste Druckzeile einstellen Mit der TOF-Funktion kann für jeden Papiereinzugsschacht und jedes Menü ein- (TOF) zeln die Position der obersten Druckzeile eingestellt werden. Vor Ausführen der TOF-Funktion muß – bei Verwendung von Endlospapier – vor- her die Abreißposition eingestellt werden (siehe oben).
  • Seite 65 Quick Start-de.book Seite 29 Freitag, 16. Oktober 2009 1:16 13 Kurzanleitung Einstellungen Die Eingabe durch Drücken der Taste Setze (1) bestätigen. FormAdj= 17/72" Die Taste Setup drücken. Der Drucker geht in die Grundstellung zurück. Setze< > Exit Online Setup Die vorgenommene Einstellung bleibt auch nach Ausschalten des Druckers erhal- ten.
  • Seite 66: Druckkopfabstand Einstellen

    Quick Start-de.book Seite 30 Freitag, 16. Oktober 2009 1:16 13 Einstellungen Kurzanleitung Druckkopfabstand Der Drucker ist mit einer Funktion ausgestattet, die den Druckkopfabstand auto- einstellen matisch auf die verwendete Papierdicke einstellt. Im Setup-Modus kann ein Kor- rekturwert zum automatisch ermittelten Kopfabstand eingegeben werden. Mit dieser Korrektur wird das Schriftbild verändert.
  • Seite 67: Zeichendichte Und Schriftart Wählen

    Quick Start-de.book Seite 31 Freitag, 16. Oktober 2009 1:16 13 Kurzanleitung Einstellungen Zeichendichte und Mit der Taste CPI (Character Per Inch = Zeichen pro Zoll) kann im Setup-Modus Schriftart wählen die Anzahl der Zeichen eingestellt werden, die pro Zoll ausgedruckt werden. Mit der Taste Font können Schriftarten ausgewählt werden.
  • Seite 68: Statusseite Beim Einschalten Ausdrucken

    Quick Start-de.book Seite 32 Freitag, 16. Oktober 2009 1:16 13 Statusseite beim Einschalten ausdrucken Kurzanleitung Statusseite beim Einschalten ausdrucken Die Statusseite enthält alle gewählten Menü-Einstellungen sowie die im Drucker installierte Steuersoftware und Zeichengeneratoren. Stellen Sie sicher, dass im aktuellen Papierweg (Standardvoreinstellung ist Statusausdruck Traktor 1) unbedrucktes Papier eingelegt ist.
  • Seite 69: Technische Daten Druckerspezifikationen

    Quick Start-de.book Seite 33 Freitag, 16. Oktober 2009 1:16 13 Kurzanleitung Technische Daten Technische Daten Druckerspezifikationen LA650+ LA800+ Druckprinzip seriell mit 24-Nadel Druckkopf Druckbreite 136 Zeichen bei 10 cpi bidirektionaler Modus, 10 cpi bidirektionaler Modus, 10 cpi Druckgeschwindigkeit 650 cps 800 cps HSQ (Matrix 12 x 10) 600 cps...
  • Seite 70: Papierspezifikationen

    Quick Start-de.book Seite 34 Freitag, 16. Oktober 2009 1:16 13 Technische Daten Kurzanleitung Papierspezifikationen Endlospapier Traktor1 Einfachformat Papiergewicht 60–120 g/m Formularsatz Zahl der Durchschläge 1 + 6 (LA650+) (muß individuell getestet werden) 1 + 5 (LA800+) Formularsatzdicke (max.) 0,60 mm Einzelblattzufuhr Einzelblatt Papiergewicht...
  • Seite 71: Daten Zur Langlebigkeit Und Umweltverträglichkeit

    Dieses Gerät ist zur Verarbeitung von Recyclingpapier ent- sprechend DIN 19 309 geeignet. Rücknahme von Drucker Unsere Geräte mit Umweltzeichen und Verbrauchsmaterial werden in unserem Recycling-Center, DASCOM Europe und Verbrauchsmaterial GmbH, Heuweg 3, D-89079 Ulm gebührenfrei angenommen und können dort persönlich oder auf dem Versandwege ange- liefert werden.
  • Seite 72: Zubehör

    Quick Start-de.book Seite 36 Freitag, 16. Oktober 2009 1:16 13 Technische Daten Kurzanleitung Zubehör Farbbandkassetten Bestellnummer Farbbandkassette schwarz 060 097 Weiteres Zubehör finden Sie im Benutzerhandbuch auf der Online-CD-ROM.
  • Seite 73 Quickstart-fr.book Seite 1 Freitag, 16. Oktober 2009 1:18 13 Guide de démarrage rapide Table des matières Guide de démarrage rapide Introduction Symboles utilisés Consignes importantes de sécurité Utilisation du CD-ROM Online Que contient le CD-ROM Online Recherche des pannes Vue d’ensemble Vue du devant Imprimante en mode continu Imprimante en mode feuille à...
  • Seite 74: Guide De Démarrage Rapide

    Quickstart-fr.book Seite 2 Freitag, 16. Oktober 2009 1:18 13 Table des matières Guide de démarrage rapide Réglages Réglage de la position de séparation Réglage de la première ligne d’impression (TOF) Réglage de l’écartement de la tête d’impression Sélection de la densité des caractères et de la police 31 Impression de la page de statut Données techniques Spécifications de l’imprimante...
  • Seite 75: Introduction

    Quickstart-fr.book Seite 3 Freitag, 16. Oktober 2009 1:18 13 Guide de démarrage rapide Introduction Introduction Ce manuel est une initiation rapide sur la manière d’utiliser l’imprimante et permet également aux utilisateurs inexpérimentés de se servir de l’imprimante. Il décrit les fonctions principales de l’imprimante et contient des informations indispensables à...
  • Seite 76: Utilisation Du Cd-Rom Online

    Quickstart-fr.book Seite 4 Freitag, 16. Oktober 2009 1:18 13 Introduction Guide de démarrage rapide Vous trouverez d’autres consignes de sécurité aux endroits appropriés dans le texte. Utilisation du Installer d’abord l’Adobe Acrobat Reader sur le disque dur dans la mesure où ce CD-ROM Online programme n’est pas déjà...
  • Seite 77: Vue D'ensemble

    Quickstart-fr.book Seite 5 Freitag, 16. Oktober 2009 1:18 13 Guide de démarrage rapide Vue d’ensemble Vue d’ensemble Vue du devant Imprimante en mode continu Panneau de commande Elément insonorisant Capot supérieur Capot avant Tracteurs Capot inférieur Interrupteur secteur Vue de l’arrière Imprimante en mode feuille à...
  • Seite 78: Installation

    Quickstart-fr.book Seite 6 Freitag, 16. Oktober 2009 1:18 13 Installation Guide de démarrage rapide Installation Déballage de l’imprimante Placer l’imprimante emballée sur un support stable. Veiller à ce que les symboles «Haut» soient orientés dans la bonne direction. Ouvrir l’emballage et sortir et déballer la cartouche du ruban encreur.
  • Seite 79: Mise En Place De L'imprimante

    Quickstart-fr.book Seite 7 Freitag, 16. Oktober 2009 1:18 13 Guide de démarrage rapide Installation Mise en place de l’impri- Placer l’imprimante sur un support stable, plan et antidérapant de façon à ce mante qu’elle ne puisse pas tomber. Veiller à ce que le panneau de commande et les magasins d’alimentation du papier soient aisément accessibles et à...
  • Seite 80: Connexion De L'imprimante

    Quickstart-fr.book Seite 8 Freitag, 16. Oktober 2009 1:18 13 Installation Guide de démarrage rapide Connexion de l’imprimante S’assurer que l’imprimante est réglée à la tension appropriée (p. ex. 220–240 V en Europe, 120 V aux USA). Voir à ce sujet la plaque signalitique placée au-dessus de la prise secteur au dos de l’imprimante.
  • Seite 81: Mise Sous Tension De L'imprimante

    Quickstart-fr.book Seite 9 Freitag, 16. Oktober 2009 1:18 13 Guide de démarrage rapide Installation Mise sous tension de l’imprimante L’interrupteur secteur qui sert à la mise sous tension de l’imprimante se trouve sur la face avant de l’imprimante, en bas à gauche vu de devant.
  • Seite 82: Panneau De Commande

    Quickstart-fr.book Seite 10 Freitag, 16. Oktober 2009 1:18 13 Panneau de commande Guide de démarrage rapide Panneau de Le panneau de commande et les touches permettent de contrôler le fonctionnement commande de l’imprimante. La première ligne de l’affichage indique si l’imprimante se trouve en mode Online (Ready) ou Offline (Pause) et la fonction papier sélectionnée (Tract 1 = tracteur 1 ou Insert).
  • Seite 83: Mode Offline

    Quickstart-fr.book Seite 11 Freitag, 16. Oktober 2009 1:18 13 Guide de démarrage rapide Panneau de commande Mode Offline L’alimentation pas à pas, le changement de ligne ou de page ne peuvent être effectués via le panneau de commande que dans ce mode (voir «Transport du papier»...
  • Seite 84: Remplacement De La Cartouche Du Ruban Encreur

    Quickstart-fr.book Seite 12 Freitag, 16. Oktober 2009 1:18 13 Remplacement de la cartouche du ruban encreur Guide de démarrage rapide Remplacement de Avant d’ouvrir le capot, s’assurer que l’imprimante est hors tension de façon à la cartouche du pouvoir effectuer les préparations automatiques pour le changement de ruban (agrandissement de l’écart de la tête d’impression).
  • Seite 85 Quickstart-fr.book Seite 13 Freitag, 16. Oktober 2009 1:18 13 Guide de démarrage rapide Remplacement de la cartouche du ruban encreur Déplacer le poussoir de friction de couleur comme illustré sur la figure (dans le sens de la flèche) et relever le dispositif de friction.
  • Seite 86 Quickstart-fr.book Seite 14 Freitag, 16. Oktober 2009 1:18 13 Remplacement de la cartouche du ruban encreur Guide de démarrage rapide Lever l’aide à l’insertion Retirez les protecteurs de couleur Placer la molette de tension de couleur dans le logement devant à droite de la nouvelle cartouche de ruban encreur. Tourner la molette dans le sens de la flèche pour tendre le ruban encreur.
  • Seite 87 Quickstart-fr.book Seite 15 Freitag, 16. Oktober 2009 1:18 13 Guide de démarrage rapide Remplacement de la cartouche du ruban encreur Incliner légèrement vers l’avant la cartouche de ruban encreur, insérer le ruban encreur entre l’aide à l’insertion de couleur et le support de ruban encreur (plaque de plastique transparente).
  • Seite 88 Quickstart-fr.book Seite 16 Freitag, 16. Oktober 2009 1:18 13 Remplacement de la cartouche du ruban encreur Guide de démarrage rapide Appuyer l’aide à l’insertion vers le bas. Faire aller et venir plusieurs fois le chariot de tête d’impression. Quand le ruban encreur est correctement installé, aucune résistance ne doit être perceptible.
  • Seite 89 Quickstart-fr.book Seite 17 Freitag, 16. Oktober 2009 1:18 13 Guide de démarrage rapide Remplacement de la cartouche du ruban encreur Appuyer le dispositif de friction vers le bas jusqu’à ce qu’il s’enclenche. Fermer la partie avant du capot supérieur.
  • Seite 90: Manipulation Du Papier

    Quickstart-fr.book Seite 18 Freitag, 16. Oktober 2009 1:18 13 Manipulation du papier Guide de démarrage rapide Manipulation du Ce chapitre explique comment régler le type de papier, mettre en place le papier papier continu et l’alimentation feuille à feuille, transporter le papier et déplacer le papier en position de séparation.
  • Seite 91: Changement Du Type De Papier Dans Le Menu Setup

    Quickstart-fr.book Seite 19 Freitag, 16. Oktober 2009 1:18 13 Guide de démarrage rapide Manipulation du papier Appuyer sur la touche Online pour que l’imprimante soit prête à fonctionner. Si Ready Insert l’imprimante reçoit des données de l’ordinateur, la feuille simple est chargée Online M1 EPS Load...
  • Seite 92: Chargement Du Papier

    Quickstart-fr.book Seite 20 Freitag, 16. Oktober 2009 1:18 13 Manipulation du papier Guide de démarrage rapide Chargement du papier Votre imprimante peut aussi bien imprimer sur du papier continu que sur du papier feuille à feuille. Pour des informations concernant les formats de papier autorisés, consulter la page 34, «Spécifications du papier».
  • Seite 93 Quickstart-fr.book Seite 21 Freitag, 16. Oktober 2009 1:18 13 Guide de démarrage rapide Manipulation du papier Ouvrir le levier de verrouillage de couleur et aligner le tracteur de façon à ce que la position du début d’impression sur le papier coïncide avec le repère X sur le carter de l’impri- mante.
  • Seite 94 Quickstart-fr.book Seite 22 Freitag, 16. Oktober 2009 1:18 13 Manipulation du papier Guide de démarrage rapide Veiller à ce que la pile de papier soit alignée parallèlement à l’imprimante et que le flux de papier ne soit pas entravé. Replacer le capot inférieur. Ready Tract 1 Online...
  • Seite 95: Papier Feuille À Feuille

    Quickstart-fr.book Seite 23 Freitag, 16. Oktober 2009 1:18 13 Guide de démarrage rapide Manipulation du papier Papier feuille à feuille Certains modèles d’imprimante ne sont conçus que pour le mode de papier continu et ne sont donc pas équipés d’une alimentation feuille à feuille. C’est pourquoi le couvercle avant ne peut pas être ouvert sur ces modèles.
  • Seite 96: Transport Du Papier

    Quickstart-fr.book Seite 24 Freitag, 16. Oktober 2009 1:18 13 Manipulation du papier Guide de démarrage rapide Insérer la feuille simple paralèllement dans le guide-papier jusqu’à la butée. Appuyer sur la touche Online pour que l’imprimante soit prête à fonctionner. La feuille simple est chargée automatiquement quand l’imprimante est Online et reçoit des données de l’ordinateur.
  • Seite 97: Déplacer Le Papier En Position De Séparation

    Quickstart-fr.book Seite 25 Freitag, 16. Oktober 2009 1:18 13 Guide de démarrage rapide Manipulation du papier Déplacer le papier en Après l’insertion l’imprimante transporte le papier dans la position d’impression position de séparation par défaut. Si vous désactivez cette fonction dans le menu de l’imprimante, le papier continu est transporté...
  • Seite 98: Enlever Le Papier

    Quickstart-fr.book Seite 26 Freitag, 16. Oktober 2009 1:18 13 Manipulation du papier Guide de démarrage rapide Enlever le papier Ne jamais déchirer le papier de l’imprimante car sinon le mécanisme risque d’être STOP endommagé. S’assurer que l’imprimante est en mode Offline (Pause), le cas échéant appuyer Pause Tract1 sur la touche Online.
  • Seite 99: Réglages

    Quickstart-fr.book Seite 27 Freitag, 16. Oktober 2009 1:18 13 Guide de démarrage rapide Réglages Réglages Cette partie décrit le réglage de la position de séparation, de la première ligne d’impression, de l’écartement de la tête d’impression, ainsi que de la police et de la densité...
  • Seite 100: Réglage De La Première Ligne D'impression (Tof)

    Quickstart-fr.book Seite 28 Freitag, 16. Oktober 2009 1:18 13 Réglages Guide de démarrage rapide Réglage de la première La fonction TOF permet de régler la position de la première ligne d’impression ligne d’impression (TOF) pour chaque bac de chargement du papier et chaque menu individuellement. Régler d’abord la position de séparation (voir plus haut) - en cas d’utilisation de papier continu - avant d’exécuter la fonction TOF.
  • Seite 101 Quickstart-fr.book Seite 29 Freitag, 16. Oktober 2009 1:18 13 Guide de démarrage rapide Réglages Valider la sélection en appuyant sur la touche Valid (1). Ligne-1= 17/72"* Online Appuyer sur la touche Setup. L’imprimante revient en position initiale. Valid < > Quit Setup Le réglage effectué...
  • Seite 102: Réglage De L'écartement De La Tête D'impression

    Quickstart-fr.book Seite 30 Freitag, 16. Oktober 2009 1:18 13 Réglages Guide de démarrage rapide Réglage de l’écartement de L’imprimante est équipée d’une fonction qui permet d’ajuster automatiquement la tête d’impression l’écartement de la tête d’impression sur l’épaisseur du papier utilisé. En mode Setup, vous pouvez entrer une valeur de correction pour modifier l’écartement de la tête d’impression défini automatiquement.
  • Seite 103: Sélection De La Densité Des Caractères Et De La Police

    Quickstart-fr.book Seite 31 Freitag, 16. Oktober 2009 1:18 13 Guide de démarrage rapide Réglages Sélection de la densité des Avec la touche CPI (Character Per Inch = nombre de caractères par pouce), vous caractères et de la police pouvez régler en mode Setup le nombre de caractères imprimés par pouce. La touche Police permet de sélectionner des polices.
  • Seite 104: Impression De La Page De Statut

    Quickstart-fr.book Seite 32 Freitag, 16. Oktober 2009 1:18 13 Impression de la page de statut Guide de démarrage rapide Impression de la La page de statut contient tous réglages de menu choisis ainsi que le logiciel de page de statut gestion et le générateur de caractères.
  • Seite 105: Données Techniques

    Quickstart-fr.book Seite 33 Freitag, 16. Oktober 2009 1:18 13 Guide de démarrage rapide Données techniques Données techniques Spécifications de Type LA650+ LA800+ l’imprimante Principe d’impression Série avec tête d’impression 24 aiguilles Largeur d’impression 136 caractères en mode 10 cpi (Mode bidirectionnel, 10 cpi) (Mode bidirectionnel, 10 cpi) Vitesse d’impression 650 cps...
  • Seite 106: Spécifications Du Papier

    Quickstart-fr.book Seite 34 Freitag, 16. Oktober 2009 1:18 13 Données techniques Guide de démarrage rapide Spécifications du papier Papier continu tracteur1 Formulaire simple Grammage 60–120 g/m Liasse de formulaires Nombre de copies 1 + 6 (LA650+) (doit être testée individuellement) 1 + 5 (LA800+) Epaisseur de formulaire (maxi) 0,60 mm...
  • Seite 107 Quickstart-it.book Seite 1 Freitag, 16. Oktober 2009 1:26 13 Guida di avvio rapida Indice Indice Guida di avvio rapida Introduzione Simboli utilizzati Indicazioni di sicurezza importanti Utilizzo del CD-ROM online Cosa c’è sul CD-ROM online Diagnostica Configurazione della stampante Vista dal davanti Configurazione della stampante per l’uso dei trascinamoduli Configurazione della stampante per l’uso di fogli singoli 5...
  • Seite 108 Quickstart-it.book Seite 2 Freitag, 16. Oktober 2009 1:26 13 Indice Guida di avvio rapida Impostazioni Impostazione della posizione di strappo Impostazione della riga di inizio stampa (Top Of Form, TOF) Regolazione della distanza della testina di stampa Selezione della densità dei caratteri e del font Pagina di stato Dati tecnici Specifiche della stampante...
  • Seite 109: Introduzione

    Quickstart-it.book Seite 3 Freitag, 16. Oktober 2009 1:26 13 Guida di avvio rapida Introduzione Introduzione La presente Guida di avvio rapida consentono di cominciare subito a lavorare con la stampante, anche a utenti inesperti. Vi sono descritte le principali funzioni della stampante e vi sono riportate le informazioni indispensabili per il lavoro giornalie- ro con la stessa.
  • Seite 110: Utilizzo Del Cd-Rom Online

    Quickstart-it.book Seite 4 Freitag, 16. Oktober 2009 1:26 13 Introduzione Guida di avvio rapida Utilizzo del CD-ROM online Se Adobe Acrobat Reader non è già caricato, installare innanzitutto questo pro- gramma sul disco fisso. Per l’installazione, attenersi alle indicazioni riportate nel file Readme, nella directory READER.
  • Seite 111: Configurazione Della Stampante

    Quickstart-it.book Seite 5 Freitag, 16. Oktober 2009 1:26 13 Guida di avvio rapida Configurazione della stampante Configurazione della stampante Vista dal davanti Configurazione della stampante per l’uso Pannello comandi dei trascinamoduli Calotta insonorizzante Coperchio superiore Coperchio anteriore Trascinamoduli Coperchio inferiore Interruttore di rete Vista posteriore Configurazione della stampante per l’uso...
  • Seite 112: Installazione

    Quickstart-it.book Seite 6 Freitag, 16. Oktober 2009 1:26 13 Installazione Guida di avvio rapida Installazione Rimozione dell’imballaggio Collocare la stampante ancora imballata su una superficie stabile. Fare attenzione a disporre i simboli “sopra” nella direzione corretta. Aprire l’imballaggio, estrarre il kit degli accessori e disim- ballarlo.
  • Seite 113: Installazione Della Stampante

    Quickstart-it.book Seite 7 Freitag, 16. Oktober 2009 1:26 13 Guida di avvio rapida Installazione Installazione della Collocare la stampante su una superficie stabile, piana e non scivolosa, per evitare stampante che cada a terra. Predisporre un agevole accesso al pannello operatore e alle guide carta, lasciando anche spazio adeguato per l’uscita della carta.
  • Seite 114: Collegamento Della Stampante

    Quickstart-it.book Seite 8 Freitag, 16. Oktober 2009 1:26 13 Installazione Guida di avvio rapida Collegamento della stampante Verificare che la stampante sia impostata sul valore di tensio- ne corretto (ad esempio 220–240 V in Europa, 120 V negli Stati Uniti). A questo proposito, vedere la targhetta presente in corrispondenza della presa di rete sul retro della stampante.
  • Seite 115: Accensione Della Stampante

    Quickstart-it.book Seite 9 Freitag, 16. Oktober 2009 1:26 13 Guida di avvio rapida Installazione Accensione della stampante L’interruttore di rete che consente di accendere la stampante è posto in basso, sul pannello anteriore della stampante, vista dal davanti.
  • Seite 116: Pannello Comandi

    Quickstart-it.book Seite 10 Freitag, 16. Oktober 2009 1:26 13 Pannello comandi Guida di avvio rapida Pannello comandi Il pannello comandi e i relativi tasti consentono di controllare il funzionamento della stampante. La prima riga del display indica se la stampante si trova nel modo Online (Ready) o Offline (Pause) e qual è...
  • Seite 117: Modo Offline

    Quickstart-it.book Seite 11 Freitag, 16. Oktober 2009 1:26 13 Guida di avvio rapida Pannello comandi Modo Offline Soltanto in questa modalità è possibile comandare l’avanzamento passo-passo, riga per riga o della modulistica attraverso il pannello comandi (vedere “Trasporto carta”, pagina 24), non è possibile la ricezione dei dati. Tasto Park (1): Libera il percorso carta quando la carta è...
  • Seite 118: Sostituzione Della Cartuccia Colore

    Quickstart-it.book Seite 12 Freitag, 16. Oktober 2009 1:26 13 Sostituzione della cartuccia colore Guida di avvio rapida Sostituzione della Prima di aprire il coperchio, verificare che la stampante sia accesa e che possa cartuccia colore quindi eseguire le funzioni di predisposizione automatica per il cambio della car- tuccia nastro (aumento della distanza della testina di stampa).
  • Seite 119 Quickstart-it.book Seite 13 Freitag, 16. Oktober 2009 1:26 13 Guida di avvio rapida Sostituzione della cartuccia colore Spostare il cursore colorato della frizione verso sinistra, come mostrato nella figura (direzione della freccia) e solle- vare la frizione. Estrarre la cartuccia consumata. Si consiglia l’impiego di cartucce nastro originali.
  • Seite 120 Quickstart-it.book Seite 14 Freitag, 16. Oktober 2009 1:26 13 Sostituzione della cartuccia colore Guida di avvio rapida Sollevare la guida di inserimento colorata Rimuovere i fermi di sicurezza colorati Inserire il pomello tendinastro colorato nel foro anteriore de- stro della cartuccia colore. Ruotare il pomello nella direzione della freccia per tendere il nastro.
  • Seite 121 Quickstart-it.book Seite 15 Freitag, 16. Oktober 2009 1:26 13 Guida di avvio rapida Sostituzione della cartuccia colore Inclinare la cartuccia lievemente in avanti in modo da inseri- re il nastro tra la guida di inserimento colorata e il supporto (finestrella in plastica trasparente). Inserire la cartuccia parallelamente nella rispettiva guida e spingerla verso il basso in modo da fissarla.
  • Seite 122 Quickstart-it.book Seite 16 Freitag, 16. Oktober 2009 1:26 13 Sostituzione della cartuccia colore Guida di avvio rapida Spingere la guida di inserimento verso il basso. Spostare ripetutamente da un lato all’altro il cursore della te- stina di stampa. Se il nastro è posizionato correttamente, non deve avvertirsi alcuna resistenza.
  • Seite 123 Quickstart-it.book Seite 17 Freitag, 16. Oktober 2009 1:26 13 Guida di avvio rapida Sostituzione della cartuccia colore Spingere la frizione verso il basso per fissarla. Richiudere il coperchio superiore della stampante.
  • Seite 124: Modalità Di Gestione Della Carta

    Quickstart-it.book Seite 18 Freitag, 16. Oktober 2009 1:26 13 Modalità di gestione della carta Guida di avvio rapida Modalità di gestione In questa sezione sono descritte le modalità di impostazione del tipo di carta, cari- della carta camento di moduli continui e fogli singoli, trasporto carta e posizionamento della carta nella posizione di strappo.
  • Seite 125: Modifica Del Tipo Di Carta Nel Menu Setup

    Quickstart-it.book Seite 19 Freitag, 16. Oktober 2009 1:26 13 Guida di avvio rapida Modalità di gestione della carta Premere il tasto Online per commutare la stampante nella condizione “pronta al Ready Foglio funzionamento”. Non appena la stampante comincia a ricevere dati dal computer, Online M1 EPS Load...
  • Seite 126: Caricamento Della Carta

    Quickstart-it.book Seite 20 Freitag, 16. Oktober 2009 1:26 13 Modalità di gestione della carta Guida di avvio rapida Caricamento della carta Nella stampante si possono caricare sia moduli continui che fogli singoli. Per mag- giori informazioni sui formati di carta compatibili, si rimanda alla pagina 34 (Dati tecnici).
  • Seite 127 Quickstart-it.book Seite 21 Freitag, 16. Oktober 2009 1:26 13 Guida di avvio rapida Modalità di gestione della carta Rilasciare la levetta colorata e disporre il trascinamoduli in modo da far coincidere la posizione di stampa sulla carta con il contrassegno X presente sulla custodia della stampante. Richiudere la levetta colorata.
  • Seite 128 Quickstart-it.book Seite 22 Freitag, 16. Oktober 2009 1:26 13 Modalità di gestione della carta Guida di avvio rapida Fare attenzione a collocare la pila dei moduli continui paral- lelamente alla stampante per evitare interferenze con l’ali- mentazione carta. Reinstallare il coperchio inferiore. Ready Trat1 Online...
  • Seite 129: Fogli Singoli

    Quickstart-it.book Seite 23 Freitag, 16. Oktober 2009 1:26 13 Guida di avvio rapida Modalità di gestione della carta Fogli singoli Determinati modelli di stampante sono realizzati esclusivamente per la modalità di funzionamento a moduli continui e non dispongono pertanto di gui- da fogli singoli.
  • Seite 130: Trasporto Carta

    Quickstart-it.book Seite 24 Freitag, 16. Oktober 2009 1:26 13 Modalità di gestione della carta Guida di avvio rapida Introdurre il foglio singolo parallelamente fino in fondo nella guida carta. Premere il tasto Online per commutare la stampante nella condizione “pronta al funzionamento”. Se la stampante è...
  • Seite 131: Posizionamento Della Carta Nella Posizione Di Strappo

    Quickstart-it.book Seite 25 Freitag, 16. Oktober 2009 1:26 13 Guida di avvio rapida Modalità di gestione della carta Posizionamento della carta Dopo l’inserimento, come impostazione standard la stampante sposta la carta in nella posizione di strappo posizione “Stp.” (strappo). Se questa funzione è stata disattivata nel menu della stampante, per spostare la carta in moduli continui in posizione di strappo, premere il tasto Stp..
  • Seite 132: Rimozione Carta

    Quickstart-it.book Seite 26 Freitag, 16. Oktober 2009 1:26 13 Modalità di gestione della carta Guida di avvio rapida Rimozione carta Non strappare mai la carta dalla stampante, poichè altrimenti si possono provo- STOP care danni meccanici. Verificare che la stampante si trovi nel modo Offline (Pause), se necessario, pre- Pause Trat1 mere il tasto Online.
  • Seite 133: Impostazioni

    Quickstart-it.book Seite 27 Freitag, 16. Oktober 2009 1:26 13 Guida di avvio rapida Impostazioni Impostazioni Questa sezione descrive come impostare la posizione di strappo, la riga di inizio stampa, la distanza della testina di stampa, il font e la densit dei caratteri. Impostazione della Se la posizione di strappo della carta non corrisponde al bordo di strappo della posizione di strappo...
  • Seite 134: Impostazione Della Riga Di Inizio Stampa (Top Of Form, Tof)

    Quickstart-it.book Seite 28 Freitag, 16. Oktober 2009 1:26 13 Impostazioni Guida di avvio rapida Impostazione della riga di Con la funzione TOF si può impostare individualmente per ogni cassetto di ali- inizio stampa (Top Of Form, mentazione carta e per ogni menu la posizione della riga di inizio stampa. TOF) Prima di eseguire la funzione TOF –...
  • Seite 135 Quickstart-it.book Seite 29 Freitag, 16. Oktober 2009 1:26 13 Guida di avvio rapida Impostazioni Confermare il valore immesso premendo il tasto OK (1). Sel. 17/72" Online Premere il tasto Setup. La stampante torna nella posizione di riposo. < > Esci Setup L’impostazione effettuata resta in memoria anche allo spegnimento della stam- pante.
  • Seite 136: Regolazione Della Distanza Della Testina Di Stampa

    Quickstart-it.book Seite 30 Freitag, 16. Oktober 2009 1:26 13 Impostazioni Guida di avvio rapida Regolazione della distanza La stampante è dotata di una funzione che consente di impostare automaticamente della testina di stampa la distanza della testina di stampa in funzione della grammatura della carta in uso. Nel modo Setup si può...
  • Seite 137: Selezione Della Densità Dei Caratteri E Del Font

    Quickstart-it.book Seite 31 Freitag, 16. Oktober 2009 1:26 13 Guida di avvio rapida Impostazioni Selezione della densità dei Nel modo Setup, con il tasto CPI si può impostare il numero di caratteri che deve caratteri e del font essere stampato per pollice. Con il tasto Font si possono selezionare i font. Premere il tasto Setup.
  • Seite 138: Pagina Di Stato

    Quickstart-it.book Seite 32 Freitag, 16. Oktober 2009 1:26 13 Pagina di stato Guida di avvio rapida Pagina di stato La pagina di stato contiene tutte le regolazioni selezionate del menu, il software di controllo installato ed i generatori di carattere. Verificare che la carta in bianco è...
  • Seite 139: Dati Tecnici

    Quickstart-it.book Seite 33 Freitag, 16. Oktober 2009 1:26 13 Guida di avvio rapida Dati tecnici Dati tecnici Specifiche della stampante Tipo LA650+ LA800+ Tecnologia di stampa seriale con testina di stampa a 24 aghi Larghezza di stampa 136 caratteri a 10 cpi (modo bidirezionale, 10 cpi) (modo bidirezionale, 10 cpi) Velocità...
  • Seite 140: Specifiche Della Carta

    Quickstart-it.book Seite 34 Freitag, 16. Oktober 2009 1:26 13 Dati tecnici Guida di avvio rapida Specifiche della carta Trascinamoduli modulicontinui) 1 Formato semplice Grammatura carta 60–120 g/m Modulistica multicopia Numero di copie 1 + 6 (LA650+) (da testare caso per caso) 1 + 5 (LA800+) Spessore modulo (max.) 0,60 mm...
  • Seite 141 Quickstart-sp.book Seite 1 Freitag, 16. Oktober 2009 1:33 13 Guía de instalación Contenido Guía de instalación Introducción Símbolos convencionales Instrucciones de seguridad importantes Utilizar la documentación en línea en el disco CD-ROM 4 Qué incluye la documentación en línea en el disco CD-ROM Detección de errores Vista de conjunto...
  • Seite 142 Quickstart-sp.book Seite 2 Freitag, 16. Oktober 2009 1:33 13 Contenido Guía de instalación Ajustes Ajustar la posición de corte Ajustar la primera línea de impresión (TOF) Ajustar la distancia de cabeza grabadora Seleccionar densidad y fuente Página del estado Datos técnicos Especificaciones de la impresora Especificaciones del papel Accesorios...
  • Seite 143: Guía De Instalación

    Quickstart-sp.book Seite 3 Freitag, 16. Oktober 2009 1:33 13 Guía de instalación Introducción Introducción La presente guía de instalación sirve como introducción rápida al uso de la impre- sora y para poner en condiciones de manejar el equipo incluso al usuario inexperi- mentado.
  • Seite 144: Utilizar La Documentación En Línea En El Disco Cd-Rom

    Quickstart-sp.book Seite 4 Freitag, 16. Oktober 2009 1:33 13 Introducción Guía de instalación Utilizar la documentación Empiece con la instalación del Adobe Acrobat Reader en el disco duro si no se ha en línea en el disco instalado ya. Para instalar siga las instrucciones contenidas en el archivo READ- CD-ROM ME en el directorio READER.
  • Seite 145: Vista De Conjunto

    Quickstart-sp.book Seite 5 Freitag, 16. Oktober 2009 1:33 13 Guía de instalación Vista de conjunto Vista de conjunto Vista frontal Impresora en modo de tractor Panel de mando Elemento insonoro Tapa superior Tapa delantera Tractores Tapa inferior Conmutador de alimentación Vista desde atrás Impresora en modo de hojas sueltas Tapa trasera...
  • Seite 146: Instalación

    Quickstart-sp.book Seite 6 Freitag, 16. Oktober 2009 1:33 13 Instalación Guía de instalación Instalación Desembalar la impresora Ponga la impresora embalada sobre una base estable. Asegúrese de que los símbolos de “Arriba” indiquen la direc- ción correcta. Abra el embalaje, quite y desempaquete la cajita de acceso- rios.
  • Seite 147: Colocar La Impresora

    Quickstart-sp.book Seite 7 Freitag, 16. Oktober 2009 1:33 13 Guía de instalación Instalación Colocar la impresora Coloque la impresora sobre una base estable, plana y antideslizante, de manera que no pueda caer al suelo. Hay que asegurar el acceso al panel de mando y los meca- nismos de alimentación de papel, y hay que proveer espacio suficiente para el pa- pel expulsado.
  • Seite 148: Conectar La Impresora

    Quickstart-sp.book Seite 8 Freitag, 16. Oktober 2009 1:33 13 Instalación Guía de instalación Conectar la impresora Asegúrese de que el equipo ha sido ajustado para la tensión correcta de la red (p. ej. 230 V en Europa, 120 V en los EE.UU.).
  • Seite 149: Encender La Impresora

    Quickstart-sp.book Seite 9 Freitag, 16. Oktober 2009 1:33 13 Guía de instalación Instalación Encender la impresora El interruptor de la red, con el que se enciende la impresora, se encuentra, visto desde la parte delantera, a la izquierda abajo en el frente de la impresora.
  • Seite 150: Panel De Mando

    Quickstart-sp.book Seite 10 Freitag, 16. Oktober 2009 1:33 13 Panel de mando Guía de instalación Panel de mando A través del panel de mando y los pulsadores correspondientes se controlan las operaciones. La líneas de arriba del visualizador indica si la impresora está en modo Online (Ready, en línea) o en modo Offline (Pause, fuera de línea) y el origen de papel seleccionado (Tractor1 o Sueltas).
  • Seite 151: Modo Offline

    Quickstart-sp.book Seite 11 Freitag, 16. Oktober 2009 1:33 13 Guía de instalación Panel de mando Modo Offline Sólo en este modo pueden efectuarse avances de paso, línea o formularios median- te el panel de mando (véase “Transporte de papel”, página 24), sin embargo, no pueden recibirse los datos.
  • Seite 152: Cambiar El Cartucho De Cinta

    Quickstart-sp.book Seite 12 Freitag, 16. Oktober 2009 1:33 13 Cambiar el cartucho de cinta Guía de instalación Cambiar el cartucho Antes de abrir la cubierta, asegúrese de que la impresora esté encendida para que de cinta ésta pueda llevar a cabo automaticamente algunas preparaciones necesarias para el cambio de la cinta (alargar la distancia de cabeza de impresión).
  • Seite 153 Quickstart-sp.book Seite 13 Freitag, 16. Oktober 2009 1:33 13 Guía de instalación Cambiar el cartucho de cinta Deje correr el pasador de color de la fricción hacia la izquier- da (en dirección de la flecha), como se muestra en la figura y abra la fricción hacia arriba.
  • Seite 154 Quickstart-sp.book Seite 14 Freitag, 16. Oktober 2009 1:33 13 Cambiar el cartucho de cinta Guía de instalación Levante el dispositivo de carga Quitar las protecciones plásticas de color de la zona de la cinta. Coloque el botón tensor colorado en la apertura delantera de la derecha que se encuentra en el cartucho de cinta nuevo.
  • Seite 155 Quickstart-sp.book Seite 15 Freitag, 16. Oktober 2009 1:33 13 Guía de instalación Cambiar el cartucho de cinta Incline el cartucho de cinta un poco hacia delante, inserte la cinta entre dispositivo de carga colorado y soporte de cinta (arandela de material sintético transparente). Introduzca el cartucho paralelamente en su guía y presione hacia abajo hasta que se engatille.
  • Seite 156 Quickstart-sp.book Seite 16 Freitag, 16. Oktober 2009 1:33 13 Cambiar el cartucho de cinta Guía de instalación Presione el dispositivo de carga colorado hacia abajo. Mueva varias veces el carro de cabeza grabadora. Si la cinta se encuentra en su posición correcta no se debe sentir ningu- na resistencia.
  • Seite 157 Quickstart-sp.book Seite 17 Freitag, 16. Oktober 2009 1:33 13 Guía de instalación Cambiar el cartucho de cinta Presione la fricción hacia abajo hasta que enganche. Cierre la parte delantera de la cubierta superior.
  • Seite 158: Manejo Del Papel

    Quickstart-sp.book Seite 18 Freitag, 16. Oktober 2009 1:33 13 Manejo del papel Guía de instalación Manejo del papel En este capítulo se describe cómo se selecciona el tipo de papel, se coloca papel continuo y hojas sueltas, se transporta papel y se arrastra papel a la posición de corte.
  • Seite 159: Cambar El Origen De Papel Mediante El Menú Setup

    Quickstart-sp.book Seite 19 Freitag, 16. Oktober 2009 1:33 13 Guía de instalación Manejo del papel Presione el pulsador Online para poner la impresora en estado listo para el servi- Ready Sueltas cio. Si la impresora recibe datos del ordenador, se carga la hoja suelta automática- Online M1 EPS Load...
  • Seite 160: Cargar Papel

    Quickstart-sp.book Seite 20 Freitag, 16. Oktober 2009 1:33 13 Manejo del papel Guía de instalación Cargar papel Su impresora puede procesar papel continuo así como hojas sueltas. Para más in- formaciones sobre los tamaños de papel admisibles, véase página 34 (Datos técni- cos).
  • Seite 161 Quickstart-sp.book Seite 21 Freitag, 16. Oktober 2009 1:33 13 Guía de instalación Manejo del papel Abra la palanca de fijación colorada y ajuste el tractor de ma- nera que la primera posición de impresión en el papel esté alineada con la marca X sobre la caja de impresora. Después cierre la palanca de nuevo.
  • Seite 162 Quickstart-sp.book Seite 22 Freitag, 16. Oktober 2009 1:33 13 Manejo del papel Guía de instalación Preste atención a que el papel esté colocado paralelamente a la impresora y que nada pueda obstaculizar el flujo de papel. Fije la tapa inferior. Ready Tractor1 Online...
  • Seite 163: Hojas Sueltas

    Quickstart-sp.book Seite 23 Freitag, 16. Oktober 2009 1:33 13 Guía de instalación Manejo del papel Hojas sueltas Algunos modelos de la impresora han sido conce- bido solamente para la impresión de papel conti- nuo, por lo cual no poseen ningún alimentador de hojas sueltas.
  • Seite 164: Transporte De Papel

    Quickstart-sp.book Seite 24 Freitag, 16. Oktober 2009 1:33 13 Manejo del papel Guía de instalación Insierte la hoja suelta de forma paralela hasta el tope en el dispositivo de alimentación de papel. Presione el pulsador Online para poner la impresora en esta- do listo para el servicio.
  • Seite 165: Transportar El Papel A La Posición De Corte

    Quickstart-sp.book Seite 25 Freitag, 16. Oktober 2009 1:33 13 Guía de instalación Manejo del papel Transportar el papel a la Después de colocarse el papel, la impresora, como estándar, lo transporta a la po- posición de corte sición de corte (“Tiro”). Si usted desactiva esta función en el menú de la impresora (ajuste: Manual), papel continuo será...
  • Seite 166: Quitar El Papel

    Quickstart-sp.book Seite 26 Freitag, 16. Oktober 2009 1:33 13 Manejo del papel Guía de instalación Quitar el papel Nunca quite el papel de la impresora con fuerza. En caso contrario, puede causar STOP daño en los componentes mecánicos. Asegúrese de que la impresora esté en modo Offline. Si fuese necesario, presione Pause Tractor1 el pulsador Online.
  • Seite 167: Ajustes

    Quickstart-sp.book Seite 27 Freitag, 16. Oktober 2009 1:33 13 Guía de instalación Ajustes Ajustes En este capítulo se describe cómo se ajustan la posición de corte, la primera línea de impresión, la distancia de cabeza grabadora, como también la fuente y la den- sidad de caracteres.
  • Seite 168: Ajustar La Primera Línea De Impresión (Tof)

    Quickstart-sp.book Seite 28 Freitag, 16. Oktober 2009 1:33 13 Ajustes Guía de instalación Ajustar la primera línea de Con la función TOF se puede ajustar la posición de la primera línea de impresión impresión (TOF) separadamente para cada origen de papel y para cada menú. Antes de iniciar la función TOF –...
  • Seite 169 Quickstart-sp.book Seite 29 Freitag, 16. Oktober 2009 1:33 13 Guía de instalación Ajustes Confirme la entrada presionando el pulsador Set (1). FormAdj= 17/72"* Presione el pulsador Setup. La impresora vuelve al estado inicial. Online < > Salir Setup La selección realizada permanece también después de desconectar la impresora. Para más detalles véase la guía del usuario en el disco CD-ROM.
  • Seite 170: Ajustar La Distancia De Cabeza Grabadora

    Quickstart-sp.book Seite 30 Freitag, 16. Oktober 2009 1:33 13 Ajustes Guía de instalación Ajustar la distancia de La impresora está provista de una función de ajuste automático de la distancia de cabeza grabadora cabeza grabadora al espesor del papel utilizado. En el modo Setup se puede intro- ducir un valor de correción para la distancia de cabeza determinada automática- mente.
  • Seite 171: Seleccionar Densidad Y Fuente

    Quickstart-sp.book Seite 31 Freitag, 16. Oktober 2009 1:33 13 Guía de instalación Ajustes Seleccionar densidad y Con el pulsador CPP (Caracteres Por Pulgada) se puede ajustar en el modo Setup fuente el número de caracteres por pulgada para la impresión. Con el pulsador Font se puede seleccionar la fuente.
  • Seite 172: Página Del Estado

    Quickstart-sp.book Seite 32 Freitag, 16. Oktober 2009 1:33 13 Página del estado Guía de instalación Página del estado La página del estado contiene todos los ajustes seleccionados del menú, el software de control instalado y los generadores de caracteres. Asegúrese de que el papel en blanco esté insertado en la fuente de papel válida (va- Status Print lor básico: Tractor 1).
  • Seite 173: Datos Técnicos

    Quickstart-sp.book Seite 33 Freitag, 16. Oktober 2009 1:33 13 Guía de instalación Datos técnicos Datos técnicos Especificaciones de la Tipo LA650+ LA800+ impresora En serie con cabeza de impresión de 24 agujas Tecnología de impresión 136 caracteres en modo 10 cpp Anchura de impresión Velocidad de impresión (modo bidireccional, 10 cpp)
  • Seite 174: Especificaciones Del Papel

    Quickstart-sp.book Seite 34 Freitag, 16. Oktober 2009 1:33 13 Datos técnicos Guía de instalación Especificaciones del papel Papel continuo tractor1 Papel simple Peso de papel 60–120 g/m Copias múltiples Número de copias 1 + 6 (LA650+) (requieren pruebas individuales) 1 + 5 (LA800+) Espesor de formulario 0,60 mm (máx.)
  • Seite 175 U3-4-multi.fm Seite 1 Donnerstag, 16. März 2006 12:50 12 “All rights reserved. Translations, reprinting or copying by any means of this manual complete or in part or in any different form requires our explicit approval. We reserve the right to make changes to this manual without notice. All care has been taken to ensure accuracy of information contained in this manual. However, we cannot accept responsibility for any errors or damages resulting from errors or inaccuracies of information herein.”...
  • Seite 176 Fax: +7 (495) 984 56 42 www.dascom.com www.dascom.com www.dascom.com SINGAPORE DASCOM AP Pte Ltd 63 Hillview Avenue #08-22, Lam Soon Industrial Building Singapore 669569 Phone: +65 6760 8833 Fax: +65 6760 1066 www.dascom.com © Oktober 2009 DASCOM Europe GmbH 063192b...

Inhaltsverzeichnis