Werbung
Verfügbare Sprachen
Verfügbare Sprachen
Quicklinks
Werbung

Verwandte Anleitungen für Ossur CHEETAH JUNIOR


Inhaltszusammenfassung für Ossur CHEETAH JUNIOR
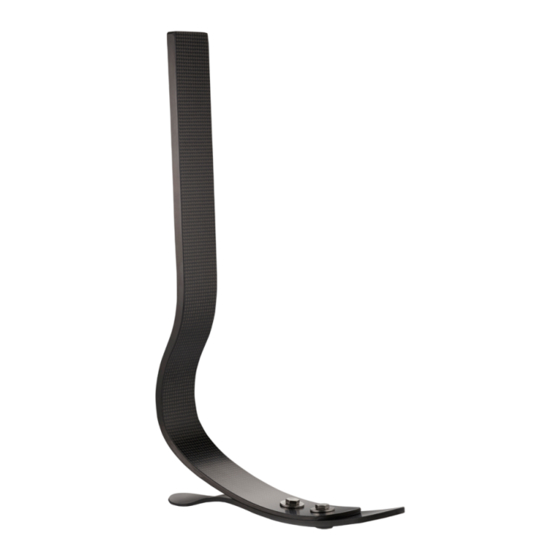
- Seite 1 Instructions for Use CHEETAH JUNIOR & ® CHEETAH XPLORE JUNIOR ®...
- Seite 2 EN | INSTRUCTIONS FOR USE DE | GEBRAUCHSANWEISUNG NOTICE D’UTILISATION INSTRUCCIONES PARA EL USO ISTRUZIONI PER L’USO DA | BRUGSANVISNING BRUKSANVISNING NL | GEBRUIKSAANWIJZING INSTRUÇÕES DE UTILIZAÇÃO INSTRUKCJA UŻYTKOWANIA 取扱説明書...
- Seite 3 Cheetah Xplore Junior Cheetah Junior ⁄ ⁄ ⁄ ⁄ ⁄...
- Seite 4 Category Bolt Size Torque 5/16“ 28 Nm (21 ft-lbs) The Cheetah Xplore Junior and Cheetah Junior may also be connected by direct lamination. FRICTION PADS Always use friction pads between foot module and socket. BENCH ALIGNMENT Sagittal plane (Figure 2) Cheetah Junior &...
- Seite 5 Note: The recommendations for bench alignment are used as a starting point. CATEGORY SELECTION CHART Please refer to the selection charts below to determine the appropriate stiffness required according to Össur recommendations. Cheetah Junior WEIGHT KG 15-24 25-34 35-45 46-55...
- Seite 6 LIABILITY The manufacturer recommends using the device only under the specified conditions and for the intended purposes. The device must be maintained according to the instructions for use. The manufacturer is not liable for damage caused by component combinations that were not authorized by the manufacturer.
- Seite 7 Spezialkleber (z. B. Loctite 410) um die Bolzen zu fixieren und stellen Sie das Drehmoment auf 14 Nm ein. • Halten Sie sich an die untenstehende Ausrichtung für Cheetah Junior (Abbildung 2). Anmerkung: Wenn der Fuß ohne Schuhe genutzt werden soll, muss für den Schutz des Fußmodells ein geeignetes Solen-Material auf der...
-
Seite 8: Statische Ausrichtung
STATISCHE AUSRICHTUNG Sagittalebene (Abbildung 2) Cheetah Junior & Cheetah Xplore Junior: • Bestimmen Sie die vertikale Schaftposition in der Aufbauspannvorrichtung. Cheetah Junior: • Die Lastlinie teilt den Schaft und verläuft durch die Bodenkontaktstelle. • Klemmen Sie den Fuß in einer Flexionsposition von 5–7° fest. - Seite 9 SOHLENBEFESTIGUNG • Um eine engere Paßform der Sohle zu erhalten oder das Geräusch zu verringern, den Einsatz an der Unterfläche des Fußmoduls mit Loctite 495 ankleben, nachdem Sie vor dem Auftragen des Klebers die Klebeflächen gereinigt haben, und dann die Klebeflächen 10 Minuten zusammenpressen bis der Kleber ausgehärtet ist.
- Seite 10 Taille du boulon Couple 5/16“ 28 Nm Le Cheetah Xplore Junior et le Cheetah Junior peuvent aussi être connectés par stratification directe. COUSSINETS DE FRICTION Veillez à toujours utiliser des coussinets de friction entre le module de pied et l’emboîture.
- Seite 11 Cheetah Junior & Cheetah Xplore Junior: • Déterminez la position de l’emboîture verticale par rapport au gabarit d’alignement. Cheetah Junior: • La ligne de charge coupe l’emboîture et passe à travers le point de contact avec le sol. • Fixez le pied selon une position de flexion de 5–7°.
- Seite 12 FIXATION DE LA SEMELLE • Pour une pose de semelle plus adaptée ou pour réduire l’impact sonore sur la surface inférieure du module de pied lors de l’utilisation du Loctite 495, nettoyez les surfaces d’adhésion avant d’appliquer l’adhésif et exercez une pression continue pendant 10 minutes. •...
- Seite 13 Aplique Loctite 410 en todas las roscas y apriete los tornillos con un torque según las siguiente especificaciones: 14 Nm • Siga la alineación del Cheetah Junior que aparece a continuación (Figura 2). Nota: Si se va a utilizar el pie sin calzado, es necesario adherir un material apropiado en la planta del Cheetah Xplore Junior para proteger el módulo del pie.
- Seite 14 ALINEACIÓN ESTÁTICA Plano sagital (Figura 2) Cheetah Junior & Cheetah Xplore Junior: • Determine la posición del encaje vertical en la horma de alineación. Cheetah Junior: • La línea de carga biseca el encaje y cae a través del punto de contacto con el suelo.
- Seite 15 SUJECIÓN DE LA SUELA • Para un mejor ajuste de la suela o para reducir el ruidoen la superficie inferior del módulo del pie con Locite 495, limpie la superficie de unión antes de aplicar el adhesivo y apriete durante 10 minutos. •...
- Seite 16 Categoria Misura dei bulloni Coppia 5/16“ 28 Nm Cheetah Xplore Junior e Cheetah Junior possono anche essere connessi per laminazione diretta. IMBOTTITURE DI ATTRITO Utilizzare sempre imbottiture di attrito fra il modulo per il piede e l'alloggiamento. ALLINEAMENTO STATICO...
- Seite 17 Cheetah Junior & Cheetah Xplore Junior: • Determinare la posizione verticale dell'alloggiamento nello strumento di allineamento. Cheetah Junior: • La linea di caricamento biseca l'alloggiamento e cade attraverso il punto di contatto di terra. • Clampare il piede in una posizione di flessione a 5–7°.
- Seite 18 FISSAGGIO DELLA SUOLA • Per stringere la suola o per ridurre l’inserto sulla superficie inferiore del modulo del piede con Loctite 495, pulire le superfici di incollaggio prima di applicare l’adesivo e tenere premuto per 10 minuti. • Far scivolare la suola Nike sul piede e accertarsi che tutti i fermagli vadano a collocarsi sopra il piede.
- Seite 19 Påfør Loctite 410 på alle tråde og spænd efter følgende specifikationer: Kategori Møtrikstørrelse Tilspændingsmoment 5/16“ 28 Nm Cheetah Xplore Junior og Cheetah Junior kan også forbindes ved hjælp af direkte laminering. FRIKTIONSPUDER Anvend altid friktionspuder mellem fodmodulet og hylstret. BÆNKOPSTILLING Sagitalplan (Figur 2) Cheetah Junior &...
- Seite 20 • Bestem passende intern eller ekstern hylsterrotation. Bemærk: De anbefalede bænkopstillinger anvendes som udgangspunkt. DIAGRAM FOR VALG AF KATEGORI Der henvises til diagrammerne nedenfor for at afgøre den passende stivhed, der er påkrævet i henhold til Össurs anbefalinger. Cheetah Junior VÆGT I KG 15-24 25-34 35-45 46-55 Højt til ekstremt højt...
- Seite 21 ANSVARSFRASKRIVELSE Producenten anbefaler kun at bruge enheden under de angivne forhold og til de påtænkte formål. Enheden skal vedligeholdes i henhold til brugsanvisningen. Producenten er ikke ansvarlig for skader forårsaget af komponentkombinationer, som ikke er godkendt af producenten. OVERENSSTEMMELSE Denne komponent er testet i henhold til ISO 10328-standarden til at kunne modstå...
- Seite 22 Loctite 410 på samtliga gängor och dra åt enligt följande specifikationer: Kategori Bultdim. Vridmom 5/16“ 28 Nm Cheetah Xplore Junior och Cheetah Junior kan också fästas genom direktlaminering. FRIKTIONSKUDDAR Använd alltid friktionskuddar mellan fotmodulen och hylsan. BÄNKJUSTERING Sagitalplan (Bild 2) Cheetah Junior &...
- Seite 23 • Fastställ lämplig inre eller yttre rotation av hylsan. obs: Rekommendationerna för bänkinriktning ska användas som utgångspunkt. KATERGORITABELL Se tabellen nedan för att avgöra korrekt styvhet enligt Össurs rekommendationer. Cheetah Junior VIKT KG 15-24 25-34 35-45 46-55 Hög till väldigt hög aktivitetsnivå...
- Seite 24 underhållas enligt rekommendationerna i bruksanvisningen. Tillverkaren ansvarar inte för skador som orsakats av användning av komponenter som inte godkänts av tillverkaren. EFTERLEVNAD Denna komponent har testats enligt standarden ISO 10328 med två miljoner lastcykler. Beroende på patientens aktivitetsnivå motsvarar detta en användning i två...
- Seite 25 Breng Loctite 410 aan op alle schroefdraden en draai aan volgens specificaties: 14 Nm. • Volg de uitlijning zoals hieronder aangegeven voor de Cheetah Junior (Af beelding 2). Opmerking: Als de voet zonder schoenen zal worden gebruikt, moet gepast zoolmateriaal aangebracht worden aan de zool van de Cheetah Xplore Junior voor bescherming van de voetmodule.
- Seite 26 Cheetah Junior & Cheetah Xplore Junior: • Bepaal verticale kokerpositie in uitlijningsmal. Cheetah Junior: • Lastlijn snijdt koker en valt door het grondcontactpunt. • Klem voet in een 5–7° flexiepositie. Cheetah Xplore Junior: • Uitlijnen met de gewenste hielhoogte. • Breng de koker in de gewenste flexie/extensie en abductie en adductie •...
- Seite 27 • Schuif de Nike zool op de voet en zorg ervoor dat alle clips over de voet gaan. • Trek de rubberband van de zool over het medaillon en schuif het eronder. Begin tijdens het losmaken van de zool met de band van het medaillon te trekken en schuif de zool dan van de voet.
- Seite 28 Tamanho de parafuso Força de aperto 5/16“ 28 Nm O Cheetah Xplore Junior e o Cheetah Junior também podem ser conectados através de laminação directa. ALMOFADAS DE ATRITO Utilize sempre almofadas de atrito entre o módulo de pé e o encaixe.
- Seite 29 Cheetah Junior & Cheetah Xplore Junior: • Assegure-se de que o encaixe está verticalmente posicionado no dispositivo de alinhamento. Cheetah Junior: • A linha de carga deve atravessar o encaixe e passar pelo ponto de contacto com o solo. • Mantenha o pé numa posição de flexão de 5–7°.
- Seite 30 limpe as superfícies a colar antes de aplicar o adesivo, mantenha sobre pressão durante 10 minutos. • Coloque a sola Nike no pé e assegure-se de que todos os clipes ficam por cima do pé. • Puxe a correia de borracha da sola sobre o medalhão e passe-a por debaixo.
- Seite 31 Na wszystkie gwinty nałożyć środek Loctite 410 i dokręcić momentem zgodnie z poniższą specyfikacją: 14 Nm • Ustawić moduł Cheetah Junior zgodnie z poniższym (Rysunek 2). Uwaga: jeśli stopa protezowa ma być użytkowana bez butów, do płytki podeszwowej modułu Cheetah Xplore Junior należy zamocować...
- Seite 32 USTAWIENIE WARSZTATOWE Płaszczyzna strzałkowa (Rysunek 2) Cheetah Junior i Cheetah Xplore Junior: • Określić położenie leja protezowego w pionie w szablonie do ustalania położenia. Cheetah Junior: • Linia obciążenia przechodzi przez lej i punkt styku z podłożem. • Stopę protezową zamocować zaciskami w położeniu zgięcia 5–7°.
- Seite 33 MOCOWANIE PODESZWY • Aby lepiej dopasować i wyciszyć podeszwę, wkleić wkładkę na dolnej powierzchni modułu stopy klejem Loctite 495. Przed nałożeniem kleju wyczyścić powierzchnie klejone. Dociskać w celu utwardzenia przez 10 minut. • Wsunąć podeszwę Nike na stopę i upewnić się, że wszystkie zaciski znajdują...
- Seite 34 ラミネーションコネクター ( 図 1 ) CHX 50001 • ラミネーションコネクターはソケット後壁に直接ラミネーションされま す。 • 差高調整が容易になるように、ラミネーションコネクターをソケットの 中央 1/3 の場所にくるように固定することをお勧めします。 • ラミネーションコネクター上のソケット表面が平らになっており、接続 されているときにフットモジュールに負荷が適切に分配されていること を確認します。 ボルトはブレードを貫通してソケットのラミネーションコネクタに留まりま す。Loctite 410 をすべてのネジ山に塗布し、次の仕様に従って締め付けます。 カテゴリー ボルトサイズ 踵のボルトのトルク値 5/16“ 28 Nm Cheetah Xplore JuniorおよびCheetah Junior は直接ラミネーションにより接 続することもできます。 摩擦パッド フットモジュールとソケットの間に、常に摩擦パッドを使用してください。 ベンチアライメント 矢状面 ( 図 2 ) Cheetah Junior および Cheetah Xplore Junior:...
- Seite 35 • 適切なソケット角度 ( 屈曲 / 伸展、外転 / 内転 ) を設定します。 • 荷重線が後方 1/3 と中央部 1/3 の接点を通るようにします ( 図 2)。 冠状面 • ジグを使用して適切なソケットの内 / 外転を設定します。 • 適切なソケットの内 / 外旋を決定します。 注: 推奨ベンチアライメントはスタート地点として使用してください。 カテゴリ選択表 この選択表を参考に、Össur の推奨に従って必要とされる適切な硬さを決定し てください。 Cheetah Junior 15-24 25-34 35-45 46-55 重量キログラム 高度からきわめて高い衝撃度 Cheetah Xplore Junior 15-24...
- Seite 36 法的責任 メーカーは、本製品を特定条件及び意図した目的においてのみ使用すること を推奨します。 本製品は必ず使用説明書に従って保守点検を行ってください。 メーカーは、メーカーが承認していない部品を組み合わせたことによって生 じた損害に一切責任を負いません。 適合性 この製品は ISO 10328 規格に従って負荷サイクル 200 万回まで試験されていま す。 切断者の活動に応じて 2 年から 3 年の使用年数に対応します。 毎年定期 的な安全点検を実施することを推奨します。 上記規格では、テストレベル(P)がある - “P” - “m”kg *) 最大体重(m in kg)に割り当てられていま す。マークがついているものによっては、 *) 体重制限を超過しないでください。 その製品に関連した最大体重に割り当てら 特定の使用条件及び使用制限については、 使用目的に関する指示をご参照ください。 れてるテストレベルがありません。これら の場合、試験負荷は指定された負荷レベル に基づいて適切に適応されています。 ISO10328 カテゴリー 重量 (kg) ラベルテキス ト ISO 10328 - ISO 10328 - ISO 10328 -...
- Seite 37 EN – Caution: Össur products and components are designed and tested according to the applicable official standards or an in-house defined standard when no official standard applies. Compatibility and compliance with these standard is achieved only when Össur products are used with other recommended Össur components.
- Seite 38 Össur Americas Össur Iberia S.L.U 27051 Towne Centre Drive Calle Caléndula, 93 - Foothill Ranch, CA 92610, USA Miniparc III Tel: +1 (949) 382 3883 Edificio E, Despacho M18 Tel: +1 800 233 6263 28109 El Soto de la Moraleja, ossurusa@ossur.com Alcobendas Madrid –...