Herunterladen Inhalt Inhalt Diese Seite drucken
LD Systems LDDSP44K Bedienungsanleitung

LD Systems LDDSP44K Bedienungsanleitung

Online control system
Vorschau ausblenden Andere Handbücher für LDDSP44K:
Inhaltsverzeichnis

Werbung

Verfügbare Sprachen
  • DE

Verfügbare Sprachen

  • DEUTSCH, seite 26
USER´S MANUAL
BEDIENUNGSANLEITUNG
MANUEL D´UTILISATION
MANUAL DE USUARIO
INSTRUKCJA OBSŁUGI
MANUALE D´USO
ONLINE CONTROL SYSTEM
LDDSP44K
LDDSP45K

Werbung

Inhaltsverzeichnis
loading

Inhaltszusammenfassung für LD Systems LDDSP44K

  • Seite 1 USER´S MANUAL BEDIENUNGSANLEITUNG MANUEL D´UTILISATION MANUAL DE USUARIO INSTRUKCJA OBSŁUGI MANUALE D´USO ONLINE CONTROL SYSTEM LDDSP44K LDDSP45K...
  • Seite 2: Inhaltsverzeichnis

    CONTENTS / INHALTSVERZEICHNIS / CONTENU / CONTENIDO / TREŚĆ / CONTENUTO ENGLISH FRANÇAIS 1. INTRODUCTION 1. INTRODUCTION 2. SOFTWARE INSTALLATION 2. INSTALLATION DU LOGICIEL 3. CREATING CONNECTION VIA USB 3. CONNEXION PAR USB 4. CREATING CONNECTION VIA ETHERNET 4. CONNEXION PAR ETHERNET 5.
  • Seite 3 POLSKI ITALIANO 1. WPROWADZENIE 1. INTRODUZIONE 2. INSTALACJA OPROGRAMOWANIA 2. INSTALLAZIONE DEL SOFTWARE 3. USTANAWIANIE POŁĄCZENIA PRZEZ USB 3. CREAZIONE DEL COLLEGAMENTO TRAMITE USB 4. USTANAWIANIE POŁĄCZENIA PRZEZ ETHERNET 4. CREAZIONE DEL COLLEGAMENTO TRAMITE 5. PREFERENCJE ETHERNET 6. OKNO PRZEGLĄDU 5.
  • Seite 4: Legal Disclaimer

    LEGAL DISCLAIMER In the event of misuse, improper use, or negligent handling of the software, the developer (Adam Hall GmbH) shall not be liable for any damage to devices of any kind or to any software; this includes personal injury. 1.
  • Seite 5: Creating Connection Via Ethernet

    4. CREATING CONNECTION VIA ETHERNET Connect the Ethernet port on the LD DSP44K or DSP45K power amp using a suitable Ethernet cable with the Ethernet port on your PC, and switch on the power amp. If you would like to connect and manage 2 or more LD DSP44K or DSP45K power amps with your PC, please use an Ethernet switch and set a unique IP address for each power amp (e.g.
  • Seite 6: Preferences

    Close the Ethernet Config window and then click on the magnifying glass symbol with a plus sign (Fig. 3.1) under Devices. The connected power amp will now be displayed under Amplifiers with the model number, name, and serial number of the amplifier (Fig 3.2). Now double click on the power amp model to synchronize the entire library stored to the power amp with the software (Fig 3.3.).
  • Seite 7: Overview Window

    6.22 LD SYSTEMS - Click this button to access the software information window (About application) and the switch-off button (Exit). New Library - Creates a new preset library. The currently loaded amp and customer speaker presets will be removed from the preset lists.
  • Seite 8 6.21 Devices - Lists the connected and added devices. Information on the selected device (model, serial numbers, name, IP address, and firmware version). 6.22 6.23 AMP PRESET LOAD - Select an amp preset from the amp preset library using the arrow icons and load it by clicking on LOAD (preset name in the window to the right next to the arrow icons).
  • Seite 9: Managing Power Amplifiers

    7. MANAGING POWER AMPLIFIERS 7.11 7.10 7.12 7.13 7.14 The LD OCS software provides the opportunity to manage multiple LD DSP44K and DSP45K power amps. Click with the right mouse button on the desired amplifier to access the editing menu for power amps. Ethernet Config - In the Ethernet Config editing window, you can view network information, change the IP address of the power amp, enable DHCP if supported by the network, reset the power amp Ethernet module, assign a name to the power amp, and, with multiple connected power amps, identify a specific one (not possible with USB connection).
  • Seite 10: Ld Speaker Preset Library

    PC in a folder of your choice, and unzip it as needed. Start the OCS software and establish a connection with the power amp (USB / Ethernet). Now click on LIBRARY in the overview window, then on LD Speaker Preset and open the previously downloaded LD Systems speaker library by clicking on “Open LD Speaker Library from disk”, select the file on your PC, and click Open.
  • Seite 11 2-way - The channels CH A and CH B or CH C and CH D are configured as a 2-way system, the channels CH A to CH D can be configured individually. In a 2-way system, the signals are controlled via the same signal source. In the CHANNEL EDIT window, only channel CH 1 or CH 3 can be edited.
  • Seite 12: X-Iir Filter (Infinite Impulse Response)

    SPEAKER PRESET LOAD - Select an amp preset from the speaker preset library using the arrow icons and load it by clicking on LOAD (preset name in the window to the right next to the arrow icons). SEND - Send a speaker preset to the power amp’s storage device and load it. - Resets the settings of the speaker preset.
  • Seite 13: X-Fir Filter (Finite Impulse Response)

    X-FIR FILTER (FINITE IMPULSE RESPONSE) 9.10 9.11 WINDOW TYPE - Collapsible menu to select the window type (custom = import a coefficient list) FILTER - Selection window for bypass and filter types low pass, high pass or bandpass. 9.10 9.11 FREQUENCY - Lower or upper crossover frequency (lower and upper crossover frequency for bandpass).
  • Seite 14: Parametric Speaker Equalizer

    PARAMETRIC SPEAKER EQUALIZER 9.36 9.31 9.22 9.25 9.28 9.37 9.32 9.33 9.29 9.34 9.35 9.23 9.26 9.22 9.25 9.28 9.24 9.27 9.30 FREQUENCY - Click on the arrow icon to increase or decrease the chosen EQ band in 1 Hz intervals. 9.22 9.23 Virtual Fader - Click and hold the Virtual Fader button and move it upwards to increase the frequency and downwards to decrease it.
  • Seite 15: Speaker Dynamic Control

    SPEAKER DYNAMIC CONTROL 9.63 9.66 9.61 9.47 9.55 9.62 9.38 9.58 9.41 9.44 9.52 9.56 9.39 9.53 9.57 9.48 9.49 9.50 9.45 9.59 9.64 9.65 9.51 9.42 9.52 9.58 9.41 9.44 9.38 9.40 9.54 9.60 9.46 9.43 SPEAKER RMS DYNAMIC CONTROL 9.38 LIMIT - Click on the arrow icon to adjust the limiter to the RMS capacity of the speaker.
  • Seite 16 9.60 Display / Input Field - Displays the value and allows direct input via keyboard. Bypass - Check box to deactivate PEAK DYNAMIC CONTROL. 9.61 9.62 Graphic depiction of both dynamic control units (gray area = RMS DYNAMIC CONTROL, white line = PEAK DYNAMIC). OUT SELECT - Select the desired channel for editing by clicking on the channel button.
  • Seite 17: Frequency Response

    FREQUENCY RESPONSE (SIGNED IN AS ADMINISTRATOR) 9.86 9.87 9.91 9.88 9.89 9.82 9.85 9.84 9.83 9.84 9.85 9.90 9.82 Frequency Response - Graphic depiction of the frequency response. (Zooming in horizontally: Mark the desired area by dragging the mouse cursor to the right. Zooming out horizontally: Mark the area by dragging the mouse cursor to the left. Push vertically with Ctrl and left mouse button) 9.83 GAIN and FREQUENCY grip point - Click and hold this grip point to change the frequency and gain of the chosen...
  • Seite 18: Speaker Data

    SPEAKER DATA 9.92 9.93 9.94 Editing window to import speaker measurement data from various measurement systems. Importing the measurement data. 9.92 9.93 Clear - Deletes the measurement data. 9.94 Adjust Ref. Level - Level adjustment via the arrow icons. ADMINISTERING CUSTOM SPEAKER PRESETS In the overview window, click on LIBRARY and then on Custom Speaker Preset.
  • Seite 19: Creating And Administering Amp Presets

    9.95 List of custom speaker presets (1 - 80). Reset Preset - Removes a preset from the list. Click on the desired preset with the right mouse button, then click on 9.96 Reset Preset and confirm with Yes. Open from Disk - Loads a preset from the PC to the list. Click on a free preset (empty) with the right mouse button, then click on 9.97 Open from disk, and select the desired preset from your PC’s hard drive and click on Open.
  • Seite 20: Parametric Input Equalizer

    10.1 CHANNEL 1 to 4 - As soon as you click on the editing field of the desired channel, the border color will change to blue. - Click on the arrow icon (up arrow) to increase or decrease (down arrow) the gain by 0.1 dB. 10.2 10.3 Virtual Fader - Click and hold the Virtual Fader button and move it upwards to increase the gain or downwards to decrease it.
  • Seite 21: Frequency Response

    GAIN 10.20 - Click on the arrow icon to increase or decrease the gain of the chosen EQ band in 0.1 dB intervals. Virtual Fader - Click and hold the Virtual Fader button and move it upwards or downwards to set the gain 10.21 as desired.
  • Seite 22: Administering Amp Presets

    ADMINISTERING AMP PRESETS In the overview window, click on LIBRARY and then on Amp Preset. You can now import the amp presets (see 6.23) previously saved to the PC into the presets list (Open from disk), construct a custom library, and save all of this to a file on your PC and send it to the power amp. 10.44 10.37 10.38...
  • Seite 23: Control Groups

    11. CONTROL GROUPS The control groups make it possible to freely group and simultaneously manage the input gain and input delay of the desired channels for the power amps connected to the computer via Ethernet. The control of the input gain and the input delay in these groups is relative to the settings in the input channels of the corresponding power amplifiers, meaning the gain and delay of the control group and input channel are added together and the result is displayed as a total value (Total).
  • Seite 24 11.1 11.2 11.9 11.10 11.6 11.5 11.7...
  • Seite 25: Firmware Update

    12. FIRMWARE UPDATE A firmware update keeps the device software up-to-date and improves software performance. When you install the latest LD OCS software onto your PC and connect an LD DSP44K or DSP45K power amp with your computer, the OCS software will automatically indicate when newer device firmware is available than that currently installed for the power amp (Fig.
  • Seite 26: Haftungsausschluss

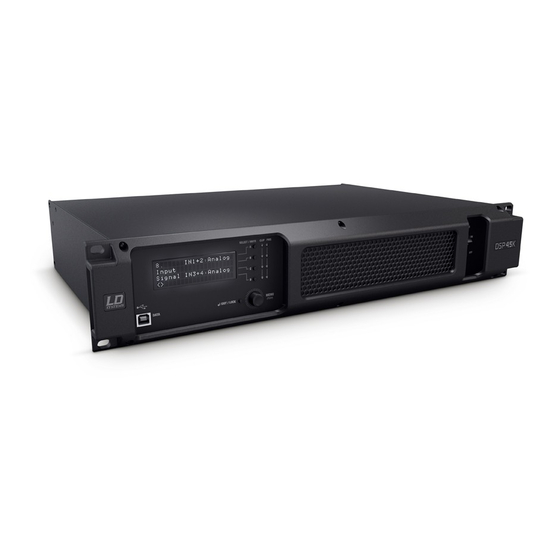
    HAFTUNGSAUSSCHLUSS Bei Fehlbedienung, unsachgemäßem Gebrauch oder nachlässiger Behandlung der Software trägt der Hersteller (Adam Hall GmbH) keine Haftung für eventuelle Schäden an Geräten aller Art oder an jedweder Software, Personenschäden eingeschlossen. 1. EINFÜHRUNG Die LD OCS-Software (Online Control System) dient dazu, LD DSP44K und DSP45K DSP-Endstufen zu konfigurieren, aktuelle LD Speaker-Presets zu laden und individuelle Custom Speaker- und Amp-Presets auf jeweils 80 Speicherplätzen zu erstellen und zu verwalten.
  • Seite 27: Verbindung Via Ethernet Herstellen

    4. VERBINDUNG VIA ETHERNET HERSTELLEN Verbinden Sie die Ethernet-Schnittstelle der LD DSP44K bzw. DSP45K Endstufe mit Hilfe eines geeigneten Ethernet-Kabels direkt mit der Ethernet-Schnittstelle Ihres Rechners und schalten die Endstufe ein. Möchten Sie 2 oder mehr LD DSP44K bzw. DSP45K Endstufen direkt mit einem PC verbinden und verwalten, verwenden Sie bitte einen Ethernet Switch und setzen für jede Endstufe eine eigene IP-Adresse (z.B.
  • Seite 28: Preferences

    Schließen Sie das Ethernet Config Fenster und klicken nun unter Devices auf das Lupen-Symbol mit dem Plus-Zeichen (Abb. 3.1). Die angeschlossene Endstufe wird nun mit Modellnummer, Namen und Seriennummer unter Amplifiers angezeigt (Abb. 3.2). Synchronisieren Sie nun mit einem Doppelklick auf das Endstufenmodell die gesamte Bibliothek im Datenspeicher der Endstufe mit der Software (Abb. 3.3). Der Synchronisierungsvorgang nimmt einige Sekunden in Anspruch.
  • Seite 29: Übersichtsfenster

    6.21 6.30 6.22 LD SYSTEMS - Schaltfläche klicken, um zum Software-Informationsfenster (About application) und zur Ausschalt-Schaltfläche (Exit) zu gelangen. New Library - Neue Preset Bibliothek anlegen. Die aktuell geladenen Amp und Custom Speaker Presets werden dabei aus den Listen der Presets entfernt.
  • Seite 30 6.21 Devices - Auflistung der angeschlossenen und hinzugefügten Geräte. Informationen zum ausgewählten Gerät (Modell, Seriennummer, Name, IP-Adresse und Firmware-Version). 6.22 6.23 AMP PRESET LOAD - Wählen Sie ein Amp Preset aus der Amp Preset Bibliothek mit Hilfe der Pfeilsymbole aus und laden es durch Klicken auf LOAD (Preset-Name im Fenster rechts neben den Pfeilsymbolen).
  • Seite 31: Endstufen Verwalten

    7. ENDSTUFEN VERWALTEN 7.11 7.10 7.12 7.13 7.14 Die LD OCS-Software bietet die Möglichkeit, mehrere LD DSP44K und DSP45K Endstufen zu verwalten. Mit einem Klick mit der rechten Maustaste auf die gewünschte Endstufe gelangen Sie in das Bearbeitungsmenü der Endstufen. Ethernet Config - Im Ethernet Config Bearbeitungsfenster können Sie Netzwerkinformationen erhalten, die IP-Adresse der Endstufe ändern, DHCP aktivieren, falls vom Netzwerk unterstützt, das Ethernet Modul der Endstufe zurücksetzen, der Endstufe einen Namen geben und bei mehreren angeschlossenen Endstufen, eine davon gezielt identifizieren (nicht bei USB-Verbindung).
  • Seite 32: Ld Speaker Preset Library

    OCS-Software und stellen eine Verbindung mit der Endstufe her (USB / Ethernet). Klicken Sie nun im Übersichtsfenster auf „LIBRARY“, dann auf „LD Speaker Preset“ und öffnen nun die zuvor heruntergeladene LD Systems Lautsprecher-Bibliothek, indem Sie auf „Open LD Speaker Library from disk“ klicken, die Datei auf dem PC auswählen und auf „Öffnen“ klicken. Die Lautsprecher-Presets werden nun mit Namen in der Liste der Lautsprecher-Presets angezeigt.
  • Seite 33 2-Ways - Die Kanäle CH A und CH B bzw. CH C und CH D werden als 2-Wege System konfiguriert, die Kanäle CH A bis CH D können individuell eingestellt werden und die Signal-Ansteuerung für ein 2-Wege System erfolgt über die gleiche Signal-Quelle. Im Fenster CHANNEL EDIT steht für die Bearbeitung nur Kanal CH 1 bzw.
  • Seite 34: X-Iir Filter (Infinite Impulse Response)

    SPEAKER PRESET LOAD - Wählen Sie ein Amp Preset aus der Speaker Preset Bibliothek mit Hilfe der Pfeilsymbole aus und laden es durch Klicken auf LOAD (Preset-Name im Fenster rechts neben den Pfeilsymbolen). SEND - Übertragen Sie ein Speaker Preset in den Datenspeicher der Endstufe und laden es. - Zurücksetzen der Einstellungen im Speaker Preset.
  • Seite 35: X-Fir Filter (Finite Impulse Response)

    X-FIR FILTER (FINITE IMPULSE RESPONSE) 9.10 9.11 WINDOW TYPE - Aufklappmenü für die Auswahl des Fenstertyps (Custom = Import einer Koeffizientenliste) FILTER - Auswahlfelder für Bypass und die Filtertypen Low Pass, High Pass oder Bandpass. 9.10 9.11 FREQUENCY - Untere bzw. obere Trennfrequenz (bei Bandpass untere und obere Trennfrequenz). Eingabefeld(er) für die Eingabe per Tastatur. OUTPUT GAIN OUTPUT DELAY 9.14...
  • Seite 36: Parametrischer Speaker Equalizer

    PARAMETRISCHER SPEAKER EQUALIZER 9.36 9.31 9.22 9.25 9.28 9.37 9.32 9.33 9.29 9.34 9.35 9.23 9.26 9.22 9.25 9.28 9.24 9.27 9.30 FREQUENCY - Klicken Sie auf die Pfeilsymbole, um die Frequenz des ausgewählten EQ-Bands in 1 Hz Schritten anzuheben bzw. abzusenken. 9.22 9.23 Virtueller Fader - Klicken und halten Sie den virtuellen Faderknopf und ziehen ihn nach oben, um die Frequenz anzuheben und nach...
  • Seite 37: Speaker Dynamic Control

    SPEAKER DYNAMIC CONTROL 9.63 9.66 9.61 9.47 9.55 9.62 9.38 9.58 9.41 9.44 9.52 9.56 9.39 9.53 9.57 9.48 9.49 9.50 9.45 9.59 9.64 9.65 9.51 9.42 9.52 9.58 9.41 9.44 9.38 9.40 9.54 9.60 9.46 9.43 SPEAKER RMS DYNAMIC CONTROL 9.38 LIMIT - Klicken Sie auf die Pfeilsymbole, um den Limiter an die RMS Belastbarkeit des Lautsprechers anzupassen.
  • Seite 38 9.59 Virtueller Fader - Klicken und halten Sie den virtuellen Faderknopf und ziehen ihn nach oben bzw. unten, um die Kennlinie auf Höhe des Schwellwerts (in diesem Fall W PEAK) anzupassen. 9.60 Anzeige- / Eingabefeld - Anzeige des Werts und direkte Eingabe per Tastatur. Bypass - Haken setzen, um PEAK DYNAMIC CONTROL zu deaktivieren.
  • Seite 39: Frequency Response

    9.79 Virtueller Fader - Klicken und halten Sie den virtuellen Faderknopf und ziehen ihn nach oben bzw. unten, um die Kennlinie auf Höhe des Schwellwerts (in diesem Fall W PEAK) anzupassen. 9.80 Anzeige- / Eingabefeld - Anzeige des Werts und direkte Eingabe per Tastatur. Bypass - Haken setzen, um PEAK DYNAMIC CONTROL zu deaktivieren.
  • Seite 40: Custom Speaker Presets Verwalten

    Bearbeitungsfenster zum Importieren von Lautsprecher-Messdaten unterschiedlicher Messsysteme. 9.92 Importieren der Messdaten. Clear - Löschen der Messdaten. 9.93 9.94 Adjust Ref. Level - Pegelanpassung mit Hilfe der Pfeilsymbole. CUSTOM SPEAKER PRESETS VERWALTEN Klicken Sie im Übersichtsfenster auf LIBRARY, dann auf Custom Speaker Preset. Sie können nun die zuvor auf dem PC gesicherten Custom Speaker Presets in die Liste der Presets importieren (Open from disk), so eine eigene Bibliothek zusammenstellen und als Gesamtes in einer Datei auf dem PC sichern und zur Endstufe übertragen.
  • Seite 41: Amp Preset Erstellen Und Verwalten

    10. AMP PRESET ERSTELLEN UND VERWALTEN Ein Amp Preset besteht aus der Auswahl von Speaker Presets aus den Bibliotheken (Library) „Custom Speaker Preset“ und „LD Speaker Preset“ und den Einstelloptionen im Bereich CHANNEL EDIT (Punkt 6.26). Wählen Sie die gewünschten Speaker Presets für die Kanäle CH A bis CH D aus (Punkt 6.28) und passen Gain, Polarität, Stummschaltung, Delay und Equalizer je nach Einsatzzweck und Hörgewohnheiten nach Bedarf in Echtzeit an.
  • Seite 42: Parametrischer Input Equalizer

    PARAMETRISCHER INPUT EQUALIZER 10.24 10.29 10.14 10.17 10.20 10.30 10.25 10.26 10.21 10.15 10.28 10.27 10.18 10.14 10.20 10.17 10.16 10.22 10.19 10.23 FREQUENCY 10.14 - Klicken Sie auf die Pfeilsymbole, um die Frequenz des ausgewählten EQ-Bands in 1 Hz Schritten anzuheben bzw. abzusenken. Virtueller Fader - Klicken und halten Sie den virtuellen Faderknopf und ziehen ihn nach oben, um die Frequenz anzuheben und 10.15 nach unten, um sie abzusenken.
  • Seite 43: Frequency Response

    FREQUENCY RESPONSE (NICHT ALS ADMINISTRATOR ANGEMELDET) 10.36 10.35 10.31 10.33 10.32 10.33 10.34 10.34 10.31 Frequency response - Grafische Darstellung des Frequenzgangs. (Horizontales Reinzoomen: Gewünschten Bereich mit rechter Maustaste nach rechts ziehend markieren. Horizontales Rauszoomen: Mit rechter Maustaste nach links ziehend markieren. Vertikal verschieben mit Strg und linker Maustaste).
  • Seite 44: Control Groups

    10.39 Open from Disk - Preset vom PC in die Liste laden. Klicken Sie mit der rechten Maustaste auf ein freies Preset (Empty), klicken nun auf Open from disk, wählen das gewünschte Preset im Datenspeicher des PCs und klicken auf Öffnen. 10.40 Save to disk - Preset im Datenspeicher des PCs sichern.
  • Seite 45 11.1 11.2 11.9 11.10 11.6 11.5 11.7...
  • Seite 46: Firmware Update

    12. FIRMWARE UPDATE Ein Firmware-Update hält die Geräte-Software auf dem neuesten Stand und verbessert die Software-Performance. Wenn Sie die neueste LD OCS-Software auf Ihrem PC installieren und eine LD DSP44K oder DSP45K Endstufe mit dem Rechner verbinden, wird in der OCS-Software automatisch angezeigt, wenn eine neuere Geräte-Firmware, als die aktuell installierte, für die Endstufe verfügbar ist (Abb.
  • Seite 47: Introduction

    EXCLUSION DE RESPONSABILITÉ En cas de mauvaise utilisation, d'utilisation non conforme, ou de manipulation négligente du logiciel, le fabricant (Adam Hall GmbH) décline toute responsabilité pour les éventuels dommages causés à des appareils et des logiciels, ainsi qu'à des personnes. 1.
  • Seite 48 Remarque : Il se peut que parfois l’ordinateur subisse des conflits entre l’interface Ethernet et l’interface Wi-Fi, qui impliquent que l’interface Ethernet ne soit pas détectée par le logiciel OCS. Dans ce cas, désactivez l’interface Wi-Fi dans l’ordinateur. Fermez la fenêtre Ethernet Config et, dans la partie Devices, cliquez sur la loupe comportant le symbole Plus (fig. 3.1). L'écran affiche alors dans la partie Amplifiers l'amplificateur raccordé...
  • Seite 49: Préférences

    6.30 6.22 LD SYSTEMS - Cliquer sur le bouton pour accéder à la fenêtre d’informations du logiciel (About application) mais aussi au bouton Quitter le programme (Exit). New Library - Créer une nouvelle bibliothèque de presets. Les presets d’enceinte personnalisés et d’ampli actuellement chargés sont...
  • Seite 50 Open Library - Charger une bibliothèque de presets depuis la mémoire du PC. Cliquer, sélectionner une bibliothèque et ouvrir. Save Library - Enregistrer une bibliothèque de presets sur le PC. Cliquer, sélectionner l’emplacement de sauvegarde, attribuer un nom et enregistrer. Save Library as - Enregistrer une bibliothèque de presets sur le PC sous un nouveau nom.
  • Seite 51 6.26 CHANNEL EDIT SOURCE -Configuration de la source du signal pour les canaux 1 à 4. LINK - Avant la modification, vous pouvez relier les canaux dont les paramètres doivent être identiques (cocher les cases). Les paramètres ne doivent ainsi être configurés que pour un canal, puis ils seront automatiquement appliqués aux canaux reliés.
  • Seite 52: Gestion Des Amplificateurs

    7. GESTION DES AMPLIFICATEURS 7.11 7.10 7.12 7.13 7.14 Le logiciel LD OCS permet de gérer plusieurs amplificateurs LD DSP44K et DSP45K. Cliquez avec le bouton droit de la souris sur l'amplifica- teur de votre choix pour accéder au menu de configuration des amplificateurs. Ethernet Config - La fenêtre de configuration Ethernet Config vous permet d'obtenir des informations sur le réseau, de modifier l'adresse IP de l'amplificateur, d'activer le DHCP si compatible avec le réseau, de réinitialiser le module Ethernet de l'amplificateur, de donner un nom à...
  • Seite 53: Bibliothèque De Presets Pour Enceinte Ld

    PC à l'amplificateur (USB / Ethernet). Dans la vue générale, cliquez sur « LIBRARY », puis sur « LD Speaker Preset » et ouvrez la bibliothèque d'enceinte LD Systems en cliquant sur « Open LD Speaker Library from disk » : sélectionnez le fichier sur votre PC et cliquez sur « Ouvrir ».
  • Seite 54 2-Ways - Les canaux CH A et CH B ainsi que CH C et CH D sont configurés comme un système à 2 voies : les canaux CH A à CH D peuvent être personnalisés et le contrôle du signal d’un système à 2 voies se fait par la même source de signal. Dans la fenêtre CHANNEL EDIT, seuls les canaux CH 1 à...
  • Seite 55: Filtre X-Iir (Réponse Impulsionnelle Infinie)

    SPEAKER PRESET LOAD - Cliquer sur la flèche pour sélectionner un preset d'enceinte dans la bibliothèque de presets d'enceinte et le charger en cliquant sur LOAD (nom du preset à droite de la flèche dans la fenêtre). SEND - Transférer un preset d'ampli vers la mémoire de l'amplificateur et le charger. - Réinitialisation des paramètres du preset d'enceinte.
  • Seite 56: Filtre X-Fir (Réponse Impulsionnelle Finie)

    FILTRE X-FIR (RÉPONSE IMPULSIONNELLE FINIE) 9.10 9.11 WINDOW TYPE - Menu déroulant pour le choix du type de fenêtre (Custom = importation d’une liste de coefficients) FILTER - Champ de sélection pour Bypass et types de filtre passe-bas, passe-haut ou passe-bande. 9.10 9.11 FREQUENCY - Fréquence de coupure supérieure ou inférieure (si passe-bande, fréquences de coupure supérieure et inférieure).
  • Seite 57: Égaliseur Paramétrique D'enceinte

    ÉGALISEUR PARAMÉTRIQUE D'ENCEINTE 9.36 9.31 9.22 9.25 9.28 9.37 9.32 9.33 9.29 9.34 9.35 9.23 9.26 9.22 9.25 9.28 9.24 9.27 9.30 FRÉQUENCE - Cliquez sur les flèches pour augmenter ou baisser la fréquence d'une bande d'égaliseur par paliers de 1 Hz. 9.22 9.23 Curseur virtuel - Cliquez et maintenez enfoncé...
  • Seite 58: Contrôle Dynamique D'enceinte

    CONTRÔLE DYNAMIQUE D'ENCEINTE 9.63 9.66 9.61 9.47 9.55 9.62 9.38 9.58 9.41 9.44 9.52 9.56 9.39 9.53 9.57 9.48 9.49 9.50 9.45 9.59 9.64 9.65 9.51 9.42 9.52 9.58 9.41 9.44 9.38 9.40 9.54 9.60 9.46 9.43 CONTRÔLE RMS DYNAMIQUE D’ENCEINTE LIMIT -Cliquez sur les flèches pour ajuster le limiteur en fonction de la puissance admissible RMS du haut-parleur.
  • Seite 59 9.59 Curseur virtuel - Cliquez, maintenez enfoncé et déplacez le curseur virtuel vers le haut ou vers le bas pour ajuster la courbe caractéristique selon la hauteur de la valeur seuil (ici, des watts crête). 9.60 Affichage / champ de saisie - Affichage de la valeur et saisie directe sur le clavier. Bypass - Cochez la case pour désactiver PEAK DYNAMIC CONTROL.
  • Seite 60: Réponse En Fréquence

    9.79 Curseur virtuel - Cliquez, maintenez enfoncé et déplacez le curseur virtuel vers le haut ou vers le bas pour ajuster la courbe caractéristique selon la hauteur de la valeur seuil (ici, des watts crête). 9.80 Affichage / champ de saisie - Affichage de la valeur et saisie directe sur le clavier. Bypass - Cochez la case pour désactiver PEAK DYNAMIC CONTROL.
  • Seite 61: Caractéristiques De L'enceinte

    CARACTÉRISTIQUES DE L'ENCEINTE 9.92 9.93 9.94 Fenêtre de modification pour l'importation des valeurs de mesure du haut-parleur de différents systèmes de mesure. Importation des valeurs de mesure. 9.92 9.93 Clear - Suppression des valeurs de mesure. 9.94 Adjust Ref. Level - Réglage du niveau à l'aide des flèches. GESTION DE PRESETS D'ENCEINTE PERSONNALISÉS Dans la vue générale, cliquez sur LIBRARY, puis sur Custom Speaker Preset.
  • Seite 62: Création Et Gestion Des Presets D'ampli

    9.97 Open from Disk - Charger un preset dans la liste à partir d’un PC. Cliquez avec la touche droite de votre souris sur un preset libre (Empty), puis cliquez sur Open from disk, sélectionnez le preset de votre choix sur le disque du PC et cliquez sur Ouvrir. 9.98 Save to disk - Enregistrement d’un preset dans la mémoire du PC.
  • Seite 63: Égaliseur Paramétrique D'entrée

    10.1 CHANNEL 1 à 4 - Dès que vous cliquez sur le champ de modification du canal de votre choix, le cadre devient bleu. - Cliquez sur les flèches pour augmenter (flèche vers le haut) ou baisser (flèche vers le bas) l'amplification 10.2 par paliers de 0,1 dB.
  • Seite 64: Réponse En Fréquence

    GAIN 10.20 - Cliquez sur les flèches pour augmenter ou baisser l'amplification d'une bande d'égaliseur par paliers de 0.1 dB. Curseur virtuel - Cliquez, maintenez enfoncé et déplacez le curseur virtuel vers le haut ou vers le bas pour réguler l'amplification. 10.21 de votre choix.
  • Seite 65: Gestion Des Presets D'ampli

    GESTION DES PRESETS D'AMPLI Dans la vue générale, cliquez sur LIBRARY, puis sur Amp Preset. Vous pouvez maintenant importer les presets d'ampli enregistrés sur le PC (cf. point 6.23) dans la liste des presets (Open from disk), et ainsi créer une bibliothèque personnalisée, la sauvegarder dans un fichier sur le PC et la transférer sur l'amplificateur.
  • Seite 66: Groupes De Contrôle

    11. GROUPES DE CONTRÔLE Les groupes de contrôle permettent de regrouper librement les valeurs Input Gain (gain d’entrée) et Input Delay (temporisation d’entrée) des canaux choisis des amplificateurs raccordés à l’ordinateur via Ethernet et de les piloter simultanément. La commande du gain d’entrée et de la temporisation d’entrée dans les groupes s’effectue en relation avec la configuration des canaux d’entrée des amplificateurs correspon- dants, c.-à-d.
  • Seite 67 11.1 11.2 11.9 11.10 11.6 11.5 11.7...
  • Seite 68: Mise À Jour Du Micrologiciel

    12. MISE À JOUR DU MICROLOGICIEL La mise à jour du micrologiciel permet de bénéficier de la toute dernière version du logiciel pour les appareils et donc d'améliorer les performances. Si vous installez la version la plus récente du logiciel LD OCS sur votre PC et raccordez un amplificateur LD DSP44K ou DSP45K à...
  • Seite 69: Exención De Responsabilidad

    1. INTRODUCCIÓN El software OCS (las siglas de Online Control System) de LD Systems sirve para configurar los amplificadores DSP LD DSP44K o DSP45K, cargar los presets actuales de altavoz LD y crear y gestionar presets personalizados individuales para amplificadores y altavoces, para los que se dispone de 80 posiciones de memoria en ambos casos.
  • Seite 70: Establecer Conexión Mediante Ethernet

    4. ESTABLECER CONEXIÓN MEDIANTE ETHERNET Conecte directamente el puerto Ethernet del amplificador LD DSP44K o DSP45K mediante un cable Ethernet adecuado con el puerto Ethernet de su ordenador y encienda el amplificador. Si desea conectar directamente dos o más amplificadores LD DSP44K o DSP45K a un ordenador y gestionarlos, utilice un conmutador Ethernet y establezca una dirección IP propia para cada amplificador (por ejemplo, 192.168.0.100, 192.168.0.101, etc.).
  • Seite 71: Preferencias

    Cierre la ventana de configuración «Ethernet Config» y haga clic seguidamente en el icono de lupa con el signo + en la opción Devices (figura 3.1). Ahora se mostrará el amplificador conectado indicando el número de modelo, el nombre y el número de serie en la sección Amplifiers (figura 3.2).
  • Seite 72: Ventana De Vista General

    6.22 LD SYSTEMS - Haga clic en este botón para llegar a la ventana de información del software (About application) y el botón de apagado (Exit). New Library - Para crear una biblioteca de presets. Al crearla, los presets de amplificador y los presets de altavoz personalizados cargados actualmente se eliminan de las listas de presets.
  • Seite 73 6.19 PEQ - Haga clic en este botón para editar el ecualizador de 12 bandas en el preset de amplificador. Com. queue - Indicación de estado al sincronizar el amplificador con el software. 6.20 6.21 Devices - Lista de todos los equipos conectados y agregados. Información sobre el equipo seleccionado (nombre del modelo, número de serie, nombre del equipo, dirección IP y versión de firmware).
  • Seite 74: Gestionar Amplificadores

    7.14 El software OCS de LD Systems brinda la posibilidad de gestionar varios amplificadores LD DSP44K y DSP45K. Con un clic del botón dere- cho del ratón en el amplificador deseado se abre el menú de edición de los amplificadores.
  • Seite 75: Biblioteca De Presets De Altavoz Ld

    Mediante el software OCS está disponible la opción de crear presets de altavoz personalizados (Custom Speaker Presets) para los amplifica- dores de potencia DSP DSP44K y DSP45K de LD Systems, y de gestionar esos presets. Inicie sesión en el software OCS como administrador haciendo clic en el botón Mode en la barra de menú, introduciendo la contraseña «admin»...
  • Seite 76 Single - Cada canal puede ajustarse individualmente a través de las opciones CHANNEL EDIT y SPEAKER PRESET EDIT y puede controlarse mediante cualquier fuente de señales (SOURCE). 2-Ways - Los canales CH A y CH B o los canales CH C y CH D se configuran como un sistema de 2 vías, los canales CH A al CH D pueden ajustarse individualmente y el control de la señal para un sistema de 2 vías se efectúa a través de la misma fuente de señales.
  • Seite 77: X-Iir Filter

    SPEAKER PRESET LOAD - Seleccione un preset de amplificador en la biblioteca de presets de altavoz mediante los iconos de flecha y cargue ese preset haciendo clic en LOAD (el nombre del preset aparece en la ventana a la derecha junto a los iconos de flecha). SEND - Transfiera un preset de altavoz a la memoria de datos del amplificador y cárguelo.
  • Seite 78: X-Fir Filter

    HIGH PASS - Filtro de paso alto. LOW PASS - Filtro de paso bajo. HIGH PASS FREQUENCY - Frecuencia de corte inferior. Campo de entrada para introducir el valor mediante el teclado. LOW PASS FREQUENCY - Frecuencia de corte superior. Campo de entrada para introducir el valor mediante el teclado. FILTER TYPE - Menú...
  • Seite 79: Ecualizador De Altavoz Paramétrico

    9.17 Visualización del nivel de señal Campo de visualización de reducción de amplificación (limitador) 9.18 9.19 - Haga clic en los iconos de flecha para aumentar o reducir el retardo de la señal del canal correspondiente. Atenuador virtual - Haga clic y mantenga pulsado el botón del atenuador virtual y desplácelo hacia arriba para aumentar el retardo 9.20 de la señal o hacia abajo para reducirlo.
  • Seite 80: Control Dinámico De Altavoz

    9.35 Open - Desde un ordenador, cargue en el canal seleccionado del A al D un preset de ecualizador guardado anteriormente. CANAL A al D - Seleccione el canal deseado para editarlo haciendo clic en el botón de canal. 9.36 9.37 EQ 1 al 16 - Ventana de vista general para los ecualizadores del 1 al 16.
  • Seite 81 CONTROL DINÁMICO DE PICOS DE ALTAVOZ 9.52 LIMIT - Haga clic en los iconos de flecha para adaptar el limitador a la capacidad de carga pico del altavoz. Atenuador virtual - Haga clic y mantenga pulsado el botón del atenuador virtual y desplácelo hacia arriba o hacia abajo para 9.53 adaptar el limitador a la capacidad de carga pico del altavoz.
  • Seite 82: Respuesta En Frecuencia

    9.70 Campo de visualización y entrada de datos - Visualización de la frecuencia de corte e introducción directa de valores mediante el teclado. 9.71 Representación gráfica de ambas unidades de control dinámico (superficie gris = RMS DYNAMIC CONTROL, línea blanca = PEAK DYNAMIC CONTROL de la banda de graves;...
  • Seite 83: Datos Del Altavoz

    DATOS DEL ALTAVOZ 9.92 9.93 9.94 Ventana de edición para importar los datos de medición del altavoz de diferentes sistemas de medición. 9.92 Para importar los datos de medición. Clear - Para borrar los datos de medición. 9.93 Adjust Ref. Level - Para ajustar el nivel mediante los iconos de flecha. 9.94 GESTIONAR PRESETS DE ALTAVOZ PERSONALIZADOS En la ventana de vista general, haga clic en LIBRARY y seguidamente en Custom Speaker Preset.
  • Seite 84 9.97 Open from Disk - Para agregar a la lista un preset desde un ordenador. Haga clic con el botón derecho del ratón en un preset libre (vacío), haga clic seguidamente en la opción Open from disk, seleccione el preset deseado en la memoria de datos del ordenador y haga clic en Abrir.
  • Seite 85: Ecualizador De Entradas Paramétrico

    10.1 CANALES 1 al 4 - En cuanto haga clic en el campo de edición del canal deseado, el color del marco cambiará a azul. - Haga clic en los iconos de flecha para aumentar la amplificación en pasos de 0,1 dB (con la flecha hacia arriba) o reducirla 10.2 (con la flecha hacia abajo).
  • Seite 86: Respuesta En Frecuencia

    10.19 Campo de visualización y entrada de datos - Visualización del factor de calidad e introducción directa de valores mediante el teclado. AMPLIFICACIÓN - Haga clic en los iconos de flecha para aumentar o reducir la amplificación de la banda de ecualizador seleccionada en pasos de 0,1 dB. 10.20 10.21 Atenuador virtual - Haga clic y mantenga pulsado el botón del atenuador virtual y desplácelo hacia arriba o hacia abajo para...
  • Seite 87: Gestionar Presets De Amplificador

    GESTIONAR PRESETS DE AMPLIFICADOR En la ventana de vista general, haga clic en LIBRARY y seguidamente en Amp Preset. Ahora es posible importar a la lista de presets los presets de amplificador que se guardaron anteriormente (ver la sección 6.23) en el ordenador (Open from disk), de modo que se puede constituir una biblioteca propia y guardarlo todo en un archivo en el ordenador y después transferirlo al amplificador.
  • Seite 88: Grupos De Control

    11. GRUPOS DE CONTROL Los grupos de control permiten reunir libremente y controlar simultáneamente la amplificación de entrada y el retardo de entrada de los canales deseados de los amplificadores conectados al ordenador a través de Ethernet. El control de la amplificación de entrada y del retardo de entrada en los grupos se efectúa en relación con los ajustes en los canales de entrada de los amplificadores correspondientes, es decir, la amplificación y el retardo del grupo de control y del canal de entrada se suman y, como resultado, se visualiza el valor total (Total).
  • Seite 89: Actualización Del Firmware

    Mediante las actualizaciones del firmware se mantiene el software del equipo al día y se mejora el rendimiento del software. Si usted instala en su ordenador la versión actualizada del software OCS de LD Systems y conecta un amplificador LD DSP44K o DSP45K al ordenador, el software OCS mostrará...
  • Seite 90 Al instalar el software OCS más reciente de LD Systems, se instala también automáticamente el actualizador del firmware. Encontrará el actualizador del firmware en el menú de inicio de Windows. Inicie el actualizador del firmware y siga minuciosamente los pasos indicados.
  • Seite 91: Wyłączenie Odpowiedzialności

    WYŁĄCZENIE ODPOWIEDZIALNOŚCI W razie nieprawidłowej obsługi, niewłaściwego użycia lub niedbałego obchodzenia się z oprogramowaniem producent (Adam Hall GmbH) nie ponosi odpowiedzialności za ewentualne uszkodzenia urządzeń lub oprogramowania, ani za szkody osobowe. 1. WPROWADZENIE Program LD OCS (Online Control System) służy do konfigurowania końcówek mocy LD DSP44K i LD DSP45K, pobierania aktualnych ustawień...
  • Seite 92: Ustanawianie Połączenia Przez Ethernet

    4. USTANAWIANIE POŁĄCZENIA PRZEZ ETHERNET Podłącz interfejs ethernetowy końcówki mocy LD DSP44K lub DSP45K za pomocą odpowiedniego kabla ethernetowego bezpośrednio do gniazda ethernetowego w komputerze, a następnie włącz końcówkę mocy. Jeśli chcesz podłączyć bezpośrednio do komputera dwie lub więcej końcówek mocy LD DSP44K lub DSP45K i zarządzać nimi, użyj przełącznika ethernetowego i ustaw osobny adres IP dla każdej końcówki mocy (np.
  • Seite 93: Preferencje

    Zamknij okno Ethernet Config, a następnie kliknij przycisk Devices i wybierz symbol lupy ze znakiem plus (ryc. 3.1). Podłączona końcówka mocy zostanie wyświetlona (numer modelu, nazwa i numer seryjny) na karcie Amplifiers(ryc. 3.2). Podwójnym kliknięciem na model końcówki mocy przeprowadź synchronizację całej biblioteki, znajdującej się w pamięci końcówki mocy, z programem (ryc. 3.3). Proces synchronizacji potrwa kilka sekund.
  • Seite 94: Okno Przeglądu

    6.21 6.30 6.22 LD SYSTEMS - Kliknij ten przycisk, aby przejść do okna z informacjami o programie (About application) oraz do przycisku wyłączającego (Exit). New Library - Tutaj możesz założyć nową bibliotekę ustawień wstępnych. Wówczas własne ustawienia wstępne wzmacniacza i głośnika, które były aktualnie wczytane, zostaną...
  • Seite 95 6.20 Com. queue - Wyświetla status podczas synchronizacji końcówki mocy z programem. Devices - Lista podłączonych i dodanych urządzeń. 6.21 6.22 Informacje o wybranym urządzeniu (model, numer seryjny, nazwa, adres IP i wersja oprogramowania sprzętowego). AMP PRESET 6.23 LOAD - Przy pomocy strzałek wybierz z biblioteki zestaw ustawień wstępnych wzmacniaczy i załaduj je, klikając przycisk LOAD (nazwa zestawu ustawień...
  • Seite 96: Zarządzanie Końcówkami Mocy

    7. ZARZĄDZANIE KOŃCÓWKAMI MOCY 7.11 7.10 7.12 7.13 7.14 Program LD OCS umożliwia zarządzanie kilkoma końcówkami mocy LD DSP44K i LD DSP45K. Kliknięcie prawym przyciskiem myszy na wybraną końcówkę mocy spowoduje przejście do menu edycji końcówek mocy. Ethernet Config - W oknie edycji Ethernet Config możesz sprawdzić informacje o sieci, zmienić adres IP końcówki mocy, aktywować...
  • Seite 97: Ld Speaker Preset Library

    W programie OCS możesz tworzyć swoje indywidualne zestawy ustawień wstępnych głośników (Custom Speaker Presets), pracujących z końcówkami mocy DSP44K i DSP45K marki LD Systems, oraz zarządzać nimi. Zaloguj się w programie OCS jako administrator – w tym celu wybierz z paska menu pozycję Mode, wpisz hasło „admin” i potwierdź przyciskiem OK. Jeśli biblioteka ustawień własnych głośników została zabezpieczona osobistym hasłem, podczas logowania należy je wpisać...
  • Seite 98 2-Ways - Kanały CH A i CH B lub CH C i CH D zostaną skonfigurowane jako układ dwudrożny, ustawienia kanałów od CH A do CH D można ustawić indywidualnie; sygnał sterujący dla systemu dwudrożnego jest podawany z tego samego źródła. W oknie CHANNEL EDIT można edytować...
  • Seite 99: Filtr X-Iir (Infinite Impulse Response)

    SPEAKER PRESET LOAD - Przy pomocy strzałek wybierz z biblioteki zestaw ustawień wstępnych głośników i wczytaj je, klikając przycisk LOAD (nazwa zestawu ustawień wstępnych widoczna w oknie po prawej obok symboli strzałek). SEND - Przenieś zestaw ustawień wstępnych głośników do pamięci końcówki mocy i wczytaj go. - Reset ustawień...
  • Seite 100: Filtr X-Fir (Finite Impulse Response)

    FILTR X-FIR (FINITE IMPULSE RESPONSE) 9.10 9.11 WINDOW TYPE - Menu rozwijane, umożliwiające wybór typu okna (Custom = import listy współczynników) FILTER - pola wyboru funkcji bypass i poszczególnych typów filtra: Low Pass, High Pass lub Bandpass. 9.10 9.11 FREQUENCY - Dolna lub górna częstotliwość podziału (w przypadku filtra bandpass dolna i górna częstotliwość podziału). Pole/ pola wprowadzania danych przy pomocy klawiatury.
  • Seite 101: Parametryczny Equalizer Głośnika

    PARAMETRYCZNY EQUALIZER GŁOŚNIKA 9.36 9.31 9.22 9.25 9.28 9.37 9.32 9.33 9.29 9.34 9.35 9.23 9.26 9.22 9.25 9.28 9.24 9.27 9.30 FREQUENCY - Przy pomocy strzałek możesz zwiększyć lub zmniejszyć częstotliwość wybranego pasma equalizera w krokach co 1 Hz. 9.22 9.23 Wirtualny fader - Kliknij i przytrzymaj przycisk wirtualnego fadera oraz przesuń...
  • Seite 102: Speaker Dynamic Control

    SPEAKER DYNAMIC CONTROL 9.63 9.66 9.61 9.47 9.55 9.62 9.38 9.58 9.41 9.44 9.52 9.56 9.39 9.53 9.57 9.48 9.49 9.50 9.45 9.59 9.64 9.65 9.51 9.42 9.52 9.58 9.41 9.44 9.38 9.40 9.54 9.60 9.46 9.43 SPEAKER RMS DYNAMIC CONTROL LIMIT - Przy pomocy strzałek dostosuj limiter do wytrzymałości RMS głośnika.
  • Seite 103 9.57 RELEASE - Ręczne ustawianie czasu wybrzmienia przy pomocy strzałek i wprowadzanie zmian przy pomocy klawiatury (usuń haczyk w pozycji Auto TC). 9.58 KNEE - Przy pomocy strzałek dostosuj charakterystykę do wysokości wartości progowej (w tym przypadku PEAK w watach) (niska wartość...
  • Seite 104: Frequency Response

    9.77 RELEASE - Ręczne ustawianie czasu wybrzmienia przy pomocy strzałek i wprowadzanie zmian przy pomocy klawiatury (usuń haczyk w pozycji Auto TC). 9.78 KNEE - Przy pomocy strzałek dostosuj charakterystykę do wysokości wartości progowej (w tym przypadku PEAK w watach) (niska wartość...
  • Seite 105: Speaker Data

    SPEAKER DATA 9.92 9.93 9.94 Okno do importowania pomiarów z głośników w różnych systemach pomiarowych. 9.92 Importowanie pomiarów. Clear - Usuwanie pomiarów. 9.93 9.94 Adjust Ref. Level - Ustawianie poziomu sygnału przy pomocy strzałek. ZARZĄDZANIE WŁASNYMI USTAWIENIAMI WSTĘPNYMI GŁOŚNIKÓW W oknie podglądu kliknij pozycję LIBRARY, a następnie opcję Custom Speaker Preset. Możesz teraz importować zapisane wcześniej na komputerze własne ustawienia wstępne głośnika do listy ustawień...
  • Seite 106: Tworzenie Ustawień Wstępnych Wzmacniaczy Izarządzanie Nimi

    9.97 Open from Disk - Wczytaj ustawienia z komputera do listy. Prawym przyciskiem myszy kliknij wolny zestaw ustawień (Empty), kliknij polecenie Open from disk, wybierz zestaw ustawień wstępnych w pamięci komputera i kliknij polecenie Otwórz. 9.98 Save to disk - Zapisz zestaw ustawień wstępnych na dysku komputera. Prawym przyciskiem myszy kliknij wybrany zestaw ust wień...
  • Seite 107: Parametryczny Equalizer Wejściowy

    Mute - Kliknij ten przycisk, by wyciszyć sygnał lub go przywrócić (gdy sygnał jest wyciszony, przycisk ma kolor czerwony). 10.6 10.7 Wskaźnik poziomu sygnału LINK - Przed rozpoczęciem edycji możesz połączyć ze sobą kanały, których ustawienia mają być takie same (zaznacz haczykiem). 10.8 Wówczas zmiana ustawień...
  • Seite 108: Frequency Response

    10.26 FILTER ON - Zaznacz odpowiednie okienko haczykiem, aby aktywować wybrany filtr; usuń haczyk, aby dezaktywować filtr (bypass). Save - Tym przyciskiem można zapisać na dysku komputera ustawienia filtrów dla wszystkich 12 pasm equalizera jako ustawienia 10.27 wstępne equalizera. Open - Wczytaj wcześniej zapisane ustawienia wstępne equalizera z komputera do wybranego kanału od 1 do 4. 10.28 10.29 CHANNEL 1–4 - Wybierz kanał...
  • Seite 109: Zarządzanie Ustawieniami Wstępnymi Wzmacniaczy

    ZARZĄDZANIE USTAWIENIAMI WSTĘPNYMI WZMACNIACZY W oknie przeglądu kliknij pozycję LIBRARY, a następnie opcję Amp Preset. Możesz teraz importować zapisane wcześniej na komputerze własne ustawienia wstępne wzmacniaczy do listy ustawień wstępnych (por. punkt 6.23), tworząc w ten sposób własną bibliotekę ustawień, którą...
  • Seite 110: Control Groups

    11. CONTROL GROUPS Control Groups służą do łączenia w grupy wartości Input Gain i Input Delay wybranych kanałów końcówek mocy podłączonych do komputera przez Ethernet, oraz do symultanicznego sterowania nimi. Sterowanie wartościami Input Gain i Input Delay w grupach kontrolnych jest skorelowane z ustawieniami kanałów wejściowych odpowiednich końcówek mocy, tzn.
  • Seite 111 11.1 11.2 11.9 11.10 11.6 11.5 11.7...
  • Seite 112: Aktualizacja Firmware

    12. AKTUALIZACJA FIRMWARE Aktualizowanie oprogramowania sprzętowego zapewnia jego optymalne działanie. Po połączeniu końcówki mocy DSP44K lub DSP45K z komputerem program OCS automatycznie Cię poinformuje, gdy będzie dostępna nowsza wersja od aktualnie zainstalowanej (ryc. A). Aktualizację oprogramowania przeprowadź skrupulatnie, wykonaj wszystkie kroki dokładnie według instrukcji, nie przerywaj procesu aktualizacji i nie dopuszczaj do zerwania połączenia USB między komputerem a końcówką...
  • Seite 113: Esclusione Di Responsabilità

    ESCLUSIONE DI RESPONSABILITÀ In caso di funzionamento errato, uso improprio o gestione negligente del software, il produttore (Adam Hall GmbH) non si assume alcuna responsabilità per eventuali danni a dispositivi di qualsiasi tipo o a software, inclusi i danni alle persone. 1.
  • Seite 114: Creazione Del Collegamento Tramite Ethernet

    4. CREAZIONE DEL COLLEGAMENTO TRAMITE ETHERNET Collegare l’interfaccia Ethernet del finale di potenza LD DSP44K o DSP45K direttamente all’interfaccia Ethernet del computer utilizzando un cavo Ethernet adatto e accendere il finale di potenza. Se si desidera collegare direttamente 2 o più finali di potenza LD DSP44K o DSP45K al PC e gestirli da lì, utilizzare uno switch Ethernet e impostare l’indirizzo IP di ogni finale di potenza (per es.
  • Seite 115: Preferenze

    Chiudere la finestra “Configurazione Ethernet” e, nella scheda “Dispositivi”, fare clic sul simbolo della lente d’ingrandimento con il simbolo “+” (fig. 3.1). Alla voce “Amplificatori” viene quindi visualizzato il finale di potenza collegato con codice del modello, nome e numero di serie (fig.
  • Seite 116: Finestra Riepilogativa

    6.30 6.22 LD SYSTEMS - Fare clic sul pulsante per accedere alla finestra con le informazioni sul software (“Informazioni sull’applicazione”) e al pulsante di uscita (“Exit”). Nuova libreria - Per creare una nuova libreria di preset. I preset di amplificatore e altoparlante personalizzato saranno così rimossi dagli elenchi dei preset.
  • Seite 117 6.20 Com. coda - Visualizzazione dello stato durante la sincronizzazione del finale di potenza e del software. Dispositivi - Elenco degli apparecchi collegati e aggiunti. 6.21 6.22 Informazioni sul dispositivo selezionato (modello, numero di serie, nome, indirizzo IP e versione del firmware). PRESET AMP 6.23 CARICA - Selezionare un preset degli amplificatori dalla relativa libreria con l’aiuto del simbolo della freccia e caricarlo...
  • Seite 118: Selezione Dei Finali

    7. GESTIONE DEI FINALI DI POTENZA 7.11 7.10 7.12 7.13 7.14 Il software LD OCS offre la possibilità di gestire più finali di potenza LD DSP44K e DSP45K. Facendo clic con il tasto destro del mouse sul finale di potenza desiderato si accede al menu operativo dei finali di potenza. Configurazione Ethernet - Nella finestra di elaborazione “Configurazione Ethernet”...
  • Seite 119: Libreria Dei Preset Degli Altoparlanti Ld

    8. LIBRERIA DI PRESET DI ALTOPARLANTI LD Scaricare la libreria di altoparlanti LD Systems desiderata dal sito web del prodotto (LDDSP44K / LDDSP45K) reperibile all’indirizzo WWW. LD-SYSTEMS.COM, salvarla nella memoria del PC in una cartella a piacere ed eventualmente decomprimerla. Avviare il software OCS e creare un collegamento con il finale di potenza (USB/Ethernet).
  • Seite 120 2 vie - I canali CH A e CH B o CH C e CH D sono configurati come sistema a 2 vie, i canali da CH A a CH D possono essere configurati individualmente e il segnale di comando per un sistema a 2 vie avviene tramite la stessa sorgente del segnale. Nella finestra MODIFICA CANALE solo il canale CH 1 o CH 3 può...
  • Seite 121: Filtro X-Iir (Infinite Impulse Response)

    PRESET ALTOPARLANTI CARICA - Selezionare un preset degli amplificatori dalla relativa libreria con l’aiuto del simbolo della freccia e caricarlo facendo clic su CARICA (nome del preset nella finestra a destra, vicino ai simboli delle frecce). INVIA - Per trasferire un preset degli altoparlanti nella memoria del finale di potenza e caricarlo. - Per resettare le impostazioni nel preset degli altoparlanti.
  • Seite 122: Filtro X-Fir (Finite Impulse Response)

    FILTRO X-FIR (RISPOSTA ALL’IMPULSO FINITA) 9.10 9.11 TIPO FINESTRA - Menu di selezione per il tipo di filtro (“Personalizzata” = importazione di una lista di coefficienti) FILTRO - Campi di selezione per Bypass e i tipi di filtri passa basso, passa alto o passa banda. 9.10 9.11 FREQUENZA - Frequenza di taglio superiore o inferiore (frequenza di taglio inferiore e superiore in caso di passa banda).
  • Seite 123: Eqalizzatore Parametrico Degli Altoparlanti

    EQUALIZZATORE PARAMETRICO ALTOPARLANTI 9.36 9.31 9.22 9.25 9.28 9.37 9.32 9.33 9.29 9.34 9.35 9.23 9.26 9.22 9.25 9.28 9.24 9.27 9.30 FREQUENZA - Fare clic sulle frecce per alzare o abbassare la frequenza della banda dell’equalizzatore selezionata di 1 Hz. 9.22 9.23 Fader virtuale - Fare clic e tenere premuto il pulsante del fader virtuale quindi trascinarlo verso l’alto per alzare la frequenza e verso...
  • Seite 124: Controllo Dinamico Degli Altoparlanti

    CONTROLLO DINAMICO DEGLI ALTOPARLANTI 9.63 9.66 9.61 9.47 9.55 9.62 9.38 9.58 9.41 9.44 9.52 9.56 9.39 9.53 9.57 9.48 9.49 9.50 9.45 9.59 9.64 9.65 9.51 9.42 9.52 9.58 9.41 9.44 9.38 9.40 9.54 9.60 9.46 9.43 CONTOLLO DINAMICO RMS DEGLI ALTOPARLANTI LIMITE - Fare clic sulle frecce per adattare il limitatore alla potenza RMS dell’altoparlante.
  • Seite 125 9.57 RILASCIO - Impostazione manuale del tempo di rilascio tramite frecce e immissione diretta tramite tastiera (rimuovere il segno di spunta in caso di TC automatico). 9.58 KNEE - Fare clic sulle frecce per adattare la linea caratteristica all’altezza del valore soglia (in questo caso “W PEAK”) (valore più...
  • Seite 126: Risposta In Frequenza

    9.75 TC automatico - Mettere il segno di spunta per l’impostazione automatica di attacco e rilascio. ATTACCO - Impostazione manuale del tempo di risposta tramite frecce e immissione diretta tramite tastiera (rimuovere il segno di 9.76 spunta in caso di TC automatico). RILASCIO - Impostazione manuale del tempo di rilascio tramite frecce e immissione diretta tramite tastiera (rimuovere il segno di 9.77 spunta in caso di TC automatico).
  • Seite 127 SPEAKER DATA 9.92 9.93 9.94 Finestra di elaborazione per l’importazione dei dati di misurazione degli altoparlanti di diversi sistemi di misurazione. Importazione dei dati di misurazione. 9.92 9.93 Elimina - Eliminazione dei dati di misurazione. 9.94 Aggiusta livello rif. - Adattamento del livello con le frecce. GESTIRE I PRESET DEGLI ALTOPARLANTI PERSONALIZZATI Nella finestra riepilogativa, fare clic su LIBRERIA, quindi su Preset altoparlanti personalizzati.
  • Seite 128: Creazione E Gestione Dei Preset Degli Amplificatori

    9.97 Apri da disco - Per caricare il preset nell’elenco dal PC. Fare clic con il tasto destro del mouse sul preset libero (vuoto), quindi fare clic su “Apri da disco”, selezionare il preset selezionato nella memoria dati del PC e fare clic su “Apri”. 9.98 Salva su disco - Per salvare il preset nella memoria del PC.
  • Seite 129: Equalizzatore Di Ingresso Parametrico

    10.1 CANALE 1-4 - Non appena si fa clic sul campo di elaborazione del canale desiderato il colore della cornice diventa blu. - Fare clic sulle frecce per aumentare (freccia rivolta verso l’alto) o diminuire 10.2 (freccia verso il basso) l’amplificazione di 0,1 dB. Fader virtuale - Fare clic e tenere premuto il pulsante del fader virtuale e tirarlo verso l’alto per alzare l’amplificazione e verso il 10.3 basso per abbassarla.
  • Seite 130: Risposta In Frequenza

    GUADAGNO 10.20 - Fare clic sulle frecce per aumentare o diminuire l’amplificazione della banda dell’equalizzatore selezionata di 0,1 dB. Fader virtuale - Fare clic e tenere premuto il pulsante del fader virtuale quindi trascinarlo verso l’alto o verso il basso per 10.21 impostare a piacere l’amplificazione.
  • Seite 131 GESTIRE I PRESET DEGLI AMPLIFICATORI Nella finestra riepilogativa, fare clic su LIBRERIA, quindi su Preset amp. Ora è possibile importare i preset degli amplificatori precedente- mente salvati su PC (v. punto 6.23) nell’elenco dei preset (Apri da disco), per creare così una libreria personalizzata, salvarla in blocco in un file sul PC e trasferirla al finale di potenza.
  • Seite 132: Gruppi Di Controllo

    11. GRUPPI DI CONTROLLO I gruppi di controllo consentono di raggruppare e comandare simultaneamente il guadagno di ingresso e il ritardo di ingresso dei canali desiderati del finale di potenza collegato al computer tramite Ethernet. Il comando del guadagno di ingresso e del ritardo di ingresso nei gruppi avviene secondo le impostazioni nei canali di ingresso dei rispettivi finali di potenza, cioè...
  • Seite 133 11.1 11.2 11.9 11.10 11.6 11.5 11.7...
  • Seite 134: Aggiornamento Del Firmware

    12. AGGIORNAMENTO FIRMWARE Con l’aggiornamento del firmware, il software del dispositivo viene aggiornato all’ultima versione migliorandone così le prestazioni. Quando si installa il software LD OCS più recente sul PC e si collega un finale di potenza LD DSP44K o DSP45K al computer, il software OCS visualizzerà...
  • Seite 135: Library & Preset

    13. LIBRARY & PRESET xxx.ahlibocs Complete Preset Library xxx.ahoutlibocs Custom Speaker Library xxx.ldoutlibocs LD Speaker Preset Library xxx.ahglocs Amp Preset xxx.ahoutocs Custom Speaker Preset / LD Speaker Preset xxx.aheqocs EQ Preset xxx.prjocs Project File...
  • Seite 136 LD-SYSTEMS.COM Adam Hall GmbH | Adam-Hall-Str. 1 | 61267 Neu-Anspach | Germany Tel. +49(0)6081/9419-0 | Fax +49(0)6081/9419-1000 web : www.adamhall.com | e-mail : mail@adamhall.com REV: 02...

Diese Anleitung auch für:

Lddsp45k

Inhaltsverzeichnis