Auriol HG02132B Bedienungs- Und Sicherheitshinweise
Temperaturstation
Vorschau ausblenden
Andere Handbücher für HG02132B:
- Bedienungs- und sicherheitshinweise (149 Seiten) ,
- Bedienungsanleitung (139 Seiten) ,
- Bedienungs- und sicherheitshinweise (123 Seiten)
Inhaltsverzeichnis
Werbung
Verfügbare Sprachen
Verfügbare Sprachen
TEMPERATURSTATION / TEMPERATURE
STATION / STATION MÉTÉO
TEMPERATURSTATION
Bedienungs- und Sicherheitshinweise
TEMPERATURE STATION
Operation and Safety Notes
STATION MÉTÉO
Instructions d'utilisation et consignes de sécurité
TEMPERATUURSTATION
Bedienings- en veiligheidsinstructies
METEOSTANICE
Pokyny pro obsluhu a bezpečnostní pokyny
ESTACIÓN METEOROLÓGICA
Instrucciones de utilización y de seguridad
ESTAÇÃO DE TEMPERATURA
Instruções de utilização e de segurança
IAN 291528
Werbung
Kapitel
Inhaltsverzeichnis

Verwandte Anleitungen für Auriol HG02132B


Inhaltszusammenfassung für Auriol HG02132B
- Seite 1 TEMPERATURSTATION / TEMPERATURE STATION / STATION MÉTÉO TEMPERATURSTATION Bedienungs- und Sicherheitshinweise TEMPERATURE STATION Operation and Safety Notes STATION MÉTÉO Instructions d‘utilisation et consignes de sécurité TEMPERATUURSTATION Bedienings- en veiligheidsinstructies METEOSTANICE Pokyny pro obsluhu a bezpečnostní pokyny ESTACIÓN METEOROLÓGICA Instrucciones de utilización y de seguridad ESTAÇÃO DE TEMPERATURA Instruções de utilização e de segurança IAN 291528...
- Seite 2 DE / AT / CH Bedienungs- und Sicherheitshinweise Seite GB / IE Operation and Safety Notes Page FR / BE Instructions d‘utilisation et consignes de sécurité Page NL / BE Bedienings- en veiligheidsinstructies Pagina 75 Pokyny pro obsluhu a bezpečnostní pokyny Strana 98 Instrucciones de utilización y de seguridad...
- Seite 3 19 20 23 24...
-
Seite 5: Inhaltsverzeichnis
Einleitung ............Seite Bestimmungsgemäße Verwendung ....Seite Teilebeschreibung ..........Seite Technische Daten ..........Seite Lieferumfang ............Seite Sicherheit ............Seite Allgemeine Sicherheitshinweise ......Seite Sicherheitshinweise für Batterien / Akkus ..Seite 10 Vor der Inbetriebnahme ......Seite 12 Allgemeine Hinweise .........Seite 12 Außenfühler in Betrieb nehmen ......Seite 13 Temperaturstation in Betrieb nehmen ....Seite 13 Sprache / Zeitzone / Uhrzeit / Datum manuell einstellen ........Seite 16 Sommerzeit anzeigen ........Seite 18... -
Seite 6: Einleitung
Temperaturstation Einleitung Wir beglückwünschen Sie zum Kauf Ihres neuen Produkts. Sie haben sich damit für ein hochwertiges Produkt entschieden. Die Bedie- nungsanleitung ist Teil dieses Produkts. Sie enthält wichtige Hinweise für Sicherheit, Ge- brauch und Entsorgung. Machen Sie sich vor der Benutzung des Produkts mit allen Bedien- und Sicherheitshinweisen vertraut. -
Seite 7: Teilebeschreibung
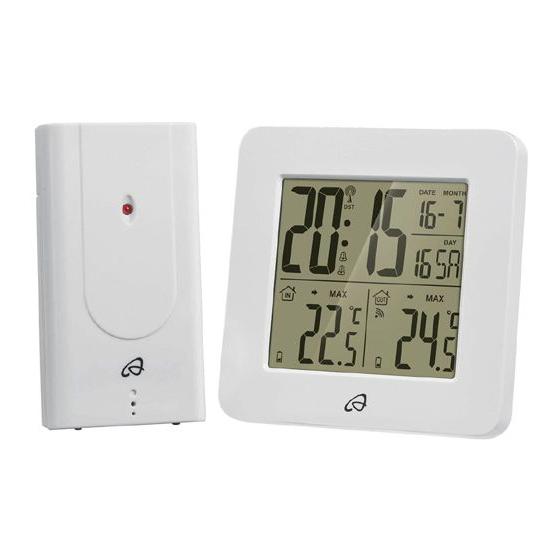
Teilebeschreibung LC-Display DST-Anzeige (Sommerzeit) -DCF-Symbol -Symbol (Schlummerfunktion) Datumsanzeige (Tag / Monat) Sekundenanzeige Wochentagsanzeige MAX- / MIN-Anzeige (Außentemperatur) Temperaturtrend (Außentemperatur) Außentemperatur -Radio-Signal-Symbol -Symbol (Außenfühler) MAX- / MIN-Anzeige für Innentemperatur Innentemperatur -Symbol (Temperaturstation) Temperaturtrend (Innentemperatur) / -Symbol (Alarm 1 / Alarm 2) Uhrzeit (Stunde / Minute) 2. -
Seite 8: Außenfühler
Außenfühler Kontroll-LED Aufhängevorrichtung Batteriefach Schraube (ø 3 mm) Dübel (ø 7,7 mm) Technische Daten Temperaturstation: Temperaturmessbereich: 0 °C bis + 50 °C +32 °F bis +122 °F Temperaturauflösung: 0,1 °C Funksignal: Batterien: 2 x AA 1,5 V (Gleichstrom) (vorinstalliert) Frequenz Band: 77.5 kHz, 433.050 bis 434.790 MHz Außenfühler:... -
Seite 9: Lieferumfang
Max. übertragene Leistung: 433.92 MHz, <10 dBm Hinweis: Wenn das LC-Display „LL.L“ oder „HH.H“ anzeigt, liegt die Temperatur außer- halb des Messbereichs. Lieferumfang 1 Temperaturstation 1 Außenfühler 4 Batterien AA, 1,5 V (vorinstalliert) 2 Schrauben (ø 3 mm) 2 Dübel (ø 7,7 mm) 1 Bedienungsanleitung Sicherheit BEWAHREN SIE ALLE SICHERHEITSHIN-... -
Seite 10: Sicherheitshinweise Für Batterien / Akkus
resultierenden Gefahren verstehen. Kinder dürfen nicht mit dem Produkt spielen. Rei- nigung und Benutzerwartung dürfen nicht von Kindern ohne Beaufsichtigung durch- geführt werden. Setzen Sie das Produkt keinem extrem hohen elektromagnetischen Feld aus. Dieses kann die Funktion des Produkts beeinträchtigen. Beachten Sie, dass Beschädigungen durch unsachgemäße Handhabung, Nichtbe- achtung der Bedienungsanleitung oder... - Seite 11 Risiko des Auslaufens von Batterien / Akkus Vermeiden Sie extreme Bedingungen und Temperaturen, die auf Batterien / Akkus einwirken können z. B. auf Heizkörpern / direkte Sonneneinstrahlung. Vermeiden Sie den Kontakt mit Haut, Au- gen und Schleimhäuten! Spülen Sie bei Kontakt mit Batteriesäure die betroffenen Stellen sofort mit klarem Wasser und suchen Sie umgehend einen Arzt auf!
-
Seite 12: Vor Der Inbetriebnahme
Reinigen Sie Kontakte an der Batterie und im Batteriefach vor dem Einlegen! Entfernen Sie erschöpfte Batterien / Akkus umgehend aus dem Produkt. Vor der Inbetriebnahme Aktivieren Sie die Batterien zuerst im Außenfühler, dann erst in der Tempe- raturstation. Hinweis: Entfernen Sie sämtliches Verpackungs- material vom Produkt. -
Seite 13: Außenfühler In Betrieb Nehmen
Funksignal (DCF): Das DCF-Signal (Zeitsignalsender) besteht aus Zeitimpulsen, die von einer der genaues- ten Uhren der Welt, in der Nähe von Frank- furt / Main, Deutschland, abgegeben werden – sie variiert um 1 Sekunde in 1 Million Jahren. Ihre Temperaturstation empfängt diese Signale unter optimalen Bedingungen bis zu einer Di- stanz von ca. - Seite 14 eine Verbindung zum Außenfühler herzustellen. Dieser Vorgang kann einige Minuten dauern. -Radio-Signal-Symbol blinkt. Bei er- folgreicher Verbindung zum Außenfühler hört -Radio-Signal-Symbol auf zu blinken und die Temperatur wird im LC- Display ange- zeigt. Hinweis: Wenn die Temperaturstation das Signal des Außenfühlers nach 3 Minuten nicht empfängt, startet die Temperaturstation auto- matisch mit dem Empfang des Funksignals.
-
Seite 15: Temperaturstation Und / Oder Außenfühler An Der Wand Montieren
Sollte der Empfang des Funksignals weiterhin gestört sein, können Sie die Uhrzeit und Datum auch manuell einstellen (siehe „Sprache / Zeitzone / Uhrzeit / Datum manuell einstellen“). Temperaturstation und / oder Außen- fühler an der Wand montieren: Hinweis: Sie benötigen für diesen Arbeitsschritt eine Bohrmaschine und einen Kreuzschlitz- schraubendreher. -
Seite 16: Sprache / Zeitzone / Uhrzeit / Datum Manuell Einstellen
Hängen Sie die Temperaturstation bzw. den Außenfühler mit der Aufhängevorrich- tung an der Schraube auf. Hinweis: Stellen Sie sicher, dass der Außen- fühler nicht in Wasser eingetaucht und keinem direkten Sonnenlicht ausgesetzt wird. Elektro- nische Geräte können den Funkempfang stören. Sprache / Zeitzone / Uhrzeit / Datum manuell einstellen Der Empfang des DCF-Funksignals kann am... - Seite 17 4. Drücken Sie die SET / RESET-Taste, um die gewünschte Sprache (GE = deutsch, FR = französisch, SP = spanisch, IT = italienisch, EN = englisch) einzustellen. 5. Drücken Sie die CLOCK-Taste, um Ihre Eingabe zu bestätigen. Die Zeitzonenan- zeige blinkt. 6.
-
Seite 18: Sommerzeit Anzeigen
Hinweis: Die Sekundenanzeige lässt sich nur auf 00 zurücksetzen. 11. Das LC-Display befindet sich im Anschluss wieder in der Standardanzeige. Sommerzeit anzeigen Die Sommerzeit wird im LC-Display durch das DST-Symbol angezeigt. Die Temperatur- station erkennt über das DCF-Funksignal auto- matisch, ob Sommerzeit ist oder nicht. Zeitzone abrufen In der Standardanzeige wird die Zeitzone nach DCF-Signal angezeigt. -
Seite 19: Alarmzeiten Aufrufen
3. Drücken Sie die ALARM-Taste, um Ihre Eingabe zu bestätigen. Die Minutenan- zeige blinkt. 4. Drücken Sie die SET / RESET-Taste, um den gewünschten Wert einzustellen. 5. Drücken Sie die ALARM-Taste, um Ihre Eingabe zu bestätigen. 6. Wiederholen Sie die Arbeitsschritte 2. bis 5., um die Zeit für Alarm 2 einzustellen. -
Seite 20: Schlummerfunktion Verwenden
Hinweis: Das Alarmsignal ertönt jeden Tag zur eingestellten Uhrzeit. Drücken Sie 3 x die SET / RESET-Taste, um Alarm 1 zu deaktivieren. Drücken Sie 2 x die SET / RESET-Taste, um Alarm 2 zu deaktivieren. Drücken Sie 1 x die SET / RESET-Taste, um Alarm 1 und 2 zu deaktivieren. -
Seite 21: Minimal- / Maximal-Werte Aufrufen
Drücken Sie die SELECT-Taste, um Ihre Eingabe zu bestätigen. Minimal- / Maximal- Werte aufrufen Die Temperaturstation speichert die Maximal- und Minimal-Werte des verbundenen Außen- fühlers sowie der Temperaturstation selbst. Drücken Sie die SELECT-Taste , um sich die Maximal-Werte der Innen- und Außen- temperatur anzeigen zu lassen. -
Seite 22: Batterieanzeige
Batterieanzeige Die Symbole erscheinen im LC-Display der Temperaturstation, wenn die Batterien des Außenfühlers oder der Tempe- raturstation schwach sind. Batterien wechseln Öffnen Sie das Batteriefach bzw. Entfernen Sie die verbrauchten Batterien. Setzen Sie je zwei neue 1,5 V (Gleich- strom) Batterien (AA) in die Batteriefächer ein. - Seite 23 gestört wird. Verändern Sie in diesem Fall den Standort (z. B. in die Nähe eines Fensters). Beachten Sie unbedingt, dass der Außenfühler immer im Umkreis von max. 30 Meter (Freifeld) von der Temperaturstation aufgestellt werden sollte. Die angegebene Reichweite ist die Freifeldreichweite und bedeutet, dass kein Hindernis zwischen dem Außenfühler und der Temperaturstation stehen sollte.
-
Seite 24: Reinigung Und Pflege
Reinigung und Pflege Reinigen Sie das Produkt nur äußerlich mit einem weichen, trockenen Tuch. Spritzen Sie den Außenfühler in keinem Fall, z. B. mit einem Gartenschlauch, ab. Der Außenfühler ist gegen Spritzwasser aus allen Richtungen geschützt. Entsorgung Die Verpackung besteht aus umwelt- freundlichen Materialien, die Sie über die örtlichen Recyclingstellen entsorgen können. - Seite 25 Möglichkeiten zur Entsorgung des ausgedienten Produkts erfahren Sie bei Ihrer Gemeinde- oder Stadtver- waltung. Werfen Sie Ihr Produkt, wenn es ausgedient hat, im Interesse des Umweltschutzes nicht in den Haus- müll, sondern führen Sie es einer fachgerechten Entsorgung zu. Über Sammelstellen und deren Öffnungs- zeiten können Sie sich bei Ihrer zu- ständigen Verwaltung informieren.
-
Seite 26: Vereinfachte Eu-Konformitätserklärung
Vereinfachte EU-Konformitätserklärung Hiermit erklärt OWIM GmbH & Co. KG, Stiftsbergstraße 1, DE-74167 Neckarsulm, DEUTSCHLAND, dass das Produkt Tempera- turstation HG02132A / HG02132B den Richtlinien 2014/53/EU und 2011/65/EU entspricht. Der vollständige Text der EU-Konformitätser- klärung ist unter der folgenden Internetadresse verfügbar: www.owim.com Garantie Das Produkt wurde nach strengen Qualitätsricht-... - Seite 27 ersetzt. Diese Garantie verfällt, wenn das Pro- dukt beschädigt, nicht sachgemäß benutzt oder gewartet wurde. Die Garantieleistung gilt für Material- oder Fabrikationsfehler. Diese Garantie erstreckt sich nicht auf Produktteile, die normaler Ab- nutzung ausgesetzt sind (z. B. Batterien) und daher als Verschleißteile angesehen werden können oder für Beschädigungen an zerbrech- lichen Teilen, z.
- Seite 28 Introduction ..........Page Proper use ............Page Description of parts and features ....Page Technical data ..........Page Scope of delivery ........... Page Safety ............Page General safety information......Page Safety instructions for batteries / rechargeable batteries ........Page Before initial use ........
-
Seite 29: Introduction
Temperature station Introduction We congratulate you on the purchase of your new product. You have chosen a high quality product. The instructions for use are part of the product. They contain important information concerning safety, use and disposal. Before using the product, please familiarise yourself with all of the safety information and instruc- tions for use. -
Seite 30: Temperature Station
snooze function symbol Date / month Second Day of the week display MAX / MIN display (outdoor temperature) Temperature trend (outdoor) Outdoor temperature Radio signal symbol Low battery symbol (outdoor sensor) MAX / MIN display (indoor temperature) Indoor temperature Low battery symbol (temperature station) Temperature trend (indoor) Alarm 1 / 2 symbol... -
Seite 31: Technical Data
Battery compartment Screw (ø 3 mm) Dowel (ø 7.7 mm) Technical data Temperature station: Temperature measurement range: 0 °C to + 50 °C +32 °F to +122 °F Temperature interval: 0.1 °C Radio signal: Batteries: 2 x AA 1.5 V (direct current) (pre-installed) Frequency band:... -
Seite 32: Scope Of Delivery
Note: If the LC display shows “LL.L” or “HH.H”, that indicate the temperature is out of measuring range. Scope of delivery 1 Temperature station 1 Outdoor sensor 4 Batteries AA, 1.5 V (pre-installed) 2 Screws (ø 3 mm) 2 Dowels (ø 7.7 mm) 1 Instructions for use Safety YOU SHOULD STORE ALL SAFETY INFOR-... -
Seite 33: Safety Instructions For Batteries / Rechargeable Batteries
user maintenance shall not be made by children without supervision. Do not expose the product to an extremely high electromagnetic field. This may impair the correct functioning of the product. Please note that the guarantee does not cover damage caused by incorrect han- dling, non-compliance with the operating instructions or interference with the product by unauthorised individuals. - Seite 34 Risk of leakage of batteries / rechargeable batteries Avoid extreme environmental conditions and temperatures, which could affect batteries / rechargeable batteries, e.g. radiators / direct sunlight. Avoid contact with the skin, eyes and mu- cous membranes. In the event of contact with battery acid, thoroughly flush the affected area with plenty of clean water and seek immediate medical attention.
-
Seite 35: Before Initial Use
Clean the contacts on the battery and in the battery compartment before inserting! Remove exhausted batteries / rechargea- ble batteries from the product immediately. Before initial use Activate the batteries first inside the outdoor sensor, then inside the tem- perature station. Note: Remove all packaging materials from the product. -
Seite 36: Preparing To Use The Outdoor Sensor
of the highest precision clocks in the world close to Frankfurt / Main in Germany – it varies by 1 second in 1 million years. In ideal conditions, your temperature station can pick up this signal over a distance of up to approx. - Seite 37 sensor, the Radio signal symbol stops flashing and the temperature is shown in the LC display. Note: If the temperature station does not receive the signal from the outdoor sensor within 3 minutes, the temperature station automatically starts with the reception of the radio time signal. After successful reception of the outdoor sen- sor signal or after 3 minutes, the temperature station starts with the reception of the radio time...
- Seite 38 Mounting the temperature station and / or the outdoor sensor on a wall: Note: You will require an electric drill and a crosshead screwdriver for this step. CAUTION! DANGER TO LIFE, RISK OF INJURY AND MATERIAL DAMAGE! Read the operating and safety instructions for your drill carefully.
-
Seite 39: Setting The Language / Time Zone / Time / Date Manually
Setting the language / time zone / time / date manually The reception of DCF radio signal where the temperature station has been positioned may become degraded or interrupted. If this hap- pens you can set the product manually. 1. Press and hold down the CLOCK button for about 3 seconds. -
Seite 40: Displaying Summer Time
but the time is different to your current lo- cal time, you can use the time zone setting to have the clock display your current lo- cal time. If you find yourself in a country in which, for example, the local time is an hour ahead of Central European Time (CET), you set the time zone to +01. -
Seite 41: Setting The Alarm Time
Press the CLOCK button . The time zone 2 symbol and the according time appear in the LC display. Press the CLOCK button again to return to the default display. Setting the alarm time You can set two different alarm times. 1. -
Seite 42: Switching The Alarm On / Off
Switching the alarm on / off Press the SET / RESET button once to activate Alarm 1. Press the SET / RESET button twice to activate Alarm 2. Press the SET / RESET button three times to activate Alarm 1 and Alarm 2. Note: The Alarm 1 / 2 symbol appears in the LC display. -
Seite 43: Displaying Temperature
Press the SELECT button to deactivate the snooze function. Displaying temperature The LC display shows the indoor temperature and the outdoor temperature Press and hold down the SELECT button for approx. 3 seconds. The °C display flashes. Press the SET / RESET button to switch between the °C (Celsius) and °F (Fahr- enheit) temperature scales. -
Seite 44: Displaying Temperature Trends
Displaying temperature trends After successfully connecting with the outdoor sensor, the temperature station can display the temperature trend (outdoor) and the temperature trend (indoor) You may see the following displays: = The temperature is rising. = The temperature is constant. = The temperature is falling. -
Seite 45: Troubleshooting
Troubleshooting Note: This product has delicate electronic components. This means that if it is placed near an object that transmits radio signals, it could cause interference. If the display indicates a problem, move such objects away from the temperature station / outdoor sensor or remove the batteries for a short while from the tem- perature station / outdoor sensor and then replace them. -
Seite 46: Cleaning And Maintenance
Another factor that may cause harmful inter- ference, are dead or weak batteries in the outdoor sensor. Replace them by new ones. At first both of the temperature station and outdoor sensor have to be put into operation -> only if problems occur, the outdoor sensor has to be restarted with keep pressed the / register button or the temperature... - Seite 47 abbreviations (a) and numbers (b) with following meaning: 1–7: plastics / 20–22: paper and fibre- board / 80–98: composite materials. The product and packaging mate- rials are recyclable, dispose of it separately for better waste treat- ment. The Triman logo is valid in France only.
-
Seite 48: Simplified Eu Declaration Of Conformity
Hereby, OWIM GmbH & Co. KG, Stiftsberg- straße 1, DE-74167 Neckarsulm, GERMANY, declares that the product Temperature station, model no.: HG02132A / HG02132B, is in compliance with Directives 2014/53/EU and 2011/65/EU. The full text of the EU declaration of conform- ity is available at the following internet address: www.owim.com... - Seite 49 show any fault in materials or manufacture within 3 years from the date of purchase, we will repair or replace it – at our choice – free of charge to you. The warranty period begins on the date of purchase. Please keep the original sales receipt in a safe location.
- Seite 50 Introduction ...........Page 51 Utilisation conventionnelle .......Page 51 Description des pièces et éléments ....Page 52 Données techniques .........Page 53 Contenu de la livraison........Page 54 Sécurité ............Page 55 Instructions générales de sécurité ....Page 55 Consignes de sécurité relatives aux piles / aux piles rechargeables ....Page 56 Avant la mise en service .......Page 58 Généralités ............Page 58...
-
Seite 51: Introduction
Station météo Introduction Nous vous félicitons pour l‘achat de votre nouveau produit. Vous avez opté pour un produit de grande qualité. Le mode d‘emploi fait partie intégrante de ce produit. Il contient des indications importantes pour la sécurité, l’utilisation et la mise au rebut. Veuillez lire consciencieusement toutes les indications d‘utilisation et de sécurité... -
Seite 52: Description Des Pièces Et Éléments
Description des pièces et éléments Écran à cristaux liquides Affichage DST (heure d’été) Symbole DCF Symbole Z (répétition d’alarme) Affichage de la date (jour / mois) Affichage des secondes Affichage du jour de la semaine Affichage MAX / MIN (température extérieure) Tendance température (température extérieure) -
Seite 53: Capteur Extérieur
Touche SET / RESET (« réglage » / « remise à zéro ») Boîtier à piles Pied Vis (ø 3 mm) Cheville (ø 7,7 mm) Capteur extérieur Voyant à diode électroluminescente Dispositif d’accrochage Boîtier à piles Vis (ø 3 mm) Cheville (ø... -
Seite 54: Contenu De La Livraison
Amplitude de transmission HF : max. 30 m en ligne libre Piles : 2 x AA 1,5 V (courant continu) (préinstallées) Indice de protection : IPX4 (protégé contre les projections d‘eau) Bande de fréquence : de 433,05 à 434,790 MHz Puissance max. transférée : 433,92 MHz, <10 dBm... -
Seite 55: Sécurité
Sécurité CONSERVEZ TOUTES LES CONSIGNES DE SÉCURITÉ ET INSTRUCTIONS POUR L‘AVENIR ! Instructions générales de sécurité Ce produit peut être utilisé par des en- fants âgés de 8 ans et plus ainsi que par des personnes ayant des capacités phy- siques, sensorielles ou mentales réduites ou manquant d‘expérience ou de connaissances, s‘ils sont surveillés ou s‘ils... -
Seite 56: Consignes De Sécurité Relatives Aux Piles / Aux Piles Rechargeables
Consignes de sécurité relatives aux piles / aux piles rechargeables DANGER DE MORT ! Rangez les piles / piles rechargeables hors de la portée des enfants. En cas d’ingestion, consultez immédiatement un médecin ! RISQUE D‘EXPLOSION ! Ne rechargez jamais des piles non rechargeables. -
Seite 57: Risque D'endommagement Du Produit
PORTER DES GANTS DE PROTECTION ! Les piles / piles rechargeables endom- magées ou sujettes à des fuites peuvent provoquer des brûlures au contact de la peau. Vous devez donc porter des gants adéquats pour les manipuler. En cas de fuite des piles / piles rechar- geables, retirez-les aussitôt du produit pour éviter tout endommagement. -
Seite 58: Avant La Mise En Service
Avant la mise en service Activez tout d‘abord les piles dans le capteur extérieur, puis seulement en- suite dans la station de température. Remarque : Veuillez retirer l‘ensemble des matériaux composant l‘emballage du produit. Remarque : Avant la première utilisation du produit, retirez le film de protection de l‘écran à... -
Seite 59: Mise En Service Du Capteur Extérieur
Signal radio (DCF) : Le signal DCF (émetteur de signaux horaires) consiste en des impulsions d’horloge émises par l’une des horloges les plus exactes du monde, située près de Francfort s. / Main, en Allemagne – elle varie d’une seconde tous les millions d’années. - Seite 60 Relier la station de température avec le chargeur externe et le signal radio DCF : Après avoir retiré la bande de sécurité des piles, la station de température tente d‘établir une connexion avec le capteur extérieur. Cette procédure peut durer quelques minutes. Le symbole de signal radio clignote.
- Seite 61 La réception peut être significativement entra- vée par des obstacles (par exemple des murs en béton) ou des sources parasites (par exemple d’autres appareils électriques). Si la réception du signal radio continue de poser des problèmes, vous pouvez également régler manuellement l’heure et la date (voir «...
-
Seite 62: Réglage Manuel De La Langue / Du Fuseau Horaire / De L'heure / De La Date
Marquez le trou de perçage (ø env. 7,7 mm) sur le mur. Percez le trou à l’aide d’une perceuse électrique. Insérez la cheville dans le trou. À l’aide d’un tournevis cruciforme, vissez la vis dans la cheville. Accrochez la station de température ou la sonde externe à... - Seite 63 3. Appuyez sur la touche CLOCK pour con- firmer votre saisie. L‘indicateur du choix de la langue clignote. Conseil : maintenez la touche SET / RESET enfoncée, ceci permet de régler les valeurs plus rapidement. Vous pouvez aussi utiliser ce réglage rapide pour les réglages suivants.
-
Seite 64: Affichage De L'heure D'été
mais l‘heure affichée est en avance d‘une heure sur l‘horaire HNEC. 7. Appuyez sur la touche CLOCK pour confirmer le paramètre saisi. L’affichage des heures clignote. 8. Appuyez sur la touche SET / RESET pour régler la valeur souhaitée. 9. Appuyez sur la touche CLOCK pour confirmer le paramètre saisi. -
Seite 65: Réglage De L'heure D'alarme
Réglage de l’heure d’alarme Vous pouvez régler deux heures d’alarme dif- férentes. 1. Appuyez sur la touche ALARM maintenez-la enfoncée pendant environ 3 secondes. Remarque : si une alarme a déjà été réglée auparavant, l’heure d’alarme ré- glée apparaît sur l’écran. Dans le cas contraire, l’affichage 0:00 ou AM 12:00 apparaît. -
Seite 66: Activation / Coupure De L'alarme
Activation / coupure de l’alarme Appuyez 1 fois sur la touche SET/RESET pour activer l’alarme 1. Appuyez 2 fois sur la touche SET/RESET pour activer l’alarme 2. Appuyez 3 fois sur la touche SET/RESET pour activer l’alarme 1 et 2. Remarque : le / (symbole d‘alarme 1/2) s‘affiche sur l‘écran à... -
Seite 67: Affichage De La Température
Le signal d‘alarme est silencieux et le / (symbole d‘alarme 1/2) clignote avec la fonction répétition Z Le signal sonore d’alarme retentit à nou- veau au bout d’environ 5 minutes. Appuyez sur la touche SELECT pour désactiver la fonction de répétition d’alarme. -
Seite 68: Affichage Tendance Températures
Ré-appuyez sur la touche SELECT pour faire afficher les valeurs minimales de la température intérieure et de la tempéra- ture extérieure. Pour remettre les valeurs à zéro, appuyez sur la touche SET / RESET pendant l’affichage des valeurs maximales et des minimales. -
Seite 69: Remplacement Des Piles
Remplacement des piles Ouvrez le boîtier à piles Retirez les piles usagées. Placez respectivement 2 piles neuves 1,5 V (courant continu) (AA) dans le boîtier à piles. Remarque : veillez à respecter la pola- rité. Celle-ci est indiquée dans le boîtier à piles (voir également Ill. -
Seite 70: Nettoyage Et Entretien
ne doit y avoir aucun obstacle entre le cap- teur extérieur et la station de température. Un „contact visuel“ entre le capteur extérieur et la station de température améliore souvent la transmission. Le froid (températures extérieures inférieures à 0°C) peut influencer la puissance des piles du capteur extérieur et ainsi réduire la trans- mission radio. -
Seite 71: Mise Au Rebut
Mise au rebut L’emballage se compose de ma- tières recyclables pouvant être mises au rebut dans les déchette- ries locales. Le «point vert» n‘est pas valable en Allemagne. Veuillez respecter l‘identification des matériaux d‘emballage pour le tri sélectif, ils sont identifiés avec des abbréviations (a) et des chiffres (b) ayant la signification suivante : 1–7 : plastiques /... -
Seite 72: Déclaration De Conformité Ue Simplifiée
Déclaration de conformité UE simplifiée Par la présente, OWIM GmbH & Co. KG, Stiftsbergstraße 1, DE-74167 Neckarsulm, ALLEMAGNE, déclare que le produit Station météo HG02132A / HG02132B est 72 FR/BE... -
Seite 73: Garantie
conforme aux directives 2014/53/UE et 2011/65/UE. La déclaration de conformité européenne est disponible en version complète à l‘adresse Internet suivante : www.owim.com Garantie Le produit a été fabriqué selon des critères de qualité stricts et contrôlé consciencieusement avant sa livraison. En cas de défaillance, vous êtes en droit de retourner ce produit au ven- deur. - Seite 74 normale (p. ex. des piles) et qui, par consé- quent, peuvent être considérées comme des pièces d’usure, ni aux dommages sur des com- posants fragiles, comme des interrupteurs, des batteries ou des éléments fabriqués en verre. 74 FR/BE...
- Seite 75 Inleiding ............Pagina Doelmatig gebruik ........Pagina Beschrijving van de onderdelen ....Pagina Technische gegevens ........Pagina Omvang van de levering......Pagina Veiligheid ..........Pagina Algemene veiligheidsinstructies ....Pagina Veiligheidsinstructies voor batterijen / accu‘s ......... Pagina Vóór de ingebruikname ....Pagina Algemene instructies ........
-
Seite 76: Inleiding
Temperatuurstation Inleiding Hartelijk gefeliciteerd met de aankoop van uw nieuwe product. U heeft voor een hoog- waardig product gekozen. De gebruiksaan- wijzing is een deel van het product. Deze bevat belangrijke aanwijzingen voor veilig- heid, gebruik en verwijdering. Maakt U zich voor de ingebruikname van het product met alle bedienings- en veiligheidsvoorschriften vertrouwd. - Seite 77 -symbool (sluimerfunctie) Datumweergave (dag /maand) Secondeweergave Weekdagweergave MAX- / MIN-weergave (buitentemperatuur) Temperatuurtrend (buitentemperatuur) Buitentemperatuur -radiosignaal-symbool -symbool (buitensensor) MAX- / MIN-weergave voor binnentemperatuur Binnentemperatuur -symbool (temperatuurstation) Temperatuurtrend (binnentemperatuur) Symbool (alarm 1 / alarm 2) Tijd 2e tijdzone (ZONE) Temperatuurstation CLOCK-toets (klok) ALARM-toets (sluimerfunctie) / REGISTER-toets Ophanginrichting...
-
Seite 78: Technische Gegevens
Buitensensor Controle-led Ophanginrichting Batterijvakje Schroef (ø 3 mm) Plug (ø 7,7 mm) Technische gegevens Temperatuurstation: Temperatuurmeetbereik: 0 °C tot + 50 °C +32 °F tot +122 °F Temperatuurresolutie: 0,1 °C Radiografisch signaal: DCF Batterijen: 2 x AA 1,5 V (gelijkstroom) (reeds gemonteerd) Frequentieband: 77.5 kHz, 433.050... -
Seite 79: Omvang Van De Levering
Max. zendvermogen: 433.92 MHz, <10 dBm Opmerking: als „LL.L“ of HH.H“ op het display verschijnt, ligt de temperatuur buiten het meetbereik. Omvang van de levering 1 temperatuurstation 1 buitensensor 4 batterijen AA, 1,5 V (reeds gemonteerd) 2 schroeven (ø 3 mm) 2 pluggen (ø... -
Seite 80: Veiligheidsinstructies Voor Batterijen / Accu's
met het product spelen. Reiniging en on- derhoud mag niet door kinderen zonder toezicht worden uitgevoerd. Stel het product niet bloot aan een extreem hoog elektromagnetisch veld. Hierdoor kan de functie van het product worden beïnvloed. Beschadigingen door ondeskundig ge- bruik, negeren van de handleiding of ingrepen door niet-geautoriseerde personen zijn van de garantieverlening... - Seite 81 Risico dat de batterijen / accu’s lekken Vermijd extreme omstandigheden en tem- peraturen die invloed op de batterijen / accu‘s zouden kunnen hebben bijv. radi- atoren / direct zonlicht. Vermijd contact met huid, ogen en slijm- vliezen! Spoel in geval van contact met batterijzuur de desbetreffende plekken direct af met voldoende schoon water en raadpleeg onmiddellijk een arts!
-
Seite 82: Vóór De Ingebruikname
Plaats de batterijen / accu‘s volgens de weergegeven polariteit (+) en (-) op bat- terij / accu en op product. Reinig de contacten van de batterij / accu en die in het batterijvak, voordat u deze plaatst! Verwijder verbruikte batterijen / accu‘s direct uit het product. -
Seite 83: Radiografisch Signaal (Dcf)
Plaats de producten niet naast of op me- talen platen. De radioverbinding tussen de apparaten kan hierdoor negatief wor- den beïnvloed. Radiografisch signaal (DCF): Het DCF-signaal (zender van het tijdsignaal) bestaat uit tijdimpulsen die door een van de meest nauwkeurige klokken ter wereld, in de buurt van Frankfurt / Main, Duitsland, worden uitgezonden –... - Seite 84 Trek de isolatiestrook van de batterij eruit waarna u een „piepgeluid“ hoort van het temperatuurstation. Sluit het batterijvakje. Temperatuurstation met de buitensen- sor en het radiografisch DCF-signaal verbinden: Nadat u de veiligheidsstrips van de batterij heeft verwijderd, probeert het temperatuursta- tion verbinding met de buitensensor te ma- ken.
- Seite 85 Opmerking: Verander de standplaats van het temperatuurstation niet tijdens de ontvangst. Anders kan dit tot ontvangststoringen leiden. Als op het tijdstip van de ingebruikname geen synchronisatie met de atoomklok mogelijk is, verandert u eerst de standplaats van het tem- peratuurstation (bijv. dichter naar een raam). De ontvangst kan door hindernissen (bijv.
-
Seite 86: Taal / Tijdzone / Kloktijd / Datum Handmatig Instellen
Opmerking: voordat u het temperatuursta- tion monteert, dient u de poot te verwijde- ren, door deze eenvoudigweg los te trekken. Teken het boorgat (ø ca. 7,7 mm) af op de muur. Boor het gat met een boormachine. Steek de plug in het boorgat. - Seite 87 Tip: houd de SET/RESET-toets ingedrukt. Op deze wijze activeert u de functie voor het snelle instellen van de waarden. De functie voor het snelle instellen kunt u ook voor de volgende instelprocessen gebrui- ken. Wanneer u niet binnen 30 seconden een andere toets indrukt, keert het LC-dis- play automatisch terug naar de stan- daardweergave.
-
Seite 88: Zomertijd Weergeven
8. Druk op de SET / RESET-toets, om de ge- wenste waarde in te stellen. 9. Druk op de CLOCK-toets, om uw invoer te bevestigen. 10. Herhaal de stappen 6 en 7 om de waar- den voor minuten, seconden, jaar, maand en datum in te stellen. -
Seite 89: Alarmtijden Oproepen
1. Druk hiervoor gedurende ca. 3 seconden op de ALARM-toets Opmerking: als tevoren een alarmtijd is ingesteld, verschijnt deze op het LC-dis- play. In het andere geval verschijnt de weergave 0:00 of AM 12:00. 2. De uurweergave knippert. Druk op de SET / RESET-toets om de gewenste waarde in te stellen. -
Seite 90: Sluimerfunctie Gebruiken
Het alarmsignaal klinkt zodra de inge- stelde alarmtijd bereikt is. Na afloop van 2 minuten verstomt het alarmsignaal au- tomatisch. Druk op de SELECT-toets , SET / RESET-toets , ALARM-toets CLOCK-toets om het alarmsignaal voortijdig te deactiveren. Opmerking: het alarmsignaal klinkt elke dag op het ingestelde tijdstip. -
Seite 91: Minimale / Maximale Waarde Oproepen
Druk hiervoor gedurende 3 seconden op . De weergave °C de SELECT-toets knippert. Druk op de SET / RESET-toets , om uit de temperatuureenheden °C (Celsius) en °F (Fahrenheit) te kiezen. Druk op de SELECT-toets om uw invoer te bevestigen. Minimale / maximale waarde oproepen Het temperatuurstation slaat de maximale en... -
Seite 92: Batterij-Indicator
temperatuurtrend (buiten) en de tempera- tuurtrend (binnen) weer. De volgende weergaven zijn mogelijk: = de temperatuur stijgt. = de temperatuur blijft constant. = de temperatuur daalt. Batterij-indicator De symbolen verschijnen op het LC-display van het temperatuurstation, als de batterijen van de buitensensor of het temperatuurstation leeg raken. - Seite 93 buitensensor of verwijder kortstondig de batterijen uit het temperatuurstation / de buitensensor als het display storingen weergeeft. Hindernissen zoals bijv. betonnen muren kun- nen er ook toe leiden dat de ontvangst merk- baar wordt verstoord. Wijzig in dit geval de locatie (bijv.
-
Seite 94: Reiniging En Onderhoud
het temperatuurstation opnieuw te starten. Om het temperatuurstation opnieuw te star- ten, verwijdert u de batterijen eventjes en plaatst deze dan weer terug. Reiniging en onderhoud Reinig het product alleen aan de buiten- zijde met een zachte, droge doek. Spuit de buitensensor in geen geval af met bijvoorbeeld een tuinslang. - Seite 95 Het product en de verpakkingsma- terialen zijn recyclebaar; verwijder deze afzonderlijk voor een betere afvalbehandeling. Het Triman-logo geldt alleen voor Frankrijk. Informatie over de mogelijkheden om het uitgediende product na gebruik te verwijderen, verstrekt uw gemeentelijke overheid. Gooi het afgedankte product om- wille van het milieu niet weg via het huisvuil, maar geef het af bij het daarvoor bestemde depot of...
-
Seite 96: Verklaring Van Overeenstemming
Hiermee verklaart OWIM GmbH & Co. KG, Stiftsbergstraße 1, DE-74167 Neckarsulm, DUITSLAND, dat het product Temperatuursta- tion HG02132A / HG02132B voldoet aan de richtlijnen 2014/53/EG en 2011/65/EG. De volledige tekst van de EU-conformiteitsver- klaring staat ter beschikking via het volgende internetadres: www.owim.com... - Seite 97 Wanneer binnen 3 jaar na de aankoop- datum van dit product een materiaal- of pro- ductiefout optreedt, dan wordt het product door ons – naar onze keuze – gratis voor u gerepareerd of vervangen. Deze garantie komt te vervallen als het product beschadigd wordt, niet correct gebruikt of onderhouden wordt.
- Seite 98 Úvod ..............Strana Použití ke stanovenému účelu ...... Strana Popis dílů ............Strana Technické údaje ..........Strana 101 Obsah dodávky ..........Strana 102 Bezpečnost ..........Strana 102 Všeobecná bezpečnostní upozornění ..Strana 102 Bezpečnostní pokyny pro baterie a akumulátory ..........Strana 103 Před uvedením do provozu ....
-
Seite 99: Úvod
Meteostanice Úvod Blahopřejeme Vám ke koupi nového výrobku. Rozhodli jste se pro kvalitní produkt. Návod k obsluze je součástí tohoto výrobku. Obsa- huje důležité pokyny pro bezpečnost, použití a likvidaci. Před použitím výrobku se seznamte se všemi pokyny k obsluze a bezpečnostními pokyny. -
Seite 100: Venkovní Čidlo
Zobrazení vteřiny Zobrazení dne v týdnu Zobrazení MAX / MIN (teplota venku) Trend teploty (teplota venku) Teplota venku -Symbol rádiového signálu Symbol (vnější čidlo) Zobrazení MAX / MIN pro teplotu uvnitř Teplota uvnitř Symbol (meteostanice) Trend teploty (teplota uvnitř) Symbol (alarm 1 / alarm 2) Přesný... -
Seite 101: Technické Údaje
Šroub (ø 3 mm) Hmoždinka (ø 7,7 mm) Technické údaje Meteostanice: Měřicí rozsah teploty: 0 °C až + 50 °C +32 °F až +122 °F Rozlišení teploty: 0,1 °C Rádiový signál: Baterie: 2 x AA 1,5 V (stejnosměrný proud) (předinstalo- vané) Frekvenční... -
Seite 102: Obsah Dodávky
Upozornění: Pokud se na displeji LC zob- razí hlášení „LL.L“ nebo „HH.H“, je teplota mimo rozsah měření. Obsah dodávky 1 stanice na měření teploty 1 venkovní čidlo 4 baterie AA, 1,5 V (předinstalované) 2 šrouby (ø 3 mm) 2 hmoždinky (ø 7,7 mm) 1 návod k obsluze Bezpečnost USCHOVEJTE SI VŠECHNY BEZPEČ-... -
Seite 103: Bezpečnostní Pokyny Pro Baterie A Akumulátory
Nevystavujte výrobek vlivům extrémních magnetických polí. Toto může omezit funkci výrobku. Mějte na paměti, že poškození způso- bená neodborným zacházením, nedbá- ním na návod k obsluze nebo zásahem neautorizované osoby jsou vyloučeny ze záruky. Bezpečnostní pokyny pro baterie a akumulátory NEBEZPEČÍ OHROŽENÍ ŽIVOTA! Uchovávejte baterie a akumulátory mimo dosah dětí. - Seite 104 které mohou negativně ovlivnit funkci baterií nebo akumulátorů. Vyhýbejte se kontaktu s pokožkou, očima a sliznicemi! Po kontaktu s kyselinou bate- rií ihned omyjte postižená místa dostateč- ným množstvím čisté vody a okamžitě vyhledejte lékařskou pomoc! NOSTE OCHRANNÉ RU- KAVICE! Vyteklé i poškozené baterie nebo akumulátory mo- hou při kontaktu s pokožkou způsobit její...
-
Seite 105: Před Uvedením Do Provozu
Před uvedením do provozu Aktivujte nejdříve baterie venkov- ního čidla a potom stanice. Upozornění: Odstraňte úplně obalový materiál z výrobku. Upozornění: Před prvním použitím stáhněte ochranou fólii z displeje LC. Všeobecné pokyny POZOR! Při výběru místa k instalaci se ujistěte, že výrobek nebude vystaven pří- mému slunečnímu záření, vibraci, prachu, horku, chladnu ani vlhkosti. -
Seite 106: Uvedení Venkovního Čidla Do Provozu
Uvedení venkovního čidla do provozu Sundejte kryt přihrádky na baterie na zadní straně venkovního čidla. Vytáhněte pojistný proužek baterie. Venkovní čidlo je připraveno k provozu a kontrolní LED se krátce rozsvítí. Zavřete kryt schránky na baterie. Uvedení teploměru s venkovním čidlem do provozu Odstraňte víčko přihrádky na baterie na zadní... - Seite 107 čidla resp. po 3 minutách s příjmem rádiového signálu. Tento proces trvá až 5 minut a na dis- pleji se zobrazuje blikajícím -DCF symbol Při úspěšném příjmu rádiového signálu DCF se -DCF symbol na LC displeji zobrazí trvale. Upozornění: Během příjmu signálu neměňte stanoviště...
-
Seite 108: Ruční Nastavení Jazyka / Časového Pásma / Přesného Času / Data
NEBEZPEČÍ OHRO- ŽENÍ ŽIVOTA! Ujistěte se, že nenarazíte na elektrické vedení, plynové či vodovodní potrubí, vrtáte-li do stěny. Před vrtáním do stěny proveďte případně zkoušku hledačem vodičů. Poznámka: před montáží stanice sejměte jednoduchým stažením její podstavec Označte na stěně vrtací díru (ø cca 7,7 mm). - Seite 109 1. Siskněte a držte stisknuté tlačítko CLOCK po dobu cca 3 vteřin. 2. Stiskněte tlačítko SET / RESET , abyste zvolili mezi 12 a 24hodinovým formátem času. 3. Stiskněte tlačítko CLOCK pro potvrzení zadání. Výběr jazyka zobrazení na displeji bliká. Tip: Držte tlačítko SET / RESET stisknuté.
-
Seite 110: Zobrazení Letního Času
času (MEZ), nastavte časové pásmo na +01. Výrobek je ještě řízený DCF signá- lem, ale ukazuje čas jednu hodinu před MEZ časem. 7. Stiskněte tlačítko CLOCK pro potvrzení zadání. Zobrazení hodin bliká. 8. Stiskněte tlačítko SET / RESET pro nastavení požadované hodnoty. 9. -
Seite 111: Nastavení Času Alarmu
Nastavení času alarmu Máte možnost nastavit dva různé časy alarmu. 1. Stiskněte a držte stisknuté tlačítko ALARM po dobu cca 3 vteřin. Upozornění: Byl-li předtím nastaven alarm, objeví se nastavený čas alarmu na displeji LC. Jinak se objeví zobrazení 0:00 nebo AM 12:00. 2. -
Seite 112: Použití Funkce Usínání
Stiskněte 3 x tlačítko SET / RESET pro akti- vaci alarmů 1 a 2. Upozornění: Na displeji LC se zobrazí (ikona buzení 1 / 2) Signál alarmu zazní, jakmile je dosažen nastavený přesný čas. Po uplynutí doby 2 minut signál alarmu automaticky ztichne. Stiskněte tlačítko Tlačítko SELECT , Tla- čítko SET / RESET... -
Seite 113: Zobrazení Teploty
Zobrazení teploty Na displeji LC se zobrazuje jak teplota uvnitř , tak i teplota venku Stiskněte a držte stisknuté tlačítko SELECT po dobu cca 3 vteřin. Zobrazení °C bliká. Stiskněte tlačítko SET / RESET pro vý- běr mezi jednotkami °C (Celsius) a °F (Fahrenheit). -
Seite 114: Zobrazení Trendu Teploty
Zobrazení trendu teploty Po úspěšném spojení s venkovním čidlem ukazuje stanice trend teploty (venku) teplotní trend (uvnitř) Jsou možná následující zobrazení: = Teplota stoupá. = Teplota zůstává konstantní. = Teplota klesá. Zobrazení stavu baterie Symboly se objeví na LC displeji, jestliže jsou baterie venkovního čidla nebo stanice slabé. - Seite 115 Jestliže ukazuje displej poruchu, od- straňte přístroje, které jsou příčinou rušení z dosahu stanice nebo venkovního čidla anebo vyjměte krátce baterie ze stanice nebo čidla. Překážky jako např. betonové stěny mohou rušit příjem. V tomto případě změňte stanovi- ště (např. do blízkosti okna). Dbejte na to, že má...
-
Seite 116: Čistění A Ošetřování
Čistění a ošetřování Výrobek čistěte jen na povrchu měkkým suchým hadrem. Nikdy neostřikujte venkovní čidlo, např. zahradní hadicí. Venkovní čidlo je ze všech stran chráněno před stříkající vodou. Zlikvidování Obal se skládá z ekologických materiálů, které můžete zlikvidovat prostřednictvím místních sběren re- cyklovatelných materiálů. -
Seite 117: Zjednodušené Eu Prohlášení O Konformitě
Cd = kadmium, Hg = rtuť, Pb = olovo. Proto odevzdejte opotřebované baterie u komunální sběrny. Zjednodušené EU prohlášení o konformitě Tímto prohlačuje firma OWIM GmbH & Co. KG, Stiftsbergstraße 1, DE-74167 Neckarsulm, NĚMECKO, že výrobek Meteostanice HG02132A / HG02132B odpovídá směrni- cím 2014/53/EU a 2011/65/EU. Úplný... -
Seite 118: Záruka
text EU prohlášení o konformitě je k dispozici na následující webové stránce: www.owim.com Záruka Výrobek byl vyroben s nejvyšší pečlivostí podle přísných kvalitativních směrnic a před odesláním prošel výstupní kontrolou. V případě závad máte možnost uplatnění zákonných práv vůči prodejci. Vaše práva ze zákona ne- jsou omezena naší... - Seite 119 Introducción ..........Página 120 Uso adecuado ..........Página 120 Descripción de los elementos..... Página 120 Datos técnicos ..........Página 122 Contenido ............ Página 123 Seguridad ..........Página 123 Indicaciones generales de seguridad ..Página 123 Indicaciones de seguridad sobre las pilas / baterías ........Página 124 Antes de la puesta en marcha ..
-
Seite 120: Introducción
Estación meteorológica Introducción Enhorabuena por la adquisición de su nuevo producto. Ha optado por un producto de alta calidad. El manual de instrucciones forma parte de este producto. Contiene im- portantes indicaciones sobre seguridad, uso y eliminación. Antes de usar el producto, fa- miliarícese con todas las indicaciones de ma- nejo y de seguridad. -
Seite 121: Estación De Temperatura
Símbolo Z (función de repetición de alarma) Indicación de la fecha (día / mes) Indicación de segundos Indicación de día de la semana Indicación MAX / MIN (temperatura ex- terior) Tendencia de temperatura (temperatura exterior) Temperatura exterior Símbolo de señal de radio -Símbolo (sensor exterior) Indicación MAX / MIN para temperatura interior... -
Seite 122: Sensor Exterior
Tornillo (ø 3 mm) Taco (ø 7,7 mm) Sensor exterior LED de control Dispositivo para colgar Compartimento de las pilas Tornillo (ø 3 mm) Taco (ø 7,7 mm) Datos técnicos Estación de temperatura: Rango de temperaturas: 0 °C a +50 °C +32 °F a +122 °F Resolución de temperatura:... -
Seite 123: Contenido
Grado de protección: IPX4 (resistente a salpicaduras de agua) Banda de frecuencia: 433.05 hasta 434.790 MHz Potencia de transmisión máx.: 433.92 MHz, <10 dBm Nota: Cuando la pantalla LCD muestre „LL.L“ o „HH.H“, la temperatura se encon- trará fuera del rango de medición. Contenido 1 estación meteorológica 1 sensor exterior... -
Seite 124: Indicaciones De Seguridad Sobre Las Pilas / Baterías
sensoriales o mentales reducidas o que cuenten con poca experiencia y/o falta de conocimientos, siempre y cuando se les haya enseñado cómo utilizar el pro- ducto de forma segura y hayan compren- dido los peligros que pueden resultar de un mal uso del mismo. No permita que los niños jueguen con el producto. - Seite 125 ponga las pilas / baterías en cortocircuito ni tampoco las abra. Estas podrían reca- lentarse, explotar o provocar un incendio. Nunca arroje pilas / baterías al fuego o al agua. No aplique cargas mecánicas sobre las pilas / baterías. Riesgo de sulfatación de las pilas / baterías Evite condiciones y temperaturas extre- mas que puedan influir en el funciona-...
-
Seite 126: Antes De La Puesta En Marcha
Retire las pilas / baterías del producto si no va a utilizarlo durante un período de tiempo prolongado. Riesgo de daño del producto ¡Utilice exclusivamente el tipo de pila / batería indicado! Introduzca las pilas / baterías teniendo en cuenta la polaridad marcada con (+) y (-) tanto en las pilas / baterías como en el producto. -
Seite 127: Puesta En Marcha Del Sensor Exterior
humedad. No sitúe el producto cerca de fuentes de calor (p. ej. radiadores). En caso contrario, el producto podría dañarse. Asegúrese de que los aparatos adyacen- tes no utilicen la misma frecuencia de 433 MHz. Estos productos pueden alterar la comunicación inalámbrica. No coloque los productos cerca o en- cima de placas de metal. -
Seite 128: Puesta En Funcionamiento De La Estación De Temperatura
Puesta en funcionamiento de la estación de temperatura Retire la tapa del compartimento para pi- las que se encuentra en la parte trasera de la estación de temperatura. Retire la cinta de seguridad de las pilas y la estación de temperatura emitirá un pi- tido. - Seite 129 Este proceso puede durar hasta 5 minutos, durante los cuales el símbolo -DCF par- padea en la pantalla LCD. Una vez recibida correctamente la señal de radiofrecuencia DCF se muestra permanente- mente el símbolo -DCF en la pantalla LCD. Nota: Durante la recepción de la señal no cambie la estación meteorológica de lugar.
-
Seite 130: Ajuste Manual De Idioma / Zona Horaria / Hora / Fecha
¡PELIGRO DE MUERTE! Asegúrese de no tocar conductos de agua, gas o electricidad cuando perfore la pared. En caso necesario, realice una comprobación con un buscador de líneas an- tes de perforar la pared. Nota: Antes de montar la estación meteoro- lógica, quite el pie de apoyo retirándolo simplemente. - Seite 131 meteorológica. En este caso tiene la posibili- dad de configurar el producto manualmente. 1. Presione y mantenga presionada la tecla CLOCK durante aprox. 3 segundos. 2. Presione la tecla SET / RESET , para cambiar el formato de la hora (12 o 24 horas).
-
Seite 132: Visualización Del Horario De Verano
en un país en el que la hora local es una hora más temprana que la hora cen- troeuropea (MEZ), ajuste la zona horaria a +01. El producto seguirá estando con- trolado por la señal DCF, pero muestra una hora menos de la hora CET. 7. -
Seite 133: Ajuste De La Alarma
Pulse la tecla CLOCK . El símbolo de la 2ª zona horaria y la hora corres- pondiente aparecen en la pantalla LCD. Pulse nuevamente la tecla CLOCK, para regresar a la visualización estándar. Ajuste de la alarma Puede ajustar 2 horas de alarma diferentes. 1. -
Seite 134: Conexión Y Desconexión De La Alarma
Pulse nuevamente la tecla ALARM para regresar a la visualización estándar. Conexión y desconexión de la alarma Pulse una vez la tecla SET / RESET para activar la alarma 1. Pulse 2 veces la tecla SET / RESET para activar la alarma 2. Pulse tres veces la tecla SET / RESET para activar las alarmas 1 y 2. -
Seite 135: Indicación De La Temperatura
con el símbolo de la función de repeti- ción Z La señal de alarma se repite al cabo de aprox. 5 minutos. Pulse la tecla SELECT para desactivar la función de retraso de la alarma. Indicación de la temperatura La pantalla LCD muestra tanto la temperatura interior como la exterior Presione y mantenga presionada la tecla... -
Seite 136: Visualizar La Tendencia De Temperatura
Pulse la tecla SET / RESET mientras se muestran los valores máximo y mínimo para resetear los valores. Pulse la tecla SELECT para regresar a la visualización estándar. Visualizar la tendencia de temperatura Una vez haya establecido correctamente la conexión con el sensor exterior, la estación meteorológica mostrará... -
Seite 137: Corregir Errores
Nota: Tenga en cuenta la polaridad co- rrecta. Ésta se indica en el comparti- mento de las pilas (véase también fig. B + D). Cierre el compartimento de las pilas. Corregir errores Nota: El producto contiene componentes electrónicos. Por ello podría sufrir interferen- cias por otros equipos de radiotransmisión que se encuentren en las proximidades. -
Seite 138: Limpieza Y Mantenimiento
estación meteorológica suele mejorar la transmisión. El frío (temperatura exterior inferior a 0 °C) puede limitar el rendimiento de las pilas del sensor exterior y con ello afectar negativa- mente la transmisión de radiofrecuencia. Las pilas gastadas o casi vacías son otro factor que puede perjudicar la recepción del sensor exterior. -
Seite 139: Eliminación
Eliminación El embalaje está compuesto por materiales no contaminantes que pueden ser desechados en el cen- tro de reciclaje local. El punto verde no se aplica en Alemania. Tenga en cuenta el distintivo del embalaje para la separación de residuos. Está compuesto por abreviaturas (a) y números (b) que significan lo siguiente: 1–7: plásticos / 20–22: papel y... -
Seite 140: Declaración De Conformidad Ue Simplificada
contenedor de reciclaje. Diríjase a la administración competente para obtener información sobre los pun- tos de recogida de residuos y sus horarios. Las pilas defectuosas o usadas deben ser re- cicladas según lo indicado en la directiva 2006/66/CE y en sus modificaciones. Recicle las pilas y/o el producto en los puntos de recogida adecuados. -
Seite 141: Garantía
HG02132A / HG02132B cumple con las di- rectivas 2014/53/UE y 2011/65/UE. Puede consultar la declaración de conformi- dad UE completa en la siguiente dirección web: www.owim.com Garantía El producto ha sido fabricado cuidadosa- mente siguiendo exigentes normas de cali- dad y ha sido probado antes de su entrega. - Seite 142 La garantía cubre defectos de materiales o de fabricación. Esta garantía no cubre aquel- los componentes del producto sometidos a un desgaste normal y que, por ello, puedan considerarse piezas de desgaste (por ej. las pilas). Tampoco cubre daños de componen- tes frágiles como, por ejemplo, los inter- ruptores, baterías y piezas de cristal.
- Seite 143 Introdução ..........Página 144 Utilização correcta ........Página 144 Descrição das peças ........Página 144 Dados técnicos ..........Página 146 Material fornecido ........Página 147 Segurança ..........Página 147 Indicações gerais de segurança ....Página 147 Indicações de segurança relativas às pilhas / baterias ........
-
Seite 144: Introdução
Estação de temperatura Introdução Damos-lhe os parabéns pela aquisição do seu novo produto. Acabou de adquirir um produto de grande qualidade. O manual de instruções é parte integrante deste produto. Contém indicações importantes referentes à segurança, utilização e eliminação. Familiari- ze-se com todas as indicações de utilização e de segurança do produto. -
Seite 145: Estação Meteorológica
Indicação da data (dia / mês) Indicação dos segundos Indicação dos dias da semana Indicação de MÁX. / MÍN. (temperatura exterior) Tendência da temperatura (Temperatura exterior) Temperatura exterior -Símbolo de sinal de rádio Símbolo (Sensor exterior) Indicação de MÁX. / MÍN. para a temperatura interior Temperatura interior Símbolo... -
Seite 146: Dados Técnicos
Sensor exterior LED de controlo Orifício para pendurar Compartimento das pilhas Parafuso (ø 3 mm) Bucha (ø 7,7 mm) Dados técnicos Estação meteorológica: Amplitude de medição da temperatura: 0 °C até + 50 °C +32 °F até +122 °F Resolução de temperatura: 0,1 °C Sinal de radiofrequência: DCF... -
Seite 147: Material Fornecido
Grau de protecção: IPX4 (protecção contra salpicos de água) Espectro de frequência: 433.05 até 434.790 MHz Potência máxima transmitida: 433.92 MHz, <10 dBm Aviso: Quando o visor LC mostra “LL.L“ ou “HH.H“, a temperatura está fora do espectro de medição. Material fornecido 1 Estação de temperatura 1 Sensor exterior... -
Seite 148: Indicações De Segurança Relativas Às Pilhas / Baterias
sensoriais ou mentais reduzidas ou defi- ciências na experiência e conhecimento, se forem vigiadas ou instruídas em rela- ção ao uso seguro do produto e se com- preenderem os perigos que daí possam resultar. As crianças não devem brincar com o produto. A limpeza e a manuten- ção pelo utilizador não devem ser reali- zadas por crianças sem vigilância. - Seite 149 Nunca atire as pilhas ou baterias para chamas ou água. Não exponha as pilhas ou baterias a uma carga mecânica demasiada elevada. Risco de derrame das pilhas / baterias Evite condições e temperaturas extremas que possam ter efeito sobre as pilhas ou baterias, por ex.
-
Seite 150: Antes Da Colocação Em Funcionamento
Perigo de dano ao produto Utilize apenas o tipo de pilha ou bateria indicado! Insira as pilhas / baterias de acordo com a especificação de polaridade (+) e (-) na pilha / bateria e produto. Limpe os contactos na pilha / bateria e no compartimento de baterias antes de colocar as baterias! Retire de imediato as pilhas ou baterias... -
Seite 151: Colocar O Sensor Exterior Em Funcionamento
frequência de 433 MHz. Estes produtos poderão causar interferências na ligação por rádio. Não coloque os produtos junto ou em cima de placas metálicas. A radiotrans- missão entre os aparelhos pode ser reduzida. Sinal de radiofrequência (DCF): O sinal DCF (emissor de sinal horário) consiste em impulsos temporais, emitidos por um dos relógios mais precisos do mundo, nas proxi- midades de Frankfurt / Main, Alemanha –... -
Seite 152: Colocar A Estação Meteorológica Em Funcionamento
Colocar a estação meteorológica em funcionamento Remova a tampa do compartimento de pilhas no lado de trás da estação de temperatura. Retire a fita de segurança das pilhas e da estação de temperatura soa um “Piep“. Feche a tampa do compartimento das pi- lhas. - Seite 153 indicado no visor LC através do -símbolo intermitente. Ao dar-se uma recepção com sucesso do si- nal de radiofrequência DCF, o -símbolo é mostrado no visor LC de forma permanente. Nota: Durante a recepção, não mude a lo- calização da estação meteorológica. Caso contrário, podem dar-se interferências na re- cepção.
- Seite 154 atentamente as indicações de utilização e de segurança do seu berbequim. PERIGO DE MORTE! Certifi- que-se de que não atinge cabos eléctricos, condutas de gás ou de água ao furar a parede. Se necessário, proceda a uma verificação com um detector de cabos antes de furar uma parede.
-
Seite 155: Configurar Manualmente Idioma / Fuso Horário / Hora / Data
Configurar manualmente idioma / fuso horário / hora / data A receção do sinal de radiofrequência DCF pode sofrer interferências e/ou interrupções no local de instalação da estação de tempe- ratura. Neste caso, tens a possibilidade de ajustar o produto manualmente. 1. -
Seite 156: Indicar A Hora De Verão
6. Prima a tecla SET / RESET para configu- rar o fuso horário desejado para fuso ho- rário 2 (–12 horas até +12 horas). Nota: Caso se encontre num país em que ainda receba o sinal de radiofrequência DCF, mas cuja hora real é divergente, pode utilizar o ajuste do fuso horário para configurar a hora real. -
Seite 157: Interrogar O Fuso Horário
temepratura deteta automaticamente se está na hora de Verão ou não através do sinal de radiofrequência DCF. Interrogar o fuso horário Na visualização padrão é indicado o fuso horário de acordo com o sinal DCF. Prima a tecla CLOCK . O símbolo para a zone de tempo 2 e a hora correspondente aparecem no visor LC. -
Seite 158: Aceder Às Horas De Alarme
4. Prima a tecla SET / RESET para configurar o valor desejado. 5. Prima a tecla ALARM para confirmar a sua configuração. 6. Repita os passos 2 a 5 para configurar a hora para o alarme 2. Aceder às horas de alarme Prima uma ou duas vezes a tecla ALARM para aceder à... -
Seite 159: Utilizar A Função "Snooze
Prima três vezes a tecla SET / RESET para desactivar o alarme 1. Prima duas vezes a tecla SET / RESET para desactivar o alarme 2. Prima uma vez a tecla SET / RESET para desactivar o alarme 1 e 2. Utilizar a função “snooze” Prima a tecla Z / REGISTER durante... -
Seite 160: Aceder A Valores Mínimos / Máximos
Aceder a valores mínimos / máximos A estação de temperatura memoriza os valores máximos e mínimos do sensor exterior conec- tado e da própria estação de temperatura. Prima a tecla SELECT para que sejam apresentados os valores máximos da temperatura interior e exterior. Prima novamente a tecla SELECT para que sejam apresentados os valores míni- mos da temperatura interior e exterior. -
Seite 161: Indicação Das Pilhas
Indicação das pilhas Os símbolos aparecem no visor LC da estação de temperatura quando as pilhas do sensor exterior ou da estação de temperatura estiverem muito fracas. Substituir as pilhas Abra o compartimento das pilhas Retire as pilhas gastas. Coloque as novas pilhas de 1,5 V (corrente contínua) (AA) nos comparti- mentos das pilhas. - Seite 162 seja destorcida fortemente. Neste caso, mude a posição (por ex., perto de uma janela). Esteja atento para o fato de que o sensor externo sempre deve ser montado no máximo 30 metros de distância da estação de tempe- ratura (ar livre). O alcance indicado é o al- cance ao ar livre e significa que nenhum obstáculo existe entre o sensor externo e a estação de temperatura.
-
Seite 163: Limpeza E Conservação
Limpeza e conservação Limpe o produto somente na parte exterior com um pano seco e macio. Nunca borrife o sensor externo, por exemplo, com uma mangueira de jardim. O sensor externo é protegido contra sal- picos de água de todas as direções. Eliminação A embalagem é... - Seite 164 As possibilidades de reciclagem dos artigos utilizados poderão ser averiguadas no seu Município ou Câmara Municipal. Não deposite o produto utilizado no lixo doméstico, a favor da pro- teção do ambiente. Elimine-o de forma responsável. Pode informar- -se no seu município sobre os lo- cais de recolha adequados e o seu período de funcionamento.
-
Seite 165: Declaração De Conformidade Ue Simplificada
Através dessa, a OWIM GmbH & Co. KG, Stiftsbergstraße 1, DE-74167 Neckarsulm, ALEMANHA, declara que o produto Estação de temperatura HG02132A / HG02132B corresponde às diretrizes 2014/53/UE e 2011/65/UE . O texto completo da decla- ração de conformidade UE está disponível no seguinte endereço da internet:... - Seite 166 Caso num espaço de tempo de 3 anos a par- tir da data da compra deste producto surja um erro de material ou de fabrico, o producto será reparado ou substituído por nós – se- gundo a nossa escolha – e sem qualquer custo.
- Seite 167 OWIM GmbH & Co. KG Stiftsbergstraße 1 DE-74167 Neckarsulm GERMANY Model no.: HG02132A / HG02132B Version: 09 / 2017 Stand der Informationen · Last Information Update · Version des informations · Stand van de informatie · Stav informací · Estado de las informaciones ·...