Herunterladen Diese Seite drucken
Linksys WRT54GS Bedienungsanleitung

Linksys WRT54GS Bedienungsanleitung

Einfache einrichtung in drei schritten
Vorschau ausblenden Andere Handbücher für WRT54GS:

Werbung

Verfügbare Sprachen

Verfügbare Sprachen

®
A Division of Cisco Systems, Inc.
2,4
GHz
Wireless-G
802.11g
Broadband Router
User Guide
with SpeedBooster
WIRELESS
WRT54GS (EU/LA/UK)
Model No.

Werbung

loading

Inhaltszusammenfassung für Linksys WRT54GS

  • Seite 1 ® A Division of Cisco Systems, Inc. Wireless-G 802.11g Broadband Router User Guide with SpeedBooster WIRELESS WRT54GS (EU/LA/UK) Model No.
  • Seite 2 Wireless-G Broadband Router with SpeedBooster Copyright and Trademarks Specifications are subject to change without notice. Linksys is a registered trademark or trademark of Cisco Systems, Inc. and/or its affiliates in the U.S. and certain other countries. Copyright © 2005 Cisco Systems, Inc. All rights reserved.
  • Seite 3: Inhaltsverzeichnis

    Wireless-G Broadband Router with SpeedBooster Table of Contents Chapter 1: Introduction Welcome What’s in this Guide? Chapter 2: Planning Your Wireless Network Network Topology Ad-Hoc versus Infrastructure Mode Network Layout Chapter 3: Getting to Know the Wireless-G Broadband Router The Back Panel The Front Panel Chapter 4: Connecting the Wireless-G Broadband Router Overview...
  • Seite 4 The Administration Tab - Config Management The Status Tab - Router The Status Tab - Local Network The Status Tab - Wireless Chapter 7: Using the Linksys Parental Control Service Overview Introduction Signing up for the Linksys Parental Control Service...
  • Seite 5 Wireless-G Broadband Router with SpeedBooster For the Router’s Web-based Utility Appendix F: Glossary Appendix G: Specifications Appendix H: Warranty Information Appendix I: Regulatory Information Appendix J: Contact Information...
  • Seite 6: List Of Figures

    Wireless-G Broadband Router with SpeedBooster List of Figures Figure 3-1: The Router’s Back Panel Figure 3-2: The Router’s Front Panel Figure 4-1: Connecting Your Modem Figure 4-2: Connecting Your Network Devices Figure 4-3: Connecting the Power Figure 4-4: Connecting the Router Behind Another Figure 4-5: Diagram for Connection to Another Router Figure 4-6: The Router with the Internet Connection is connected through the Internet Port Figure 4-7: Connecting Your Network Devices...
  • Seite 7 Wireless-G Broadband Router with SpeedBooster Figure 5-21: Additional Information - Hardware Button Figure 5-22: Additional Information - Software Button Figure 5-23: Setup Wizard’s Configure Wireless Settings Screen Figure 5-24: Setup Wizard’s Confirm New Settings Screen Figure 5-25: Setup Wizard’s Safe Surfing Screen Figure 5-26: Setup Wizard’s Congratulations Screen Figure 5-27: Setup Wizard’s Configure Wireless Settings Screen Figure 5-28: Setup Wizard’s Wireless Settings Screen...
  • Seite 8 Wireless-G Broadband Router with SpeedBooster Figure 6-16: Setup Tab - Advanced Routing (Router) Figure 6-17: Wireless Tab - Basic Wireless Settings Figure 6-18: Wireless Tab - Wireless Security (WPA Pre-Shared Key) Figure 6-19: Wireless Tab - Wireless Security (WPA RADIUS) Figure 6-20: Wireless Tab - Wireless Security (RADIUS) Figure 6-21: Wireless Tab - Wireless Security (WEP) Figure 6-22: Wireless Tab - Wireless MAC Filter...
  • Seite 9 Wireless-G Broadband Router with SpeedBooster Figure 7-2: Access Restrictions Tab - Parental Control Figure 7-3: Linksys Service Agreement Figure 7-4: Sign Up Figure 7-5: Purchase Service Figure 7-6: Connecting to the Parental Control Service Figure 7-7: Congratulations Figure 7-8: Parental Controls Login...
  • Seite 10 Wireless-G Broadband Router with SpeedBooster Figure 7-35: Right-Click Tray Icon Figure 7-36: Re-activate Tray Icon Figure C-1: Upgrade Firmware Figure E-1: IP Configuration Screen Figure E-2: MAC Address/Adapter Address Figure E-3: MAC Address/Physical Address Figure E-4: MAC Address Filter List Figure E-5: MAC Address Clone...
  • Seite 11: Chapter 1: Introduction

    Wireless-G Broadband Router with SpeedBooster Chapter 1: Introduction Welcome Thank you for choosing the Linksys Wireless-G Broadband Router with SpeedBooster. The Wireless-G Broadband Router with SpeedBooster will allow you to network wirelessly better than ever, sharing Internet access, files and fun, easily and securely.
  • Seite 12: What's In This Guide

    • Chapter 6: Configuring the Wireless-G Broadband Router This chapter explains how to use the Router’s Web-Based Utility. • Chapter 7: Using the Linksys Parental Control Service This chapter explains how to sign up for the Service, manage your account, and use the Internet when the Service is actively controlling Internet traffic and messages.
  • Seite 13 This appendix supplies the Router’s warranty information. • Appendix I: Regulatory Information This appendix supplies the Router’s regulatory information. • Appendix J: Contact Information This appendix provides contact information for a variety of Linksys resources, including Technical Support. Chapter 1: Introduction What’s in this Guide?
  • Seite 14: Chapter 2: Planning Your Wireless Network

    Wireless-G Broadband Router with SpeedBooster Chapter 2: Planning Your Wireless Network Network Topology network: a series of computers or devices connected for the purpose of data sharing, A wireless local area network is exactly like a regular local area network (LAN), except that each computer in the storage, and/or transmission between users.
  • Seite 15: Chapter 2: Planning Your Wireless Network Network Layout

    Linksys's switches (such as the SD205 or SD208). With these, and many other, Linksys products, your networking options are limitless. Go to the Linksys website at www.linksys.com for more information about products that work with the Wireless-G Broadband Router.
  • Seite 16: Chapter 3: Getting To Know The Wireless-G Broadband Router

    Wireless-G Broadband Router with SpeedBooster Chapter 3: Getting to Know the Wireless-G Broadband Router The Back Panel The Router's ports, where the cables are connected, are located on the back panel. Important: Resetting the Router will erase all of your settings (WEP Encryption, network settings, etc.) and replace them with the factory defaults.
  • Seite 17: The Front Panel

    Wireless-G Broadband Router with SpeedBooster The Front Panel The Router’s LEDs, where information about network activity is displayed, are located on the front panel. NOTE: SecureEasySetup is a feature that makes it easy to set up your wireless network. If you have SecureEasySetup devices, run the Router’s Setup Wizard CD-ROM and follow the on-screen instructions to use SecureEasySetup.
  • Seite 18: Chapter 4: Connecting The Wireless-G Broadband Router

    Wireless-G Broadband Router with SpeedBooster Chapter 4: Connecting the Wireless-G Broadband Router Overview This chapter includes two sets of instructions. If the Wireless-G Broadband Router will be the only router in your network, follow the instructions in “Hardware Installation for Connection to Your Broadband Modem.” You may wish to run some applications, such as Parental Control, for only certain PCs on your network and will need to run the Wireless-G Broadband Router behind another router to do this.
  • Seite 19: Figure 4-2: Connecting Your Network Devices

    Wireless-G Broadband Router with SpeedBooster 5. Connect your network PCs or Ethernet devices to the Router’s numbered ports using standard Ethernet network cabling. Figure 4-2: Connecting Your Network Devices 6. Connect the AC power adapter to the Router's Power port and the other end into an electrical outlet. Only use IMPORTANT: Make sure you use the power the power adapter supplied with the Router.
  • Seite 20: Connecting One Router To Another

    First, make sure the Router is NOT connected to your network. Then follow these instructions: NOTE: Steps 1-4 are instructions for a typical Linksys router; however, if you are using a non- 1. To access the other router’s Web-based Utility, launch Internet Explorer or Netscape Navigator, and enter the Linksys router, refer to the other router’s...
  • Seite 21: Figure 4-6: The Router With The Internet Connection Is Connected Through The Internet Port

    Wireless-G Broadband Router with SpeedBooster 8. Connect a standard Ethernet network cable to the Broadband Router’s Internet port. Then, connect the other end of the Ethernet cable to one of the numbered Ethernet ports on your other router. Figure 4-6: The Router with the Internet Connection is connected through the Internet Port 9.
  • Seite 22: Figure 4-8: Connecting The Power

    Wireless-G Broadband Router with SpeedBooster 10. Connect the AC power adapter to the Broadband Router's Power port and the other end into an electrical outlet. Only use the power adapter supplied with the Broadband Router. Use of a different adapter may result in product damage.
  • Seite 23: Chapter 5: Setting Up The Wireless-G Broadband Router

    Wireless-G Broadband Router with SpeedBooster Chapter 5: Setting up the Wireless-G Broadband Router Overview The Wireless-G Broadband Router with SpeedBooster Setup Wizard will guide you through the installation procedure. It will go through the instructions for configuring the Router’s network and wireless settings. Using the Setup Wizard 1.
  • Seite 24: Figure 5-3: Setup Wizard's License Agreement Screen

    Wireless-G Broadband Router with SpeedBooster 4. After reading the License Agreement, click the Next button if you accept, or click the Cancel button to end the installation. Figure 5-3: Setup Wizard’s License Agreement Screen 5. The Setup Wizard will ask you to disconnect your broadband modem from your PC. After you have done so, click the Next button.
  • Seite 25: Figure 5-5: Setup Wizard's Connect The Modem To The Router Screen

    Wireless-G Broadband Router with SpeedBooster 6. The Setup Wizard will ask you to connect your broadband modem to the Router. After you have done so, click the Next button. Figure 5-5: Setup Wizard’s Connect the Modem to the Router Screen 7.
  • Seite 26: Figure 5-7: Setup Wizard's Connect The Network Cable To The Router Screen

    Wireless-G Broadband Router with SpeedBooster 8. The Setup Wizard will ask you to connect the other end of the network cable to the Router. Then you can also connect additional PCs to the Router. After you have done so, click the Next button. Figure 5-7: Setup Wizard’s Connect the Network Cable to the Router Screen 9.
  • Seite 27: Figure 5-9: Setup Wizard's Check The Router's Status Screen

    Wireless-G Broadband Router with SpeedBooster 10. Make sure the Router’s Power, Internet, and numbered LEDs (depending on the number of PCs connected) are lit on its front panel. After you have done so, click the Next button. Figure 5-9: Setup Wizard’s Check the Router’s Status Screen 11.
  • Seite 28: Figure 5-11: Setup Wizard's Configure Dsl (Pppoe) Settings Screen

    Wireless-G Broadband Router with SpeedBooster DSL (PPPoE) User Name - Enter the User Name provided by your ISP. Password - Enter the Password provided by your ISP. Confirm - To confirm the Password, enter it again in this field. Keep Alive - If you want the Router to periodically check your Internet connection, select Keep Alive. Then specify how often you want the Router to check the Internet connection.
  • Seite 29: Figure 5-13: Setup Wizard's Advanced Internet Settings - Pptp Screen

    Wireless-G Broadband Router with SpeedBooster PPTP Connection - PPTP (Point-to-Point Tunneling Protocol) service is used in Europe only. If you are using a PPTP connection, select PPTP from the drop-down menu. User Name - Enter the User Name provided by your ISP. Password - Enter the Password provided by your ISP.
  • Seite 30: Figure 5-15: Setup Wizard's Advanced Internet Settings - L2Tp Screen

    Wireless-G Broadband Router with SpeedBooster L2TP Connection - If you are using an L2TP (Layer 2 Tunneling Protocol) connection, select L2TP from the drop- down menu. User Name - Enter the User Name provided by your ISP. Password - Enter the Password provided by your ISP. Confirm - To confirm the Password, enter it again in this field.
  • Seite 31: Figure 5-16: Setup Wizard's Advanced Internet Settings - Telstra Screen

    Wireless-G Broadband Router with SpeedBooster Telstra Connection - Telstra is a service used in Australia only. If you are using this service, select Telstra from the drop-down menu. User Name - Enter the User Name provided by your ISP. Password - Enter the Password provided by your ISP. Confirm - To confirm the Password, enter it again in this field.
  • Seite 32: Figure 5-17: Setup Wizard's Set The Router's Password Screen

    Wireless-G Broadband Router with SpeedBooster 12. The Router provides a Web-based Utility you can use for configuring the Router from any networked PC. Password - Enter a password that will control access to the Utility. Confirm - Enter the password again in the Confirm field. Click the Next button to continue or the Back button to return to the previous screen.
  • Seite 33: Figure 5-19: Setup Wizard's Secureeasysetup Screen

    Wireless-G Broadband Router with SpeedBooster Using the Router’s SecureEasySetup Feature Read these instructions before you press any SecureEasySetup buttons. You should locate the SecureEasySetup buttons of your devices before using the Router’s SecureEasySetup feature. NOTE: SecureEasySetup uses WPA-Personal encryption. If your current wireless devices do not support WPA-Personal security, then you cannot use SecureEasySetup on your network.
  • Seite 34: Figure 5-23: Setup Wizard's Configure Wireless Settings Screen

    Wireless-G Broadband Router with SpeedBooster 2. Press the Router’s orange Cisco logo on its front panel. When the logo turns white and begins to flash, press the SecureEasySetup button on another device. The Router’s Cisco logo will stop flashing when the device has been added to the network.
  • Seite 35: Figure 5-25: Setup Wizard's Safe Surfing Screen

    Suite button to install the special edition of Norton Internet Security on your computer, or click the Linksys Parental Control Service button to sign up for a freee trial of the Linksys Parental Control Service. Click Exit to return to the Setup Wizard.
  • Seite 36: Figure 5-27: Setup Wizard's Configure Wireless Settings Screen

    In the SSID field, enter the name of your wireless network. The SSID must be identical for all devices in the network. The default setting is linksys (all lowercase). NOTE: An SSID is the network name shared by all devices in a wireless network. Your network’s SSID should be unique to your network and identical for all devices within the network.
  • Seite 37: Figure 5-29: Setup Wizard's Wireless Security - Wpa-Psk Screen

    Wireless-G Broadband Router with SpeedBooster 3. Select the method of security you want to use: WPA-PSK (also called WPA-Personal), WEP (64-Bit), or WEP (128-Bit). WPA stands for Wi-Fi Protected Access, and WEP stands for Wired Equivalent Privacy. WPA is a stronger security method than WEP.
  • Seite 38: Figure 5-30: Setup Wizard's Wireless Security - Wep (64-Bit) Screen

    16 alphanumeric characters. It must match the passphrase of your other wireless network devices and is compatible with Linksys wireless products only. (If you have any non-Linksys wireless products, enter the WEP key manually on those products.) WEP Key - The WEP key you enter must match the WEP key of your wireless network.
  • Seite 39: Figure 5-32: Setup Wizard's Safe Surfing Screen

    Suite button to install the special edition of Norton Internet Security on your computer, or click the Linksys Parental Control Service button to sign up for a freee trial of the Linksys Parental Control Service. Click Exit to return to the Setup Wizard.
  • Seite 40: Using Secureeasysetup To Configure Your Notebook

    Wireless-G Broadband Router with SpeedBooster Using SecureEasySetup to Configure Your Notebook This section explains how to use SecureEasySetup if you have a computer displaying the SecureEasySetup logo. NOTE: SecureEasySetup uses WPA-Personal encryption. If your current wireless devices do not support WPA-Personal security, then you cannot use SecureEasySetup on your network. You will need to manually configure your network security using the encryption supported by your existing devices.
  • Seite 41: Figure 5-36: Configure Wireless Settings #1 Screen

    Wireless-G Broadband Router with SpeedBooster 2. The next screen will tell you to press the lighted Cisco logo on the Router. After you have pressed the logo, click the Next button to continue. To exit the Wireless Setup Wizard, click the Exit button. If you need more information, click the Help button. Figure 5-36: Configure Wireless Settings #1 Screen 3.
  • Seite 42: Figure 5-38: Your Wireless Settings Screen

    Wireless-G Broadband Router with SpeedBooster 4. The Your Wireless Settings screen will appear when the wireless settings have been configured. To save your configuration settings to a text file on your computer, click the Save button. To print your configuration settings, click the Print button.
  • Seite 43: Chapter 6: Configuring The Wireless-G Broadband Router

    Wireless-G Broadband Router with SpeedBooster Chapter 6: Configuring the Wireless-G Broadband Router NOTE: When first installing the Router, you should Overview use the Setup Wizard on the Setup CD-ROM. If you want to configure advanced settings, use this chapter to learn about the Web-based Utility. You should always use the Setup CD-ROM when first installing the Router.
  • Seite 44: The Setup Tab - Basic Setup

    Wireless-G Broadband Router with SpeedBooster The Setup Tab - Basic Setup The first screen that appears displays the Setup tab. This allows you to change the Router's general settings. Change these settings as described here and click the Save Settings button to apply your changes or Cancel Changes to cancel your changes.
  • Seite 45: Figure 6-5: Pppoe Connection Type

    Wireless-G Broadband Router with SpeedBooster • PPPoE. Some DSL-based ISPs use PPPoE (Point-to-Point Protocol over Ethernet) to establish Internet connections. If you are connected to the Internet through a DSL line, check with your ISP to see if they use PPPoE.
  • Seite 46: Figure 6-7: L2Tp Connection Type

    Wireless-G Broadband Router with SpeedBooster • L2TP. Connection. If you are using an L2TP (Layer 2 Tunneling Protocol) connection, select L2TP from the drop- down menu. User Name. Enter the User Name provided by your ISP. Password. Enter the Password provided by your ISP. Figure 6-7: L2TP Connection Type Confirm.
  • Seite 47 Wireless-G Broadband Router with SpeedBooster Connect on Demand. If you want the Router to end the Internet connection after it has been inactive for a period of time, select Connect on Demand and designate the number of minutes you want that period of inactivity to last.
  • Seite 48 Wireless-G Broadband Router with SpeedBooster DHCP Server. DHCP is enabled by factory default. If you already have a DHCP server on your network, or you don’t want a DHCP server, then click the Disable radio button (no other DHCP features will be available). Starting IP Address.
  • Seite 49: The Setup Tab - Ddns

    Wireless-G Broadband Router with SpeedBooster The Setup Tab - DDNS The Router offers a Dynamic Domain Name System (DDNS) feature. DDNS lets you assign a fixed host and domain name to a dynamic Internet IP address. It is useful when you are hosting your own website, FTP server, or other server behind the Router.
  • Seite 50: The Setup Tab - Mac Address Clone

    Wireless-G Broadband Router with SpeedBooster The Setup Tab - MAC Address Clone A MAC address is a 12-digit code assigned to a unique piece of hardware for identification. Some ISPs will require you to register a MAC address in order to access the Internet. If you do not wish to re-register the MAC address with your ISP, you may assign the MAC address you have currently registered with your ISP to the Router with the MAC Address Clone feature.
  • Seite 51: The Setup Tab - Advanced Routing

    Wireless-G Broadband Router with SpeedBooster The Setup Tab - Advanced Routing This tab is used to set up the Router’s advanced functions. Operating Mode allows you to select the type(s) of advanced functions you use. Dynamic Routing will automatically adjust how packets travel on your network. Static Routing sets up a fixed route to another network destination.
  • Seite 52: The Wireless Tab - Basic Wireless Settings

    (use any of the characters on the keyboard). Make sure this setting is the same for all points in your wireless network. For added security, you should change the default SSID (linksys) to a unique name. Figure 6-15: Setup Tab - Advanced Routing (Gateway) Wireless Channel.
  • Seite 53: The Wireless Tab - Wireless Security

    Wireless-G Broadband Router with SpeedBooster The Wireless Tab - Wireless Security The Wireless Security settings configure the security of your wireless network. There are four wireless security mode options supported by the Router: WPA Pre-Shared Key, WPA RADIUS, RADIUS, and WEP. (WPA stands for Wi- Fi Protected Access, which is a security standard stronger than WEP encryption.
  • Seite 54: Figure 6-18: Wireless Tab - Wireless Security (Wpa Pre-Shared Key)

    Wireless-G Broadband Router with SpeedBooster RADIUS. This option features WEP used in coordination with a RADIUS server. (This should only be used when a IMPORTANT: If you are using WPA, always remember that each device in your wireless RADIUS server is connected to the Router.) First, enter the RADIUS server’s IP Address and port number, along with a key shared between the Router and the server.
  • Seite 55: The Wireless Tab - Wireless Mac Filter

    Wireless-G Broadband Router with SpeedBooster The Wireless Tab - Wireless MAC Filter IMPORTANT: If you are using WEP encryption, always remember that each device in your wireless network MUST use Wireless access can be filtered by using the MAC addresses of the wireless devices transmitting within your the same WEP encryption method and network’s radius.
  • Seite 56: The Wireless Tab - Advanced Wireless Settings

    Wireless-G Broadband Router with SpeedBooster The Wireless Tab - Advanced Wireless Settings This tab is used to set up the Router’s advanced wireless functions. These settings should only be adjusted by an expert administrator as incorrect settings can reduce wireless performance. Authentication Type.
  • Seite 57: Figure 6-24: Wireless Tab - Advanced Wireless Settings

    Wireless-G Broadband Router with SpeedBooster Fragmentation Threshold. This value specifies the maximum size for a packet before data is fragmented into multiple packets. If you experience a high packet error rate, you may slightly increase the Fragmentation Threshold. Setting the Fragmentation Threshold too low may result in poor network performance. Only minor reduction of the default value is recommended.
  • Seite 58: The Security Tab - Firewall

    Wireless-G Broadband Router with SpeedBooster The Security Tab - Firewall fragmentation: breaking a packet into smaller units when transmitting over a network medium that Firewall Protection. Enable this feature to employ Stateful Packet Inspection (SPI) for more detailed review of cannot support the original size of the packet.
  • Seite 59: Figure 6-25: Security Tab - Firewall

    Wireless-G Broadband Router with SpeedBooster Change these settings as described here and click the Save Settings button to apply your changes or Cancel Changes to cancel your changes. Figure 6-25: Security Tab - Firewall firewall: a set of related programs located at a network gateway server that protects the resources of a network from users from other networks.
  • Seite 60: The Access Restrictions Tab - Parental Control

    Linksys Parental Control feature, click the Disable radio button. Sign Up for Parental Control Service. To sign up for a free trial of the Linksys Parental Control Service, click Figure 6-27: Access Restrictions Tab - Parental Control this link.
  • Seite 61: The Access Restrictions Tab - Internet Access

    Wireless-G Broadband Router with SpeedBooster The Access Restrictions Tab - Internet Access The Internet Access screen allows you to block or allow specific kinds of Internet usage and traffic, such as Internet access, designated services, websites, and inbound traffic during specific days and times. Internet Access Policy.
  • Seite 62: Figure 6-31: Port Services

    Wireless-G Broadband Router with SpeedBooster 7. You can filter access to various services accessed over the Internet, such as FTP or telnet, by selecting services from the drop-down menus next to Blocked Services. (You can block up to 20 services.) Then enter the range of ports you want to filter.
  • Seite 63: The Applications And Gaming Tab - Port Range Forward

    Wireless-G Broadband Router with SpeedBooster The Applications and Gaming Tab - Port Range Forward The Applications and Gaming Tab allows you to set up public services on your network, such as web servers, ftp servers, e-mail servers, or other specialized Internet applications. (Specialized Internet applications are any applications that use Internet access to perform functions such as videoconferencing or online gaming.
  • Seite 64: The Applications & Gaming Tab - Port Triggering

    Wireless-G Broadband Router with SpeedBooster The Applications & Gaming Tab - Port Triggering The Port Triggering screen allows the Router to watch outgoing data for specific port numbers. The IP address of the computer that sends the matching data is remembered by the Router, so that when the requested data returns through the Router, the data is pulled back to the proper computer by way of IP address and port mapping rules.
  • Seite 65: The Applications And Gaming Tab - Dmz

    Wireless-G Broadband Router with SpeedBooster The Applications and Gaming Tab - DMZ The DMZ feature allows one network user to be exposed to the Internet for use of a special-purpose service such as Internet gaming or videoconferencing. DMZ hosting forwards all the ports at the same time to one PC. The Port Range Forward feature is more secure because it only opens the ports you want to have opened, while DMZ hosting opens all the ports of one computer, exposing the computer to the Internet.
  • Seite 66 Wireless-G Broadband Router with SpeedBooster Router’s other four ports will be automatically assigned low priority. Incoming Rate Limit limits the incoming bandwidth. To use this feature, select 8M, 4M, 2M, 1M, 512K, 256K, or 128K (M stands for Mbps, while K stands for kbps). If you do not want to use this feature, keep the default, Disable.
  • Seite 67: The Administration Tab - Management

    Wireless-G Broadband Router with SpeedBooster The Administration Tab - Management This section of the Administration tab allows the network’s administrator to manage specific Router functions for access and security. Local Router Access. You can change the Router’s password from here. Enter a new Router password and then type it again in the Re-enter to confirm field to confirm.
  • Seite 68: The Administration Tab - Diagnostics

    Wireless-G Broadband Router with SpeedBooster The Administration Tab - Diagnostics The diagnostic tests (Ping and Traceroute) allow you to check the connections of your network components. Ping Test. The Ping test will check the status of a connection. Click the Ping button to open the Ping Test screen. Enter the address of the PC whose connection you wish to test and how many times you wish to test it.
  • Seite 69: The Administration Tab - Factory Defaults

    Firmware can be upgraded by clicking the Upgrade button after browsing for the firmware, which you can download from the Linksys international website. Do not upgrade your firmware unless you are experiencing problems with the Router. For more information about upgrading firmware, refer to “Appendix C: Upgrading Firmware”.
  • Seite 70: The Administration Tab - Config Management

    Wireless-G Broadband Router with SpeedBooster The Administration Tab - Config Management This screen is used to back up or restore the Router’s configuration file. To back up the Router’s configuration file, click the Backup button. Then follow the on-screen instructions. To restore the Router’s configuration file, click the Browse button to locate the file, and follow the on-screen instructions.
  • Seite 71: The Status Tab - Router

    Wireless-G Broadband Router with SpeedBooster The Status Tab - Router The Router screen on the Status Tab displays the Router’s current status. Firmware Version. This is the Router’s current firmware. Current Time. This shows the time, as you set on the Setup Tab. MAC Address.
  • Seite 72: The Status Tab - Local Network

    Wireless-G Broadband Router with SpeedBooster The Status Tab - Local Network The Local Network screen on the Status Tab displays the status of your network. MAC Address. This is the Router’s MAC Address, as seen on your local, Ethernet network. IP Address.
  • Seite 73: The Status Tab - Wireless

    Wireless-G Broadband Router with SpeedBooster The Status Tab - Wireless The Wireless screen on the Status Tab displays the status of your wireless network. MAC Address. This is the Router’s MAC Address, as seen on your local, wireless network. Mode. As selected from the Wireless tab, this will display the wireless mode (Mixed, G-Only, or Disabled) used by the network.
  • Seite 74: Chapter 7: Using The Linksys Parental Control Service

    Chapter 7: Using the Linksys Parental Control Service Overview This chapter will describe the Linksys Parental Control Service*, as well as explain how to sign up for the Service, manage your account, and use the Internet when the Service is actively controlling Internet traffic and messages.
  • Seite 75: Signing Up For The Linksys Parental Control Service

    Signing up for the Linksys Parental Control Service account, you will need an active Internet connection. There are two ways to access the website you will use to sign up for your Linksys Parental Controls account. Setup Wizard At the end of the Setup Wizard, you will see the Safe Surfing screen. Click the Linksys Parental Control Service button to sign up for a free trial service.
  • Seite 76: Figure 7-3: Linksys Service Agreement

    To sign up for your Linksys Parental Controls account, you will need an active Internet connection. Then follow these instructions: 1. After you click Linksys Parental Control Service from the Setup Wizard or the Sign Up for Parental Control Service button from the Web-based Utility, the Linksys Service Agreement screen will appear. You must scroll down the entire agreement before you can accept the Agreement.
  • Seite 77: Figure 7-5: Purchase Service

    In the Full Name on Card field, enter the complete name that appears on the credit card you are using. Then click the Finish button. To cancel your sign-up, click the Cancel button. Figure 7-5: Purchase Service Chapter 7: Using the Linksys Parental Control Service Signing up for the Linksys Parental Control Service...
  • Seite 78: Figure 7-6: Connecting To The Parental Control Service

    If you want to create user profiles for your family members now, click the Create Profiles button. For additional instructions, proceed to step 4 of the “Managing Linksys Parental Controls” section. If you want to access the Internet immediately, click the Sign in and Surf button. For more information, go to the “Using the Linksys Parental Control Service”...
  • Seite 79: Managing Linksys Parental Controls

    Wireless-G Broadband Router with SpeedBooster Managing Linksys Parental Controls To manage your Linksys Parental Controls account, you will need an active Internet connection. Then follow these instructions: 1. Open the Router’s Web-based Utility. 2. Click the Access Restrictions tab. 3. Click the Manage Account button on the Parental Controls screen. (This screen also lists the status of your Parental Controls account.)
  • Seite 80: Support Center

    Subscribe to Service Click Subscribe to Service to sign up for your Parental Controls subscription before your free trial period expires. The Purchase Linksys Parental Control Service screen will appear. Follow these instructions: 1. Select a subscription option. Figure 7-9: Support Center 2.
  • Seite 81: Figure 7-11: Update Contact Information

    If you want to cancel your Parental Control Service account, click this link. Click the Proceed button on the following screen to cancel your Parental Control Service. Figure 7-12: Cancel Your Parental Control Account Chapter 7: Using the Linksys Parental Control Service Support Center...
  • Seite 82: Activity Reports

    Delete button. To save all reports to your computer, click the Download button. The reports will be saved as a tab-delimited text file called PcReport. To scroll through the entries, click First, Figure 7-14: Types of Reports Previous, or Next. Chapter 7: Using the Linksys Parental Control Service Activity Reports...
  • Seite 83: Figure 7-15: Web Report

    Delete button. To save all reports to your computer, click the Download button. The reports will be saved as a tab-delimited text file called PcReport. To scroll through the entries, click First, Previous, or Next. Figure 7-15: Web Report Chapter 7: Using the Linksys Parental Control Service Activity Reports...
  • Seite 84: Family Settings

    Click the I’m Done button when you are finished with your changes. I’m Done. When you have finished making changes to your Parental Controls account, click the I’m Done button to exit the Parental Controls Billing & Support Center website. Chapter 7: Using the Linksys Parental Control Service Family Settings...
  • Seite 85 Instant Messaging. Select one of the following: No Instant-Messaging/Chat reporting, Report only Blocked Instant-Messaging/Chat activity, or Report all Instant-Messaging/Chat activity. Click the Save button to save your changes, or click the Cancel button to cancel your changes. Figure 7-19: Online Reporting Chapter 7: Using the Linksys Parental Control Service Family Settings...
  • Seite 86 Click the Save button to save your changes, or click the Cancel button to cancel your changes. After you select and save the Maturity Level setting, then you can customize the other settings, such as Time, Web Browsing, E- mail, and Instant-Messaging Restrictions. Chapter 7: Using the Linksys Parental Control Service Family Settings...
  • Seite 87 To cancel your changes, click Undo Changes. Click the Cancel button to cancel your changes and return to the previous screen. Click the Save button to save your changes. Figure 7-21: Time Restrictions Chapter 7: Using the Linksys Parental Control Service Family Settings...
  • Seite 88 To cancel your changes, click Undo Changes. Click the Cancel button to cancel your changes and return to the previous screen. Click the Save button to save your changes. Figure 7-23: Web Site Categories Chapter 7: Using the Linksys Parental Control Service Family Settings...
  • Seite 89 To remove a blocked Web site, select the name of the Web site in the Blocked Web Sites field, and then click the Remove button. Click the Cancel button to cancel your changes. Click the Save button to save your changes. Figure 7-24: Blocked & Allowed Web Sites Chapter 7: Using the Linksys Parental Control Service Family Settings...
  • Seite 90 Click the Cancel button to cancel your changes. Click the Save button to save your changes. On the E-mail Restrictions screen, click the Cancel button to cancel your changes. Click the Save button to save your changes. Figure 7-26: E-mail Settings Chapter 7: Using the Linksys Parental Control Service Family Settings...
  • Seite 91 Click the Cancel button to cancel your changes. Click the Save button to save your changes. Figure 7-27: Instant-Messaging Restrictions Delete To delete a family member, click Delete. Figure 7-28: Password Chapter 7: Using the Linksys Parental Control Service Family Settings...
  • Seite 92: Suggest A Rating

    Figure 7-29: Suggest a Rating Using the Parental Control Service When the Linksys Parental Control Service is actively managing your family’s Internet activities, you must sign in with the Linksys Parental Control Service before you can access the Internet. Follow these instructions: 1.
  • Seite 93: Figure 7-32: Tray Icon

    Wireless-G Broadband Router with SpeedBooster 3. In your web browser, a Welcome to Parental Controls screen will appear. Log into the Linksys Parental Control Service. Select your name from the SIGN IN drop-down menu, and enter your password. Select when you want to be automatically logged out.
  • Seite 94: Figure 7-34: Pop-Up Screen (Sign Out)

    If you have exited the tray icon and want to use it, click the Start button, Programs, Parental Controls, and Figure 7-35: Right-Click Tray Icon PCT Helper. The tray icon will re-appear. Figure 7-36: Re-activate Tray Icon Chapter 7: Using the Linksys Parental Control Service Using the Parental Control Service...
  • Seite 95: Appendix A: Troubleshooting

    Provided are possible solutions to problems that may occur during the installation and operation of the Router. Read the descriptions below to help you solve your problems. If you can’t find an answer here, check the Linksys website at www.linksys.com.
  • Seite 96 Wireless-G Broadband Router with SpeedBooster • For Windows 2000: 1. Click Start, Settings, and Control Panel. Double-click Network and Dial-Up Connections. 2. Right-click the Local Area Connection that is associated with the Ethernet adapter you are using, and select the Properties option. 3.
  • Seite 97 Wireless-G Broadband Router with SpeedBooster B Open a command prompt. For Windows 98SE and Me: • Click Start and Run. In the Open field, type command. Press the Enter key or click the OK button. For Windows 2000 and XP: •...
  • Seite 98 Wireless-G Broadband Router with SpeedBooster 6. I am not able to access the Setup page of the Router’s web-based utility. • Refer to “Problem #3, I want to test my Internet connection” to verify that your computer is properly connected to the Router. •...
  • Seite 99 Wireless-G Broadband Router with SpeedBooster 8. I need to set up online game hosting or use other Internet applications. If you want to play online games or use Internet applications, most will work without doing any port forwarding or DMZ hosting. There may be cases when you want to host an online game or Internet application.
  • Seite 100 Wireless-G Broadband Router with SpeedBooster Follow these steps to set DMZ hosting: 1. Access the Router’s web-based utility by going to http://192.168.1.1 or the IP address of the Router. Go to the Applications & Gaming => Port Forwarding tab. 2. Disable or remove the entries you have entered for forwarding. Keep this information in case you want to use it at a later time.
  • Seite 101 “Appendix C: Upgrading Firmware.” 14. I need to upgrade the firmware. In order to upgrade the firmware with the latest features, you need to go to the Linksys website and download the latest firmware at www.linksys.com/international.
  • Seite 102 Wireless-G Broadband Router with SpeedBooster 6. You may see the login status display as Connecting. Press the F5 key to refresh the screen, until you see the login status display as Connected. • Click the Save Settings button to continue. •...
  • Seite 103 Wireless-G Broadband Router with SpeedBooster • For DSL users - 1) Make sure you have typed in your user name and password correctly. Some service providers use your full email address as the user name. If you are sure you have enter the right user name, try using username@[isp.com], where isp.com is the name of your service provider.
  • Seite 104: Frequently Asked Questions

    Wireless-G Broadband Router with SpeedBooster Frequently Asked Questions After using SecureEasySetup, my existing wireless devices can no longer connect to the Router. SecureEasySetup uses WPA-Personal encryption. If your current wireless devices do not support WPA-Personal security, then you cannot use SecureEasySetup on your network. You will need to manually configure your network security using the encryption supported by your existing devices.
  • Seite 105 Does the Router support any operating system other than Windows 98SE, Windows Millennium, Windows 2000, or Windows XP? Yes, but Linksys does not, at this time, provide technical support for setup, configuration or troubleshooting of any non-Windows operating systems. Does the Router support ICQ send file? Yes, with the following fix: click ICQ menu ->...
  • Seite 106 How will I be notified of new Router firmware upgrades? All Linksys firmware upgrades are posted on the Linksys website at www.linksys.com, where they can be downloaded for free. To upgrade the Router’s firmware, use the System tab of the Router’s web-based utility. If the Router’s Internet connection is working well, there is no need to download a newer firmware version, unless...
  • Seite 107 Wireless-G Broadband Router with SpeedBooster What is DMZ Hosting? Demilitarized Zone (DMZ) allows one IP address (computer) to be exposed to the Internet. Some applications require multiple TCP/IP ports to be open. It is recommended that you set your computer with a static IP if you want to use DMZ Hosting.
  • Seite 108 Wireless-G Broadband Router with SpeedBooster • CSMA/CA plus Acknowledge protocol • Multi-Channel Roaming • Automatic Rate Selection • RTS/CTS feature • Fragmentation • Power Management What is ad-hoc mode? When a wireless network is set to ad-hoc mode, the wireless-equipped computers are configured to communicate directly with each other.
  • Seite 109 Wireless-G Broadband Router with SpeedBooster worldwide. This presents a truly revolutionary opportunity to place convenient high-speed wireless capabilities in the hands of users around the globe. What is Spread Spectrum? Spread Spectrum technology is a wideband radio frequency technique developed by the military for use in reliable, secure, mission-critical communications systems.
  • Seite 110 There are eleven available channels, ranging from 1 to 11 in North, Central, and South America, and 1 to 13 in most of Europe. If your questions are not addressed here, refer to the Linksys website, www.linksys.com/international. Appendix A: Troubleshooting...
  • Seite 111: Appendix B: Wireless Security

    Wireless-G Broadband Router with SpeedBooster Appendix B: Wireless Security Linksys wants to make wireless networking as safe and easy for you as possible. The current generation of Linksys products provide several network security features, but they require specific action on your part for implementation.
  • Seite 112 This includes hackers. So, don’t broadcast the SSID. Wireless networking products come with a default SSID set by the factory. (The Linksys default SSID is “linksys”.) Hackers know these defaults and can check these against your network. Change your SSID to something unique and not something related to your company or the networking products you use.
  • Seite 113 These security recommendations should help keep your mind at ease while you are enjoying the most flexible and convenient technology Linksys has to offer. Appendix B: Wireless Security Security Threats Facing Wireless Networks...
  • Seite 114: Appendix C: Upgrading Firmware

    The Broadband Router's firmware is upgraded through the Web-based Utility's Administration tab. Follow these instructions: 1. Download the firmware from Linksys's website at www.linksys.com/international. 2. Click Firmware Upgrade from the Web-Utility's Administration tab, and the Upgrade Firmware screen, will appear.
  • Seite 115: Appendix D: Windows Help

    Wireless-G Broadband Router with SpeedBooster Appendix D: Windows Help All Linksys wireless products require Microsoft Windows. Windows is the most used operating system in the world and comes with many features that help make networking easier. These features can be accessed through Windows Help and are described in this appendix.
  • Seite 116: Appendix E: Finding The Mac Address And Ip Address For Your Ethernet Adapter

    Wireless-G Broadband Router with SpeedBooster Appendix E: Finding the MAC Address and IP Address for Your Ethernet Adapter This section describes how to find the MAC address for your computer’s Ethernet adapter so you can use the MAC filtering and/or MAC address cloning feature of the Router. You can also find the IP address of your computer’s Ethernet adapter.
  • Seite 117: For The Router's Web-Based Utility

    Wireless-G Broadband Router with SpeedBooster 3. Write down the Physical Address as shown on your computer screen; it is the MAC address for your Ethernet adapter. This appears as a series of numbers and letters. The MAC address/Physical Address is what you will use for MAC address cloning or MAC filtering. Note: The MAC address is also called the Physical Address.
  • Seite 118: Appendix F: Glossary

    Wireless-G Broadband Router with SpeedBooster Appendix F: Glossary 802.11b - An IEEE wireless networking standard that specifies a maximum data transfer rate of 11Mbps and an operating frequency of 2.4GHz. 802.11g - An IEEE wireless networking standard that specifies a maximum data transfer rate of 54Mbps, an operating frequency of 2.4GHz, and backward compatibility with 802.11b devices.
  • Seite 119 Wireless-G Broadband Router with SpeedBooster CTS (Clear To Send) - A signal sent by a wireless device, signifying that it is ready to receive data. Database - A collection of data that is organized so that its contents can easily be accessed, managed, and updated.
  • Seite 120 Wireless-G Broadband Router with SpeedBooster Firewall - A set of related programs located at a network gateway server that protects the resources of a network from users from other networks. Firmware - The programming code that runs a networking device. Fragmentation -Breaking a packet into smaller units when transmitting over a network medium that cannot support the original size of the packet.
  • Seite 121 Passphrase - Used much like a password, a passphrase simplifies the WEP encryption process by automatically generating the WEP encryption keys for Linksys products. Ping (Packet INternet Groper) - An Internet utility used to determine whether a particular IP address is online.
  • Seite 122 Wireless-G Broadband Router with SpeedBooster SMTP (Simple Mail Transfer Protocol) - The standard e-mail protocol on the Internet. Software - Instructions for the computer. A series of instructions that performs a particular task is called a "program". SPI (Stateful Packet Inspection) Firewall - A technology that inspects every incoming packet of information before allowing it to enter the network.
  • Seite 123 Wireless-G Broadband Router with SpeedBooster URL (Uniform Resource Locator) - The address of a file located on the Internet. VPN (Virtual Private Network) - A security measure to protect data as it leaves one network and goes to another over the Internet. WAN (Wide Area Network)- The Internet.
  • Seite 124: Appendix G: Specifications

    Wireless-G Broadband Router with SpeedBooster Appendix G: Specifications Model WRT54GS Standards IEEE 802.3, IEEE 802.3u, IEEE 802.11g, IEEE 802.11b Channels 11 Channels (North, Central, and South America) 13 Channels (most of Europe, Asia, and Africa) Ports/Buttons Internet: One 10/100 RJ-45 Port...
  • Seite 125 Wireless-G Broadband Router with SpeedBooster Power External, 12V DC, 1.0A Certification FCC, IC-03, CE Operating Temp. 0° C to 40° C Storage Temp. -20° C to 70° C Operating Humidity 10% to 85% Non-Condensing Storage Humidity 5% to 90% Non-Condensing Appendix G: Specifications...
  • Seite 126: Appendix H: Warranty Information

    Your exclusive remedy and Linksys' entire liability under this warranty will be for Linksys at its option to repair or replace the Product or refund Your purchase price less any rebates.
  • Seite 127: Appendix I: Regulatory Information

    Wireless-G Broadband Router with SpeedBooster Appendix I: Regulatory Information FCC Statement This product has been tested and complies with the specifications for a Class B digital device, pursuant to Part 15 of the FCC Rules. These limits are designed to provide reasonable protection against harmful interference in a residential installation.
  • Seite 128 Wireless-G Broadband Router with SpeedBooster Compliance Information for 2.4-GHz Wireless Products Relevant to the EU and Other Countries Following the EU Directive 1999/5/EC (R&TTE Directive) Declaration of Conformity with Regard to the EU Directive 1995/5/EC (R&TTE Directive) Appendix I: Regulatory Information...
  • Seite 129 • A pdf file is included on the product's CD. • A print copy is included with the product. • A pdf file is available on the product's webpage. Visit www.linksys.com/international and select your country or region. Then select your product.
  • Seite 130 Wireless-G Broadband Router with SpeedBooster CE Marking For the Linksys Wireless-B and Wireless-G products, the following CE mark, notified body number (where applicable), and class 2 identifier are added to the equipment. Check the CE label on the product to find out which notified body was involved during the assessment.
  • Seite 131 (AC9SMA) and an R-TNC extension cable (AC9TNC). Both of these cables are 9 meters long and have a cable loss (attenuation) of 5 dB. To compensate for the attenuation, Linksys also offers higher gain antennas, the HGA7S (with R-SMA connector) and HGA7T (with R-TNC connector).
  • Seite 132 Note: The power output setting may not be available on all wireless products. For more information, refer to the documentation on your product’s CD or http://www.linksys.com/international. Wireless Adapters Wireless adapters have the power output set to 100% by default. Maximum power output on each adapter does not exceed 20 dBm (100 mW);...
  • Seite 133 7. Click the type of documentation you want. The document will automatically open in PDF format. Note: If you have questions regarding the compliance of these products or you cannot find the information you need, please contact your local sales office or visit http://www.linksys.com/international for more details. Appendix I: Regulatory Information...
  • Seite 134: Appendix J: Contact Information

    Appendix J: Contact Information Need to contact Linksys? Visit us online for information on the latest products and updates to your existing products at: http://www.linksys.com/international If you experience problems with any Linksys product, you can e-mail us at: In Europe E-mail Address Austria support.at@linksys.com...
  • Seite 135 ® A Division of Cisco Systems, Inc. Sans fil - 802.11g Routeur haut débit Guide de l'utilisateur avec SpeedBooster SANS FIL WRT54GS (FR) Modèle...
  • Seite 136 Routeur haut débit sans fil - G avec SpeedBooster Copyright et marques commerciales Les spécifications peuvent être modifiées sans préavis. Linksys est une marque déposée ou une marque commerciale de Cisco Systems, Inc. et/ou ses filiales aux Etats-Unis et dans certains autres pays.
  • Seite 137 Routeur haut débit sans fil - G avec SpeedBooster Table des matières Chapitre 1 : Introduction Bienvenue Contenu de ce guide Chapitre 2 : Planification de votre réseau sans fil Topologie réseau Mode Ad hoc et mode Infrastructure Configuration du réseau Chapitre 3 : Présentation du routeur haut débit sans fil - G Panneau arrière Panneau avant...
  • Seite 138 Onglet Status - Router (Etat - Routeur) Onglet Status - Local Network (Etat - Réseau local) Onglet Status - Wireless (Etat - Sans fil) Chapitre 7 : Utilisation du service de contrôle parental de Linksys Présentation Introduction Inscription au service de contrôle parental de Linksys Inscription au service de contrôle parental de Linksys...
  • Seite 139 Routeur haut débit sans fil - G avec SpeedBooster Annexe E : Recherche des adresses MAC et IP de votre adaptateur Ethernet 106 Instructions pour Windows 98 SE ou Windows Me Instructions pour Windows 2000 ou Windows XP Pour l'utilitaire Web du routeur Annexe F : Glossaire Annexe G : Spécifications Annexe H : Informations de garantie...
  • Seite 140 Routeur haut débit sans fil - G avec SpeedBooster Liste de figures Figure 3-1 : Panneau arrière du routeur Figure 3-2 : Panneau avant du routeur Figure 4-1 : Connexion du modem Figure 4-2 : Connexion de vos périphériques réseau Figure 4-3 : Connexion de l'alimentation Figure 4-4 : Connexion du routeur derrière un autre routeur Figure 4-5 : Schéma de connexion à...
  • Seite 141 Routeur haut débit sans fil - G avec SpeedBooster Figure 5-12 : Ecran Advanced Internet Settings - Static IP (Paramètres Internet avancés - IP statique) de l'assistant de configuration Figure 5-13 : Ecran Advanced Internet Settings - PPTP (Paramètres Internet avancés - PPTP) de l'assistant de configuration Figure 5-14 : Ecran Keep Alive/Connect on Demand (PPTP Continued) (Maintenir la connexion/Connexion à...
  • Seite 142 Routeur haut débit sans fil - G avec SpeedBooster Figure 5-34 : Ecran Welcome - Start Wizard (Bienvenue - Lancer l'assistant) de l'assistant de configuration Figure 5-35 : Ecran SecureEasySetup Welcome (Bienvenue SecureEasySetup) Figure 5-36 : Ecran Configure Wireless Settings #1 (Configuration des paramètres sans fil 1) Figure 5-37 : Ecran Configure Wireless Settings #2 (Configuration des paramètres sans fil 2) Figure 5-38 : Ecran Your Wireless Settings (Vos paramètres sans fil)
  • Seite 143 Figure 7-2 : Onglet Access Restrictions - Parental Control (Restrictions d'accès - Contrôle parental) Figure 7-3 : Contrat de service Linksys Figure 7-4 : Inscription Figure 7-5 : Achat du service Figure 7-6 : Connexion au service de contrôle parental de Linksys Figure 7-7 : Félicitations Figure 7-8 : Connexion au contrôle parental...
  • Seite 144 Routeur haut débit sans fil - G avec SpeedBooster Figure 7-9 : Centre de support Figure 7-10 : Souscription au service Figure 7-11 : Mise à jour des informations de contact Figure 7-12 : Annulation de votre compte de contrôle parental Figure 7-13 : Rapports d'activité...
  • Seite 145: Chapitre 1 : Introduction

    Chapitre 1 : Introduction Bienvenue Merci d'avoir choisi le routeur haut débit sans fil G avec SpeedBooster de Linksys. Le routeur haut débit sans fil G avec SpeedBooster offre une fonction de connexion à un réseau sans fil plus développée qu'auparavant, vous permettant de partager l'accès à...
  • Seite 146: Contenu De Ce Guide

    • Chapitre 6 : Configuration du routeur haut débit sans fil - G Ce chapitre explique comment utiliser l'utilitaire Web du routeur. • Chapitre 7 : Utilisation du service de contrôle parental de Linksys Ce chapitre explique comment s'abonner au service de contrôle parental, gérer le compte et utiliser Internet lorsque ce service surveille le trafic et les messages.
  • Seite 147 • Annexe I : Réglementation Cette annexe contient la réglementation relative au routeur. • Annexe J : Contacts Cette annexe fournit des informations sur diverses ressources Linksys que vous pouvez contacter, notamment le support technique. Chapitre 1 : Introduction Contenu de ce guide...
  • Seite 148: Chapitre 2 : Planification De Votre Réseau Sans Fil

    Routeur haut débit sans fil - G avec SpeedBooster Chapitre 2 : Planification de votre réseau sans fil Topologie réseau réseau : ordinateurs ou périphériques reliés entre eux dans le but de partager et de stocker des données, ainsi Un réseau local sans fil (WLAN) est identique à un réseau local (LAN) classique. La seule différence est que que de transmettre des données entre des utilisateurs.
  • Seite 149: Configuration Du Réseau

    G. Pour ajouter d'autres ports, vous pouvez connecter n'importe quel port LAN du routeur haut débit sans fil G à l'un des commutateurs de Linksys (par exemple, SD205 ou SD208). Fortes de tous ces éléments et des nombreux autres produits Linksys, vos possibilités en matière de développement réseau sont illimitées.
  • Seite 150: Chapitre 3 : Présentation Du Routeur Haut Débit Sans Fil - G

    Routeur haut débit sans fil - G avec SpeedBooster Chapitre 3 : Présentation du routeur haut débit sans fil - G Panneau arrière Les ports du routeur auxquels sont connectés les câbles sont situés sur le panneau arrière. Important : Toute réinitialisation du routeur entraîne la suppression de tous vos paramètres (cryptage WEP, paramètres réseau, etc.) et les remplace par les paramètres usine par défaut.
  • Seite 151: Panneau Avant

    Routeur haut débit sans fil - G avec SpeedBooster Panneau avant Les voyants où s'affichent les informations relatives à l'activité du réseau sont situés sur le panneau avant du routeur. REMARQUE : SecureEasySetup est une fonction qui facilite la configuration de votre réseau sans fil. Si vous disposez de périphériques SecureEasySetup, exécutez le CD-ROM de l'assistant de configuration du routeur et suivez les instructions affichées pour...
  • Seite 152: Chapitre 4 : Connexion Du Routeur Haut Débit Sans Fil - G

    Routeur haut débit sans fil - G avec SpeedBooster Chapitre 4 : Connexion du routeur haut débit sans fil - G Présentation Ce chapitre présente deux séries d'instructions. Si le routeur haut débit sans fil G doit agir en tant que routeur unique de votre réseau, suivez les instructions de la section «...
  • Seite 153: Figure 4-2 : Connexion De Vos Périphériques Réseau

    Routeur haut débit sans fil - G avec SpeedBooster 5. A l'aide d'un câble réseau Ethernet standard, connectez vos ordinateurs réseau ou périphériques Ethernet aux ports numérotés du routeur. Figure 4-2 : Connexion de vos périphériques réseau 6. Branchez l'adaptateur secteur sur le port d'alimentation du routeur et l'autre extrémité sur une prise IMPORTANT : Veillez à...
  • Seite 154: Interconnexion De Deux Routeurs

    REMARQUE : Les étapes 1 à 4 présentent les instructions Tout d'abord, assurez-vous que le routeur n'est PAS connecté à votre réseau. Procédez ensuite comme suit : destinées à un routeur Linksys traditionnel ; néanmoins, si vous utilisez un routeur autre qu'un routeur Linksys, 1.
  • Seite 155: Figure 4-6 : Le Routeur Relié À La Connexion À Internet Est Connecté Via Le Port Internet

    Routeur haut débit sans fil - G avec SpeedBooster 8. Connectez un câble réseau Ethernet standard au port Internet du routeur haut débit, puis connectez l'autre extrémité du câble Ethernet à l'un des ports Ethernet numérotés sur l'autre routeur. Figure 4-6 : Le routeur relié à la connexion à Internet est connecté via le port Internet 9.
  • Seite 156: Figure 4-8 : Connexion De L'alimentation

    Routeur haut débit sans fil - G avec SpeedBooster 10. Branchez l'adaptateur secteur sur le port d'alimentation du routeur haut débit et l'autre extrémité sur une prise secteur. Utilisez uniquement l'adaptateur secteur fourni avec le routeur haut débit. Le branchement d'un autre adaptateur pourrait endommager le produit.
  • Seite 157: Chapitre 5 : Configuration Du Routeur Haut Débit Sans Fil - G

    Routeur haut débit sans fil - G avec SpeedBooster Chapitre 5 : Configuration du routeur haut débit sans fil - G Présentation L'assistant de configuration du routeur haut débit sans fil G avec SpeedBooster vous guidera tout au long de la procédure d'installation.
  • Seite 158: Figure 5-3 : Ecran License Agreement (Accord De Licence) De L'assistant De Configuration

    Routeur haut débit sans fil - G avec SpeedBooster 4. Après avoir lu l'accord de licence, cliquez sur Next (Suivant) si vous l'acceptez ou sur Cancel (Annuler) pour interrompre l'installation. Figure 5-3 : Ecran License Agreement (Accord de licence) de l'assistant de configuration 5.
  • Seite 159: Figure 5-5 : Ecran Connect The Modem To The Router (Connecter Le Modem Au Routeur) De L'assistant De Configuration

    Routeur haut débit sans fil - G avec SpeedBooster 6. L'assistant de configuration vous demande de connecter votre modem haut débit au routeur. Une fois cette opération terminée, cliquez sur le bouton Next (Suivant). Figure 5-5 : Ecran Connect the Modem to the Router (Connecter le modem au routeur) de l'assistant de configuration 7.
  • Seite 160: Figure 5-7 : Ecran Connect The Network Cable To The Router (Connecter Le Câble Réseau Au Routeur) De L'assistant De Configuration

    Routeur haut débit sans fil - G avec SpeedBooster 8. L'assistant de configuration vous demande de connecter l'autre extrémité du câble réseau au routeur. Vous pouvez alors également connecter d'autres ordinateurs au routeur. Une fois cette opération terminée, cliquez sur le bouton Next (Suivant). Figure 5-7 : Ecran Connect the Network Cable to the Router (Connecter le câble réseau au routeur) de l'assistant de configuration...
  • Seite 161: Figure 5-9 : Ecran Check The Router's Status (Vérifier L'état Du Routeur) De L'assistant De Configuration

    Routeur haut débit sans fil - G avec SpeedBooster 10. Vérifiez que les voyants Power (Alimentation), Internet et numérotés du routeur (en fonction du nombre d'ordinateurs connectés) sont allumés sur le panneau avant. Une fois cette opération terminée, cliquez sur le bouton Next (Suivant).
  • Seite 162: Figure 5-11 : Ecran Configure Dsl (Pppoe) Settings (Configuration Des Paramètres Dsl (Pppoe)) De L'assistant De Configuration

    Routeur haut débit sans fil - G avec SpeedBooster DSL (PPPoE) User Name (Nom d'utilisateur) : saisissez le nom d'utilisateur fourni par votre FAI. Password (Mot de passe) : saisissez le mot de passe fourni par votre FAI. Confirm (Confirmer) : pour confirmer le mot de passe, saisissez-le à nouveau dans ce champ. Keep Alive (Maintenir la connexion) : pour que le routeur vérifie régulièrement votre connexion Internet, sélectionnez Keep Alive (Maintenir la connexion).
  • Seite 163: Figure 5-13 : Ecran Advanced Internet Settings - Pptp (Paramètres Internet Avancés - Pptp) De L'assistant De Configuration

    Routeur haut débit sans fil - G avec SpeedBooster Protocole PPTP Connection (Connexion) : le service PPTP (Point-to-Point Tunneling Protocol) est exclusivement utilisé en Europe. Si vous utilisez une connexion PPTP, sélectionnez PPTP dans le menu déroulant. User Name (Nom d'utilisateur) : saisissez le nom d'utilisateur fourni par votre FAI. Password (Mot de passe) : saisissez le mot de passe fourni par votre FAI.
  • Seite 164: Figure 5-15 : Ecran Advanced Internet Settings - L2Tp (Paramètres Internet Avancés - L2Tp) De L'assistant De Configuration

    Routeur haut débit sans fil - G avec SpeedBooster L2TP Connection (Connexion) : si vous utilisez une connexion L2TP (Layer 2 Tunneling Protocol), sélectionnez L2TP dans le menu déroulant. User Name (Nom d'utilisateur) : saisissez le nom d'utilisateur fourni par votre FAI. Password (Mot de passe) : saisissez le mot de passe fourni par votre FAI.
  • Seite 165: Figure 5-16 : Ecran Advanced Internet Settings - Telstra (Paramètres Internet Avancés - Telstra) De L'assistant De Configuration

    Routeur haut débit sans fil - G avec SpeedBooster Telstra Connection (Connexion) : le service Telstra est exclusivement utilisé en Australie. Si vous utilisez ce service, sélectionnez Telstra dans le menu déroulant. User Name (Nom d'utilisateur) : saisissez le nom d'utilisateur fourni par votre FAI. Password (Mot de passe) : saisissez le mot de passe fourni par votre FAI.
  • Seite 166: Figure 5-17 : Ecran Set The Router's Password (Définir Le Mot De Passe Du Routeur) De L'assistant De Configuration

    Routeur haut débit sans fil - G avec SpeedBooster 12. Pour configurer le routeur à partir de n'importe quel ordinateur du réseau, vous pouvez utiliser l'utilitaire Web qui l'accompagne. Password (Mot de passe) : saisissez un mot de passe qui contrôlera l'accès à l'utilitaire. Confirm (Confirmer) : saisissez à...
  • Seite 167: Figure 5-19 : Ecran Secureeasysetup De L'assistant De Configuration

    Routeur haut débit sans fil - G avec SpeedBooster Utilisation de la fonction SecureEasySetup du routeur Lisez ces instructions avant d'enfoncer le moindre bouton SecureEasySetup. Il est préférable de localiser tous les boutons SecureEasySetup de vos périphériques avant d'utiliser cette fonction du routeur. REMARQUE : SecureEasySetup utilise le cryptage WPA personnel.
  • Seite 168: Figure 5-23 : Ecran Configure Wireless Settings (Configuration Des Paramètres Sans Fil) De L'assistant De Configuration

    Routeur haut débit sans fil - G avec SpeedBooster 2. Appuyez sur le logo Cisco orange du panneau avant du routeur. Lorsque le logo devient blanc et commence à clignoter, appuyez sur le bouton SecureEasySetup d'un autre périphérique. Le logo Cisco du routeur cesse de clignoter lorsque le périphérique a été...
  • Seite 169: Figure 5-25 : Ecran Safe Surfing (Surf Sécurisé) De L'assistant De Configuration

    Norton Internet Security Suite (Suite Norton Internet Security) pour installer l'édition spéciale de Norton Internet Security sur votre ordinateur ou cliquez sur le bouton Linksys Parental Control Service (Service de contrôle parental de Linksys) pour souscrire à un abonnement d'essai gratuit. Cliquez sur Exit (Quitter) pour retourner dans l'assistant de configuration.
  • Seite 170: Figure 5-27 : Ecran Configure Wireless Settings (Configuration Des Paramètres Sans Fil) De L'assistant De Configuration

    Dans le champ SSID, saisissez le nom de votre réseau sans fil. Le SSID doit être identique pour tous les périphériques du réseau. Le paramètre par défaut est linksys (entièrement en minuscules). REMARQUE : Un SSID est le nom de réseau que partagent tous les périphériques d'un réseau sans fil.
  • Seite 171: Figure 5-29 : Ecran Wireless Security - Wpa-Psk (Sécurité Sans Fil - Wpa-Psk) De L'assistant De Configuration

    Routeur haut débit sans fil - G avec SpeedBooster 3. Sélectionnez la méthode de sécurité que vous souhaitez utiliser : WPA-PSK (aussi appelée WPA personnel), WEP (64-Bit) (WEP 64 bits) ou WEP (128-Bit) (WEP 128 bits). WPA signifie Wi-Fi Protected Access et WEP Wired Equivalent Privacy.
  • Seite 172: Figure 5-30 : Ecran Wireless Security - Wep (64-Bit) (Sécurité Sans Fil - Wep (64 Bits))

    16 caractères alphanumériques. Elle doit correspondre à celle des autres périphériques sans fil du réseau et n'est compatible qu'avec les produits sans fil Linksys. Si vous possédez des produits sans fil non Linksys, saisissez la clé WEP manuellement sur ces derniers.
  • Seite 173: Figure 5-32 : Ecran Safe Surfing (Surf Sécurisé) De L'assistant De Configuration

    Norton Internet Security Suite (Suite Norton Internet Security) pour installer l'édition spéciale de Norton Internet Security sur votre ordinateur ou cliquez sur le bouton Linksys Parental Control Service (Service de contrôle parental de Linksys) pour souscrire à un abonnement d'essai gratuit. Cliquez sur Exit (Quitter) pour retourner dans l'assistant de configuration.
  • Seite 174: Utilisation De La Fonction Secureeasysetup Pour Configurer Votre Ordinateur Portable

    Routeur haut débit sans fil - G avec SpeedBooster Utilisation de la fonction SecureEasySetup pour configurer votre ordinateur portable Cette section explique comme utiliser la fonction SecureEasySetup si vous disposez d'un ordinateur affichant le logo SecureEasySetup. REMARQUE : SecureEasySetup utilise le cryptage WPA personnel. Si vos périphériques sans fil actuels ne prennent pas en charge la sécurité...
  • Seite 175: Figure 5-36 : Ecran Configure Wireless Settings #1

    Routeur haut débit sans fil - G avec SpeedBooster 2. L'écran suivant vous invite à appuyer sur le logo Cisco allumé sur le routeur. Après avoir appuyé sur le logo, cliquez sur le bouton Next (Suivant) pour continuer. Pour quitter l'assistant de configuration sans fil, cliquez sur le bouton Exit (Quitter). Pour plus d'informations, cliquez sur le bouton Help (Aide).
  • Seite 176: Figure 5-38 : Ecran Your Wireless Settings (Vos Paramètres Sans Fil)

    Routeur haut débit sans fil - G avec SpeedBooster 4. L'écran Your Wireless Settings (Vos paramètres sans fil) s'affiche une fois les paramètres sans fil configurés. Pour enregistrer vos paramètres de configuration dans un fichier texte sur votre ordinateur, cliquez sur le bouton Save (Enregistrer).
  • Seite 177: Chapitre 6 : Configuration Du Routeur Haut Débit Sans Fil - G

    Routeur haut débit sans fil - G avec SpeedBooster Chapitre 6 : Configuration du routeur haut débit sans fil - G Présentation REMARQUE : Lors de la première installation du routeur, Vous devez toujours utiliser le CD-ROM d'installation lors de la première installation du routeur. Si vous ne utilisez l'assistant de configuration du CD-ROM souhaitez pas exécuter l'assistant de configuration disponible sur le CD-ROM d'installation, configurez alors le d'installation.
  • Seite 178: Onglet Setup - Basic Setup (Configuration - Configuration De Base)

    Routeur haut débit sans fil - G avec SpeedBooster Onglet Setup - Basic Setup (Configuration - Configuration de base) Le premier écran qui apparaît affiche l'onglet Setup (Configuration). Les options de cet onglet vous permettent de modifier les paramètres généraux du routeur. Modifiez ces paramètres comme indiqué, puis cliquez sur le bouton Save Settings (Enregistrer les paramètres) pour appliquer vos modifications ou sur le bouton Cancel Changes (Annuler les modifications) pour les annuler.
  • Seite 179: Figure 6-5 : Type De Connexion Pppoe

    Routeur haut débit sans fil - G avec SpeedBooster • PPPoE. Certains fournisseurs d'accès Internet DSL utilisent le protocole PPPoE (Point-to-Point Protocol over Ethernet) pour établir des connexions Internet. Si vous êtes connecté à Internet par l'intermédiaire d'une ligne DSL, demandez à votre FAI s'il utilise le protocole PPPoE. Si tel est le cas, vous devrez sélectionner l'option PPPoE.
  • Seite 180: Figure 6-7 : Type De Connexion L2Tp

    Routeur haut débit sans fil - G avec SpeedBooster • L2TP. Connection (Connexion). Si vous utilisez une connexion L2TP (Layer 2 Tunneling Protocol), sélectionnez L2TP dans le menu déroulant. User Name (Nom d'utilisateur). Saisissez le nom d'utilisateur fourni par votre FAI. Password (Mot de passe).
  • Seite 181: Figure 6-9: Optional Settings

    Routeur haut débit sans fil - G avec SpeedBooster Connect on Demand (Connexion à la demande). Pour que le routeur interrompe la connexion Internet après paquet : unité de données transmises sur une période d'activité, sélectionnez Connect on Demand (Connexion à la demande) et spécifiez la durée en un réseau.
  • Seite 182: Figure 6-12: Time Setting

    Routeur haut débit sans fil - G avec SpeedBooster réseau pour les connecter à un serveur DHCP (le routeur) et vérifier qu'aucun autre serveur DHCP n'est présent sur le réseau. DHCP Server (Serveur DHCP). Cette option est activée par défaut (valeur usine). Si vous disposez déjà d'un serveur DHCP sur votre réseau ou ne souhaitez utiliser aucun serveur DHCP, cliquez sur la case d'option Disable adresse IP dynamique : adresse IP (Désactiver).
  • Seite 183: Onglet Setup (Configuration) - Ddns

    Routeur haut débit sans fil - G avec SpeedBooster Onglet Setup (Configuration) - DDNS Le routeur inclut une fonction DDNS (Dynamic Domain Name System) qui vous permet d'attribuer un nom de domaine et d'hôte fixe à une adresse IP Internet dynamique. Cela peut s'avérer utile si vous hébergez votre propre site Web, un serveur FTP ou tout autre type de serveur derrière le routeur.
  • Seite 184: Onglet Setup - Mac Address Clone (Configuration - Adresse Mac Dupliquée)

    Routeur haut débit sans fil - G avec SpeedBooster Onglet Setup - MAC Address Clone (Configuration - Adresse MAC dupliquée) Une adresse MAC désigne un code à 12 chiffres attribué à un composant matériel unique en vue de son identification. Certains fournisseurs d'accès Internet (FAI) exigent l'enregistrement d'une adresse MAC pour l'accès à...
  • Seite 185: Onglet Setup - Advanced Routing (Configuration - Routage Avancé)

    Routeur haut débit sans fil - G avec SpeedBooster Onglet Setup - Advanced Routing (Configuration - Routage avancé) Vous pouvez faire appel aux options de cet onglet pour définir les fonctions avancées du routeur. La section Operating Mode (Mode opérationnel) vous permet de sélectionner le ou les type(s) des fonctions avancées à utiliser. Les options de la section Dynamic Routing (Routage dynamique) vous permettent de régler le mode de transmission des paquets sur votre réseau.
  • Seite 186: Onglet Wireless - Basic Wireless Settings (Sans Fil - Paramètres Sans Fil De Base)

    être utilisés. Vérifiez que ce paramètre est identique pour tous les points de votre réseau sans fil. Pour optimiser la sécurité, vous devez remplacer le SSID par défaut (linksys) par un nom unique. Wireless Channel (Canal sans fil). Sélectionnez le canal approprié dans la liste fournie en fonction de vos paramètres réseau.
  • Seite 187: Onglet Wireless - Wireless Security (Sans Fil - Sécurité Sans Fil)

    Routeur haut débit sans fil - G avec SpeedBooster IMPORTANT : Si vous utilisez la technologie WPA, Onglet Wireless - Wireless Security (Sans fil - Sécurité sans fil) gardez toujours à l'esprit que chaque périphérique de votre réseau sans fil DOIT utiliser la même Les paramètres de cette section permettent de configurer la sécurité...
  • Seite 188: Figure 6-20 : Onglet Wireless - Wireless Security (Radius) (Sans Fil - Sécurité Sans Fil (Radius))

    Routeur haut débit sans fil - G avec SpeedBooster RADIUS. Cette option associe le système WEP à l'utilisation conjointe d'un serveur RADIUS (à sélectionner IMPORTANT : Si vous utilisez le cryptage WEP, gardez toujours à l'esprit que chaque périphérique de votre uniquement lorsqu'un serveur RADIUS est connecté...
  • Seite 189: Onglet Wireless - Wireless Mac Filter (Sans Fil - Filtre Mac Sans Fil)

    Routeur haut débit sans fil - G avec SpeedBooster Onglet Wireless - Wireless MAC Filter (Sans fil - Filtre MAC sans fil) Vous pouvez filtrer l'accès sans fil selon les adresses MAC des périphériques sans fil qui émettent dans le rayon d'action de votre réseau.
  • Seite 190: Onglet Wireless - Advanced Wireless Settings (Sans Fil - Paramètres Sans Fil Avancés)

    Routeur haut débit sans fil - G avec SpeedBooster Onglet Wireless - Advanced Wireless Settings (Sans fil - Paramètres sans fil avancés) Vous pouvez utiliser les options de cet onglet pour définir les fonctions sans fil avancées du routeur. Il est préférable de réserver cette tâche à...
  • Seite 191 Routeur haut débit sans fil - G avec SpeedBooster Fragmentation Threshold (Seuil de fragmentation). Cette valeur permet de spécifier la taille maximale d'un fragmentation : acte de scinder un paquet en unités paquet avant de fragmenter les données en plusieurs paquets. Si le taux d'erreur de paquet que vous rencontrez plus petites lors d'une transmission sur un support est élevé, vous pouvez légèrement augmenter le seuil de fragmentation.
  • Seite 192: Onglet Security - Firewall (Sécurité - Pare-Feu)

    Routeur haut débit sans fil - G avec SpeedBooster Onglet Security - Firewall (Sécurité - Pare-feu) Firewall Protection (Protection par pare-feu). Activez cette fonctionnalité pour utiliser la technologie SPI (Stateful Packet Inspection) et procéder à une vérification plus poussée des paquets de données infiltrant votre environnement réseau.
  • Seite 193: Onglet Access Restrictions - Parental Control (Restrictions D'accès - Contrôle Parental)

    L'écran Parental Control (Contrôle parental) permet de vous abonner au compte de contrôle parental Linksys et de le gérer. Le service de contrôle parental* de Linksys fournit des outils puissants pour contrôler la disponibilité des services, de l'accès et des fonctions Internet et les personnaliser pour chaque membre de votre famille. Pour plus d'informations, reportez-vous au «...
  • Seite 194: Onglet Access Restrictions - Internet Access (Restrictions D'accès - Accès Internet)

    Routeur haut débit sans fil - G avec SpeedBooster Onglet Access Restrictions - Internet Access (Restrictions d'accès - Accès Internet) L'écran Internet Access (Accès à Internet) vous permet de bloquer ou d'autoriser des modes spécifiques d'exploitation et de trafic Internet, notamment l'accès à Internet, les services dédiés, les sites Web et le trafic des données entrant sur le réseau à...
  • Seite 195: Figure 6-31 : Services Des Ports

    Routeur haut débit sans fil - G avec SpeedBooster 7. Vous pouvez filtrer l'accès à divers services accessibles par Internet, notamment FTP ou Telnet, en choisissant ces services dans les menus déroulants en regard de l'option Blocked Services (Services bloqués). (Vous pouvez bloquer jusqu'à 20 services.) Saisissez ensuite l'intervalle des ports à filtrer. Si le service que vous envisagez de bloquer n'apparaît pas dans la liste ou si vous souhaitez modifier les paramètres d'un service, cliquez alors sur le bouton Add/Edit Service (Ajouter/Modifier un service).
  • Seite 196: Onglet Applications And Gaming - Port Range Forward (Applications Et Jeux - Transfert De Connexion)

    Routeur haut débit sans fil - G avec SpeedBooster Onglet Applications and Gaming - Port Range Forward (Applications et jeux - Transfert de connexion) Les options de l'onglet Applications and Gaming (Applications et jeux) vous permettent de définir des services publics sur votre réseau, notamment des serveurs Web, des serveurs FTP, des serveurs de messagerie ou d'autres applications Internet spécialisées.
  • Seite 197: Onglet Applications & Gaming - Port Triggering (Applications Et Jeux - Déclenchement De Connexion)

    Routeur haut débit sans fil - G avec SpeedBooster Onglet Applications & Gaming - Port Triggering (Applications et jeux - Déclenchement de connexion) L'écran Port Triggering (Déclenchement de connexion) permet au routeur de contrôler les données sortantes de certains numéros de ports spécifiques. L'adresse IP de l'ordinateur qui envoie les données correspondantes est enregistrée par le routeur.
  • Seite 198: Onglet Applications And Gaming (Applications Et Jeux) - Dmz

    Routeur haut débit sans fil - G avec SpeedBooster Onglet Applications and Gaming (Applications et jeux) - DMZ La fonctionnalité DMZ permet à un utilisateur du réseau d'accéder à Internet en vue d'utiliser un service à usage spécifique, tel que des jeux Internet ou un système de vidéoconférence. L'hébergement DMZ permet de transférer tous les ports en même temps vers un seul ordinateur.
  • Seite 199 Routeur haut débit sans fil - G avec SpeedBooster la transmission des données entre les périphériques du réseau. Pour désactiver cette option, sélectionnez Disable (Désactiver). La priorité des quatre autres ports du routeur est automatiquement définie sur Low (Faible). L'option Incoming Rate Limit (Limite d'intervalle entrant) limite la bande passante entrante. Pour utiliser cette fonction, 512K 256K 128K...
  • Seite 200: Onglet Administration - Management (Gestion)

    Routeur haut débit sans fil - G avec SpeedBooster Onglet Administration - Management (Gestion) Cette section de l'onglet Administration permet à l'administrateur du réseau de gérer les fonctions d'accès et de sécurité spécifiques du routeur. Local Router Access (Accès local au routeur). Vous pouvez modifier le mot de passe du routeur dans cette section.
  • Seite 201: Onglet Administration - Diagnostics

    Routeur haut débit sans fil - G avec SpeedBooster Onglet Administration - Diagnostics Les tests de diagnostic (Ping et Traceroute (Détermination d'itinéraire)) vous permettent de vérifier les connexions de vos composants réseau. Ping Test (Test Ping). Le test Ping permet de vérifier l'état d'une connexion. Cliquez sur le bouton Ping pour ouvrir l'écran Ping Test (Test Ping).
  • Seite 202: Onglet Administration - Factory Defaults (Paramètres Usine Par Défaut)

    Vous pouvez mettre à niveau le micrologiciel en cliquant sur le bouton Upgrade (Mettre à niveau) après l'avoir localisé sur le disque. Ce micrologiciel peut être téléchargé à partir du site Web international de Linksys. Ne mettez pas à niveau votre micrologiciel sauf si vous rencontrez des problèmes avec le routeur. Pour plus d'informations sur la mise à...
  • Seite 203: Onglet Administration - Config Management (Gestion De La Configuration)

    Routeur haut débit sans fil - G avec SpeedBooster Onglet Administration - Config Management (Gestion de la configuration) Cet écran sert à sauvegarder ou à restaurer le fichier de configuration du routeur. Pour sauvegarder le fichier de configuration du routeur, cliquez sur le bouton Backup (Sauvegarder). Suivez les instructions affichées.
  • Seite 204: Onglet Status - Router (Etat - Routeur)

    Routeur haut débit sans fil - G avec SpeedBooster Onglet Status - Router (Etat - Routeur) L'écran Router (Routeur) de l'onglet Status (Etat) affiche l'état actuel du routeur. Firmware Version (Version de micrologiciel). Il s'agit de la version actuelle du micrologiciel du routeur. Current Time (Heure actuelle).
  • Seite 205: Onglet Status - Local Network (Etat - Réseau Local)

    Routeur haut débit sans fil - G avec SpeedBooster Onglet Status - Local Network (Etat - Réseau local) L'écran Local Network (Réseau local) de l'onglet Status (Etat) indique l'état de votre réseau. MAC Address (Adresse MAC). Il s'agit de l'adresse MAC du routeur telle qu'elle apparaît sur votre réseau local Ethernet.
  • Seite 206: Figure 6-47 : Onglet Status - Wireless (Etat - Sans Fil)

    Routeur haut débit sans fil - G avec SpeedBooster Onglet Status - Wireless (Etat - Sans fil) L'écran Wireless (Sans fil) de l'onglet Status (Etat) indique l'état de votre réseau sans fil. MAC Address (Adresse MAC). Il s'agit de l'adresse MAC du routeur telle qu'elle apparaît sur votre réseau local sans fil.
  • Seite 207: Chapitre 7 : Utilisation Du Service De Contrôle Parental De Linksys

    Internet lorsque ce service surveille activement le trafic et les messages. Introduction Le service de contrôle parental de Linksys permet à votre famille de naviguer en toute sécurité sur Internet. Ce service fournit des outils puissants pour contrôler la disponibilité des services, de l'accès et des fonctions base de données : ensemble de données...
  • Seite 208: Inscription Au Service De Contrôle Parental De Linksys

    Linksys ». Si vous souhaitez des informations complémentaires sur le service de contrôle parental de Linksys, cliquez sur le bouton More info (Plus d'infos). Si vous avez déjà créé votre compte de contrôle parental, cliquez sur le bouton Manage Account (Gérer le compte) pour y accéder et le modifier. Pour plus d'informations, accédez à...
  • Seite 209: Figure 7-3 : Contrat De Service Linksys

    Routeur haut débit sans fil - G avec SpeedBooster Inscription au service de contrôle parental de Linksys Pour vous connecter à votre compte de contrôle parental de Linksys, vous devez disposer d'une connexion Internet active. Procédez ensuite comme suit : 1.
  • Seite 210: Figure 7-5 : Achat Du Service

    Cliquez ensuite sur le bouton Finish (Terminer). Pour annuler votre inscription, cliquez sur le bouton Cancel (Annuler). Figure 7-5 : Achat du service Chapitre 7 : Utilisation du service de contrôle parental de Linksys Inscription au service de contrôle parental de Linksys...
  • Seite 211: Figure 7-6 : Connexion Au Service De Contrôle Parental De Linksys

    Pour plus d'informations, accédez à la section « Utilisation du service de contrôle parental de Linksys ». Figure 7-7 : Félicitations Chapitre 7 : Utilisation du service de contrôle parental de Linksys Inscription au service de contrôle parental de Linksys...
  • Seite 212: Gestion Du Contrôle Parental De Linksys

    Routeur haut débit sans fil - G avec SpeedBooster Gestion du contrôle parental de Linksys Pour gérer votre compte de contrôle parental de Linksys, vous devez disposer d'une connexion Internet active. Procédez ensuite comme suit : 1. Ouvrez l'utilitaire Web du routeur.
  • Seite 213: Centre De Support

    Souscription au service Cliquez sur Subscribe to Service (Souscrire au service) pour vous inscrire au contrôle parental avant que la période d'essai gratuite n'expire. L'écran Purchase Linksys Parental Control Service (Acheter le service de Figure 7-9 : Centre de support contrôle parental de Linksys) s'affiche.
  • Seite 214: Figure 7-11 : Mise À Jour Des Informations De Contact

    Cliquez sur le bouton Proceed (Continuer) sur l'écran suivant pour annuler votre service de contrôle parental. Figure 7-12 : Annulation de votre compte de contrôle parental Chapitre 7 : Utilisation du service de contrôle parental de Linksys Centre de support...
  • Seite 215: Rapports D'activité

    (Télécharger). Les rapports seront enregistrés dans un fichier texte délimité par des tabulations appelé PcReport. Pour parcourir les entrées, cliquez sur First (Début), Previous (Précédent) ou Next (Suivant). Chapitre 7 : Utilisation du service de contrôle parental de Linksys Rapports d'activité...
  • Seite 216: Figure 7-15 : Rapport Web

    Download (Télécharger). Les rapports seront enregistrés dans un fichier texte délimité par des tabulations appelé PcReport. Pour parcourir les entrées, cliquez sur First (Début), Previous (Précédent) ou Next (Suivant). Figure 7-15 : Rapport Web Chapitre 7 : Utilisation du service de contrôle parental de Linksys Rapports d'activité...
  • Seite 217: Figure 7-16: Family Settings

    I’m Done (J'ai terminé) pour quitter le site Web du centre de support et de facturation du service de contrôle parental. Chapitre 7 : Utilisation du service de contrôle parental de Linksys Family Settings (Paramètres familiaux)
  • Seite 218: Figure 7-18: All Settings

    Cliquez sur le bouton Save (Enregistrer) pour enregistrer vos modifications ou cliquez sur le bouton Cancel (Annuler) pour les annuler. Figure 7-19 : Online Reporting (Rapports en ligne) Chapitre 7 : Utilisation du service de contrôle parental de Linksys Family Settings (Paramètres familiaux)
  • Seite 219: Figure 7-20: Maturity Level

    (Annuler) pour les annuler. Après avoir sélectionné et enregistré le paramètre Maturity Level (Niveau de maturité), vous pouvez alors personnaliser les autres paramètres, tels que les restrictions concernant le temps, la consultation Web, la messagerie électronique et la messagerie instantanée. Chapitre 7 : Utilisation du service de contrôle parental de Linksys Family Settings (Paramètres familiaux)
  • Seite 220: Figure 7-21: Time Restrictions

    Cancel (Annuler) pour annuler vos modifications et revenir à l'écran précédent. Cliquez sur le bouton Save (Enregistrer) pour enregistrer vos modifications. Figure 7-21 : Time Restrictions (Restrictions temporelles) Chapitre 7 : Utilisation du service de contrôle parental de Linksys Family Settings (Paramètres familiaux)
  • Seite 221: Figure 7-22: Web Browsing Restrictions

    Cancel (Annuler) pour annuler vos modifications et revenir à l'écran précédent. Cliquez sur le bouton Save Figure 7-23 : Web Site Categories (Catégories de (Enregistrer) pour enregistrer vos modifications. sites Web) Chapitre 7 : Utilisation du service de contrôle parental de Linksys Family Settings (Paramètres familiaux)
  • Seite 222: Figure 7-24: Blocked & Allowed Web Sites

    Cliquez sur le bouton Cancel (Annuler) pour annuler vos modifications. Cliquez sur le bouton Save (Enregistrer) pour enregistrer vos modifications. Figure 7-24 : Blocked & Allowed Web Sites (Sites Web bloqués et autorisés) Chapitre 7 : Utilisation du service de contrôle parental de Linksys Family Settings (Paramètres familiaux)
  • Seite 223: Figure 7-25: E-Mail Restrictions

    Dans l'écran E-mail Restrictions (Restrictions de la messagerie électronique), cliquez sur le bouton Cancel (Annuler) pour annuler vos modifications. Cliquez sur le bouton Save (Enregistrer) pour enregistrer vos modifications. Figure 7-26 : E-mail Settings (Paramètres de messagerie électronique) Chapitre 7 : Utilisation du service de contrôle parental de Linksys Family Settings (Paramètres familiaux)
  • Seite 224: Figure 7-27: Instant-Messaging Restrictions

    Cancel (Annuler) pour annuler vos modifications. Cliquez sur le bouton Save (Enregistrer) pour enregistrer vos modifications. Delete (Supprimer) Pour supprimer un membre de la famille, cliquez sur Delete (Supprimer). Figure 7-28 : Password (Mot de passe) Chapitre 7 : Utilisation du service de contrôle parental de Linksys Family Settings (Paramètres familiaux)
  • Seite 225: Figure 7-29: Suggest A Rating

    Utilisation du service de contrôle parental Lorsque le service de contrôle parental Linksys gère de manière active les activités Internet de votre famille, vous devez vous connecter au service de contrôle parental Linksys avant de pouvoir accéder à Internet. Procédez comme suit : 1.
  • Seite 226: Figure 7-31: Welcome To Parental Controls

    ActiveX, une icône s'affiche dans la barre d'état système et un écran Status (Etat) s'affiche dans le coin supérieur droit de votre bureau. 4. Selon votre profil, le service de contrôle parental de Linksys autorise ou refuse l'accès à Internet et régule les activités de messagerie électronique ou instantanée.
  • Seite 227: Figure 7-34 : Ecran Contextuel De Déconnexion

    Programmes, Parental Controls (Contrôle parental) et PCT Helper (Auxiliaire de la barre d'état du contrôle parental). L'icône de la barre d'état s'affiche de nouveau. Figure 7-36 : Réactivation de l'icône de la barre d'état Chapitre 7 : Utilisation du service de contrôle parental de Linksys Utilisation du service de contrôle parental...
  • Seite 228: Annexe A : Dépannage

    Lisez les descriptions ci-dessous pour vous aider à résoudre vos problèmes. Si vous ne trouvez pas la réponse appropriée dans cette section, visitez le site Web de Linksys à l'adresse suivante : www.linksys.com. Problèmes courants et solutions 1.
  • Seite 229 Routeur haut débit sans fil - G avec SpeedBooster 6. Cliquez sur le bouton OK dans la fenêtre Propriétés TCP/IP, puis cliquez sur Fermer ou sur OK dans la fenêtre Réseau. 7. Redémarrez l'ordinateur lorsque vous y êtes invité. • Sous Windows 2000 : 1.
  • Seite 230 Routeur haut débit sans fil - G avec SpeedBooster 3. Je souhaite tester ma connexion Internet. Vérifiez vos paramètres TCP/IP. Sous Windows 98 Deuxième Edition, Me, 2000 et XP : • Assurez-vous que l'option Obtenir une adresse IP automatiquement est sélectionnée dans les paramètres. B Ouvrez une invite de commande.
  • Seite 231 Routeur haut débit sans fil - G avec SpeedBooster • Assurez-vous que vous disposez du câble approprié. Vérifiez que le voyant Link/Act du modem routeur est allumé dans la colonne Internet. • Assurez-vous que le câble de votre modem câble ou DSL est connecté au port Internet du routeur. Vérifiez que la page Status (Etat) de l'utilitaire Web du routeur indique une adresse IP valide fournie par votre FAI.
  • Seite 232 Routeur haut débit sans fil - G avec SpeedBooster 6. Activez la case à cocher Enable (Activer) correspondant au service des ports à utiliser. Prenons l'exemple suivant : Application Début et fin Protocole Adresse IP Activé Serveur Web 80 à 80 Les deux 192.168.1.100 Serveur FTP...
  • Seite 233 Routeur haut débit sans fil - G avec SpeedBooster 6. Activez la case à cocher Enable (Activer) correspondant au service des ports à utiliser. Prenons l'exemple suivant : Application Début et fin Protocole Adresse IP Activé 7777 à 27900 Les deux 192.168.1.100 Halflife 27015 à...
  • Seite 234 Routeur haut débit sans fil - G avec SpeedBooster 10. J'ai oublié mon mot de passe ou l'invite de mot de passe apparaît toujours lorsque j'enregistre des paramètres du routeur. Réinitialisez les paramètres d'usine par défaut du routeur. Pour cela, maintenez le bouton Reset (Réinitialiser) enfoncé...
  • Seite 235 Linksys (www.linksys.com/international) et télécharger la dernière version du micrologiciel. Procédez comme suit : 1. Accédez au site Web de Linksys (http://www.linksys.com/international) et téléchargez la toute dernière version du micrologiciel. 2. Pour mettre à niveau le micrologiciel, suivez les instructions de l'« annexe C : Mise à niveau du micrologiciel ».
  • Seite 236 Routeur haut débit sans fil - G avec SpeedBooster 4. Cliquez sur le bouton Save Settings (Enregistrer les paramètres). 5. Sélectionnez l'onglet Status (Etat), puis cliquez sur le bouton Connect (Connecter). 6. Il se peut que l'état de la connexion soit défini à Connecting (Connexion en cours). Appuyez sur la touche F5 pour actualiser l'écran jusqu'à...
  • Seite 237 Routeur haut débit sans fil - G avec SpeedBooster Connexions. Assurez-vous que la case à cocher Ne jamais établir de connexion est activée. Dans Netscape Navigator, cliquez sur Edition, Préférences, Avancé et Proxies. Assurez-vous que la case à cocher Connexion directe à Internet est activée. 19.
  • Seite 238: Questions Fréquemment Posées

    Routeur haut débit sans fil - G avec SpeedBooster Questions fréquemment posées Après avoir utilisé la fonction SecureEasySetup, mes périphériques sans fil existants ne parviennent plus à se connecter au routeur. SecureEasySetup utilise le cryptage WPA-Personal. Si vos périphériques sans fil actuels ne prennent pas en charge la sécurité...
  • Seite 239 Le routeur prend-il en charge d'autres systèmes d'exploitation que Windows 98 Deuxième Edition, Windows Millennium, Windows 2000 ou Windows XP ? Oui, mais Linksys ne propose à l'heure actuelle aucun service de support technique réservé à l'installation, à la configuration et au dépannage de ces systèmes d'exploitation.
  • Seite 240 Ethernet. (Accédez au Panneau de configuration du réseau dans l'onglet Propriétés avancées de l'adaptateur Ethernet). Assurez-vous que votre paramètre de proxy est désactivé dans le navigateur. Pour plus d'informations, consultez le site Web de Linksys à l'adresse suivante : www.linksys.com/international.
  • Seite 241 Routeur haut débit sans fil - G avec SpeedBooster Je ne parviens pas à afficher l'écran de configuration Web du routeur. Que puis-je faire ? Il se peut que vous deviez supprimer les paramètres de proxy sur votre navigateur Internet (par exemple, Netscape Navigator ou Internet Explorer).
  • Seite 242 Routeur haut débit sans fil - G avec SpeedBooster Puis-je exécuter une application à partir d'un ordinateur distant via le réseau sans fil ? Cela dépend si votre application est conçue ou non pour une utilisation via un réseau. Consultez la documentation de l'application pour déterminer si elle prend en charge le fonctionnement en réseau.
  • Seite 243 Routeur haut débit sans fil - G avec SpeedBooster Lorsque l'utilisateur se déplace, l'émetteur HF du nœud final vérifie régulièrement le système afin de déterminer s'il est en contact avec le point d'accès d'origine ou s'il doit en rechercher un autre. Lorsqu'un nœud ne reçoit plus de confirmation de son point d'accès d'origine, il entreprend une nouvelle recherche.
  • Seite 244 Onze canaux sont disponibles, classés de 1 à 11 en Amérique du Nord, Amérique centrale et Amérique du Sud et de 1 à 13 dans la plupart des pays européens. Si certaines de vos questions ne sont pas abordées dans cette annexe, consultez le site Web de Linksys à l'adresse suivante : www.linksys.com/international.
  • Seite 245: Annexe B : Sécurité Sans Fil

    Annexe B : Sécurité sans fil Linksys souhaite rendre la mise en réseau sans fil aussi fiable et facile que possible. La génération actuelle de produits Linksys intègre plusieurs fonctions de sécurité réseau que vous devez cependant mettre en œuvre vous-même.
  • Seite 246 Par conséquent, ne diffusez pas le nom SSID. Les périphériques réseau sans fil possèdent un nom SSID par défaut, configuré en usine (celui de Linksys est « linksys »). Les pirates informatiques connaissent ces noms par défaut et peuvent vérifier s'ils sont utilisés sur votre réseau.
  • Seite 247 Ces conseils de sécurité vous permettent de conserver votre tranquillité d'esprit tout en profitant de la technologie la plus adaptée et la plus souple que Linksys vous propose. Annexe B : Sécurité sans fil...
  • Seite 248: Annexe C : Mise À Niveau Du Micrologiciel

    Vous pouvez mettre à niveau le micrologiciel du routeur haut débit à partir de l'onglet Administration de l'utilitaire Web. Pour cela, procédez comme suit : 1. Téléchargez le micrologiciel à partir du site Web de Linksys à l'adresse suivante : www.linksys.com/ international.
  • Seite 249: Annexe D : Aide De Windows

    Routeur haut débit sans fil - G avec SpeedBooster Annexe D : Aide de Windows Tous les produits sans fil de Linksys exigent l'utilisation de Microsoft Windows. Windows est le système d'exploitation le plus répandu à l'échelle internationale. Il est accompagné d'un grand nombre de fonctionnalités qui facilitent toutes les tâches d'exploitation en réseau.
  • Seite 250: Annexe E : Recherche Des Adresses Mac Et Ip De Votre Adaptateur Ethernet

    Routeur haut débit sans fil - G avec SpeedBooster Annexe E : Recherche des adresses MAC et IP de votre adaptateur Ethernet Cette section explique comment rechercher l'adresse MAC de l'adaptateur Ethernet de votre ordinateur en vue d'utiliser la fonctionnalité de filtrage MAC et/ou la fonctionnalité de clonage des adresses MAC du routeur. Vous pouvez également rechercher l'adresse IP de l'adaptateur Ethernet de votre ordinateur.
  • Seite 251: Pour L'utilitaire Web Du Routeur

    Routeur haut débit sans fil - G avec SpeedBooster 3. Notez l'adresse physique indiquée à l'écran votre ordinateur. Il s'agit de l'adresse MAC de votre adaptateur Ethernet. Elle apparaît sous la forme d'une série de chiffres et de lettres. L'adresse MAC/adresse physique vous servira pour le clonage des adresses MAC ou le filtrage MAC. Remarque : L'adresse MAC est également appelée Adresse physique.
  • Seite 252: Annexe F : Glossaire

    Routeur haut débit sans fil - G avec SpeedBooster Annexe F : Glossaire 802.11b : norme de mise en réseau sans fil IEEE qui spécifie un débit de transfert de données maximal de 11 Mbit/s et une fréquence de 2,4 GHz. 802.11g : norme réseau sans fil IEEE spécifiant un débit de transfert de données maximal de 54 Mbit/s, une fréquence de 2,4 GHz et une rétro-compatibilité...
  • Seite 253 Routeur haut débit sans fil - G avec SpeedBooster CSMA/CA (Carrier Sense Multiple Access/Collision Avoidance) : méthode de transfert des données adoptée pour éviter les collisions de données sur un réseau. CTS (Clear To Send) : signal émis par un périphérique sans fil pour indiquer qu'il est prêt à recevoir des données. DDNS (Dynamic Domain Name System) : autorise l'hébergement d'un site Web, d'un serveur FTP ou d'un serveur de messagerie avec un nom de domaine fixe (par exemple, www.xyz.com) et une adresse IP dynamique.
  • Seite 254 Routeur haut débit sans fil - G avec SpeedBooster HTTP (HyperText Transport Protocol) : protocole de communication utilisé pour la connexion à des serveurs sur Internet. IEEE (The Institute of Electrical and Electronics Engineers) : institut indépendant chargé du développement des normes réseau.
  • Seite 255 Phrase mot de passe : équivalent d'un mot de passe, une phrase mot de passe simplifie le processus de cryptage WEP en générant automatiquement les clés de cryptage WEP des produits Linksys. Ping (Packet INternet Groper) : utilitaire Internet utilisé pour déterminer si une adresse IP particulière est en ligne.
  • Seite 256 Routeur haut débit sans fil - G avec SpeedBooster Réseau fédérateur : partie d'un réseau qui relie la plupart des systèmes et des réseaux entre eux et de gère la majorité des données. Réseau : série d'ordinateurs ou de périphériques reliés entre eux dans le but de partager et de stocker des données et/ou de permettre la transmission de données entre des utilisateurs.
  • Seite 257 Routeur haut débit sans fil - G avec SpeedBooster URL (Uniform Resource Locator) : adresse d'un fichier situé sur Internet. VPN (Virtual Private Network) : mesure de sécurité visant à protéger des données lorsqu'elles quittent un réseau et s'acheminent vers un autre via Internet. WAN (Wide Area Network) : Internet.
  • Seite 258: Annexe G : Spécifications

    Routeur haut débit sans fil - G avec SpeedBooster Annexe G : Spécifications Modèle WRT54GS Normes IEEE 802.3, IEEE 802.3u, IEEE 802.11g, IEEE 802.11b Canaux 11 canaux (Amérique du Nord, Amérique centrale et Amérique du Sud) 13 canaux (dans la plupart des pays d'Europe, d'Asie et d'Afrique)
  • Seite 259 Routeur haut débit sans fil - G avec SpeedBooster Poids 0,48 kg Alimentation Externe, 12 V CC, 1,0 A Certification FCC, IC-03, CE Température de fonctionnement 0 °C à 40 °C Température de stockage -20 °C à 70 °C Humidité en fonctionnement 10 à...
  • Seite 260: Annexe H : Informations De Garantie

    Cette garantie ne s'applique pas si le produit (a) a été modifié, sauf si cette modification est le fait de Linksys, (b) n'a pas été installé, exploité, réparé ou entretenu conformément aux instructions fournies pas Linksys ou (c) a été altéré suite à une charge physique ou électrique anormale, un usage inadapté...
  • Seite 261: Annexe I : Réglementation

    Routeur haut débit sans fil - G avec SpeedBooster Annexe I : Réglementation Déclaration FCC Cet équipement a été testé et déclaré conforme aux normes des équipements numériques de catégorie B, conformément à la section 15 des règlements FCC. L'objectif de ces normes est de fournir une protection raisonnable contre toute interférence nuisible dans une installation résidentielle.
  • Seite 262 Routeur haut débit sans fil - G avec SpeedBooster Informations de conformité pour les produits sans fil 2,4 GHz concernant l'Union européenne et les autres pays se conformant à la directive européenne 1999/5/CE (R&TTE) Déclaration de conformité concernant la directive européenne 1995/5/CE (R&TTE) Annexe I : Réglementation...
  • Seite 263 • Un fichier PDF figure sur le CD du produit. • Une copie imprimée est fournie avec le produit. • Un fichier PDF est disponible sur la page Web du produit. Visitez le site www.linksys.com/international et sélectionnez votre pays ou région. Sélectionnez ensuite votre produit.
  • Seite 264 Routeur haut débit sans fil - G avec SpeedBooster Marquage CE Pour les produits Linksys sans fil B et G, le marquage CE, le numéro de l'organisme notifié (le cas échéant) et l'identifiant de classe 2 suivants sont ajoutés à l'équipement.
  • Seite 265 R-SMA (AC9SMA) et R-TNC (AC9TNC). Ces câbles mesurent tous les deux 9 mètres de long et présentent une atténuation de 5 dB. Pour la compenser, Linksys propose également des antennes à gain plus élevé, la HGA7S (avec le connecteur R-SMA) et la HGA7T (avec le connecteur R-TNC). Ces antennes présentent un gain de 7 dBi et ne peuvent être utilisées qu'avec le câble R-SMA ou R-TNC.
  • Seite 266 Remarque : Le réglage de la puissance de sortie n'est peut-être pas disponible sur tous les produits sans fil. Pour plus d'informations, reportez-vous à la documentation fournie sur le CD du produit ou consultez le site http://www.linksys.com/international. Adaptateurs sans fil La sortie des adaptateurs sans fil est définie sur 100 % par défaut.
  • Seite 267 Routeur haut débit sans fil - G avec SpeedBooster Documents techniques disponibles sur le site www.linksys.com/international Pour accéder aux documents techniques, procédez comme suit : 1. Ouvrez la page http://www.linksys.com/international. 2. Cliquez sur votre région de résidence. 3. Cliquez sur le nom de votre pays de résidence.
  • Seite 268: Annexe J : Contacts

    Consultez notre site Web pour obtenir des informations sur les derniers produits et les mises à jour disponibles pour vos produits existants à l'adresse suivante : http://www.linksys.com/international. Si vous rencontrez des problèmes avec un produit Linksys, adressez un e-mail au service de support technique du pays où vous résidez : Europe Adresse électronique...
  • Seite 269 ® A Division of Cisco Systems, Inc. Wireless-G 802.11g Broadband-Router Benutzerhandbuch mit SpeedBooster WIRELESS WRT54GS (DE) Modell-Nr.
  • Seite 270 Wireless-G Broadband-Router mit SpeedBooster Copyright und Marken Technische Änderungen vorbehalten. Linksys ist eine eingetragene Marke bzw. eine Marke von Cisco Systems, Inc. und/ oder deren Zweigunternehmen in den USA und anderen Ländern. Copyright © 2005 Cisco Systems, Inc. Alle Rechte vorbehalten.
  • Seite 271 Wireless-G Broadband-Router mit SpeedBooster Inhaltsverzeichnis Kapitel 1: Einführung Willkommen Der Inhalt dieses Handbuchs Kapitel 2: Planen des Wireless-Netzwerks Netzwerktopologie Der Unterschied zwischen Ad-Hoc- und Infrastrukturmodus Netzwerkanordnung Kapitel 3: Kennenlernen des Wireless-G Broadband-Routers Rückseite Vorderseite Kapitel 4: Anschließen des Wireless-G Broadband-Routers Übersicht Hardware-Installation für Verbindungen mit dem Breitband-Modem Verbinden von Routern...
  • Seite 272 Registerkarte „Administration“ (Verwaltung) – „Config Management“ (Konfigurationsverwaltung) Registerkarte „Status“ – „Router“ Registerkarte „Status“ – „Local Network“ (Lokales Netzwerk) Registerkarte „Status“ – „Wireless“ Kapitel 7: Verwenden des Linksys Parental Control-Diensts Übersicht Einführung Anmeldung beim Linksys Parental Control-Dienst Anmeldung beim Linksys Parental Control-Dienst...
  • Seite 273 Wireless-G Broadband-Router mit SpeedBooster Anhang A: Fehlerbehebung Behebung häufig auftretender Probleme Häufig gestellte Fragen Anhang B: Sicherheit im Wireless-Netzwerkbetrieb Vorsichtsmaßnahmen Sicherheitsrisiken bei Wireless-Netzwerken Anhang C: Aktualisieren der Firmware Anhang D: Windows-Hilfe Anhang E: Ermitteln der MAC-Adresse und der IP-Adresse des Ethernet-Adapters Anweisung für Windows 98 SE/ME Anweisung für Windows 2000/XP...
  • Seite 274 Wireless-G Broadband-Router mit SpeedBooster Abbildungsverzeichnis Abbildung 3-1: Rückseite des Routers Abbildung 3-2: Vorderseite des Routers Abbildung 4-1: Anschließen des Modems Abbildung 4-2: Anschließen der Netzwerkgeräte Abbildung 4-3: Anschließen des Netzstromkabels Abbildung 4-4: Verbinden von Routern hintereinander Abbildung 4-5: Beispiel für eine Verbindung mit einem anderen Router Abbildung 4-6: Der Router mit der Internetverbindung wird über den Internet-Port angeschlossen Abbildung 4-7: Anschließen der Netzwerkgeräte...
  • Seite 275 Wireless-G Broadband-Router mit SpeedBooster Abbildung 5-12: Setup-Assistent – Fenster Advanced Internet Settings (Erweiterte Interneteinstellungen) für statische IP-Adressen Abbildung 5-13: Setup-Assistent – Fenster Advanced Internet Settings (Erweiterte Interneteinstellungen) für PPTP Abbildung 5-14: Setup-Assistent – Fenster Keep Alive/Connect on Demand (PPTP Continued) (Verbindung aufrechterhalten/Bei Bedarf verbinden (Fortsetzung PPTP)) Abbildung 5-15: Setup-Assistent –...
  • Seite 276 Wireless-G Broadband-Router mit SpeedBooster Abbildung 5-31: Setup-Assistent – Fenster Confirm New Settings (Bestätigen der neuen Einstellungen) Abbildung 5-32: Setup-Assistent – Fenster Safe Surfing (Sicheres Surfen) Abbildung 5-33: Setup-Assistent – Glückwunschfenster Abbildung 5-34: Setup-Assistent – Willkommensfenster – Fenster zum Starten des Assistenten Abbildung 5-35: SecureEasySetup –...
  • Seite 277 Wireless-G Broadband-Router mit SpeedBooster Abbildung 6-18: Registerkarte „Wireless“ – „Wireless Security (WPA Pre-Shared Key)“ (Wireless-Sicherheit (WPA/Vorläufiger gemeinsamer Schlüssel)) Abbildung 6-19: Registerkarte „Wireless“ – „Wireless Security (WPA RADIUS)“ (Wireless-Sicherheit (WPA RADIUS)) Abbildung 6-20: Registerkarte „Wireless“ – „Wireless Security (RADIUS)“ (Wireless-Sicherheit (RADIUS)) Abbildung 6-21: Registerkarte „Wireless“...
  • Seite 278 Abbildung 6-47: Registerkarte „Status“ – „Wireless“ Abbildung 7-1: Sicheres Surfen Abbildung 7-2: Registerkarte „Access Restrictions“ (Zugriffsbeschränkungen) – „Parental Control“ (Parental Control-Dienst) Abbildung 7-3: Linksys Verwendungsbedingungen Abbildung 7-4: Anmelden Abbildung 7-5: Bestellung Abbildung 7-6: Verbinden mit dem Parental Control-Dienst Abbildung 7-7: Glückwunschfenster Abbildung 7-8: Anmeldefenster für den Parental Control-Dienst...
  • Seite 279 Wireless-G Broadband-Router mit SpeedBooster Abbildung 7-17: Neues Familienmitglied Abbildung 7-18: Alle Einstellungen Abbildung 7-19: Online-Berichterstellung Abbildung 7-20: Reifeebene Abbildung 7-21: Zeitbeschränkungen Abbildung 7-22: Beschränkungen zum Web-Browsing Abbildung 7-23: Website-Kategorien Abbildung 7-24: Blockierte und zugelassene Websites Abbildung 7-25: E-Mail-Beschränkungen Abbildung 7-26: E-Mail-Einstellungen Abbildung 7-27: Instant-Messaging-Beschränkungen Abbildung 7-28: Passwort Abbildung 7-29: Bewertungsvorschläge...
  • Seite 280: Kapitel 1: Einführung

    Kapitel 1: Einführung Willkommen Vielen Dank, dass Sie sich für einen Wireless-G Broadband-Router mit SpeedBooster von Linksys entschieden haben. Der Wireless-G Broadband-Router mit SpeedBooster optimiert den Wireless-Netzwerkbetrieb wie nie zuvor, sodass Sie einfach und sicher auf das Internet, Dateien und jede Menge Spaß zugreifen können.
  • Seite 281: Der Inhalt Dieses Handbuchs

    • Kapitel 6: Konfigurieren des Wireless-G Broadband-Routers In diesem Kapitel wird beschrieben, wie Sie das webbasierte Dienstprogramm des Routers verwenden. • Kapitel 7: Verwenden des Linksys Parental Control-Diensts In diesem Kapitel werden die Anmeldung bei diesem Dienst, die Verwaltung Ihres Kontos sowie die Verwendung des Internets erklärt, wenn der Dienst den Internetdatenverkehr und Nachrichten kontrolliert.
  • Seite 282 • Anhang I: Zulassungsinformationen In diesem Anhang sind die für den Router geltenden Zulassungsinformationen aufgeführt. • Anhang J: Kontaktinformationen In diesem Anhang finden Sie Kontaktinformationen zu einer Reihe von Linksys Ressourcen, darunter auch zum Support. Kapitel 1: Einführung Der Inhalt dieses Handbuchs...
  • Seite 283: Kapitel 2: Planen Des Wireless-Netzwerks

    Wireless-G Broadband-Router mit SpeedBooster Kapitel 2: Planen des Wireless-Netzwerks Netzwerktopologie Netzwerk: Mehrere Computer oder Geräte, die miteinander verbunden sind, damit Benutzer WLANs (Wireless Local Area Network) entsprechen im Prinzip regulären LANs (Local Area Network), mit der Daten gemeinsam nutzen, speichern und Ausnahme, dass jeder Computer im Wireless-Netzwerk die Verbindung zum Netzwerk über ein Wireless-Gerät untereinander übertragen können.
  • Seite 284: Netzwerkanordnung

    Wenn Sie Ihr Wireless-Netzwerk mit Ihrem verdrahteten Netzwerk verbinden möchten, können Sie dazu die vier LAN-Ports des Wireless-G Broadband-Routers verwenden. Wenn Sie weitere Ports benötigen, können Sie an einen der LAN-Ports des Wireless-G Broadband-Routers einen Linksys Switch (wie beispielsweise den SD205 oder SD208) anschließen.
  • Seite 285: Kapitel 3: Kennenlernen Des Wireless-G Broadband-Routers

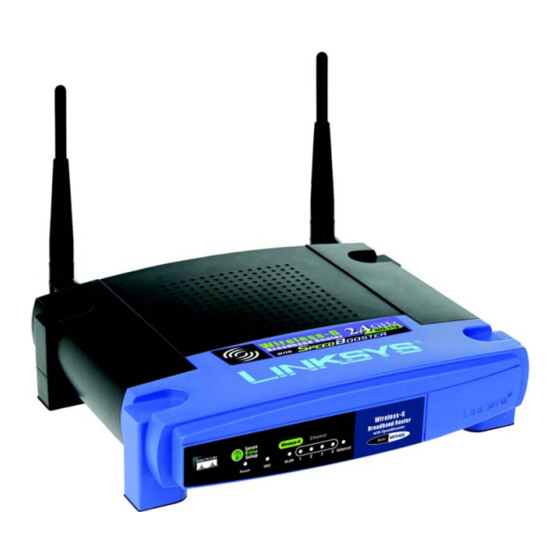
    Wireless-G Broadband-Router mit SpeedBooster Kapitel 3: Kennenlernen des Wireless-G Broadband-Routers Rückseite Die Ports des Routers zum Anschließen von Kabeln befinden sich auf der Rückseite. Wichtig: Durch das Zurücksetzen des Routers werden alle Einstellungen (WEP-Verschlüsselung, Netzwerkeinstellungen usw.) gelöscht und durch die Werkseinstellungen ersetzt.
  • Seite 286: Vorderseite

    Wireless-G Broadband-Router mit SpeedBooster Vorderseite Auf der Vorderseite des Routers befinden sich die LEDs, mit denen Informationen zur Netzwerkaktivität angezeigt werden. HINWEIS: Bei SecureEasySetup handelt es sich um eine Funktion, mit der Sie auf einfache Weise das Wireless-Netzwerk einrichten können. Wenn Sie über SecureEasySetup-Geräte verfügen, führen Sie die Setup-Assistenten-CD-ROM des Routers aus, und befolgen Sie dann die Anweisungen auf dem...
  • Seite 287: Kapitel 4: Anschließen Des Wireless-G Broadband-Routers

    Wireless-G Broadband-Router mit SpeedBooster Kapitel 4: Anschließen des Wireless-G Broadband-Routers Übersicht Dieses Kapitel enthält zwei verschiedene Anleitungsblöcke. Wenn der Wireless-G Broadband-Router der einzige Router in Ihrem Netzwerk ist, befolgen Sie die Anweisungen unter „Hardware-Installation für Verbindungen mit dem Breitband-Modem“. Wenn Sie bestimmte Anwendungen, wie beispielsweise den Parental Control-Dienst, nur auf bestimmten PCs ausführen möchten, muss der Wireless-G Broadband-Router dazu hinter einem anderen Router ausgeführt werden.
  • Seite 288: Abbildung 4-2: Anschließen Der Netzwerkgeräte

    Wireless-G Broadband-Router mit SpeedBooster 5. Schließen Sie Ihre Netzwerk-PCs oder Ethernet-Geräte mit Standard-Ethernet-Netzwerkkabeln an die nummerierten Ports des Routers an. Abbildung 4-2: Anschließen der Netzwerkgeräte 6. Schließen Sie den Netzstromadapter an den Stromanschluss des Routers an, und stecken Sie das andere WICHTIG: Verwenden Sie nur den Netzstromadapter, Ende in eine Netzsteckdose.
  • Seite 289: Verbinden Von Routern

    HINWEIS: Die Schritte 1 bis 4 beziehen sich auf möglich, den Router mit dem Parental Control-Dienst einzurichten. typische Linksys Router. Wenn Sie jedoch einen Router von einem anderen Anbieter als Linksys verwenden, Vergewissern Sie sich zuerst, dass der Router NICHT mit Ihrem Netzwerk verbunden ist. Befolgen Sie dann die...
  • Seite 290: Abbildung 4-6: Der Router Mit Der Internetverbindung Wird Über Den Internet-Port Angeschlossen

    Wireless-G Broadband-Router mit SpeedBooster 8. Schließen Sie ein Standard-Ethernet-Netzwerkkabel am Internet-Port des Broadband-Routers an. Schließen Sie dann das andere Ende des Ethernet-Kabels an einen der nummerierten Ethernet-Ports am anderen Router an. Abbildung 4-6: Der Router mit der Internetverbindung wird über den Internet-Port angeschlossen 9.
  • Seite 291: Abbildung 4-8: Anschließen Des Netzstromkabels

    Wireless-G Broadband-Router mit SpeedBooster 10. Schließen Sie den Wechselstrom-Netzstromadapter an den Netzstrom-Port des Broadband-Routers an, und stecken Sie das andere Ende in eine Netzsteckdose. Verwenden Sie nur den im Lieferumfang des Broadband- Routers enthaltenen Netzstromadapter. Bei Verwendung anderer Netzstromadapter kann das Produkt beschädigt werden.
  • Seite 292: Kapitel 5: Einrichten Des Wireless-G Broadband-Routers

    Wireless-G Broadband-Router mit SpeedBooster Kapitel 5: Einrichten des Wireless-G Broadband-Routers Übersicht Der Setup-Assistent für den Wireless-G Broadband-Router mit SpeedBooster führt Sie durch den Installationsvorgang. Er zeigt Ihnen Schritt für Schritt, wie Sie die Netzwerk- und Wireless-Einstellungen des Routers konfigurieren. Verwenden des Setup-Assistenten 1.
  • Seite 293: Abbildung 5-3: Setup-Assistent - Fenster License Agreement (Lizenzvereinbarung)

    Wireless-G Broadband-Router mit SpeedBooster 4. Klicken Sie nach dem Lesen der Lizenzvereinbarung auf die Schaltfläche Next (Weiter), wenn Sie diese akzeptieren, oder auf die Schaltfläche Cancel (Abbrechen), um den Installationsvorgang zu beenden. Abbildung 5-3: Setup-Assistent – Fenster License Agreement (Lizenzvereinbarung) 5.
  • Seite 294: Abbildung 5-5: Setup-Assistent - Fenster Connect The Modem To The Router (Anschließen Des Modems An Den Router)

    Wireless-G Broadband-Router mit SpeedBooster 6. Der Setup-Assistent fordert Sie auf, das Breitband-Modem an den Router anzuschließen. Klicken Sie anschließend auf die Schaltfläche Next (Weiter). Abbildung 5-5: Setup-Assistent – Fenster Connect the Modem to the Router (Anschließen des Modems an den Router) 7.
  • Seite 295: Abbildung 5-7: Setup-Assistent - Fenster Connect The Network Cable To The Router (Anschließen Des Netzwerkkabels An Den Router)

    Wireless-G Broadband-Router mit SpeedBooster 8. Der Setup-Assistent fordert Sie auf, das andere Ende des Netzwerkkabels an den Router anzuschließen. Sie können dann weitere PCs an den Router anschließen. Klicken Sie anschließend auf die Schaltfläche Next (Weiter). Abbildung 5-7: Setup-Assistent – Fenster Connect the Network Cable to the Router (Anschließen des Netzwerkkabels an den Router) 9.
  • Seite 296: Abbildung 5-9: Setup-Assistent - Fenster Check The Router's Status

    Wireless-G Broadband-Router mit SpeedBooster 10. Vergewissern Sie sich, dass die Netzstrom-LED, die Internet-LED und die nummerierten LEDs (je nach der Anzahl angeschlossener PCs) auf der Vorderseite des Routers leuchten. Klicken Sie anschließend auf die Schaltfläche Next (Weiter). Abbildung 5-9: Setup-Assistent – Fenster Check the Router’s Status (Überprüfen des Routerstatus) 11.
  • Seite 297: Abbildung 5-11: Setup-Assistent - Fenster Configure Dsl (Pppoe) Settings (Konfigurieren Der Dsl-Einstellungen (Pppoe))

    Wireless-G Broadband-Router mit SpeedBooster DSL (PPPoE) User Name (Benutzername): Geben Sie den Benutzernamen ein, der Ihnen von Ihrem ISP zugeteilt wurde. Password (Passwort): Geben Sie das Passwort ein, das Ihnen von Ihrem ISP zugeteilt wurde. Confirm (Bestätigen): Geben Sie das Passwort zur Bestätigung erneut in dieses Feld ein. Keep Alive (Verbindung aufrechterhalten): Wenn die Internetverbindung regelmäßig vom Router überprüft werden soll, aktivieren Sie die Option Keep Alive (Verbindung aufrechterhalten).
  • Seite 298: Abbildung 5-13: Setup-Assistent - Fenster Advanced Internet Settings (Erweiterte Interneteinstellungen) Für Pptp

    Wireless-G Broadband-Router mit SpeedBooster PPTP Connection (Verbindung): Der PPTP-Dienst (Point-to-Point Tunneling Protocol) wird nur in Europa verwendet. Wenn Sie eine PPTP-Verbindung verwenden, wählen Sie PPTP aus dem Dropdown-Menü aus. User Name (Benutzername): Geben Sie den Benutzernamen ein, der Ihnen von Ihrem ISP zugeteilt wurde. Password (Passwort): Geben Sie das Passwort ein, das Ihnen von Ihrem ISP zugeteilt wurde.
  • Seite 299: Abbildung 5-15: Setup-Assistent - Fenster Advanced Internet Settings (Erweiterte Interneteinstellungen) Für L2Tp

    Wireless-G Broadband-Router mit SpeedBooster L2TP Connection (Verbindung): Wenn Sie eine L2TP-Verbindung (Layer 2 Tunneling Protocol) verwenden, wählen Sie L2TP aus dem Dropdown-Menü aus. User Name (Benutzername): Geben Sie den Benutzernamen ein, der Ihnen von Ihrem ISP zugeteilt wurde. Password (Passwort): Geben Sie das Passwort ein, das Ihnen von Ihrem ISP zugeteilt wurde. Confirm (Bestätigen): Geben Sie das Passwort zur Bestätigung erneut in dieses Feld ein.
  • Seite 300: Abbildung 5-16: Setup-Assistent - Fenster Advanced Internet Settings (Erweiterte Interneteinstellungen) Für Telstra

    Wireless-G Broadband-Router mit SpeedBooster Telstra Connection (Verbindung): Telstra ist ein Dienst, der nur in Australien verwendet wird. Wenn Sie diesen Dienst verwenden, wählen Sie Telstra aus dem Dropdown-Menü aus. User Name (Benutzername): Geben Sie den Benutzernamen ein, der Ihnen von Ihrem ISP zugeteilt wurde. Password (Passwort): Geben Sie das Passwort ein, das Ihnen von Ihrem ISP zugeteilt wurde.
  • Seite 301: Abbildung 5-17: Setup-Assistent - Fenster Set The Router's Password

    Wireless-G Broadband-Router mit SpeedBooster 12. Für den Router steht ein webbasiertes Dienstprogramm zur Verfügung, mit dem Sie den Router von jedem Netzwerk-PC aus konfigurieren können. Password (Passwort): Geben Sie ein Passwort für den Zugriff auf das Dienstprogramm ein. Confirm (Bestätigen): Geben Sie im Feld Confirm (Bestätigen) das Passwort erneut ein. Klicken Sie auf die Schaltfläche Next (Weiter), um fortzufahren, oder auf die Schaltfläche Back (Zurück), um zum vorherigen Fenster zurückzukehren.
  • Seite 302: Verwenden Der Secureeasysetup-Funktion Des Routers

    Wireless-G Broadband-Router mit SpeedBooster Verwenden der SecureEasySetup-Funktion des Routers Lesen Sie die folgenden Anweisungen, bevor Sie eine der SecureEasySetup-Tasten verwenden. Stellen Sie fest, wo sich die SecureEasySetup-Tasten an den Geräten befinden, bevor Sie die SecureEasySetup-Funktion des Routers verwenden. HINWEIS: SecureEasySetup verwendet die WPA Personal-Verschlüsselung. Wenn Ihre aktuellen Wireless-Geräte die Sicherheitsmethode WPA Personal nicht unterstützen, können Sie SecureEasySetup nicht in Ihrem Netzwerk verwenden.
  • Seite 303: Abbildung 5-23: Setup-Assistent - Fenster Configure Wireless Settings

    Wireless-G Broadband-Router mit SpeedBooster 2. Drücken Sie auf der Vorderseite des Routers auf das orangefarben leuchtende Cisco Logo. Sobald das Logo weiß blinkt, drücken Sie die SecureEasySetup-Taste an einem anderen Gerät. Das Cisco Logo des Routers leuchtet konstant, sobald das Gerät dem Netzwerk hinzugefügt wurde. Wiederholen Sie diesen Vorgang für alle weiteren SecureEasySetup-Geräte.
  • Seite 304: Abbildung 5-25: Setup-Assistent - Fenster Safe Surfing (Sicheres Surfen)

    Schaltfläche Norton Internet Security Suite, um Norton Internet Security Special Edition auf dem Computer zu installieren, oder auf die Schaltfläche Linksys Parental Control Service (Linksys Parental Control-Dienst), um sich für eine kostenlose Demoversion des Parental Control-Diensts von Linksys anzumelden.
  • Seite 305: Manuelles Konfigurieren Der Wireless-Einstellungen Des Routers

    Geben Sie in das Feld SSID die SSID des Wireless-Netzwerks ein. Die SSID muss für alle Geräte im Netzwerk der Wireless-Einstellungen) identisch sein. Die Standardeinstellung ist linksys (in Kleinbuchstaben). Wählen Sie den Betriebskanal für Ihr Wireless-Netzwerk aus. Über diesen Kanal kommunizieren alle Wireless-Geräte.
  • Seite 306: Abbildung 5-29: Setup-Assistent - Fenster Wireless Security (Wireless-Sicherheit) Für Wpa-Psk

    Wireless-G Broadband-Router mit SpeedBooster 3. Wählen Sie die gewünschte Sicherheitsmethode aus: WPA-PSK (auch als „WPA Personal“ bezeichnet), WEP (64-Bit) oder WEP (128-Bit). WPA ist die Abkürzung für Wi-Fi Protected Access, WEP für Wired Equivalent Privacy. Bei WPA handelt es sich um einen höheren Sicherheitsstandard als bei WEP. Fahren Sie mit den entsprechenden Anweisungen für die gewünschte Sicherheitsmethode fort.
  • Seite 307: Abbildung 5-30: Setup-Assistent - Fenster Wireless Security (Wireless-Sicherheit) Für Wep (64-Bit)

    Bei der Passphrase ist die Groß- und Kleinschreibung sowie eine Längenbeschränkung von 16 alphanumerischen Zeichen zu beachten. Sie muss mit den Passphrasen der anderen Wireless-Netzwerkgeräte übereinstimmen und ist nur mit Wireless-Produkten von Linksys kompatibel. (Wenn Sie Wireless-Produkte anderer Hersteller besitzen, geben Sie den WEP-Schlüssel bei diesen Produkten manuell ein.) WEP Key (WEP-Schlüssel): Der eingegebene WEP-Schlüssel muss mit dem WEP-Schlüssel Ihres Wireless-...
  • Seite 308: Abbildung 5-32: Setup-Assistent - Fenster Safe Surfing (Sicheres Surfen)

    Klicken Sie auf die Schaltfläche Norton Internet Security Suite, um Norton Internet Security Special Edition auf dem Computer zu installieren, oder auf die Schaltfläche Linksys Parental Control Service (Linksys Parental Control-Dienst), um sich für eine kostenlose Demoversion des Parental Control-Diensts von Linksys anzumelden.
  • Seite 309: Konfigurieren Des Notebooks Mit Secureeasysetup

    Wireless-G Broadband-Router mit SpeedBooster Konfigurieren des Notebooks mit SecureEasySetup In diesem Abschnitt wird beschrieben, wie Sie die SecureEasySetup-Funktion verwenden, wenn auf einem Computer das SecureEasySetup-Logo angezeigt wird. HINWEIS: SecureEasySetup verwendet die WPA Personal-Verschlüsselung. Wenn Ihre aktuellen Wireless-Geräte die Sicherheitsmethode WPA Personal nicht unterstützen, können Sie SecureEasySetup nicht in Ihrem Netzwerk verwenden.
  • Seite 310: Abbildung 5-37: Fenster Configure Wireless Settings 2

    Wireless-G Broadband-Router mit SpeedBooster 2. Im nächsten Fenster werden Sie aufgefordert, auf das beleuchtete Cisco Logo auf dem Router zu drücken. Drücken Sie auf das Logo, und klicken Sie dann auf die Schaltfläche Next (Weiter), um fortzufahren. Klicken Sie zum Beenden des Setup-Assistenten auf die Schaltfläche Exit (Beenden). Klicken Sie auf die Schaltfläche Help (Hilfe), um weitere Informationen zu erhalten.
  • Seite 311: Abbildung 5-38: Fenster Your Wireless Settings (Ihre Wireless-Einstellungen)

    Wireless-G Broadband-Router mit SpeedBooster 4. Nach dem Konfigurieren der Wireless-Einstellungen wird das Fenster Your Wireless Settings (Ihre Wireless-Einstellungen) angezeigt. Klicken Sie auf die Schaltfläche Save (Speichern), wenn Sie die Konfigurationseinstellungen in einer Textdatei auf Ihrem Computer speichern möchten. Klicken Sie auf die Schaltfläche Print (Drucken), wenn Sie die Konfigurationseinstellungen drucken möchten.
  • Seite 312: Kapitel 6: Konfigurieren Des Wireless-G Broadband-Routers

    Wireless-G Broadband-Router mit SpeedBooster Kapitel 6: Konfigurieren des Wireless-G Broadband-Routers Übersicht HINWEIS: Wenn Sie den Router erstmals installieren, Sie sollten immer die Installations-CD-ROM verwenden, wenn Sie den Router erstmals installieren. Wenn Sie den sollten Sie unbedingt den Setup-Assistenten auf der Setup-Assistenten auf der Installations-CD-ROM nicht ausführen möchten, können Sie das webbasierte Installations-CD-ROM verwenden.
  • Seite 313: Registerkarte „Setup" (Einrichtung) - „Basic Setup" (Grundlegende Einrichtung)

    Wireless-G Broadband-Router mit SpeedBooster Registerkarte „Setup“ (Einrichtung) – „Basic Setup“ (Grundlegende Einrichtung) Im ersten geöffneten Fenster wird die Registerkarte Setup (Einrichtung) angezeigt. Hier können Sie die allgemeinen Einstellungen des Routers ändern. Ändern Sie die Einstellungen wie hier beschrieben, und klicken Sie auf die Schaltfläche Save Settings (Einstellungen speichern), um Ihre Änderungen anzuwenden, oder auf die Schaltfläche Cancel Changes (Änderungen verwerfen), um Ihre Änderungen zu verwerfen.
  • Seite 314: Abbildung 6-5: Verbindungstyp „Pppoe

    Wireless-G Broadband-Router mit SpeedBooster • PPPoE: Einige ISPs mit DSL-Option verwenden PPPoE (Point-to-Point Protocol over Ethernet) zur Herstellung von Internetverbindungen. Wenn die Verbindung mit dem Internet über eine DSL-Leitung hergestellt wird, klären Sie mit dem ISP, ob PPPoE verwendet wird. Falls ja, wählen Sie die Option PPPoE aus. User Name (Benutzername) und Password (Passwort): Geben Sie den Benutzernamen und das Passwort ein, die Sie von Ihrem ISP erhalten haben.
  • Seite 315: Abbildung 6-7: Verbindungstyp „L2Tp

    Wireless-G Broadband-Router mit SpeedBooster • L2TP: Connection (Verbindung): Wenn Sie eine L2TP-Verbindung (Layer 2 Tunneling Protocol) verwenden, wählen Sie L2TP aus dem Dropdown-Menü aus. User Name (Benutzername): Geben Sie den Benutzernamen ein, der Ihnen von Ihrem ISP zugeteilt wurde. Password (Passwort): Geben Sie das Passwort ein, das Ihnen von Ihrem ISP zugeteilt wurde. Confirm (Bestätigen): Geben Sie das Passwort zur Bestätigung erneut in dieses Feld ein.
  • Seite 316: Abbildung 6-9: Optionale Einstellungen

    Wireless-G Broadband-Router mit SpeedBooster Connect on Demand (Bei Bedarf verbinden): Wenn der Router die Internetverbindung nach einer bestimmten Leerlaufzeit trennen soll, aktivieren Sie die Option Connect on Demand (Bei Bedarf verbinden), und geben Sie die gewünschte Leerlaufzeit in Minuten an. Klicken Sie auf die Schaltfläche Next (Weiter), um fortzufahren, oder auf die Schaltfläche Back (Zurück), um Paket: Eine Dateneinheit, die über ein zum vorherigen Fenster zurückzukehren.
  • Seite 317: Abbildung 6-12: Zeiteinstellung

    Wireless-G Broadband-Router mit SpeedBooster DHCP Server (DHCP-Server): Die DHCP-Option ist standardmäßig aktiviert. Wenn in Ihrem Netzwerk bereits ein DHCP-Server vorhanden ist oder kein DHCP-Server eingerichtet werden soll, aktivieren Sie die Optionsschaltfläche Disable (Deaktivieren) (es sind keine weiteren DHCP-Funktionen verfügbar). Starting IP Address (Start-IP-Adresse): Geben Sie einen Wert ein, mit dem der DHCP-Server beim Zuweisen von IP-Adressen beginnen soll.
  • Seite 318: Registerkarte „Setup" (Einrichtung) - „Ddns

    Wireless-G Broadband-Router mit SpeedBooster Registerkarte „Setup“ (Einrichtung) – „DDNS“ Der Router verfügt über die Funktion DDNS (Dynamic Domain Name System). Mit DDNS können Sie einer dynamischen Internet-IP-Adresse einen festen Host- und Domänennamen zuweisen. Dies kann sich für das Hosting Ihrer eigenen Website, Ihres FTP-Servers oder anderer Server hinter dem Router als nützlich erweisen. Bevor Sie diese Funktion verwenden können, müssen Sie sich bei den DDNS-Dienstanbietern unter www.dyndns.org oder www.TZO.com für den DDNS-Dienst anmelden.
  • Seite 319: Registerkarte „Setup" (Einrichtung) - „Mac Address Clone" (Kopieren Der Mac-Adresse)

    Wireless-G Broadband-Router mit SpeedBooster Registerkarte „Setup“ (Einrichtung) – „MAC Address Clone“ (Kopieren der MAC-Adresse) Eine MAC-Adresse ist ein 12-stelliger Code, der einem einzigen Hardware-Objekt zu Identifikationszwecken zugewiesen wird. Bei einigen ISPs ist für den Internetzugang die Registrierung einer MAC-Adresse erforderlich. Wenn Sie die MAC-Adresse nicht erneut bei Ihrem ISP registrieren möchten, können Sie dem Router die aktuell bei Ihrem ISP registrierte MAC-Adresse mit der Funktion MAC Address Clone (Kopieren der MAC-Adresse) zuweisen.
  • Seite 320: Registerkarte „Setup" (Einrichtung) - „Advanced Routing" (Erweitertes Routing)

    Wireless-G Broadband-Router mit SpeedBooster Registerkarte „Setup“ (Einrichtung) – „Advanced Routing“ (Erweitertes Routing) Auf dieser Registerkarte werden die erweiterten Funktionen des Routers eingerichtet. Mit der Option Operating Mode (Betriebsmodus) können Sie die Arten der von Ihnen verwendeten erweiterten Funktionen auswählen. Mit Dynamic Routing (Dynamisches Routing) wird die Paketübertragung in Ihrem Netzwerk automatisch angepasst.
  • Seite 321: Registerkarte „Wireless" - „Basic Wireless Settings" (Grundlegende Wireless-Einstellungen)

    Einstellung für alle Punkte im Wireless-Netzwerk dieselbe ist. Um die Sicherheit zu erhöhen, sollten Sie die Standard-SSID (linksys) in einen eindeutigen Namen ändern. Wireless Channel (Wireless-Kanal): Wählen Sie aus der angezeigten Liste den Kanal aus, der den Netzwerkeinstellungen entspricht. Eine korrekte Funktion Ihres Wireless-Netzwerks ist nur gewährleistet, wenn die Übertragung für alle Geräte über denselben Kanal erfolgt.
  • Seite 322: Registerkarte „Wireless" - „Wireless Security" (Wireless-Sicherheit)

    Wireless-G Broadband-Router mit SpeedBooster Registerkarte „Wireless“ – „Wireless Security“ (Wireless-Sicherheit) WICHTIG: Wenn Sie WPA verwenden, MUSS jedes Gerät im Wireless-Netzwerk dieselbe WPA-Methode Mit den Wireless-Sicherheitseinstellungen wird die Sicherheit des Wireless-Netzwerks konfiguriert. Vom Router und denselben gemeinsamen Schlüssel verwenden, werden vier Wireless-Sicherheitsoptionen unterstützt: WPA Pre-Shared Key (WPA/Vorläufiger gemeinsamer damit das Wireless-Netzwerk ordnungsgemäß...
  • Seite 323: Abbildung 6-20: Registerkarte „Wireless" - „Wireless Security (Radius)" (Wireless-Sicherheit (Radius))

    Wireless-G Broadband-Router mit SpeedBooster RADIUS: Bei dieser Option wird WEP in Kombination mit einem RADIUS-Server verwendet. (Diese WICHTIG: Wenn Sie die WEP-Verschlüsselung Vorgehensweise sollte nur verwendet werden, wenn ein RADIUS-Server mit dem Router verbunden ist.) Geben verwenden, MUSS jedes Gerät im Wireless-Netzwerk Sie zuerst die IP-Adresse und die Port-Nummer des RADIUS-Servers sowie den Schlüssel ein, der für die dasselbe WEP-Verschlüsselungsverfahren und Verwendung durch den Router und den Server freigegeben ist.
  • Seite 324: Registerkarte „Wireless" - „Wireless Mac Filter" (Wireless-Mac-Filter)

    Wireless-G Broadband-Router mit SpeedBooster Registerkarte „Wireless“ – „Wireless MAC Filter“ (Wireless-MAC-Filter) Der Wireless-Zugriff kann mit den MAC-Adressen der Wireless-Geräte innerhalb des Übertragungsbereichs Ihres Netzwerks gefiltert werden. Wireless MAC Filter (Wireless-MAC-Filter): Um Wireless-Benutzer nach der MAC-Adresse zu filtern, wobei der Zugriff entweder zugelassen oder verweigert wird, klicken Sie auf Enable (Aktivieren). Wenn Sie die Benutzer nicht nach der MAC-Adresse filtern möchten, wählen Sie Disable (Deaktivieren) aus.
  • Seite 325: Registerkarte „Wireless" - „Advanced Wireless Settings" (Erweiterte Wireless-Einstellungen)

    Wireless-G Broadband-Router mit SpeedBooster Registerkarte „Wireless“ – „Advanced Wireless Settings“ (Erweiterte Wireless-Einstellungen) Auf dieser Registerkarte werden die erweiterten Wireless-Funktionen des Routers eingerichtet. Diese Einstellungen sollten nur von einem erfahrenen Administrator angepasst werden, da falsche Einstellungen die Leistung des Routers im Wireless-Betrieb beeinträchtigen können. Authentication Type (Authentifizierungstyp): Standardmäßig ist die Option Auto (Automatisch) ausgewählt, mit der sowohl der Authentifizierungstyp Open System (Offenes System) als auch Shared Key (Freigegebener Schlüssel) verwendet werden kann.
  • Seite 326 Wireless-G Broadband-Router mit SpeedBooster Beacon Interval (Beacon-Intervall): Der Standardwert ist 100. Geben Sie einen Wert zwischen 1 und 65.535 Millisekunden ein. Der Wert des Beacon-Intervalls gibt das Sendeintervall des Beacons an. Ein Beacon ist eine Paketübertragung des Routers zur Synchronisierung des Wireless-Netzwerks. DTIM Interval (DTIM-Intervall): Der Wert (zwischen 1 und 255) gibt das Intervall der DTIM (Delivery Traffic Indication Message) an.
  • Seite 327: Registerkarte „Security" (Sicherheit) - „Firewall

    Wireless-G Broadband-Router mit SpeedBooster Registerkarte „Security“ (Sicherheit) – „Firewall“ Firewall Protection (Firewall-Schutz): Aktivieren Sie diese Funktion, um SPI (Stateful Packet Inspection) für eine genauere Überprüfung der in Ihre Netzwerkumgebung eingehenden Datenpakete einzusetzen. Block WAN Requests (WAN-Anfragen blockieren): Aktivieren Sie die Funktion zum Blockieren von WAN-Anfragen, indem Sie das Kontrollkästchen Block Anonymous Internet Requests (Anonyme Internetanfragen blockieren) aktivieren.
  • Seite 328: Kapitel 6: Konfigurieren Des Wireless-G Broadband-Routers Registerkarte "Security" (Sicherheit) - "Vpn Passthrough" (Vpn-Passthrough)

    Wireless-G Broadband-Router mit SpeedBooster PPTP Passthrough (PPTP-Passthrough): Mit PPTP (Point-to-Point Tunneling Protocol) kann das Point-to-Point Protocol (PPP) über einen Tunnel durch ein IP-Netzwerk geleitet werden. Um PPTP-Tunnel durch den Router zuzulassen, klicken Sie auf Enable (Aktivieren). Die Option PPTP Passthrough (PPTP-Passthrough) ist standardmäßig aktiviert.
  • Seite 329: Registerkarte „Access Restrictions" (Zugriffsbeschränkungen) - „Parental Control" (Parental Control-Dienst)

    Haushalt individuell einstellbar sind. Weitere Informationen hierzu finden Sie in „Kapitel 7: Verwenden des Linksys Parental Control-Diensts“. Der Linksys Parental Control-Dienst setzt die Richtlinien des Routers für den Internetzugriff außer Kraft. Anders ausgedrückt: Wenn Sie den Linksys Parental Control-Dienst einsetzen, werden die Sicherheitsrichtlinien für den Internetzugriff im Fenster Internet Access (Internetzugriff) auf der Registerkarte Access Policies (Zugriffsbeschränkungen) deaktiviert.
  • Seite 330: Registerkarte „Access Restrictions" (Zugriffsbeschränkungen) - „Internet Access" (Internetzugriff)

    Wireless-G Broadband-Router mit SpeedBooster Registerkarte „Access Restrictions“ (Zugriffsbeschränkungen) – „Internet Access“ (Internetzugriff) Im Fenster Internet Access (Internetzugriff) können Sie bestimmte Arten von Internetverwendung und -verkehr blockieren bzw. zulassen, wie z. B. Internetzugriffe, designierte Dienste, Websites und eingehenden Datenverkehr während bestimmter Tage und Uhrzeiten. Internet Access Policy (Richtlinien für Internetzugriff): Der Zugriff kann mithilfe von Richtlinien verwaltet werden.
  • Seite 331: Abbildung 6-31: Anschlussdienste

    Wireless-G Broadband-Router mit SpeedBooster 7. Sie können den Zugang zu verschiedenen Diensten filtern, auf die über das Internet zugegriffen werden kann, z. B. FTP oder Telnet, indem Sie diese Dienste in den Dropdown-Menüs neben Blocked Services (Blockierte Dienste) auswählen. (Sie können bis zu 20 Dienste blockieren.) Geben Sie anschließend den Bereich der Ports ein, die Sie filtern möchten.
  • Seite 332: Registerkarte „Applications & Gaming" (Anwendungen & Spiele) - „Port Range Forward" (Weiterleitung Eines Anschlussbereichs)

    Wireless-G Broadband-Router mit SpeedBooster Registerkarte „Applications & Gaming“ (Anwendungen & Spiele) – „Port Range Forward“ (Weiterleitung eines Anschlussbereichs) Auf der Registerkarte Applications & Gaming (Anwendungen & Spiele) können Sie öffentliche Dienste in Ihrem Netzwerk einrichten, wie z. B. Webserver, FTP-Server, E-Mail-Server oder andere spezielle Internetanwendungen.
  • Seite 333: Registerkarte „Applications & Gaming" (Anwendungen & Spiele) - „Port Triggering" (Port-Triggering)

    Wireless-G Broadband-Router mit SpeedBooster Registerkarte „Applications & Gaming“ (Anwendungen & Spiele) – „Port Triggering“ (Port-Triggering) Im Fenster Port Triggering (Port-Triggering) kann der Router ausgehende Daten für bestimmte Port-Nummern überwachen. Die IP-Adresse des Computers, der die übereinstimmenden Daten sendet, wird vom Router gespeichert.
  • Seite 334: Registerkarte „Applications & Gaming" (Anwendungen & Spiele) - „Dmz

    Wireless-G Broadband-Router mit SpeedBooster Registerkarte „Applications & Gaming“ (Anwendungen & Spiele) – „DMZ“ Mit der DMZ-Funktion (DMZ = Demilitarized Zone; Entmilitarisierte Zone) kann für einen Netzwerkbenutzer eine Verbindung zum Internet hergestellt werden, damit dieser einen speziellen Dienst, wie z. B. Internetspiele oder Videokonferenzen, nutzen kann.
  • Seite 335: Anwendungs-Port-Priorität

    Wireless-G Broadband-Router mit SpeedBooster QoS mit Ethernet-Port-Priorität muss nicht von Ihrem ISP unterstützt werden, da es sich bei den Ports mit Priorität um LAN-Ports handelt, die direkt mit Ihrem Netzwerk kommunizieren. Anwendungs-Port-Priorität Über Application Port Priority (Anwendungs-Port-Priorität) werden Informationen beim Übertragen und Empfangen verwaltet.
  • Seite 336: Registerkarte „Administration" (Verwaltung) - „Management" (Verwaltungsfunktionen)

    Wireless-G Broadband-Router mit SpeedBooster Registerkarte „Administration“ (Verwaltung) – „Management“ (Verwaltungsfunktionen) In diesem Abschnitt der Registerkarte Administration (Verwaltung) kann der Netzwerkadministrator spezielle Routerfunktionen für Zugriff und Sicherheit verwalten. Local Router Access (Lokaler Routerzugriff): Hier können Sie das Passwort des Routers ändern. Geben Sie ein neues Passwort für den Router ein, und geben Sie dieses zur Bestätigung erneut im Feld Re-enter to confirm (Zur Bestätigung erneut eingeben) ein.
  • Seite 337: Registerkarte „Administration" (Verwaltung) - „Diagnostics" (Diagnose)

    Wireless-G Broadband-Router mit SpeedBooster Registerkarte „Administration“ (Verwaltung) – „Diagnostics“ (Diagnose) Mit den Diagnosetests Ping und Traceroute (Routenverfolgung) können Sie die Verbindungen Ihrer Netzwerkkomponenten überprüfen. Ping Test (Ping-Test): Mit dem Ping-Test wird der Status einer Verbindung überprüft. Klicken Sie auf die Schaltfläche Ping, um das Fenster Ping Test (Ping-Test) zu öffnen.
  • Seite 338: Registerkarte „Administration" (Verwaltung) - „Factory Defaults" (Werkseinstellungen)

    Registerkarte „Administration“ (Verwaltung) – „Firmware Upgrade“ (Firmware aktualisieren) Sie können die Firmware aktualisieren, indem Sie die Firmware von der internationalen Linksys Website herunterladen, den entsprechenden Pfad angeben und auf die Schaltfläche Upgrade (Aktualisieren) klicken. Aktualisieren Sie die Firmware nur, wenn Sie Probleme mit dem Router haben. Weitere Informationen zum Aktualisieren der Firmware erhalten Sie in „Anhang C: Aktualisieren der Firmware“.
  • Seite 339: Registerkarte „Administration" (Verwaltung) - „Config Management" (Konfigurationsverwaltung)

    Wireless-G Broadband-Router mit SpeedBooster Registerkarte „Administration“ (Verwaltung) – „Config Management“ (Konfigurationsverwaltung) In diesem Fenster wird die Konfigurationsdatei des Routers gesichert bzw. wiederhergestellt. Klicken Sie zum Erstellen einer Sicherungskopie der Konfigurationsdatei des Routers auf die Schaltfläche Backup (Sichern). Befolgen Sie dann die Anweisungen auf dem Bildschirm. Klicken Sie zum Wiederherstellen der Konfigurationsdatei des Routers auf die Schaltfläche Browse (Durchsuchen), um nach der Datei zu suchen, und befolgen Sie dann die Anweisungen auf dem Bildschirm.
  • Seite 340: Registerkarte „Status" - „Router

    Wireless-G Broadband-Router mit SpeedBooster Registerkarte „Status“ – „Router“ Auf der Registerkarte Status wird im Fenster Router der aktuelle Status des Routers angezeigt. Firmware Version (Firmware-Version): Hierbei handelt es sich um die aktuelle Firmware-Version des Routers. Current Time (Aktuelle Uhrzeit): Hier wird die Uhrzeit so angezeigt, wie Sie sie auf der Registerkarte Setup (Einrichtung) festgelegt haben.
  • Seite 341: Registerkarte „Status" - „Local Network" (Lokales Netzwerk)

    Wireless-G Broadband-Router mit SpeedBooster Registerkarte „Status“ – „Local Network“ (Lokales Netzwerk) Auf der Registerkarte Status wird im Fenster Local Network (Lokales Netzwerk) der Status des Netzwerks angezeigt. MAC Address (MAC-Adresse): Hierbei handelt es sich um die MAC-Adresse des Routers, vom Standpunkt Ihres lokalen Ethernet-Netzwerks aus gesehen.
  • Seite 342: Abbildung 6-47: Registerkarte „Status" - „Wireless

    Wireless-G Broadband-Router mit SpeedBooster Registerkarte „Status“ – „Wireless“ Auf der Registerkarte Status wird im Fenster Wireless der Status des Wireless-Netzwerks angezeigt. MAC Address (MAC-Adresse): Hierbei handelt es sich um die MAC-Adresse des Routers, vom Standpunkt Ihres lokalen Wireless-Netzwerks aus gesehen. Mode (Modus): Hier wird der auf der Registerkarte Wireless ausgewählte und im Netzwerk verwendete Wireless-Modus Mixed (Gemischt), G-Only (Nur G) oder Disabled (Deaktiviert) angezeigt.
  • Seite 343: Kapitel 7: Verwenden Des Linksys Parental Control-Diensts

    Kapitel 7: Verwenden des Linksys Parental Control-Diensts Übersicht In diesem Kapitel wird der Linksys Parental Control-Dienst* beschrieben; darüber hinaus werden die Anmeldung bei diesem Dienst, die Verwaltung Ihres Kontos sowie die Verwendung des Internets erklärt, wenn der Dienst den Internetdatenverkehr und Nachrichten kontrolliert.
  • Seite 344: Anmeldung Beim Linksys Parental Control-Dienst

    Anmeldung beim Linksys Parental Control-Dienst Control-Konto ist eine aktive Internetverbindung erforderlich. Es stehen zwei Möglichkeiten für den Zugriff auf die Website, die Sie zur Anmeldung für Ihr Linksys Parental Control-Konto verwenden, zur Verfügung. Setup-Assistent Am Ende des Setup-Assistenten wird Ihnen das Fenster Safe Surfing (Sicheres Surfen) angezeigt. Klicken Sie auf die Schaltfläche Linksys Parental Control Service (Linksys Parental Control-Dienst), um sich für eine...
  • Seite 345: Abbildung 7-3: Linksys Verwendungsbedingungen

    Wireless-G Broadband-Router mit SpeedBooster Anmeldung beim Linksys Parental Control-Dienst Zur Anmeldung für Ihr Linksys Parental Control-Konto ist eine aktive Internetverbindung erforderlich. Befolgen Sie dann die folgenden Anweisungen: 1. Das Fenster Linksys Service Agreement (Linksys Verwendungsbedingungen) wird angezeigt, nachdem Sie im Setup-Assistenten auf die Schaltfläche Linksys Parental Control Service (Linksys Parental Control-Dienst)
  • Seite 346: Abbildung 7-5: Bestellung

    (Vollständiger Name auf der Karte) ein. Klicken Sie anschließend auf die Schaltfläche Finish (Fertig stellen). Um Ihre Anmeldung abzubrechen, klicken Sie auf die Schaltfläche Cancel (Abbrechen). Abbildung 7-5: Bestellung Kapitel 7: Verwenden des Linksys Parental Control-Diensts Anmeldung beim Linksys Parental Control-Dienst...
  • Seite 347: Abbildung 7-6: Verbinden Mit Dem Parental Control-Dienst

    Linksys Parental Control-Diensts“ in Schritt 4. Wenn Sie sofort Zugang zum Internet möchten, klicken Sie auf die Schaltfläche Sign in and Surf (Anmelden und Surfen). Weitere Informationen hierzu finden Sie im Abschnitt „Verwenden des Linksys Parental Control-Diensts“. Abbildung 7-7: Glückwunschfenster...
  • Seite 348: Verwalten Des Linksys Parental Control-Diensts

    Wireless-G Broadband-Router mit SpeedBooster Verwalten des Linksys Parental Control-Diensts Zum Verwalten Ihres Linksys Parental Control-Kontos ist eine aktive Internetverbindung erforderlich. Befolgen Sie dann die folgenden Anweisungen: 1. Öffnen Sie das webbasierte Dienstprogramm des Routers. 2. Klicken Sie auf die Registerkarte Access Restrictions (Zugriffsbeschränkungen).
  • Seite 349: Support-Center

    Klicken Sie auf Subscribe to Service (Dienst abonnieren), um sich für Ihr Parental Control-Abonnement Abbildung 7-9: Support-Center anzumelden, bevor die kostenlose Probezeit abläuft. Das Fenster Purchase Linksys Parental Control Service (Linksys Parental Control-Dienst bestellen) wird angezeigt. Führen Sie die folgenden Schritte aus: 1.
  • Seite 350: Kontenangaben Aktualisieren

    Klicken Sie auf diesen Link, wenn Sie Ihr Konto für den Parental Control-Dienst kündigen möchten. Klicken Sie im nächsten Fenster auf die Schaltfläche Proceed (Fortfahren), um Ihren Parental Control-Dienst zu kündigen. Abbildung 7-12: Parental Control- Konto kündigen Kapitel 7: Verwenden des Linksys Parental Control-Diensts Support-Center...
  • Seite 351: Aktivitätsberichte

    Berichte auf Ihrem Computer zu speichern, klicken Sie auf die Schaltfläche Download (Herunterladen). Die Berichte werden als durch Tabulator getrennte Textdatei (PcReport) gespeichert. Sie können über die Schaltflächen First (Anfang) Previous (Zurück) bzw. Next (Weiter) durch die Einträge blättern. Abbildung 7-14: Berichtsarten Kapitel 7: Verwenden des Linksys Parental Control-Diensts Aktivitätsberichte...
  • Seite 352: Instant-Messaging-Bericht

    Delete (Löschen). Um alle Berichte auf Ihrem Computer zu speichern, klicken Sie auf die Schaltfläche Download (Herunterladen). Die Berichte werden als durch Tabulator getrennte Textdatei (PcReport) gespeichert. Sie können über die Schaltflächen First (Anfang) Previous (Zurück) bzw. Next (Weiter) durch die Einträge blättern. Kapitel 7: Verwenden des Linksys Parental Control-Diensts Aktivitätsberichte...
  • Seite 353: Familieneinstellungen

    Done (Fertig), nachdem Sie alle gewünschten Änderungen ausgeführt haben. I’m Done (Fertig): Klicken Sie nach Vornahme aller Änderungen an Ihrem Parental Control-Konto auf die Schaltfläche I’m Done (Fertig), um die Website für die Rechnungsstellung und das Support-Center von Linksys Parental Control zu schließen.
  • Seite 354: Abbildung 7-18: Alle Einstellungen

    • Password (Passwort) • Delete (Löschen) I’m Done (Fertig): Klicken Sie nach Vornahme aller Änderungen an Ihrem Parental Control-Konto auf die Schaltfläche I’m Done (Fertig), um die Website für die Rechnungsstellung und das Support-Center von Linksys Parental Control zu schließen. Online-Berichterstellung Abbildung 7-18: Alle Einstellungen Im Fenster Online Reporting (Online-Berichterstellung) können Sie die zu überwachenden Aktivitätenarten auswählen.
  • Seite 355: Abbildung 7-20: Reifeebene

    Cancel (Abbrechen), um die Änderungen zu verwerfen. Nach dem Auswählen und Speichern von Einstellungen für die Reifeebene können Sie weitere Einstellungen, wie beispielsweise Beschränkungen zu Uhrzeit, Web- Browsing, E-Mail und Instant-Messaging, individuell anpassen. Kapitel 7: Verwenden des Linksys Parental Control-Diensts Familieneinstellungen...
  • Seite 356: Abbildung 7-21: Zeitbeschränkungen

    Klicken Sie auf Undo Changes (Änderungen rückgängig machen), um Ihre Änderungen zu verwerfen. Klicken Sie auf die Schaltfläche Cancel (Abbrechen), um Ihre Änderungen zu verwerfen und zum vorherigen Fenster zurückzukehren. Klicken Sie auf die Schaltfläche Save (Speichern), um die Änderungen zu speichern. Abbildung 7-21: Zeitbeschränkungen Kapitel 7: Verwenden des Linksys Parental Control-Diensts Familieneinstellungen...
  • Seite 357: Abbildung 7-22: Beschränkungen Zum Web-Browsing

    Klicken Sie auf Undo Changes (Änderungen rückgängig machen), um Ihre Änderungen zu verwerfen. Klicken Sie auf die Schaltfläche Cancel (Abbrechen), um Ihre Änderungen zu verwerfen und zum vorherigen Fenster zurückzukehren. Klicken Sie auf die Schaltfläche Save (Speichern), um die Änderungen zu speichern. Kapitel 7: Verwenden des Linksys Parental Control-Diensts Familieneinstellungen...
  • Seite 358: Abbildung 7-24: Blockierte Und Zugelassene Websites

    Website aus und klicken Sie dann auf die Schaltfläche Remove (Entfernen). Klicken Sie auf die Schaltfläche Cancel (Abbrechen), um Ihre Änderungen zu verwerfen. Klicken Sie auf die Schaltfläche Save (Speichern), um die Änderungen zu speichern. Abbildung 7-24: Blockierte und zugelassene Websites Kapitel 7: Verwenden des Linksys Parental Control-Diensts Familieneinstellungen...
  • Seite 359: Abbildung 7-25: E-Mail-Beschränkungen

    Klicken Sie im Fenster E-mail Restrictions (E-Mail-Beschränkungen) auf die Schaltfläche Cancel (Abbrechen), um Ihre Änderungen zu verwerfen. Klicken Sie auf die Schaltfläche Save (Speichern), um die Änderungen zu speichern. Abbildung 7-26: E-Mail-Einstellungen Kapitel 7: Verwenden des Linksys Parental Control-Diensts Familieneinstellungen...
  • Seite 360: Abbildung 7-27: Instant-Messaging-Beschränkungen

    Schaltfläche Cancel (Abbrechen), um Ihre Änderungen zu verwerfen. Klicken Sie auf die Schaltfläche Save (Speichern), um die Änderungen zu speichern. Löschen Klicken Sie auf Delete (Löschen), um ein Familienmitglied zu löschen. Abbildung 7-28: Passwort Kapitel 7: Verwenden des Linksys Parental Control-Diensts Familieneinstellungen...
  • Seite 361: Bewertungsvorschläge

    Verwenden des Parental Control-Diensts Wenn der Linksys Parental Control-Dienst die Internetaktivitäten Ihrer Familie aktiv verwaltet, müssen Sie sich beim Linksys Parental Control-Dienst anmelden, bevor Sie auf das Internet zugreifen. Führen Sie die folgenden Schritte aus: 1. Öffnen Sie Ihren Web-Browser.
  • Seite 362: Abbildung 7-31: Willkommen Beim Parental Control-Dienst

    3. In Ihrem Web-Browser wird das Fenster Welcome to Parental Controls (Willkommen beim Parental Control- Dienst) angezeigt. Melden Sie sich beim Linksys Parental Control-Dienst an. Wählen Sie aus dem Dropdown- Menü SIGN IN (Anmelden) Ihren Namen aus, und geben Sie Ihr Passwort ein. Wählen Sie den Zeitpunkt aus, zu dem Sie automatisch abgemeldet werden möchten.
  • Seite 363: Verwenden Des Symbols In Der Taskleiste

    • Administration (Verwaltung): Wenn Sie Ihr Parental Control-Konto verwalten möchten, klicken Sie auf Administration (Verwaltung). Das Anmeldefenster Parental Control Billing & Support Center (Rechnungsstellung und Support-Center von Linksys Parental Control) wird angezeigt. • Preferences (Voreinstellungen): Wenn Sie Ihre Voreinstellungen für das Fenster Status ändern möchten, klicken Sie auf Preferences (Voreinstellungen).
  • Seite 364: Anhang A: Fehlerbehebung

    Er enthält Lösungsvorschläge zu Problemen, die während der Installation und des Betriebs des Routers auftreten können. Lesen Sie sich zur Fehlerbehebung die unten aufgeführten Beschreibungen durch. Wenn hier kein Lösungsvorschlag zu Ihrem Problem aufgeführt ist, finden Sie weitere Informationen auf der Linksys Website unter www.linksys.com.
  • Seite 365 Wireless-G Broadband-Router mit SpeedBooster 5. Klicken Sie auf die Registerkarte DNS, und stellen Sie sicher, dass die Option DNS aktiviert ist. Geben Sie den Host- und den Domänenname ein (z. B. „Johann“ als Hostname und „home“ als Domänenname). Geben Sie den DNS-Eintrag ein, den Sie von Ihrem ISP erhalten haben. Falls Sie keine DNS-IP-Adresse von Ihrem ISP erhalten haben, wenden Sie sich an Ihren ISP bzw.
  • Seite 366 Wireless-G Broadband-Router mit SpeedBooster 6. Geben Sie für die Subnetzmaske den Eintrag 255.255.255.0 ein. 7. Geben Sie für das Standard-Gateway den Eintrag 192.168.1.1 ein (die Standard-IP-Adresse des Routers). 8. Wählen Sie im unteren Fensterbereich die Option Folgende DNS-Serveradressen verwenden aus, und geben Sie den bevorzugten und den alternativen DNS-Server ein (diese Angaben erhalten Sie von Ihrem ISP).
  • Seite 367 Wireless-G Broadband-Router mit SpeedBooster 5. Mit meiner Internetverbindung erhalte ich keine IP-Adresse im Internet. • Lesen Sie sich den oben aufgeführten Abschnitt „3. Ich möchte meine Internetverbindung prüfen“ durch, und überprüfen Sie anhand dessen Ihre Verbindung. • Informationen zur Registrierung der MAC-Adresse Ihres Ethernet-Adapters bei Ihrem ISP finden Sie in „Anhang E: Ermitteln der MAC-Adresse und der IP-Adresse des Ethernet-Adapters“.
  • Seite 368: Anwendung

    Wireless-G Broadband-Router mit SpeedBooster 1. Rufen Sie über http://192.168.1.1 bzw. über die IP-Adresse des Routers das webbasierte Dienstprogramm des Routers auf. Rufen Sie unter Applications & Gaming (Anwendungen & Spiele) die Registerkarte Port Forwarding (Anschlussweiterleitung) auf. 2. Geben Sie für die benutzerdefinierte Anwendung einen beliebigen Namen ein. 3.
  • Seite 369 Wireless-G Broadband-Router mit SpeedBooster 4. Aktivieren Sie das zu verwendende Protokoll (TCP und/oder UDP). 5. Geben Sie die IP-Adresse des Ziel-PCs bzw. -Netzwerkgeräts für den Anschluss-Server ein. Beispiel: Wenn die IP-Adresse für den Ethernet-Adapter des Webservers 192.168.1.100 lautet, geben Sie den Wert 100 in das dafür vorgesehene Feld ein.
  • Seite 370 Wireless-G Broadband-Router mit SpeedBooster 10. Ich habe das Passwort vergessen bzw. die Aufforderung zur Eingabe des Passworts wird jedes Mal angezeigt, wenn ich die Einstellungen für den Router speichere. Setzen Sie den Router auf die Werkseinstellungen zurück, indem Sie die Reset-Taste 10 Sekunden lang gedrückt halten.
  • Seite 371 Aktualisieren der Firmware“ aufgeführten Schritte durch. 14. Ich möchte die Firmware aktualisieren. Um die aktuellsten Funktionen für Ihre Firmware zu erhalten, gehen Sie auf die Website von Linksys, und laden Sie die neueste Firmware unter www.linksys.com/international herunter. Führen Sie die folgenden Schritte aus: 1.
  • Seite 372 Wireless-G Broadband-Router mit SpeedBooster 3. Wählen Sie im Fenster Setup (Einrichtung) die Option Keep Alive (Verbindung aufrechterhalten) aus, und legen Sie für die Option Redial Period (Wahlwiederholung) 20 Sekunden fest. 4. Klicken Sie auf die Schaltfläche Save Settings (Einstellungen speichern). 5.
  • Seite 373 Wireless-G Broadband-Router mit SpeedBooster • Wenn der Router korrekt konfiguriert ist, prüfen Sie Ihre Internetverbindung (Kabel-/DSL-Modem usw.), um den ordnungsgemäßen Betrieb zu überprüfen. Sie können den Router entfernen, um dadurch die direkte Verbindung zu prüfen. • Konfigurieren Sie die TCP/IP-Einstellung mithilfe einer von Ihrem ISP zur Verfügung gestellten DNS- Adresse manuell.
  • Seite 374: Häufig Gestellte Fragen

    Wireless-G Broadband-Router mit SpeedBooster Häufig gestellte Fragen Nach der Verwendung von SecureEasySetup können die vorhandenen Wireless-Geräte keine Verbindung mehr zum Router herstellen. SecureEasySetup verwendet die WPA Personal-Verschlüsselung. Wenn Ihre aktuellen Wireless-Geräte die Sicherheitsmethode WPA Personal nicht unterstützen, können Sie SecureEasySetup nicht in Ihrem Netzwerk verwenden.
  • Seite 375 Verfügung gestellten IP-Adresse verwenden. Unterstützt der Router auch andere Betriebssysteme als Windows 98 SE, ME, 2000 oder XP? Ja. Linksys bietet jedoch derzeit keinen technischen Support hinsichtlich Installation, Konfiguration oder Fehlersuche für andere Betriebssysteme als die Windows-Betriebssysteme an. Unterstützt der Router die ICQ-Dateiübertragung? Ja, führen Sie dazu folgende Schritte aus: Klicken Sie auf das Menü...
  • Seite 376 Setzen Sie den Router auf die Werkseinstellungen zurück, indem Sie die Reset-Taste drücken, bis die Netzstrom-LED aufleuchtet und wieder erlischt. Setzen Sie das Kabel-/DSL-Modem zurück, indem Sie die Einheit aus- und erneut einschalten. Laden Sie die neueste Firmware-Version über die Website von Linksys unter www.linksys.com herunter, und nehmen Sie die Aktualisierung vor.
  • Seite 377 Wireless-G Broadband-Router mit SpeedBooster Funktioniert der Router in einer Macintosh-Umgebung? Ja, der Zugriff auf die Setup-Seiten des Routers kann jedoch nur über Internet Explorer 4.0 bzw. über Netscape Navigator 4.0 oder höher für Macintosh erfolgen. Ich kann die Webkonfigurationsseite für den Router nicht aufrufen. Was kann ich tun? Sie müssen möglicherweise die Proxy-Einstellungen in Ihrem Internet-Browser, z.
  • Seite 378 Wireless-G Broadband-Router mit SpeedBooster Wie kann ich mIRC mit dem Router verwenden? Legen Sie in der Registerkarte Port Forwarding (Anschlussweiterleitung) den Wert 113 für den PC fest, auf dem Sie mIRC verwenden möchten. Kann der Router als DHCP-Server eingesetzt werden? Ja.
  • Seite 379 Wireless-G Broadband-Router mit SpeedBooster Was ist Roaming? Roaming ermöglicht Benutzern von tragbaren Computern einen reibungslosen Datenaustausch beim Zurücklegen von Entfernungen, die nicht von einem einzigen Access Point abgedeckt werden können. Vor Verwendung der Roaming-Funktion muss der Computer auf dieselbe Kanalnummer wie der Access Point des dedizierten Empfangsbereichs gesetzt werden.
  • Seite 380 Wireless-G Broadband-Router mit SpeedBooster Was ist DSSS? Was ist FHSS? Worin liegt der Unterschied? Bei FHSS wird ein Schmalbandträger verwendet, der nach einem für Sender und Empfänger bekannten Muster die Frequenz ändert. Bei ordnungsgemäßer Synchronisation wird jeweils ein einziger logischer Kanal aufrechterhalten.
  • Seite 381 In Nord-, Mittel- und Südamerika sind insgesamt 11 Kanäle (von 1 bis 11) und in den meisten Teilen Europas 1 bis 13 Kanäle verfügbar. Wenn Ihre Fragen hier nicht beantwortet wurden, finden Sie weitere Informationen auf der Linksys-Website unter www.linksys.com/international.
  • Seite 382: Anhang B: Sicherheit Im Wireless-Netzwerkbetrieb

    Wireless-G Broadband-Router mit SpeedBooster Anhang B: Sicherheit im Wireless-Netzwerkbetrieb Linksys hat es sich zum Ziel gesetzt, den Wireless-Netzwerkbetrieb für Sie so sicher und einfach wie möglich zu gestalten. Die aktuellen Produkte von Linksys bieten verschiedene Netzwerksicherheitsfunktionen. Um diese anzuwenden, müssen Sie jedoch bestimmte Schritte ausführen. Beachten Sie daher Folgendes beim Einrichten bzw.
  • Seite 383 Geräte für den Wireless-Netzwerkbetrieb sind werkseitig auf eine Standard-SSID eingestellt. (Die Standard-SSID von Linksys lautet „linksys“.) Hacker kennen diese Standardeinstellungen und können Ihr Netzwerk darauf überprüfen. Ändern Sie Ihre SSID in einen eindeutigen Namen, der keinerlei Bezug zu Ihrem Unternehmen oder zu den von Ihnen verwendeten Netzwerkprodukten hat.
  • Seite 384 Sie jedoch sensible Daten über das Netzwerk senden, sollten Sie diese verschlüsseln. Durch die Einhaltung dieser Sicherheitsempfehlungen können Sie ganz beruhigt arbeiten und die flexible und praktische Technologie von Linksys bedenkenlos einsetzen. Anhang B: Sicherheit im Wireless-Netzwerkbetrieb Sicherheitsrisiken bei Wireless-Netzwerken...
  • Seite 385: Anhang C: Aktualisieren Der Firmware

    Die Firmware des Broadband-Routers wird über die Registerkarte Administration (Verwaltung) des webbasierten Dienstprogramms aktualisiert. Führen Sie die folgenden Schritte aus: 1. Laden Sie die Firmware von der Linksys Website unter folgender Adresse herunter: www.linksys.com/ international. 2. Klicken Sie im webbasierten Dienstprogramm auf der Registerkarte Administration (Verwaltung) auf die Option Firmware Upgrade (Firmware aktualisieren).
  • Seite 386: Anhang D: Windows-Hilfe

    Wireless-G Broadband-Router mit SpeedBooster Anhang D: Windows-Hilfe Für alle Wireless-Produkte von Linksys ist Microsoft Windows erforderlich. Windows ist das weltweit am häufigsten verwendete Betriebssystem und bietet zahlreiche Funktionen, die den Netzwerkbetrieb vereinfachen. Diese Funktionen können über die Windows-Hilfe aufgerufen werden und werden im vorliegenden Anhang erläutert.
  • Seite 387: Anhang E: Ermitteln Der Mac-Adresse Und Der Ip-Adresse Des Ethernet-Adapters

    Wireless-G Broadband-Router mit SpeedBooster Anhang E: Ermitteln der MAC-Adresse und der IP-Adresse des Ethernet-Adapters In diesem Abschnitt wird beschrieben, wie Sie die MAC-Adresse für den Ethernet-Adapter Ihres Computers ermitteln, um die MAC-Filterung bzw. die Router-Funktion zum Kopieren von MAC-Adressen verwenden zu können.
  • Seite 388: Anweisung Für Windows 2000/Xp

    Wireless-G Broadband-Router mit SpeedBooster Anweisung für Windows 2000/XP 1. Klicken Sie auf Start und Ausführen. Geben Sie im Feld Öffnen die Zeichenfolge cmd ein. Drücken Sie dann die Eingabetaste, oder klicken Sie auf die Schaltfläche OK. 2. Geben Sie an der Eingabeaufforderung ipconfig /all ein. Drücken Sie die Eingabetaste. 3.
  • Seite 389: Anhang F: Glossar

    Wireless-G Broadband-Router mit SpeedBooster Anhang F: Glossar 802.11b: IEEE-Standard für den Wireless-Netzwerkbetrieb, der eine maximale Datenübertragungsrate von 11 Mbit/s sowie eine Betriebsfrequenz von 2,4 GHz festlegt. 802.11g: IEEE-Standard für den Wireless-Netzwerkbetrieb, der eine maximale Datenübertragungsrate von 54 Mbit/s und eine Betriebsfrequenz von 2,4 GHz festlegt sowie Abwärtskompatibilität mit Geräten garantiert, die dem Standard 802.11b entsprechen.
  • Seite 390 Wireless-G Broadband-Router mit SpeedBooster CSMA/CA (Carrier Sense Multiple Access/Collision Avoidance): Eine Datenübertragungsmethode, die verwendet wird, um Datenkollisionen zu verhindern. CTS (Clear To Send): Ein von einem Wireless-Gerät gesendetes Signal, das angibt, dass das Gerät für Daten empfangsbereit ist. Datenbank: Eine Datensammlung, die so organisiert ist, dass die enthaltenen Daten schnell und einfach verwaltet und aktualisiert werden können sowie problemlos abrufbar sind.
  • Seite 391 Wireless-G Broadband-Router mit SpeedBooster Firmware: Der für den Betrieb eines Netzwerkgeräts verwendete Programmcode. Fragmentierung: Das Aufteilen von Paketen in kleinere Einheiten bei der Übertragung über ein Netzwerkmedium, das die ursprüngliche Größe des Pakets nicht unterstützt. FTP (File Transfer Protocol): Ein Protokoll für die Übertragung von Dateien über ein TCP/IP-Netzwerk. Gateway: Ein Gerät zur Verbindung von Netzwerken mit unterschiedlichen, inkompatiblen Kommunikationsprotokollen.
  • Seite 392 übertragen können. Paket: Eine Dateneinheit, die über ein Netzwerk gesendet wird. Passphrase: Wird wie ein Passwort verwendet und erleichtert die WEP-Verschlüsselung, indem für Linksys Produkte automatisch WEP-Verschlüsselungsschlüssel erstellt werden. Ping (Packet INternet Groper): Ein Internetdienstprogramm, mit dem ermittelt werden kann, ob eine bestimmte IP-Adresse online ist.
  • Seite 393 Wireless-G Broadband-Router mit SpeedBooster RADIUS (Remote Authentication Dial-In User Service): Ein Protokoll zur Überwachung des Netzwerkzugriffs mithilfe eines Authentifizierungsservers. Roaming: Die Möglichkeit, mit einem Wireless-Gerät aus einem Access Point-Bereich in einen anderen zu wechseln, ohne dass die Verbindung unterbrochen wird. Router: Ein Netzwerkgerät, mit dem mehrere Netzwerke miteinander verbunden werden.
  • Seite 394 Wireless-G Broadband-Router mit SpeedBooster Telnet: Benutzerbefehl und TCP/IP-Protokoll zum Zugriff auf Remote-PCs. TFTP (Trivial File Transfer Protocol): Eine Version des TCP/IP-FTP-Protokolls, das über keinerlei Verzeichnis- oder Passwortfunktionen verfügt. TKIP (Temporal Key Integrity Protocol): Eine Wireless-Verschlüsselungsmethode, mit der für jedes übertragene Datenpaket dynamische Verschlüsselungsschlüssel zur Verfügung stehen.
  • Seite 395: Anhang G: Spezifikationen

    Wireless-G Broadband-Router mit SpeedBooster Anhang G: Spezifikationen Modell WRT54GS Standards IEEE 802.3, IEEE 802.3u, IEEE 802.11g, IEEE 802.11b Kanäle 11 Kanäle (Nord-, Mittel- und Südamerika) 13 Kanäle (in den meisten Teilen von Europa, Asien und Afrika) Ports/Tasten Internet: Ein 10/100-RJ-45-Port...
  • Seite 396 Wireless-G Broadband-Router mit SpeedBooster Gerätegewicht 0,48 kg Stromversorgung Extern, 12 V GS, 1 A Zertifizierung FCC, IC-03, CE Betriebstemperatur 0 °C bis 40 °C Lagertemperatur -20 °C bis 70 °C Luftfeuchtigkeit bei Betrieb 10 % bis 85 %, nicht kondensierend Luftfeuchtigkeit bei Lagerung 5 % bis 90 %, nicht kondensierend Anhang G: Spezifikationen...
  • Seite 397: Anhang H: Garantieinformationen

    DEN KAUFBELEG BEARBEITET WERDEN. Der Versand fehlerhafter Produkte an Linksys erfolgt auf Ihre Verantwortung. Linksys kommt nur für Versandkosten von Linksys zu Ihrem Standort per UPS auf dem Landweg auf. Bei Kunden außerhalb der USA und Kanadas sind sämtliche Versand- und Abfertigungskosten durch die Kunden selbst zu tragen.
  • Seite 398: Anhang I: Zulassungsinformationen

    Wireless-G Broadband-Router mit SpeedBooster Anhang I: Zulassungsinformationen FCC-Bestimmungen Dieses Gerät wurde geprüft und entspricht den Bestimmungen für ein digitales Gerät der Klasse B gemäß Teil 15 der FCC- Bestimmungen. Die Grenzwerte wurden so festgelegt, dass ein angemessener Schutz gegen Störungen in einer Wohngegend gewährleistet ist.
  • Seite 399 Wireless-G Broadband-Router mit SpeedBooster Informationen zur Einhaltung gesetzlicher Vorschriften bei 2,4-GHz-Wireless-Produkten für den Bereich der EU und anderer Länder gemäß der EU-Richtlinie 1999/5/EG (R&TTE-Richtlinie) Konformitätserklärung zur EU-Richtlinie 1995/5/EG (R&TTE-Richtlinie) Anhang I: Zulassungsinformationen...
  • Seite 400 • PDF-Datei auf der Produkt-CD. • Druckversion im Lieferumfang des Produkts. • PDF-Datei auf der Produkt-Webseite. Rufen Sie www.linksys.com/international auf, und wählen Sie das für Sie zutreffende Land bzw. die entsprechende Region aus. Wählen Sie dann Ihr Produkt aus. Wenn Sie weitere technische Dokumente benötigen, finden Sie entsprechende Hinweise im Abschnitt „Technische Dokumente unter www.linksys.com/international“...
  • Seite 401 Wireless-G Broadband-Router mit SpeedBooster CE-Kennzeichnung Die Wireless-B- und Wireless-G-Produkte von Linksys sind mit der folgenden CE-Kennzeichnung, der Nummer der Überwachungs- und Zertifizierungsstelle (sofern zutreffend) und der Kennung der Klasse 2 versehen. oder oder Überprüfen Sie das CE-Etikett auf dem Produkt, um die Überwachungs- und Zertifizierungsstelle zu ermitteln, die in die Bewertung einbezogen wurde.
  • Seite 402 Verlängerungskabel (AC9TNC) an. Beide Kabel sind jeweils 9 m lang und weisen eine Kabeldämpfung (Abschwächung) von 5 dB auf. Zum Ausgleich der Abschwächung bietet Linksys auch leistungsstärkere Antennen an: HGA7S (mit R-SMA- Stecker) und HGA7T (mit R-TNC-Stecker). Die Verstärkungsleistung dieser Antennen beträgt 7 dBi. Sie können nur mit dem R-SMA- oder dem R-TNC-Verlängerungskabel verwendet werden.
  • Seite 403 Hinweis: Die Einstellungen für die Ausgangsleistung sind u. U. nicht für alle Wireless-Produkte verfügbar. Weitere Informationen finden Sie in der Dokumentation auf der Produkt-CD oder unter http://www.linksys.com/international. Wireless-Adapter Bei Wireless-Adaptern ist die Ausgangsleistung standardmäßig auf 100 % eingestellt. Die Ausgangsleistung der einzelnen Adapter beträgt maximal 20 dBm (100 mW), liegt aber gewöhnlich bei 18 dBm (64 mW) oder darunter.
  • Seite 404 Technische Dokumente unter www.linksys.com/international Führen Sie die folgenden Schritte aus, um auf die gewünschten technischen Dokumente zuzugreifen: 1. Navigieren Sie mit dem Browser zur Website http://www.linksys.com/international. 2. Klicken Sie auf Ihre Region. 3. Klicken Sie auf den Namen Ihres Landes.
  • Seite 405: Anhang J: Kontaktinformationen

    Möchten Sie sich persönlich an Linksys wenden? Informationen zu den aktuellen Produkten und Aktualisierungen für bereits installierte Produkte finden Sie online unter: http://www.linksys.com/international Wenn Sie im Zusammenhang mit Linksys Produkten auf Probleme stoßen, können Sie uns unter folgenden Adressen eine E-Mail senden: In Europa...